How to Use Enamel Paint on Walls Properly
You can get tough, washable walls by prepping, priming, and applying enamel in thin, even coats with the right tools. Clean, sand, and repair surfaces, then use a bonding or stain‑blocking primer. Choose oil‑based for durability or water‑based for faster drying and low odor. Use natural brushes for oil or synthetics for water enamel, keep a wet edge, and allow full cure between coats. Keep going to learn practical tips and troubleshooting.
Quick Answer: Is Enamel Right for Your Walls?
If you want a tough, washable finish for high-traffic rooms, enamel can be a great choice because it dries hard and resists scuffs and stains. You’ll pick enamel when you need durability, easy cleaning, and a sleek look.
Consider room use, ventilation, and substrate—enamel’s fumes need airflow and certain primers for adhesion. You can do color blending carefully; enamel’s quick set can make shifts stark, so test swatches.
For texture application, smooth finishes suit enamel best, though light stippling works with thicker formulas. Choose oil- or water-based enamel based on cleanup and drying time.
Why Choose Enamel Paint for Interior Walls
Because you want walls that stand up to daily wear, enamel delivers a hard, durable finish that resists scuffs, stains, and frequent cleaning. You’ll appreciate its low-porosity surface for high-traffic rooms, where moisture and grease won’t penetrate like with flat paints.
Enamel’s sheen options highlight architectural details and adapt to varied wall textures, from smooth plaster to subtle orange peel.
When renovating, you can use color mixing to achieve consistent hues and touch-up blends without obvious seams.
Oil vs. Water‑Based Enamel: Choose the Right Type
You’ll want to weigh oil‑based enamel’s tough, long‑lasting finish against water‑based enamel’s low odor and faster drying.
Consider where durability matters most—trim and high‑traffic areas often benefit from oil‑based formulas.
Also think about application and cleanup: water‑based paints are easier to apply and clean with soap and water, while oil‑based require mineral spirits.
Oil-Based Durability Benefits
When durability matters most, oil-based enamel stands out for its hard, long-lasting finish that resists scuffs, stains, and frequent cleaning. You’ll appreciate how it maintains sheen and color depth, so Color theory choices stay truer over time despite wear.
On textured or smooth wall textures, oil-based enamel fills minor imperfections and bonds tightly, reducing chipping. You can scrub high-traffic areas without dulling the surface, and it tolerates soaps and solvents better than many alternatives.
Plan for longer drying and proper ventilation, and use compatible primers and cleaners to guarantee adhesion and preserve that durable, low-maintenance finish.
Water-Based Low Odor
Although it dries faster and gives up some of oil-based enamel’s rock-solid toughness, water-based enamel lets you paint with far less odor and easier cleanup, so you can finish rooms quicker and get back to living in them. You’ll appreciate lower VOCs and a gentler smell when painting bedrooms or living areas.
Choose water-based for easier Color mixing and faster recoat times; it blends pigments smoothly and stays true as it cures.
Consider Wall texture: flat or textured surfaces may show less sheen, so test samples.
For everyday interiors, water-based enamel balances convenience with durable finish.
Application And Cleanup
Because oil- and water-based enamels behave differently during application and cleanup, pick the type that matches your workflow and patience level.
If you want easy cleanup, water-based enamel rinses with soap and water, dries faster, and lets you correct color matching quickly; it’s forgiving and better for low-odor jobs.
Oil-based flows smoother, levels nicely, and resists wear, but you’ll need mineral spirits for cleanup and longer drying times.
For either type, strain brushes, store leftover paint in airtight cans, label with date and formula, and follow proper paint storage to preserve color and usability for touch-ups.
How Gloss Level Affects Durability and Look
Want a finish that cleans up easily and still looks sharp? You pick a gloss level to balance durability and appearance: higher gloss resists scuffs and wipes clean, while satin or eggshell hides imperfections. Consider these points so you get the look and longevity you need:
Pick a gloss level to balance durability and appearance—higher gloss wipes clean, satin and eggshell hide imperfections.
- High gloss: maximum durability, shows surface flaws.
- Satin: good durability, softer sheen, versatile.
- Matte: hides defects, less washable.
- Semi-gloss: balances shine and cleaning.
Also think about color mixing for consistent tones and eco-friendly options if indoor air quality matters.
Choose based on traffic, light, and maintenance needs.
Best Enamel Finish for High‑Traffic Rooms
Which enamel sheen should you pick for high-traffic rooms? You’ll typically choose semi-gloss or satin for durability and easy cleaning.
Semi-gloss resists scuffs and wipes clean; satin hides minor imperfections while standing up well to wear. Test small areas to confirm sheen with your chosen color mixing, since additives or tints can slightly change gloss and appearance.
Apply proper surface prep and thin, even coats for best results.
Store leftover product in airtight cans upright and labeled; good paint storage preserves sheen and prevents contamination. That way your walls stay attractive and resilient in busy spaces.
Estimate How Much Enamel Paint You Need
To figure out how much enamel paint you need, start by checking the coverage per gallon on the paint can — most enamel paints cover about 300–400 square feet per gallon.
Measure each wall’s height and width, subtracting windows and doors, then add a bit for touch-ups and a second coat.
With those numbers you can calculate gallons needed and avoid buying too much or too little.
Coverage Per Gallon
Curious how much enamel paint you’ll need? Coverage per gallon varies by brand, sheen, and wall texture; a typical gallon covers about 350–400 sq ft with one coat.
Account for porosity, rough surfaces, and trim. After painting, follow paint storage tips to keep leftovers usable.
- Smooth drywall: ~400 sq ft per gallon
- Textured or rough walls: plan closer to 300–350 sq ft
- High-gloss or deep colors may need extra coats
- Trim and doors use more concentrated paint; estimate separately
Measure areas, factor in coats, and buy a little extra to allow for touch-ups and waste.
Room Measurement Tips
Now that you know typical coverage per gallon, you can measure your room to estimate how much enamel paint you’ll need. Measure wall length and height, subtract doors/windows, and note wall texture since rough surfaces need more paint. Consider primer and number of coats for color matching, especially when switching tones. Use this simple table to organize measurements and calculations:
| Item | Value |
|---|---|
| Perimeter (ft) | |
| Wall height (ft) | |
| Total sq ft | |
| Adjusted for texture/coats |
Divide adjusted square footage by coverage per gallon to get gallons needed, then round up.
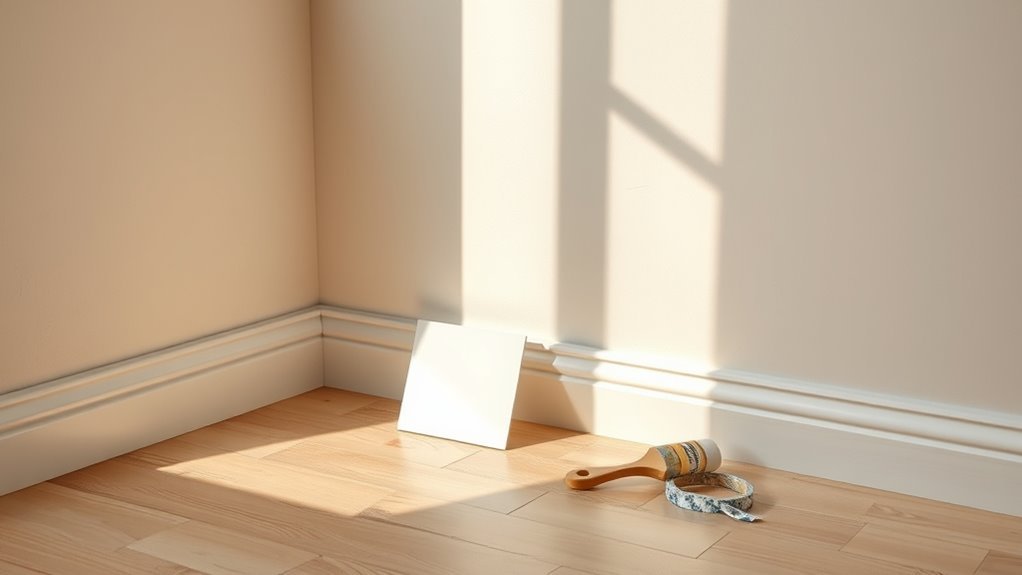
Tools & Materials Checklist for Enamel Walls
Before you start painting, gather the right tools and materials so the job goes smoothly and the enamel finish lasts. You’ll want quality supplies for consistent color mixing and to protect items during furniture placement.
Before painting, gather quality tools and materials to ensure smooth application and a long-lasting enamel finish
Check brush types, rollers, and trays; pick enamel-suitable primers and paints; and have drop cloths ready. Keep a small kit for touch-ups.
- High-quality enamel paint and primer
- Synthetic brushes, short-nap rollers, and trays
- Drop cloths, painter’s tape, and clean rags
- Stir sticks, cans opener, and a small paint tray for touch-ups
Confirm quantities from room measurements before you buy.
Safety Gear and Ventilation for Enamel Painting
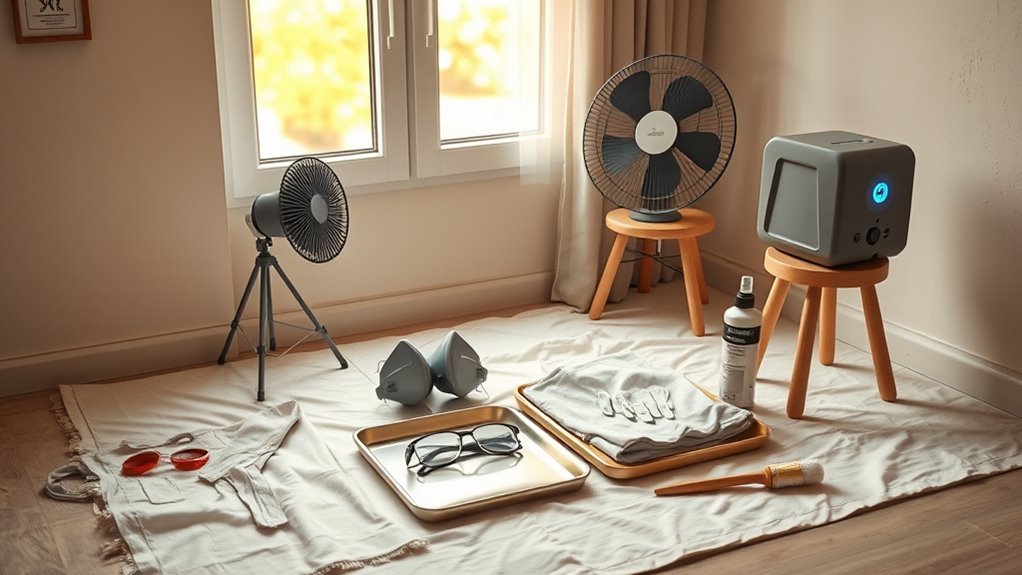
Because enamel paints give off stronger fumes and can irritate skin and eyes, you’ll want proper personal protective gear and good airflow before you open a can. Wear gloves, goggles, and a respirator; choose clothing you won’t mind discarding. Position fans and open windows; consider portable ventilation systems for enclosed rooms. Keep combustibles away and have a fire extinguisher nearby. Monitor children and pets—keep them out.
| Item | Purpose | Tip |
|---|---|---|
| Gloves | Skin protection | Nitrile, solvent-resistant |
| Respirator | Fume filtration | Match cartridge to solvent |
| Fans | Air exchange | Exhaust outward |
| Goggles | Eye safety | Wraparound fit |
Quick Adhesion Test for Your Wall Surface
If your enamel doesn’t bond well, your finish will fail fast, so do a quick adhesion test to be sure the wall is ready. You’ll confirm the surface holds paint and won’t peel later.
Choose a small, inconspicuous area, clean it, and test using tape or a spot of enamel.
Note how the surface accepts color blending and whether texture patterns interfere.
- Clean a 2×2 inch area with mild detergent.
- Apply a small square of tape over a dab of enamel.
- Remove tape after 24 hours to check adhesion.
- Record results before full painting.
Preparing New Drywall for Enamel Paint
Before you apply enamel, wipe new drywall thoroughly to remove dust and drywall residue so the primer and paint can stick.
Check seams and screw heads, then fill them with joint compound, let it dry, and sand smooth.
Finish with a tack cloth to pick up sanding dust before priming.
Surface Cleaning And Dusting
When you’re preparing new drywall for enamel paint, start by removing dust and loose particles so the finish will adhere evenly and look smooth. You want a clean surface to preserve wall texture and guarantee the paint sheen reads correctly. Work top to bottom, using gentle methods so you don’t bruise the drywall.
- Vacuum with a brush attachment to lift fine dust.
- Wipe with a damp microfiber cloth for remaining residue.
- Tack cloths catch stubborn particles before priming.
- Inspect under natural light to spot missed areas.
Clean surfaces make primer and enamel perform predictably and last longer.
Joint Compound And Sanding
Because joint compound hides seams and fasteners, you’ll want smooth, well-sanded joints so enamel lays on evenly and doesn’t highlight imperfections. Apply compound in thin coats, feather edges beyond seams, and let each coat fully dry before sanding.
Use 120–220 grit sandpaper, sanding gently to avoid gouges and maintain a consistent surface level. Check under angled light for ridges or low spots, patch and sand again.
If you plan texture patterns or wall accents, replicate or skim to match the surrounding finish before priming.
Clean dust thoroughly, then prime with a bonding primer to guarantee enamel adhesion and uniform sheen.
Repair Cracks, Holes, and Damaged Plaster
If you want a smooth, long-lasting enamel finish, fix cracks, holes, and damaged plaster first. Small flaws telegraph through glossy paint and ruin the look. You’ll patch with joint compound or patching plaster, let it dry, then sand flush. Match texture if you plan decorative patterns or subtle texture before painting. Consider primer over repairs to guarantee even color mixing and adhesion.
- Scrape loose plaster, widen hairline cracks, and clean dust.
- Apply patch, build in thin layers, let each set.
- Sand smooth with fine grit.
- Vacuum and tack cloth before priming.
Clean Greasy or Dirty Walls the Right Way
Before you paint, you’ll want to remove grease with a commercial degreaser so the enamel will stick.
Then wash the surface with a TSP solution to cut through remaining dirt and film.
Rinse thoroughly and let the wall dry completely before priming or painting.
Remove Grease With Degreaser
Want cleaner paint that sticks and looks right? Use a commercial degreaser to strip oil and grime before you paint. You’ll prep walls so faux finishing and artistic techniques lay down evenly and last. Follow product directions, ventilate, and test a small spot.
- Put on gloves and goggles.
- Apply degreaser with a sponge, working top to bottom.
- Rinse thoroughly and let dry completely.
- Repeat stubborn areas or use a stronger formula.
Don’t skip this step—grease prevents enamel from bonding. Once dry, sand lightly and proceed to priming for the best adhesion and finish.
Wash With TSP Solution
After degreasing, give walls a thorough wash with a TSP (trisodium phosphate) solution to remove remaining oils, dirt, and mildew that can interfere with enamel adhesion. You’ll mix per label, work top to bottom, and scrub stubborn spots. Focus where grease gathered and on varied wall textures so paint and chosen color combinations lay evenly. Wear gloves and ventilate. Avoid saturating drywall; use a damp, not dripping, sponge.
| Surface | TSP Strength | Notes |
|---|---|---|
| Glossy | Mild | Short scrub |
| Matte | Moderate | Gentle to preserve texture |
| Textured | Stronger | Extra rinsing recommended |
Rinse And Dry Thoroughly
How will you know the TSP did its job? Rinse until water runs clear, then dry completely. You don’t want residue affecting adhesion or altering wall texture. Use clean water, change rinse buckets, and blot with microfiber or cotton towels. If humidity’s high, use fans or a dehumidifier. Proper drying prevents trapped moisture and mold, and keeps your paint storage containers from swelling after opening.
- Rinse with fresh water until suds vanish.
- Pat dry; don’t rub abrasive areas.
- Use airflow to speed evaporation.
- Check recessed areas and textured surfaces for lingering dampness.
When and How to Sand for a Smooth Base
Because enamel highlights every imperfection, you should sand walls before priming or painting whenever surfaces feel rough, show old gloss, or have visible repairs.
Because enamel reveals flaws, sand walls first whenever they feel rough, glossy, or show repairs.
Inspect for bumps, peeling, and uneven wall textures. Sand glossy spots with 220-grit to dull the sheen, and feather edges of repairs with 120–150 grit for a smooth blend.
Use a sanding block or pole sander for flat areas and hand-sand corners. Remove dust with a vacuum and tack cloth.
For color matching, lightly scuff adjacent areas so new enamel blends; wipe clean, let dry, then proceed to priming and painting.
Choosing the Correct Primer for Enamel
When you’re using enamel, choose a primer that bonds to both the wall substrate and the enamel finish so your paint won’t peel or show stains. You want a primer that seals, evens out porosity, and helps with color matching if you’re moving between bold tones or subtle decorative accents.
Pick a stain-blocking primer for tannins or smoke, and a bonding primer for slick surfaces. Apply per label directions.
- Use a universal primer for mixed surfaces.
- Choose stain-blocking for discoloration.
- Match base type to enamel (oil or water).
- Test a small patch for adhesion and color.
How to Prime Different Wall Surfaces
Curious about prepping different wall types for enamel? You’ll assess surface material first:
Drywall needs light sanding and a high-adhesion primer.
Plaster benefits from a mist coat to seal and even out wall texture.
Previously painted walls require cleaning, scuff-sanding, and a bonding primer.
For glossy surfaces, degloss with sandpaper or use a primer formulated for slick substrates.
Masonry and concrete demand a masonry primer or acrylic sealer to block moisture.
Always follow primer dry times and store leftover primer per label for proper paint storage—cool, sealed, away from freezing or heat to preserve performance.
Tape and Protect Trim, Floors, and Fixtures
Now that your walls are primed and surface-ready, protect the surrounding areas before you load the brush. Tape trim edges with quality painter’s tape, cover floors with drop cloths, and mask fixtures to avoid enamel drips. Plan for color mixing nearby so you don’t track spills, and set paint storage containers on a stable, sealed surface.
With walls primed, tape trim, cover floors, mask fixtures, and keep paint cans sealed and nearby for neat work.
- Run a tight tape line along trim and baseboards.
- Lay overlapping drop cloths toward the door.
- Wrap light switches and vents with plastic.
- Keep stirred cans closed between coats for proper paint storage.
Check tape edges before you begin each coat.
Best Brushes for Enamel Finishes
When you’re choosing brushes for enamel finishes, pick the right bristle for the job. Natural bristle brushes hold and lay oil-based enamel smoothly for a rich finish.
Synthetic bristle brushes resist wear and work better with water-based enamels. I’ll compare their strengths so you can decide which suits your project.
Natural Bristle Brushes
Although synthetic brushes have their place, natural bristle brushes remain the top choice for enamel finishes because their split ends (flagged hairs) hold and release thick, oil-based paints smoothly, giving you superior leveling and fewer brush marks.
You’ll notice better color blending and subtle texture effects when you use them correctly. Choose quality hog or badger bristles, keep strokes long and even, and clean with proper solvent. Care preserves flags and tack.
Pros and tips:
- Select a brush width that matches the surface.
- Load sparingly to avoid drips.
- Maintain a wet edge for smooth finish.
- Store upright after cleaning.
Synthetic Bristle Brushes
Because synthetic brushes resist swelling and maintain their shape with water- and solvent-based enamels, they’re often the best choice for quick, consistent coverage on walls and trim.
You’ll pick synthetic brushes for smooth edges, minimal bristle loss, and easier cleaning. Use high-quality nylon or polyester blends to reduce brush marks and blend coats seamlessly.
Work with light, even strokes and keep a wet edge to avoid lap marks. Proper cleaning and storage after each job helps paint longevity and preserves bristle alignment.
Replace worn brushes to maintain finish quality—cheap brushes cost more in touch-ups and time.
Best Rollers and Nap Lengths for Enamel
If you want a smooth, durable finish with enamel paint, pick a roller that matches the surface and the paint’s viscosity. You’ll consider nap length by wall texture and the way color mixing affects coverage.
Use short naps for glossy, smooth finishes and longer naps for rougher surfaces.
For glossy, smooth finishes choose short naps; for rougher surfaces, opt for longer naps to ensure even coverage
- 1/4″ nap: best for very smooth walls and trim
- 3/8″ nap: good for light orange peel or moderate texture
- 1/2″ nap: handles slightly rough surfaces well
- 3/4″ nap or more: choose for heavy texture or masonry
Match roller material to solvent type for ideal results.
When and How to Thin Enamel Paint
When you find enamel paint too thick to roll smoothly or it’s leaving lap marks, it’s time to thin it; check the manufacturer’s label first for recommended solvents and maximum thinning percentage. You’ll thin only enough to improve flow and leveling without altering Enamel color or hiding properties.
Use the suggested solvent—mineral spirits for oil-based, water for water-based—adding small amounts, mixing thoroughly, and testing on a scrap board.
Consider Wall texture: rough surfaces tolerate slightly thinner mix, smooth surfaces need minimal thinning to avoid sagging.
Always follow dry-time and recoat guidance; don’t exceed the recommended percentage to maintain durability and sheen.
Stirring and Loading Techniques for Even Coats
Before you start painting, stir the enamel thoroughly with a flat stir stick to reincorporate any pigments or solvents that settled.
Load your brush or roller evenly—dip just the tip of the brush or roll in the tray and tap off excess to avoid drips and heavy edges.
Consistent loading and stirring help you lay down smooth, even coats with fewer touch-ups.
Proper Paint Stirring
Although stirring might seem like a small step, doing it correctly sets the stage for even coats and a smooth finish. You’ll want to blend pigment and solvents fully for consistent color mixing and to prevent glossy or flat patches.
Stir before and during painting, scraping the can’s sides and bottom. If you keep cans for touch-ups, proper paint storage preserves mixed consistency.
- Use a flat stirrer, not a stick that bends.
- Stir slowly to avoid bubbles.
- Mix until uniform, checking sheen.
- Re-stir after resting pauses before loading tools.
Optimal Brush And Roller Loading
Because proper loading controls how paint lays down, you should aim for a balanced, even pick-up on your brush or roller that avoids drips, streaks, and overloads. Dip brushes about one-third into enamel, tap against the can edge, and wipe excess on the rim.
For rollers, submerge then roll in the tray’s well until nap is saturated but not dripping. Match tool nap to wall textures to prevent pooling in crevices.
When color matching or touching up, load less to blend smoothly. Work in manageable sections, reload frequently, and inspect finish under good light to correct thin spots immediately.
Cut In Clean Edges Without Laps or Blobs
When you cut in, work steadily and keep a loaded brush at a consistent angle so the paint spreads smoothly and you don’t leave laps or blobs along trim and corners. You’ll control edge width, avoid excess buildup, and blend with surrounding paint without touching rolling technique.
When cutting in, hold a loaded brush at a steady angle to spread paint smoothly and avoid laps or blobs.
Mind color mixing so adjacent panels match; small differences show at edges. For subtle texture effects, keep strokes uniform and don’t overwork the wet edge.
Tips to follow:
- Use a sash brush for tight lines and steady pressure
- Feather edges with light strokes toward the wall
- Remove excess on the tray rim before cutting
- Keep a damp rag handy for quick corrections
Rolling Technique to Avoid Lap Marks
After cutting crisp edges, move to rolling while the paint still has a wet edge so you can blend brushwork into the field without laps.
Start in a small section, load the roller evenly, and use a consistent “W” or “M” pattern, then fill in without lifting the roller.
Keep a wet edge by working quickly and overlapping each pass about 50%. Adjust pressure and nap for your wall texture so paint lays uniformly.
Stir thoroughly for even color mixing before loading the roller.
If you notice a drying ridge, stop, feather the seam immediately, and maintain speed to prevent lap marks.
How to Prevent Brush Marks With Enamel
To prevent brush marks with enamel, pick a high-quality brush with fine, tapered synthetic bristles that hold paint evenly.
Load the brush correctly and use long, smooth strokes, keeping a wet edge as you work.
Finish with light, feathering strokes to blend and reduce visible brush lines.
Choose The Right Brush
Although a smooth finish starts with proper technique, choosing the right brush is the single most important step in preventing brush marks with enamel. You’ll pick a brush that matches enamel’s viscosity and your surface.
Natural-bristle works for oil-based enamel; synthetic is best for water-based. Consider size for edges versus flats, and maintain brushes to avoid dried bristles from ruining your finish. Also note how color mixing and paint storage affect consistency—store mixed enamel airtight and stir before use.
- Choose synthetic for latex/enamel blends
- Match brush width to panel size
- Keep bristles tapered and clean
- Replace worn brushes promptly
Use Proper Painting Technique
When you work with enamel, steady strokes and the right rhythm matter most: load the brush evenly, cut in with thin, controlled passes, then lay off each section by lightly brushing outward to blend and remove excess paint.
Keep a wet edge to avoid lap marks; work in small, manageable panels and finish each while paint’s open.
Match pressure and brush angle for consistent surface textures, and use long, continuous strokes across seams.
Check color matching under different light as you go.
If brush marks appear, lightly sand when dry and recoat thinly—patience prevents rework and yields a smooth enamel finish.
Working Around Doors, Windows, and Outlets
If you want clean edges and no drips, mask off trim and cover hardware before you start. Keep a steady, confident brush stroke when cutting in around doors, windows, and outlets.
Mask trim and hardware, then use steady, confident brush strokes when cutting in around doors, windows, and outlets
Protect door hardware and take care with window trims; remove switch plates and outlet covers. Use painter’s tape on jambs, and fold tape back for crisp lines.
Work top-down to catch drips early. Use a compact angled brush for control and a small foam roller for flat areas.
- Remove plates and knobs where possible
- Tape edges tightly
- Brush toward the trim
- Clean spills immediately
Applying Multiple Coats: Timing and Order
After you’ve masked and cut in neatly, plan your coat schedule so each layer bonds and levels properly.
Apply a thin primer or first coat to establish color blending and adhesion, then assess coverage before a second coat. Sand lightly between coats if the surface feels rough or if you want smoother finishes.
For altered texture options, choose thicker mid-coats or microtexture additives, applying evenly. Work from top to bottom and keep strokes consistent so subsequent coats hide brush marks.
Let each coat set enough to be tack-free, then proceed—this order prevents trapping imperfections and guarantees durable, uniform enamel coverage.
Wet Edge, Dry Time, and Recoating Explained
You’ll want to keep a wet edge as you work so brush or roll into still-wet paint to avoid lap marks.
Check the paint’s recommended dry time—usually a few hours for touch-dry and longer for full cure—before deciding when to recoat.
Follow the manufacturer’s recoat window to guarantee proper adhesion and a smooth finish.
Wet Edge Management
Wondering how to keep a seamless finish when using enamel paint? You’ll manage the wet edge by working steadily, matching new strokes to still-wet paint, and avoiding lap marks. Proper color mixing guarantees uniform hue, and good paint storage keeps viscosity consistent.
- Keep a wet edge by painting in consistent sections.
- Maintain a slow, steady pace; don’t stop mid-wall.
- Use a damp brush or roller edge to feather joins.
- Monitor dry time; temperature and humidity affect it.
Plan recoat timing based on manufacturer specs, but don’t rush; premature recoating breaks the wet edge.
Recoat Timing Guidelines
Keeping the wet edge is only part of the job — knowing when to let paint dry before recoating will determine whether your finish stays smooth and hard-wearing. You’ll wait for surface tack to disappear; most enamel dries to touch in 1–6 hours, depending on temperature and ventilation.
For full cure between coats expect 24 hours, longer for oil-based enamels. Lightly sand between coats to knock down imperfections and guarantee adhesion.
When adding color accents or using decorative techniques, test a small area first. Follow manufacturer recoat intervals and don’t rush: patience prevents lifting, streaks, and uneven gloss.
How Long Does Enamel Take to Cure Fully?
Although surface dry times can be quick, full enamel cure takes much longer, and you should plan for days to weeks depending on the formula, film thickness, temperature, and humidity. You’ll notice surface hardness before full cure; deeper solvent release and crosslinking continue longer.
Surface dryness is quick, but full enamel curing can take days to weeks as solvents release and crosslinking continues.
Expect:
- Oil-based enamels: 7–30 days to fully cure.
- Water-based enamels: 3–14 days, faster in warm, dry conditions.
- High-build or textured finishes: longer cure due to thicker film and texture options.
- Lower temps or high humidity: extend cure time.
Consider color matching only after full cure for final swatches, since sheen and depth can shift as paint completes curing.
Speed Up Drying and Curing Safely
You can speed enamel drying by increasing air circulation—open windows and run fans to move fresh air across the surface.
If you need more heat, use low and indirect sources like a space heater on low or warm air from a dehumidifier to avoid softening the finish.
Don’t use high heat or direct flames, and keep the room well-ventilated while the paint cures.
Increase Air Circulation
1 simple step to speed up enamel paint drying is to increase air circulation around the painted area. You’ll help solvents evaporate more evenly and reduce dust settling. Use an Air Purifier only if it’s rated for VOCs and won’t blow directly on wet paint. Consider connecting to a Ventilation System or opening windows to create cross-flow without drafts.
- Place fans to move air gently, not blast the surface.
- Keep doors open between rooms to balance airflow.
- Avoid people walking through the area until tack-free.
- Monitor humidity; lower is better for curing.
Follow these controls and check manufacturer drying times.
Use Low Heat Sources
If you want to speed enamel paint drying without risking surface defects or fire hazards, use low, indirect heat sources and keep temperatures steady and moderate. You should avoid direct heaters or open flames that create hot spots or blistering.
Position a fan to circulate warmed air gently, or use ceramic or oil-filled radiators set to a low output so paint temperature rises evenly. Monitor with a thermometer and maintain recommended ranges from the paint manufacturer.
Don’t rush curing with high heat; uneven drying weakens finish. By controlling heat sources and paint temperature, you’ll get a smooth, durable enamel result.
How to Check if Enamel Is Tacky or Cured
Wondering whether your enamel is tacky or fully cured? You can tell by looking, feeling, and testing gently so your finish stays perfect. Use color matching and texture techniques to spot uneven sheen or soft spots.
Check these signs:
- Lightly press a hidden area; tacky paint will show a slight indentation.
- Smell: cured enamel has minimal solvent odor compared with fresh tacky paint.
- Fingernail test: no mark means it’s likely cured; avoid heavy pressure.
- Visual check under angled light for consistent sheen and no pooling.
If tests show tackiness, wait longer under recommended drying conditions.
Fix Drips, Runs, and Sagging in Enamel
If you spot drips, runs, or sagging, identify the cause quickly so you know whether it’s too much paint, poor technique, or a bad batch.
Remove excess paint with a scraper or wet rag before it dries, then let the area fully cure.
Once tack-free, sand smooth and recoat carefully with thinner, even layers to prevent a repeat.
Identify Causes Quickly
Why are those unsightly drips forming on your enamel-painted wall, and how can you stop them fast? You’ll spot causes quickly by inspecting application and environment. Check paint thickness, brush or roller choice, and drying conditions. Note how color coordination decisions and underlying wall texture affect visibility and approach.
- Too-thick coats from overloading the brush
- Humid or cold conditions slowing curing
- Rough or uneven wall texture catching extra paint
- Poor technique: long pauses or reworking areas
Act fast: thin coats, use proper tools, control humidity, and sand or prime textured spots before repainting to prevent sagging.
Remove Excess Paint
Now that you’ve spotted what’s causing those sags and runs, it’s time to remove the excess before the enamel fully sets. Work quickly: use a clean brush or a flexible putty knife to lift drips gently, pulling excess paint toward the wet edge to avoid streaks.
For sagging, support the area and coax paint back into place with light strokes. Keep a damp cloth nearby to catch stray beads, and don’t overwork the surface.
While correcting, consider how color mixing affected coverage and make sure furniture placement won’t disturb drying walls. Act promptly to prevent permanent blemishes.
Sand And Recoat Carefully
Once the enamel has fully dried, sand the blemished spots lightly with fine-grit paper to level the surface without cutting through the finish. Gently remove dust, inspect for sagging or runs, and determine whether a thin recoat or spot touch-up is needed.
When you recoat, blend using careful color mixing if touch-ups are visible, and keep strokes consistent to match sheen. Mind temperature and ventilation, and use proper paint storage for leftovers.
- Sand only until smooth
- Clean thoroughly before recoating
- Apply very thin, even layers
- Keep a sample patch to compare
Remove Brush Marks and Orange Peel After Painting
If your enamel finish shows brush marks or an orange peel texture, you can smooth it out with careful sanding and the right tools; start by identifying whether the issue is surface texture or dried brush strokes so you choose the correct method. Use 220–400 grit sandpaper for light orange peel, wet-sand for glossy finishes, and sand out dried brush ridges with a block. Keep color mixing consistent and label paint storage to avoid mismatches. Clean, dust, then prime bare spots before recoating. Use fine foam rollers or a high-quality brush to minimize recurrence.
| Task | Grit | Tool |
|---|---|---|
| Light peel | 220–320 | Sandblock |
| Glossy | 400 | Wet-sponge |
| Brush marks | 220 | Fine file |
Spot Repairs and Blending Touch‑Ups
When a small scuff, chip, or stain mars your enamel wall, you can fix it without repainting the whole surface by cleaning the area, feathering the edges, and matching both texture and sheen before you touch up.
Start by sanding lightly, wiping residue, and applying primer to bare spots. Use a small brush or sponge for controlled application.
Consider color psychology when selecting touch‑up paint so repaired areas feel cohesive. Choose eco friendly options like low‑VOC enamel if you care about indoor air.
Tips:
- Test patch in an inconspicuous spot
- Blend with feathering strokes
- Match sheen precisely
- Allow full cure before evaluating
Maintain Enamel Walls: Cleaning Routine
Because enamel finishes are durable but show dirt and fingerprints, you should clean them regularly with gentle methods that won’t dull the sheen. Start by dusting with a microfiber cloth.
Then test a mild detergent solution in an inconspicuous spot. Use a soft sponge, rinse often, and avoid abrasive pads that can mar texture patterns or create visible streaks.
For greasy marks, a diluted degreaser works; for scuffs, try a melamine sponge lightly.
Dry with a soft towel to prevent water spots.
Regular, careful cleaning preserves finish and helps maintain the desired color psychology impact of your painted walls.
When to Use a Clear Coat or Topcoat
If you want extra protection or a specific sheen, consider applying a clear coat once the enamel is fully cured.
You’ll usually wait 24–48 hours for water-based enamel or longer for oil-based before topcoating.
Pick a finish—matte, satin, or gloss—based on durability needs and the look you’re after.
When To Apply
Although enamel paints are durable on their own, you’ll want a clear coat when surfaces need extra protection, enhanced sheen, or easier cleaning.
Apply topcoat after enamel cures to touch — usually 24–72 hours depending on product and temperature. Use clear coats to lock in color blending or preserve texture techniques before high traffic use.
Prep by wiping dust, scuff-sanding matte spots, and ensuring dry conditions.
- Wait manufacturer’s recommended cure time.
- Test adhesion on a small area first.
- Choose compatible clear coat (water or solvent-based).
- Apply thin, even layers; allow full cure between coats.
Choosing Finish Type
When you want extra durability, sheen control, or easier cleaning, choose a clear coat that matches the enamel’s base (waterborne over waterborne, solvent over solvent) and the room’s needs—satin or semi-gloss for high-traffic areas, gloss for trim and spots that need scrubbing, and matte only when you’re sure you won’t need frequent cleaning.
You’ll pick topcoats based on function: moisture resistance for bathrooms, scuff resistance for hallways, UV stability for sunlit rooms.
Use compatible primers and test small patches to confirm color blending and finish appearance.
For special effects, apply texture techniques before sealing with a compatible clear coat.
Prevent Yellowing and Gloss Loss
Why does enamel sometimes yellow or lose its shine over time? You can prevent it by choosing quality alkyd or water-based enamels designed to resist yellowing and by using proper preparation: clean, dry surfaces and a compatible primer. Control environment and maintenance to keep gloss.
- Use water-based enamels for less yellowing and easy touch-ups.
- Avoid cigarette smoke, heat, and UV exposure that accelerate discoloration.
- Employ color blending and texture techniques to hide minor sheen variations.
- Clean gently with a mild detergent; abrasive scrubbing dulls finish.
Follow these steps and you’ll preserve enamel’s original brightness longer.
Choosing Colors: Reflection, Wear, and Sheen
Now that you’ve minimized yellowing and preserved gloss, pick colors with reflection, wear, and sheen in mind so the finished wall looks and performs as you expect.
Now that yellowing’s minimized, choose colors and sheens for reflection, wear resistance, and the look you want.
You’ll use color psychology to set mood—cool tones calm, warm tones energize—while matching sheen to traffic: higher sheen resists scuffs, satin or semi-gloss suits kitchens and trim.
Test samples under real lighting considerations at different times to judge true hue and glare.
Consider how reflection alters perceived depth; glossy finishes highlight imperfections, matte conceals them.
Balance aesthetic goals with durability so your enamel choice endures and complements the room’s function.
Budget‑Friendly Tips for Enamel Projects
If you want good results without overspending, plan each enamel project around three essentials: materials, tools, and prep.
Buy mid‑grade enamel and stretch it with proper thinning; test Color mixing on cardboard to avoid waste.
Reuse tools when possible and repair chips rather than replace hardware.
Practice tidy paint storage to keep leftovers usable for touchups.
- Buy multipurpose rollers and wash them promptly
- Use sample pots to trial shades and avoid big mistakes
- Salvage trim or fixtures for practice instead of new pieces
- Keep lids sealed and cans inverted to extend shelf life
When to Call a Pro Versus DIY
When a job demands specialized skills, equipment, or time you don’t have, call a pro instead of tackling it yourself. You’ll save stress on large surfaces, tricky prep, or complex color coordination. DIY works when scope is small, you’ve done budget planning, and you’re comfortable with brushes and cleanup. Use pros for high-gloss finishes, textured walls, or tight deadlines.
| DIY fits | Call a pro |
|---|---|
| Small rooms | Whole-house jobs |
| Simple trim | Structural repairs |
| Limited budget | Perfect finishes |
| Practice projects | Time-sensitive work |
Decide by weighing cost, skill, and desired longevity.
Dispose Leftover Enamel Safely and Legally
Because enamel is considered hazardous waste in many areas, you’ll need to handle leftover cans with care and follow local disposal rules. Check local environmental regulations first so you choose safe Disposal methods and avoid fines.
Because enamel is often hazardous, handle leftovers carefully and follow local disposal rules to avoid fines.
If the can’s nearly full, look for hazardous waste collection or paint-exchange programs. If it’s dry, you can often discard the empty can following local guidance.
- Store unopened cans in a cool, ventilated spot until disposal.
- Take liquid leftovers to a household hazardous waste site.
- Never pour enamel down drains or into soil.
- Label containers and keep them sealed for transport.
Fix Stubborn Adhesion or Peeling Issues
Although stubborn peeling can seem like a lost cause, you can usually restore adhesion with the right preparation and materials. Start by removing loose flakes, sanding glossy areas to dull the surface, and cleaning with a degreaser.
Spot-prime with a bonding primer designed for enamel, allow full cure, then feather edges to blend old and new paint so color blending is seamless.
For uneven surfaces, apply a skim coat or use texture effects to match surrounding finish before repainting.
Test a small patch, inspect after drying, and only proceed when adhesion and appearance meet your standards.
Maintenance Schedule to Keep Walls Like New
If you want your enamel-painted walls to look new year after year, set a simple maintenance schedule and stick to it. Check monthly for scuffs, dust weekly with a soft cloth, and spot-clean stains promptly with mild soap.
Rotate any Creative wall art periodically to avoid uneven fading. Inspect seams and corners quarterly for chips, repairing with touch-up enamel. Consider removing or replacing Decorative wall decals gently to prevent surface damage.
- Dust and light wipe-down weekly
- Spot-clean stains as they appear
- Rotate artwork every few months
- Touch up chips quarterly
Stick to this plan and your finish will stay fresh.
Quick Final Checklist to Finish Your Enamel Job Right
You’ve kept up with maintenance, now finish strong with a quick checklist to guarantee your enamel job looks professional and lasts.
Inspect surfaces for missed spots, drips, or uneven coverage; touch up thin areas and sand minor imperfections.
Inspect for missed spots, drips, or thin coverage—touch up and sand minor imperfections for a flawless enamel finish
Confirm Color matching under natural light and adjust if needed.
Clean edges and remove painter’s tape slowly to avoid tears.
Check hardware and reinstall fixtures once paint cures to the manufacturer’s recommended time.
Review ventilation tips: verify fresh airflow during curing and avoid high humidity.
Dispose of waste properly, store leftover paint labeled for future touch-ups, and enjoy your finished walls.
Frequently Asked Questions
Can Enamel Paint Be Used Over Wallpaper Without Removing It First?
Yes—you can paint over wallpaper, but it’s usually best to do wallpaper removal first; if not, focus on thorough surface preparation, repair seams and clean, then prime and use enamel for durable, even coverage.
Will Enamel Fumes Affect Pets Long‑Term, and How to Protect Them?
Like a Roman centurion shielding dogs, you shouldn’t ignore pet safety: long term exposure to enamel fumes can harm pets’ respiratory and neurological health, so ventilate, use low‑VOC paint, keep animals away, and monitor vets.
Can Colored Enamel Be Tinted to Match Custom Paint Samples?
Yes — you can tint colored enamel to match custom samples. You’ll use color matching tools and precise tinting techniques, and you’ll test small batches, adjust pigments, and document formulas to guarantee consistent, accurate results.
How to Repair Enamel if It Develops Hairline Crazing Later?
You’ll sand the crazed area, clean thoroughly, apply primer, then use enamel crack repair filler or flexible touch-up enamel, feathering edges; to prevent recurrence, control surface prep, humidity, and use proper flexible primers for hairline crazing prevention.
Are There Eco‑Friendly Enamel Alternatives With Similar Durability?
Yes — you can choose eco friendly options like water‑based alkyds, low‑VOC acrylics, or plant‑based oils; you’ll get durable, natural finishes that resist wear while reducing toxins, and you’ll still enjoy long‑lasting performance.
Conclusion
Enamel paint can give your walls a hard, washable finish that lasts — and it’s worth noting that households spend an average of 2–3% of their property value on maintenance annually, so choosing durable coatings pays off. Pick oil‑ or water‑based enamel by room needs, address surface prep and adhesion issues promptly, and follow a simple maintenance schedule. With proper disposal of leftovers, your enamel job will stay looking fresh for years.