How to Use Paint Remover on Wall Safely
You’ll start by identifying your wall type and paint so you pick the right remover—chemical, heat, or sanding—and test a small patch first. Wear a respirator, gloves, and goggles, ventilate the room, and protect floors and furniture. Follow manufacturer instructions, go slowly to avoid surface damage, and stop if you see harmful dust, fumes, or lead signs. Dispose of residues safely and consult a pro for risks; keep going for step-by-step guidance.
Who This Guide Is For And What It Covers
Whether you’re tackling a small patch or prepping an entire room, this guide is for DIYers, renters, and homeowners who need a safe, effective way to remove paint from interior walls. You’ll find clear guidance on evaluating surfaces, choosing removers suited to decorative finishes, and protecting yourself and nearby belongings.
The content covers methods matched to common wall textures, tools you’ll need, and how to examine underlying materials like plaster or drywall. You won’t get step-by-step removal instructions here; instead, you’ll learn when to proceed, when to test, and when to consult a pro to avoid damage or health risks.
Quick Answer: Remove Paint From A Wall Safely
Now that you know who this guide is for and what it covers, here’s the quick answer: remove paint from a wall safely by choosing a method matched to the surface and paint type, protecting yourself and the room, testing a small area, and proceeding slowly to avoid damage.
Start by identifying wall textures and original paint—smooth drywall, plaster, or textured finishes need different approaches. Wear respirator, gloves, and goggles; ventilate and cover floors. Use chemical stripper, heat, or sanding appropriate to the substrate, and work in sections.
Rinse, neutralize if needed, and prep for creative painting or refinishing.
When To Strip Paint Vs. Repaint A Wall
If the existing finish is sound and you just want a new color, repainting usually makes more sense. You should strip paint when you face peeling, multiple old layers, or decorative finishes you want removed. Choose repaint when adhesion is good, surface is smooth, or wallpaper removal already exposed clean drywall. Consider effort, cost, and time.
| Condition | Strip | Repaint |
|---|---|---|
| Peeling/multiple layers | Yes | No |
| Smooth, sound surface | No | Yes |
| Decorative finishes/wallpaper removal needed | Yes | Maybe |
Decide by inspection and desired final look.
How To Check If The Paint Contains Lead?
Before you strip old paint, check whether it contains lead so you can protect yourself and follow the right safety steps. You’ll start with lead testing kits for a quick home check, then confirm results with a certified lab or inspector if needed.
Before stripping old paint, test for lead with an EPA kit and confirm positives with a certified inspector.
Treat any positive or uncertain result seriously: use containment, respirators, and follow local disposal rules as safety precautions. Don’t sand or dry-scrape until you know the result.
- Buy an EPA-recognized lead testing kit.
- Hire a certified lead inspector for confirmation.
- Follow containment and PPE guidance immediately after a positive test.
Signs To Stop Work: Health Or Structural Hazards
If you suddenly develop coughing, wheezing, shortness of breath, or throat irritation while working, stop immediately and get fresh air—these can be signs of acute respiratory exposure.
Also halt work if you see cracks, sagging, or loose plaster that suggest the wall’s integrity is compromised.
Both health symptoms and visible structural damage mean it’s unsafe to continue until the cause is addressed.
Sudden Respiratory Symptoms
When you suddenly develop coughing, wheezing, chest tightness, or breathlessness while using paint remover, stop working immediately and move to fresh air; these symptoms can signal acute inhalation of toxic vapors or dangerous dust that require prompt attention.
You should remove yourself from the area, loosen clothing, and avoid returning until symptoms ease and the space is ventilated.
Seek medical help if symptoms persist, worsen, or include dizziness or throat burning.
For future DIY project safety, review paint chemistry and product labels, use appropriate respirators, and control dust.
- Leave the area immediately
- Get medical evaluation if needed
- Use proper respirator and ventilation
Visible Structural Damage
While you’re working, stop immediately if you notice cracks, sagging, bulges, or new gaps around beams, ceilings, or door and window frames—these are clear signs the wall’s structure may be compromised and could collapse or release hazardous materials.
You should step back, evacuate the area, and avoid disturbing the wall further. Photograph visible damage and mark the spot so others know to stay away.
Contact a qualified structural engineer or contractor before continuing; don’t assume cosmetic fixes will suffice.
Report any suspected asbestos, lead paint, or water damage to professionals equipped for safe removal and repair to address structural concerns properly.
When To Call A Professional For Lead Abatement
Because lead poses serious health risks and its removal can stir up hazardous dust, you should hire a certified lead abatement professional whenever your home was built before 1978 and you plan to disturb painted surfaces, can’t confirm the paint is lead-free, or you or household members are pregnant, nursing, or have young children.
A pro assesses risk, contains dust, follows regulations, and can balance historical preservation with eco friendly techniques. Call one if testing shows lead, if large areas need stripping, or if occupants are vulnerable. They’ll provide written plans, HEPA cleanup, and certification so you can safely proceed.
- Testing confirms lead present
- Extensive paint disturbance required
- Vulnerable occupants or historic finishes
Decision Framework: Chemical Stripper Vs. Mechanical Removal
If you’re weighing chemical strippers against mechanical removal, focus first on the surface condition, the paint type, and occupant safety—these factors determine which method will be faster, cleaner, and less risky.
You’ll choose chemicals when delicate substrates, intricate moldings, or historical preservation demand minimal abrasion and controlled waste.
Pick mechanical removal for durable, flat surfaces where speed matters and containment’s simpler.
Consider environmental impact: chemical use needs proper disposal; sanding creates dust and may release lead.
Factor in ventilation, PPE, and containment.
If uncertainty remains, test a small area or consult a conservator to balance efficiency, risk, and long-term preservation.
Types Of Chemical Paint Removers And How They Differ
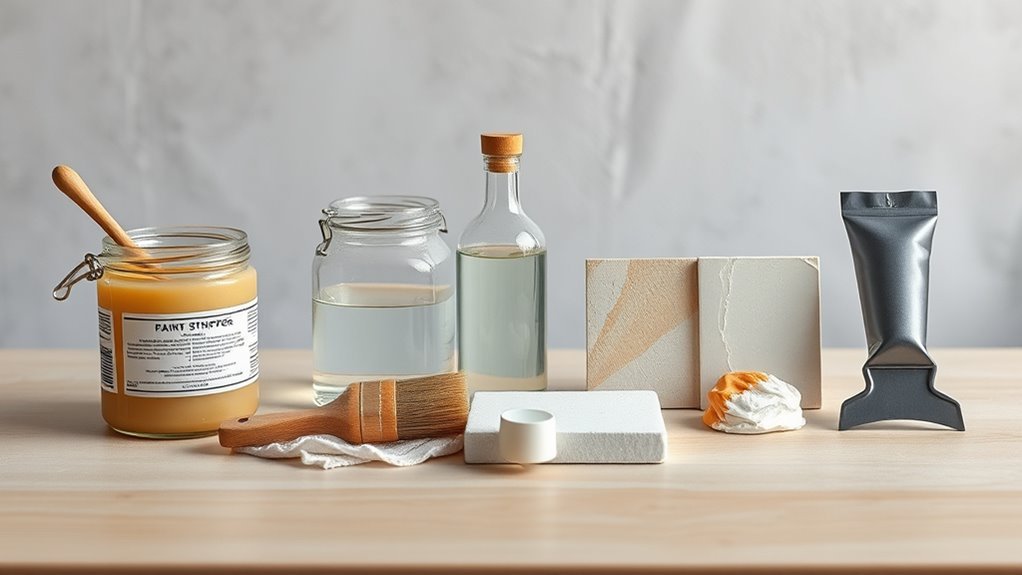
You’ll choose between solvent-based removers, which break down paint with organic chemicals, and caustic (alkali) strippers, which saponify and lift coatings using strong bases.
Each type works differently on paints and substrates, so you’ll need to match the remover to the surface and finish.
Next, we’ll compare their effectiveness, safety concerns, and cleanup needs so you can pick the safest option.
Solvent-Based Removers
When you choose a solvent-based remover, understand that you’re picking a chemical that dissolves paint at the molecular level rather than lifting it mechanically. These products work fast and come in several types—ketones, esters, aromatic hydrocarbons, and chlorinated solvents—each differing in strength, odor, toxicity, and compatibility with substrates.
You should assess substrate sensitivity, ventilation, and personal protective equipment before use.
Solvents vary: ketones cut tough coatings, esters are milder, aromatics balance speed and smell, chlorinated types are potent but hazardous.
Consider how removal affects color matching and texture restoration when prepping for repainting.
- Ketones: aggressive
- Esters: gentler
- Aromatics: balanced
Caustic (Alkali) Strippers
Although they work differently than solvents, caustic (alkali) strippers dissolve paint by breaking down its chemical bonds—especially in oil-based and alkyd finishes—so you’ll often see them recommended for heavy-duty stripping.
You should wear gloves, eye protection, and a respirator because chemical hazards include severe burns and toxic fumes. Apply carefully, keep children and pets away, and neutralize residues per label instructions.
Caustic strippers work well on metal and masonry but can damage wood and plaster, so test first.
Consider disposal rules and environmental impact: avoid drains, follow local hazardous-waste guidelines, and choose less caustic options when possible.
Low-Odor And Eco-Friendly Strippers: Pros And Limits
Because they cut down on fumes and environmental harm, low-odor and eco-friendly paint strippers are an attractive choice for indoor projects and conscientious homeowners. You’ll appreciate eco friendly alternatives that reduce VOC exposure and disposal impact, though you should recognize limits in chemical effectiveness compared with stronger products.
Low-odor, eco-friendly paint strippers reduce fumes and VOCs—great for indoor use, though gentler and sometimes slower than harsher options.
They work well on water-based and some alkyd paints, but may need longer dwell times, multiple applications, or light scraping.
- Expect gentler action and slower results.
- Use proper ventilation and follow label disposal instructions.
- Test a small area first to confirm performance before treating whole walls.
Solvent-Based Strippers : Uses And Risks
Solvent-based strippers are powerful but can pose serious health and safety hazards if you don’t handle them correctly.
You’ll need to use them only with proper ventilation—open windows, run fans, and consider a respirator rated for organic vapors.
We’ll cover specific exposure risks and safe ventilation techniques next so you can decide whether they’re right for your project.
Health And Safety Hazards
When you use solvent-based paint strippers, you’ll need to respect their strong fumes, skin- and eye-irritating chemicals, and flammability—because mishandling them can cause burns, respiratory problems, or fire hazards.
You must avoid sparks and incompatible cleaners to prevent dangerous chemical reactions. Wear proper personal protective equipment: gloves, goggles, and a respirator rated for organic vapors. Treat contaminated rags and containers as combustible waste.
- Keep ignition sources away and store products upright.
- Replace damaged PPE and wash exposed skin promptly.
- Follow label disposal instructions and never mix strippers.
Stay vigilant: small mistakes can create serious hazards.
Proper Ventilation Techniques
If you’re working with solvent-based paint strippers, set up ventilation that moves fresh air in and contaminated air out so fumes never build up where you’re breathing. Position fans to create cross-ventilation: one pulling fresh air in, another exhausting toward an open window or door. Seal off other rooms to prevent spread.
Use directional airflow optimization—aim intake low and exhaust high to carry vapors away. Consider a portable air purification unit with activated carbon to reduce lingering solvents, but don’t rely on it alone.
Always wear a respirator rated for organic vapors and monitor conditions; stop if odors intensify.
Caustic (Lye) Strippers: When To Avoid Them
Although caustic (lye) strippers work quickly on multiple paint layers, you should avoid them in certain situations: on softwoods, painted drywall, delicate trim, or surfaces with lead paint where chemical reactions or deep penetration could cause damage or hazardous residue.
Although fast, caustic lye strippers can damage softwoods, drywall, delicate trim, or react dangerously with lead paint—avoid them.
You’ll want to skip lye when Caustic dangers outweigh benefits — it can swell wood, harm paper-faced drywall, and react unpredictably with old coatings. If you’re unsure, choose gentler methods.
Protect yourself from splashes and fumes, and don’t use lye where residue could persist.
- Softwoods and veneered surfaces
- Painted drywall and plaster
- Suspected lead-painted areas
Gel, Paste, Liquid, And Poultice: Which Is Best For Walls?
Wondering which remover form will give you the cleanest, safest result on your walls? You’ll choose gel for vertical surfaces because it clings, reducing drips and protecting trim. Paste works similarly for textured or carved areas.
Liquids penetrate thin coatings fast but can run and oversaturate drywall, so use controlled application.
Poultices draw deep stains and are ideal for spot removal without spreading residue.
Consider color matching and aesthetic considerations when removing paint from visible areas—test small patches to ensure underlying color and texture won’t ruin your finish.
Always ventilate and protect floors and adjacent surfaces.
How To Read Product Labels And SDS Safely
Before you start, read both the product label and the Safety Data Sheet (SDS) so you know exactly what you’re handling, how to use it, and what protections are required. You’ll confirm hazards, emergency steps, and proper storage.
Focus on label interpretation: signal words, pictograms, and first-aid instructions. SDS sections give detailed chemical hazards, composition, and spill response.
Take notes and compare label vs SDS; follow the stricter instruction.
- Check signal words and pictograms for immediate risks.
- Note exposure routes and recommended controls in the SDS.
- Record emergency contact and spill procedures before beginning.
PPE Checklist For Paint Removal
When you’re removing paint, wear the right personal protective equipment to protect your skin, lungs, and eyes from chemical splashes, dust, and fumes.
Wear chemical-resistant gloves, long sleeves, and disposable coveralls to prevent skin contact.
Use a respirator with appropriate cartridges for organic vapors and particulates; fit-test and check seals.
Put on chemical splash goggles and a face shield for extra protection.
Choose sturdy safety footwear to protect against spills and dropped tools.
Keep a stocked first aid kit nearby and know basic treatment for chemical exposure.
Inspect PPE before use and replace damaged items immediately to stay safe.
How To Ventilate A Room Properly During Stripping
When you strip paint, open windows and doors to create a clear path for fumes to leave.
Put an exhaust fan in a window or doorway to pull contaminated air outside.
Avoid crossflows that blow fumes through other occupied rooms or toward people.
Open Windows And Doors
If you’re stripping paint, open windows and doors to create a steady cross-breeze that carries fumes and dust out of the room. You’ll want fresh air flowing before you apply remover paint or start scraping.
Position openings opposite each other to pull contaminants through; keep interior doors open to extend airflow into hallways. Close off vents to other rooms if possible and warn household members to avoid the area.
Use window screens to keep insects out while air moves.
- Open windows wide on opposite walls
- Remove paint debris promptly
- Keep interior doors open for circulation
Use Exhaust Fans
Because open windows alone don’t always move enough air, run a strong exhaust fan to pull fumes and dust out of the room while you strip paint. Position the fan near the work area and direct airflow out a window or vent.
Check exhaust fan maintenance before starting: clean blades, replace filters, and guarantee cords and mounts are safe.
Run the fan continuously during stripping and for at least 30 minutes after finishing to improve indoor air quality.
Monitor for smells or irritation; if they persist, increase ventilation or pause work.
Keep the fan accessible for quick adjustments as conditions change.
Avoid Drafty Crossflows
Although a steady breeze might seem helpful, avoid creating drafty crossflows while stripping paint because they can spread fumes and dust to other areas and interfere with controlled ventilation.
You should set up directed air circulation: open windows on one side and use an exhaust fan or box fan facing outward to pull contaminants away.
Seal doorways with plastic sheeting and tape to prevent migration to other rooms.
Position yourself upwind of the work and take breaks to check airflow.
Monitor for odors and dust; stop work if ventilation changes.
- Use one exhaust point
- Seal adjacent rooms
- Check airflow often
Containment For Dust And Fumes In Occupied Homes
When you work in an occupied home, contain dust and fumes to protect residents and pets by sealing the work area, using plastic sheeting and painter’s tape to isolate doors, vents, and hallways. You’ll set up negative pressure with a HEPA fan and keep windows closed when fumes are present. Consider eco friendly options like low-VOC strippers for historical preservation projects, and post signage to keep occupants away. Monitor air with a meter and provide temporary sleeping spaces if needed.
| Barrier | Ventilation | PPE |
|---|---|---|
| Plastic sheeting | HEPA fan | N95 masks |
| Tape seals | Exhaust ducting | Gloves |
| Door sweep | Air purifier | Eye protection |
How To Protect Floors, Trim, Fixtures, And Furniture Fast
After you’ve sealed the work area and controlled dust and fumes, protect floors, trim, fixtures, and furniture quickly to prevent chemical and paint damage. Lay heavy contractor paper or plastic sheeting, tape edges with low-residue painter’s tape, and cover vents. Move small pieces out; wrap immovable items with drop cloths. Keep a dedicated trash bucket for used rags.
- Use weighted floor protection to stop slips and tears.
- Wrap trim and fixtures with painter’s tape and thin foam to avoid scuffs.
- Cover furniture with breathable cloths to prevent trapped moisture, aiding later color matching and texture blending.
Protecting Pets And Children During The Job
Keep pets out of the work area and shut doors or use baby gates to prevent curious animals from wandering in.
Move kids to a separate room and put up clear boundaries so they won’t touch tools or wet remover.
You’ll reduce exposure risks and make cleanup easier by keeping everyone out until the area’s fully ventilated and dry.
Keep Pets Out
How will you protect curious pets and small children while you strip paint? Keep pets out of work zones completely: close doors, use baby gates, and post notices so everyone knows the area’s off-limits. For pet safety, relocate animals to a well-ventilated room or a friend’s house while you work.
If old paint might contain lead, arrange professional lead testing before beginning and follow recommendations. Clean floors and surfaces thoroughly after work.
- Seal off the room and tape thresholds.
- Provide comforting bedding and water elsewhere.
- Schedule short, supervised check-ins only after ventilation and cleanup are complete.
Secure Child Areas
You’ve already isolated pets and sealed off work zones, so now focus on creating a child-safe perimeter that prevents accidental exposure. Set up physical barriers like baby gates and tape lines, post clear signs, and keep doors closed.
Store removers, rags, and tools on high shelves or locked containers. Supervise children in a separate room with toys and snacks to limit curiosity.
Ventilate the area and avoid carrying contaminated clothing near kids. Teach older children about paint hazards and enforce strict no-entry rules until surfaces fully dry and you’ve removed residues.
Prioritize Child safety at every step.
Choosing Strippers For Indoor Vs. Outdoor Walls
Whether you’re stripping a living room wall or prepping an exterior façade, pick a stripper formulated for the job. You’ll choose indoor formulas with low fumes and residue for living areas, preserving color matching and delicate wall texture. Outdoor products tolerate moisture, rough surfaces, and UV exposure but you’ll need ventilation and PPE.
- For interiors: low-odor, water-based gel for minimal runoff.
- For exteriors: heavier-duty solvent or caustic mix for layers and mildew.
- For transitional spaces: test a small patch to check finish, color matching, and any impact on texture.
Test first; follow label safety directions.
Budget: Cost Comparison For Paint-Removal Methods
When planning paint removal, weigh upfront costs against time and cleanup. You’ll factor Budget planning into choices: DIY chemical strippers cost less in materials but need PPE, disposal and many hours.
Heat guns and sanding gear raise equipment cost and can increase cleanup or safety expenses. Hiring pros boosts labor cost but shortens project time and may reduce waste disposal hassles.
Do a quick Cost analysis: list material, tool rental or purchase, PPE, disposal fees, and estimated labor hours. Compare totals to your time value and risk tolerance to pick the most economical, sensible method.
Tools Pros Use That DIYers Can Adopt
You can get better results and work faster by using professional-grade scrapers that hold up to heavy use and keep edges sharp longer.
Don’t skimp on respiratory protection gear—N95s or respirators with appropriate cartridges will cut your exposure to harmful fumes and dust.
Together those tools make paint removal safer and more efficient for a DIY job.
Professional-Grade Scrapers
Although it looks simple, choosing a professional-grade scraper can make the difference between a quick, clean strip and hours of sanding and touch-ups. You’ll want tools that sit solidly in your hand, hold a sharp blade, and let you control pressure precisely.
Pick stainless blades that resist rust, ergonomic handles to reduce fatigue, and adjustable blade angles for different wall textures and delicate finishes. You’ll notice cleaner edges and less gouging, which helps later color mixing or touch-ups.
Consider a set that includes rigid and flexible blades so you match scraper stiffness to the surface.
- Heavy-duty stainless steel blade
- Ergonomic pistol grip
- Assorted rigid/flexible blades
Respiratory Protection Gear
Because fine dust and chemical fumes can linger long after you think the job’s done, pros always prioritize respiratory protection and you should too. Choose a respirator rated for organic vapors and particulates, not just a dust mask.
Check respirator fit every time—seal checks before work guarantee protection.
Replace cartridges per manufacturer guidance and after heavy exposure.
Keep a separate storage case and wipe surfaces; mask maintenance prevents contamination and extends life.
If you wear glasses, use models compatible with the respirator to avoid gaps.
Practice putting it on and off until it feels quick and secure.
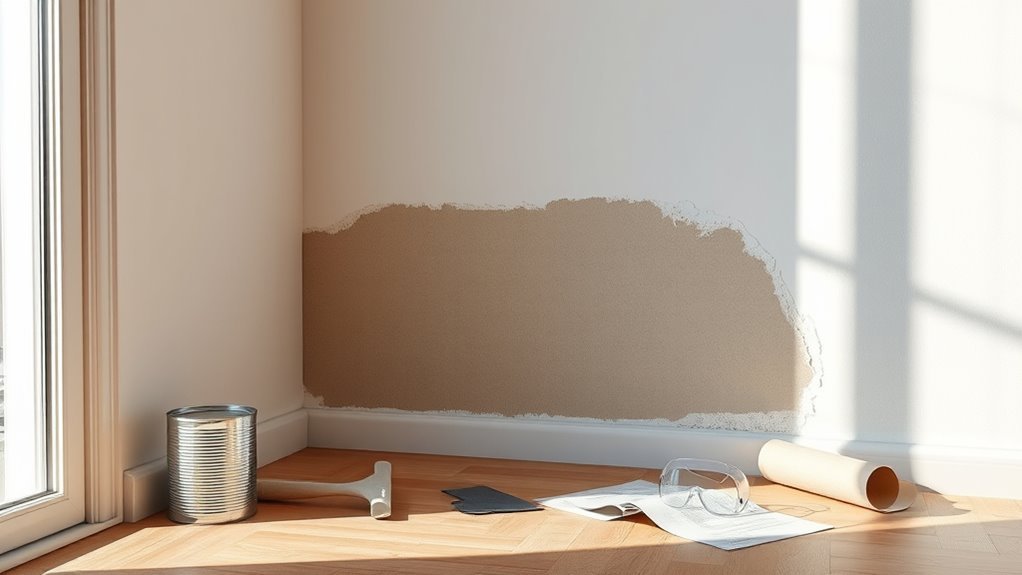
How To Prepare The Wall Before Using A Stripper
Where should you start before applying a stripper? Begin with thorough surface preparation: clear furniture, cover floors, and remove loose paint with a scraper so the stripper works evenly. Ventilate the area and wear gloves and eye protection. Patch holes and sand rough spots for an even finish after stripping.
- Remove switch plates and tape edges to protect trim.
- Lay down drop cloths and seal vents to control debris.
- Label and store hardware safely for reattachment.
After stripping and cleaning, consider primer application to seal the substrate before repainting, ensuring good adhesion and a lasting result.
How To Test A Small Area To Choose Technique
Now that the wall’s prepped and protected, you’ll want to test a small area to pick the safest and most effective stripping method. Choose an inconspicuous corner or behind trim, note the existing color matching to avoid surprises, and photograph the spot for reference.
Try a tiny patch with your gentlest technique first—mechanical scraping, heat, or a mild solvent—wearing proper PPE. Wait the recommended dwell time, remove residue, and assess adhesion, substrate damage, and how well underlying vintage finishes show.
Repeat with stronger methods only if needed, comparing results and photos before proceeding across the wall.
Step-By-Step: Use Chemical Stripper To Remove Paint From A Wall
First, you’ll prepare the work area by ventilating the room, covering floors and furniture, and putting on gloves, goggles, and a respirator.
Next, you’ll apply the chemical stripper evenly according to the product instructions, letting it sit for the recommended time.
Finally, you’ll scrape and wipe away the softened paint, clean the surface, and dispose of residue safely.
Prepare The Work Area
Before you apply any chemical stripper, clear and protect the room so you can work safely and cleanly. Lay down drop cloths, tape off trim, and move furniture away from the wall.
Open windows and set up fans for ventilation; you’ll want steady airflow without drafts that blow dust onto wet surfaces. Wear gloves, goggles, and a respirator rated for organic vapors. Keep a fire extinguisher nearby and store chemicals in their original containers.
Consider how your eventual color mixing and brush techniques will affect cleanup and workspace layout so tools and rinsing stations are within easy reach.
- Remove furniture and fragile items
- Seal off adjoining rooms
- Arrange ventilation and disposal supplies
Apply And Remove Stripper
Once you’ve prepped the area and donned protective gear, start by applying the stripper in manageable sections so it stays wet long enough to work. Use a brush or applicator suited to your wall texture to guarantee even coverage; avoid drips.
Let the stripper dwell per instructions, watching for paint lifting and any odd color mixing from underlying coats.
Scrape gently with a plastic or putty knife, holding it flat to prevent gouging.
Wipe residue with recommended solvent or water, rinse thoroughly, and inspect for missed spots.
Repeat only as needed, allowing proper ventilation and disposal of waste per local rules.
How Long To Leave Stripper On (By Product & Paint Type)
Because different strippers and paint types react at different speeds, you’ll need to match the product to the coating and monitor progress closely.
For water-based paints, gel strippers often work in 15–30 minutes.
For oil-based or alkyd, expect 30–60 minutes.
Heavy or multiple layers and leaded paints need longer and specialized paint chemical formulations; follow label dwell times and prioritize removal safety.
Check every 5–10 minutes; reapply if it skins over without lifting.
- Water-based paints: 15–30 minutes
- Oil/alkyd paints: 30–60 minutes
- Thick/multiple layers or leaded: follow specialist product times
Safe Scraping Technique To Avoid Gouging Drywall Or Plaster
Pick a scraper suited to your surface—plastic or flexible-blade metal for drywall, stiffer metal for plaster—and keep the blade sharp and clean.
Hold the scraper at a low angle with your hand near the blade for control, and always pull or push in smooth, consistent strokes.
Apply light, even pressure so you lift softened paint without gouging the substrate.
Choose The Right Tool
When you’re scraping paint from drywall or plaster, using the right tool and technique will keep the surface intact and save you repair work later. Choose flexible plastic scrapers for thin coatings and sharp but narrow metal scrapers for stubborn spots. Matching blade size to wall texture will help avoid gouges.
If you’re prepping for repainting, think about color mixing impacts and avoid over-sanding that alters texture. Use a drop cloth and light pressure, testing in an inconspicuous area first.
- Flexible plastic scraper for light paint
- Narrow metal blade for small stubborn patches
- Putty knife for edges and trim
Hold The Scraper Correctly
Now that you’ve selected the right scraper, how you hold it determines whether you remove paint cleanly or gouge the wall. Grip the handle near the blade for control, thumb on top to guide angle, fingers wrapped underneath.
Keep the blade almost flush—about 15–30 degrees—to skim paint layers and respect paint texture shifts. Use your free hand to steady thin plaster or drywall near edges.
Rotate the scraper, not your wrist, for longer strokes and consistent contact. After stripping, inspect exposed substrate for primer compatibility before refinishing.
Replace dull blades; sharp ones cut paint, not the wall.
Use Light, Even Pressure
Although you want to remove paint efficiently, use light, even pressure so the blade skims layers without digging into drywall or plaster. You’ll protect underlying surface texture by practicing pressure control: hold the scraper at a shallow angle, push gently, and let the tool do the work.
Test a small area first to see how paint releases and adjust pressure accordingly. If stubborn spots remain, repeat passes instead of increasing force. Keep blade sharp and clean to minimize gouging.
- Maintain a shallow blade angle
- Make multiple gentle passes
- Inspect surface texture frequently
How To Remove Softened Paint Without Spreading Mess
Once the remover has softened the paint, work deliberately to lift it without dragging residue across the wall. Use a wide putty knife held at a shallow angle and scrape in short, controlled strokes. Wipe the blade on a disposable rag or paper towel between passes so softened flakes don’t smear or fall onto clean areas.
Protect decorative finishes and respect wall textures by testing a small patch first.
Collect debris on drop cloths and use a hand broom or vacuum with a brush attachment frequently. For edges and crevices, use a plastic scraper or soft-bristled brush, preventing spread by containing and disposing of waste promptly.
How To Use Heat Guns Safely As An Alternative
If you prefer to avoid chemical strippers, a heat gun can be an effective alternative for softening paint—just be mindful of fire and burn risks. You’ll follow heat gun safety: wear gloves, eye protection, and a respirator; keep a fire extinguisher nearby; and clear flammable materials.
Use temperature regulation to work at the lowest effective setting and keep the nozzle moving to avoid scorching. Aim the gun at small sections, peel softened paint with a scraper, and let the surface cool before touching.
- Keep ventilation steady and avoid inhaling fumes.
- Test temperature on a hidden spot first.
- Maintain three feet of clearance.
When To Combine Sanding With Chemical Stripping
When the paint’s thick, layered, or you’ve already softened it with a stripper but still see stubborn spots, combine chemical stripping with light sanding to speed removal and smooth the surface.
You’ll target raised edges and residue without overworking intact layers beneath decorative finishes you plan to preserve. Use fine-grit sanding and gentle pressure after the stripper has done most of the work.
Test a small area to guarantee you don’t damage texture or underlying pigments important for color matching.
Wear protection, vacuum dust between passes, and stop when surfaces feel even and ready for primer or refinishing.
How To Neutralize Caustic Strippers After Use
Because caustic strippers leave alkaline residues that can continue to eat paint and irritate skin, you should neutralize treated surfaces promptly and thoroughly. You’ll protect yourself from paint stripper hazards and prevent ongoing damage by using proper neutralization techniques.
Because caustic strippers leave alkaline residues, promptly and thoroughly neutralize treated surfaces to protect skin and paint.
Mix a mild acidic solution (water with white vinegar or citric acid) and apply it evenly, working from top to bottom. Rinse with clean water afterward and dry.
- Wear chemical-resistant gloves and eye protection.
- Test neutralizer on a small area first.
- Use disposable cloths and ventilate the room well.
How To Clean Residue From Walls After Removal
Want a clean, paint-free surface? After neutralizing strippers, rinse the wall with clean water and a mild detergent using a sponge, working top to bottom. Scrub gently to remove softened residue, then blot with dry towels.
For stubborn patches, use a plastic scraper or fine abrasive pad—don’t gouge the substrate. Rinse again and let the wall dry fully before inspection.
Check for residue streaks and uneven texture; address spots with light sanding to aid texture blending. Note any color variations so you’ll plan color matching later.
Dispose of waste per local regulations and ventilate until odors dissipate.
How To Prepare A Stripped Wall For Priming And Paint
Ready to prime and paint? You’ll inspect the stripped wall for gouges, residue, and uneven texture. Patch holes with appropriate filler, sand smooth, and clean dust away. Aim for seamless texture blending so primer and paint sit evenly; note areas needing extra skim coat for consistent finish and color matching later.
Inspect for gouges, patch and feather filler, sand and clean—prime only after repairs fully cure for flawless paint results.
- Sand lightly and vacuum to remove dust.
- Apply filler and feather edges for smooth texture blending.
- Use a white primer or tint toward your target color to aid color matching.
Let all repairs cure fully, then tack-cloth before priming to guarantee a flawless surface.
How To Handle Lead-Painted Surfaces During And After Stripping
If your home was built before 1978 or you suspect lead paint, treat the surface as hazardous: test first with a kit or lab analysis, wear a properly fitted NIOSH-approved respirator and disposable coveralls, and contain the work area with plastic sheeting and tape to prevent dust spread. You should wet-strip or use low-dust chemical methods, avoid sanding, and keep children and pets away. Follow disposal rules in the next section. Use HEPA vacuuming and wet wiping for cleanup, change clothes before leaving, and document results. Maintain strict safety precautions to minimize exposure to lead.
| Step | Action |
|---|---|
| 1 | Test |
| 2 | Contain |
How To Dispose Of Paint Waste And Used Stripper Responsibly
Because paint stripper and removed coatings can be hazardous, you should handle and discard them deliberately. Seal scraps and used cloths in labeled, leakproof containers.
Don’t pour stripper or rinse water down drains; treat residues as hazardous waste and follow local disposal rules.
For eco-friendly disposal, ask your municipal hazardous waste facility about collection days or take-back programs.
If solvents remain usable, store them safely for future projects in original containers.
Wear gloves when transporting waste, and document disposal if required.
- Contact local hazardous waste collection centers.
- Use sealed, labeled containers for transport.
- Follow community eco-friendly disposal guidelines.
Manage Ventilation And Air Quality After The Job
After you’ve packed and labeled waste for proper disposal, focus on restoring indoor air quality before reoccupying the space. Open windows and run box or window fans to pull fresh air through, aiming for cross-ventilation for several hours.
Use a HEPA air purifier to capture lingering particulates and fumes; change filters afterward per manufacturer guidance.
Use a HEPA air purifier to remove lingering particles and fumes, and replace filters afterward per manufacturer instructions
Wipe surfaces with damp microfiber to remove residue that could affect future color matching or cling to wall texture.
Keep pets and sensitive people out until odors are gone.
Monitor smell and comfort; if irritation persists, ventilate longer or consult a professional.
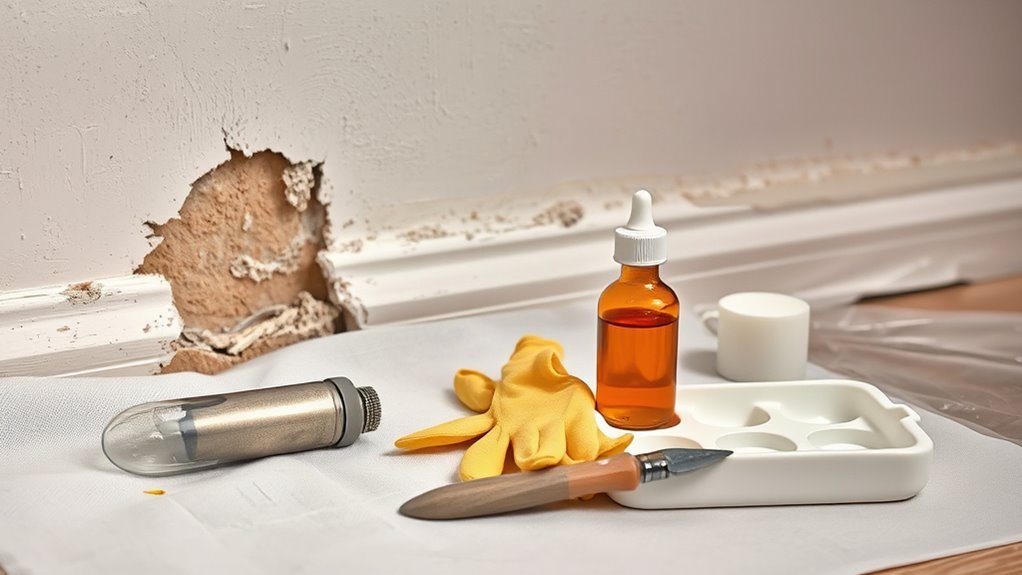
How To Spot And Repair Substrate Damage Found By Stripping
When you strip paint, inspect the substrate closely for soft spots, gouges, cracks, or leftover adhesive—these signs tell you whether the wall needs simple patching or more extensive repair. You’ll check for substrate stability by pressing, tapping, and shining a light to reveal hollows.
Prioritize surface preparation: clean dust, remove loose material, and note moisture or rot.
- Patch small holes with appropriate filler, sand smooth, re-clean surface.
- Replace or sister damaged drywall/plywood sections if stability is compromised.
- Seal repaired areas and allow full cure before repainting to guarantee long-term adhesion.
Dealing With Multiple Paint Layers And Incompatible Systems
Before you strip, check whether the existing coatings are compatible—oil over latex (or vice versa) can cause adhesion issues.
If you find multiple layers, test a small area to see how each layer responds to your remover so you can choose the right method.
Plan to remove incompatible or flaking layers completely before refinishing to guarantee a stable surface.
Identify Paint Compatibility
Because different paints and coatings react differently to strippers and sanding, you’ll want to confirm what’s on your wall before you start work. Test small areas: scrape a corner, wet with solvent, note gloss, smell, and adhesion to identify oil, latex, or specialty coatings.
Consider underlying issues like primer types or contamination that affect compatibility. Use color matching and wall texture cues to decide whether to strip, sand, or prime. If unsure, run a solvent and heat test or consult a pro.
- Scrape test for layers
- Solvent test for binder type
- Note texture and color matching needs
Layered Paint Removal
If your tests showed multiple coatings or a mix of oil and latex, you’ll need a strategy that handles each layer without damaging the substrate.
Start by identifying topcoat types and whether color mixing has occurred across layers; that affects stripper choice. Test a small area with a compatible remover, working from least aggressive to stronger products.
Use chemical strippers, heat, or careful sanding as appropriate for the materials and wall textures present. Remove softened paint gently with a scraper and nylon brush, keeping substrate wet when required.
Neutralize residues, rinse thoroughly, and allow full drying before priming with a bonding primer.
Removing Stubborn Oil-Based Paint From Plaster Or Brick
When oil-based paint won’t budge from plaster or brick, you’ll need a stronger, more deliberate approach that balances effectiveness with care for the substrate. You’ll test a solvent-based remover on a small area, work in well-ventilated conditions, and use a nylon brush or plastic scraper to avoid gouging.
After removal, neutralize residues and rinse thoroughly. Plan repairs for any damaged mortar or plaster, and consider color matching and texture restoration before repainting to blend patched areas.
- Use appropriate PPE and ventilation.
- Choose removers labeled safe for masonry.
- Patch, prime, then repaint for best results.
Stripping Textured Or Popcorn Walls Safely
Before you start stripping textured or popcorn walls, clear the room, cover floors and furniture, and seal vents to control dust.
Test a small area with your chosen remover and let it sit to see how the texture reacts.
Work slowly with a gentle scraper, removing material in thin layers to avoid gouging the drywall.
Prepare The Room
Since textured and popcorn ceilings can trap dust, loose fibers, or even asbestos, you should treat the room as a containment zone: shut off HVAC, seal vents and doorways with plastic sheeting, and lay drop cloths over floors and furniture.
Next, remove or cover movable items, turn on a HEPA air purifier outside the work area, and gather PPE: N95 or P100 respirator, goggles, and disposable coveralls.
Keep a clear staging area for tools and waste.
Plan color blending needs and document wall textures before work so you can restore finishes accurately afterward.
- Seal vents and doorways
- Wear proper PPE
- Stage tools and waste
Test And Scrape Slowly
If you suspect lead, asbestos, or fragile texture, test a small, hidden area first and keep your respirator and goggles on while you work. Never sand or power-scrape suspected hazardous material.
Begin by softening a tiny section with paint remover per product directions, then scrape gently with a flexible putty knife at a low angle. Move slowly to avoid gouging textured or popcorn surfaces.
Collect debris in sealed bags and clean tools promptly.
If you’re doing historical preservation, document layers and samples; consult a specialist before proceeding.
Consider color matching for repairs so patched areas blend seamlessly with surrounding finish.
Troubleshooting: Paint Won’t Soften Or Scrape Off
When paint won’t soften or scrape off, don’t assume the remover is at fault—check for common causes like an incompatible paint type, an old or sealed surface, or insufficient dwell time.
You’ll want to assess color mixing layers and different wall textures; primer or enamel layers can resist removers. Try increasing dwell time, warming slightly with a heat gun, or using a stronger product rated for the paint type.
If you suspect multiple coatings, test a small area first.
- Increase dwell time progressively
- Test a stronger remover on a tiny spot
- Gently warm textured areas before scraping
Common Mistakes That Damage Walls And How To Avoid Them
Although it’s tempting to rush, common mistakes like over-scraping, using the wrong remover, or skipping proper prep can permanently damage drywall, plaster, or wood trim.
You should test removers on a hidden patch to check compatibility and observe effects on wall texture.
Don’t use metal scrapers aggressively; switch to plastic tools or chemical softeners for stubborn layers.
For wallpaper removal, follow manufacturer steps and soften adhesives first to avoid gouging.
Avoid soaking surfaces excessively, which weakens paper-faced drywall.
Patch small flaws promptly and sand gently.
Take your time, use the right products, and protect trim and floors.
Time Planning: How Long A Room Will Be Out Of Use
Plan for at least an hour of prep and ventilation before you start to keep fumes down and protect nearby furniture.
Expect additional drying and curing time—anywhere from several hours to a few days depending on the remover and wall material.
Don’t reenter as a living space until odors are gone and you’ve waited the recommended safety period on the product label.
Prep And Ventilation Time
Because you’ll need time for both prep and off-gassing, estimate how long the room will be unusable before you start—most paint removers need several hours to work, and good ventilation can stretch into a day for fumes to clear.
You should clear furniture, cover floors, and plan for air changes; also consider how removing paint affects color matching and texture preservation for later repairs.
Keep entry limited during active off-gassing and wear protection. Schedule work when you can leave windows open and fans running.
Track elapsed hours so you know when it’s safe to re-enter.
- Clear and cover surfaces
- Run cross-ventilation
- Monitor odor and time
Drying And Cure Periods
Once the fumes have cleared and you’ve removed protective coverings, factor in the drying and curing time for any residues, primers, or new coatings before reclaiming the room—these stages can extend the period the space is unusable beyond the off-gassing window.
Plan around manufacturer Drying time estimates and expect variability with temperature, humidity, and ventilation.
Light traffic may be allowed after surface dryness, but the full Curing process—when coatings reach design hardness and chemical resistance—can take days to weeks.
Keep the area ventilated, maintain recommended conditions, and schedule final furniture and use only after both drying time and curing process guidelines are met.
Reentry And Safety Wait
After you’ve cleared fumes and confirmed surfaces are dry, figure out a realistic reentry schedule that accounts for off-gassing, drying, and full curing times so you know exactly how long the room will be unusable.
You should follow reentry procedures and safety protocols: check odor levels, verify ventilation, and confirm tack-free and cured surfaces.
Plan buffer time beyond manufacturer guidelines for temperature and humidity variations.
Communicate the timeline to occupants, post warnings, and restrict access until tests are satisfactory.
Use a fan and air purifier if needed, and document completion so you can safely resume normal use.
- Check odor and ventilation
- Post timeline and barriers
- Verify curing and document completion
Quick Checklist For A Safe, Successful Paint-Removal Session
Before you start scraping or applying remover, run through a quick checklist to protect yourself, your surfaces, and your home. Check ventilation, wear PPE, test a small patch, and consider how removed paint will affect creative color schemes and wall texture options you plan next. Cover floors, move furniture, and seal vents.
| Task | Why it matters | Done |
|---|---|---|
| Ventilation | Reduces fumes | |
| PPE | Protects skin/eyes | |
| Containment | Prevents spread | |
| Patch test | Confirms method |
Follow the list, work methodically, and pause if unsure.
Short Post-Job Care: Sealing, Priming, And Compatible Paints
Once the remover’s residue is gone, you’ll want to seal bare or porous areas with an appropriate primer to lock in stains and guarantee even adhesion.
Pick a primer and topcoat that are chemically compatible—oil-based primers with oil or alkyd paints, and water-based primers with latex paints.
That match will prevent peeling, bubbling, and uneven finish as you repaint.
Seal With Appropriate Primer
When the surface is clean and dry, seal bare or damaged areas with a compatible primer to lock in any remaining residue and create a uniform base for topcoat adhesion. You’ll choose a primer suited to the substrate—shellac, oil, or latex—then apply thin, even coats and let them cure fully.
Priming prevents bleed-through, improves adhesion, and evens porosity, which helps later color matching and lets decorative finishes look consistent.
After priming, sand lightly if needed and wipe dust away before painting. Follow manufacturer dry times to avoid trapping solvents.
- Use the recommended primer type for the surface
- Apply thin, even coats
- Sand and clean between coats
Choose Compatible Paints
If you’ve sealed and primed properly, pick topcoats that chemically match the primer and substrate so the finish bonds well and lasts—use shellac- or oil-based paints over shellac/oil primers and stick to latex over latex primers.
Choose paints that suit the wall texture and room use: flat for hides, satin or semi-gloss where you’ll clean more.
When color mixing, confirm pigments are compatible with your chosen base to prevent adhesion or discoloration issues.
Test a small patch, let it cure, inspect adhesion and sheen, and adjust.
Proper compatibility reduces peeling, uneven finish, and future stripping.
How To Document The Process For Maintenance Or Disclosure
Because you’ll likely need records for future maintenance or to disclose to buyers or contractors, document each step of paint removal clearly and concisely. You should note materials, times, surface condition, and any discoveries affecting Historical accuracy or Artistic restoration.
Document every paint‑removal step—materials, times, surface condition, and findings affecting historical or artistic accuracy.
Take dated photos before, during, and after, label them, and keep digital and printed copies.
Record safety measures, neutralizers used, and ventilation status.
Summarize unexpected issues and recommended follow-ups so future workers understand context and risks.
- Date-stamped photos and brief captions
- Materials, concentrations, and exposure times
- Notes on preservation, damage, and recommended next steps
Disposal And Safety Resources By Country (Quick Links)
Although rules vary, you’ll want quick access to country-specific disposal and safety resources before you start stripping paint.
Check government websites, local waste authorities, and certified hazardous-waste centers for guidance on disposal of solvents, contaminated rags, and residues from historical paint formulas.
Use links to recycling programs and approved transporters to avoid fines and contamination.
Seek databases listing material safety data sheets and export/import restrictions.
Prefer environmentally friendly techniques and approved neutralizers when disposal is limited.
Save contact info for emergency response and licensed abatement contractors.
Bookmark these resources so you can act fast and stay compliant.
Legal And Safety Compliance Notes For Lead Work
When you’re working on surfaces that may contain lead, follow local lead-safe regulations and get any required certifications before you begin. You should understand historical regulations that shaped current rules, document compliance, and limit disturbance to reduce environmental impact.
Keep records and notifications, use licensed contractors when needed, and verify waste handling.
Maintain clear records and notifications, hire licensed contractors when necessary, and confirm proper testing and waste handling.
- Verify local licensing, permits, and training requirements.
- Use containment, HEPA filtration, and approved disposal to minimize contamination.
- Keep clear records of testing, abatement methods, and waste manifests for inspectors and future owners.
Stay proactive and compliant to protect people, property, and the environment.
Final Wrap-Up: Deciding Your Best Removal Approach
As you wrap up, weigh the condition of the surface, the type of paint or finish, and any lead-safety requirements to choose the safest, most effective removal method for your situation.
You’ll balance speed, cost, and disruption: chemical strippers for detail work, heat or sanding with proper controls for durable surfaces, or professional abatement where lead or complexity demands it.
Consider environmental impact when selecting products and disposal methods.
If the wall has historic character, prioritize techniques that support historical preservation and consult specialists.
Make a clear plan, gather PPE and containment supplies, and proceed methodically to minimize risk and damage.
Frequently Asked Questions
Can Paint Remover Damage Electrical Outlets or Wiring Behind Walls?
Yes — it can. You’ll risk electrical safety and wall damage if remover seeps into outlets or wiring; you’ve got to turn power off, mask openings, use minimal product, and avoid pouring near electrical fixtures.
Will Paint Stripper Affect Wallpaper Adhesive or Embedded Paper?
Like a sponge soaking dye, yes—you’ll risk wallpaper damage because strippers can dissolve adhesive, causing adhesive removal and embedded paper to swell, lift, or smear, so you should test a hidden spot and work gently.
How Long After Stripping Can I Hang Heavy Items or Cabinets?
You can hang heavy items or cabinets after thorough wall preparation and full drying time; typically wait 24–72 hours for primers or sealers to cure, longer if plaster’s damp—always check manufacturer’s cure specs first.
Are There Insurance or Warranty Implications From DIY Paint Stripping?
Yes — you could affect insurance implications and warranty considerations: you’ll risk voiding warranties and face denied claims if DIY stripping causes damage or violates policy terms, so check documents and notify your insurer before proceeding.
Can Mold or Mildew Grow Beneath Layers After Chemical Stripping?
Yes — mold growth can occur beneath layers after chemical stripping if moisture’s present; you’ll prevent mildew by drying surfaces thoroughly, fixing leaks, using a mold-inhibiting primer, and ensuring proper ventilation before repainting.
Conclusion
You’ve got the map now — like Odysseus weighing ports, choose whether to strip or repaint based on lead risk, wall condition, and safety laws. If tests show lead, don’t brave the sea alone: call certified pros. Document what you do, dispose of waste per local rules, and stop if health or structural danger appears. Follow protective steps and legal guidance, and you’ll reach safer shores with your walls intact.