How to Use TSP Before Painting Walls Properly
Use TSP to degrease and degloss walls before painting so paint will stick and last: wear chemical-resistant gloves, goggles, and ventilate the room. Dissolve TSP in water per label (add powder to water), test a hidden spot, then clean top-to-bottom with a sponge, rinse until water runs clear, and let surfaces dry at least 24 hours. Avoid raw or finished wood and aluminum; sand and prime patched or glossy areas. Keep going to get tips on primers, stains, and safe disposal.
Quick Answer: When and How to Use TSP Before Painting
If your walls are greasy, smoky, stained, or heavily soiled, you should use TSP (trisodium phosphate) before painting to guarantee paint adheres and lasts. Do it when surfaces show buildup, previous smoke damage, or before drastic color selection changes.
Mix per label, wear gloves and goggles, ventilate, and test a small area. Scrub with a sponge, rinse thoroughly, and let walls dry fully.
Use TSP before applying primer on porous or glossy spots. After cleaning, proceed with decorative techniques or standard finishes, knowing the surface is prepped for primer and topcoat for lasting results.
Why TSP Works to Remove Grease, Grime, and Stains
Because TSP combines a strong alkaline base with sequestering agents and surfactants, it breaks down greasy residues and lifts dirt that ordinary soap can’t remove. You’ll see oils emulsify and particulate soils suspend, so rinsing removes them instead of smearing.
TSP’s chelating components bind mineral and organic residues, improving cleaning agents’ efficiency on painted or bare surfaces. Use controlled concentrations and brief contact to avoid surface damage: TSP can dull delicate finishes or etch porous substrates if overused.
You’ll neutralize and rinse thoroughly, then inspect for remaining stains before priming and painting to ensure adhesion and longevity.
When to Use TSP: Grease, Nicotine, and Heavy Soiling
When walls are stained with kitchen grease, heavy nicotine buildup, or persistent grime, reach for trisodium phosphate (TSP) — it’s one of the few cleaners that reliably cuts through those residues so paint will adhere and look right. You’ll use TSP for surfaces with visible oily films, smoked-in rooms, garage walls, and prep after cooking-heavy areas.
Wear gloves, eye protection, and follow chemical safety instructions on the label. Use appropriate cleaning tools — scrub brushes, abrasive pads, and microfiber for final rinses. Test a small area first, rinse thoroughly, and let walls dry completely before priming and painting.
Surfaces to Avoid TSP On (Wood, Aluminum, Delicate Finishes)
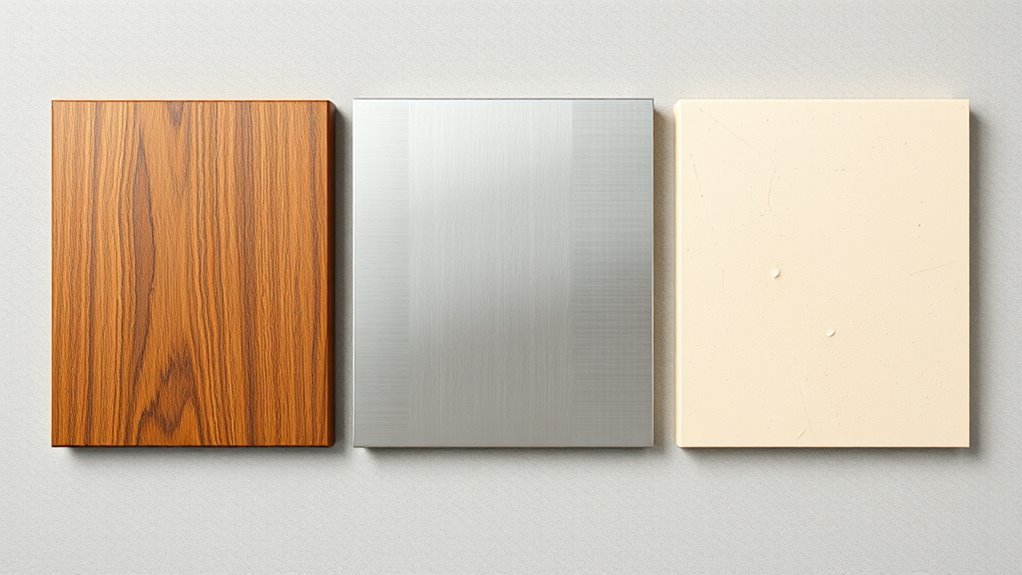
TSP handles tough grease and grime well, but it isn’t right for every surface; you’ll want to skip it on certain materials to avoid damage. Avoid using TSP on raw or finished wood surfaces — it can strip oils, raise grain, or remove sealers.
Don’t apply it to aluminum, which may discolor or corrode when exposed to strong alkaline cleaners. Steer clear of delicate finishes like antique paints, lacquer, or porous veneers; those coatings can craze, dull, or lift.
For those items, choose milder cleaners, spot-test first, and use gentle methods like pH-neutral solutions or microfiber wiping instead.
Safety Gear and Ventilation Before Mixing TSP
Before you mix the cleaner, gear up and make fresh-air plans: wear chemical-resistant gloves, eye protection, and a respirator or mask rated for alkaline vapors, and open windows or run a fan to guarantee steady ventilation.
Before mixing, gear up: chemical-resistant gloves, splash goggles, respirator for alkaline vapors, and ensure steady cross-ventilation.
You’ll follow safety precautions to protect skin, eyes, and lungs; don’t skip checks or shortcuts.
Keep people and pets out of the area until fumes clear.
Have water and eyewash nearby in case of splashes, and read product labels before starting.
- Use nitrile or neoprene gloves
- Wear splash goggles
- Use a suitable respirator
- Guarantee cross-ventilation is active
Which TSP Product and Mix Ratio to Choose
If you’re tackling greasy or heavily soiled walls, pick a heavy-duty trisodium phosphate substitute labeled for paint prep and mix it to the manufacturer’s recommended strength. For light dust or general cleaning, a milder ratio—often one tablespoon per gallon—will do.
Stubborn grime usually needs a stronger mix such as a quarter to half cup per gallon. Choose a product that specifies compatibility with existing finishes and that replaces harsh cleaning solvents.
Always match concentration to surface condition so you won’t damage drywall or remove primer. Proper selection guarantees effective cleaning and consistent paint priming, improving adhesion and finish quality.
How to Mix a TSP Solution Step‑By‑Step
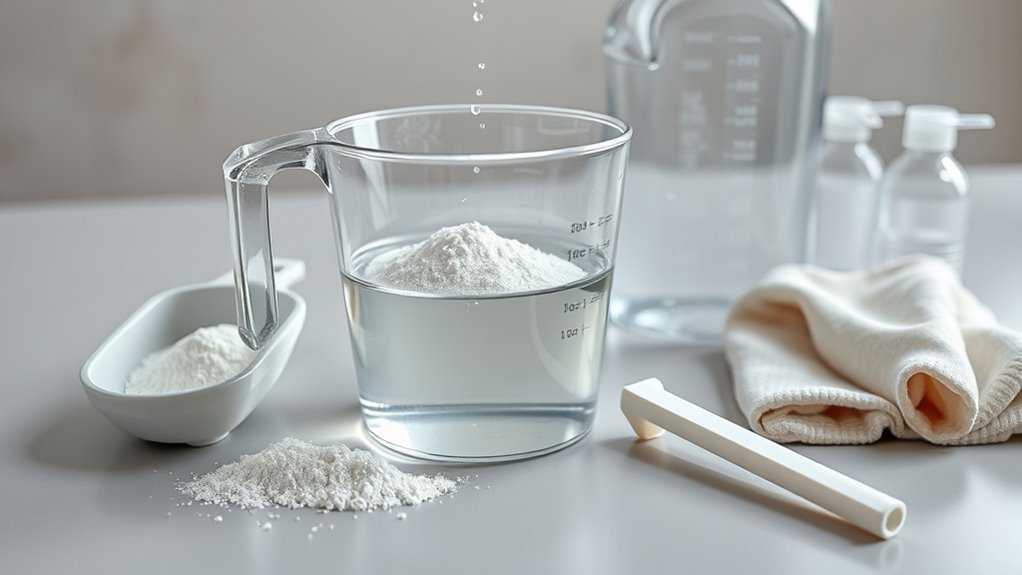
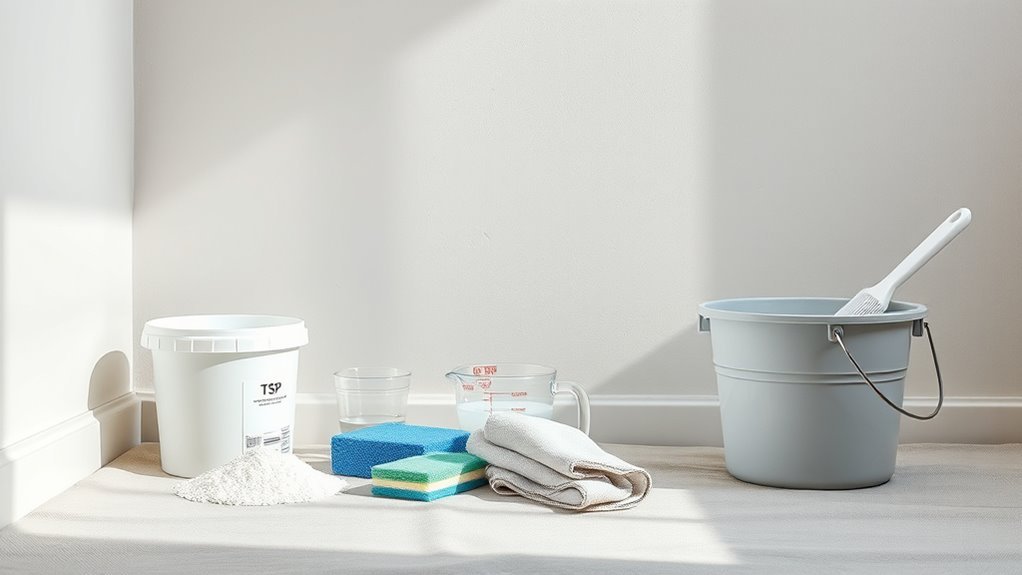
When you’re ready to mix the solution, gather the product, a clean plastic bucket, measuring tools, and warm water so you can work efficiently and safely.
Measure per label directions, usually one tablespoon per gallon for light cleaning or higher for heavy grime. Add TSP to water, not water to TSP, and stir until dissolved.
Measure per label—about 1 tbsp/gallon for light cleaning. Always add TSP to water and stir until dissolved.
Wear gloves and keep cleaning tools nearby. Rinse tools after use to avoid residue.
- Use a plastic or wooden stirrer, not metal
- Keep a spray bottle for spot treatments
- Label the bucket with the mix strength
- Test a small wall area before full application
Rinse walls before painting color application.
Preparing the Room: Furniture, Floors, and Masking
Before you mix TSP, move or cover furniture so it’s out of the way and protected from splashes.
Lay down drop cloths or plastic and tape them at the edges to protect floors completely.
Mask trim, outlets, and fixtures with painter’s tape so cleaned walls stay neat and ready for painting.
Move Or Cover Furniture
Although you can clean smaller rooms with furniture in place, it’s best to move or thoroughly cover items so dust and cleaning solution don’t damage them. You should clear pathways, create space for ladders, and guarantee Furniture protection by using breathable covers that won’t trap moisture.
Keep Room ventilation active—open windows and run fans so fumes and moisture dissipate. Work from top to bottom, wiping left to right, and avoid placing soaked rags on upholstery.
- Shift small pieces to another room
- Wrap large items in drop cloths
- Elevate furniture on blocks if needed
- Label covered items for easy return
Protect Floors Thoroughly
Since paint drips and TSP solution can stain and damage floors, cover every surface you’ll work over with heavy-duty protection and secure it so it won’t slip. Lay drop cloths or plastic sheeting, tape seams, and use non-slip underlay. Keep a tray for brushes and a designated bucket for rinsing cleaning supplies so you don’t track residue. Move small rugs out and stick down edges of coverings near thresholds.
| Item | Purpose |
|---|---|
| Drop cloths | Floor protection from spills |
| Tape | Secure coverings |
| Bucket | Contain cleaning supplies and rinse water |
Mask Trim And Fixtures
With floors protected, turn your attention to trim and fixtures so paint and TSP residue don’t ruin the clean edges you’ve worked to preserve. Tape baseboards, window trim, and door frames with low-tack painter’s tape; remove switch plates and light fixtures when possible.
Clean trim with TSP, rinse, and let dry fully before masking. Consider color theory for adjacent surfaces to prevent accidental contrast, and choose brush selection appropriate for trim width and sheen.
Work methodically, press edges of tape firmly, and cover hardware with plastic. Inspect seams before painting to guarantee crisp lines and protected fixtures.
How to Apply TSP on Drywall and Plaster
Start by wiping dust and loose debris from drywall or plaster, then sand any glossy spots so the TSP can bond.
Mix TSP to the manufacturer’s ratio, apply with a sponge or soft-bristle brush, and work in small sections.
Rinse thoroughly with clean water and let the surface dry completely before priming or painting.
Surface Preparation Steps
Before you mix any cleaner, remove loose dust, cobwebs, and peeling paint so the TSP solution can contact the actual drywall or plaster surface. Wear gloves, goggles, and ventilate the room. Test a small patch to confirm substrate soundness and compatibility with upcoming paint types and color trends choices.
- Vacuum and dry-brush surfaces
- Tape off trim and outlets
- Patch holes and sand smooth
- Protect floors and furniture
Dampen a sponge with TSP solution and work top-to-bottom, rinsing frequently. Let the wall dry fully before priming.
Inspect for stains or residue; repeat spot cleaning if needed to guarantee proper adhesion.
Correct TSP Mixing
Once you’ve prepped the area, mix TSP precisely to avoid residue or surface damage: follow the manufacturer’s ratio (commonly one tablespoon per quart of warm water for light cleaning, up to one cup per gallon for heavy soils). Dissolve the powder fully, and transfer the solution to a labeled spray bottle or bucket so you can apply it evenly to drywall and plaster.
Work in small sections, testing a hidden spot to make certain the solution won’t alter surface texture. Use a soft scrub pad for plaster and a gentler approach on drywall to protect the substrate and preserve the existing paint finish before painting.
Rinse And Dry Thoroughly
After you’ve scrubbed a section with the correct TSP mix, rinse it thoroughly to remove all residue—leftover alkalinity can interfere with primer and paint adhesion. You should use clean water, a sponge or low-pressure sprayer, and change rinse water often.
On drywall and plaster, rinse until water runs clear, then blot excess moisture with lint-free towels. Let surfaces dry fully; humidity slows drying and can affect primer soak-in and final color coordination.
Check crevices and textured areas so wall textures don’t trap soap. Only paint when the wall feels dry to the touch and shows no streaks.
- Rinse until clear
- Blot excess water
- Air-dry completely
- Inspect textures and crevices
How to Apply TSP on Glossy or Previously Coated Surfaces
If your walls have a glossy finish or an existing paint coat, you’ll need to abrade and thoroughly degrease the surface so TSP can bite and remove contaminants rather than just sit on top.
Lightly scuff with fine-grit sandpaper or a Scotch-Brite pad to dull the sheen, then mix TSP per directions and work small sections with a nonabrasive sponge.
Lightly scuff glossy walls with fine-grit sandpaper or a Scotch-Brite pad, then clean small sections with TSP and a nonabrasive sponge
Rinse residue away (see next section for timing) and note how underlying color matching and paint sheen will affect your primer and topcoat choices.
Test a small area to confirm adhesion before proceeding with full-scale cleaning and preparation.
Rinse, Dry, and Sand: Timing After TSP Cleaning
When you’ve rinsed TSP residue away with clean water, let the wall dry fully before sanding so you don’t gum up the sandpaper or trap moisture under new paint.
Wait at least 24 hours in warm, dry conditions; longer if humidity’s high. Dry walls sand better and give you a consistent profile for primer and paint.
After sanding, vacuum and wipe to remove dust. Clean your cleaning brushes immediately to avoid hardened TSP residue.
- Check dryness by touch before sanding
- Use fine-grit sandpaper for smooth adhesion
- Remove dust before priming
- Consider drying time when choosing paint and schedule
Dealing With Stubborn Stains: Repeat, Spot Treat, or Prime
Because some stains cling even after a TSP wash, you’ll need to decide whether to repeat cleaning, spot-treat the area, or block it with primer.
First, assess the stain: oily, tannin, or mold respond differently. If residue remains, repeat TSP only on affected spots, rinse, and inspect.
For persistent marks, spot-treat with a targeted cleaner or stain remover following product directions.
When cleaning won’t lift discoloration, seal with a high-quality stain-blocking primer before painting.
Prioritize proper stain removal and surface preparation to guarantee adhesion and avoid bleed-through, saving time and preventing paint failures later.
Safe TSP Alternatives for Sensitive Surfaces
If you’re working with delicate surfaces, skip full-strength TSP and reach for mild, eco-friendly cleaners that won’t strip finishes or harm plants.
You can also use abrasive-free degreasing methods—like microfiber cloths with a gentle citrus or vinegar solution—to lift grime without scuffing.
Test any product in an inconspicuous spot first so you know it’s safe.
Mild, Eco-Friendly Cleaners
Although TSP is powerful, you don’t always need it—mild, eco-friendly cleaners offer safer alternatives for painted drywall, plaster, and other sensitive surfaces. You’ll preserve finish and prevent damage by choosing products labeled for Eco friendly cleaning and checking Surface compatibility first.
Mix gentle solutions, test a hidden spot, then wipe gently with a soft cloth. For light dirt and grime, these options work well without harsh chemicals:
- Diluted white vinegar (1:4) for general cleaning
- Castile soap solution for washable walls
- Baking soda paste for spot cleaning
- Commercial plant-based wall cleaner
Rinse and let dry before priming or painting.
Abrasive-Free Degreasing Methods
Looking for a gentler way to cut kitchen grease without TSP? You can rely on simple, abrasive-free degreasing methods that protect sensitive surfaces.
Mix warm water with mild detergent or vinegar; apply with soft cleaning tools like microfiber cloths or non-scratch sponges. Work along surface textures to lift grime without damaging paint or wallpaper.
For stubborn spots, use baking soda paste gently, then rinse thoroughly. Always test a hidden area first.
Dry surfaces to prevent streaks and residue. These alternatives clean effectively, preserve delicate finishes, and reduce chemical exposure while preparing walls for painting.
Common TSP Prep Mistakes and How to Avoid Them
When you skip steps or rush TSP cleaning, small mistakes can ruin paint adhesion and lead to peeling or uneven finish later on. You should weigh the TSP chemical, follow dilution, and wear gloves; improper mix or skipped rinses leave residues.
Rushing TSP cleaning risks poor adhesion and peeling—measure, dilute, rinse, and test surfaces to avoid residue issues.
Do surface testing on a small hidden area to confirm compatibility and drying time. Also check for trapped grease, loose paint, and moisture before painting.
- Not rinsing thoroughly
- Using wrong TSP concentration
- Skipping surface testing
- Painting over damp or contaminated walls
Do You Need Primer After TSP? Adhesion Explained
After you’ve cleaned with TSP, you’ll want to confirm the surface is fully dry and free of residue so primer can bond properly.
Check primer compatibility with your wall material and the type of paint you’ll use, and follow a simple checklist for adhesion-promoting primers.
If paint starts to peel or shows poor coverage after priming, troubleshoot by testing a different primer type or improving surface prep before repainting.
Surface Preparation Importance
Because TSP removes grease, grime, and chalky residue so effectively, you might assume primer isn’t necessary—but that’s not always true. You still need to assess surface texture and repair imperfections so the paint bonds evenly. Proper prep improves paint durability and reduces peeling, flashing, or uneven sheen.
After TSP, let the wall fully dry and inspect for rough spots, holes, or glossy areas that resist adhesion. Sand or fill as needed before priming.
Consider these quick checks to prioritize prep:
- Cleanliness confirmed and surfaces dry
- Smoothed rough or chalky areas
- Repaired holes and cracks
- Lightly sanded glossy patches
Primer Compatibility Checklist
If you’ve cleaned walls with TSP, you’ll still want to decide whether primer is necessary by checking surface type, previous paint, and the condition of the cleaned area.
Start by confirming the substrate: bare drywall, plaster, or patched areas usually need primer; glossy or stained surfaces often do, too.
After cleaning mold, verify surfaces are dry and treated; primer with mildew resistance helps.
Removing loose paint and sanding edges creates a stable base—if flakes remain, prime the exposed substrate.
Also match primer to finish and stain-blocking needs.
When in doubt, prime: it improves adhesion and evens porosity.
Paint Adhesion Troubleshooting
When you’ve cleaned walls with TSP and are prepping to paint, check adhesion by testing small areas and noting how paint holds to the cleaned surface. You may not always need primer after TSP; assess whether paint flakes, beads, or soaks in.
If adhesion’s poor, scuff-sand, wipe, and apply a suitable primer. Use consistent brush techniques during tests and consider how color mixing affects opacity and hiding power—darker mixes may need more coats.
Aim for proper bond before full application to avoid failures.
- Test multiple spots
- Scuff and re-clean
- Apply a compatibility primer
- Re-evaluate with your brush techniques
Dispose of TSP Safely: Cleanup and Waste Handling
Although TSP helps get paint-ready walls, you’ve got to handle the cleanup and waste carefully to protect yourself and the environment.
Rinse cloths outdoors sparingly; wring them into a bucket and dispose of rinse water per local TSP disposal rules.
Rinse cloths outdoors sparingly—wring into a bucket and dispose rinse water according to local TSP rules.
Collect solid residues, used gloves, and contaminated materials in sealed bags labeled for hazardous cleaning waste.
Don’t pour concentrated solution down storm drains or soil.
Check municipal Waste management guidelines for disposal points or hazardous-waste events.
Wear gloves and eye protection during cleanup, and wash hands after.
Follow local regulations to avoid fines and environmental harm.
TSP Prep Checklist Before You Open the Paint Can
Before you open the paint can, run through a simple TSP prep checklist to make sure the surface, your supplies, and safety measures are all ready. You’ll confirm surface cleanliness, gather PPE, and recall TSP history briefly so you understand why it’s recommended versus alternative cleaning methods. Prepare boxes for rinse water and ventilate the room. Follow label directions and mix accurately.
- Wear gloves, goggles, and a respirator
- Test a small patch for paint adhesion
- Mix TSP per instructions; note disposal plan
- Have clean rinse water and towels ready
Now you’re set to clean efficiently and safely.
Frequently Asked Questions
Can TSP Remove Lead-Based Paint Residues Safely?
Yes — you can use TSP for lead paint safety; it helps with TSP residue removal when cleaning surfaces pre-paint. You’ll wear PPE, contain waste, follow regulations, and test afterward to guarantee residues are gone.
Will TSP Affect VOC Levels in the Room?
Studies show indoor VOCs can be 2–5× higher than outdoors; you’ll lower emissions by thorough surface preparation, but TSP won’t markedly reduce VOCs and its chemical reactions can briefly release odors, so ventilate while cleaning.
Can I Use TSP on Exterior Brick or Masonry?
Yes — you can use TSP on exterior brick or masonry for cleaning brick, but you’ll dilute it, rinse well, and wear protection; consider TSP alternatives like trisodium phosphate substitutes or biodegradable cleaners for gentler, eco-friendlier results.
How Long Should Painted Trim Be Left Off-Limits After TSP Cleaning?
If you’re testing the idea that speedy paint prevents problems, you’ll find you should keep painted trim off-limits for at least 24–48 hours after TSP surface cleaning; paint preparation and surface cleaning guarantee proper cure and adhesion.
Does TSP Interfere With Latex vs. Oil-Based Caulk Adhesion?
Yes — TSP preparation can affect caulk adhesion; if you rinse thoroughly and let surfaces fully dry, you’ll preserve caulk adhesion for both latex and oil-based caulk, ensuring proper bonding and longer-lasting seals.
Conclusion
You’re ready to paint, but don’t rush—TSP strips away the stubborn grease and old life from your walls, leaving a clean, blank promise that both humbles and excites. With safety goggles on and careful rinsing done, you’ll stand before a surface that feels strangely new and familiar at once. That contrast—safety and risk, old grime and fresh possibility—pushes you to prime, paint, and finally transform the room you thought you knew.