How Warm for Paint to Dry Outside Properly
You should plan exterior painting when temperatures stay around 50–85°F (10–29°C) so your paint can dry, cure, and bond properly. Cooler temps slow solvent loss and risk tacky, weak films; hotter temps speed drying too fast, causing poor flow, blisters, or sheen issues. Also watch humidity, dew point and surface temperature, not just the air. Follow product specs and time coats for stable temps, and keep going if you want details on timing, tools, and fixes.
Quick Answer: Ideal Paint-Drying Temperature Ranges
If you want paint to dry properly outdoors, aim for temperatures between about 50°F and 85°F (10°C–29°C). Most latex paints cure best in that window, while oil-based paints tolerate slightly cooler nights but still prefer warmer daytime highs.
You’ll pick a range based on paint type and project size: small touch-ups can handle brief dips, full exterior jobs need steady days. Monitor humidity and wind alongside temps.
Choose a paint sheen suited to the surface and exposure—higher sheen sheds moisture but shows flaws. Stay aware of current color trends when selecting finishes so your work looks modern and holds up.
Why Temperature Matters for Outdoor Paint Drying
You’ll want to aim for the ideal temperature range because it lets paint cure evenly and reach full durability.
If it’s too cold, drying slows, adhesion suffers, and you risk cracking or poor film formation.
If it’s too hot, solvents can evaporate too fast, causing blistering, uneven sheen, or reduced working time.
Ideal Temperature Range
Because temperature controls the chemical reactions that let paint form a hard film, knowing the ideal range matters for every outdoor painting job. You should aim for roughly 50–85°F (10–29°C); that’s where most latex and oil formulas cure evenly, preserve paint sheen, and prevent unexpected color contrast shifts.
Check label specs and plan mid-day work when temperatures peak safely. Consider humidity and direct sun separately.
Quick tips:
- Confirm manufacturer’s min/max temps.
- Avoid painting near dew or rain forecasts.
- Use heaters or wait for a warmer window if needed.
- Test a small patch before full application.
Effects Of Cold
When temperatures drop below a paint’s recommended range, the drying process slows dramatically and the finish can suffer. You’ll see longer tack times, poor film formation, and increased risk of freezing before the binder fully cures.
You should delay painting rather than gamble with compromised adhesion, blistering, or chalky surfaces. Cold traps moisture, extending recoat intervals and intensifying paint scent persistence, which can be unpleasant and attract complaints.
Also remember that colder hues may feel colder psychologically; color psychology influences perceived warmth, so pick shades that offset chilly conditions. Protect freshly painted surfaces from frost and plan projects for warmer windows.
Effects Of Heat
Cold can stall paint, but excessive heat creates its own set of problems for outdoor drying. You’ll see surface skinning, rapid solvent loss, and uneven sheen when temperatures soar. Heat can also alter paint pigmentation, making colors shift as binders cure too quickly. Consider color psychology too—hot-weather fading can dull vibrant hues you chose to energize a space.
- Faster surface drying leads to poor flow.
- Trapped solvents cause blisters or bubbles.
- UV and heat accelerate pigment breakdown.
- Thinner coats reduce film integrity in heat.
Work in shade, use recommended temps, and adjust primers and timing.
How Paint Chemistry Changes Temperature Sensitivity
If you tweak the resin, pigment, or solvent mix, you change how the paint reacts to temperature. You’ll notice additives alter drying speed, viscosity, and cure pathways, so warm days might speed reactions or cause skinning.
Pigment choice affects heat absorption; darker hues follow paint color trends and warmer tones can dry faster outdoors, which ties into color psychology when you choose finishes for mood as well as performance.
Solvent volatility and resin Tg determine sensitivity to cool nights. You should match formulation to expected temperatures to avoid cracking, blistering, or incomplete film formation when painting outside.
Best Temperature Ranges for Latex (Water-Based) Paint
For latex (water-based) paint, you’ll get the best results when you apply it within the manufacturer’s recommended temperature range—typically between about 50°F and 85°F (10°C–29°C).
Below that lower limit, the paint won’t coalesce properly, causing poor film formation and longer drying times.
Keep in mind that even above the minimum, cold nights or sudden temperature drops can still slow curing, so plan your timing accordingly.
Ideal Application Temperatures
When you’re planning to paint outdoors, aim to apply latex (water-based) paint when temperatures are consistently between about 50°F and 85°F (10°C–29°C). That range gives the paint enough warmth to flow and cure without drying so fast that it causes brush marks or so slowly that it attracts dirt and sags.
You’ll want to consider humidity and surface temperature, not just air. Focus on color consistency and brush techniques to avoid lap marks. Check forecast for stable temps through drying.
Tips:
- Paint mid-morning after dew evaporates.
- Avoid peak heat midday.
- Keep surfaces shaded.
- Test a small patch first.
Cold Weather Limitations
Although latex paint can tolerate cool conditions, you shouldn’t apply it once temperatures regularly fall below about 50°F (10°C), because cold slows the water-based binder’s film formation and can prevent proper curing.
You’ll risk tacky surfaces, poor adhesion, and increased dirt pickup if moisture freezes before the paint sets.
Plan projects for warmer days or use heaters and blankets in enclosed areas.
Pick eco-friendly formulations designed for lower temps and follow manufacturer minimums.
Also consider color psychology: darker tones absorb heat and may cure faster than pale shades, but verify compatibility before relying on temperature alone.
Best Temperature Ranges for Oil-Based and Alkyd Paints
Since oil-based and alkyd paints cure through solvent evaporation and chemical cross-linking, they need warmer, steadier temperatures than many water-based finishes to dry properly. You should aim for daytime temps between 50–85°F (10–29°C); lower slows curing, higher risks soft finishes. Check label recommendations from paint branding and consider how color choices affect heat absorption.
- Ideal range: 60–80°F for reliable curing.
- Minimum workable: 50°F; expect extended tack time.
- Max safe: 85°F; watch flash drying and film weakness.
- Store cans at stable room temps before use to ensure consistency.
Humidity and Paint-Drying Temperature Interactions
You’ll notice humidity strongly affects how fast paint dries because moist air slows solvent evaporation and can tack up the surface.
Higher temperatures speed evaporation, but if humidity is high or the temperature is near the dew point you risk condensation that prevents proper curing.
Keep an eye on both temperature and dew point so you can pick conditions that let the paint evaporate and chemically cure rather than stay soft.
Humidity Effects On Drying
When humidity climbs, paint takes longer to cure because moisture in the air slows solvent evaporation and interferes with film formation. You’ll notice color contrast shifts and altered paint texture as drying drags, and prolonged tackiness raises dust pickup and runs.
Manage humidity to protect finish by:
- Timing coats for drier hours.
- Using dehumidifiers or fans in enclosed areas.
- Choosing formulations rated for high humidity.
- Allowing extra cure time before handling or topcoating.
Monitor relative humidity; aim for manufacturer-recommended ranges. If humidity’s unpredictable, test a small area first to confirm acceptable appearance and adhesion before proceeding.
Temperature And Evaporation Rates
Although humidity sets the stage, temperature controls how fast solvents evaporate and how the paint film forms, so you’ll see drying times drop sharply as air warms and slow dramatically in cold conditions. You’ll notice warm, moderate temperatures speed solvent loss, letting coatings level and cure faster; too hot, and surface skinning traps solvents below. Cooler air prolongs tackiness and risks poor film formation, affecting color fading over time and reducing UV resistance if binders don’t crosslink properly. Use temperature-aware timing for recoats and avoid extremes.
| Condition | Effect |
|---|---|
| Warm | Faster evaporation |
| Cold | Slower curing |
Dew Point And Paint Curing
Because paint dries by losing solvent to the air, you need to watch the dew point: if the surface temperature falls to or below it, moisture will condense on the wet film and stall curing.
You should plan projects around forecasted night lows and humidity, since dew can ruin color consultation results and alter paint texture.
Take these steps before painting:
- Check dew point vs. surface temperature.
- Delay if expected drop approaches dew point.
- Use low-humidity windows for best curing.
- Protect drying surfaces overnight.
Controlling dew point helps coatings cure evenly, avoids tackiness, and preserves finish consistency.
How Wind and Sun Change Drying Speed
If you’re painting outdoors, wind and sun are the two fastest ways to change how quickly the film sets and cures. You’ll note direct sun speeds surface dry but can trap heat that alters color matching and affects paint formulations; wind thins the wet layer, speeding evaporation but risking uneven texture. Balance exposure: use shading or gentle breeze to control rate. Monitor feel and tack rather than clock. Quick drying helps layering but can worsen brush marks and adhesion if too fast.
| Effect | Result |
|---|---|
| Direct sun | Faster surface dry |
| Strong wind | Rapid evaporation |
| Shade | Slower cure |
| Controlled breeze | Even finish |
| Heat spike | Color shift |
Minimum Temperature Limits You Must Not Ignore
You need to know the minimum safe temperatures for the paint you’re using, because many formulations won’t cure properly below their rated lows.
Choose cold-weather paint types if you’re working in cooler months, since they’re formulated to dry at lower temperatures.
Also check nighttime temperature drops—even if it’s warm during the day, a frost or sudden chill can ruin a fresh finish.
Minimum Safe Temperatures
When temperatures drop near a paint’s labeled minimum, don’t expect proper curing—paints need a certain warmth to chemically set and form a durable film. You should check the product’s minimum safe temperature and avoid painting at night or in shaded, cold spots.
Poor color matching can happen if temperature alters sheen; keep samples at recommended paint storage temperatures before matching. Follow these simple rules:
- Don’t paint below the labeled minimum temperature.
- Wait for several hours above minimum before recoating.
- Store paint at stable, moderate temperatures.
- Use heaters or delay work when overnight lows fall below limits.
Cold-Weather Paint Types
After checking a paint’s minimum safe temperature, pick a product formulated for cold conditions so it’ll cure properly even when the mercury drops. You’ll want acrylic latex or specially labeled cold-weather enamels that set at lower temps; manufacturers list minimums—don’t ignore them.
Look for fast-dry formulas and additives that prevent freeze-thaw issues. Consider your color coordination early, since pigments can affect opacity and drying behavior in chillier air.
Compare paint branding for warranties and tested minimums, and follow surface prep and application rates precisely. If conditions approach a product’s limit, delay painting until consistent warmth returns.
Nighttime Temperature Drops
If temperatures dip below a paint’s listed minimum overnight, your fresh coat can stop curing and trap moisture, so don’t assume daytime warmth alone is enough. You’ll need to watch lows closely; unexpected chill causes poor adhesion and color fading. Use weather forecasting to pick nights with safe minimums. Protect with blankets or temporary enclosures when needed.
- Check paint label minimums before starting.
- Monitor hourly forecasts for overnight lows.
- Delay if dew point suggests moisture risk.
- Use heat lamps or insulated tarps for critical jobs.
Act proactively to prevent ruined finishes and rework.
Maximum Temperature Risks: Blistering and Rapid Skinning
Although high heat can speed drying, extreme temperatures create real risks: paint can blister as solvents vaporize too quickly and the surface forms a skin while underlying layers stay wet. You’ll notice bubbles, cracking, and poor adhesion when temperatures soar. Choose eco friendly formulations designed for heat, and remember color psychology—darker tones absorb more heat and raise surface temperature. Cool the work area, work in morning or late afternoon, and use thinner coats.
| Sign | Cause | Fix |
|---|---|---|
| Blisters | Rapid solvent escape | Sand, recoat |
| Skinning | Surface dries first | Thin coats |
| Cracking | Uneven cure | Control temp |
Air vs. Surface (Substrate) Temperature Differences
Because air and surface can sit at very different temperatures, you can’t judge drying conditions by the thermostat or a shaded-air reading alone. You need to account for substrate warmth because it controls cure rate, adhesion, and final appearance.
If the surface is hotter or cooler than the air, you’ll see issues like color consistency problems and sheen variation.
- Cooler substrate slows drying, promoting runs and longer tack.
- Hot substrate accelerates skinning, trapping solvents beneath.
- Uneven substrate temps cause patchy gloss and mottled color.
Plan work when both air and substrate are within the paint’s recommended range.
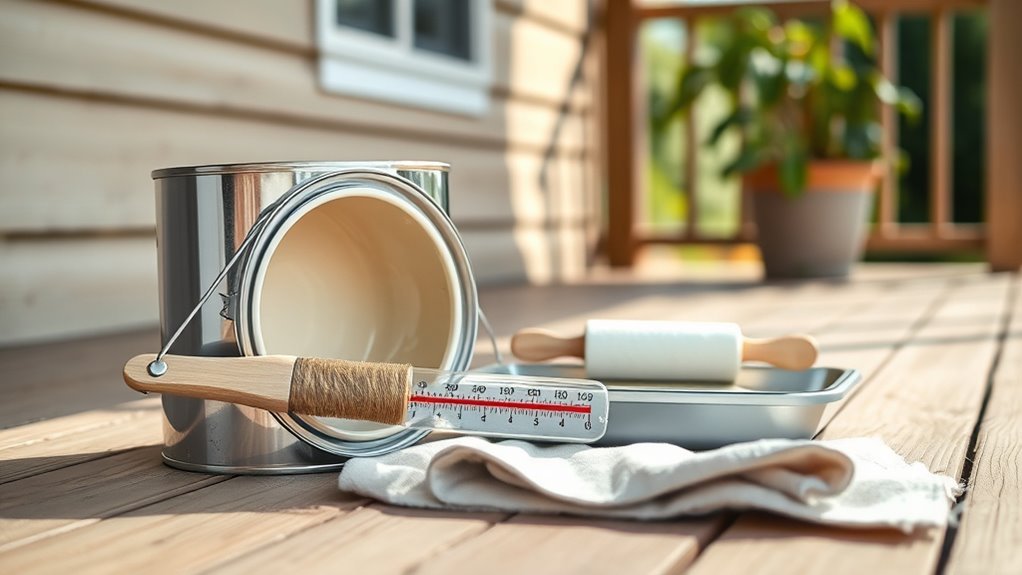
How to Measure Surface Temperature Accurately
You’ll get the most reliable surface readings with an infrared thermometer, so point it at the area you’ll paint and follow the device’s distance-to-spot guidelines.
Measure several spots across the surface to catch hot or cold patches, and record a representative range.
Remember that different materials (metal, wood, concrete) hold heat differently, so adjust expectations and timing accordingly.
Use An Infrared Thermometer
When you need a quick, accurate reading of a paint surface, grab an infrared (IR) thermometer: it measures the skin temperature of the substrate without touch, so you can confirm the surface is within the paint manufacturer’s recommended range before you start.
Use it to avoid curing failures and to check effects of sun, shade, and stored heat. Consider color selection and primer compatibility since darker surfaces run hotter and primers change thermal behavior.
Quick steps:
- Aim perpendicular, 6–12 inches away.
- Read emissivity-adjusted value.
- Wait for steady reading.
- Record before painting.
Measure Multiple Spots
If you want consistent results, measure surface temperature at several spots across the area before you paint. Walk the surface in a grid, checking shaded and sunlit patches, edges, and midsections with your infrared thermometer.
Note variations and average them to guide timing and product choice. Record readings to compare with manufacturer recommendations; uneven temperatures affect drying rates, paint texture, and final color perception tied to color psychology.
Recheck after a changing sun angle or breeze. If readings differ widely, delay or adjust technique—spot priming, smaller sections, or wait for more uniform warmth—to guarantee even curing and finish.
Account For Surface Material
Because different materials absorb and hold heat differently, you should match your surface-temperature checks to the substrate you’re painting. Check how surface texture and paint pigmentation affect readings: rough, porous woods heat differently than smooth metal or vinyl. Use an infrared thermometer at several spots and average results.
- Scan high and low areas for hotspots.
- Measure shaded versus sunlit sections.
- Test after surface preparation and primer.
- Recheck during painting for shifts.
If a material holds heat, wait for even cooling; if it heats quickly, paint during stable periods. Adjust timing based on substrate behavior and readings.
Acceptable Surface Temperatures for Common Exterior Materials
Although paint manufacturers often quote ambient temperature ranges, the temperature of the surface you’re painting matters more—different exterior materials hold and transfer heat differently, so each has its own safe temperature window for proper adhesion and drying.
Surface temperature matters more than air temperature—different materials hold heat differently, so check the substrate before painting.
For wood aim for 50–85°F to avoid trapped moisture and harm from temperature fluctuations.
For metal keep surfaces above 45°F and dry to prevent condensation and corrosion.
For masonry and stucco wait until they’re above 40°F and rising to ensure curing.
Dark pigments heat faster; paint pigmentation affects surface warmth, so adjust timing and monitor substrate temperature, not just air thermometers.
Thinning and Additives for Cool-Weather Painting (Ratios)
Now that you’re watching surface temps rather than just air readings, you’ll also need to adjust how you thin paint and what additives you use for cooler conditions. You’ll thin more cautiously to avoid extended tack time that invites color fading and compromises primer adhesion. Follow measured ratios and compatible products:
- Add up to 5% solvent for latex when temps are 40–50°F.
- Use 3–5% slow-dry additive for alkyds near 40°F.
- Don’t exceed manufacturer’s max; track viscosity with a cup.
- Include anti-freeze or coalescing agents only per label.
Test a small area and record ratios for consistency.
Thinning and Additives for Hot-Weather Painting (Warnings)
When temperatures climb, you’ll need to thin and additives more cautiously to prevent over-flashing, sagging, and solvent lock that can ruin gloss and adhesion. You shouldn’t over-thin; use the manufacturer’s ceiling and reduce only slightly to maintain film build.
Additives that slow drying help but can affect leveling, so test a small panel under your interior lighting to judge sheen and how the paint color settles.
Avoid incompatibilities—don’t mix retarders with fast-evaporating solvents.
Work in shorter strokes, watch edges for skinning, and discard mixes that sit too long.
When in doubt, use cooler hours or shade to apply.
Timing Coats: Recoat Windows by Paint-Drying Temperature
After you’ve managed thinning and slow-dry additives in hot weather, you’ll need to time your recoats by the actual paint-drying temperature rather than a clock. You’ll check the manufacturer’s recommended recoat temperature window on the can—paint branding often lists minimums.
Match windows to forecasted highs and lows so color matching stays consistent across coats.
- Note current surface temp.
- Confirm paint branding recoat range.
- Wait until surface reaches stable temp for at least an hour.
- Recoat during that stable window.
If you ignore temp, you’ll risk poor adhesion, blush, and uneven finish.
Prep Steps to Improve Drying in Marginal Temperatures
When temperatures are marginal, you can still get good results by prepping the surface thoroughly—clean, sand, and remove any loose material so paint bonds and sheds moisture evenly.
Pick fast‑drying primers and topcoats formulated for cooler temps to shorten tack time and reduce run risk.
Finally, control ambient conditions where you can: block wind, raise substrate temperature with heat lamps or sun timing, and avoid painting when humidity is high.
Surface Preparation Techniques
If temperatures are marginal, preparing the surface correctly gives your paint the best chance to cure properly — clean, dry, and lightly abraded surfaces help coatings adhere and shed moisture more predictably. You’ll reduce color fading and boost primer adhesion by following focused prep steps that limit moisture traps and uneven films.
- Remove dirt, mildew, and loose paint; wash, rinse, and dry thoroughly.
- Sand glossy or rough areas to promote mechanical bite.
- Fill cracks, let fillers dry fully, then sand smooth.
- Wipe with a solvent or tack cloth to remove dust before priming.
Choose Fast‑Drying Products
You’ve prepped the surface to control moisture and adhesion; now pick products that finish faster in cool or damp conditions so your work actually cures.
Choose fast‑drying alkyds or waterborne enamels formulated for lower temperatures; they reduce tack time and resist dew. Look for labels stating lower minimum cure temps and accelerated recoat intervals.
Test small areas to confirm paint texture and adhesion before committing.
Use thinner coats and quick‑dry primers to speed cure without sacrificing coverage.
Also consider color trends that favor lighter hues—they reflect heat and can modestly improve surface drying during marginal conditions.
Control Ambient Conditions
Because outdoor drying depends as much on the air as the surface, take steps to control humidity, temperature, and airflow before you paint. You’ll improve cure times, avoid blushing, and protect color consistency and paint sheen by prepping the environment. Focus on simple, effective measures:
- Use a portable heater to raise ambient temp into the manufacturer’s range.
- Run a dehumidifier or wait for lower relative humidity periods.
- Position fans for gentle cross‑ventilation without causing dust or spray distortion.
- Create temporary windbreaks or tents to stabilize conditions.
Monitor conditions with a thermometer/hygrometer and adjust during the job.
Protecting Fresh Paint Overnight and During Storms
When evening brings cooler temperatures or an unexpected storm, take quick steps to shield fresh exterior paint so it can cure properly overnight. Cover with breathable tarps or drop cloths, anchoring edges to prevent flapping that harms finish and color matching.
Prop coverings to avoid touching wet surfaces; use stakes or poles. Keep humidity low by ensuring airflow around the area without blowing directly on paint.
For varied gloss levels, protect high-gloss zones from rain spots that leave marks. If heavy rain’s coming, delay painting; if caught mid-job, prioritize sealing trim and flashing points to prevent water intrusion.
Safe Use of Heaters, Tents, and Fans on Exterior Jobs
When you add heaters, tents, or fans to an exterior job, place heaters on stable, non-flammable surfaces and keep clearances per the manufacturer.
Make sure tents are ventilated so fumes don’t build up and heat can circulate evenly.
Point fans to move air gently across the surface without blasting the paint, and adjust speed to avoid dust or overspray.
Safe Heater Placement
If you’re using heaters, tents, or fans on an exterior paint job, place and secure them so they warm and ventilate the work area without creating fire, carbon-monoxide, or moisture hazards.
Position heaters away from walls, paint cans, and drop cloths; keep fuel and electrical lines clear. Follow manufacturer guidelines and use carbon-monoxide detectors when using combustion heaters.
Maintain stable temperatures to protect color matching and respect paint branding temperature ranges.
Fasten tents to prevent collapse and direct fans to avoid blowing dust onto wet surfaces.
- Keep clearances
- Anchor equipment
- Monitor air quality
- Follow specs
Tent Ventilation Strategies
You’ve already covered placement and air-quality checks; now plan how to keep fresh air moving through any temporary enclosure. Set up intake and exhaust openings opposite each other to promote cross-ventilation, and use vented tent tops or rolled flaps to prevent pockets of fumes.
Position heaters safely away from fabric, secure tie-downs to avoid sagging that blocks airflow, and add solar shading to reduce heat buildup when sunlight hits the tent.
Line floors with moisture barriers to protect finishes and prevent condensation from altering dry times. Check seals for leaks, monitor conditions, and adjust openings instead of increasing heat.
Fan Direction And Speed
Although tents and heaters can speed drying, you’ll need to direct fans and set speeds carefully to avoid stirring dust, spreading fumes, or blowing soft finishes. Position fans to move air across, not directly at, wet surfaces. Low to medium speeds reduce turbulence and overspray drift.
Consider how color psychology and paint color trends affect client expectations for sheen and uniformity when choosing airflow. Follow this checklist:
- Aim airflow parallel to the surface, not perpendicular.
- Use variable-speed fans; start low, increase only if safe.
- Shield edges to prevent dust intrusion.
- Monitor temperature and odor for ventilation needs.
Scheduling Around Daily and Seasonal Temperature Swings
When planning outdoor painting, watch the daily and seasonal swings in temperature so your finish cures properly. You’ll schedule work during stable midday warmth to avoid dew or rapid cooling that harms color consistency and causes uneven drying.
Check forecasts for overnight lows and heat spikes; plan priming and topcoats when a multi-hour window of moderate temperatures is likely.
Transport and store paint in insulated containers to keep viscosity steady.
Match brush selection to conditions—use stiffer bristles in cooler weather to push paint smoothly.
Keep portable thermometers handy and postpone if temperatures cross the product’s recommended range.
Painting Wood, Metal, Masonry: Temperature Tips by Substrate
Because wood, metal, and masonry react differently to heat and humidity, you’ll need to adjust timing, prep, and product choice for each substrate to get a durable finish. You should plan around substrate-specific needs: moisture content for wood, thermal expansion for metal, and porosity for masonry.
Keep color matching samples and clean application tools; manage paint storage to maintain viscosity.
Quick checklist:
- Wood: paint when surface temp is 50–85°F; allow longer cure in cool damp weather.
- Metal: avoid high heat; prime and paint when 40–90°F for adhesion.
- Masonry: warmer, dry conditions help penetration.
- Inspect daily.
Troubleshooting Tacky or Slow-Drying Outdoor Paint
If paint stays tacky or takes ages to dry, you’ll want to diagnose a few common causes quickly so you can fix them before finish quality suffers. Check temperature, humidity, surface cleanliness, and product age. Use correct brush selection and ensure proper thinning per label. Poor color matching can hint at incompatible primers or additives slowing cure. Below are quick clues and actions.
| Symptom | Likely cause |
|---|---|
| Tacky surface | High humidity or cold |
| Runs/ sagging | Too thin or heavy coat |
| Uneven sheen | Incompatible layers |
| Very slow cure | Old paint or additives |
Test a small patch before recoating.
Fixes for Blistering, Peeling, and Heat-Related Adhesion Failures
Although heat can seem to bake your finish into place, it often causes blistering and adhesion failures you’ll need to address promptly. You’ll start by removing loose paint, sanding to feather edges, and cleaning surfaces thoroughly.
Heat may seem to set paint, but it often causes blisters—remove loose paint, sand edges, and clean thoroughly.
Consider these steps to fix and prevent recurrence:
- Strip blisters, sand, and clean with a solvent or detergent.
- Prime with a high-adhesion primer suited to substrate and paint formulation.
- Recoat during cooler parts of day to reduce trapped moisture and thermal stress.
- Choose products mindful of environmental impact, low-VOC options, and proper disposal.
Test a small area before full recoat to ensure adhesion.
When to Postpone a Job Despite Pressure to Proceed
When deadlines loom and customers push, you’ll still want to postpone a job if conditions risk a poor finish or safety—wet surfaces, extreme temperatures, high humidity, or contaminated substrates can ruin adhesion and lead to costly callbacks. So wait for suitable weather, proper surface prep, and the right materials rather than rushing.
You should delay when temperature fluctuations threaten curing, when winds blow debris onto wet coats, or when dew is expected overnight. Also postpone if paint color choices require multiple coats and ideal drying times.
Communicate clearly with clients about risks, timelines, and the benefits of waiting for proper conditions.
Long-Term Durability: How Application Temperature Affects Lifespan
Delaying a job for the right weather doesn’t just protect the immediate finish—it helps guarantee the paint lasts. You’ll see better adhesion, uniform curing, and fewer failures when temperature matches the paint’s specs.
Poor temperature speeds degradation, promotes cracking, and shortens intervals between repainting.
- Proper cure prevents premature chalking and UV damage.
- Consistent temperature supports film elasticity and resistance.
- Avoid extremes to reduce blistering and solvent entrapment.
- Longer lifespan means less waste and supports paint recycling efforts.
Also consider how color psychology affects maintenance choices—lighter tones age differently than darks under heat.
Quick Pre-Paint Checklist for Optimal Drying Conditions
Because proper drying starts before you open the can, run a quick checklist to confirm temperature, humidity, surface condition, and ventilation are all within the paint’s specifications.
Check the forecast for stable temps during drying windows and avoid dew or rain.
Measure relative humidity and air movement; low to moderate humidity and steady ventilation speed curing.
Inspect and clean surfaces—remove loose paint, dust, and oils so adhesion and drying aren’t compromised.
Verify primer compatibility and test a small patch for color matching in real light.
Prepare safe paint disposal supplies for leftover material and contaminated rags before you begin.
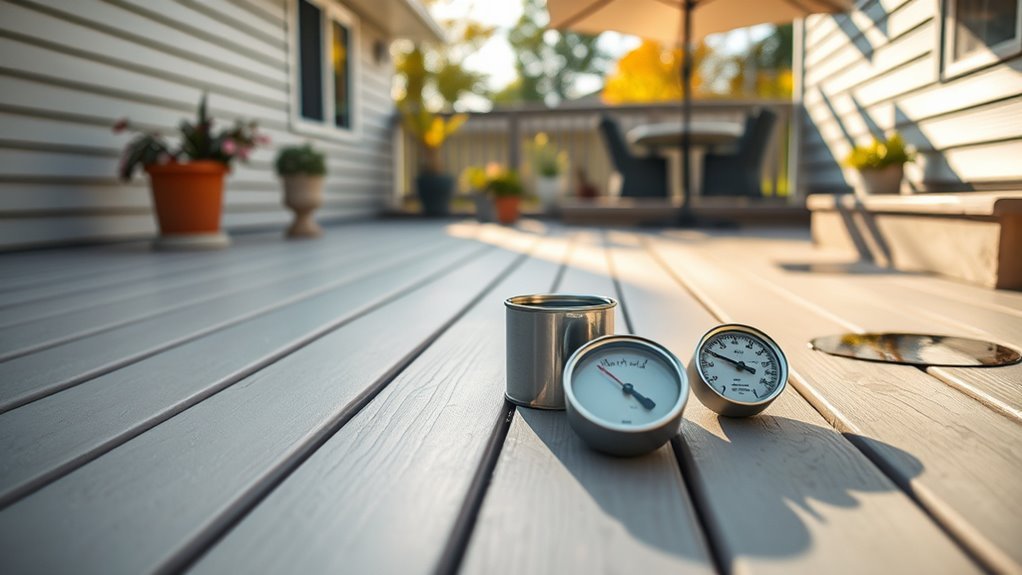
Best Thermometers and Tools for DIY Exterior Painters
After you’ve checked temps, humidity, and surface prep, pick the right measuring tools to make those readings reliable—your paint will only cure as well as the conditions you monitor. You’ll want tools that give quick, accurate data for color mixing decisions and primer selection timing. Consider compact, durable options you can trust outdoors.
- Infrared thermometer — checks surface temps fast.
- Digital hygrometer — monitors humidity swings.
- Wet-bulb thermometer or sling psychrometer — refines dew point awareness.
- Paint-specific moisture meter — tests siding or wood before primer selection.
Use calibrated devices and log readings for consistent results.
Frequently Asked Questions
Can Paint Dry Properly on a Damp or Recently Rained-On Surface?
No, you shouldn’t paint on a damp or recently rained-on surface because surface moisture prevents proper paint adhesion; you’ll get poor bonding, blistering, and peeling, so wait until the substrate’s dry before you apply paint.
How Does Paint Drying Temperature Affect VOC Emissions and Odor Duration?
Higher drying temperatures speed solvent evaporation, so you’ll see quicker VOC reduction but potentially higher short-term emissions; conversely cooler temps slow drying, prolong odor longevity and overall VOC release, so you’ll balance temperature for safe ventilation.
Will Primer and Topcoat Require Different Drying Conditions Outdoors?
Yes — you’ll need slightly different conditions: primer curing often needs longer, warmer, dry periods to set properly, while topcoat adhesion benefits from moderate temperatures and proper cure time; follow manufacturers’ guidelines for best results.
Can Temperature Extremes During Shipping Affect Paint Performance?
Yes — you’ll see reduced paint performance if shipping hits temperature extremes; paint formulation can separate or cure prematurely, altering drying time and final film properties, so manufacturers recommend controlled temperatures to preserve consistency and shelf life.
How Do Nearby Heat Sources (Cars, Masonry) Alter Local Drying Behavior?
Ironically, nearby heat sources speed drying — and sometimes ruin it. You’ll get uneven cure where heat reflection from cars or masonry boosts surface temperature, while variable surface absorption makes some areas dry too fast or blister.
Conclusion
You’ve got the facts—paint dries best in moderate, stable temps, so don’t rush the job when conditions aren’t right. Remember: “measure twice, cut once.” If you follow the recommended temperature and humidity windows, check forecasts, and use proper prep and tools, your finish will last longer and look better. Trust patience over haste; delaying a day or two now can save you time and money on repairs later.