Is It Hard to Paint a Wall? Beginner Guide
It isn’t hard to paint a wall—you can do it with basic prep, the right tools, and patience. You’ll clean and patch surfaces, tape trim, prime if needed, then roll in overlapping “W” patterns for even coverage. Choose water‑based latex and a suitable sheen for each room, test color samples in different light, and allow proper drying before rehanging things. Follow simple steps and safety tips, and keep going to learn quick timelines, eco options, and finishing tricks.
Is Painting a Wall Hard for a Complete Beginner?
Wondering if you can handle painting a wall as a complete beginner? You can. Painting’s skills are mostly practice, patience, and basic technique rather than talent.
Start small, learn how different colors affect mood—color psychology helps you choose tones that calm, energize, or focus a room. You’ll pick up steady brush and roller control quickly by rehearsing edges and consistent strokes.
You won’t need to master complex historical paint techniques unless you want period-authentic finishes; those are specialist skills. Keep expectations realistic, work methodically, and you’ll gain confidence with each square foot you cover.
Essential Tools and Supplies
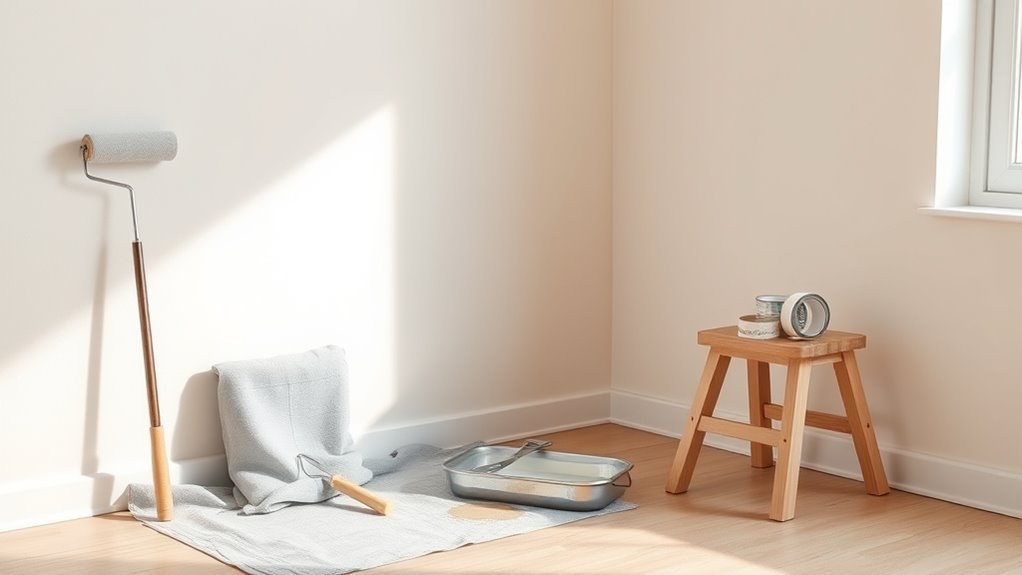
Now that you know painting is a skill you can learn, get the right tools to make the work easier and the finish look professional. Start with quality brushes, rollers, a tray, extension pole, drop cloths, painter’s tape, sandpaper, putty knife, and a reliable ladder.
You’ll want a good primer if surfaces need it, plus stir sticks and a bucket. Keep rags and a mild cleaner for prep.
Choose samples to test color psychology on small patches before committing. If you prefer safer options, look for eco friendly paints labeled low-VOC to reduce odors and fumes during the job.
What Paint Types Are Best for Walls?
Because the right paint affects durability, appearance, and ease of cleaning, you’ll want to choose the type that fits each room’s needs. For most interiors, water-based latex is ideal: low odor, fast drying, and durable for living areas and bedrooms.
Choose paints by room: water-based latex works best indoors—low odor, quick-drying, and durable for living spaces.
Use acrylic blends for high-traffic zones since they resist stains. For kitchens and bathrooms, pick mildew-resistant formulations.
Consider natural or low-VOC options if you’re sensitive to fumes. Think about color psychology when selecting hues to match mood and function.
Finally, follow proper paint storage guidelines—seal cans tightly and store upright in a cool, dry place to preserve quality.
Choosing the Right Paint Sheen Per Room
Which sheen you pick will shape how a room looks and performs, so choose with purpose. You’ll balance appearance and function: flat hides imperfections and suits low-traffic spaces; eggshell adds slight sheen for living rooms; satin resists scuffs in hallways and kitchens; semi-gloss or gloss offers maximum paint durability for trim, bathrooms, and kids’ rooms.
Think about light and color psychology—glossier finishes reflect more light and can make colors feel brighter and more energetic, while flatter sheens absorb light for a cozy, muted vibe. Match sheen to use, lighting, and desired mood for best results.
Estimate How Much Paint You Need
Start by measuring each wall’s width and height so you can calculate total square footage.
Then factor in the number of coats you’ll apply—primer plus one or two paint coats—to get an accurate coverage estimate.
Finally, compare that total to the paint can’s square-foot coverage to determine how many gallons you’ll need.
Measure Wall Dimensions
Before you buy paint, measure each wall so you know exactly how much you’ll need. Use a tape measure to record width and height, then multiply for square footage. Subtract areas for doors and windows to avoid waste. Note ceiling height changes and alcoves separately.
Keep a running total per room and convert square feet to gallons using the paint’s coverage rate on the can. Jot measurements in a simple table or app to prevent errors.
While choosing color, remember color psychology impacts perception of size; consult historical painting techniques for mixing or finish choices when matching legacy surfaces.
Account For Coats
Now that you’ve totaled wall square footage, factor in how many coats you’ll need so your gallon estimate will be accurate. If you’re covering dark with light, plan for two or three coats; a similar shade may need just one. Consider primer—sometimes it replaces a coat and improves paint durability.
High-quality paint covers better, but check manufacturer coverage per gallon and adjust. Also think about color psychology: bold hues often need extra coats for true depth.
Multiply square footage by coats, divide by per-gallon coverage, and round up. Buy a little extra for touch-ups and unexpected absorption.
Clear, Cover, and Protect the Room
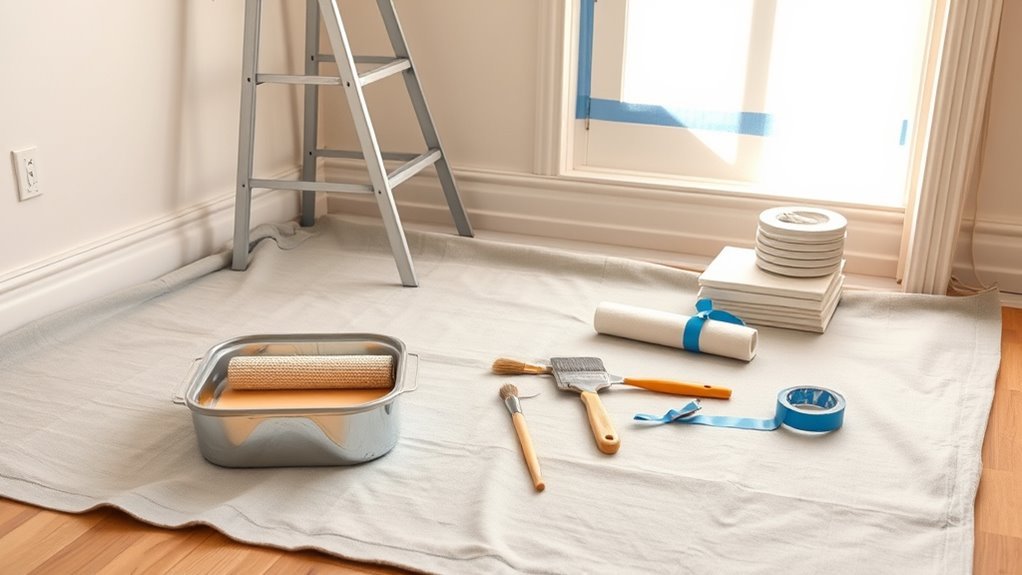
How will you keep paint where it belongs? Clear the room: remove furniture or cluster it centrally and cover with drop cloths. Take down pictures, outlet covers, and loose trim.
Cover floors with canvas or plastic sheeting, taping seams to prevent slips. Protect adjacent surfaces with painter’s tape—press edges for clean lines. Consider wall texture when choosing tape and cloth so you don’t pull paint off.
Keep paint storage sealed and elevated to avoid spills; label cans and store lids and stir sticks nearby. Keep a damp rag, small brush for touch-ups, and trash bin handy for waste control.
Fix Common Wall Imperfections
Before you paint, you’ll want to patch holes quickly with spackle or filler so they don’t show through the finish.
Smooth any rough areas with sandpaper or a sanding block until the surface feels even.
Doing these simple fixes now saves time and gives you a professional-looking result.
Patch Holes Quickly
If you’ve got nail holes, dents, or small cracks, you can patch them fast with a few basic tools and minimal drying time. Lightly clean the area, squeeze lightweight spackle into holes, and scrape flush with a putty knife.
For deeper gouges, fill in layers, letting each dry briefly. Sand gently once dry to match surrounding wall texture, avoiding over-sanding. Wipe dust, prime spots if needed, then touch up with matching paint color for seamless repair.
Small patches cure quickly, so you’ll be ready to repaint within hours rather than days, keeping your wall looking uniform.
Smooth Rough Areas
Once small holes and dents are patched, you’ll notice other rough spots like raised paint, orange peel texture, or tiny bumps that catch light and show after painting. Address them before priming: sand glossy areas, use a light skim coat for orange peel, and fill stubborn bumps with joint compound. Finish by sanding smooth and wiping dust.
- Start with 120–150 grit sandpaper for leveling.
- Apply thin coats of compound, feathering edges for invisibility.
- Prime repaired zones to make sure of even absorption and trueness to paint color trends.
This simple prep helps color psychology work as designed.
When and How to Prime a Wall
Although it might seem like an extra step, priming your wall makes paint adhere better and gives you truer color and smoother coverage, so you’ll end up using less paint and getting a more professional finish.
Prime when switching from dark to light, painting over stains, or changing sheen. Use oil-based or stain-blocking primer for marks and water-based for drywall.
Sand and clean before priming; patch holes first. Roll or brush primer evenly, keeping a wet edge to avoid lap marks.
Priming also influences color psychology and paint texture, ensuring predictable hue and consistent finish once you apply topcoat.
Set Up Your Painting Workspace Efficiently
Before you open a can of paint, clear and protect the room so you can work fast and clean. Move furniture and decorating accessories out or to the center, cover with drop cloths, and remove wall art. Set up a well-lit staging area for tools and a trash bin for debris. Keep supplies within reach to avoid interruptions.
- Lay drop cloths and secure edges.
- Arrange brushes, rollers, trays, and a ladder ergonomically.
- Keep a damp cloth and small bin nearby for quick cleanups.
Plan workflow by walls, ventilate the room, and wear comfortable clothes you don’t mind painting.
Tape for Clean Lines: Pro Techniques
When you want razor-sharp edges, quality painter’s tape and proper application make all the difference. Choose a tape rated for delicate surfaces to avoid paint bleed and surface damage.
Clean and dry the wall, press tape down firmly, and remove one strip immediately after the paint becomes tacky, not fully dry.
For crisp lines between creative color combinations, mask generously and overlap slightly where colors meet.
Use minimal paint on the roller near tape, and smooth edges with a putty knife if needed.
If you use eco-friendly paints, test tape adhesion first to guarantee a clean release.
How to Hold and Use a Brush for Cutting‑In
If you want clean edges without taping every corner, learn to hold and use a brush for cutting‑in like a pro: grip the handle closer to the ferrule for control. Rest your pinky or heel of your hand against the wall for steadying. Tilt the brush slightly so only the tips of the bristles touch the surface.
Practice these simple brush techniques to cut sharply along ceilings, trim, and corners. Keep a steady wrist, load sparingly, and pull paint away from the edge in smooth strokes.
Practice steady, controlled brushwork—load lightly, keep your wrist steady, and pull smooth strokes for crisp edges.
Tips:
- Use short, controlled strokes
- Maintain consistent pressure
- Blend wet edges quickly considering color psychology
Load and Use a Roller Like a Pro
After you’ve sharpened edges with a brush, it’s time to cover larger areas efficiently by loading and using a roller like a pro. Pour paint into a tray, roll until the nap is evenly saturated but not dripping.
Start in a W or M pattern, then fill in without pressing hard—let the roller’s weight spread paint smoothly. Maintain a wet edge to avoid lap marks.
Pause to reload when coverage thins, and store leftover paint properly—seal cans tightly and note color psychology choices for future touchups.
Clean rollers promptly and keep paint storage cool and labeled.
Cutting‑In Along Ceilings and Trim: Step‑by‑Step
Because crisp edges make a room look finished, cut‑in along ceilings and trim carefully before rolling large surfaces. You’ll steady your hand, use a quality angled brush, and load paint sparingly to avoid drips. Focus on consistent pressure and a clean sightline to the ceiling edge.
Crisp edges matter — cut in carefully with a steady hand, angled brush, and light paint load.
- Hold brush at a 30° angle for controlled strokes.
- Use painter’s tape sparingly where ceilings aren’t straight.
- Wipe excess paint on tray lip to prevent drips.
Choose colors with color psychology in mind; subtle contrast highlights trim. Proper technique also preserves paint durability, reducing touchups and extending the finish.
Rolling the Main Wall Surfaces: Step‑by‑Step
Now that you’ve cut in the edges, get the room ready by protecting floors and furniture and keeping your rollers and trays nearby.
Start each wall with the cut-in edges in mind, then load your roller evenly and work in a “W” pattern to spread paint without streaks.
Keep a wet edge, overlap passes for full coverage, and check for drips or thin spots as you go.
Prep And Protect
When you’re ready to roll the main wall surfaces, start by laying down drop cloths, taping edges, and fitting a roller cover to an extension pole so you can work efficiently and keep paint off floors and trim.
Prep and protect means clearing furniture, repairing holes, and cleaning dust so paint adheres evenly. Remember color psychology and historical trends when choosing sheen and primer—they affect mood and authenticity.
Use slow, overlapping strokes and keep a wet edge.
Pack a small kit:
- lint-free roller covers for smooth finish
- painter’s tape for clean lines
- tack cloth for final dust removal
Cutting In Edges
Although cutting in can feel fiddly, it’s the key to crisp, professional-looking corners and trim before you roll the main wall surfaces. You’ll load a quality angled brush, remove excess, and steady your hand against the trim. Work in manageable sections, keeping a wet edge so lines stay smooth.
Use light, deliberate strokes to avoid overlaps and drips; blend toward the wall, not the trim. Choosing the right sheen influences color psychology and perceived space, while correct technique preserves paint durability along edges.
Pause to touch up any thin spots before proceeding to the rolling stage.
Rolling Technique And Coverage
Ready to cover the big areas efficiently? You’ll load a roller evenly, start in a “W” pattern, then fill in without pressing too hard. Maintain a wet edge to avoid lap marks and work top to bottom for consistent sheen. Consider color psychology when choosing finishes; light hues need fewer coats.
If using eco friendly paints, check drying times and opacity—some low-VOC formulas cover differently.
- Keep a tray grid and moderate roller nap for your wall texture.
- Overlap each pass by 50% to blend strokes.
- Re-roll lightly for uniform coverage and edge blending.
When to Apply a Second Coat
If your first coat looks even but still shows faint streaking or the old color peeking through, plan on a second coat to guarantee full coverage and a uniform finish. You’ll know it’s time when color psychology matters — deeper hues need richer opacity — and when touch tests reveal thin spots that threaten paint durability. Wait the manufacturer’s dry time, feel for tackiness, then roll a thin, even second coat. Trust your eye: a consistent sheen and no bleeding of the old color mean you’re done.
| Feeling | Result |
|---|---|
| Relief | Solid, true color |
| Pride | Lasting finish |
| Calm | Confident space |
Blend Edges and Avoid Lap Marks
Before the second coat fully sets, blend your edges to avoid lap marks that show as darker or shinier bands where wet paint overlaps partially dried paint. Work quickly with a loaded brush or roller, keeping a wet edge and tipping off long strokes to feather gradients. Control humidity and temperature so drying is predictable.
Remember color psychology—directional light and sheen affect perceived tone where laps occur. Store extra paint properly; paint storage keeps viscosity consistent for seamless blending.
Quick reminders:
- Maintain a consistent roller pressure and speed
- Re-load before the edge dries
- Use matching sheen and batch numbers
Paint Around Outlets, Windows, and Sockets
When you paint around outlets, windows, and sockets, work deliberately with the proper tools so you get clean lines without damaging fixtures or creating safety hazards. Turn power off at the breaker, remove plates, and use outlet masking to protect openings.
Use a small angled brush for edges and a steady hand to cut in along window frames; practice on scrap wood first.
For window trimming, remove or mask trim as needed, paint trim separately, and press painter’s tape firmly to avoid bleed.
Replace plates when paint’s fully dry and restore power. Clean brushes and dispose of rags safely.
Techniques for Textured and Popcorn Walls
Before you start on textured or popcorn walls, make sure you clean and repair loose material so paint will stick.
Pick the right tools — thick-nap rollers, extension poles, and angled brushes — to reach crevices and conform to the texture.
Work in small sections and use consistent pressure to get even coverage without flattening the texture.
Preparing Textured Surfaces
Although textured and popcorn walls can hide imperfections, they need specific prep to take paint evenly and last, so you’ll want to tackle loose material, dust, and grease first.
Start by inspecting wall texture for flaking or gaps, then remove loose bits with a soft-bristle brush. Clean the surface with mild detergent, rinse, and let dry.
Patch larger voids with lightweight joint compound, feathering edges. Prime after sanding any repairs.
Quick checklist:
- Brush off loose texture and dust
- Degrease stains and rinse thoroughly
- Fill and sand holes, then apply primer
Good surface preparation prevents peeling and uneven coverage.
Choosing Proper Tools
Now that your textured surfaces are clean and patched, pick tools that match the texture to get even coverage and avoid damage.
For popcorn ceilings, use a thick-nap roller (3/4″–1″) or a hopper spray to reach crevices without flattening texture.
For heavy stucco or knockdown walls, choose roller naps 1/2″–3/4″ and sturdy brushes for edges.
Use extension poles and angled brushes to reduce strain.
Test tools with your chosen eco-friendly paints to guarantee adhesion and finish.
Consider color psychology when selecting sheen and tint—lighter tones open rooms, while warmer hues cozy spaces—while matching tool choice to effect.
Applying Even Coverage
How will you get smooth, consistent coverage over bumpy surfaces? You’ll prep textured or popcorn walls by cleaning and priming. Use a high-nap roller or airless sprayer for even buildup, and choose eco-friendly paints to reduce odor while respecting color psychology for mood.
Focus on technique: load roller fully, apply in overlapping “W” motions, and keep wet edges to avoid lap marks. Use thicker paints or additives for better hide on popcorn finishes.
- Test a small patch first to adjust nap and pressure
- Maintain consistent speed and pressure
- Feather edges to blend seams smoothly
Paint an Accent Wall for Maximum Impact
When you pick the right wall and color, an accent wall instantly changes a room’s mood and focal point; it doesn’t have to be complicated to be effective. You’ll choose a wall that complements layout, test colors for color psychology, and consider paint durability for high-traffic areas. Prep carefully: clean, sand, and use painter’s tape. Use a roller for broad strokes and a brush for edges, applying even coats until coverage looks consistent. Step back often to confirm balance with furniture and lighting.
| Wall choice | Finish | Impact |
|---|---|---|
| Opposite entry | Matte | Subtle |
| Behind sofa | Satin | Warm |
| Fireplace | Gloss | Bold |
| Narrow wall | Eggshell | Elongates |
Drying vs Curing: How Long Before Rehanging?
Although paint may feel dry to the touch within hours, it can take days to fully cure, so wait before rehanging artwork, mirrors, or shelves to avoid scuffs or shifts in adhesion. You’ll judge readiness by cure time, not surface dryness.
Smooth surfaces often cure faster than rough wall texture; humidity, temperature, and paint type affect paint durability. Aim for 24–48 hours for light items, 72 hours for heavier pieces, and up to two weeks for full cure with specialty paints.
Check manufacturer specs and test discreetly.
Consider:
- Weight of item
- Wall texture and mounting hardware
- Room conditions (temp/humidity)
Common Beginner Mistakes and Fixes
Because painting seems simple, beginners often skip prep or rush steps and end up with drips, uneven coverage, or poor adhesion. You can avoid that by taping edges, sanding glossy spots, and priming patched areas.
If color looks different than swatches, test samples—color psychology influences mood, so view paint under room light.
Roll in consistent strokes to prevent lap marks; thin coats beat thick ones. Fix drips by sanding when dry and recoat.
Choose eco-friendly paints to reduce fumes and recoil from strong odors. Read labels for drying times and follow manufacturer guidance to ensure a lasting finish.
Cleanup, Brush Care, and Storing Leftover Paint
If you want your tools and leftover paint to stay usable, clean brushes and rollers right after you’re done and seal cans properly before storing them.
Rinse water-based paint until it runs clear; use solvent for oil-based.
Squeeze excess paint back into the can to preserve paint color and reduce waste.
Store cans upside down for a tight seal; label with room and wall texture notes.
- Remove excess with a comb or wire brush.
- Wrap brush in plastic if you’ll reuse within days.
- Keep lids clean and place cans on a shelf, not the floor.
Check stored paint before reuse.
Troubleshoot Peeling, Bubbling, and Uneven Coverage
Why is your fresh paint peeling, bubbling, or laying on unevenly? Check surface prep first: dirt, grease, or old loose paint cause peeling issues and poor adhesion. Scrape and sand flaky spots, clean with a degreaser, and prime porous or patched areas.
Bubbles often mean trapped moisture or painting over a damp wall—dry thoroughly and fix leaks.
Roll or brush with consistent pressure and overlap strokes to avoid uneven coverage; use proper nap for the surface and apply thin, even coats, letting each dry fully.
Temperature and humidity matter—paint within recommended conditions to prevent problems.
When to Call a Pro Instead of DIY
When a job goes beyond basic prep, tools, or comfort, call a pro—especially for large surfaces, structural repairs, persistent moisture problems, lead paint concerns, or when you need a flawless, fast finish.
You should hire help if you can’t safely reach high areas, need drywall or trim rebuilt, or suspect mold or lead.
Pros also advise on color psychology for tricky lighting and save you from poor paint storage decisions that ruin cans.
Consider a pro when deadlines or perfection matter.
When timing or flawless results matter, bring in a pro to guarantee speed and perfection.
- Unsafe access or complex repairs
- Hidden moisture, mold, or lead
- Desire for perfect color and finish
Cost to Paint a Wall: DIY vs Hire a Pro
Because the price you’ll pay depends on scale, finish, and skill level, comparing DIY vs. hiring a pro starts with a clear breakdown of costs: materials and your time for DIY, versus labor, overhead, and often higher-quality supplies from a contractor.
You’ll spend less upfront doing it yourself—brushes, rollers, primer, paint—but factor in imperfect coverage and more touch-ups.
A pro charges more but finishes faster, uses durable finishes, and can advise on color psychology for room mood.
If you or household members have paint allergies, disclose that; pros can source low-VOC options, though at added cost.
Safety: Ventilation, Fumes, and Ladders
Although fresh paint can brighten a room, you’ve got to prioritize ventilation and stable ladder setup before you start. You’ll follow basic safety precautions: open windows, run fans, and wear a respirator when needed because ventilation concerns reduce fume exposure.
Fresh paint brightens rooms—prioritize ventilation and ladder safety: open windows, run fans, and wear a respirator when needed.
Secure ladders on level ground, keep three points of contact, and don’t overreach. Plan breaks to air the space and limit time near strong odors.
Keep solvents sealed and children or pets out. If you’re unsure about fumes or high work, consider a helper or hire a pro to guarantee safe, efficient results.
- Open windows and use fans
- Use respirator or mask
- Stabilize ladder properly
Choose Colors That Suit Lighting and Furniture
Look at how much natural light your room gets at different times of day, since light will change how colors read on the wall.
Match your paint choices to the tones and finishes of your furniture so everything feels intentional.
Always test paint swatches on the wall to see the color in real light before committing.
Assess Natural Light
When you assess natural light, note how its color temperature and intensity change through the day so you can pick paint that complements both the light and your furniture. Stand in the room at morning, midday, and evening to see warmth, coolness, and shadow. Test samples on different walls and observe before committing. Consider reflective surfaces and window treatments that alter effect.
- Watch how north- or south-facing windows shift hues.
- Compare paint color swatches in direct and indirect light.
- Photograph samples at various times to review later.
Trust what you see; natural light will make or break your choice.
Coordinate With Furniture
If your furniture already sets the room’s tone, pick wall colors that echo or balance those tones so everything feels intentional. Cool sofas and metallic accents pair well with warm, muted walls, while vibrant upholstery can handle a more neutral backdrop.
Consider color psychology to influence mood—soft blues calm, warm ochres energize—then match intensity to your room’s use. Look at furniture placement and decide whether walls should recede or pop.
Behind a focal couch, a deeper shade grounds the layout, while lighter hues expand tight corners. Coordinate trims and rugs to tie the palette together without overwhelming the space.
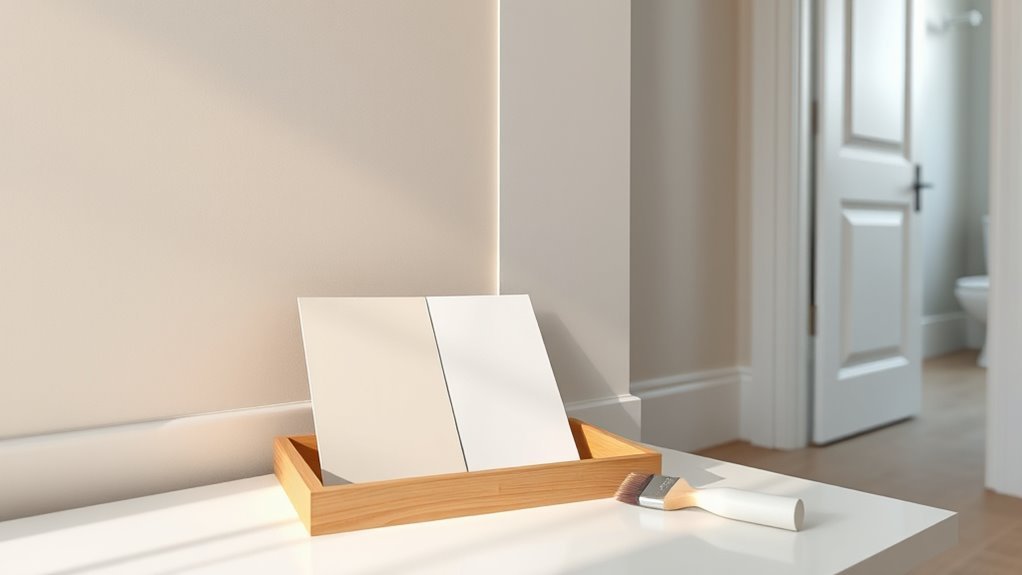
Test Paint Swatches
Because lighting and furniture change how a color reads, always test paint swatches on several walls and observe them at different times of day; you’ll see undertones shift and how pieces interact. Tape 4×6 samples, then live with them 48–72 hours before deciding. Consider color psychology to match mood: calming blues, energetic yellows, neutral grays. Keep samples and leftover cans labeled for paint storage so you can retouch or compare later.
- View swatches in morning, midday, and evening.
- Compare swatches next to major furniture and textiles.
- Photograph swatches under different lights for reference.
Tricks to Make Small Rooms Feel Larger With Paint
Want to make a small room feel noticeably bigger without major renovations? Use light, cool hues—color psychology shows pale blues, greens, and warm whites recede visually, opening space.
Keep ceilings bright with a shade lighter than walls to lift the room.
Paint trim and doors in a crisp, slightly reflective white for contrast that reads as depth.
Vertical stripes or a single accent wall can add perceived height or length when used sparingly.
Arrange furniture away from walls and store excess paint in clear, labeled paint storage to touch up rather than repaint.
Good lighting finishes the illusion.
Eco Options: Low‑VOC and Greener Paints
When you’re choosing paint, opting for low‑VOC and greener formulations can cut indoor odors and reduce harmful emissions without sacrificing finish or durability. You’ll get healthier air and still achieve rich color with eco friendly finishes made from sustainable materials.
Consider these tips:
- Choose certified low‑VOC or zero‑VOC paints for living spaces and bedrooms.
- Look for natural binders, recycled pigments, and transparency about sourcing to guarantee sustainable materials.
- Test small areas first to confirm coverage and sheen, since some greener formulas behave differently.
You’ll protect indoor air quality, support greener manufacturing, and still enjoy a durable, attractive wall.
Paint Baseboards and Trim for a Finished Look
Before you start painting baseboards and trim, make sure you prep the surfaces by cleaning, sanding, and filling any gaps so the finish sticks and looks smooth.
Use painter’s tape to protect walls and floors and keep crisp lines.
Work with a steady brush, load it properly, and sand between coats for a professional result.
Prep Trim Surfaces
How do you get crisp, professional-looking edges without laboring over them? First, clean trim with a damp cloth to remove dust and grease; grime ruins adhesion and shows against wall texture and paint color.
Sand lightly to smooth nicks, then wipe again. Fill gaps and holes with wood filler; sand flush when dry. Prime bare wood or repaired spots for even sheen.
- Sand and clean thoroughly for good adhesion
- Fill cracks and sand smooth before priming
- Use a stain-blocking primer on knots or raw wood
You’ll save time and get trim that complements your freshly painted walls.
Use Painter’s Tape
While you’re ready to paint, use painter’s tape to get sharp, professional-looking edges on baseboards and trim; it keeps paint off adjacent surfaces and saves touch-ups. Press tape firmly along seams, stretching slightly to follow contours, and remove it within an hour of the final coat to avoid peeling.
Mask hardware and gaps, and choose low-residue tape made for delicate surfaces. Tape also helps you visualize contrast and balance as color psychology comes into play—see how trim frames a room before committing.
If you’re using eco-friendly paints, tape prevents accidental splatter and preserves clean lines for a finished look.
Smooth And Paint
Now that your edges are protected with painter’s tape, smooth and paint your baseboards and trim to give the room a polished finish. You’ll prep by sanding lightly, filling gaps with caulk, and wiping dust away.
Choose trim sheen to complement wall color; Color psychology affects mood, so pick white or contrasting hues intentionally. Consider paint texture—smooth for modern, subtle texture for character.
Use a quality angled brush and long, steady strokes for crisp lines. Finish with a second coat if needed.
- Sand, caulk, clean
- Pick sheen and color
- Brush steady, thin coats
One‑Day Timeline: Paint a Single Wall in a Weekend
If you want to refresh a single wall over a weekend, you can finish the job in a day with a clear plan and a few efficient techniques.
Start by removing furniture, taping trim, and laying a drop cloth.
Clear the area: move furniture, tape trim, and spread a drop cloth for a mess-free start.
Sand and patch quickly, then prime if needed.
Choose paint with color psychology in mind—light shades enlarge, warm tones add coziness—and pick eco friendly options to reduce fumes.
Cut edges in the morning, roll broad sections midday, and apply a second coat later if required.
Clean brushes, remove tape while paint’s tacky, and replace furniture once dry for a completed wall.
Maintain Painted Walls to Keep Them Looking New
Keep your freshly painted walls looking new by dusting or wiping them regularly to prevent grime buildup.
When you spot scuffs or chips, tackle them promptly with a quick touch-up so small issues don’t spread.
A little daily care and fast repairs will keep your paint job crisp for years.
Daily Dusting And Cleaning
Want your paint to look fresh for years? You’ll stop dust buildup before it dulls colors by adopting simple daily dusting and cleaning habits. Use a soft microfiber mop or cloth to remove grit, then spot-clean smudges with mild soap and water. Keep consistent cleaning schedules so dirt doesn’t settle into finishes.
- Dust walls weekly in high-traffic rooms.
- Wipe marks promptly with gentle cleaners.
- Use a vacuum’s brush attachment for textured surfaces.
These routines prevent staining and prolong paint life without abrasive scrubbing. Stay consistent, and your walls will keep that just-painted appearance.
Prompt Spot Repairs
Because small chips and scuffs can spread and draw dirt, you should tackle spot repairs as soon as you notice them. Inspect routinely, clean the area, and sand lightly to feather edges. Match paint using leftover cans or samples—remember color psychology affects room mood, so keep tones consistent.
Apply primer on bare spots, then thin coats of touch-up paint, blending with a small brush or mini roller. For healthier homes, choose eco friendly paints with low VOCs to avoid odors and speed reoccupation.
Finish by wiping surrounding surfaces and noting supplies so you can repair quickly next time.
Frequently Asked Questions
Can I Paint Over Wallpaper Without Removing It First?
You can paint over wallpaper sometimes, but you’ll likely need wallpaper removal later; proper surface preparation is essential—clean, repair seams, prime with an appropriate bonding primer, and test a small area before committing to the entire wall.
How Do I Prevent Paint Smell From Lingering in the House?
You’ll stop paint smell by ventilating well: open windows, use fans, and follow ventilation tips like cross-breezes. Run air purifiers with activated carbon, keep doors closed to contain odor, and avoid heavy traffic until cured.
What Paint Finish Is Best for High‑Traffic Hallways?
Like armor for a busy street, you’ll choose satin or semi‑gloss for high‑traffic hallways; Choosing the right sheen matters, and thorough Surface preparation guarantees durability, so you’ll clean, patch, and prime before applying the tougher finish.
How Long Should I Wait Between Coats in Humid Conditions?
Wait about 24–48 hours between coats in humid conditions; higher humidity levels extend drying time, so check tackiness before recoating, use fans or dehumidifiers to speed drying, and adjust intervals based on actual drying time.
Can I Paint Over Water Stains or Do They Need Special Treatment?
You can’t just paint over water stains; they need discreet care first. Treat with water stain treatment, let the surface dry, then use a stain-blocking primer application, and you’ll avoid bleed-through and discoloration.
Conclusion
Think of painting a wall like learning to dance in a new room: at first your steps feel awkward, but with the right shoes (tools), music (paint type), and a little practice, the rhythm comes. You’ll measure, mix, and smooth until the room responds. Start small, pick eco-friendly paints if you like, and treat trim like punctuation. Keep up simple maintenance, and your painted wall will wear its new coat with quiet confidence—proof you can master it.