Is Krylon Spray Paint Latex or Oil Based?
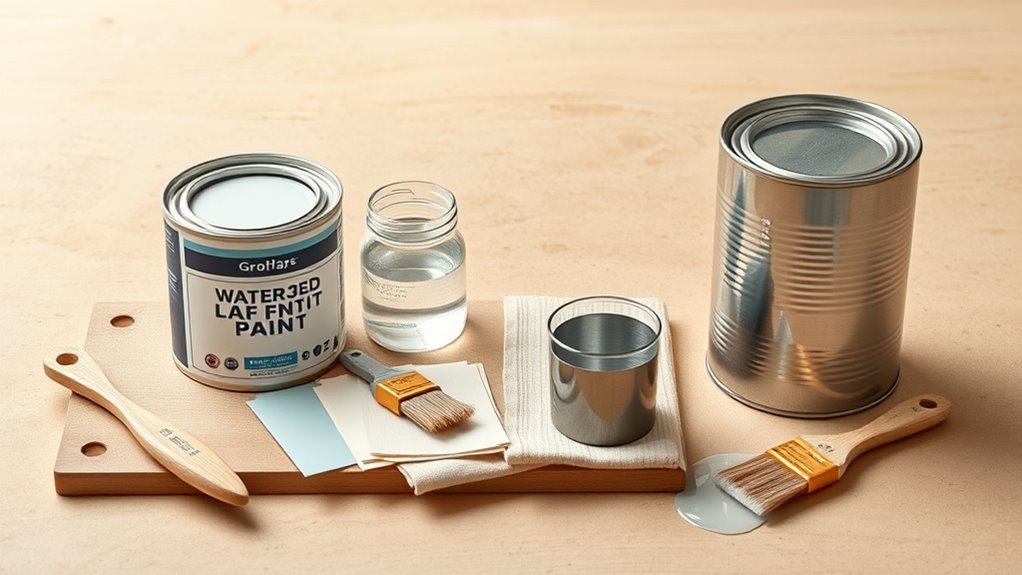
Krylon makes both latex (water‑based) and oil/solvent (alkyd) spray paints, so you’ll need to check the specific can to know which one you’ve got. Look for labels like “waterborne,” “acrylic,” or “latex” for water‑based formulas and words like “solvent,” “alkyd,” “enamel,” or heavier VOC warnings for oil‑based versions; the SDS or ingredient list will confirm. Keep the label and SDS handy, and keep going to learn how to match product to project.
Quick Answer: Is Krylon Latex (Water-Based) or Oil-Based?
Wondering whether Krylon spray paint is latex or oil-based? You’ll find Krylon primarily offers solvent-based (alkyd/oil) formulas and water-based acrylic options depending on the product line.
You can usually choose based on project needs: oil-based gives durability and smoother finishes for metal or high-wear pieces, while water-based acrylics dry faster and clean up with water.
For effective color matching and proper adhesion, pick the base that suits your substrate and topcoat.
Adjust spray techniques—distance, pass speed, and number of thin coats—to control build and finish regardless of whether you use oil or water-based Krylon.
How to Tell From the Can Whether a Krylon Spray Is Water- or Oil-Based
When you pick up a Krylon can, the quickest clues to whether it’s water- or oil-based are right on the label—look for words like “waterborne,” “acrylic,” or “latex” for water-based formulas and “solvent,” “alkyd,” “enamel,” or “oil” for solvent-based versions.
Check the Krylon label—words like waterborne, acrylic, or latex mean water-based; solvent, alkyd, enamel, or oil mean solvent-based.
Also check drying time listed; water-based sprays often note faster tack-free times.
Symbols or claims like “low VOC” or “eco-friendly” hint at reduced environmental impact and usually indicate waterborne chemistry.
If the label promotes “durable” or “industrial” finish without low-VOC claims, it’s likely solvent-based.
Use these visible cues to choose appropriately.
Reading Krylon Ingredient Lists and SDS
Because the label only tells part of the story, you’ll want to consult the ingredient list and the Safety Data Sheet (SDS) to confirm whether a Krylon spray is water- or oil-based and to identify specific solvents, resins, pigments, and hazards.
When you read an SDS, look for sections on composition, solvents (acetone, xylene, alcohols), and resin type—acrylic or alkyd—that signal water or oil bases.
Check pigment and VOC content for color matching concerns and note recommended PPE and ventilation.
Also scan handling guidance for spray nozzle cleaning and disposal.
Keep copies handy before you start a project.
Krylon Product Lines That Are Water-Based (Latex) Sprays

After you’ve checked labels and SDS sheets to confirm resin and solvent types, you can identify which Krylon lines are water-based. You’ll find specific consumer lines designed for lower odor, faster cleanup, and reduced VOCs.
Pay attention to performance notes like adhesion and dry time, and test color matching before large jobs. Adjust spray nozzle distance and technique for even coverage.
- Use sample sprays to verify color matching on your substrate.
- Choose water-based for indoor projects needing quick cleanup.
- Replace or clean the spray nozzle promptly to maintain consistent spray patterns.
Krylon Product Lines That Are Solvent/Alkyd (Oil-Based) Sprays
If you need tougher adhesion and longer-lasting finishes, look to Krylon’s solvent/alkyd (oil-based) spray lines for projects that demand durability and chemical resistance. You’ll find lines like Krylon Fusion All-In-One (some formulations), Krylon ColorMaster (older alkyd versions), and specialty metal and lacquer coatings labeled solvent or alkyd.
You should check labels for VOCs and Environmental impact notes, since oil-based sprays emit stronger fumes and require proper ventilation.
For precise Color matching, test sprays on a sample and allow full cure; oil-based pigments can appear richer but may shift slightly as they dry.
How Latex vs Oil Binders Affect Adhesion, Sheen, and Flexibility
When you pick between latex and oil binders, you’re choosing how well the paint will bond to different surfaces. Latex tends to form a flexible, lower-sheen film that resists cracking on wood and drywall.
Oil binders give a harder, glossier finish that sticks well to metal and previously painted surfaces. Those differences in adhesion, sheen, and flexibility will guide your choice for each project.
Adhesion Surface Bonding
Because the binder in spray paint controls how the finish grabs the substrate, you’ll notice clear differences between Krylon’s latex (water-based) and oil-based formulas in adhesion, sheen, and flexibility. You’ll care about color matching and environmental impact when choosing: water-based latex often bonds well to porous surfaces after priming and cleans up easily, while oil-based adhesives stick strongly to glossy, nonporous materials and resist moisture.
Consider surface prep, cure time, and meant use. Key points to weigh:
- Porosity: latex soaks in; oil sits atop.
- Priming: equalizes adhesion across materials.
- Cleanup: latex cuts solvent use, lowering environmental impact.
Sheen And Flexibility
Surface characteristics and binder chemistry don’t just affect how well paint sticks—they also shape the final sheen and how the film flexes over time. You’ll notice oil-based binders often produce richer, glossier sheens and better long-term flexibility on metal, resisting micro-cracks as substrates expand.
Waterborne (latex-like) sprays dry thinner, favoring matte or satin looks and faster color blending when layering, but they can stress and craze if the substrate flexes.
Your technique matters: keep a consistent distance and a steady spray nozzle motion to avoid build-up and uneven gloss. Test first on scrap to match sheen and flexibility needs.
Which Surfaces Work Best With Krylon Water-Based Sprays
You’ll find Krylon’s water-based sprays perform very well on porous surfaces like wood and drywall, where the paint soaks in and bonds strongly.
They can also adhere to nonporous materials such as metal and plastic, but you’ll get the best results if you roughen the surface first and use a compatible primer.
Proper cleaning, sanding, and priming are the key prep steps that guarantee long-lasting coverage and adhesion.
Porous Surfaces Compatibility
When you’re choosing Krylon’s water-based sprays for porous materials, think about how much the substrate will absorb the paint—materials like untreated wood, unprimed drywall, fabric, and certain ceramics take the paint readily and may need sealing or extra coats for even coverage and durability.
You’ll want to test Color matching on a scrap, because absorption can darken or mute tones.
Also consider Environmental impact: lower VOCs matter when treating fabrics or indoor drywall.
Prep and sealing help. Use primer for longevity, multiple thin coats for uniformity, and gentle sanding between coats for adhesion.
- Test on scraps first
- Seal porous substrates
- Apply thin, even coats
Nonporous Surfaces Bonding
Because nonporous materials don’t absorb paint, Krylon’s water-based sprays bond best to smooth, primed, or specially treated surfaces like metal, glass, glazed ceramics, laminate, and some plastics. You’ll get faster drying, more even coverage, and less need for multiple coats.
You’ll want to test adhesion on unfamiliar plastics and metals, confirm color matching under your lighting, and use consistent passes for a uniform finish.
Hold the can steady, maintain the recommended distance, and watch the spray nozzle for clogs that cause spits or uneven texture.
Proper technique lets you achieve durable, attractive results on nonporous items without extra coats.
Priming And Preparation
If you want the best results from Krylon’s water-based sprays, start by matching the right primer to the surface: use a bonding primer for slick metals and plastics, a stain-blocking primer for tannin-rich woods, and a high-build primer for uneven or patched areas.
You’ll prep by cleaning, sanding glossy finishes, and removing contaminants so adhesion and Color matching stay predictable.
Consider Spray can design for ergonomics during long coats.
Choose primers that accept water-based topcoats, test small areas, and note drying times.
- Metals: degrease, bond
- Plastics: scuff, prime
- Wood: seal, block stains
Which Surfaces Work Best With Krylon Oil-Based Sprays
Although oil-based Krylon sprays take a bit longer to dry, you’ll get durable, smooth coverage on hard, nonporous surfaces like metal, glass, and properly primed wood.
Though slower to dry, oil-based Krylon sprays give durable, smooth coverage on hard, nonporous surfaces like metal and glass
You’ll find color blending easier on smooth coats, letting you layer shades without streaks. Use them on outdoor fixtures, wrought iron, toolboxes, and trim for long-lasting resistance to wear.
Avoid unprimed porous masonry or fabrics; adhesion suffers. For varied finish textures, sand between coats on wood or apply specialty primers for glass and metal to improve grip.
Test a small area first so you can adjust technique and assure proper adhesion.
Dry and Cure Times: Latex vs Oil Krylon
Now that you know where oil-based Krylon shines, you’ll want to understand how its drying and curing compare to latex formulas so you can plan timing and layering.
Oil-based dries to touch slower but often cures harder over days. Latex feels dry fast but reaches full cure sooner in humid conditions. Check label times and test a small patch to confirm color matching after cure.
Adjust spray nozzle distance and passes to avoid runs.
Consider:
- Oil: longer cure, better leveling for smooth finishes.
- Latex: quicker recoat, sensitive to humidity.
- Test: spray nozzle setting affects texture and final tone.
Durability and Scratch Resistance: Krylon Latex vs Oil
When you’re choosing between Krylon’s latex and oil-based sprays, think about how the finish will stand up to wear. You’ll find oil-based formulas generally offer tougher, more scratch-resistant coatings ideal for high-traffic items.
Latex variants resist yellowing and flex better on flexible surfaces. For best durability, prep properly, apply multiple thin coats, and cure fully.
Use consistent spray techniques to avoid weak spots and guarantee even color matching across touch-ups. If you expect abrasion, pick oil-based for longevity; if you need flexibility and easier cleanup, latex can still perform well with proper application.
How Temperature and Humidity Change Krylon Spray Performance
If you spray in weather that’s too cold or too humid, you’ll see slower drying, poor adhesion, and increased runs or blushing. You’ll need to plan around temperature and humidity because they directly affect atomization, film formation, and environmental impact—excess solvent may evaporate differently, altering VOC release.
Spray only in suitable temperature and humidity—cold or humid conditions slow drying, harm adhesion, and cause blushing.
Humidity can cause cloudy finishes that ruin color matching and force recoats. To manage conditions, consider these actions:
- Choose warmer, drier windows for spraying to improve cure and adhesion.
- Shake and test sprays to ensure consistent atomization and true color.
- Use thin, even coats and allow longer flash times between passes.
Preparing Surfaces for Krylon Water-Based Sprays
Because water-based Krylon relies on a clean, dry surface to bond properly, start by removing dirt, grease, and loose paint so the finish adheres and cures evenly. Sand glossy areas lightly, wipe with a damp cloth, and let dry. Use a primer if surface is porous or stained. Test color matching on a hidden spot before full application. Shake the can well and clear the spray nozzle to prevent sputtering. Maintain recommended distance and overlapping strokes for even coverage. Clean nozzle after use.
| Step | Tool | Tip |
|---|---|---|
| Clean | Cloth | Mild detergent |
| Sand | 120-220 grit | Light pressure |
| Prime | Primer | If porous |
| Test | Swatch | Check color matching |
| Spray | Can | Clear spray nozzle |
Preparing Surfaces for Krylon Oil-Based Sprays
Although oil-based Krylon tolerates a bit more surface variation than water-based formulas, you should still remove grease, wax, and loose finish so the paint bonds and cures evenly. You’ll sand glossy surfaces lightly, clean with solvent, and prime bare metal or bare wood to prevent flash rust and tannin bleed.
Even with oil-based Krylon, remove grease and loose finish, sand glossy areas, clean with solvent, and prime bare surfaces.
Consider Color matching before priming if you need coverage with fewer coats. Practice consistent Spray techniques on a test panel to dial in distance and overlap.
Key prep steps:
- Degrease with mineral spirits or dedicated cleaner
- Sand to dull sheen and remove flaking
- Apply appropriate oil-based primer and allow full cure
Spraying Technique for Krylon Latex Cans
When you spray Krylon latex cans, hold the can 8–12 inches from the surface and keep your wrist steady so each pass stays parallel and evenly overlapped. Move smoothly, apply thin coats, and check color matching by spraying a test panel. Monitor drying times between coats—usually short—so you won’t trap solvents. Avoid heavy buildup; use light feathering at edges for even finish. Clean the nozzle after use.
| Step | Action | Tip |
|---|---|---|
| 1 | Test spray | Verify color matching |
| 2 | Thin coats | Short drying times |
| 3 | Feather edges | Prevent runs |
Spraying Technique for Krylon Oil/Alkyd Cans
If you’re switching to Krylon oil/alkyd cans, expect a slower dry time and adjust your technique accordingly. You’ll need longer flash times between coats, thinner layers, and careful handling of the spray nozzle to avoid runs. Focus on surface prep and temperature control so color matching stays consistent as the paint levels cure.
Use sweeping, overlapping passes and wait fully before re-coating.
- Spray in light, steady strokes to prevent pooling.
- Test the spray nozzle pattern on scrap to confirm flow and hue.
- Keep humidity low and dry times extended for true color matching.
When to Use a Primer With Krylon Water-Based Sprays
Because water-based Krylon bonds best to clean, absorbent surfaces, you should prime whenever the substrate is porous, stained, previously painted with oil-based finishes, or when you need extra adhesion and uniform color coverage.
You’ll also prime if you want true color matching over dark or uneven bases, or when metal needs rust resistance before water-based topcoats. Use a compatible water-based or universal primer, follow recommended dry times, and sand lightly between coats.
Adjust spray techniques—distance, overlap, and thin passes—to avoid lifting primer. Primer reduces soak-in and provides a stable base so your Krylon finish applies predictably.
When to Use a Primer With Krylon Oil-Based Sprays
When you’re working with Krylon oil-based sprays, check the surface porosity first—porous wood or drywall will soak up paint and usually needs a primer.
You’ll also want primer where better coverage and adhesion are required, especially on smooth or previously painted surfaces.
And if you’re tackling bare metal or rusty spots, prime to block corrosion and create a stable base for the oil-based finish.
Surface Porosity Assessment
Although surface porosity might seem minor, it determines whether you need a primer before using Krylon oil-based sprays. You’ll inspect the substrate: rough, chalky, or highly absorbent surfaces usually need primer to prevent uneven finish and protect against environmental impact. Smooth, nonporous items often don’t.
- High porosity: primer seals, reduces absorption, improves color matching.
- Medium porosity: spot-prime problem areas to conserve product.
- Low porosity: primer optional; clean thoroughly first.
You’ll test by applying a small spray patch. If paint soaks in or looks dull, prime that surface before finishing for durability and true color.
Coverage And Adhesion
Good coverage and strong adhesion start with choosing whether to prime before you spray; primer fills tiny surface irregularities and creates a uniform bonding layer so Krylon oil-based sprays lay down evenly and stick long-term.
You’ll prime when surfaces are porous, previously painted with incompatible coatings, or need extra durability. Follow Krylon’s brand history guidance on recommended primers and prep—older formulations sometimes required specific bases.
Apply thin, even primer coats, sand lightly, then spray.
Consider environmental impact: low-VOC primers exist and reduce fumes.
Skipping primer can save time but risks uneven coverage, poor adhesion, and premature finish failure, so choose wisely.
Rust And Corrosion Prevention
You’ve already seen how primer helps fill imperfections and boost adhesion; for metal surfaces, primer also blocks moisture and halts corrosion before it starts. When you plan to use Krylon oil-based spray, prime rusty or bare metal to prevent future flaking.
Choose a rust-inhibiting primer, guarantee proper color matching if a tinted primer improves final coverage, and test your spray nozzle for even atomization.
Prep by removing loose rust and degreasing; apply thin, even coats. Remember:
- Primer creates a bonded barrier to moisture
- Correct color matching reduces topcoat coats
- A good spray nozzle prevents runs and gaps
Matching Topcoats and Clears to Krylon Base Types
Which clearcoat should you pair with a Krylon base? You’ll match clears to the base: oil-based Krylon prefers solvent clears; water-based/latex Krylon pairs with waterborne topcoats. Consider historical applications where oil clears protected metalwork; today you can choose eco friendly alternatives for less odor and VOCs. Test adhesion on scrap before committing.
| Krylon Base | Recommended Clear | Notes |
|---|---|---|
| Oil-based | Solvent clearcoat | Durable, traditional protection |
| Water-based | Waterborne clear | Low VOC, flexible finish |
| Universal | Hybrid clearcoat | Balances adhesion and eco goals |
Cleanup: Water for Latex, Solvents for Oil-Based Krylon
When you finish a latex Krylon project, you can rinse brushes and equipment with warm water and mild soap.
For oil-based Krylon, you’ll need mineral spirits or a dedicated solvent to break down the paint.
Always follow local guidelines to capture waste and dispose of used solvents, rags, and paint residue safely.
Water For Latex
Wondering how to clean up latex Krylon? You can rinse brushes and wipe overspray with water while paint’s wet; it’s forgiving and less toxic. You’ll also reduce environmental impact by avoiding harsh chemicals, and water lets you test color matching easily before it dries.
For best results:
- Rinse tools immediately to prevent clogging and waste.
- Use mild soap to remove stubborn residue without harming drains.
- Blot fresh overspray with a damp cloth; avoid scrubbing painted surfaces.
You’ll save money, protect the environment, and keep colors consistent when you act quickly with water.
Solvent For Oil-Based
Because oil-based Krylon won’t rinse away with water, you’ll need the proper solvents to clean brushes, remove overspray, and thin the paint when necessary. Use mineral spirits or paint thinner for general cleanup.
Acetone or lacquer thinner works for stubborn residues but can soften underlying finishes. Work in a ventilated area and test a small patch to avoid damage when you’re doing color matching or retouching.
When adjusting viscosity for advanced spray techniques, add solvent sparingly and stir thoroughly. Wipe tools on rags and store contaminated rags safely.
Dispose of used solvent according to local hazardous-waste rules.
Proper Disposal Methods
If you’re cleaning up latex Krylon, you can simply rinse brushes and tools with warm, soapy water and let them air-dry.
For oil-based Krylon, you’ll need mineral spirits or paint thinner and proper ventilation.
Dispose of solvents and paint waste responsibly to minimize environmental impact and comply with VOC regulations.
Follow local hazardous-waste guidelines.
- Contain used solvents in labeled, sealed containers.
- Take leftover oil-based paint and solvent to a hazardous-waste facility.
- Dry out small amounts of latex paint and recycle cans if accepted.
You’ll protect health, follow VOC regulations, and reduce environmental impact.
Safety, Ventilation, and PPE Differences for Krylon Types
When you’re choosing between Krylon’s latex-style water-based sprays and their solvent-based (oil) formulas, the safety, ventilation, and PPE needs change considerably.
You’ll note environmental impact and historical development drove water-based options to lower VOCs. For solvent-based Krylon, work outdoors or in a well-ventilated spray booth, use a respirator rated for organic vapors, chemical-resistant gloves, and eye protection.
For latex-style sprays, still ventilate and wear a mask (particulate/paint mist) and gloves; risks focus on overspray and aerosols rather than strong fumes.
Always read the label, follow local regulations, and keep fire sources away from oil-based products.
Common Problems With Krylon Latex Sprays and Fixes
You’ll often run into three main issues with Krylon latex sprays: paint not adhering, uneven coverage, and clogging or sputtering.
Check surface prep and use a proper primer if paint won’t stick.
Spray in thin, overlapping passes to fix coverage.
Clear or replace clogged nozzles to stop sputtering.
These simple checks and fixes will solve most problems quickly.
Paint Not Adhering
Why won’t your Krylon latex spray stick to the surface? You’ll first check surface cleanliness, compatibility, and humidity. Krylon’s color blending and finish options don’t fix poor prep—latex needs a keyed, clean substrate.
Lightly sand glossy or slick surfaces, wipe with a solvent or degreaser, and guarantee dryness before spraying. Prime when switching between materials or covering stains. Avoid painting in high humidity or extreme cold.
If adhesion still fails, try a bonding primer or use a different Krylon formulation designed for plastics or metal.
- Clean, sand, and prime for best bond
- Control temperature and humidity
- Match primer to surface
Uneven Coverage
Ever notice patchy streaks or thin spots after spraying Krylon latex? You can fix uneven coverage by adjusting technique and materials.
Shake cans thoroughly to prevent poor color mixing that yields inconsistent tones. Hold the spray can 8–12 inches from the surface, maintain steady passes, and overlap each pass by about 50% to build even film.
Use smooth, light coats rather than one heavy pass. Check the spray nozzle for damage or misalignment—swap it if it fans erratically.
Allow proper drying between coats and work in consistent temperature and humidity to avoid runs and thin patches.
Clogging And Sputtering
How often does your Krylon latex can sputter or clog mid-job? You’ll face sputtering if paint thickens, nozzle blocks, or you shake poorly. Clean the spray nozzle between passes, keep a steady distance for proper color matching, and store cans upright.
Quick fixes:
- Remove and soak the spray nozzle in warm solvent to clear clogs.
- Use short bursts and test sprays to maintain even flow and hue.
- Replace damaged nozzles and strain paint to prevent particulates.
If problems persist, thin according to label instructions or switch cans; consistent maintenance prevents interruptions and preserves finish quality.
Common Problems With Krylon Oil-Based Sprays and Fixes
When oil-based Krylon doesn’t behave the way you expect, you’ll usually see a few recurring issues—runs, orange peel texture, slow drying, or poor adhesion—and each one has a straightforward fix if you know what to look for.
If you get runs, sand lightly and re-spray with thinner coats from farther away.
For orange peel, reduce pressure, warm the can slightly, and spray smoother, overlapping passes.
Slow drying often means high humidity or cold—move to a warmer, drier spot or use a fast-dry formulation compliant with environmental regulations.
For adhesion problems, scuff, clean, and use an appropriate primer to guarantee proper color matching.
Choosing Between Krylon Types for Furniture Projects
When you’re picking between Krylon latex and oil-based sprays for furniture, consider the paint type’s adhesion and drying time.
You’ll also need to prep the surface—cleaning, sanding, and priming—to get an even coat.
Finally, think about the durability and finish you want, since oil-based gives tougher protection and latex offers easier cleanup and a different sheen.
Spray Paint Types
Although both Krylon latex (water-based) and oil-based sprays can cover furniture, you’ll pick the best one by weighing durability, surface prep, and finish needs. You’ll consider color matching and whether the spray nozzle gives smooth control for edges and detailed trim.
Oil-based offers tougher wear and leveling; latex cleans easier and has less odor. Match finish (matte, satin, gloss) to use and traffic.
- Choose oil for high-traffic durability.
- Choose latex for easy cleanup and lower fumes.
Test spray on a hidden spot to confirm coverage and color before committing.
Surface Preparation
Because surface prep determines whether Krylon latex or oil-based spray will bond and finish properly, you should assess and ready the piece before picking a product. Inspect for grease, old finish, and loose varnish; strip glossy surfaces or sand to dullness.
Clean with a degreaser, wipe with tack cloth, and let fully dry. Fill cracks and sand smooth, progressing to finer grit for furniture.
Test a small area to check adhesion and color mixing results between coats. When you spray, hold the can steady and maintain recommended distance, replacing or cleaning the spray nozzle to prevent spitting and uneven coverage.
Durability And Finish
If you want a tough, long-lasting surface for a frequently used piece, oil-based Krylon typically gives harder, more chip-resistant finishes, while latex (water-based) varieties dry faster, feel less brittle, and resist yellowing over time; choose based on use and look.
You’ll consider sheen, sanding between coats, and whether you’ll topcoat. Color matching matters—test swatches under real light. Adjust the spray nozzle for even coverage and avoid drips.
Balance durability against flexibility: oil for heavy wear, latex for quicker projects and less odor.
- Oil: harder, better chip resistance
- Latex: faster, more forgiving
- Test: color, nozzle, finish
Buying Checklist: What to Confirm on the Krylon Can
When you pick up a can of Krylon, scan the label to confirm the finish, compatibility (latex or oil-based), and any surface prep recommendations so you know it’ll work for your project and substrate.
Check drying times, recommended primer, VOC levels and safety warnings; those affect adhesion and Environmental impact.
Note spray pattern and recoat window to match your workflow.
Verify color code and batch number for consistency.
Compare similar Krylon lines and do Brand comparisons if unsure which formulation suits furniture, metal or plastic.
Finally, inspect nozzle condition and expiration or manufacture date before purchase to avoid problems.
Quick Troubleshooting Flowchart for Krylon Spray Issues
Start by identifying the symptom—clogged nozzle, sputtering spray, runs, or poor adhesion—and follow a simple yes/no path to isolate the cause.
If nozzle clogged, clean or replace.
If sputtering, shake can and check propellant.
If runs, reduce distance and apply thinner coats.
If poor adhesion, confirm surface prep and primer.
Ask: is finish texture correct? If not, test spray on scrap to adjust technique or product.
Consider color blending issues—use compatible formulations and intercoat drying.
Quick checklist:
- Clean nozzle and strain paint
- Test spray on scrap
- Use primer for adhesion and consistent finish texture
Frequently Asked Questions
Can Krylon Spray Paint Be Layered Over Existing Enamel Finishes?
Yes — you can layer Krylon over enamel if you prep properly; you’ll guarantee spray paint compatibility by scuffing, cleaning, using primer if needed, and applying thin, even coats; these layering techniques prevent adhesion and finish issues.
Are Krylon Sprays Safe for Use on Children’s Toys?
You shouldn’t use Krylon sprays on children’s toys unless the product’s label explicitly states child safety and non-toxic certification; otherwise you’re risking paint toxicity and exposure to harmful solvents, so choose certified, toy-safe paints.
Do Krylon Color Names Match Industry-Standard Color Codes?
Yes — but only roughly: like a musician tuning by ear, you’ll find Krylon color names aren’t exact Color matching to Industry standards, so you’ll need swatches or spectrometric matching for precise, standardized results.
How Long Should Unopened Krylon Cans Last in Storage?
Unopened Krylon cans typically last 2–5 years in storage; you’ll extend shelf life by keeping them sealed, upright, cool, dry, and away from extreme temperatures and sunlight to preserve spray quality and pigment stability.
Can Krylon Sprays Be Used in Food-Contact Areas After Sealing?
No, you shouldn’t use Krylon sprays in food-contact areas after sealing; food safety risks remain, so you’ll need certified food-safe coatings and proper sealing techniques, curing, and testing to guarantee no toxic migration occurs.
Conclusion
Quick recap: Krylon makes both water-based (latex/acrylic) and oil-based (solvent/alkyd) sprays, so always check the can or SDS; water-based labels say “water,” “acrylic,” or “latex,” while oil-based list solvents, “alkyd,” or “enamel.” For furniture, choose oil-based for durability, water-based for low odor and easy cleanup. Don’t forget surface prep, primer, and ventilation—miss those and you’ll create a paint apocalypse of drips and tacky messes!