Is Latex Paint for Wood? What You Should Know
Yes — you can use latex paint on most wood projects, and it’s a solid choice if you want fast drying, easy cleanup, and good color retention. You’ll need proper prep: clean, sand, and prime bare or previously finished wood to prevent tannin bleed and guarantee adhesion. For high-wear surfaces consider tougher topcoats or alkyds, and test adhesion on slick finishes first. Keep going to learn primers, techniques, and when to pick alternatives.
Who This Guide Is For
If you’re planning a DIY project or managing a small renovation that involves painting wood—trim, doors, furniture, or exterior siding, this guide is for you. You want clear, practical advice on prep, selecting compatible products, and finishing details without getting bogged down.
You’re likely a homeowner, renter with permission, or hobbyist tackling interior or sheltered exterior wood. You’ll learn basics like surface prep, color mixing tips to achieve consistent shades, and brush techniques that reduce streaks and drips.
You won’t need professional jargon—just straightforward steps to help you get durable, attractive results.
Quick Answer: Can You Use Latex Paint on Wood?
Yes—you can use latex paint on wood, and it’s a popular choice for many indoor and sheltered outdoor projects because it dries fast, cleans up with water, and resists yellowing.
You’ll get good adhesion on properly prepped surfaces—clean, sand, and prime where needed.
Latex handles expansion and contraction better than some oil-based options, reducing cracking.
For best results, test a small area, follow manufacturer instructions, and consider sheen for durability.
When mixing for consistent color mixing, stir thoroughly and avoid over-thinning.
Store leftovers tightly sealed, upright, and in stable temperature to extend paint storage life.
How to Decide: Latex Vs Alternatives
When choosing between latex and other paints, weigh the project’s location, durability needs, and prep time so you pick the best option for the job. You’ll compare performance, cost, and environmental impacts before deciding. Consider:
- Indoor vs outdoor: exposure affects longevity and finish.
- Surface prep and adhesion: some alternatives need primers or sanding.
- Environmental concerns and VOC emissions: low-VOC latex reduces indoor toxins; oil or alkyd may emit more.
Balance maintenance, appearance, and health. If you need stain-blocking or extreme wear resistance, alternatives can win; if quick cleanup and lower VOCs matter, latex often fits.
When Latex Is a Great Choice for Wood
If you’re freshening up indoor furniture, latex is a smart, low-odor choice that sands and recoats easily.
It also works well when you need a quick-dry finish for small projects or fast turnaround between coats.
You’ll get durable coverage without long wait times, which makes it ideal for many home touch-ups.
Indoor Furniture Refresh
Although you might think oil-based paints are the go-to for furniture, latex is often a smarter choice for indoor pieces. You’ll find it’s easier to clean, less smelly, and quicker to live with.
Before you start, plan color mixing for coordinated rooms and check paint storage dates so pigments perform predictably. Sand and prime worn surfaces, then apply thin, even coats.
Consider these practical tips:
- Use high-quality latex for durability and smooth finish.
- Lightly sand between coats to prevent brush marks.
- Seal high-wear areas with a water-based polyurethane for extra protection.
Quick-Dry Projects
Need a fast turnaround? You’ll love latex for small wood projects: trim, picture frames, or a quick tabletop touch-up. It dries fast, sands easily, and recoats within hours so you finish the same day. You’ll cut downtime and avoid long waits for curing.
Still, respect latex hazards—work in ventilated spaces, wear gloves, and keep kids and pets away until dry. Clean brushes and spills promptly, and follow proper paint storage to preserve quality between jobs.
For rapid, reliable results on low-traffic pieces, latex is a smart choice when speed matters and you handle it safely.
When Latex Is Not the Right Choice for Wood
When you need extreme durability, moisture resistance, or a factory-smooth finish, latex paint can come up short on certain wood projects. You’ll want alternatives when Latex durability is critical or when Oil based compatibility with existing finishes matters.
Consider avoiding latex for trim, floors, or exterior siding that sees heavy wear or moisture. Think about solvent-based options or specialized coatings instead.
- Floors: high abrasion calls for tougher, oil-based or polyurethane systems.
- Historic pieces: existing oil finishes need compatible products to prevent adhesion failure.
- Wet environments: bathrooms and exterior trim benefit from moisture-resistant coatings.
Which Wood Surfaces Take Latex Best
If you’ve ruled out latex for high‑wear or moisture‑exposed pieces, you’ll still find many wood surfaces where latex performs very well.
You’ll want to use latex on interior trim, baseboards, door casings, and furniture with light to moderate use—surfaces that don’t face constant abrasion. It sticks well to primed surfaces and sealed veneer, making color matching easier when touching up or repainting.
Latex also suits cabinets with proper primer and satin or semi‑gloss finish. If you’re eco conscious, choose low‑VOCs and eco friendly options; they offer good durability without compromising indoor air quality.
Solid Wood Vs Engineered Wood: Latex Differences
You’ll notice solid wood soaks up latex differently because its higher porosity affects how primers and paint bond.
Engineered wood’s layered construction and factory finishes change surface absorption and may need special prep.
Pay attention to adhesion and flexibility—latex needs a stable, slightly flexible surface to prevent cracking or peeling.
Solid Wood Porosity
How porous is solid wood compared to engineered boards, and why does that matter for latex paint? You’ll find solid wood absorbs more because its open wood grain and variable density let latex soak in, affecting paint texture and coverage. Sealers and primers block absorption; without them you’ll see blotchy sheen and higher paint use.
- Sand and prime: smooths grain, evens absorption.
- Thinner coats: reduce texture differences and raise durability.
- Spot-fill knots: prevent bleed-through and uneven gloss.
Treating porosity up front gives you consistent finish and predictable maintenance.
Engineered Wood Layers
Because engineered boards layer a thin hardwood veneer over plywood or MDF cores, they behave differently with latex paint than solid wood does.
You’ll notice the veneer accepts paint like solid wood, but thinner layers can reveal seams, grain differences, or underlying tones that complicate color matching.
You should sand gently, prime with a sealer designed for veneers, and test a small area to check for staining or unexpected chemical reactions between old finishes and new latex.
Since cores may swell at exposed edges, protect edges and avoid heavy buildup; good prep keeps results consistent and durable.
Adhesion And Flexibility
Those veneer-focused prep steps also affect how paint sticks and moves on a piece; solid wood and engineered boards respond differently to latex because of their structure and flexibility. You’ll notice differences in adhesion and how paint texture lays over grain or cross-laminated layers.
Solid wood swells and contracts with humidity, so latex must flex without cracking. Engineered boards resist movement but need priming to bond.
- Sanding evens texture, aiding adhesion and consistent color mixing.
- Primer increases flexibility and prevents delamination on veneers.
- Topcoat selection balances durability with desired paint texture.
Interior Vs Exterior: Latex Performance
Wondering whether latex paint is right for your project? You’ll find interior latex excels for color mixing, low odor, and easier cleanup, while exterior formulas resist UV, moisture, and mildew better. Consider environmental impact: many interior latex options have low-VOC choices; exterior options focus on durability.
| Setting | Strengths | Considerations |
|---|---|---|
| Interior | Smooth finish, easy tinting | Low VOC options available |
| Exterior | Weather resistance, UV protection | Needs milder sheen to hide imperfections |
Choose interior latex for trim and furniture, exterior for siding and doors. Match formula to exposure and finish to get lasting results.
How Bare Wood Accepts Latex
When you paint bare wood with latex, its porosity and absorption control how much paint and primer you’ll need.
Pay attention to grain direction, because end grain soaks up more and can cause uneven coverage.
Proper surface preparation—cleaning, sanding, and sealing—will help the finish go on smoothly and last longer.
Porosity And Absorption
How does bare wood take latex paint? You’ll find porosity and absorption determine coverage, drying, and final look. Open-grained woods soak more, changing color mixing and reducing finish sheen unless you seal first.
To manage absorption:
- Test soak-in on scrap to gauge primer needs.
- Use a penetrating primer for very porous species to prevent blotchiness.
- Sand and clean between coats so latex bonds evenly and sheen stays uniform.
You’ll control how much paint the wood drinks by adjusting primer and coat thickness, ensuring predictable color and an even, durable finish.
Grain Direction Effects
Which way the grain runs makes a big difference in how latex paint wets, soaks, and levels on bare wood. You’ll notice paint lays smoother along the grain and can look streaky across it; end grain soaks more, altering color and Finish sheen.
Plan strokes to follow grain for even coverage and test a small area to judge leveling.
For open-grain species, you’ll get more visible texture and may prefer higher sheen to highlight detail or matte to hide it.
Consider Texture options—brush, roller nap, or spray—to match grain direction and minimize lap marks.
Surface Preparation Needs
If you want latex to stick and look its best on bare wood, you need to get the surface clean, dry, and properly keyed first.
Sand smooth with progressively finer grit, remove dust, and ensure wood moisture is below 12%.
Prime with a quality latex or bonding primer to seal tannins and improve paint texture.
Consider how color mixing affects final tone—test swatches after priming.
Follow these steps:
- Clean: degrease, sand, vacuum.
- Dry: allow full drying time; check moisture.
- Prime: use bonding primer; sand lightly between coats.
You’ll get durable, even coverage that accepts latex well.
How Previously Finished Wood Accepts Latex
When you’re repainting previously finished wood, the key is evaluating the existing coating—its type, condition, and adhesion—because these factors determine how well latex will stick and what prep is needed. You’ll test adhesion, sand glossy finishes, remove loose paint, and decide if primer’s necessary. Consider color mixing impacts and whether latex’s paint durability meets your needs; sometimes bonding primers bridge old oil to new latex.
| Existing Finish | Prep Needed |
|---|---|
| Oil-based | Degloss, primer |
| Shellac | Clean, primer |
| Latex | Sand, spot-prime |
| Varnish | Scuff, primer |
| Chalk paint | Light sand, prime |
High-Traffic Wood Surfaces That Need Tougher Finishes
Want your painted wood to stand up to daily wear? Pick tougher finishes for floors, stairs, entry doors, and tabletops where traffic and abrasion are highest. You’ll choose finishes that resist scuffs and clean easily while considering eco friendly options to limit VOCs.
Choose durable, low‑VOC finishes for high‑traffic painted wood—floors, stairs, doors, and tabletops—to resist scuffs and clean easily
- Floors: use high-durability latex with clear polyurethane topcoat for abrasion resistance.
- Stairs and handrails: select satin or semi-gloss and reinforce with frequent maintenance.
- Tabletops and counters: prefer conversion varnish alternatives or durable water-based topcoats.
Use precise color matching techniques when repainting touch points so repairs blend seamlessly.
How Moisture and Humidity Affect Latex on Wood
You’ll want to check the wood’s moisture content before painting, because too much dampness prevents latex from adhering properly.
Apply when ambient humidity is moderate and drying conditions are steady, since high humidity slows cure time and raises the risk of tacky paint.
Over the long term, repeated moisture cycles can cause peeling, blistering, or mold unless you use proper sealing and maintenance.
Wood Moisture Content
How damp is the wood you’re about to paint? You need to verify moisture before applying latex: wet wood swells, raises wood grain, and prevents proper adhesion, changing paint texture and causing peeling.
Measure with a moisture meter or use simple tests, then follow these guidelines:
- Aim for 6–12% moisture content for interior wood; exterior can be slightly higher.
- Let newly milled or pressure-treated lumber dry until stable relative to its environment.
- Recheck after rain or heavy condensation; don’t paint until readings return to target.
Controlling wood moisture ensures lasting bonds and a smooth finish.
Humidity During Application
Because latex paint cures by water evaporation, the ambient humidity you’re working in directly controls drying speed and adhesion. If humidity’s high, paint stays tacky longer, attracting dust and sagging along wood grain.
Low humidity speeds skin formation, risking brush marks and poor flow. You should aim for moderate conditions—typically 40–60%—so solvents evaporate evenly and paint sheen levels out without flash drying.
Monitor weather and use dehumidifiers or humidifiers as needed, and avoid painting right after rain or during heavy dew. Proper ventilation, controlled temperature, and timed coats help maintain consistent finish and protect your work.
Long-Term Moisture Effects
Short-term humidity control helps your paint cure properly, but long-term moisture exposure determines how well latex holds up on wood over months and years. You’ll need to manage moisture with proper sealing and consider Moisture barriers or Waterproof coatings where humidity is persistent. Follow these steps to protect finishes:
- Apply a quality primer and sealant to reduce wood absorption.
- Use Moisture barriers or Waterproof coatings in basements, exteriors, or near water.
- Maintain ventilation and inspect for leaks; repair flashing and caulking quickly.
If you’re proactive, latex will resist peeling and mildew longer, but constant wetting will still degrade it.
Why Proper Surface Prep Matters (Tests & Steps)
When you skip proper surface prep, paint won’t adhere well, leading to peeling, brush marks, and uneven coverage that show up long before you expect—so testing and careful steps matter.
Skip surface prep and paint fails—peeling, brush marks, and uneven coverage appear quickly, so test and prep first.
You’ll test for gloss, loose fibers, and tannin bleed; a quick adhesion or solvent test tells you whether sanding or priming’s needed.
Sanding, dust removal, and repairing gouges create a uniform surface for latex.
Prime resinous or bare wood to block stains and improve color matching.
Work with ventilation to avoid concentrated paint fumes.
Follow manufacturer dry times between coats; that disciplined sequence prevents failures and extends finish life.
How to Clean Wood Before Painting With Latex
Before you pick up a brush, remove dirt, grease, and old finish so the latex can stick and dry evenly; clean wood thoroughly using the right techniques to avoid adhesion problems later.
Start by wiping with a damp cloth and mild detergent to remove surface grime. Rinse and let dry fully.
If mold or mildew appears, treat with diluted bleach, then rinse. Avoid heavy solvents that alter wood color or paint texture.
Keep paint tools clean for consistent color mixing later.
Follow this quick checklist:
- Soap and water wipe
- Bleach treatment for mildew
- Final rinse and dry
How to Sand Wood for Latex Adhesion
With the surface clean and dry, sanding creates the tiny tooth latex needs to grip and helps smooth imperfections that would telegraph through paint.
Start with 120–150 grit to remove rough spots, then 180–220 grit for a fine finish. Sand with the grain, keep pressure light, and wipe dust with a tack cloth before painting.
For previously finished surfaces, scuff-sand to dull gloss without removing all layers.
Proper sanding preserves consistent paint texture and helps color mixing appear even across panels.
Finish by vacuuming and a final wipe so your latex adheres and dries uniformly.
When to Use a Primer Before Latex
Why should you prime wood before applying latex? You’ll improve adhesion, prevent tannin bleed, and get truer color mixing results when the latex lays over a consistent base. Prime when wood is bare, stained, or patched. Skip priming only on well-sealed, previously painted surfaces in good condition.
- Bare or porous wood — prime to seal and reduce paint soak-in.
- Stained or knotty wood — prime to block tannins and prevent discoloration.
- High-traffic or exterior pieces — prime to enhance durability and limit paint fumes by allowing fewer coats.
Priming saves time and gives a professional finish.
Choosing the Right Primer for Latex on Wood
Wondering which primer will give your latex paint the best performance on wood? You’ll pick by matching primer type to project: oil-based for tannin-rich hardwoods, water-based latex for softer woods and easy cleanup, and stain-blocking formulas when knots or discoloration show.
Consider adhesion, drying time, and sanding quality. Choose a primer that supports color blending if you plan layered finishes, and one that accepts the texture techniques you want—brush, roller, or spray.
Test a small area to confirm coverage and feel. Proper primer choice reduces coats, improves durability, and guarantees a uniform final appearance.
Using Bonding Primers on Glossy or Slick Wood
If your wood has a glossy or slick finish, you’ll need to prep it by cleaning, lightly sanding, and removing waxes or oils so the primer can stick.
Choose a bonding primer formulated for slick surfaces—these are designed to adhere where standard primers won’t.
Apply according to label instructions and check that the surface is fully dry before painting with latex.
Prepping Smooth Gloss Surfaces
Have you ever tried painting over glossy wood only to have the new coat peel or blister? You can avoid that by properly prepping smooth gloss surfaces with bonding primer steps that guarantee adhesion and a uniform look.
Remember proper color mixing for final coats and keep paint storage stable so primer performance isn’t compromised. Follow these actions:
- Scuff with fine sandpaper, clean residue with tack cloth.
- Apply a compatible bonding primer in thin, even coats; allow recommended dry time.
- Lightly sand between coats, wipe, then proceed with your latex paint finish.
Choosing The Right Primer
Which primer you pick makes all the difference when you’re covering glossy or slick wood. Bonding primers are formulated to grab onto smooth surfaces and create a stable base for latex paint.
You’ll choose a high-adhesion primer designed for nonporous substrates, ensuring topcoat durability and minimizing sanding. Consider primers labeled for plastic, laminate, or previously painted gloss.
Check VOC levels and environmental impact to balance performance with safety. If color mixing is needed, tint the primer lightly to improve coverage and reduce coats.
Apply per instructions, allow proper cure, and test a small area before committing to the full project.
Spot-Priming Vs Full Priming: When to Do Each
When your wood has only a few small blemishes or bare patches, you’ll save time and materials by spot-priming those areas instead of priming the whole surface. Use spot-priming for minor repairs and full priming for new or heavily stained wood.
Good priming techniques hinge on proper surface preparation: clean, sand, and remove loose finish first.
Choose spot-priming when damage is isolated; choose full priming when you need uniform adhesion or stain blocking.
Consider:
- Spot-priming for small gouges, knots, or nail pops.
- Full priming for raw wood, water stains, or color changes.
- Test a small area before proceeding.
Best Latex Sheens for Trim and Furniture
When choosing a latex sheen for trim or furniture, you’ll usually pick between satin and semi-gloss based on the look and how much wear it must take.
Satin gives a softer, more forgiving finish that’s great for furniture and low-traffic trim.
While semi-gloss stands up better to scuffs and cleaning on high-traffic trim.
Think about where the piece lives and how often you’ll wipe it down to decide which sheen will last.
Satin Vs. Semi-Gloss
Curious which sheen will give your trim and furniture the best look and durability? You’ll pick satin for subtle warmth and semi-gloss for sharper highlights. Consider color mixing to match trim tones and practice brush techniques to avoid streaks.
- Satin: hides imperfections, soft luster, forgiving with light scuffs.
- Semi-gloss: shows details, easy to clean, emphasizes trim lines.
- Use primer and thin coats: improves adhesion, reduces drips, smooths finish.
You’ll choose based on aesthetic and cleaning needs: satin for understated elegance, semi-gloss when you want crisp definition and easier maintenance.
Durability For Furniture
You’ve weighed satin vs. semi-gloss for trim; now think about how those sheens hold up on furniture that gets daily use. You’ll want semi-gloss or high-gloss for surfaces that need frequent wiping—they resist scuffs and clean easier.
Satin hides minor imperfections and feels softer under your hand, but it’ll show wear sooner in high-traffic spots. Consider topcoats for added abrasion resistance and test color mixing first to ensure consistency under layers.
Also weigh environmental impact: choose low-VOC latex formulas to limit fumes without sacrificing durability. Regular maintenance extends finish life and keeps pieces looking newer.
How Paint Sheen Affects Durability and Look
Although sheen might seem like a purely aesthetic choice, it directly influences both how durable the paint will be and how your wood surfaces will look over time. You’ll notice sheen variation changes light reflection and hides or highlights imperfections in grain and surface texture. Pick higher sheen for durability where cleaning and scuffs matter, lower sheen to conceal flaws.
Sheen affects durability and appearance—choose higher sheen for washability and scuff resistance, lower sheen to mask flaws.
- Low sheen: hides texture, less washable.
- Satin/eggshell: balances durability and concealment.
- High gloss: maximizes washability, reveals every imperfection.
Match sheen to use and finish prep so your wood stays attractive and stands up to wear.
Water-Based Vs Acrylic Latex: Differences
Sheen helps you choose the right finish, but film chemistry determines how paint behaves long-term. When picking a latex for wood, you’ll mostly face two options: water-based and acrylic latex.
Water-based latex is usually cheaper, has faster drying time, and cleans up with soap and water. It can yellow less and offer simpler color mixing for interior trims.
Acrylic latex contains more acrylic resins, so it bonds better to exterior wood, resists moisture and UV, and maintains color longer.
You’ll pick water-based for quick indoor jobs and acrylic for tougher surfaces that need durability and long-term color retention.
When to Choose Alkyd (Oil-Modified) Instead of Latex
When you need tougher adhesion, smoother leveling, or a durable gloss that withstands handling, choose an alkyd (oil-modified) instead of latex. You’ll prefer alkyd when working on trim, high-traffic furniture, or antique restorations where paint texture and flow matter.
Consider these situations:
- You need superior sanding and finish smoothing for flawless paint texture.
- You’re matching finishes and rely on subtle color mixing without sheen shift.
- You require durable, solvent-resistant surfaces that handle frequent cleaning.
Alkyd cures harder and levels better than latex, so choose it when longevity, refinishing, and a polished look outweigh quick dry and easy cleanup.
How to Test If Latex Will Bond to Your Finish
If you’re unsure whether latex will stick to an existing finish, start with a few simple tests that reveal surface compatibility before you paint.
Clean a small area, rub with denatured alcohol and a rag; if finish softens or color lifts, latex may not bond well.
Do a tape test: press painter’s tape, pull sharply—adhesion failure warns you.
Scuff varnish lightly with fine sandpaper, then apply a test patch of latex.
Wait 24–48 hours and inspect for lifting or cracking.
Note: old color mixing issues or poor paint storage can affect test samples, so use fresh, well-stored paint.
Strip Old Paint or Paint Over It With Latex?
If the old paint is peeling, chalking, or has multiple flaky layers, you’ll need to strip down to a sound surface before applying latex.
If the existing finish is solid, well-adhered, and clean, you can often scuff, prime, and paint over it with latex.
Consider lead-paint risks and the condition of the substrate when deciding which route to take.
When To Strip First
Because old paint can hide problems that ruin a new coat, you should strip before repainting when the existing finish is peeling, chalking, or poorly adhered; otherwise you can often paint over sound latex. You’ll preserve paint durability and avoid trapped moisture or flaking layers.
Consider these triggers:
- Multiple layers or lead concerns that compromise adhesion.
- Visible rot, deep gouges, or texture that prevents smooth color mixing and even coverage.
- Severe blistering, bubbling, or persistent solvent-softened spots indicating underlying failure.
Strip when any item applies; if none do, clean and prime instead to save time and maintain a durable finish.
Painting Over Old
How do you decide whether to strip old paint or just roll latex over it? Inspect adhesion: if paint flakes or bubbles, strip to bare wood or use a chemical stripper.
If it’s sound, clean, sand glossy spots, and prime. Consider color blending when covering a dark or vivid shade; a tinted primer helps reduce coats.
Match substrate texture — smooth sanding before latex, or preserve texture applications if you want depth.
Remove lead-based paint safely. Test a small area to confirm adhesion and appearance.
Ultimately, strip for severe damage or contaminants; paint over for stable, well-prepared surfaces.
Block Stains: Pick the Right Stain-Blocking Primer
When stains like tannin bleed-through, water marks, or smoke discoloration threaten your finish, pick a primer labeled for stain-blocking so you won’t see the blemishes through the topcoat. You’ll choose between oil-based, shellac, or high-hide latex primers; each seals differently and affects color mixing and environmental impact. Consider:
- Shellac: fastest stain control, strong odor, best for tough tannins.
- Oil-based: durable, good seal, longer cure and solvent concerns.
- High-hide latex: lower VOCs, easier cleanup, improving stain resistance.
Test on scrap wood, follow manufacturer dry times, and sand lightly before latex topcoats.
Tinting and Mixing Latex for Wood Projects
If you want a custom look for your wood project, tinting latex paint lets you match color and control opacity without extra coats. You’ll tint at the store or mix small batches at home using manufacturer-compatible colorants; don’t add oil-based tints.
Test samples on scrap wood to see true tone and drying shifts. For consistent color mixing, measure by volume and stir thoroughly between additions.
Consider finish options—matte hides flaws, satin adds durability, gloss emphasizes grain.
After tinting, strain and store labeled containers for touch-ups. Keep proportions if you’ll recreate the same shade later.
Apply Latex: Brush Vs Roller Vs Sprayer
Now that you’ve got the color and tint sorted, it’s time to pick the application method that suits your project and skill level. You’ll choose based on surface, finish, and speed; remember earlier notes on color mixing and follow paint storage guidance for consistency.
- Brush: precise for edges and small details, good control on trim and carved wood.
- Roller: fast for flat panels and doors, minimizes strokes but needs nap selection for texture.
- Sprayer: fastest and smoothest for large pieces, requires masking and experience to avoid overspray.
Match tool to job, clean thoroughly, and store leftover paint properly for touch-ups.
How to Avoid Brush Marks and Lap Lines
Although you’ll want to move quickly to keep a wet edge, slow, deliberate strokes and the right technique prevent brush marks and lap lines on wood.
Start with a high-quality synthetic brush and thin paint slightly if manufacturer allows; proper color mixing guarantees consistent sheen and opacity.
Load the brush evenly, remove excess, and use long, even strokes with the grain. Overlap each pass lightly while the paint stays wet to blend edges.
For corners and trim, switch to smaller brushes and employ careful Brush techniques: tip-and-pull for edges, feathering to smooth progressions.
Avoid reworking tacky paint.
How Many Coats Does a Wood Project Need?
How many coats your wood project needs depends on the surface, paint quality, and the look you want. Typically, one coat can seal and color well on primed or light-use pieces, but most projects benefit from two coats for even coverage and durability.
You’ll judge by soak-in, color mixing results, and desired sheen. Consider finish, traffic, and tool selection to apply evenly.
Quick checklist:
- One coat: primed, low-traffic, or stain-blocking primer used.
- Two coats: standard for most furniture and trim for durability.
- Three coats: high-wear or deep color correction needs.
Sanding Between Latex Coats on Wood
After you’ve decided on the number of coats, you’ll want to sand between latex layers to improve adhesion and smooth out brush marks or dust nibs. Use 220–320 grit for light scuffing—don’t strip the previous coat.
Wipe with a tack cloth to remove dust so the next coat lays flat and avoids trapped particles. If you’re doing color mixing, test scuffed samples to confirm uniform coverage before committing.
Keep sanding tools clean and store leftover paint properly; good paint storage prevents skinning that could clog sandpaper. Gentle sanding speeds a professional finish without compromising the underlying film.
Drying and Recoat Times for Latex on Wood
Wondering how long you need to wait between coats of latex on wood? You’ll typically wait 2–4 hours for touch-dry and 24 hours before heavy handling, but temperature, humidity, and finish affect times. Plan recoat intervals to avoid color mixing if you’re blending shades or touching up.
Wait 2–4 hours to touch-dry and about 24 hours before heavy handling; adjust for temperature, humidity, and finish.
Consider environmental impact: faster drying reduces dust attraction and potential runoff, but poor ventilation traps VOCs.
- Warm, dry conditions: shorter wait, quicker recoat.
- Cool or humid conditions: extend wait, prevent tackiness.
- Thick or glossy coats: longer wait to ensure proper adhesion and smooth results.
Curing Time and When Paint Reaches Full Hardness
Because latex paint continues to chemically cure long after it feels dry, you should expect full hardness to take days to weeks depending on conditions and film thickness. You’ll notice surface dry times vs. cure progress: humidity, temperature, ventilation, and film thickness matter. Don’t confuse tack-free with cured. If you’re concerned about color mixing or adding drying accelerators, test small areas first; additives can alter sheen and durability. Below is a quick reference:
| Factor | Typical effect |
|---|---|
| Temperature | Faster cure in warmth |
| Humidity | Slows cure |
| Film thickness | Thicker = longer cure |
| Additives | Can speed cure but may change finish |
Protecting Painted Wood From Scratches and Dents
Once your latex paint has cured, you’ll want to add a protective topcoat to resist scratches and make cleaning easier.
Choose a clear polyurethane or water-based varnish compatible with latex to boost abrasion and impact resistance.
Also prevent dents by padding feet, avoiding slams, and treating high-traffic surfaces with extra care.
Use Protective Topcoats
A clear topcoat is your best defense against everyday scratches and dents on painted wood, and applying one is simple and fast. You’ll protect the finish and extend durability by choosing the right product and technique. Consider eco-friendly options, VOC considerations, and surface prep before you start.
Apply thin, even coats with a synthetic brush or roller; sand lightly between coats for adhesion. Let dry fully.
- Pick water-based polyurethane for low odor and easy cleanup.
- Use a wipe-on poly for furniture or tight spots.
- Test in an inconspicuous area first.
Prevent Impact Damage
If you want painted wood to stay looking fresh, focus on preventing knocks and drops before they happen: add bumpers and felt pads to furniture legs, use corner guards on high-traffic edges, and anchor heavy items so they can’t tip.
Inspect vulnerable surfaces and reinforce with clear edge protectors or thin metal strips to deflect impact. Choose paints and topcoats with good heat resistance where appliances or sunlight may warm surfaces.
Opt for eco friendly options when selecting pads, guards, and finishes to reduce VOCs. Regularly tighten hardware and teach household members to lift, not drag, to minimize scratches and dents.
Repairing Chips and Nicks in Latex-Painted Wood
When you spot chips or nicks in latex-painted wood, act quickly to prevent moisture and wear from worsening the damage. Start by cleaning the area, sanding edges smooth, and removing loose paint.
Choose matching latex touch-up paint, considering color mixing for a seamless blend and preserving finish durability.
- Fill deep gouges with wood filler, sand level, prime exposed wood.
- Apply thin coats of touch-up paint, feathering edges to hide transitions.
- Once dry, assess sheen match; add a compatible clear coat if needed.
You’ll restore appearance and protect the wood without overworking the surface.
Cleaning and Maintaining Latex-Painted Wood
Although latex paint’s durable finish makes upkeep simple, you should clean and maintain painted wood regularly to keep it looking fresh and protect the substrate. Wipe surfaces with a soft cloth and mild soap solution; avoid abrasive scrubbers that damage the film.
For stubborn grime, use a nonyellowing cleaner and rinse thoroughly. When touching up, match colors carefully to prevent visible color blending lines—feather edges and blend while paint is wet.
Guarantee good ventilation to disperse paint fumes during spot repairs and repainting. Inspect periodically for chips, mildew, or moisture damage and address issues promptly to extend the finish’s life.
When to Add a Clear Topcoat Over Latex
Because latex paints can vary in sheen and durability, you’ll want to add a clear topcoat whenever you need extra protection, enhanced sheen control, or easier cleaning — for high-traffic surfaces, outdoor wood, or cabinets and trim that get frequent handling.
A topcoat boosts latex durability and evens paint texture, so you preserve finish and resist scuffs.
Consider these situations:
- Floors, stair rails, and tabletops that see daily wear.
- Exterior trim or furniture exposed to weather and moisture.
- Kitchen and bathroom cabinets where cleaning and humidity are constant.
Apply after paint cures; choose compatible clear finishes for best results.
Choosing Varnish, Polyurethane, or Polycrylic
If you want durable protection and a specific look for painted wood, pick your clear finish based on use and environment.
You’ll choose varnish for UV resistance and a warm amber tone, good outdoors or on oak; it affects color blending with underlying paints.
Use oil or water-based polyurethane for hardwearing floors and trim; water-based clears keep color truer and dry faster.
Choose polycrylic for light-colored indoor projects—it’s low-odor and resists yellowing.
Consider eco friendliness: water-based polyurethanes and polycrylics emit fewer VOCs than traditional varnish.
Always test a small area to confirm appearance and adhesion.
Refreshing Worn Latex Paint Without Full Repaint
After picking the right clear finish, you may find the underlying latex paint has worn but doesn’t need a full repaint — and you can refresh it quickly. Assess the surface, clean grime, and sand glossy spots lightly. Match imperfections with targeted fixes rather than stripping everything. Consider Color matching samples to blend touch-ups seamlessly and choose Eco friendly options for primers or sealers.
- Clean and sand blemishes.
- Feather in touch-up paint after Color matching.
- Seal with an Eco friendly clear coat.
Work in small sections, let cures set, and inspect in varied light for uniformity.
Common Mistakes People Make With Latex on Wood
When you skip proper surface prep or use the wrong primer, latex on wood often fails prematurely—peeling, blushes, and poor adhesion are common results. You often rush painting without sanding, cleaning, or allowing moisture to escape, and that undermines finish longevity.
Skip prep and wrong primer—latex on wood peels, blisters, and loses adhesion; sand, clean, and let moisture escape.
You ignore manufacturer instructions, over-thin paint, or apply coats too thickly. You mix colors without testing samples, assuming color mixing is foolproof; that leads to unexpected hues.
You pick finishes unsuited for wear or exterior exposure. You overlook eco-friendly options and compatible sealers, then wonder why durability and appearance suffer.
Plan, test, and follow guidelines.
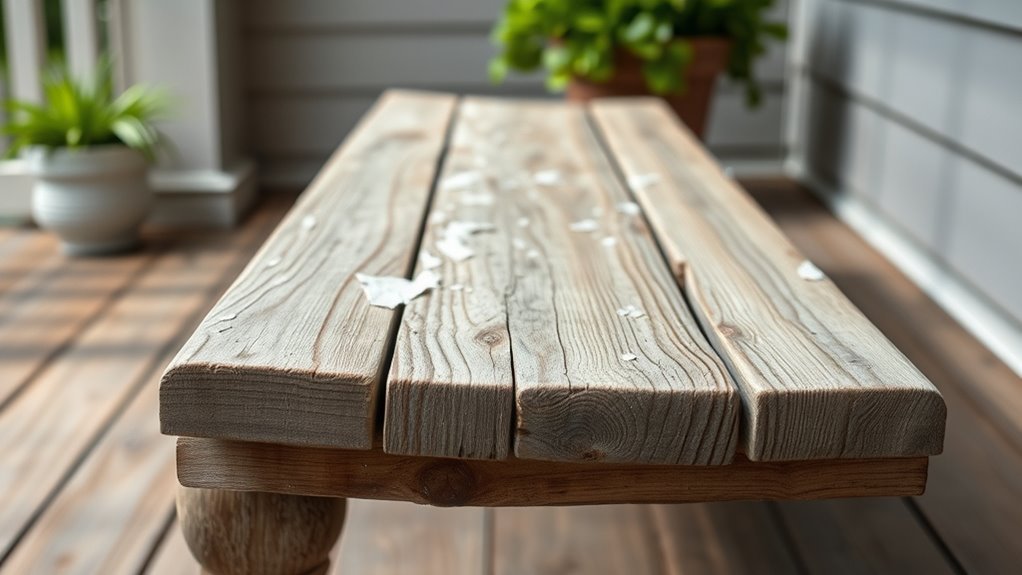
Troubleshooting Adhesion, Peeling, and Cracking
Because paint problems usually show obvious signs, you can often diagnose adhesion, peeling, or cracking by inspecting the surface and tracing back to prep and application steps. Check for contamination, old glossy finish, or incompatible primers. Consider color mixing mistakes that dilute binders and reduce paint durability.
Fix by removing loose paint, sanding to feather edges, and cleaning before repainting. Follow this checklist:
- Remove failed areas, sand, and clean thoroughly.
- Apply appropriate primer and allow proper cure.
- Recoat with correctly mixed latex, maintain thin even layers for peak durability and adhesion.
How Temperature and Weather Affect Latex Application
You’ll notice that temperature directly controls latex curing time—too cold and paint stays soft, too hot and it can skin over before it bonds.
Humidity also affects drying: high moisture slows solvent evaporation and can cause tackiness or clouding, while very low humidity speeds drying but can reduce flow.
Pay attention to both factors and adjust your schedule or product choice to get a durable finish.
Curing Time And Temperature
Wondering how long latex paint really takes to cure? You’ll find that temperature controls curing speed and final hardness. Warmer conditions speed cure; cold slows it and can leave a soft film. Consider color mixing effects—dark colors absorb heat and cure slightly faster. Also mind paint storage: store at moderate temps to preserve solvents and additives.
- Aim for 50–70°F for steady curing.
- Avoid applying below 45°F; curing may stall.
- High daytime temps speed cure but watch rapid skinning.
Plan projects around steady temperatures to ensure durable, even finishes on wood.
Humidity’s Impact On Drying
How does humidity change the way latex paint dries on wood? You’ll notice high humidity slows evaporation, so films stay tacky longer and attract dust.
Lower humidity speeds drying but can cause brush marks or poor leveling. Avoid painting when humidity exceeds 85% or drops under 30% for best results.
Control conditions to maintain color mixing accuracy—humidity can shift pigments visually while wet. Proper drying improves paint durability; long tack times can soften the film and invite adhesion problems.
Plan coats for stable, moderate humidity and allow extra cure time after damp spells to ensure a tough finish.
Safety and Ventilation When Painting Wood With Latex
Because latex paint releases volatile compounds and fine particles as it dries, you should prioritize ventilation and basic protective gear when painting wood. Open windows, run fans, and work outdoors when possible to dilute fumes. Wear a respirator or mask rated for particles and VOCs, gloves, and eye protection. Keep kids and pets away.
Prioritize ventilation and PPE when painting wood—open windows, run fans, and keep kids and pets away.
- Choose low-VOC latex and dry brushes properly to limit airborne particles.
- Use proper brush techniques to reduce splatter and overspray, improving color matching and finish.
- Clean up with soap and water; ventilate until odors vanish.
Cost Comparison: Latex Vs Oil-Based for Wood
When you shop for paint, you’ll notice latex usually costs less per can than oil-based options.
Consider not just the upfront purchase price but also long-term costs like maintenance, touch-ups, and how often you’ll need to repaint.
Those ongoing expenses can make a pricier oil-based paint more or less economical depending on the job.
Upfront Purchase Price
Although both latex and oil-based paints will cover your wood, latex usually costs less up front, so you’ll spend less at the store for the same square footage. You can still achieve good color matching and minimize texture contrast with latex, so upfront savings don’t force compromises.
Consider these purchase factors:
- Gallon price differences: latex lower per gallon, oil higher for premium durability.
- Primer needs: oil sometimes needs fewer coats, affecting initial spend.
- Specialty finishes: satin or gloss choices can alter cost regardless of base.
Decide based on project size and finish expectations without weighing long-term maintenance here.
Long-Term Cost Impact
If you plan to keep your woodwork looking good for years, compare not just the sticker price but how often you’ll repaint and what repairs each paint type will demand.
You’ll find latex often needs touch-ups sooner on high-wear surfaces but resists yellowing and cracks better than oil, reducing major refinishes.
Oil-based coatings last longer between full repaints but can require more prep and stripping, raising labor costs.
Factor disposal and environmental impact—oil requires special handling, while latex supports easier paint recycling programs.
Tally materials, labor frequency, and disposal fees to see which truly saves you money.
Time & Effort: Latex Vs Alternative Finishes
Because latex dries fast and cleans up with soap and water, you’ll spend less time on setup and cleanup compared with oil-based or shellac finishes.
Because latex dries quickly and cleans up with soap and water, setup and cleanup take far less time.
However, you may need more coats and light sanding between them to get a perfectly smooth result. You’ll find latex easier for color mixing and quicker for texture application than solvents.
Compare effort:
- Prep: light sanding and dust removal for adhesion.
- Coats: several thin layers improve durability and smoothness.
- Cleanup: soap, water, and reusable brushes save time.
You’ll trade some additional coats and sanding for faster turnaround and easier maintenance.
Best Primers and Latex Paints for Wood (Products)
When you’re picking primers and latex paints for wood, focus on adhesion, durability, and finish level so you get the right product for the job. Choose a high-quality acrylic latex primer for raw wood and a stain-blocking primer for knots.
For topcoats, pick 100% acrylic latex for exterior resilience or a mid-grade interior latex with a satin or semi-gloss finish for trim. Consider paint labels for low-VOC options to diminish environmental impact.
If you plan color mixing, buy compatible bases and test samples. Always match primer and paint types to guarantee proper adhesion and lasting results.
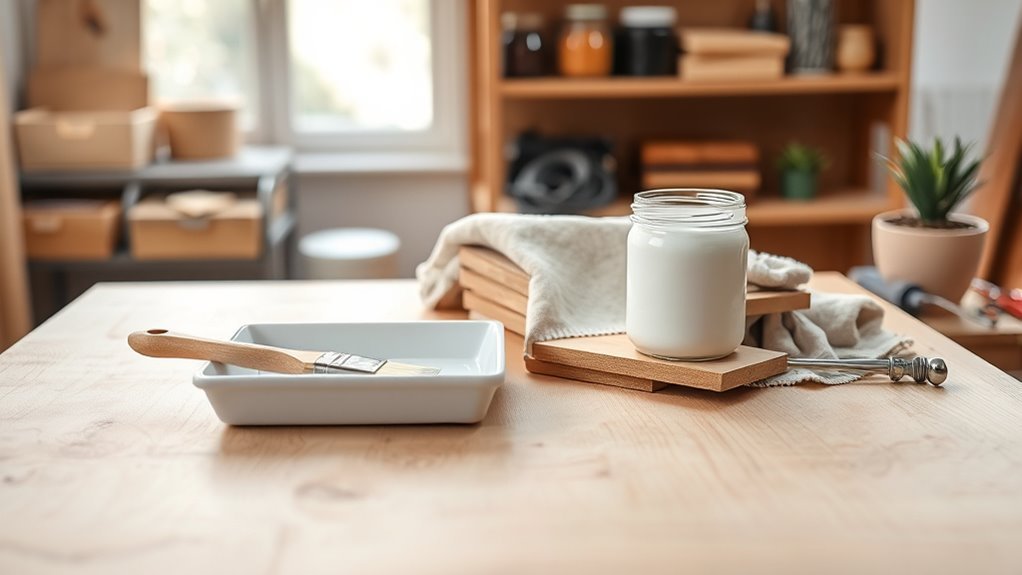
Tools and Supplies Checklist for Latex on Wood
Before you start painting, gather the right tools and supplies so your latex finish on wood goes on smoothly and lasts. You’ll need sandpaper and sanding blocks to prep surfaces, tack cloths to remove dust, and a quality primer to boost paint durability.
Pick brushes and rollers suited to latex and wood grain, plus a tray, stir sticks, and drop cloths. For color matching, bring paint chips or use a sample pot to test on scrap wood.
Keep gloves, painter’s tape, and a small putty knife for repairs. Confirm ventilation and cleanup supplies before you begin.
Decision Checklist: Should You Use Latex Paint for This Project?
If you’re weighing latex for your wood project, check the surface type, expected wear, and exposure to moisture or heat to decide if it’s the right choice. You should assess adhesion, finish durability, sanding needs, and whether easy Color mixing matters for touch-ups. Consider drying time requirements and whether multiple coats fit your schedule. For high-traffic or exterior items, oil-based or a specialized acrylic may outperform latex. Use the table to map priorities quickly.
| Surface Type | Expected Wear | Best Choice |
|---|---|---|
| Interior trim | Low-moderate | Latex |
| Furniture | High | Acrylic/oil |
| Exterior | Variable | Specialized acrylic |
Frequently Asked Questions
Can Latex Paint Be Used on Pressure-Treated Outdoor Wood Decks?
Yes — you can use latex paint on pressure treated wood for outdoor painting, but you’ll need to let the wood fully dry, apply a suitable primer, and use exterior-grade latex for proper adhesion and weather resistance.
Will Latex Paint Hide Wood Grain Effectively on Cabinets?
Yes — you can hide wood grain on cabinets if you pick high paint opacity and apply multiple coats; you’ll sand, prime, and use a high-build primer for smoother results, though some deep grain may still show through.
How Long Should Painted Wood Be Left Unused Before Regular Cleaning?
Although paint looks dry, you shouldn’t rush: after proper wood surface preparation and following recommended drying time, wait at least 7–14 days before regular cleaning so coatings fully cure and you don’t damage the finish.
Can Latex-Painted Wood Be Refinished With Varnish Later?
Yes — you can refinish latex-painted wood with varnish if you sand, clean, and degloss for proper wood preparation; that improves adhesion and maintains paint durability, so the varnish won’t peel and will protect the surface longer.
Is Latex Safe for Children’s Wooden Toys and High-Contact Items?
Yes — you can use latex for kids’ wooden toys if you choose labeled non toxic finishes; you’ll guarantee child safety by sanding, sealing, and curing fully, and you’ll avoid lead or low-quality paints for frequent contact.
Conclusion
Yes — latex works great on many wood projects, but only if you prep and prime properly. Don’t worry about durability: use a quality latex primer, sand between coats, and add a topcoat where needed, and you’ll get long-lasting results without the fumes and cleanup hassle of oil. For high-wear or exterior jobs consider alternative finishes, but for interior trim, furniture, and cabinets, latex is often the smarter, easier choice.