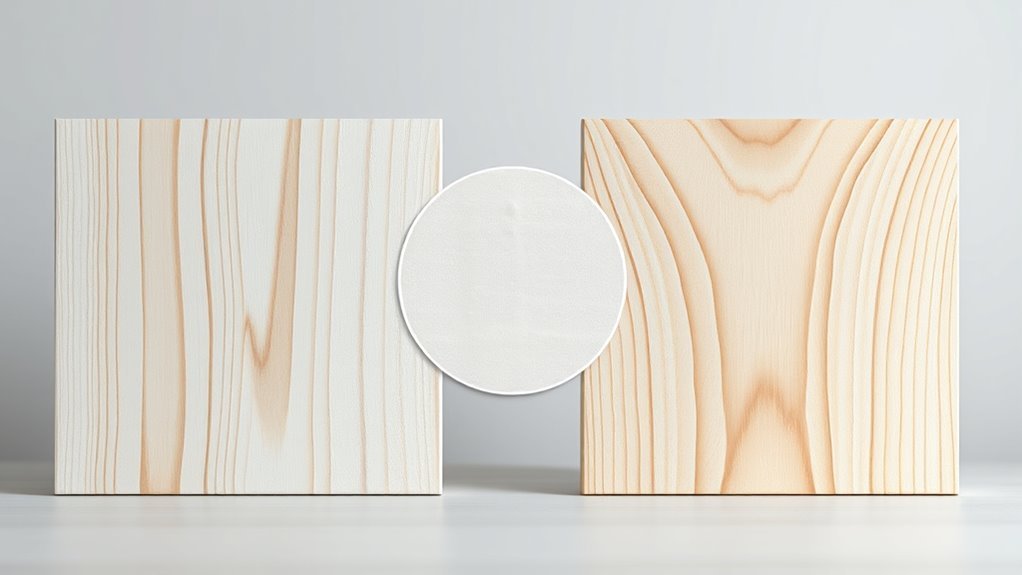
Is Latex Paint the Same as Acrylic Paint?
They’re similar but not identical: when you hear “latex” it’s a broad, water‑based category that often uses vinyl‑acrylic copolymers, while “acrylic” means a 100% acrylic binder that gives better flexibility, weather and UV resistance, and longer life. For most indoor jobs either will work, but for exterior trim or high‑movement surfaces you’ll want acrylic. Check labels and tech sheets for binder type and VOCs, and keep going to get practical pick-and-prep tips.
Quick Decision Guide: Pick Latex or Acrylic

Wondering which to choose for your project? You’ll weigh surface, durability, and drying time. Consider acrylic for flexible, UV-resistant finishes on exterior wood or masonry; choose latex for easy cleanup and interior walls.
Think about the historical evolution of both: acrylic emulsions improved weather resistance, while latex formulations prioritized user-friendly application.
Consider their origins: acrylics gained weatherproofing, while latex evolved for easier, more user-friendly application.
Check brand comparisons for coverage, VOC levels, and warranty — top brands often offer both lines with distinct additives.
Match paint to substrate, budget, and exposure: pick acrylic where longevity matters, latex where convenience and cost matter.
Test samples to confirm sheen and adhesion before committing.
What People Mean by “Latex” Paint
When people say “latex” paint, they usually mean water-based paints that use synthetic polymers—most commonly styrene-butadiene or acrylic co-polymer emulsions—as the binder. You’re not dealing with natural latex from rubber trees.
You should understand that “latex” became a trade term through historical evolution as waterborne formulations replaced oil-based ones, and manufacturers kept the familiar name.
When choosing paint, consider that industry standards govern labeling, performance tests, and VOC limits, so “latex” covers a range of water-based binders meeting those standards.
Check product data sheets to confirm composition and suitability for your project.
What “Acrylic” Paint Actually Is
When you look at acrylic paint, you’re really looking at pigments suspended in a water-based polymer emulsion.
As the water evaporates, that polymer binder coalesces into a durable film that holds the color in place.
That binder is what gives acrylics their flexibility and strong adhesion compared with other coatings.
Water-Based Polymer Binder
Although it looks like a simple tube of paint, acrylic paint is basically pigment suspended in a water-based polymer binder that forms the film when the water evaporates.
You’ll notice that binder controls adhesion, flexibility, and durability, so you can apply layers without cracking. It influences drying speed, letting you choose slower mediums for extended color blending or fast-drying sprays for quick layers.
The binder also affects gloss and how texture effects hold—thicker binders preserve impasto, thinner ones level out.
Understanding the binder helps you select acrylics for indoor walls, canvas work, or mixed-media projects with predictable performance.
Pigments Suspended In Emulsion
How exactly do pigments and emulsion work together to make acrylic paint so versatile? You’re looking at tiny solid pigments evenly dispersed in a water-based polymer emulsion. That dispersion guarantees pigment stability so colors don’t settle, fade, or separate.
The emulsion consistency controls flow, drying rate, and film formation, letting you thin, layer, or build texture without losing adhesion. When water evaporates, the polymer coalesces, locking pigments into a durable, flexible film.
Binder Types: The Core Chemical Difference
Because the binder is the chemical heart of any paint, understanding it tells you why latex and acrylic behave differently.
You’ll see that binder chemistry distinguishes these products: acrylic binders are pure acrylic polymers, while “latex” often means vinyl-acrylic or other emulsion copolymers.
Those polymer types set flexibility, UV resistance, and water tolerance.
Paint formulations pair pigments and additives with chosen binders to meet performance and cost targets, so two paints labeled similarly can still differ.
When you compare cans, check the binder type on technical data sheets—it’s the clearest indicator of long-term durability and finish characteristics.
How Binders Affect Adhesion to Surfaces
When you apply paint, the binder is what actually grabs the surface—forming a continuous film that wets, penetrates, and bonds to the substrate. You’ll notice binder chemistry controls how well films spread, resist moisture during cure, and match substrate porosity, directly affecting surface adhesion.
Choose formulations that suit wood, drywall, or metal to get proper wetting and interfacial strength.
- Higher polarity binders improve wetting on polar substrates.
- Flexible binders accommodate movement without cracking.
- Fillers and primers alter surface energy for better bonding.
- Contaminants and poor prep override even good binder chemistry.
Durability and Wear: Latex vs Acrylic
Although both latex and acrylic paints look similar on the surface, their long-term wear differs because of binder chemistry and film properties. Acrylic binders generally form tougher, more elastic films that resist chalking, UV degradation, and frequent abrasion better than basic latex formulations.
You’ll notice durability differences when surfaces flex or see heavy traffic: acrylic’s superior chemical composition gives better cohesion and longevity. Proper application techniques—correct thinning, adequate drying time, and recommended recoats—maximize either paint’s life, but acrylic tolerates wider conditions and retains color longer.
Choose based on expected wear, substrate movement, and maintenance frequency.
Acrylic vs Latex: Moisture Resistance for Exteriors
When you’re choosing exterior paint, moisture resistance should be top of mind because water exposure and trapped vapor affect longevity.
Compare how acrylic and latex block water, allow vapor to pass, and hold up in consistently wet climates.
I’ll point out which performs better for siding, trim, and humid environments so you can pick the right one.
Water Resistance Comparison
How well do acrylic and latex paints stand up to damp conditions on exterior surfaces? You’ll find acrylics generally resist water better, holding color and film integrity after exposure. Latex is cost-effective and flexible but can absorb moisture faster.
Consider color mixing and application techniques to improve performance. Quick tips:
- Use acrylic for higher water resistance on siding and trim.
- Apply primer and proper technique to seal porous surfaces.
- Recoat windowsills sooner with latex in humid zones.
- Choose formulations labeled “exterior” and follow dry-time recommendations.
You’ll reduce water problems by selecting the right base and applying it correctly.
Breathability And Vapor Transmission
Beyond water resistance, you’ll also want to think about breathability and vapor transmission—how well a paint lets moisture vapor pass through the wall assembly.
You’ll notice breathability differences between acrylic and latex formulas: 100% acrylic often allows higher vapor transmission rates, letting trapped moisture escape and reducing blister risk. Traditional latex blends can be less permeable, so they may trap more vapor unless formulated for breathability.
When choosing for exteriors, check technical data sheets for explicit vapor transmission rates and vapor permeance (perms). That way you’ll match paint choice to substrate and climate, avoiding moisture problems later.
Durability In Wet Climates
Curious which paint will hold up best on a rainy coast or humid backyard? You’ll want acrylic for superior water penetration resistance and better surface flexibility, but quality latex still performs when applied correctly. Consider these practical points:
- Acrylic resists peeling and blocks moisture better on porous siding.
- Latex can be more breathable, letting trapped vapor escape.
- Both need proper primers and maintenance to prevent water penetration.
- Surface flexibility matters on wood and stucco that expand in humidity.
You’ll reduce failures by choosing high-quality acrylic for constant wet exposure, or premium latex with correct prep for moderate damp climates.
Finish and Sheen: How Formulas Change Look
When you pick a paint, the formula determines more than color — it controls finish and sheen, which change how light interacts with the surface and how durable the coating will be.
You’ll notice matte, eggshell, satin, semi-gloss and gloss differ in reflectivity and in hiding minor flaws. Formula variations—more binders, different resins, or added flatteners—alter sheen and durability.
Acrylic-based formulas usually retain color and resist yellowing; some latex blends cost less but vary in hardness.
Choose finish sheen to match room use: lower sheen hides imperfections; higher sheen cleans easier and stands up to wear.
Coverage and Hiding Power Compared
When you paint, coverage and opacity determine how many coats you’ll need and how well the surface beneath is concealed. Acrylics usually offer stronger hiding power per coat, while many water-based latex formulas may need extra coats on darker or stained surfaces.
We’ll compare how pigments, binder strength, and pigment volume concentration affect real-world coverage.
Coverage And Opacity
How well a paint hides the surface beneath it makes a big practical difference, so you’ll want to compare the coverage and hiding power of latex versus acrylic before you start a job. You’ll notice differences in opacity with glossy vs. matte sheens, and color mixing can affect perceived depth. Texture variation on the substrate changes how many coats you’ll need.
Consider these practical points:
- Latex often spreads smoothly, covering large areas quickly.
- Acrylic can offer stronger pigment binders per coat.
- Primer use improves hide and reduces coats.
- Dark or vibrant colors typically demand extra layers.
Hiding Power Differences
Curious which paint will actually block the surface beneath it? You’ll find acrylic often has stronger hiding power than standard latex because its binders create denser films, so fewer coats hide stains or dark colors.
That said, modern latex formulas can match acrylic if pigment load and sheen suit your needs. Focus on color consistency across batches and follow recommended application techniques—proper thinning, roller nap, and drying time—to get uniform coverage.
Primer choice matters: a good primer boosts hiding and reduces coats. Test on a small area to judge real-world hiding power before committing to a full job.
Drying Times and Recoat Windows
Want faster results or a fail-safe finish? You’ll notice latex and acrylic differ in drying times and recoat windows, which affects color blending and Painter’s techniques. Plan coats to avoid lifting or visible seams.
- Wait the manufacturer’s recommended recoat interval to prevent tacky finishes.
- Touch a hidden edge; if it’s dry but dentable, give more time.
- For smooth blending, work within the wet edge to feather transitions.
- If sanding between coats, ensure full cure for proper adhesion.
Knowing each product’s recoat window helps you schedule work and achieve consistent, professional-looking results.
How Temperature and Humidity Affect Performance
When you paint, temperature directly changes how fast latex and acrylic dry — cold slows the chemical curing and heat speeds it up.
High humidity can leave a tacky finish or cause blushing, while very low humidity may lead to cracking or poor flow.
You’ll need to adjust drying times and application techniques based on the conditions to get a consistent finish.
Temperature Effects On Drying
How does temperature—and the humidity that usually accompanies it—alter how latex and acrylic paints dry and perform? You’ll notice temperature sensitivity impacts drying speed and film formation: too cold slows curing, too hot accelerates surface skinning. Manage conditions to avoid defects.
- Cold temperatures: extend drying time, risk poor adhesion.
- Hot temperatures: speed drying, risk brush marks and inadequate coalescence.
- Rapid temperature swings: cause cracking or uneven film.
- Suitable range: follow manufacturer recommendations for best curing and hardness.
You should control ambient temperature during application and curing to ensure proper performance and longevity.
Humidity’s Impact On Finish
Because moisture in the air changes how waterborne paints lose solvent and form film, humidity has a direct, measurable effect on the finish quality of both latex and acrylic coatings. You’ll notice high humidity slows drying, increasing tack time and risking runs, sagging, or trapped dirt.
Low humidity speeds drying, which can cause poor coalescence and a brittle, chalky surface. Humidity effects also interact with surface absorption—porous substrates soak up water differently, altering adhesion and sheen.
To get a uniform finish, control ventilation, avoid painting at extremes, and test on the substrate so you can adjust thinning, timing, or application technique accordingly.
Surface Prep and Primer Recommendations
Before you open a can, make sure the surface is clean, dry, and free of loose paint or grease so your new coat will adhere properly. You’ll sand glossy spots, fill holes, and wipe dust before priming.
Choose primer by substrate and desired finish; acrylic primers work well under latex and for color blending, while oil-based primers suit stained wood. Match primer to topcoat for adhesion and durability.
Use proper brush techniques to lay smooth primer coats and avoid lap marks.
- Sand and clean thoroughly
- Select primer by substrate
- Test color blending with a sample
- Apply even brush strokes
Cleanup: Water vs Solvents and Tools
When you finish a job with latex or acrylic, you’ll usually wash brushes and rollers with plain water while the paint’s still wet.
For hardened paint or oil-based tools, you’ll need solvents like mineral spirits or paint thinner to get them clean.
Remember that once paint dries it leaves more stubborn residue, so clean tools promptly to avoid extra scraping or replacement.
Water-Based Cleanup
Cleanup is one of the quickest ways you’ll notice the difference between latex and acrylic: both are water-based so you can wipe brushes and rollers with soap and water, but some acrylic formulations and high-gloss finishes resist simple rinsing and benefit from stronger detergents or specialty brush cleaners.
You’ll still follow basic steps to protect tools and preserve color blending and finish textures. Keep this quick checklist in mind:
- Rinse excess paint immediately under warm water.
- Use mild dish soap for general cleanup.
- Employ a nylon brush comb for bristles.
- Soak stubborn residue with concentrated cleaner briefly.
Dry and store properly.
Solvent-Required Tools
You’ve already seen how water handles most latex and many acrylic cleanups, but some paints and finishes demand solvents and different tools to get things truly clean. When you tackle dried acrylic additives, oil-based primers, or specialty varnishes, grab mineral spirits or lacquer thinner and use lint-free rags, metal scrapers, and solvent-safe brushes. Keep color mixing containers separate and label them; solvents can linger and contaminate hues. For brush maintenance, flush brushes promptly with appropriate solvent, then condition with soap and water if possible. Always work in ventilated spaces and store solvents in sealed, labeled containers.
| Task | Recommended Tool |
|---|---|
| Heavy residue | Mineral spirits |
| Oil-based cleanup | Lacquer thinner |
| Fine detail | Lint-free rag |
Drying Affects Residue
How long did you let that spill sit? You’ll notice drying residue hardens, changing cleanup choices. Wet latex or acrylic wipes away with water; once cured, solvents or scraping work better. Consider environmental impact when choosing cleaners—don’t pour solvents down drains.
- Act fast: water cleans fresh paint easily.
- Hardened residue: use a scraper or mineral spirits.
- Rinse cautiously: contain runoff to limit environmental impact.
- Tools: soft rags for wet, stainless scrapers for cured spots.
You’ll save time and reduce harm if you plan cleanup quickly and pick appropriate tools for the paint’s drying stage.
Best Uses: Rooms, Trim, Siding, and Crafts
When choosing between latex and acrylic paint for rooms, trim, siding, or crafts, think about durability, finish, and where the surface will live.
Latex (water-based) is great for interior walls and siding because it resists fading and cleans up with water.
While 100% acrylic offers superior adhesion and flexibility for trim and exterior surfaces that expand and contract.
For crafts, either can work depending on the substrate and desired finish.
You’ll pick latex for large indoor walls and easy cleanups, acrylic for craft pieces needing toughness, and acrylic for exterior trim or siding.
Consider color mixing and paint texture when planning.
Touch-Ups, Maintenance, and Lifespan
Because latex and acrylic behave differently over time, your touch-up strategy should match the paint type and the surface, not just the color. You’ll inspect for fading, peeling, or chalking and address underlying causes before repainting.
Achieve good color matching by testing small areas and noting sheen differences; paint texture can reveal mismatch even when hue is right. For maintenance, clean gently and reseal edges.
Expect acrylic to last longer outdoors; interior latex resists yellowing.
- Match sheen and base, not only color.
- Feather edges to blend.
- Keep originals labeled (batch code).
- Recoat within manufacturer windows.
Cost Differences and Value Considerations
Comparing costs, you’ll find acrylic paints typically carry a higher upfront price than standard water-based latex. However, that difference can be offset by longer durability on exteriors and better color retention, so evaluate price per performance rather than just per gallon.
You’ll weigh initial cost against fewer recoats, reduced maintenance, and potential savings over years. Consider how color mixing needs and custom tints affect price when matching shades.
Also factor in labor: some brush techniques work faster with acrylic, lowering application time. Decide based on total cost of ownership—materials, time, and likely lifespan—rather than sticker price alone.
VOCs, Odors, and Environmental Impacts
Beyond price and longevity, you’ll also want to take into account indoor air quality and environmental effects—areas where latex and acrylic paints can differ. You’ll notice VOC emissions vary by formulation; low-VOC and zero-VOC options cut odors and exposure.
Also factor indoor air quality and environmental impact—opt for low- or zero-VOC formulations to reduce odors and exposure
Consider how cleanup, durability, and disposal affect environmental safety. Quick tips to weigh:
- Choose low-VOC or zero-VOC labels for less odor and indoor pollution.
- Ventilate during and after painting to reduce lingering fumes.
- Prefer water-based acrylics for easier, less-toxic cleanup.
- Dispose of leftover paint per local hazardous-waste guidelines to protect ecosystems and waterways.
Labeling Tricks: What the Can Actually Means
When you read a paint can, don’t assume the biggest words tell the whole story; manufacturers often use marketing terms like “latex,” “acrylic,” “interior,” or “premium” that can mask important details about composition, VOC levels, and performance.
You’ll want to check ingredient lists and technical data sheets to verify labeling accuracy rather than trusting marketing. Watch for vague Brand naming that emphasizes benefits over chemistry.
Look for solids content, binder type, and VOC numbers. If a label lacks specifics, search the brand’s website or contact customer service.
That extra step prevents surprises and matches product to your needs.
How to Choose: Project-Based Decision Steps
If you want paint that fits the job, start by matching the surface, location, and expected wear. You’ll then weigh durability, finish, and ease of use. Think about Color mixing needs and which base lets you achieve tints without losing performance. Also consider Application techniques—brush, roller, or sprayer affect sheen choice and prep.
Follow these steps:
- Identify surface (drywall, trim, siding) and exposure (interior, exterior).
- Choose latex or acrylic based on flexibility and adhesion required.
- Match finish for traffic and cleanability.
- Test small patch to confirm color, coverage, and application behavior.
Quick Checklist to Pick the Right Paint
Because you want a quick, reliable way to choose paint, use this compact checklist to match surface, environment, durability, finish, and application method before you buy.
First, identify surface porosity and outdoor exposure; pick acrylic for flexible, weather-resistant needs, latex for interior walls.
Note desired finish—flat to high gloss—and required durability for washability.
Consider application techniques: brush, roller, or sprayer, and confirm product viscosity and drying time.
Check color mixing compatibility with tint bases and how many coats are realistic.
Finally, test a small patch, evaluate adhesion and sheen, then buy the appropriate quantity.
Frequently Asked Questions
Can I Mix Latex and Acrylic Paints Together Safely?
Yes — you can usually mix latex and acrylic paints, but test first; you’ll want to guarantee paint durability and surface adhesion remain strong, and you’ll avoid incompatible additives, uneven finish, or weakened film by doing small trials.
Are Faux-Finish Techniques Affected by Paint Binder Type?
Of course binder type never matters—except it totally does: you’ll see brush techniques and finish textures change with different binders, so pick compatible paints, test samples, and adjust tools and layering to get the faux look you want.
Do Paint Warranties Specify Latex Versus Acrylic Use?
Sometimes they do: you’ll need to read warranties because manufacturers may specify latex or acrylic to guarantee paint durability and warranty validity, and you’ll also want to take into account environmental impact differences before choosing products for coverage.
How Does Paint Color Fading Differ Between Latex and Acrylic?
Like a sunlit garden, you’ll see acrylic petals hold vivid hue longer—its color longevity and fading resistance beat many latex varieties, though premium latex can perform well; you’ll choose based on exposure, pigment quality, and finish.
Can I Spray Latex Paint Through an Airless Sprayer?
Yes — you can spray latex paint through an airless sprayer, but you’ll adjust tip size and pressure. You’ll follow spray techniques for proper atomization, ensuring paint compatibility with the sprayer and thinning if manufacturer recommends.
Conclusion
In short, don’t sweat the jargon: “latex” often playfully stands in for water-based paints, while “acrylic” points to a sturdier synthetic binder. For most rooms, that friendly water-based latex will do; for trim, siding, or anything needing extra resilience, opt for the more composed acrylic. Consider surface, weather, and VOCs, and you’ll make a tasteful choice that keeps your space looking deliberately cared for without fuss.