Is Masking Tape Safe for Painted Walls? What to Know
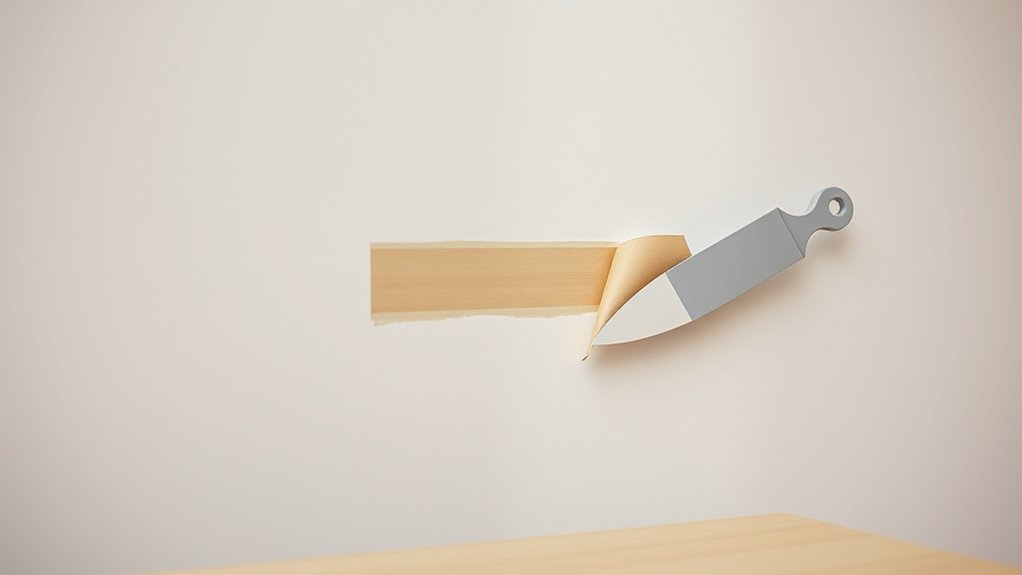
You can usually use masking tape on painted walls if you pick the right tape, test a small area first, and remove it properly. Use painter’s or low‑tack “delicate surface” tape on fresh or glossy paint, press edges firmly, and pull slowly at a 45° angle. Beware oil, chalky, or very new paint—these need longer cure times. Temperature and humidity matter too. Keep going to learn which tapes, timing, and fixes will protect your finish.
Quick Answer: Is Masking Tape Safe for Painted Walls?
If you choose the right tape and remove it correctly, masking tape is generally safe for painted walls; however, low-quality tapes, long dwell times, or delicate finishes can cause peeling or residue. You’ll still want to test a small area, since paint age, finish, and sun exposure matter.
Use painter’s masking for delicate surfaces and press edges firmly to protect decorative accents and crisp lines. On varied wall textures, choose tape designed for rough surfaces to guarantee adhesion without excess tack.
Remove tape slowly at a 45° angle while paint is dry to the touch to reduce damage.
When Tape Is Safe : And When It Isn’t
When you pick the right tape and follow proper timing, masking tape can protect paint and create sharp lines without damage. You’ll be safe when you use low-tack paper tape on fully cured paint, test a small area first, and remove tape slowly at a 45° angle.
Watch for high-adhesion tapes, prolonged exposure, or freshly painted surfaces.
- Use low-tack for decorative masking on cured walls.
- Limit time applied; check edges regularly.
- Test before larger creative applications.
If you follow those steps, you’ll avoid peeling and enjoy clean lines for projects.
How Paint Type (Latex, Oil, Enamel, Chalk) Changes Risk
Picking the right tape and timing matters, but the paint type you’re masking makes a big difference in how safe that tape will be.
If you’re dealing with latex, it’s generally flexible and forgiving; low-tack tape usually lifts cleanly, especially on smooth wall texture.
Oil and enamel finishes bond harder; they resist peeling but can lift or leave adhesive when tape pulls at edges, so use delicate removal angles and shorter dwell times.
Chalk or chalky finishes are fragile—tape can strip pigment or ruin color matching.
Always test a small, inconspicuous area first to confirm compatibility before wider use.
Why Paint Cure Time Matters More Than “Dry to Touch
Although paint feels dry to the touch within hours, it can take days or even weeks to fully cure, and that unseen hardening is what really determines whether tape will pull paint or leave residue. You’ll want to respect cure time because fresh films are soft and bond poorly to tape, especially over decorative patterns or uneven wall textures.
Dry to touch isn’t cured — wait days or weeks before taping to avoid lifting or residue.
Consider these quick points:
- Soft paint lifts easily when adhesive pulls against it.
- Cured paint resists adhesive and cleans up without tearing.
- Temperature, humidity, and paint thickness change cure speed.
Wait for proper cure to protect finish and avoid repairs.
When Should You Wait for Full Paint Cure?
You should wait until the paint reaches its full hardness before applying or removing masking tape to avoid lifting or tack residue.
Check the paint type—latex, enamel, and oil-based finishes cure at very different rates and need different wait times.
When in doubt, follow the manufacturer’s cure-time and test a small, inconspicuous area first.
Wait For Paint Hardness
When should you remove tape versus wait for the paint to fully cure? You’ll rely on paint hardness more than dry-to-touch timing. Historical trends and Cultural influences shaped patience expectations, but today you can test hardness gently. Follow these cues:
- Light fingernail press: no indentation means stronger cure.
- Slightly tacky but resilient: wait 24–72 hours before taping removal.
- Firm, resistant surface after a week: safe for long-term adhesion.
If tape must stay longer, monitor edges for lift or residue. Always pull tape slowly at a 45° angle to protect the cured surface.
Consider Paint Type
Hardness tests tell you when tape can come off, but paint formulation dictates how long full cure takes and how tape interacts with the surface. You should wait longer for oil-based and alkyd paints—they cure via oxidation, often taking weeks.
While latex and acrylic dry faster, they can take up to a month to fully harden. Test a discrete area before applying traditional masking methods aggressively.
If you’re worried about adhesive damage, choose low-tack or painter’s tape and consider eco-friendly alternatives like paper-based tapes with gentler adhesives.
When in doubt, wait; patience prevents peeling and staining.
Which Masking Tapes Are Safest for Fresh Paint
When you’re working with fresh paint, choose low-tack masking tapes that won’t pull or lift the finish.
Look for tapes labeled paint-friendly or designed for delicate surfaces, since their adhesives release cleanly.
Test a small strip first to confirm the tape won’t damage your specific paint.
Low-Tack Options
Because fresh paint can lift or peel easily, choosing a low-tack masking tape matters. You want tape that stays put but removes cleanly without marring decorative patterns or compromising wallpaper compatibility. Look for painter’s tapes labeled “low-tack” or “delicate surfaces.”
Consider:
- Paper-based crepe tape — gentle removal on newly painted walls.
- Thin blue painter’s tape — balances adhesion and clean release.
- Specialized delicate-surface tape — best for textured paint and near wallpaper seams.
Test a small area for 24 hours before full application. Remove tape slowly at a 45° angle while the paint is cured enough to resist lifting.
Paint-Friendly Adhesives
If you’re protecting freshly painted walls, pick tapes with gentle, paint-safe adhesives that hold without peeling finish or leaving residue. You’ll want low-tack paper tapes labeled “paint-friendly” or delicate-surface masking for trim, decorative patterns, and quick projects. Test a small patch first and remove within manufacturer time limits. For textured surfaces or wallpaper removal prep, choose tapes that peel cleanly and won’t lift fragile coatings. Here’s a quick comparison to guide you:
| Tape type | Best use |
|---|---|
| Delicate-surface | Fresh paint, trim |
| Artist’s tape | Decorative patterns |
| Low-tack paper | Wallpaper removal prep |
Which Tapes to Avoid on Painted Surfaces
While masking tape seems like a simple choice, you’ll want to steer clear of tapes with aggressive adhesives, rubber-based glues, or heavy-duty backing—their strong tack can lift paint, leave residue, or even strip the finish when removed.
Avoid these specific types on painted walls, especially if you have delicate gloss, freshly painted surfaces, decorative patterns, or pronounced surface textures:
- Duct tape or cloth-backed tape — too abrasive and sticky.
- Double-sided heavy adhesive tape — designed for permanent bonds.
- Packing or shipping tape — high-tack plastic film that leaves residue.
Choose low-tack, painter’s tape instead to protect finishes.
How Tape Adhesive and Backing Affect Paint Removal
When you press tape onto painted walls, the adhesive chemistry and backing material determine how easily the tape releases and whether it pulls paint with it. You’ll notice stronger adhesives and rigid backings cling to topcoats, risking flakes, while gentler adhesives and flexible paper backings peel more cleanly. Good surface preparation reduces lift by removing dust and ensuring paint cured properly; color matching isn’t affected by tape type but by how much paint is removed. Compare choices:
| Adhesive type | Backing material |
|---|---|
| High-tack | Plastic film |
| Low-tack | Crepe paper |
Low-Adhesion Tape Options for Delicate Painted Finishes
Because delicate finishes can lift with aggressive tapes, choose low-adhesion options that balance stick and release so you don’t strip cured paint. You’ll want tapes formulated for fragile surfaces and labeled for removal without residue.
Consider options with Eco friendly adhesives or paper backings that breathe and reduce surface stress. Also look at alternative wall protectors like cling films or repositionable strips when extensive coverage is needed.
Compare these three choices:
- Low-tack paper tape—holds, peels clean.
- Painter-grade low-adhesion—designed for delicate trim.
- Repositionable strips/clings—non-adhesive protection for sensitive areas.
Painter’s Tape vs. Standard Masking Tape: When to Use Each
If you need crisp paint lines or are working on painted trim, grab painter’s tape; it’s formulated to stick well without damaging finish and releases cleanly, especially after short-term use. Use painter’s tape when you want sharp edges, decorative patterns, or when masking glossy surfaces and trim.
Choose standard masking tape for rougher jobs, priming, or when wall texture reduces adhesion demands—you’ll save money and still protect adjacent areas. Always test a small inconspicuous patch first, remove tape slowly at a 45° angle, and don’t leave standard masking tape on delicate painted surfaces for long to avoid lift or residue.
How Humidity and Temperature Change Tape Performance
You’ve learned when to pick painter’s tape versus standard masking tape; now consider how humidity and temperature affect how those tapes stick and lift. You’ll notice humidity fluctuations and temperature variations change adhesive strength and paint interaction.
Warmer, humid air can soften adhesive; cold, dry conditions make it brittle. Test a small strip before large jobs and monitor conditions during painting.
- High humidity: increased stickiness, harder clean removal.
- Low humidity: reduced adhesion, risk of lifting.
- Rapid temperature swings: adhesive breakdown, paint edge failure.
Adjust timing and tape choice based on local conditions.
How Long Can Masking Tape Stay on Painted Walls?
How long you can leave masking tape on a painted wall depends a lot on the paint’s cure time, since fresh paint is more easily lifted or marred.
You’ll also need to take into account the tape’s adhesive strength—stronger adhesives can bond too well and peel paint, while low-tack tapes may fail early.
Finally, environmental conditions like heat, humidity, and sunlight can speed adhesive bonding or make tape brittle, so check and remove tape within the safe window for your specific paint and tape.
Paint Cure Time
Because paint continues to harden after it feels dry, you’ll want to know how long you can safely leave masking tape on a painted wall without causing damage. Paint cure time varies by formula, humidity, and temperature. For delicate creative wall designs or finishes using eco-friendly adhesives, wait longer.
- Latex walls: remove tape after 24–48 hours to avoid lifting if paint isn’t fully cured.
- Satin/semi-gloss: wait 48–72 hours; these surfaces harden faster.
- Oil-based: allow 5–7 days for proper curing before taping.
When in doubt, test a hidden spot first.
Tape Adhesive Strength
When you leave masking tape on painted walls, its adhesive strength — influenced by tape type, temperature, and surface finish — determines whether the paint will peel when you remove it. You should remove standard painter’s tape within 14 days to avoid bonds that lift paint, especially on fresh or delicate finishes. Low-tack tapes suit decorative patterns and satin sheens; high-tack options risk damage on glossy or textured finishes. Test a small hidden area first. Follow manufacturer guidance and peel slowly at a 45° angle. If residue remains, use a gentle adhesive remover safe for paint.
| Tape Type | Recommended Duration |
|---|---|
| Low-tack | 1–14 days |
| Medium-tack | 3–7 days |
| High-tack | <48 hours |
| Specialty delicate | 1–7 days |
Environmental Conditions
Although temperature, humidity, and sunlight exposure all affect how long masking tape can stay on painted walls, the biggest risks come from heat and prolonged moisture. You should remove tape within 7–14 days in moderate conditions to avoid adhesive residue or paint lift. In hot, humid, or direct sun, strip it sooner.
- Cool, dry indoor: 7–14 days.
- Warm or humid: 2–5 days.
- Direct sun/very hot: 24–48 hours.
Also consider environmental impact: prolonged tape use can increase waste. Choose tapes with recyclable backing and follow masking tape recycling guidelines when disposing to reduce harm.
Prep Your Painted Wall Before Applying Tape
Before you apply tape, make certain the paint is fully cured and the surface is clean and dry so the adhesive bonds properly. Check wall texture for dust, grease, or loose particles; gently vacuum or wipe with a damp microfiber cloth, then let dry.
For glossy or satin finishes, cleaning is especially important because oils show more. Test a small strip in an inconspicuous spot to confirm adhesion won’t lift paint or alter paint color.
If the surface feels chalky, remove residue with a mild detergent and rinse. Proper prep reduces risks and guarantees cleaner removal without damaging the finish.
Best Taping Technique to Prevent Peeling Paint
Start by prepping the surface—clean, dry, and free of loose paint—so tape sticks only to solid finish.
Pick a low-tack painter’s tape to minimize adhesive grip on your paint.
When you’re done, pull the tape back slowly at a 45° angle while the paint is slightly tacky to avoid lifting.
Prep Surface Thoroughly
When you prep the wall properly, tape will stick where it should and pull away cleanly without taking paint with it. You’ll assess wall texture, clean surface oils and dust, and smooth loose flakes before taping. Follow painter’s techniques to avoid surprises.
- Clean: wipe with mild detergent, rinse, dry.
- Sand: scuff glossy areas and remove loose paint, then dust off.
- Prime: spot-prime bare or repaired areas and let cure.
Do these steps in order, work in small sections, and press tape edges firmly. Proper prep reduces lifting and preserves your finish.
Use Low-Tack Tape
Although choosing the right tape might seem minor, using a low-tack painter’s tape is one of the simplest ways to prevent peeling your finish. You’ll pick tape suited to your wall texture and paint sheen; delicate surfaces need gentler adhesives. Press tape down lightly to seal edges without forcing adhesive into pores. Test a small strip for 24 hours to confirm removal safety and compatibility. Choose tapes labeled for “delicate” or “low-tack” and match duration to manufacturer guidance.
| Surface | Tape Type | Recommended Use |
|---|---|---|
| Smooth | Low-tack | Up to 14 days |
| Textured | Delicate | Short term |
| Glossy | Painter’s | Test first |
| Flat | Low-tack | Longer holds |
Remove Tape Properly
If you wait until the paint’s fully dry, you risk peeling—so remove the tape while the paint is still slightly tacky to preserve crisp lines. You’ll protect paint adhesion and avoid lifting layers.
Pull tape back slowly at a 45-degree angle, steady and even, testing a corner first. If resistance rises, warm the tape with a hair dryer to improve tape durability and release.
- Peel slowly at 45°
- Use heat if tape resists
- Replace damaged sections immediately
Clean residue with a damp cloth and mild cleaner, then inspect edges for any touch-up before full cure.
How to Apply Tape for Clean Paint Edges
Before you press the tape down, clean and dry the surface so the adhesive bonds firmly and the edge stays sharp.
Before applying tape, thoroughly clean and dry the surface so the adhesive bonds firmly and edges stay sharp.
Choose quality painter’s tape suited to your paint finish, and measure carefully so lines align for creative wall designs or decorative tape patterns.
Press tape firmly along the edge with a plastic card or your fingernail to seal against paint bleed.
Overlap short lengths for curves and cut cleanly with a utility knife.
Paint with thin, even coats away from the tape line.
Let paint dry to the manufacturer’s recommended tack level before any handling to keep edges crisp.
How to Remove Tape for Clean Edges Without Damage
When the paint has reached the manufacturer’s recommended tack level, peel the tape back slowly at a 45-degree angle to protect the fresh edge and reduce the chance of lifting paint.
You’ll consider Adhesive strength and Surface texture as you remove tape to avoid damage. Follow these concise steps:
- Pull the tape slowly and steadily, watching the edge for any lifting.
- If adhesive residue remains, rub gently with a soft cloth and warm soapy water; avoid harsh scrubbing.
- For delicate textures, heat the tape slightly with a hairdryer to soften the adhesive before peeling.
Stop if paint peels; re-evaluate technique.
A Five-Minute Edge Test to Check Tape Safety
After you peel a small test strip as described above, try a five-minute edge test to confirm the tape’s safety on your painted surface. Press the tape edge firmly, wait five minutes, then remove slowly at a 45° angle. If paint lifts, stop and try a gentler adhesive or a different brand. You’ll want to record results for different colors or finishes, especially when using creative masking techniques or working near historically treated areas. Use this quick table to log outcomes and support historical paint preservation decisions.
| Surface Type | Result |
|---|---|
| Satin | Pass |
| Flat | Fail |
| Trim | Pass |
How to Protect Textured or Porous Painted Surfaces
When you’re working with textured or porous paint, pick a low-tack masking tape to reduce the chance of pulling away finish.
Always test the tape on a hidden spot for a few minutes to make sure it won’t lift or leave residue.
If the test shows any damage, switch to a gentler tape or use a paper or fabric barrier instead.
Choose Low-Tack Tape
Because textured and porous paints grip adhesives more tightly, you should pick low-tack masking tape designed for delicate surfaces to avoid pulling off paint or leaving residue. You’ll protect finish and reduce paint peeling risk while balancing tape durability for your project. Choose tape that peels cleanly and won’t stretch into pores.
- Pick “delicate surface” low-tack tape for minimal adhesion.
- Look for labeled short-term use and clean removal to limit damage.
- Prefer paper-based tape with gentle adhesive; it’s often kinder to textured walls.
Use gentle pressure when applying and remove slowly at an angle to protect the paint.
Test On Hidden Area
Wondering if a tape will pull paint or leave residue on your textured walls? You should test on a hidden area first. Pick a small spot that matches the wall texture and note the tape color—darker tapes can stain light paint. Press a short strip, leave for 24 hours, then remove slowly at a 45° angle. Inspect for lifting, residue, or color transfer. If fine, test longer (72 hours). If paint peels, choose lower-tack tape or use a primer barrier.
| Surface | Tape color tested | Result |
|---|---|---|
| Smooth | White | No residue |
| Orange peel | Blue | Slight lift |
| Porous | Brown | Leaves residue |
How to Remove Adhesive Residue Without Harming Paint
If adhesive residue clings to your painted wall after removing masking tape, you can lift it safely without scrubbing or harsh chemicals; start with gentle, paint-friendly methods and work up only if needed.
Consider decorative patterns and wall texture when choosing a method so you don’t alter finishes.
Try these steps:
- Rub a soft eraser or rubber sponge gently to pick up tacky bits.
- Apply a tiny amount of warm, soapy water with a microfiber cloth; blot, don’t rub, then dry.
- Use a cotton ball with a dab of rubbing alcohol or adhesive remover, testing first, and rinse promptly.
What to Do If Paint Peels When You Remove Tape
When paint peels as you pull off tape, stop immediately and assess the damage so you don’t make it worse; continuing will tear more paint and expand the area needing repair.
If paint peels when removing tape, stop right away and assess the damage to avoid worsening it.
Gently press edges to see if flakes loosen; remove only fully detached pieces.
Lightly sand rough edges, feathering toward surrounding paint so repairs blend with wall textures.
If the peeled area is small, prime and touch up with matching paint; for decorative patterns, recreate the pattern carefully or consider a small stencil.
For larger damage, patch with joint compound, sand, prime, then repaint to match finish and texture.
Remove Old Tape Without Stripping Multiple Paint Layers
Before you tackle fresh repairs, learn how to remove old tape without stripping multiple paint layers so you don’t undo your good work. You should assess wall texture and adhesive chemistry first: smoother surfaces release easier, textured walls hide edge lift.
Warm the tape with a hair dryer on low to soften adhesive, then pull back slowly at a 45° angle. If residue remains, use a citrus-based adhesive remover and test in a hidden spot.
- Heat: low, even warmth.
- Angle: slow, 45° peel.
- Cleanup: mild remover, soft cloth.
Work patiently to protect paint.
When Masking Tape Is Useful for Touch-Ups and Repairs
Although touch-ups often feel like small jobs, masking tape can make them neater and faster by protecting adjacent surfaces and creating crisp paint edges. You’ll find it useful when repairing scuffs, filling nail holes, or repainting trim where wall texture meets a smooth surface.
Choose low-tack tape for delicate finishes and test a hidden spot first. Match tape color to lighting so you can see the edge clearly while painting, then remove tape at a 45° angle once paint’s tacky but not fully dry.
Work slowly to avoid pulling flakes and to keep lines sharp.
Alternatives to Masking Tape for Painted Walls
If you’re worried about paint damage, consider low-tack painter’s tape as a gentler alternative that still gives crisp edges.
Keep adhesive remover options on hand for any sticky residue, and test them on a hidden spot first.
For lightweight protection during projects, non-adhesive wall protectors can shield surfaces without risking pull-off.
Low-Tack Painter’s Tape
When you need crisp paint lines without risking damage, low-tack painter’s tape gives you reliable adhesion that peels off cleanly on finished walls. You’ll appreciate how it addresses masking tape myths and benefits from painter’s tape history improvements. Use it when working on trim, stripes, or delicate surfaces.
- Choose tape labeled “low-tack” for fresh paint and cured finishes.
- Test a small corner for 24 hours before full application.
- Press edges firmly to prevent bleed-through; remove slowly at a 45° angle.
You’ll get sharp edges and minimal risk of paint lift when you follow these steps.
Adhesive Remover Options
Because tape isn’t your only option, adhesive removers offer a safe way to tackle residue on painted walls without scraping or repainting. You can choose citrus-based gels, rubbing alcohol, or commercial adhesive solvents designed for delicate finishes.
Test any product in an inconspicuous spot to confirm it won’t dull or lift paint. Apply gently with a soft cloth, let it work briefly, then wipe away residue and clean the area with mild soap and water.
For effective masking tape removal, loosen adhesive first and follow proper surface preparation to prevent damage and guarantee a clean, smooth finish.
Non-Adhesive Wall Protectors
Though you might default to tape, non-adhesive wall protectors offer a safer way to shield painted surfaces during projects without risking paint lift or residue. You can use magnetic strips, foam shields, or clamp-on guards to protect edges, corners, and delicate decorative patterns while you work on wall murals or touch-ups.
They’re reusable, won’t leave residue, and adapt to uneven surfaces. Consider these options:
- Magnetic bars for metal trim and removable panels.
- Clamp-on shields for baseboards and molding.
- Foam or plastic edge guards for delicate paint and textured finishes.
Choose based on surface, ease, and protection needs.
Tool Kit: Cleaners and Tools to Fix Tape-Related Problems
If you run into adhesive residue, paint lift, or micro-scratches, having the right cleaners and tools lets you fix the problem without harming the finish. Keep a soft scraper, microfibre cloths, gentle adhesive remover, and touch-up paint for decorative patterns and varied wall textures. Work gently and test cleaners in an inconspicuous spot.
| Tool | Use | Tip |
|---|---|---|
| Soft scraper | Remove residue | Angle shallowly |
| Adhesive remover | Dissolve tack | Patch-test first |
| Touch-up kit | Repair lift/scratch | Feather edges carefully |
Follow manufacturer instructions, dry thoroughly, and store supplies for future quick fixes.
Common Beginner Mistakes That Cause Tape Damage
When you rush placement, peel too quickly, or pick the wrong tape, you’ll invite paint lift, residue, and surface scratches that are avoidable with a bit of care. You’ll also damage decorative wall accents by ignoring surface prep.
Don’t press tape into rough textures or skip testing on inconspicuous areas — wall texture considerations matter.
Avoid pressing tape into rough textures; always test on inconspicuous areas first—wall texture can make or break results.
Common mistakes:
- Using high-tack tape on fresh paint.
- Pulling at a steep angle or too fast.
- Leaving tape on for days in sun or humidity.
You can prevent harm by choosing the right tape, timing removal, and testing before committing.
Signs a Paint Job Is Salvageable After Tape Damage and Next Steps
Check the paint integrity by running your fingernail lightly over the taped area—if the paint doesn’t flake or lift, it’s likely salvageable.
If you spot small nicks or missing bits, you can sand lightly, prime bare spots, and use a matching touch-up to blend repairs.
For larger damage or peeling, consider skimming the affected area and repainting to guarantee a uniform finish.
Paint Integrity Check
Although tape can lift paint, you can often tell quickly whether a job’s salvageable by inspecting a few key signs. Check wall texture for gouges or flakes and look for softened or bubbling areas that signal deeper adhesion failure. Gently run your fingernail over lifted edges to see if paint peels away in layers. Note any adhesive residue that attracts dirt or prevents primer from bonding.
If damage is limited to surface scuffs, you can often avoid full repainting.
- Edge lift: small, isolated
- Surface scuffing: intact substrate
- Residue only: cleanable
Touch-Up And Repair
If your inspection shows only edge lift, surface scuffs, or removable residue, you can often fix the area without a full repaint. Start by gently cleaning and evaluating how much paint actually came away.
If loss is minimal, lightly sand edges, apply matching touch-up paint with a small brush, and feather into the surrounding finish. For patterned areas or decorative patterns, use fine masking or stencils to recreate motif continuity.
If color mismatch persists, test nearby tape color options—some tapes leave tints or adhesive stains. When damage is extensive, plan a targeted repaint rather than tolerating uneven patches.
Frequently Asked Questions
Can Masking Tape Damage Wallpaper or Decals?
Yes — it can. You’ll risk adhesive residue and paint peeling on delicate wallpaper or decals if tape’s too strong or left too long; you should test a small area, use low-tack tape, and remove it slowly.
Is Painter’s Tape Safe on Exterior-Painted Surfaces?
Yes — but cautiously. You’ll tense as tape meets sun-baked siding; choose low-adhesive painter’s tape for outdoor use. Its adhesive strength and surface compatibility matter, so test small areas to avoid peeling or residue.
Can Tape Cause Color Fading Over Time?
Yes—you might see slight fading where tape blocks light, but tape itself usually won’t chemically cause color change; however prolonged adhesion can leave adhesive residue, and aggressive removal may cause paint peeling, so be cautious with duration.
Will Tape Interfere With VOC Off-Gassing or Paint Odor?
Barely—you won’t move mountains: tape may slightly trap VOC off gassing and concentrate paint odor locally, but it won’t stop overall off-gassing; remove tape promptly and ventilate well to avoid lingering localized smells and buildup.
Are Specialty Tapes Safe for Metallic or Pearlescent Paints?
Yes — you can use specialty tapes on metallic finishes and pearlescent coatings if you choose low-tack, paint-safe tapes; you’ll avoid lifting or scuffing by testing first, removing slowly, and not leaving tape on too long.
Conclusion
Masking tape can be safe, but you need to be careful. If paint’s fully cured, low-tack paper tape is usually fine; if it’s not, tape can lift or peel fresh paint like a bandage being ripped off. Wait for full cure when possible, test a small hidden spot, and use painter’s tape or alternatives for delicate finishes. If damage happens, clean gently, sand feather edges, and touch up—don’t rush, or you’ll undo your hard work.