Is Paint Darker When It Dries
Yes — paint often looks a bit darker as it dries. You’ll notice wet paint appears glossier and sometimes lighter because moisture and sheen boost reflections; as solvents evaporate the finish flattens, pigment concentration rises, and true undertones emerge, deepening the hue. Film thickness, substrate color, primer, and humidity also change the final tone, so test swatches and allow full cure before judging. Keep going and you’ll learn what causes those shifts and how to control them.
Is Paint Darker When It Dries?
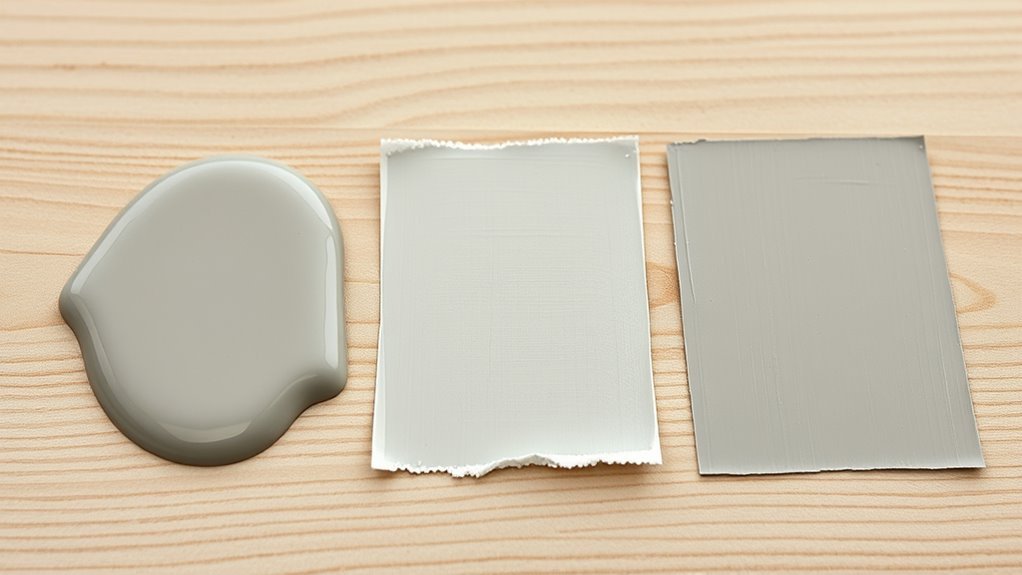
Does paint really get darker as it dries? You’ll notice wet paint often looks deeper because surface sheen and moisture change light reflection, not because pigment shifts.
Wet paint often looks deeper due to sheen and moisture altering reflection, not pigment change.
As the coat loses solvent, binder and pigment settle, revealing true color consistency across layers; proper mixing prevents streaks so what dries matches what you meant.
Pigment stability matters—high-quality pigments resist chemical change, keeping hue steady during drying.
Temperature and humidity affect drying speed and appearance, but they don’t alter intact pigments.
Quick Summary: Why Wet and Dry Paint Look Different
Although wet paint often appears richer, the change is mostly about surface gloss and moisture altering how light reflects, not a shift in pigment. You’ll notice differences for practical and psychological reasons. Consider these quick points:
- Wet surface scatters light differently, making hues seem deeper.
- Moisture temporarily amplifies saturation; drying evens tones.
- Your perception links to color psychology—context and sheen affect mood and contrast.
- Long-term appearance also ties to paint durability; finish and wear influence aging and perceived depth.
Keep this in mind when choosing shades and finishes to predict final results.
How Sheen Changes Perceived Color
After noticing how moisture and gloss change wet paint’s look, you’ll see sheen plays a similar role once a surface is dry. Sheen alters reflectivity, so you perceive color differently: flat finishes absorb light, appearing richer, while gloss reflects, seeming brighter. You’ll weigh aesthetic goals, color psychology, and paint durability when choosing sheen—high gloss hides marks and lasts longer, flat conceals flaws. Use the table to compare effects quickly:
| Sheen | Perceived Color | Practical Effect |
|---|---|---|
| Flat | Deeper | Hides imperfections |
| Satin | Balanced | Moderate durability |
Choose according to mood and use.
Why Gloss Looks Lighter When Wet
When you wet a glossy surface, a thin film of water fills microscopic texture and smooths the surface, so light reflects more uniformly and specular highlights grow stronger—making the color look lighter and more saturated. You notice changes because:
- Surface reflectivity increases, boosting mirror-like glare that brightens perceived hue.
- Reduced scattering lets deeper pigments appear clearer, altering apparent color temperature.
- Wetness enhances contrast between highlights and base tone, so midtones seem lighter.
- Your eye interprets stronger reflections as higher luminance, so gloss reads as lighter until it dries.
Why Matte Often Seems Darker When Dry
Because matte finishes scatter light instead of reflecting it directly, you perceive them as darker once the surface loses any lingering sheen. You’ll notice textures absorb highlights, so colors look deeper; Color psychology then influences mood, making spaces feel cozier or smaller. Environmental factors like lighting angle and intensity change appearance, so test samples in real rooms. Matte hides imperfections but reduces specular bounce, so you rely on diffuse reflection. Compare finishes side-by-side to decide.
| Finish | Light behavior | Perceived effect |
|---|---|---|
| Matte | Scatters | Darker |
| Satin | Partial reflect | Softer |
| Gloss | Direct reflect | Lighter |
| Flat | High scatter | Muted |
Pigment Concentration and Final Color
Pay attention to pigment concentration because the pigment load directly affects how saturated and opaque the dried color will look.
If you use a higher pigment-to-binder ratio, the color will usually appear richer and truer.
With more binder, the paint can look thinner and sometimes lighter.
You’ll want to balance pigment and binder to get the final hue and finish you expect.
Pigment Load Effects
Although it might seem subtle, the amount of pigment you mix into paint—the pigment load—directly controls how the dried color looks: higher pigment concentration deepens and saturates the hue, while lower pigment load produces paler, more translucent results.
You’ll notice effects tied to color psychology and historical pigments: intense loads feel bolder, low loads feel softer. Consider practical choices:
- High pigment: stronger tint, less light scattering.
- Medium pigment: balanced saturation, versatile.
- Low pigment: washed, glazing-friendly.
- Minimal pigment: subtle, allows substrate influence.
Adjust load deliberately to match visual intent; testing ensures predictable dried appearance.
Binder-to-Pigment Ratio
You’ve seen how pigment load shapes hue and saturation; now look at how the binder-to-pigment ratio fine-tunes that effect.
You’ll notice that more binder thins pigment concentration, increasing transparency and often lightening wet appearance once the drying process completes.
Less binder concentrates pigment, deepening color and improving opacity, but can make films brittle.
For consistent results, measure ratios to maintain color consistency across batches and surface types.
During drying, binder migration and solvent loss alter refractive index and how light scatters, so small ratio tweaks change final tone.
Test mixes on the intended substrate before committing to large areas.
How Undertones Emerge as Paint Cures
As paint cures, you’ll notice hidden undertones starting to appear because surface moisture and solvents evaporate.
The binder and pigment can shift slightly during this process, altering how those subtle hues register.
You’ll also see changes in how light interacts with the dried film, which can make undertones more or less noticeable.
Drying Reveals Undertones
Ever wondered why a swatch you loved looks different a few hours after painting? As paint cures, drying uncovers undertones you didn’t notice wet. You’ll see shifts because color perception changes with gloss, light scattering, and film thickness, while pigment stability determines which hues dominate once solvents evaporate.
- Wet paint reflects more light, masking subtle tones.
- Evaporation reduces sheen, revealing base pigments.
- Thin layers amplify undertones; thicker layers mute them.
- Viewing angle and ambient light expose hidden hues.
Watch samples dry fully before committing, and compare under the room’s usual lighting.
Binder And Pigment Shift
How does the binder in paint change the way pigments show up as the surface cures? You’ll notice binders alter pigment dispersion and refractive index, so undertones that seemed hidden while wet begin to appear.
As solvents evaporate, binder films tighten, improving color consistency across the surface. That shift can reveal warmer or cooler edges of mixed pigments without changing their chemical makeup.
Binders also affect sheen and surface microstructure, contributing to subtle texture enhancement that influences perceived depth. You’ll see more stable, predictable color once curing finishes, so choose binders to control how undertones reveal themselves during drying.
Light Interaction Changes
When light moves across drying paint, you’ll start to notice undertones that were masked when the surface was wet. As the finish cures, surface texture and refractive index change, revealing hues that affect mood and perception. You’ll see shifts tied to binder clarity and pigment settling; these alter how light scatters and which wavelengths dominate.
- Sheen change: more specular reflection highlights undertones.
- Microscopic roughness: scatters light, deepening perceived tone.
- Layering: base coats influence transmitted light and color psychology.
- Time plus environment: humidity and UV exposure affect paint durability and final tint.
Watch samples over days to judge.
Tinting Strength and Its Effect on Shade
Because pigments don’t all behave the same, tinting strength is the single most important factor that determines how much a paint’s shade will shift when you add colorant. You’ll notice high-strength pigments shift shade dramatically with small amounts, while weak tints require more colorant and can muddy mixes.
Consider color temperature: warm pigments often read richer, cool ones subtler. Also watch drying stretch — how much apparent depth increases as binders cure — since strong tints amplify that effect.
When sampling, apply test strips, let them cure, and compare; that way you’ll predict final shade shifts without overworking formulas.
How Film Thickness Alters Color
If you apply a thicker film, you’ll usually see deeper, more saturated color because more pigment and binder interact with light. Conversely, thinner coats let more substrate show through and can read paler or less intense.
Thicker films deepen and saturate color; thinner coats let the substrate show, appearing paler and less intense.
You’ll notice film thickness affects color consistency and perceived Paint transparency, so control matters. Consider practical effects:
- Thicker film increases pigment hiding, reducing transparency.
- Thinner film raises substrate influence, harming consistency.
- Uneven thickness creates mottling and shifts in hue.
- Controlled application yields predictable drying appearance and uniform tone.
Monitor wet film thickness and tools to achieve the color you expect.
Why Multiple Coats Deepen Hue
Although a single coat gives you a quick idea of color, applying multiple coats deepens hue by increasing pigment density and reducing light transmission through the film. You’ll notice richer saturation because more pigment particles absorb and scatter light before it reflects back, so underlying substrates show less influence.
This intensification affects perception and color psychology: deeper tones can feel more dramatic or cozy, altering mood and space. You should also account for environmental factors like ambient light and humidity during application, which change how layers merge visually.
Apply consistent, even coats to achieve predictable depth without relying on illusion.
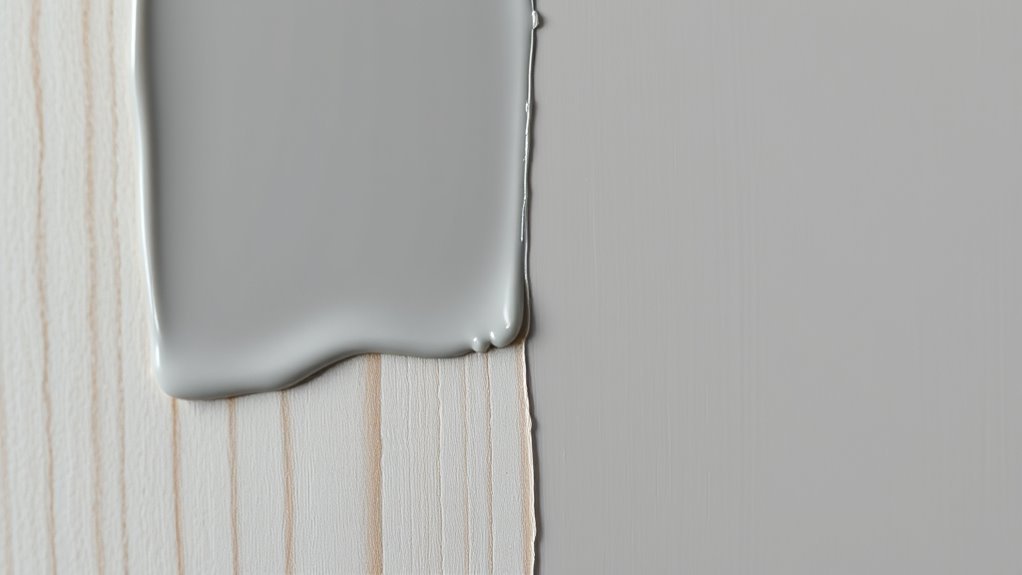
Solvent Evaporation: Immediate Color Shifts
When the solvent in a fresh coat evaporates, you’ll see an almost immediate shift as the paint film tightens and pigments settle—wet paint often reads lighter or glossier than the dried finish. You notice quick changes tied to solvent loss and surface tension.
Consider these practical effects:
- Gloss reduction alters perceived depth and mood, linking to color psychology.
- Pigment concentration increases slightly, deepening hue.
- Light scattering decreases as the film smooths, reducing apparent brightness.
- Early solvent-driven curing affects initial paint durability before full crosslinking.
Watch finishes as they dry; initial shifts predict final appearance without binder discussion.
How Binders Influence the Final Tone
Because binders form the matrix that holds pigment and additives together, they strongly shape the paint’s final tone as they dry and cure. You’ll notice how different binders—acrylic, alkyd, or oil—affect sheen, depth, and perceived saturation.
In paint formulation, binder refractive index and film thickness change how light scatters, so colors can look richer or flatter after curing. That shift influences color psychology: warmer, glossier films feel more vibrant; matte, porous films seem subdued.
When selecting paint, consider binder type to predict finished appearance and emotional impact, not just pigment choice or surface prep.
How Fast- vs Slow-Drying Formulas Compare
If you need quick recoats and predictable color shifts, fast-drying formulas will feel more controlled, while slow-drying paints give pigments time to settle and often deepen as solvents evaporate more gradually. You’ll notice differences in color consistency and pigment stability depending on speed.
Consider:
- Fast-drying: less open time, faster cure, minimal pooling.
- Slow-drying: extended open time, higher risk of leveling changes.
- Fast: easier layering, predictable final tone for tight schedules.
- Slow: richer depth as binders and pigments redistribute before full cure.
Choose based on workflow, humidity, and desired final depth; test samples before committing.
Why Metallic and Pearlescent Paints Shift Differently
When you compare metallics and pearlescents, remember they rely on different reflectors: pigments versus tiny flakes or mica. That changes how light scatters across the surface and can make colors look to shift or deepen as the binder and clearcoat level out.
You’ll see how the binder’s refractive index and clearcoat thickness influence the final sheen and apparent darkness.
Pigment vs. Flakes
Although both finish types dry to the touch, pigment-based paints and flake-laden metallic or pearlescent paints behave very differently as they cure. You’ll notice that difference in how their color and brightness shift. You rely on pigment particles to provide stable color saturation, while flakes reflect light differently as the binder levels change.
Watch for how brush strokes interact with each type: pigments hide strokes more uniformly, flakes reveal texture and orientation.
Consider these practical points:
- Pigment depth stays consistent.
- Flakes change apparent brightness.
- Brush strokes affect flake alignment.
- Clear coats lock appearance fast.
Light Scattering Effects
Moving from how pigments and flakes behave as binders level out, let’s look at why metallic and pearlescent paints shift their look: it’s all about how tiny reflective particles scatter light. You’ll notice metallics mirror angle changes, while pearlescents refract and transmit light, so perceived hue and brightness vary despite color consistency goals. Pigment stability affects non-flake areas, but scattering dominates flake-rich finishes. You can control shifts by choosing particle size and orientation during formulation and application.
| Finish Type | Scattering Behavior |
|---|---|
| Metallic | Specular reflection |
| Pearlescent | Diffraction/refraction |
Binder and Clearcoat
Because the binder and clearcoat set how flakes sit and how light exits the surface, you’ll see metallics and pearlescents respond differently as they dry. You notice how the binder’s film formation and clearcoat refractive index influence color consistency and pigment stability. Small shifts in orientation or index change perceived depth and hue.
- Binder viscosity governs flake tilt and layer thickness.
- Clearcoat cures, altering refractive paths and gloss.
- Metallics reflect via metallic flakes; orientation matters more.
- Pearlescents rely on interference; thin-film spacing affects shimmer.
You can control these variables to keep finishes predictable.
How Lighting Changes Perceived Color After Drying
When paint dries, the way light hits its surface changes what you see, so a color that looked one way wet can read differently under the same lamp once it’s cured. You notice sheen shifts, surface texture, and micro-reflections altering hue perception.
Warm incandescent, cool LED, and natural daylight each reveal pigments differently, so choose samples viewed at desired hours. Consider color psychology when selecting tones for mood, and remember paint branding can show subtle formula differences between batches.
Test full-size patches, observe under multiple light sources, and decide after curing to confirm the finished appearance matches your vision.
Temperature, Humidity, and Drying Color
If your room’s temperature and humidity swing while paint is curing, you’ll see clear effects on both drying speed and final color, since solvent evaporation and pigment dispersion respond directly to those conditions. You’ll notice shifts in tone, sheen, and perceived depth that influence color harmony and even long-term paint durability. Control conditions to predict outcomes.
- High humidity -> slower drying, flatter appearance, possible darker wet look.
- Low humidity -> fast curing, potential powdery finish, subtle lightening.
- Warm temps -> quicker film formation, risk of uneven gloss.
- Cool temps -> extended open time, better leveling but risk of dulling.
How Substrate Color Alters the Dried Appearance
Beyond temperature and humidity, the color of the surface you paint on will directly shape how the dried color reads. If you paint a pale tint over a dark substrate, the final shade will look muddier and deeper; over a light substrate it stays truer and brighter.
You’ll want to test swatches because surrounding tones and undertones shift perception — that’s color psychology at work: context changes mood.
Substrate choice also affects paint durability indirectly; uneven absorption can thin the film and shorten wear. Always sample on the actual surface so you see the real dried result before committing.
When and How Primer Prevents Color Shifts
You’ll notice primer can subtly tint your topcoat, so picking a shade that complements the final color matters.
It also blocks stains and tannin bleed from wood or previous finishes, preventing unwanted dark spots.
Choosing the right primer for your substrate stops those shifts before you even start painting.
Primer’s Tinting Effect
While primer’s job often gets reduced to simply improving adhesion, it also plays an essential role in preventing the topcoat from shifting color as it dries. You rely on tinting to counteract substrate tones, so your chosen primer keeps hues true and supports color psychology and paint branding promises.
Use a tinted primer when:
- Covering dark or vibrant underlayers.
- Moving between dramatic and pale palettes.
- Applying thin-topcoat technical finishes.
- Matching brand-specified swatches for consistency.
A correctly tinted primer reduces the number of topcoats you need and preserves the *meant* final shade, so test small areas before full application.
Blocking Stains And Bleed
How do you keep old stains from bleeding through fresh paint? You spot-prime water, smoke, or tannin stains with a stain-blocking primer that seals contaminants so color blending won’t shift as topcoat cures. Apply thin, even coats; porous surfaces need multiple seal coats to prevent bleed-through.
Pay attention to texture influence: rough or glossy substrates change primer adhesion and may require sanding or a bonding primer. Test a small patch, let it dry fully, and inspect for dye migration or sheen changes.
Once sealed, finish coats match expected dried shade without hidden stains altering the result.
How VOCs and Additives Affect Drying Appearance
Because VOCs and additives change the way solvents evaporate and bind pigments, they can make paint look noticeably different as it dries. You’ll notice shifts in Color consistency during the Drying process depending on formulation and environment.
Because VOCs and additives alter solvent evaporation and pigment binding, paint’s color and finish can shift as it dries.
Consider these effects:
- Faster solvent loss can dull pigments temporarily.
- Plasticizers keep sheen even as pigment layers settle.
- Coalescents influence film formation, changing perceived saturation.
- Low-VOC blends may show uneven sheen until fully cured.
You should test samples under your room conditions; additives interact with humidity and temperature, so appearance can vary between formulations and applications.
Why Gloss Sheen Masks Undertones
If you look closely, gloss finishes reflect light more directly, which tends to wash out subtle undertones and make colors read as cleaner or cooler than they are. You’ll notice gloss hides muted shifts because specular reflection emphasizes the surface layer, reducing perceived depth and hue variation.
When you choose gloss for high-traffic areas, you’ll get improved paint durability and easier cleaning, but expect less visible nuance between swatches. For consistent results, test samples under your room’s lighting to check color consistency.
Use gloss where longevity matters and subtle undertones aren’t critical to the final look.
Why Matte Sheen Reveals Undertones
When you use a matte finish, the paint’s true tone becomes more apparent as the sheen doesn’t bounce light back the way gloss does.
Matte finishes absorb more light, so subtle undertones that were hidden by reflectivity start to show.
The textured surface also scatters light unevenly, making those undertones easier to spot.
Finish Shows True Tone
Notice how a matte finish seems to “flatten” a color and make subtle undertones pop—matte sheens scatter light instead of reflecting it, so you’re seeing more of the pigment and less of the surface gloss. You’ll notice true tone affects mood and Color psychology more honestly in matte, so choose accordingly.
Matte also hides imperfections but trades some paint durability compared to satin or gloss. Consider these points as you select finish:
- Matte reveals undertones clearly.
- Low sheen masks flaws, alters perceived depth.
- Easier touch-up but can scuff.
- Gloss boosts reflectivity, mutes undertones.
Light Absorption Differences
You’ve seen how matte finishes let undertones read more honestly; that happens because matte paints absorb and scatter light differently than glossier sheens.
When you look at a matte wall, microscopic surface irregularities trap light, reducing specular reflection and revealing pigment nuances. That lowered reflection emphasizes undertones, so perceived value can feel deeper even if Color consistency remains controlled by formulation.
Drying kinetics play a role too: as solvents evaporate, binder distribution and pigment settling change surface optical properties, subtly altering absorption.
Understanding these mechanisms helps you predict how a color will appear once fully cured, not just when wet.
Surface Texture Effects
Because matte surfaces scatter light instead of throwing it back in a mirror-like way, they let the paint’s undertones show through more clearly. You’ll notice subtle shifts as texture interacts with pigment. You can control that effect with good surface prep and mindful application. Consider these practical points:
- Smooth vs. textured: rough surfaces boost texture enhancement and reveal warm or cool undertones.
- Primer choice: a neutral primer evens the base so undertones don’t exaggerate.
- Application method: rollers emphasize texture; spraying minimizes it.
- Finish choice: higher sheen hides undertones, while matte exposes them.
Adjust prep and technique to manage appearance.
How Age and Yellowing Change Color Over Time
As paint ages, chemical reactions and exposure to light and air cause pigments and binders to shift, often producing a warm, yellowed cast that changes the original hue. You’ll notice whites and creams warm first, altering mood and color psychology in a room.
Yellowing can make cool tones feel muted and diminish contrast, so plan for long-term appearance when choosing hues. Factors like UV exposure, smoke, and humidity accelerate change, while paint durability—formulation and quality—slows it.
Regular cleaning, proper ventilation, and UV-filtering windows reduce yellowing. Repainting is the final fix when aging noticeably distorts meant color.
When Sheen Matters More Than Pigment
When light hits a wall, the sheen often shapes what you actually see more than the pigment itself, so choosing gloss level can change a room’s perceived color and texture. You’ll notice gloss reflects more, making colors pop; flats absorb light, muting hues. Sheen interacts with paint formulation and affects color consistency across walls and touch-ups.
Consider these effects:
- Matte hides imperfections, appears softer.
- Satin balances reflectivity and washability.
- Semi-gloss highlights architectural details and looks brighter.
- Gloss maximizes reflectance, can reveal brush strokes.
Pick sheen to control light behavior rather than relying only on pigment.
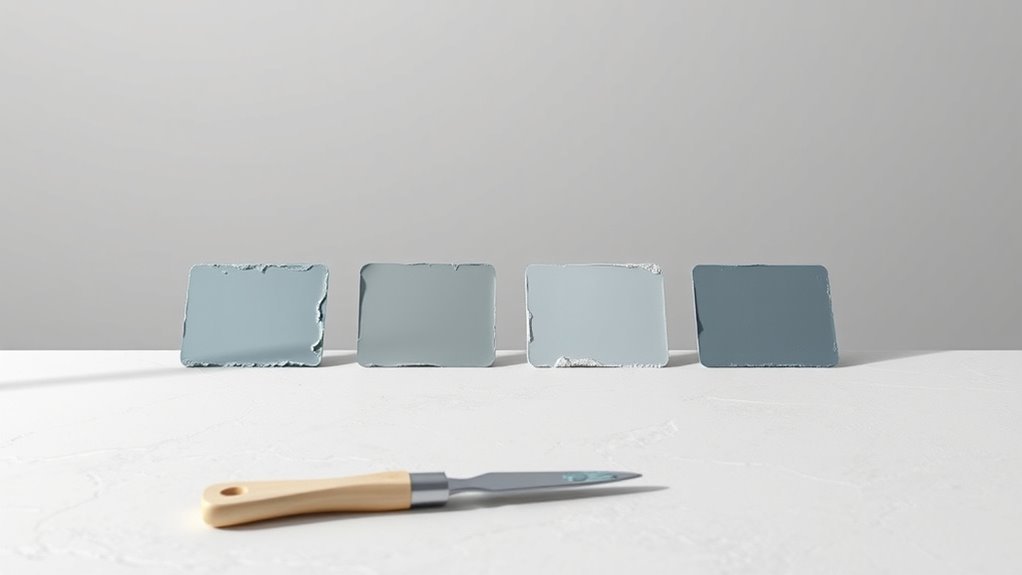
How to Test Paint Color Before Committing
If you want to avoid costly mistakes, test paint color in the room before you commit. Apply several 6×6″ swatches on different walls, near windows and light fixtures, and observe at various times of day.
Test paint in-room first: place multiple 6×6″ swatches near windows and lights, and observe them throughout the day
Label each swatch with brand, sheen, and date; note how color psychology influences mood—cool tones calm, warm tones energize.
Use primer beneath dark samples to mimic coverage. Consult paint history for period-appropriate palettes if restoring older homes.
Live with samples for at least a week to judge drying shifts and lighting effects.
Photograph samples under consistent light to compare choices before buying gallons.
How to Predict Final Color From Sample Cards
Because sample cards show a trimmed-down version of a paint, you’ll need to account for finish, lighting, and surrounding surfaces to predict the final color accurately. Use cards as guides, not guarantees. Consider how gloss changes reflectivity and how texture alters perceived depth. Think about color psychology—warm tones energize, cool tones calm—and match intent to space. Also factor paint durability for high-traffic areas; tough finishes can slightly change sheen.
- View cards at different times of day.
- Tape cards to multiple walls.
- Compare adjacent trim and flooring.
- Apply a larger wet sample patch.
Trust observation and context.
How Lighting Tests Reveal Dry Paint Tone
Although lighting can make a sample look right in the store, you’ll need to test it at home to see the true dry tone. Place painted swatches on different walls and observe them at morning, midday, and evening to note shifts from warm to cool.
Use a daylight-balanced bulb and the room’s actual fixtures to compare. Record impressions—how the hue affects mood ties into color psychology, so note whether it feels calming or intense.
Also check texture for gloss changes that influence perception and consider paint durability under light exposure. Repeat before committing to full walls.
Why Color Samples and Swatches Can Mislead
You might trust a tiny swatch, but lighting shifts can make the same paint look warmer, cooler, lighter, or darker in different rooms.
Small samples also hide how color behaves at scale, so a thumb-sized patch won’t reveal subtle undertones.
And don’t forget that finish—matte, satin, or gloss—changes perceived tone as the paint dries.
Lighting Changes Perception
When you hold a paint sample under different lights, the color can look noticeably darker or lighter because light direction, intensity, and temperature change how pigments reflect and absorb wavelengths.
You’ll notice mood shifts tied to color psychology when warm bulbs cozy a room or daylight makes hues crisp.
Consider paint durability separately; finish and pigment concentration affect longevity but not immediate visual shifts.
Test in situ at multiple times of day and with fixtures you’ll use.
Try these checks:
- Observe at morning daylight.
- Check under warm evening light.
- View with overhead vs. side lighting.
- Compare with your furniture nearby.
Sample Size Limits
Lighting can change how a swatch reads, but sample size itself plays a big role in misleading your eye. When you test a thin strip or small card, surrounding surfaces and edge effects dominate perception.
Small samples won’t show true color mixing behavior on a full wall, and they hide how pigments layer. You also won’t see realistic Surface absorption on different substrates—primered drywall soaks differently than raw wood.
Trust larger swatches and multiple coats on the real surface before deciding. Take photos under consistent light, compare across times of day, and remember tiny samples can lie about the finished look.
Finish Affects Tone
Although the same pigment, different finishes change how a color looks by altering sheen and light reflection, so a swatch can mislead you about the final tone. You’ll notice finish affects perceived depth: glossy surfaces bounce light and can seem lighter, while matte absorbs light and reads darker.
Consider these practical points:
- Test full-size patches to evaluate Color contrast against trim and floors.
- Compare finishes—flat, eggshell, satin, gloss—on the same wall.
- Watch ambient light; it interacts with Texture variation to shift tone.
- Observe at different times of day before committing to a finish.
How to Avoid Surprise Color Darkening
If you want to prevent a paint color from surprising you after it dries, start by testing swatches on the actual wall and viewing them at different times of day; paint samples let you see how sheen, base, and underlying surface change appearance.
You’ll also check labels for pigment load and binder—basic paint chemistry that affects wet-to-dry shifts.
Use both primer and the desired topcoat on samples so color perception matches the final job.
Inspect swatches under your room’s lighting, next to furniture and trim.
Take photos at different hours, wait full drying time, and only commit when you’re confident.
How to Correct Paint That Dried Too Dark
When paint dries darker than you expected, don’t panic—you can fix it without redoing the whole room. Assess lighting and mood first; color psychology matters for how you feel in the space.
Then try these targeted steps:
- Add accent trim or lighter furniture to balance tone and brighten perception.
- Recoat with a lighter shade in a small test area to confirm impact and paint durability.
- Use strategic lighting—warmer or brighter fixtures—to alter appearance without repainting.
- Introduce textiles or art with lighter hues to shift focus and soften the overall darkness.
Each option saves time and preserves quality.
How to Lighten a Dark-Dried Paint Job Safely
If you catch a dark edge while the paint’s still wet, you can feather it with a slightly damp brush or roller to blend the tone into the surrounding area.
For fully dried sections, you’ll lighten them safely by applying a thin, tinted glaze or by re-coating with a lighter shade rather than over-thinning the paint.
Never thin paint more than the manufacturer’s recommendation—use proper thinner and ventilate the space to avoid fumes and poor adhesion.
Lightening Wet Edges
Struggling with a dark-dried strip along a freshly painted wall? You can fix wet edges before they cure to preserve color consistency and compensate for paint transparency. Act quickly and gently.
- Feather the edge: use a slightly damp, soft brush to blend the darker strip into the wet area.
- Light glaze: mist a tiny amount of water on latex paint, then re-roll lightly to even sheen.
- Match pressure: apply consistent roller pressure from the wet zone into the dry to avoid lap marks.
- Work in small sections: keep a wet edge and finish before paint begins to set.
Safe Paint Thinning
Want to lighten a dark-dried paint area without ruining the finish? You can thin paint carefully to blend and reduce darkness, but respect paint chemistry and finish type. Start by testing a small patch: mix minimal compatible thinner—water for latex, manufacturer-recommended solvent for oil—until viscosity eases.
Apply thin glazes or scumbles, building translucency rather than stripping color. Use glazing medium to preserve sheen and control tint. Keep strokes consistent and feather edges to avoid lap marks.
Remember color theory: layering translucent lighter tones alters perceived value more naturally than over-thinning, which risks poor adhesion and streaks.
When to Repaint vs. Glaze or Lighten
When you’re deciding whether to repaint or simply glaze/lighten a wall, start by evaluating the surface condition and your goal. You’ll choose repainting for damage or drastic hue shifts; glazing or lightening works for subtle adjustments, color blending, and texture enhancement.
Consider:
- Surface damage: holes, peeling, stains require repainting.
- Color change magnitude: big shifts mean new paint.
- Desired finish: glazing adds depth; lightening softens tone.
- Time and budget: glazing is quicker, repainting more labor.
Match technique to need, test a small area, and you’ll avoid unnecessary work while achieving the desired look.
How Professional Painters Control Final Color
How do pros get the wall color you pictured in your head? You’ll see them test swatches, observing light at different times to predict dry tone, and they’ll adjust tint formulas on the spot.
They consider color psychology to match mood and function—calming blues for bedrooms, energizing yellows for kitchens—so the final hue supports the room’s purpose.
You’ll notice they prep surfaces, control sheen, and apply consistent coats to guarantee even absorption and paint durability.
If a sample reads off, they tweak base, pigment load, or application method until the wet sample reliably equals the dry result.
How Product Labels Explain Expected Dry Color
When you’re comparing a wet swatch to a dry sample, remember the color you see wet will often look richer than the final dry finish.
Check the product label for notes about “wet appearance” versus “dry color” and any recommended drying times before judging the shade.
The label will also tell you about sheen and pigment strength, which help you predict how the color will settle once it’s fully dry.
Wet Vs. Dry Sample
Although a wet paint sample can look vividly darker, product labels usually tell you what the color will be once it dries, so you won’t be surprised by the final result. You’ll want to compare wet swatches to labeled expectations, since sheen, pigment load, and base affect perception.
Consider these quick checks:
- Note the labeled dry shade and undertones.
- Observe sheen listed—gloss shifts perceived depth.
- Test a small dried patch under room lighting.
- Repeat on different walls to see true aesthetic appeal.
You’ll also weigh color psychology when choosing hues that feel lighter or heavier once dry.
Reading The Label
After you’ve compared wet swatches and checked dried test patches, the label becomes your guide to the paint’s final look. You’ll find manufacturer notes on sheen, pigment load, and expected shift during the drying process.
Look for terms like “true color,” “final cure,” or “fugitive pigments” that explain temporary darkening or lightening.
Instructions often mention substrate preparation and primer recommendations to guarantee color consistency across surfaces.
VOCs, temperature, and humidity warnings tell you how environment alters drying.
Trust labeled recoat times and sample size suggestions to confirm the advertised finish before committing to a full purchase.
How to Document and Communicate Color Expectations
Because paint can shift in value and undertone as it dries, you should set clear, documented color expectations before the job starts. You’ll record chosen swatches, sheen, and conditions so stakeholders know what to expect. Note how lighting and substrate affect perception, and reference color psychology when explaining mood and intent. Tie selections to paint branding so warranties and batch codes are trackable.
- Capture photos of wet vs. dry samples.
- Log brand, formula, and batch numbers.
- State room lighting and finish.
- Get written sign-off from client or decision-maker.
Common Myths About Paint Darkening, Debunked
When paint seems to darken after you apply it, it’s easy to assume the color’s changing permanently, but many common explanations are myths. You’ll learn facts: partial wet-darkening is temporary, sheen differences don’t alter pigment, and temperature or humidity usually affect drying speed more than hue. Consider how color psychology influences perception—mood and lighting change how you see color. Paint durability matters, but aging shifts take years, not hours. Compare scenarios:
| Situation | Perceived Change | Reality |
|---|---|---|
| Wet look | Darker | Temporary |
| Sheen mismatch | Different | Same pigment |
| Fast drying | Odd tint | Surface effect |
Quick Checklist to Prevent Unexpected Color Shifts
You’ve seen why many perceived color changes are temporary or psychological, so here’s a compact checklist to help you avoid surprises before, during, and after painting. Follow these steps to respect color psychology and guarantee paint durability.
- Test swatches in multiple lighting conditions and view at different times to see true tones.
- Use the manufacturer’s recommended primer and apply consistent coats for even sheen and durability.
- Keep humidity and temperature within suggested ranges; drying conditions affect final pigment appearance.
- Let paint cure fully before judging color, and document batch numbers for touch-ups.
Frequently Asked Questions
Will Cleaning or Sealing Painted Surfaces Change the Dried Color?
Yes — cleaning or sealing can change dried color: you’ll alter paint consistency and surface reflectivity, so cleaned areas might look lighter while sealers deepen sheen and hue; test a small spot to confirm the final appearance.
Can Undercoats or Stains Bleed Through Over Time?
Yes — sometimes you’ll see stains or undercoats bleed through over time; coincidence of thin paint consistency and long drying time lets pigments migrate, so you should prime, seal, and use proper coats to prevent it.
Do UV Rays Cause Paint Color to Fade Unevenly?
Yes — UV exposure can cause paint fading unevenly, especially on sun‑exposed surfaces. You’ll notice lighter, chalky areas where pigments break down faster, and protective coatings or UV stabilizers help slow that uneven deterioration.
Will Textured Finishes Alter Perceived Color After Drying?
Yes — textured finishes will alter perceived color after drying: texture influence changes light reflection, so shadows and highlights shift tone. You’ll notice depth and variability compared to smooth surfaces, especially under directional or uneven lighting.
How Do Paint Color Names Relate to Actual Dried Shade?
Paint names are marketing guides; you’ll see variation between swatches and actual dried shade due to color consistency limits and the drying process, so always test samples on your surface under real lighting before committing.
Conclusion
When paint dries, remember it’s not just color that’s changing—it’s a story finishing its last brushstroke. Like a lake smoothing from ripples to glass, wet gloss can shine brighter, while matte settles into quiet depth. Trust labels, test swatches, and let time be your translator. Your chosen shade will reveal its true self once the surface breathes; accept the subtle shift as proof that your space has moved from promise to presence.