Is Primer Necessary for Exterior Painting
You usually should prime before exterior painting because it seals porous surfaces, evens out color, and prevents stains or peeling that can ruin your topcoat. You’ll want primer on raw wood, bare metal, masonry, or patched areas and when switching from a dark to a lighter shade. Some well-prepped, previously painted surfaces can skip it, but risk is higher. Choosing the right primer boosts adhesion and durability—keep going to learn how to decide for your project.
How This Guide Answers Your Primer Questions (Format & Quick Path)

Because you probably want quick, usable answers, this guide organizes primer information by task and outcome so you can jump straight to what matters.
Designed for quick, usable guidance—primer tips organized by task and outcome so you can get things done fast
You’ll find short sections: when to prime, surface prep steps, and product choices tied to common problems. Each task notes Color matching tips and how primer affects final hue, plus Budget considerations so you can compare cost versus longevity.
You’ll get quick-check lists for siding, trim, and patched areas, plus recommended primer types with pros and cons.
Use the quick-path markers to skip detailed explorations and land on the exact action you need now.
Quick Answer: Is Primer Necessary for Exterior Painting?
If your siding, trim, or patched spots are bare, porous, stained, or patched, you should prime before painting.
In many other cases, you can skip primer, but consider two factors: color contrast and substrate condition. If you’re covering a darker or vivid color, primer helps block bleed-through and reduces the number of finish coats.
On new or porous materials, primer improves adhesion and enhances primer durability, so your topcoat resists peeling and weathering longer.
For spot repairs, priming prevents visible patches.
Ultimately, primer isn’t always required, but it’s your insurance for consistent, lasting exterior results.
How To Decide If You Need Primer (Quick Checklist)
Now that you know when primer helps, use this quick checklist to decide fast on each surface.
Inspect substrate: bare wood, metal, or new drywall usually needs primer. Look for stains, tannin bleed, rust, or patch joint compound—prime those.
Inspect the substrate—bare wood, metal, or new drywall usually needs primer; block stains, rust, or patched areas.
If you’re changing from dark to light, color matching requires primer to block previous tones.
Check adhesion: peeling paint or powdery siding needs primer after proper prep; consider primer removal for failing old coats first.
For glossy surfaces, sand then prime.
For previously painted, sound surfaces, test a small area—if coverage is good, you may not need full priming.
When Skipping Primer Is Reasonable
When you’re working with a sound, previously painted surface and the color change is small, skipping primer can be reasonable — provided you sand glossy areas, clean thoroughly, and use a high-quality topcoat formulated for good adhesion.
You’ll save time if the existing coating is intact, mildew-free, and compatible with your new finish. Focus on surface prep and test a small patch to verify adhesion and color coordination.
Choose a topcoat with proven primer durability to resist peeling and weathering. If you see poor coverage, bleed-through, or adhesion issues during the test, apply primer before proceeding.
When You Must Use Primer for Exterior Surfaces
Because exterior conditions and substrate problems can quickly undermine a new paint job, you must prime whenever bare wood, rust, patched areas, or drastic color changes are involved. You’ll also prime porous masonry, raw metal, and any surfaces showing tannin bleed.
Choose a primer compatible with your topcoat and the substrate; consider stain-blocking, rust-inhibiting, or masonry formulas. Mind color mixing—tinted primers can reduce topcoat coats when shifting hue dramatically.
Prep thoroughly: clean, sand, and address moisture. Keep tool maintenance regular so rollers and brushes deliver proper coverage and don’t introduce defects that defeat the primer’s purpose.
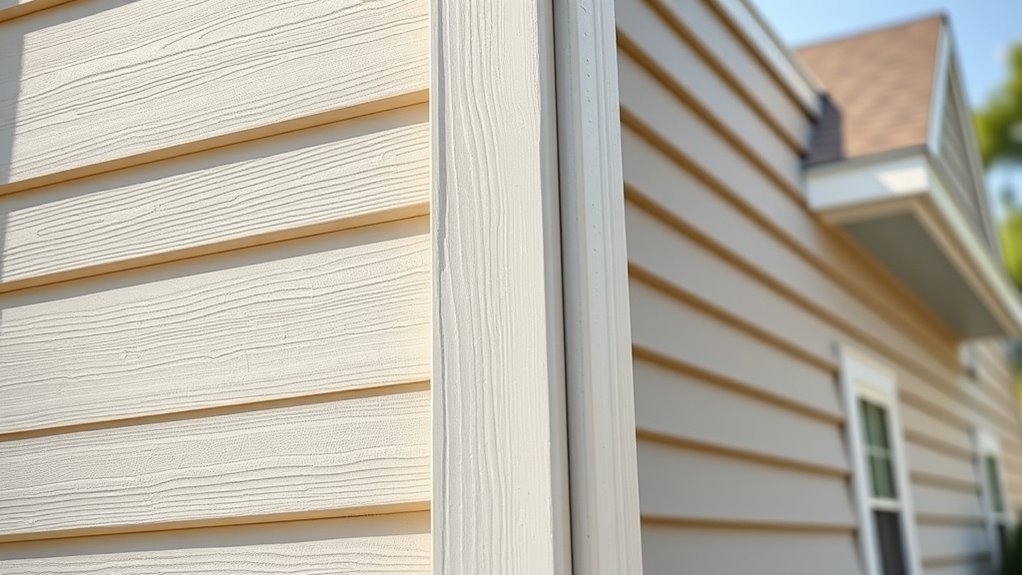
Primer and Paint Adhesion on Siding
Before you paint siding, you’ll want the surface clean and dry so primer can bond properly. Use adhesion-promoting methods like light sanding, a bonding primer, or a compatible etching primer depending on the siding.
Check primer compatibility with your siding material—wood, vinyl, fiber cement, and metal each need different products for reliable adhesion.
Surface Cleanliness Importance
Why does surface cleanliness matter so much for primer and paint adhesion on siding? You must remove dirt, mildew, chalk, and loose flakes so primer bonds directly to the substrate. Contaminants block adhesion and cause peeling.
Clean surfaces also let you assess and achieve accurate color matching, since grime alters perceived hue. When siding’s clean, primer and paint form continuous films that resist moisture intrusion and boost weather resistance.
You’ll extend finish life, avoid premature failures, and get truer color results. Prep should be thorough but not invasive—cleaning, rinsing, and drying are essential before you apply primer or paint.
Adhesion Promotion Methods
How do you make sure primer and paint really stick to siding? Start with a clean, dry surface, then sand glossy spots to create tooth.
Choose a primer formulated for exterior use and for the surface profile; that helps bonding and color matching when switching shades.
Apply primer with appropriate brush types or a roller for even coverage—angled brushes reach trim, synthetic bristles suit acrylics.
Feather edges to avoid ridges and allow full drying before topcoat.
Consider a bonding primer for problematic areas and spot-prime bare patches.
Test a small area to confirm adhesion before finishing the entire wall.
Siding Material Compatibility
Which siding you are working with matters a lot for primer and paint adhesion.
If you have vinyl, use a primer formulated for non-porous surfaces to help paint stick and keep color matching consistent; some paints for vinyl don’t need primer if the surface is intact.
For fiber cement or wood, primer blocks tannins and evens porosity, ensuring durable adhesion.
Metal needs rust-inhibiting primers.
For stucco or masonry, use high-penetration primers.
Consider weather considerations: temperature, humidity, and exposure affect primer choice and drying.
Match primer chemistry to siding to prevent peeling, staining, and premature failure.
Why Primer Seals Porous Materials Like Bare Wood
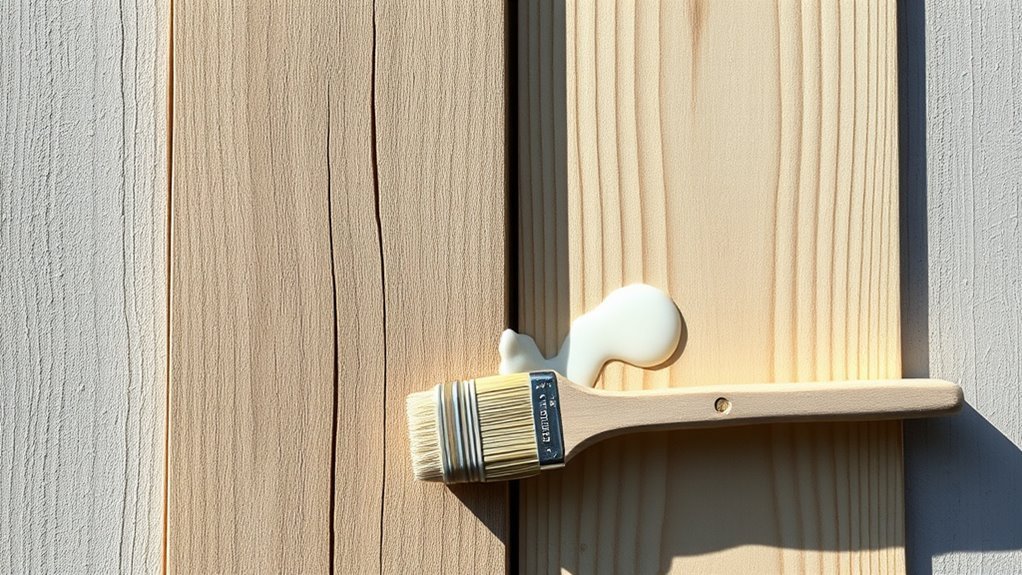
Because bare wood soaks up liquids like a sponge, primer’s job is to fill those tiny pores and create a stable, uniform surface for paint to bond to. You apply primer so paint covers evenly, uses less topcoat, and resists peeling. That predictability helps with color matching—you’ll get the hue you expect without multiple coats.
Sealing pores also reduces weathering and moisture intrusion that warp or split wood. Consider primer cost in budget planning: it adds upfront expense but lowers total paint use and maintenance over time.
Skip it, and you risk uneven finish and shorter-lived exterior protection.
How Primer Prevents Tannin and Stain Bleed-Through
When you prime tannin-rich woods like cedar or redwood, the primer blocks pigment-laden juices from migrating through the topcoat and discoloring your finish; it does this by creating a chemical and physical barrier that locks stains in place and prevents solvents in later coats from drawing them out. You’ll choose a stain-blocking primer that bonds to wood, isolates tannins, and helps you achieve consistent color matching and texture matching with fewer coats.
| Surface | Primer Type | Benefit |
|---|---|---|
| Cedar | Shellac/alkyd | Stops tannins |
| Redwood | Oil-based | Improves adhesion |
| Aged wood | Stain-blocker | Uniform finish |
When Primer Blocks Rust and Metal Corrosion
When you prime metal surfaces, you stop surface oxidation before it starts so rust can’t take hold.
A good metal primer also gives paint something to grip, so coatings stick better and last longer.
That combination prevents corrosion from spreading and keeps your exterior finish sound.
Prevents Surface Oxidation
If you’re painting metal surfaces, a good primer does more than improve adhesion—it forms a protective barrier that keeps moisture and oxygen from reaching the metal and starting the oxidation process. You’ll prevent surface oxidation by sealing pores, blocking electrolytes, and isolating bare metal from corrosive elements.
Choose primer color to suit topcoat opacity and inspection needs—zinc-rich or red-oxide options give visible corrosion protection cues. Apply evenly, repair scratches promptly, and follow manufacturer recoat windows to maintain the barrier.
- Seal pores
- Block electrolytes
- Isolate metal
- Monitor primer color
Enhances Paint Adhesion
How does a primer that blocks rust actually help your topcoat stick—and stay stuck? You rely on a corrosion-blocking primer to create a stable, roughened surface that mechanical and chemical bonds can grab. It seals porous metal, prevents undercutting by rust, and evens out substrate irregularities so your paint lays down uniformly.
That consistency aids color matching and reduces the chance of premature peeling or flaking. Because the primer shields metal from moisture and oxidation, it boosts long-term weather resistance and maintains adhesion under temperature shifts.
Use the right metal primer, and your topcoat will perform as designed.
Which Primers Help Hide Uneven Patches and Repairs
Because patchwork and texture differences catch the eye, you’ll want a primer that evens out surface appearance while improving adhesion. Choose products with good filling properties and Color matching tinting to neutralize repaired areas and create uniform base tones.
Also pick primers offering Weather resistance to protect patched spots from moisture and UV stress.
- High-build latex primer for skim-filling minor texture.
- Oil-based primer for sealing porous repairs and stains.
- Stain-blocking primer with tinting for better color match.
- Flexible exterior primer that resists cracking and withstands weather exposure.
Primer by Substrate: Wood, Masonry, Metal
When you’re choosing a primer, match it to the substrate—wood, masonry, or metal—so the coating adheres properly and lasts longer.
For wood, use a penetrating primer that seals tannins and stabilizes grain; it improves paint grip and lets your color theory choices read true.
Masonry needs a breathable, alkali-resistant primer to prevent moisture entrapment and enhance weatherproofing on porous surfaces.
For metal, pick a rust-inhibiting, adhesion-promoting primer to prevent corrosion and flaking.
Always prep surfaces—clean, dry, and repair—so primers can perform.
Correct primer selection reduces maintenance and preserves finish integrity across substrate types.
Primer Selection for Previously Painted Surfaces
After matching primers to raw substrates, you’ll also need to pick the right product for previously painted surfaces. You’ll assess adhesion, sheen differences, and any peeling or chalking before choosing.
Consider these quick steps to guide selection:
- Clean and sand to reveal underlying primer texture and remove loose paint.
- Spot-prime bare patches with a bonding primer that matches existing sheen for easier color matching.
- Use a high-hide primer when drastic color shifts require fewer topcoats.
- Choose flexible, breathable primers on aged coatings to prevent future flaking.
Follow these steps and you’ll get a durable, uniform finish without over-priming.
Best Primer Types for New Construction vs. Repainting
If you’re starting a new build, you’ll typically choose high-coverage, moisture-resistant primers formulated for raw substrates, while repainting calls for adhesion-focused or stain-blocking primers that bond to existing coatings and hide imperfections. You’ll pick primers for new construction that seal porous materials and aid color matching; for repainting you’ll prioritize adhesion, stain control, and minimizing environmental impact. Consider substrate, topcoat type, and local regs when choosing.
| Situation | Primer focus |
|---|---|
| New wood | Sealant, high coverage |
| Masonry | Breathable, moisture-resistant |
| Previously painted | Adhesion, stain blocking |
| Low-VOC need | Environmental impact considered |
Oil-Based Primer: Pros, Cons, and Ideal Uses
Switching from primer selection by substrate, you’ll want to contemplate oil-based primers where durability and stain blocking matter most. You’ll choose oil when tannin bleed, rust, or heavy staining threatens finish quality. Expect longer cure times and stronger fumes; practice safe ventilation and proper cleanup during primer removal if you switch systems.
Oil excels on bare wood, metal, and previously oil-coated surfaces, and it helps with color matching by providing an opaque, uniform base.
Downsides: hard-to-sand films and less flexibility in extreme cold. Evaluate substrate, climate, and topcoat compatibility before committing.
- Durability
- Stain blocking
- Surface prep
- Compatibility
Latex (Acrylic) Primer: Pros, Cons, and Ideal Uses
When you use a latex (acrylic) primer, you’ll notice strong adhesion and good flexibility that helps painted surfaces resist cracking as they expand and contract.
It also dries quickly, letting you recoat sooner and finish jobs in less time. These traits make it a solid choice for many exterior materials, especially where fast turnaround and movement resistance matter.
Adhesion And Flexibility
Because exterior surfaces expand, contract, and face moisture, you’ll want a primer that grips well and stays flexible — and latex (acrylic) primers are designed for that. You’ll get reliable adhesion and flexibility when you focus on primer durability and proper surface preparation, so coatings resist cracking and peel.
Use latex on wood, fiber cement, and masonry where movement occurs; it tolerates temperature swings and wetting better than rigid primers.
- Promotes paint bond on varied substrates
- Accommodates thermal and moisture movement
- Reduces hairline cracks and flaking
- Simplifies maintenance and recoating
Quick Drying Benefits
How quickly do you need a primer to set up and still perform well? You want a latex (acrylic) primer that dries fast so you can finish coats before weather considerations change. Quick drying reduces downtime, limits dust contamination, and helps with tight schedules. It also aids color matching by letting you test topcoat shades sooner. Consider humidity and temperature; fast dry isn’t always best in extreme cold. Use this quick comparison:
| Benefit | When to Use | Caution |
|---|---|---|
| Fast recoating | Mild, dry days | Not in very cold/humid |
| Quick touch-ups | Short timelines | May flash if rushed |
| Color tests | Color matching needed | Allow full cure before final coat |
Shellac and Specialty Primers: When to Use Them
If you’re tackling stains, heavy odor, or tricky surfaces, shellac and other specialty primers can be your best first step; they seal, block, and adhere where regular latex primers often fail. You’ll choose shellac for nicotine, water stains, or severe tannin bleed, and oil-based or blocking primers for persistent odors.
Consider color matching when switching from dark to light finishes, and weigh primer durability against exposure conditions. Use specialty primers when substrate contamination, extreme weather, or rapid turnaround demand superior sealing.
- Shellac for stains and odor control
- Oil-based for sealing tannins
- Stain-blocking for wood
- Fast-dry for quick recoats
Bonding Primers for Slick Surfaces and Plastics
When you’re painting slick surfaces like PVC, laminate, or glossy metal, bonding primers give paint something to grab onto so coatings don’t peel or flake prematurely.
You should choose a primer formulated for low-energy plastics or slick substrates; these contain adhesion promoters that help topcoats bond. Test adhesion before committing, and consider color matching when switching from dark to light topcoats to reduce tint coats.
Apply per manufacturer directions, sanding lightly if recommended. Store leftover primer properly—seal containers, avoid freezing, and follow primer storage guidelines to preserve performance.
Proper prep and the right bonding primer prevent costly recoats.
Rust-Inhibiting Primers for Ferrous Metals
Because bare ferrous metal rusts quickly, you’ll want a primer that stops corrosion before topcoating, and rust-inhibiting primers are formulated to do just that. You’ll choose primers that bond to steel, block metal rust, and provide a stable base for exterior paints.
Pay attention to primer color—zinc-rich grays or red oxides signal corrosion protection and affect topcoat coverage. Apply to clean, de-rusted surfaces; follow manufacturer dry times.
For best results, pick a primer rated for exterior exposure and compatible with your chosen topcoat.
Consider these selection points:
- Surface prep required
- Corrosion inhibitors present
- Primer color choice
- Topcoat compatibility
Masonry Primers and Masonry-Specific Considerations
Shifting from metal to masonry, you’ll face very different needs: porous surfaces like brick, stucco, and concrete draw in moisture and paint differently than steel, so you need primers that seal, block efflorescence, and improve adhesion.
Choose masonry primers formulated to penetrate and fill pores, resist alkali, and work with masonry sealants where joints or heavy moisture demand extra protection. Mind surface texture—rough or pitted areas need higher-build products to avoid shadowing and uneven wear.
Test adhesion on small sections, use breathable primers to let trapped moisture escape, and match primer type to topcoat for durable, long-lasting results.
Primer for Composite and Engineered Siding Materials
With composite and engineered siding, you’ll want to know when primer is required—especially on cut edges, repairs, or surfaces with factory sealers.
Skipping primer can lead to poor adhesion, uneven sheen, and premature peeling that shortens the lifespan of your finish.
Before you paint, check manufacturer guidance and spot-test to avoid those risks.
When Primer Is Needed
How do you know if composite or engineered siding needs primer? You’ll check surface porosity, previous coatings, and any manufacturer guidance before painting. Use primer for better adhesion and to enable consistent color matching, especially when switching tones or covering stains.
For large areas, consider spray techniques to get even coverage.
- New, uncoated composite—prime for adhesion and uniform finish.
- Bare patches or repairs—spot-prime to seal substrate.
- Porous or chalky surfaces—prime to prevent peeling.
- Major color changes—prime to ensure true topcoat hue.
Skipping Primer Risks
Ever wondered what happens if you skip primer on composite or engineered siding? You risk poor adhesion, uneven sheen, and premature peeling because these materials can resist paint.
Without primer, color matching becomes unpredictable as substrates soak up or reflect pigments differently.
Moisture can penetrate seams, causing swelling or mold that ruins the finish.
If you later decide to fix it, primer removal and repainting cost more time and money than doing it right initially.
You’ll also face warranty issues if the manufacturer guidance called for priming.
Bottom line: don’t skip primer—it’s protection, consistency, and long-term savings.
Primer Compatibility With Topcoat Types
Although primers share the job of promoting adhesion and sealing surfaces, not every primer pairs well with every topcoat, so you’ll need to match chemistries to avoid failures. You want a primer that supports color blending and aids texture smoothing while preventing peeling or ambering. Think about solvent-based primers under oil enamels, latex primers under acrylics, and specialty primers for glossy or slick substrates. Follow manufacturer recommendations and test a small area.
Match primer and topcoat chemistries—test first—to ensure adhesion, prevent peeling or ambering, and smooth color and texture.
Common pairings to consider:
- Latex primer + acrylic topcoat
- Oil-based primer + oil enamel
- Bonding primer + hard-to-stick surfaces
- Stain-blocking primer + tannin-rich woods
Spot-Priming vs. Full-Surface Priming: When Each Works
You’ll spot-prime when small areas show bare wood, rust, or isolated stains that don’t warrant redoing the whole surface.
Prime the entire surface if you’re changing paint types, covering widespread repairs, or dealing with uneven porosity that would cause patchy sheen or adhesion.
Choosing correctly saves time and guarantees a uniform, long-lasting finish.
When To Spot-Prime
When deciding between spot-priming and priming an entire surface, focus on the condition and uniformity of the substrate. You’ll spot-prime when small repairs, stains, or raw patches interrupt an otherwise sound surface. Consider color matching for stubborn stains and pick primers that’ll accept your topcoat.
Choose tool selection—brush, roller, or small sprayer—based on access and texture so you don’t over-apply. Limit priming to areas that need adhesion or sealing rather than cosmetic consistency.
- Seal stains and tannin bleed-through.
- Prime exposed bare wood or patched drywall.
- Treat rusted metal touch-ups.
- Address localized water damage.
When To Prime Fully
Spot-priming handles small, localized issues, but there are times you’ll want to prime the whole surface to guarantee uniform absorption, adhesion, and color holdout.
Prime fully when substrate porosity varies, when old paint shows tannin bleed, or when you switch between radically different colors—full priming ensures consistent color matching and hides underlying stains.
You should also prime entire facades after repairs, raw siding replacement, or extensive mildew removal to create an even base.
In climates prone to insect activity, choose primers that aid pest control by sealing gaps and resisting degradation.
Full priming prevents uneven wear and extends finish life.
How To Test If a Surface Needs Primer Before Painting
Before you pick up a brush, run a few quick tests to see if the surface actually needs primer. You’ll assess adhesion, staining, and whether the new color will cover the old for proper color matching, while considering environmental impact from extra coats.
Before painting, run simple tests to check adhesion, staining, and color coverage—saving coats and the environment.
- Clean test: wipe a small area; if grime sticks, primer helps adhesion.
- Scratch test: rub with fingernail; flakes mean bare wood or rust needing primer.
- Water test: sprinkle; beading suggests glossy or sealed surfaces may skip primer.
- Bleed test: tape a white cloth to detect tannin or stain transfer that primer must block.
Surface Prep Steps That Make Primer More Effective
Now that you’ve checked adhesion, staining, and surface sealing, get the prep right to help primer bond and perform. Remove loose paint, dirt, and mildew with a scraper, pressure wash, and mild detergent; let surfaces fully dry.
Sand glossy areas to dull the substrate so primer adheres evenly. Mask and protect trim.
For patched or repaired spots, feather edges and sand smooth to avoid telegraphing. Match existing tones when selecting primer and consider color matching under a thin coat to reduce topcoat layers.
Store primers upright, sealed, and at recommended temperatures—proper primer storage preserves performance and pot life.
Repairing and Priming Water-Damaged Areas
Start by inspecting the affected area and removing any soft, moldy, or crumbling material so you’re working with solid surfaces.
Repair or replace damaged boards or trim, let everything dry fully, and treat any remaining mold.
Once the area’s sound and dry, prime with a quality water-resistant primer formulated for exterior use.
Assess And Remove Damaged Material
If water’s left its mark on siding, trim, or soffits, you need to inspect the area thoroughly and remove any soft, swollen, or moldy material before you prime and paint. You’ll cut out damaged sections back to sound substrate, dry the cavity, and treat mold with an appropriate cleaner. Save salvable pieces for color matching and consider eco-friendly options for replacements and cleaners.
Patch or replace boards, ensuring fasteners and flashings are secure. Follow with a smooth substrate ready for primer application.
- Cut out rot to solid wood or substrate
- Dry and ventilate the cavity
- Clean mold with recommended agents
- Replace with matched, durable material
Apply Appropriate Water-Resistant Primer
Because repaired areas will still be vulnerable to moisture, apply a water-resistant primer that bonds to the substrate and seals exposed fibers before you paint. You’ll clean the surface, remove loose primer removal residue, sand edges smooth, and let the area dry completely.
Choose a primer formulated for exterior, damp-prone substrates and consider color matching if the patched area will show through thinner topcoats. Use a brush for crevices and a roller for flats, feathering to blend with surrounding primer.
Follow manufacturer dry times and recoat instructions; proper priming prevents staining, adhesion failure, and recurrent water damage.
Priming Over Stains: Techniques for Tough Discoloration
When stains penetrate wood, stucco, or siding, you’ll need a targeted primer that blocks discoloration and prevents bleed-through; regular latex won’t cut it for tannins, rust, or water marks. You choose shellac or oil-based stain-blockers for severe tannin or rust, and apply them sparingly to avoid lap marks.
Consider color matching for final coats and weigh environmental impact when selecting strong primers.
Prep by cleaning, sanding glossy spots, and feathering edges so primer bonds well.
- Test a small area first.
- Use respirator and ventilation.
- Apply thin, even coats.
- Seal edges and flash points.
Drying and Cure Times: Primer vs. Topcoat Expectations
When you’re planning a job, know that primers usually dry faster to the touch than topcoats but often need longer to fully cure.
Factors like primer formulation, coat thickness, and surface porosity all change cure time, and temperature and humidity are especially influential—cold or damp conditions slow chemical curing.
Always follow product instructions and allow extra time in adverse weather so the topcoat bonds and performs as designed.
Primer Versus Topcoat Drying
Although primers often feel dry to the touch within an hour or two, they typically need more time than a topcoat to develop full hardness and adhesion, so you should plan your schedule around manufacturer cure times rather than surface dryness.
You’ll notice primers, especially eco friendly primers, may accept sanding sooner but still need longer to bond and resist moisture. Color matching primers can also change slightly as they cure, affecting final topcoat appearance.
Consider these practical expectations:
- Primer may be dry-to-handle before full cure.
- Topcoat often cures faster on properly primed surfaces.
- Sanding windows differ between products.
- Follow manufacturer cure times.
Factors Affecting Cure Time
You’ve seen how primers can feel dry before they’ve fully cured; now let’s look at what actually controls that cure time. You’ll notice formulation matters: oil, latex, or specialty primers cure differently and affect color matching by altering how the topcoat lays in and reveals hue.
Film thickness and coat count change solvent evaporation and polymer crosslinking, so follow manufacturer recommendations.
Surface porosity and previous coatings dictate soak-in and adhesion, which influence paint durability long-term.
Additives, pigment load, and ventilation change reaction rates without invoking weather specifics.
Plan cures before recoating to avoid trapping solvents or compromising finish.
Temperature And Humidity Effects
Because temperature and humidity directly control how solvents evaporate and polymers crosslink, you’ll see primer and topcoat drying and cure times change noticeably with the conditions. You should plan applications when temperatures stay within manufacturer ranges and humidity is low to avoid tacky finishes or extended recoat waits.
High humidity slows solvent escape; cold temperatures retard crosslinking. That affects adhesion, color matching, and whether you choose an eco-friendly, fast-curing formulation.
- Warm, dry: faster cure, quicker recoat.
- Cool, dry: slower cure, stable finish.
- Warm, humid: risk of blushing, longer tack.
- Cool, humid: avoid painting; cure may stall.
How Weather Affects Primer Application and Performance
When you’re planning an exterior primer job, remember that temperature, humidity, and wind all change how primer goes on and cures. You should monitor weather patterns before mixing and rolling.
Sudden rain or strong wind can ruin tacky primer, trap moisture, and cause uneven film. Wind drives dust into wet primer, lowering adhesion, while persistent dampness lengthens cure time and invites blushing or mildew.
Proper timing boosts primer durability and long-term adhesion, reducing peeling and stain bleed-through. Plan for stable drying conditions, shelter the work area if needed, and check forecasts so your primer achieves full strength before topcoating.
Temperature and Humidity Limits for Exterior Priming
You should aim to prime when temperatures are within the manufacturer’s recommended range, typically between 50°F and 85°F, to guarantee proper adhesion and curing.
Keep relative humidity below about 85%, and avoid priming when surfaces are damp or dew is expected.
If conditions fall outside those limits, wait or use products rated for cooler or more humid environments.
Ideal Temperature Range
Although paint manufacturers set specific windows, the general rule is to prime exterior surfaces only when daytime temperatures stay within roughly 50–85°F (10–29°C) and relative humidity is below about 85%. You’ll want consistent warmth so primer flows, adheres, and cures properly.
Consider local weather patterns and schedule around cold mornings or heat spikes. Also think about color coordination—darker primers can absorb heat and alter drying.
- Aim for stable daytime temps in the stated range.
- Avoid priming near forecasted freezes or heat waves.
- Work when surfaces are dry and out of direct midday sun.
- Use sun/temperature shields for sensitive jobs.
Acceptable Humidity Levels
Because moisture slows primer bonding and curing, aim to prime exterior surfaces when relative humidity is consistently below about 85%—and preferably in the 40–60% range—so the film can dry evenly and resist blushing or adhesion problems.
You should avoid priming during overnight humidity spikes or after rain, because trapped moisture undermines adhesion. Watch local weather patterns and choose mid-day windows when dew has evaporated.
High humidity from nearby plant growth can raise surface moisture, so trim vegetation before painting. If conditions are marginal, use fast-drying primers formulated for damp conditions or postpone until humidity drops for reliable results.
Primer Application: Brush, Roller, Sprayer Pros & Cons
Which method fits your project best depends on surface, speed, and finish goals. You’ll choose based on texture, access, and whether you need precise color matching after primer removal from failed spots.
Brushes let you cut in and remove runs; rollers cover flat areas with good texture control; sprayers give speed and uniformity but can overspray and waste primer. Consider tools, cleanup, and skill.
- Brush: precision, best for trim and repairs.
- Roller: efficient for siding and broad walls.
- Sprayer: fastest, best for large areas.
- Hybrid: combine methods for ideal results.
Coverage Rates and How Much Primer You’ll Need
When planning primer, figure coverage by surface type and primer label—most primers cover about 300–400 sq ft per gallon on smooth surfaces and 200–300 sq ft on rough or porous siding. So measure exposed square footage, account for texture and porosity, and round up for touch-ups and waste.
You’ll calculate gallons by dividing area by the labeled coverage, then add 10–20% for irregularities and primer removal waste.
For multi-color projects, coordinate primer color with topcoat choices—use tinted primer to improve hiding and reduce coats. Keep a small extra can for repairs and consistent color matching later.
Cost Comparison: Primer Now vs. Repaint Sooner Later
You’ll pay more up front when you buy quality primer, but that cost can cut down on how often you need a full repaint.
Skipping primer might save money today but usually raises long-term repaint expenses due to peeling and extra prep.
We’ll compare those immediate primer costs to the potential future repaint bills so you can decide which saves you money over time.
Upfront Primer Cost
Wondering whether priming now will save you money down the road? You’ll weigh upfront primer cost against immediate finish quality. Color matching and primer tinting can reduce the number of paint coats, cutting labor and material.
Consider these factors:
- Primer price per gallon versus paint price per gallon.
- Coverage improvement from primer tinting that minimizes paint used.
- Labor time saved when fewer coats are needed.
- Surface adhesion benefits that lower touch-up frequency.
You decide if a slightly higher initial outlay for primer yields clearer short-term savings and better immediate results.
Long-Term Repaint Expense
One clear way to decide whether to prime now is to compare the lifetime cost. You’ll save repaint cycles when primer prevents blistering, improves adhesion, and reduces visible color blending issues that force touch-ups. Skipping primer can mean primer removal later, extra labor, and faster faded finish. Consider both materials and the emotional toll of frequent repainting.
| Scenario | Immediate Cost | Long-term Pain |
|---|---|---|
| Prime now | Higher upfront | Fewer repaints, calmer |
| Skip primer | Lower start | More work, frustration |
| Remove failed primer | Expensive | Regret, exhaustion |
Common Mistakes That Make Primer Fail
When primer fails, it’s usually because of avoidable mistakes like painting over dirty surfaces, skipping proper drying times, or choosing the wrong product for the material. You’ll notice issues fast: peeling, uneven color, and increased environmental impact from premature recoating.
When primer fails, it’s usually from avoidable mistakes—dirty surfaces, rushed drying, or the wrong product—leading to peeling and wasted effort.
Also consider color psychology—poor primer choice can alter final hues and mood. Avoid these errors:
- Painting over dust, mildew, or oil without cleaning.
- Ignoring manufacturer drying and recoat times.
- Using interior or incompatible primer on exterior surfaces.
- Skipping adhesion tests on glossy or previously painted areas.
Fix these to extend finish life and reduce waste.
How To Tell If Old Primer Is Still Good or Needs Removal
Before you repaint, you’ll want to check whether the old primer is still sticking—press or scrape a small area to spot adhesion problems like flaking or peeling.
Also inspect the surface for contamination such as dirt, grease, or mold, since those will prevent new coats from bonding.
If you find loose primer or visible contaminants, plan to remove and clean the area before priming again.
Check For Adhesion Problems
Because adhesion fails long before paint visibly peels, you should test old primer now to avoid rework later. Inspect by scoring a small area, then press a piece of tape; if paint lifts, primer’s compromised. Check edges, corners and trim where wear concentrates. Consider color matching when evaluating bare spots—differing hue can signal loss of primer film.
Choose Brush selection wisely for tests: a stiff brush reveals loose particles, a soft one won’t. If failures appear, remove and re-prime the affected zones. Keep records of locations and results so you target remediation efficiently and avoid full-strip jobs unnecessarily.
- Score and tape test
- Edge inspection
- Color-match check
- Brush-based assessment
Inspect For Contamination
How can you tell if old primer’s been contaminated and needs removal? Inspect visually for discoloration, mold, or oily sheen — common contamination sources include dust, grease, mildew, and paint overspray.
Smell for mustiness or solvents.
Touch areas cautiously; primer that crumbles, peels, or wipes off indicates surface contamination or poor cure.
Tape test small sections: press and remove tape—if primer lifts, it’s compromised.
Check adhesion with a scraper and look for blisters or powdering.
If contamination is localized, clean and re-prime; widespread contamination or deep breakdown means strip and start fresh for reliable exterior performance.
When To Remove Failing Primer vs. Recoat It
When primer is blistering, peeling, chalking, or showing adhesion failure, you should remove and re-prime the area rather than just painting over it.
You’ll also consider primer removal when stains bleed, when previous coats are inconsistent, or when color consistency matters for the final finish.
If the primer is sound, you can often recoat after light sanding and cleaning.
- Remove failed primer down to a stable substrate for flaking or loss of adhesion.
- Re-prime stained or tannin-bleeding areas with a suitable sealer.
- Sand and spot-prime marginal areas before full recoat.
- Test a small area for color consistency before finishing.
Environmental and VOC Considerations for Primers
When choosing a primer, you’ll want to take into account low‑VOC and water‑based options that cut emissions without sacrificing performance.
Think about environmental factors like local air-quality rules, the primer’s lifecycle impact, and how weather can affect off‑gassing.
Finally, follow your municipality’s guidance for leftover primer and containers to ensure proper disposal or recycling.
Low-VOC Primer Options
Curious about cutting fumes without sacrificing performance? You can choose low-VOC primers that deliver adhesion and stain blocking while keeping air safer. Look for eco friendly options labeled water-based or acrylic; they dry fast and accept topcoats well.
Use color matching techniques at the store to tint primer for better coverage and fewer coats. Consider these practical choices:
- Water-based acrylic primer — low odor, good for wood and siding.
- Shellac-based low-VOC — excellent stain sealing, quick dry.
- Zero-VOC acrylic — best for sensitive occupants.
- Hybrid primers — blend performance with reduced emissions.
Environmental Impact Factors
You’ve already seen how low‑VOC and water‑based primers cut fumes without giving up performance; now consider the broader environmental footprint of your primer choice. You’ll want products that minimize VOCs to protect indoor air quality during storage, mixing, and application.
Check labels for certifications and compliance with local environmental regulations to avoid banned solvents or heavy metals. Choose formulations with recycled content and sustainable packaging to reduce lifecycle impacts.
Favor manufacturers that disclose ingredient lists and stewardship plans. By selecting compliant, transparent primers, you’ll reduce emissions, protect occupants and workers, and support greener manufacturing practices.
Proper Disposal Methods
Proper disposal of primers protects both your local environment and indoor air quality, so plan ahead before you open a can. You’ll want to address Environmental concerns and follow Disposal guidelines to limit VOC release and soil or water contamination. Handle leftovers, empty cans, and contaminated rags responsibly.
- Donate usable primer to community groups or recycling centers.
- Solidify small amounts with cat litter, then dispose per local rules.
- Take hazardous waste and aerosol cans to designated collection sites.
- Store partially used cans sealed and upright, labeled, until proper drop-off.
Follow local Disposal guidelines and you’ll reduce environmental harm.
Primer and Warranty Implications From Paint Manufacturers
Because manufacturers tie many warranties to specific primers and prep steps, you should understand those requirements before you buy paint. You’ll need to follow their listed primer brand, application method, and surface preparation to keep coverage and durability guarantees valid.
Read labels and technical data sheets so color matching steps don’t void terms, and note any mandated primer removal on deteriorated surfaces. Keep receipts, photos, and contractor confirmations to document compliance.
If you diverge, expect reduced or denied warranty claims. When in doubt, call the manufacturer for written guidance to guarantee your primer choice won’t compromise warranty protection.
Matching Primer to Paint Sheen and Color Coverage Needs
When you’re selecting a primer, match its tint and base to the paint sheen and the amount of color change you need to achieve. You’ll consider color matching and sheen selection early: a tinted primer reduces coats when shifting dark to light, while a high-build white primer masks stains.
Pick a primer base compatible with your finish—waterborne for acrylic sheens, alkyd for oil-based topcoats—so adhesion and sheen remain consistent. Balance hiding power with texture to avoid flash.
Practical steps:
- Test tinted primer against final sheen.
- Evaluate coverage on a small panel.
- Check compatibility labels.
- Adjust tint sparingly.
Color-Blocking and Tinted Primer Strategies
When you plan exterior zones by color-blocking, you’ll cut down on time and material by painting large areas with coordinated tones.
Use tinted primer to boost coverage and get truer final colors, especially when switching between dark and light sections.
Together, these strategies help you save coats and achieve a cleaner, more consistent finish.
Strategic Color Blocking
Curious how to cut down on coats and keep crisp lines? You’ll plan strategic color blocking to limit overlap, using color psychology to place bold hues where they draw attention and muted tones where you want calm. Match paint texture between adjacent areas to avoid visible seams. Tape smartly, press edges, and work from light to dark when possible.
- Map zones by function and visual weight.
- Pre-cut trim edges for straight progression.
- Feather brush strokes to blend textures.
- Inspect under varied light before final coat.
This approach saves time and sharpens your exterior’s visual impact.
Tinted Primer Benefits
Although tinted primer isn’t glamourous, it’ll cut coats and improve color clarity by neutralizing substrate tones and boosting topcoat coverage. You’ll pick a tint toward your final hue to simplify color matching and reduce visible undertones on patched surfaces. That means fewer finish layers, less time, and lower material waste.
Use tinted primer for bold accents or when shifting from dark to light shades during strategic color blocking. Store leftover primer properly—seal lids, keep containers upright, and follow primer storage temperature guidelines—to preserve tint integrity for touch-ups.
Proper use saves labor and gives truer, more consistent exterior color results.
Primer for Trim, Doors, and Exterior Woodwork
Why start with primer on trim, doors, and exterior woodwork? You want lasting adhesion, smooth coverage, and consistent Color matching so finish coats don’t ghost or require extra layers. Primer seals end grain, blocks tannins, and evens porosity on new or repaired wood.
Start with primer on trim and doors to seal end grain, block tannins, and ensure smooth, lasting finish.
Consider Environmental impact when choosing low-VOC or water-based primers to protect both surfaces and surroundings. Follow proper prep: clean, sand, and fill gaps before priming.
- Seal end grain for moisture protection.
- Block stains and tannins from bleeding.
- Improve topcoat adhesion and durability.
- Choose low-VOC options to reduce environmental harm.
Priming Porous Masonry, Stucco, and Concrete Exteriors
When you’re preparing porous masonry, stucco, or concrete for paint, start with a primer designed to penetrate and seal those open surfaces so the finish coat bonds evenly and lasts longer.
You’ll choose a masonry or elastomeric primer that soaks in, blocking efflorescence and reducing suction. Apply consistent primer thickness to avoid blotchy topcoat coverage; a roller or sprayer with overlapping passes helps.
If you need color matching to cover stains or shift base tones, tint the primer slightly toward the final shade.
Let the primer fully cure per manufacturer instructions before applying your finish coat for durable results.
Quick Priming Tips When You’re Short on Time
If you’re pressed for time, focus on high-impact priming steps that guarantee a good bond without overcomplicating the job. Skip priming every surface; target trouble spots and avoid falling for priming myths that waste effort. Use a fast-drying, stain-blocking primer and spot-treat areas with bare wood, rust, or tannin bleed.
For quick color matching, undercoat with a universal gray or a tinted primer close to your topcoat.
- Clean and sand only visible trouble spots.
- Spot-prime seams, knots, and rust.
- Tint primer for easier color matching.
- Use quick-dry products for fast recoats.
Safety and Cleanup Best Practices When Priming Outside
You can move from quick priming tactics to safety and cleanup by focusing on the small steps that keep your jobsite safe and your finish intact. Wear proper safety gear—gloves, goggles, respirator—and sturdy footwear. Secure ladders and protect nearby plants and patios with drop cloths.
Contain drips with low-permeability tarps and use absorbent pads for spills. Clean brushes and rollers in a designated area; capture wash water and dispose of it per local guidelines to minimize environmental impact.
Seal leftover primer in original containers, label them, and recycle empty cans. Leave the site tidy to prevent accidents and contamination.
Professional vs. DIY Priming: What Changes the Decision
Although tackling primer yourself can save money, choosing between DIY and hiring a pro comes down to skill level, project scope, and your tolerance for prep and cleanup. You’ll weigh time, surface complexity, and finish expectations.
Pros diagnose old coatings, handle primer removal safely, and match primer to substrate for durable adhesion. You handle smaller jobs, enjoy control over color selection, and avoid labor costs.
Consider these factors:
- Surface condition — complex repairs favor a pro.
- Time — pros work faster.
- Tools and safety — pros have gear for primer removal.
- Budget — DIY saves on labor but adds effort.
Primer Decision Checklist
Deciding whether to tackle priming yourself or hire a pro calls for a quick, practical checklist to guide your choice. Use this to assess surfaces, timing, tools, and skills—don’t ignore Color matching needs or Tool maintenance plans. If you’re unsure about adhesion, extensive repairs, or large areas, consider a pro.
| Question | Action |
|---|---|
| Surface condition? | Prime if bare or chalky |
| Previous finish? | Check for compatibility |
| Color change? | Plan Color matching |
| Time available? | Factor prep and drying |
| Tools ready? | Verify Tool maintenance |
Follow the checklist to decide confidently and avoid costly rework.
Case Studies: Exterior Primer Choices That Saved Jobs
When a mid-century clapboard house started peeling after a DIY repaint, choosing the right exterior primer rescued the job. Switching from a generic latex primer to a bonding primer designed for chalky wood stopped further failure, let the new topcoat lay down smoothly, and saved the owners hundreds in repairs.
You’ll learn from concise case studies that debunk Primer myths and highlight practical Color matching tips so your choices stick. Consider these scenarios and outcomes:
- Bonding primer fixed chalky siding and prevented repaint.
- Oil-based primer sealed tannin bleed on cedar.
- Block filler primer cured porosity on stucco.
- Rust-inhibitor primer saved metal trim.
Additional Resources for Choosing the Right Exterior Primer
If you want to pick the right exterior primer without guesswork, start with a shortlist of reliable resources—product datasheets, independent lab tests, and contractor forums—that tell you about adhesion, compatibility, and expected durability.
You’ll also check manufacturer guides for substrate-specific recommendations and VOC limits. Use color matching tools and paint-store spectrophotometers if you need tinting or to block primer stains.
Read field reports for climate-related performance and search for third-party certifications. Ask pros about coverage rates and recoat windows.
Keep a concise comparison chart so you can choose the primer that fits surface, weather, and finish needs.
Frequently Asked Questions
Can Primer Affect Long-Term Paint Color Fading Outdoors?
Yes — primer influences long-term color fading outdoors. You’ll get better paint adhesion and improved color retention when you prime; it seals substrates, blocks stains, and helps topcoat withstand UV, moisture, and weathering longer.
Are There Primers Safe for Use Near Edible Gardens?
Of course you’ll love non-toxic primers — they exist. You can choose low-VOC, water-based sealers labeled safe for garden safety and edible plant protection, and you’ll minimize contamination while protecting paint adhesion and plant health.
How Does Primer Interact With Exterior Insulation Systems (EIFS)?
Primer promotes surface adhesion on EIFS, enhancing paint bond while maintaining the system’s moisture barrier. You’ll choose compatible, breathable primers formulated for EIFS to avoid trapping moisture and compromising insulation performance.
Will Primer Reduce Mildew Growth on Humid-Climate Exteriors?
Like a shield in rain, you’ll find primer helps: Mildew prevention improves when you’re doing proper surface preparation, because primer seals pores, blocks moisture and creates a cleaner base that slow-growing mildew can’t easily claim.
Can Primer Improve Exterior Soundproofing or Thermal Performance?
Yes—you’ll see modest soundproofing advantages and thermal insulation benefits from primer: it seals gaps, reduces airborne noise transmission slightly, and improves paint’s insulating continuity, though major acoustic or thermal upgrades need dedicated materials.
Conclusion
So you can skip primer—if you enjoy surprises, peeling paint, and repainting sooner than you’d like. But if you want durable, even color and fewer callbacks, primer’s the boring hero you actually need. You’ll save time, money, and headaches by priming when surfaces are bare, stained, porous, or changing from dark to light. In short: skip primer only if you like short-term fixes; otherwise, do the sensible, unglamorous prep first.