Is Trim Paint Different Than Wall Paint? Explained
Yes — trim paint is different than wall paint. You’ll want trim formulas for baseboards, casings, and doors because they’re harder, glossier, and scrub-resistant, so they handle scuffs and cleaning without showing wear. Wall paint focuses on coverage, hiding texture, and softer sheens that conceal flaws. You can sometimes use one product for both, but expect compromises in durability or appearance. Keep going to see practical choices, prep tips, and cost-saving options for each surface.
Quick Guide: Trim Paint Vs. Wall Paint
When you’re deciding between trim paint and wall paint, think about function first: trim needs durability and a smoother, glossier finish to resist scuffs and stand out, while wall paint prioritizes coverage, washability, and a matte or eggshell look to hide imperfections.
You’ll choose trim coatings for edges and high-contact areas where paint longevity matters; walls get flatter sheens to conceal texture.
For cohesive rooms, plan Color matching carefully—match undertones rather than just swatches. Test samples in different light, note maintenance needs, and pick products formulated for each surface so finish and lifespan meet expectations.
Short Answer: Is Trim Paint Different Than Wall Paint?
Yes — they’re different in a few key ways you’ll notice right away.
Trim paint usually has a higher sheen and harder formulation for extra durability and easier cleaning.
Wall paint is flatter and formulated for better coverage and touch-up.
Choosing the right one depends on the finish you want and how much wear the surface will get.
Finish And Sheen
Although both trim and wall paints can share the same color, they usually differ in finish and sheen. You’ll pick glossier sheens for trim to highlight edges and resist scuffs, while walls often use matte or eggshell to hide imperfections.
Consider color matching carefully so sheen changes don’t make shades look different. If you prefer eco-friendly options, test low-VOC trim formulas that still offer a smoother, reflective finish.
Balance aesthetics and maintenance by choosing sheen based on room use and light. Remember: sheen affects perceived color, cleaning, and visual contrast between trim and walls.
- Gloss for trim
- Satin for balance
- Eggshell/matte for walls
- Test swatches
Durability And Formulation
Because trim takes more handling and cleaning than most walls, manufacturers formulate trim paint to be tougher and more resilient. You’ll notice higher solids, stronger binders, and more durable pigments that resist scuffs and frequent wiping.
Wall paint emphasizes coverage, breathability, and texture, so it’s usually softer and less abrasion-resistant. When you pick paint, check specs for abrasion resistance and scrub ratings, and ask about color matching to guarantee consistency between trim and walls.
Many brands now offer eco-friendly options with low VOCs that still provide trim-grade durability, letting you balance performance with indoor air quality.
Why Homeowners Ask If Paints Are Interchangeable
When you’re standing in the paint aisle trying to decide between trim and wall paint, it’s natural to wonder if you can use one for the other; homeowners ask because they want to save time, money, or avoid extra trips. You’re balancing practical concerns and finish expectations.
Color matching and paint cost matter, but so do ease of application and coverage. You’re also thinking about cleanup and how mistakes will look.
- Convenience: fewer cans to buy or store
- Budget: lower overall paint cost
- Time: faster completion with one product
- Risk: potential mismatch in sheen or wear
What Trim Paint Is Made to Do
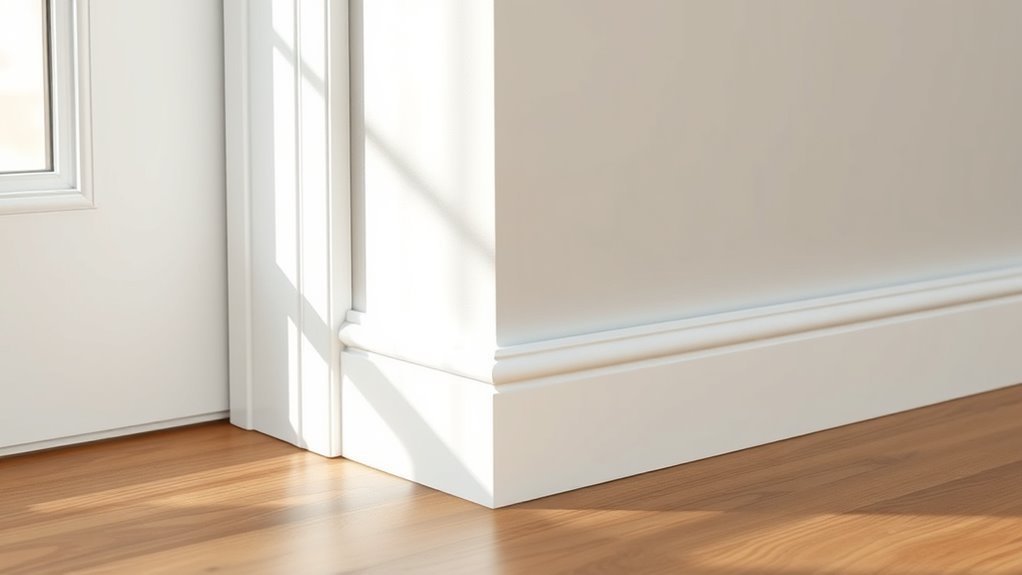
If you want crisp, durable edges that stand up to touch and cleaning, trim paint is formulated for that job. You’ll get higher sheen, quicker drying, and tougher film to resist scuffs on baseboards, casings, and doors. Trim formulas prioritize adhesion and smooth brushability, plus Color matching to coordinate with walls. Many lines offer Eco friendly formulations so you can reduce VOCs without losing performance. Below is a quick feature comparison:
| Feature | Benefit |
|---|---|
| Sheen | Easy cleaning |
| Dry time | Faster recoats |
| Durability | Resists scuffs |
| Adhesion | Bonds to wood |
| Eco options | Lower VOCs, safer use |
What Wall Paint Is Made to Do
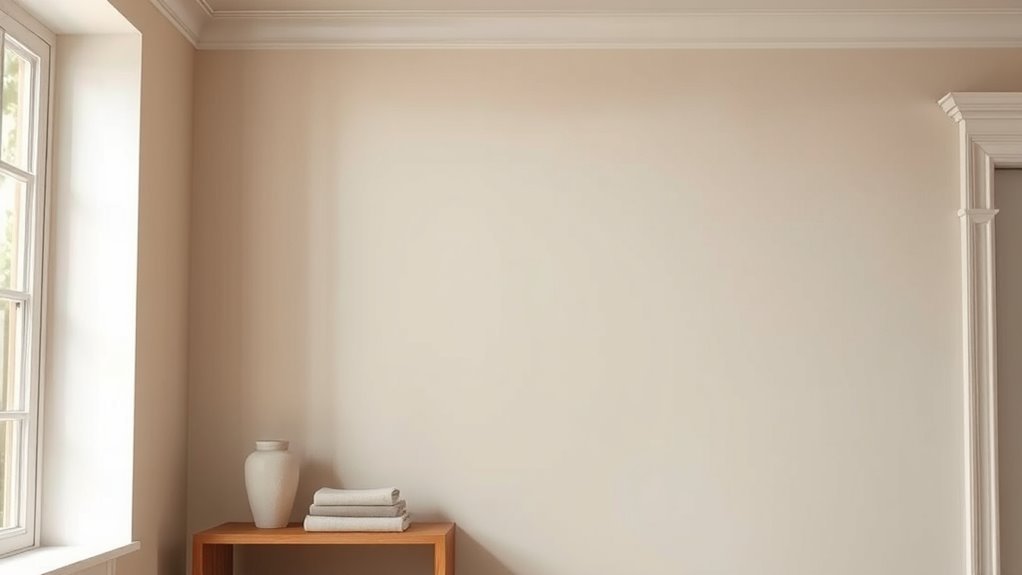
Though trim paint handles wear, wall paint’s made to cover large surfaces with even color and subtle texture while hiding minor flaws. You rely on it to create mood, mask imperfections, and provide a uniform backdrop that complements trim.
You’ll care about color matching to ensure walls coordinate with furniture and fixtures. Wall paint prioritizes easier rolling and spreading over durability accents, so manufacturers tune paint thickness for coverage and hiding power.
It cleans moderately well but isn’t meant for heavy scuffing. Choose finishes that balance washability and appearance, and test samples to confirm true color and coverage before committing.
- Coverage
- Color coordination
- Paint thickness
- Finish selection
Key Ingredient Differences Between Trim and Wall Paint
You already think about coverage, finish, and durability for walls, but the real performance gap comes down to what’s inside the cans: trim paint uses a higher proportion of binders and pigments and often includes polymers and additives that boost hardness and adhesion.
While wall paint prioritizes larger pigments and flow agents to improve spreadability and hiding over big areas. You’ll notice trim formulas resist scuffs and accept fine detailing better, while wall formulas cover fast.
Consider color matching: pigments and base choices differ, so matches can shift between types. Also weigh Environmental impact—additives and solvent levels vary, affecting VOCs and disposal.
How Sheen Affects Trim Paint Vs. Wall Paint
When you pick a sheen, you’re choosing more than just shine—you’re deciding how trim and walls will handle light, wear, and surface flaws. You’ll notice sheen impact immediately: higher gloss levels reflect more light, making trim pop and revealing imperfections, while flatter sheens hide texture on walls.
Choose based on room use and desired contrast between surfaces. Consider maintenance needs and aesthetic balance; sheen differences guide cleaning and visual focus.
Pick sheens by function and contrast—balance maintenance, visual focus, and how surfaces interplay with light.
Below are quick comparisons to help you decide.
- High gloss: durable, reflective, shows flaws.
- Semi-gloss: common for trim, easier to clean.
- Eggshell: soft sheen for walls.
- Matte: minimal reflection, hides defects.
Why Trim Needs a Smoother, Tougher Finish
You handle trim more than walls, so it needs a tougher, hardwearing finish that stands up to knocks and frequent cleaning.
You’ll want paint that lays down smoothly with brush and roll to hide tool marks and create crisp lines.
Choose a formula with strong stain- and scuff-resistance so the trim stays looking fresh longer.
Durable Hardwear Finish
Because trim gets touched, bumped, and cleaned far more than walls, it needs a smoother, tougher finish that stands up to daily wear. You’ll choose trim paint that resists scuffs, cleans without dulling, and keeps edges crisp for color matching with adjacent surfaces. Consider durability along with paint recyclability when planning updates so you minimize waste while maintaining resilience. A hardwear finish reduces maintenance and preserves sheen.
- Choose a high-adhesion formula for impact resistance.
- Prefer semi-gloss or gloss for easier cleaning.
- Test compatibility with wall colors for seamless blending.
- Reuse leftover paint to limit waste.
Smooth Brush And Roll
Alongside choosing a hardware finish, how you apply trim paint matters as much as the formula itself. You’ll get a smoother, tougher result when you use precise brush techniques and controlled paint mixing.
Load the brush lightly, tip off excess, and pull long, even strokes toward the edge to avoid ridges. Use a high-density foam or quality bristle for crisp lines, then follow with a mini-roller to level brush marks while the coat’s wet.
Keep mixes small and consistent between batches to prevent sheen shifts. Dry light sanding between coats guarantees an ultra-smooth final appearance.
Stain And Scuff Resistance
Although trim sits in high-contact zones like doorways and stair rails, it also frames rooms visually, so it needs a finish that resists scuffs and stains while staying smooth. You’ll pick trim paints with harder binders and higher sheen so marks wipe away without ghosting. That durability aids Color matching longevity and keeps touch-ups minimal.
Consider low-VOC options to reduce environmental impact while maintaining toughness. Balance sheen for aesthetics and resistance; too glossy highlights flaws, too flat hides them but wears faster. Choose a finish that tolerates cleaning and preserves crisp edges.
- High-sheen for easy cleaning
- Durable binders
- Low-VOC choices
- Precise Color matching
How Wall Paint Hides Surface Imperfections
When you paint your walls, the right wall paint can minimize the look of small dents, hairline cracks, and texture irregularities by filling and reflecting light more evenly across the surface. You’ll notice that flatter sheens hide imperfections best because they reduce glare from uneven surface texture, while eggshell or satin add slight reflectivity that can reveal flaws.
Choosing a mid-tone paint color softens contrast between shadows and highlights, making flaws less obvious than with very dark or very light hues. Proper application—thin, even coats and light sanding between—lets the paint mask blemishes without calling attention to them.
Durability: Scuff Resistance and Cleaning for Trim Vs. Walls
You’ll notice trim paint is usually tougher and more scuff-resistant than wall paint, so it handles knocks and shoe scuffs better.
Compare cleaning methods—trim can take scrubbing and stronger cleaners, while walls often need gentler wipes to avoid removing pigment.
Consider long-term finish durability when choosing paint: high-gloss or semi-gloss trims will stay looking fresh longer than flat wall finishes.
Scuff Resistance Differences
Because trim usually sits where hands, furniture, and shoes make contact, it needs tougher scuff resistance than wall paint. Manufacturers consequently formulate trim paints with harder binders and higher pigment loading so you can scrub marks without removing finish.
You’ll notice trim finishes resist abrasion and staining better, which affects color matching when touch-ups are needed and can influence environmental impact through fewer recoats.
Consider differences in sheen, binder hardness, and pigment concentration:
- Higher binder hardness increases abrasion resistance.
- Greater pigment loading improves hiding power and durability.
- Sheen level alters cleanability and visual scuffs.
- Additives boost scrub resistance without yellowing.
Cleaning Methods Compared
Although trim and wall paints both get dirty, you’ll clean them differently because trim is formulated for tougher, more frequent scrubbing.
You’ll use gentler cleaning techniques on walls — a soft sponge, mild detergent, and light circular motions to avoid removing paint or creating sheen variation.
For trim, you can apply firmer scrubbing and stronger cleaners, but always test a hidden spot first.
Prioritize proper surface preparation before painting so future cleaning won’t damage the finish: clean, sand, and prime trim; wash walls and repair imperfections.
Following correct cleaning techniques extends appearance and reduces touch-ups.
Long-Term Finish Durability
Now that you know how cleaning differs between walls and trim, consider how those care habits and the paints themselves affect long-term durability. You’ll notice trim uses glossier formulas that resist scuffs and wipe-clean more than flat wall paints, so touch-ups and color matching matter for visible areas.
Walls hide marks better but can’t take harsh scrubbing. Also weigh environmental impact: low-VOC, durable options reduce repaint frequency.
- Trim: high gloss, strong scuff resistance, easier cleaning.
- Walls: matte, hides imperfections, gentler maintenance.
- Color matching: critical for trim touch-ups.
- Longevity: choose durable, low-VOC paints to lower environmental impact.
Coverage and Hide: What to Expect From Each Paint
When you’re choosing between trim and wall paint, expect different coverage and hiding power. Trim paints are formulated for high-opacity, often requiring fewer coats to mask old finishes and nail holes, so you’ll spend less time layering.
Wall paints prioritize spread and even tinting across large areas; they flatten minor imperfections but may need extra coats over dark colors. If you’re matching tricky shades, color matching services help bridge differences between sheen levels.
Also consider eco friendly paints: low-VOC options now offer improved hide, though extreme contrasts might still demand primer for best results.
Dry Time and Recoat Intervals: Trim Vs. Walls
Because trim paint typically contains more binder and cures harder, it dries faster to the touch and lets you recoat sooner than many wall paints, so you can finish molding and window casings with less downtime. You’ll notice trim often allows recoat within 2–4 hours, while walls may need 4–24 hours depending on formula and humidity.
Match sheen and color matching carefully when painting adjacent surfaces to avoid visible seams. Also consider paint toxicity for occupied rooms and ventilation needs. Plan sequencing to prevent smudges and allow full cure before heavy use.
- Trim: 2–4 hour recoat
- Walls: 4–24 hour recoat
- Sequence: cut in, then roll
- Check labels for toxicity and cure
VOCs and Odor: Trim and Wall Formulas Compared
Although both trim and wall paints release volatile organic compounds (VOCs), trim formulas—especially oil-based and high‑sheen enamels—typically emit stronger odors and higher VOC levels during application and initial cure. So you’ll want better ventilation and possibly a low‑VOC alternative for occupied spaces.
You should compare labels and choose water‑based trims when odor sensitivity matters; their VOCs and fumes are usually lower. Expect wall paints, especially matte interior types, to be milder.
When selecting low‑odor products, check color matching accuracy—sheen affects perceived color. Look for eco friendly options certified by credible programs to minimize indoor air impacts.
When Oil-Based Trim Paint Still Makes Sense
You may still choose oil‑based trim paint for specific situations where its strengths outweigh the drawbacks of higher VOCs and odor. You’ll prefer it when durability, smooth leveling, and stain-blocking matter—especially on high-traffic trim, antique moldings, or surfaces needing a hard finish.
Consider oil if you’re matching historic sheen or doing expert paint mixing to replicate period colors. Also weigh cleanup and ventilation needs.
- High-traffic trim requiring exceptional wear resistance
- Stain-blocking over tannin-bleeding wood
- Precise color coordination with older finishes
- Seamless blending during complex paint mixing
Advantages of Modern Water-Based (Latex) Trim Paints
When you want a durable, low-odor finish that’s easy to apply and clean up, modern water-based (latex) trim paints are hard to beat. You’ll get faster drying times, less yellowing over years, and easier recoating so projects finish sooner.
Clean-up with soap and water saves solvents, improving environmental impact and convenience. Modern formulations sand, level, and resist stains while offering excellent color retention; color matching systems work well at stores and online, so you can coordinate trim to walls precisely.
Primers: Choosing One for Trim or Walls
Pick a primer based on the surface and the topcoat—stain-blocking or bonding primers work differently on trim than on drywall.
You’ll also want to assess and prep the surface first, because primers can’t fix raw damage or heavy gloss without sanding or filler.
Choosing the right combo of primer and prep makes your paint stick and look its best.
Primer Type Matters
Because trim and wall surfaces have different porosity, sheen goals, and wear patterns, choosing the right primer matters more than you might think. You’ll pick primers based on substrate, desired final sheen, and durability needs; trim often needs bonding and stain-blocking while walls prioritize coverage and color psychology impact.
Also weigh eco-friendly formulations to reduce VOCs. Match primer type—shellac, oil, or latex—to the job: shellac for tough stains, oil for adhesion on slick trims, latex for breathability on drywall.
Consider tinting primers toward the final color for better hide.
Surface Prep Needs
If you want durable, professional-looking trim and walls, prep the surfaces differently before you prime. You’ll sand trim smoother, remove gloss, and fill gaps for crisp edges. Walls need cleaning and patching larger imperfections.
Choose primers by substrate: stain-blocking or adhesion primers for trim, high-hide or leveling primers for walls. Consider color matching—use tinted primers to reduce topcoat coats, especially on trim versus bold walls.
Also weigh environmental impact: low-VOC or water-based primers cut odors and fumes for indoor work.
Prep carefully; the right primer and surface prep conserve time and ensure a lasting, uniform finish.
Using Wall Paint on Trim: When It Works
When you’re short on time or paint, you can sometimes use wall paint on trim—provided you choose the right formula and prep the surface properly. You’ll want a semi-gloss or satin wall paint with good adhesion, a smooth finish, and proper sanding and priming.
Match sheen and color closely; color matching prevents contrast and makes touchups easier. Keep leftover tins sealed for paint storage and label them.
Match sheen and color closely to avoid contrast, and seal and label leftover tins for easy touchups.
- Choose semi-gloss/satin wall paint for durability
- Sand and prime trim before painting
- Verify color matching under room light
- Store and label leftover paint for future touchups
Using Trim Paint on Walls: When It Helps
If you want crisp edges for detailed trim or built-in molding, using trim paint on nearby wall sections can give you that sharp, durable finish.
It’s also a smart choice in small rooms where a glossy trim tone on part of the wall can make the space feel cleaner and brighter.
And when you’re aiming for a high-gloss accent wall, trim paint’s sheen and durability can create a bold, easy-to-clean focal point.
When Detail Work Matters
Because trim paint has a higher sheen and thicker formulation, it can disguise minor imperfections and stand up to frequent cleaning where walls need extra durability. When detail work matters, you’ll choose trim paint for crisp edges, contrast, and longevity. Pay attention to color matching before you start, and plan for paint removal if you switch finishes later.
Use these approaches:
- Apply trim paint to chair rails and wainscoting for defined lines.
- Use angled brushes for clean corners around windows and doors.
- Feather edges to avoid lap marks between finishes.
- Protect adjacent surfaces with low-tack tape and steady strokes.
Small Rooms And Trim
Although small rooms can feel cramped, painting the walls with the same high-sheen trim paint you use for moldings can visually expand the space and make cleaning easier. You’ll notice reflections bounce light, and color matching between trim and walls creates cohesion. Be mindful: high-sheen shows imperfections and may need extra prep. Test a small area for adhesion and consider future paint removal options if tastes change. Below is a quick comparison to help decide.
| Benefit | Consideration |
|---|---|
| Brighter feel | Shows flaws |
| Easier cleaning | Harder repainting |
| Unified look | Requires prep |
| Durable finish | Paint removal planning |
High-Gloss Accent Walls
When you want a bold focal point, a high-gloss accent wall painted with trim paint delivers drama and depth while reflecting light to brighten the room. You’ll get a durable, wipeable surface that emphasizes architectural features and resists scuffs better than typical wall finishes.
Consider sheen contrast carefully and check color matching between trim and wall formulations. Also weigh environmental impact—low-VOC trim formulas reduce fumes if you’re covering large areas.
- Use for small walls to add depth without overpowering.
- Test samples to ensure color matching under room light.
- Prep surfaces for adhesion.
- Choose low-VOC options.
How Sheen Mismatch Changes Perceived Color
Ever notice the same paint looking slightly different between trim and walls? You’ll spot how sheen mismatch alters color perception: glossy trim reflects more light, so it reads lighter and sharper than flatter walls. That contrast can make a unified scheme look like two different shades. You can use this to highlight features or aim for harmony by testing samples together under real lighting.
| Surface | Visual Effect |
|---|---|
| High sheen trim | Brighter, more saturated |
| Flat wall | Muted, softer |
| Mixed lighting | Varies hue intensity |
| Matte accents | Absorb light, deepen tone |
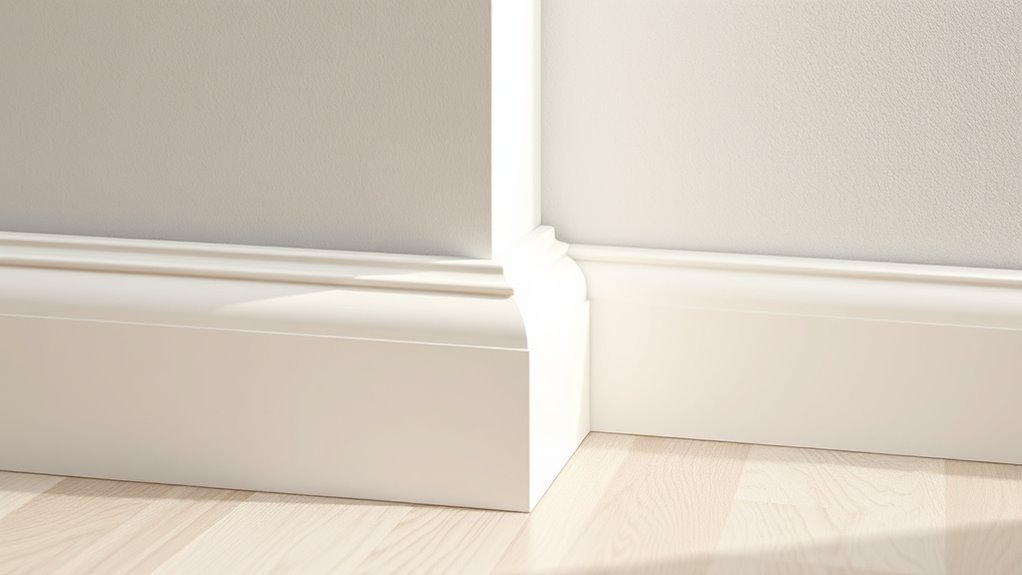
Best Sheens for Baseboards, Casings, and Doors
When choosing sheens, think about use and cleanup: high-gloss works best on doors for durability and easy wiping. You’ll get a clean, crisp look with semi-gloss on baseboards and other trim.
For casings where you want a softer sheen that still resists scuffs, satin is a smart middle ground.
High-Gloss For Doors
Although high-gloss paints show every detail, they’re the best choice for doors if you want durability and easy cleaning. You’ll appreciate their scuff resistance and wipeability, especially in high-traffic areas.
Use high-gloss to highlight door profiles and improve color blending between trim and walls. Be mindful of prep; smooth surfaces and careful sanding help with texture matching so the sheen looks uniform.
Apply thin, even coats to avoid drips and brush marks. Consider oil-based or high-quality acrylic formulas for longevity.
- Durable surface
- Easy cleaning
- Highlights profiles
- Requires good prep
Semi-Gloss For Trim
If high-gloss gives doors durability and shine, semi-gloss offers a slightly softer option that still stands up to daily wear on baseboards, casings, and doors.
You’ll like semi-gloss for its balance: easier touch-ups than flat finishes, visible enough trim definition without overwhelming sheen, and resilience against scuffs.
Use quality painter tools—angled brushes for edges and foam rollers for smooth panels—to get clean lines.
For coordinated rooms, test color matching under your lighting; semi-gloss can read brighter than matte.
Choose semi-gloss when you want durable, crisp trim that complements walls without the high-gloss glare.
Satin For Casings
Since satin hits a sweet spot between matte and semi-gloss, you’ll get a gentle sheen that hides minor imperfections while still standing up to everyday bumps and cleaning on casings and baseboards.
You’ll find Satin casings offer a softer Trim sheen than semi-gloss, ideal if you want durability without stark contrast against walls. Use satin where you want subtle reflection and easier maintenance.
Consider these practical choices:
- High-traffic baseboards for wipeability
- Door casings to balance sheen and warmth
- Painted woodwork that shows slight flaws
- Transitional rooms where subtle contrast helps cohesion
Best Paint Types for High-Traffic Trim Areas
When you pick paint for high-traffic trim, prioritize durability and cleanability over trend-driven finishes. You’ll want semi-gloss or high-gloss for scrubbability, acrylic-enamel for toughness, and water-based options if you care about Color matching and Eco friendly formulas. Choose low-VOC waterborne alkyds for smooth leveling and resilience.
| Type | Finish | Best Use |
|---|---|---|
| Acrylic-enamel | Semi/High gloss | Door frames |
| Waterborne alkyd | Satin/Gloss | Millwork |
| Water-based latex | Semi-gloss | Baseboards |
| Low-VOC | Semi-gloss | Kid areas |
Test samples and pick the hardest-wearing option.
Surface Prep Differences for Trim Vs. Walls
You picked a tough, scrubbable finish for high-traffic trim, but prepping trim calls for a different approach than prepping walls. You’ll address surface contamination differently: trim needs degreasing, fine sanding, and seam attention; walls often need patching and broader cleaning. Consider environmental impact when choosing cleaners and primers, using low-VOC products and minimizing waste.
For trim, degrease, fine-sand, and spot-prime—different prep than walls; choose low‑VOC products.
- Clean: remove fingerprints, oils, and dust from trim edges.
- Sand: scuff trim gently; walls may need heavier abrasion.
- Prime: spot-prime bare wood or repaired trim; use appropriate wall primers.
- Protect: tape and cover floors to prevent cross-contamination.
Tools: Brush, Roller, and Spray for Trim and Walls
You’ll want the right tool for each surface: a sash brush for trim, a medium-nap roller for walls, and a sprayer for large or detailed areas.
Compare brush versus roller for control, finish, and speed—brushes give crisp edges while rollers cover flat areas quickly.
Use a sprayer when you need fast, even coverage on complex trim or whole walls, but mask and practice first.
Best Tools Per Surface
Although trim and walls share paint in a room, they demand different tools to get a professional finish. You’ll pick brushes for crisp edges, rollers for broad coverage, and sprayers for speed.
Think about color matching across surfaces and the environmental impact of overspray or wasted product. Choose tools that suit trim profile, wall texture, and your cleanup tolerance.
- Angled brush — precise control for molding and corners.
- Mini roller — smooth coverage on narrow surfaces.
- Full roller — fast, even wall application.
- HVLP sprayer — seamless finish, but needs masking and care.
Brush Versus Roller
Having picked the right tools for each surface, it’s time to compare brush and roller performance so you can decide which to use where.
You’ll use a brush for trim because it gives control on edges, corners, and profiles; it handles thicker trim paint and precise painting techniques like feathering and cutting in.
Rollers cover large wall areas fast, creating an even texture and reducing lap marks when you maintain a wet edge.
Consider color mixing: always stir mixed paint thoroughly before loading either tool to guarantee uniform hue.
Choose brush for detail, roller for speed and consistent coverage.
When To Spray
When should you reach for a paint sprayer instead of a brush or roller? You’ll choose spray when speed, smoothness, and coverage matter. For trim and walls, weigh tool selection against project size, detail, and finish.
Sprayers excel on large, flat walls and intricate trim profiles but need masking and practice. Use a brush for cutting in and touch-ups; use a roller for textured walls.
Consider color matching: sprayers can atomize subtle tones evenly, but test spray samples first.
- Big rooms — fast, even coverage
- Detailed trim — smooth profiles
- Small fixes — brush precision
- Textured walls — roller control
Technique Tips That Change the Finish
If you want trim to read as crisp and walls to look seamless, technique matters as much as product choice: your brush angle, the amount of paint on the applicator, and the speed of your strokes will change sheen and texture.
You should cut in with steady, angled strokes for sharp edges, feathering toward the wall to avoid ridges. Use thin, even coats rather than heavy-loaded strokes to prevent drips and brush marks; sand lightly between coats if needed.
For spot corrections, do paint removal carefully and reapply small amounts to blend.
When matching colors, test samples under real light before committing.
Specialty Trim Paints for Kitchens and Bathrooms
Because kitchens and bathrooms face more moisture, heat, and frequent cleaning, you’ll want trim paints formulated for durability and mildew resistance.
You’ll pick semi-gloss or satin finishes that wipe clean and resist staining, and look for mildewcide additives.
Consider ventilation to reduce paint fumes when you apply, and plan dry times to avoid tackiness.
For a cohesive look, prioritize color matching between trim and cabinets or tiles; many brands offer tinting to coordinate.
Choose low-VOC formulas if you’re sensitive.
Practical tips:
- Use semi-gloss for easy cleaning
- Pick mildew-resistant formulations
- Make certain proper ventilation
- Match trim to adjacent surfaces
Cost Comparison and When Premium Trim Paint Pays Off
After choosing the right finish and mildew resistance for moisture-prone rooms, you’ll want to weigh how much to spend on trim paint versus the benefits you get. You’ll compare cost per quart, longevity, and sheen retention. Premium trim paint often costs more but resists scuffs, needs fewer recoats, and eases color matching for crisp edges. If you value durability or have high-traffic trim, it pays off. Look for eco friendly options to reduce VOCs without sacrificing performance.
| Option | Cost | Best Use |
|---|---|---|
| Standard | Low | Low-traffic rooms |
| Premium | High | High-traffic trim |
| Eco-friendly premium | Mid-High | Health-conscious spaces |
Practical Tips for Matching Trim Color to Walls
When you want a crisp, cohesive look, start by testing trim samples against your wall color in the room’s natural and artificial light. You’ll notice slight shifts; color psychology influences mood, so pick contrasts that support the room’s purpose.
Consider sheen differences and how cleaning needs affect choice. If sustainability matters, choose eco friendly formulations for both trim and walls to guarantee consistent finish and low VOCs.
- Test samples on multiple walls and observe at different times.
- Use a slightly higher sheen on trim for durability.
- Match undertones, not just perceived color.
- Photograph samples for reference.
Fixing Problems From Using the Wrong Paint
Getting your trim and wall colors right takes some testing, but using the wrong type of paint can create problems that testing alone won’t catch.
If trim paint peels, yellows, or shows brush marks against matte walls, you’ll need to strip or sand affected areas, then prime with a bonding primer before repainting.
For color matching, bring a swatch to the store or have a pro match trim sheen to wall tones so the repaired section blends.
Choose paints with compatible eco-friendly formulations to avoid VOC clashes and guarantee adhesion.
Test a small patched area and let it cure before finishing the job.
Touching Up Trim Without Redoing the Wall
If your trim needs a fresh coat but the walls are fine, you can touch up the trim without repainting the whole wall by protecting the surrounding surface, sanding or deglossing the damaged areas, and using a compatible primer and paint in the same sheen—work in small sections and feather the edges so the new finish blends into the old.
Prep carefully: mask adjacent wall, remove loose paint, and clean dust.
Match trim color precisely; consider slight tinting for age differences.
Use small brushes and thin coats. For stubborn old layers, controlled paint removal avoids damage.
- Prep and mask
- Sand/degloss
- Color matching
- Feathered touch-up
Environmental and Health Considerations for Trim Paint
Because trim is often painted with higher-sheen, oil-based, or alkyd formulas, you should pay attention to VOCs, fumes, and disposal practices before you start; they affect indoor air quality and long-term exposure.
Choose low-VOC or water-based trim paints when possible to reduce immediate fumes and lessen environmental impact.
Work in well-ventilated spaces, run fans, and use respirators if recommended.
Store and dispose of solvents, rags, and leftover paint per local regulations to avoid contamination.
Consider occupants with asthma, children, or pets—prioritize health safety by scheduling work when spaces can be empty until fumes dissipate.
Repaint Frequency: Trim Vs. Walls
While walls can go several years between fresh coats, you’ll typically need to repaint trim more often because it takes more wear from hands, furniture, and cleaning. You should check trim yearly for chips, scuffs, and yellowing.
Trim shows wear faster than walls—inspect yearly for chips, scuffs, and yellowing, and refresh as needed.
High-traffic areas may need touch-ups every 1–3 years while walls last 5–7. Use strong, easy-clean trim paints and consider eco-friendly options to reduce odors during frequent repainting.
Keep a small sample for color matching when you touch up. Plan faster maintenance for baseboards, door frames, and window casings to keep your interior looking sharp.
- Baseboards
- Door frames
- Window casings
- Stair rails
When to Hire a Pro for Trim Work
When trim work involves intricate profiles, tight miters, or runs longer than you’re comfortable cutting and joining, call a pro—you’ll save time and avoid costly mistakes.
You should also hire someone if you’re replacing rotted sections, tackling crown molding at high ceilings, or need flawless paint-grade prep. Pros handle precise Color matching for existing trim and coordinate texture options so the finish looks intentional, not patched.
If you lack specialized tools, steady ladders, or patience for tedious caulking and sanding, bring in a professional. That safeguards your investment, ensures durable joints, and delivers a clean, consistent result you’ll appreciate.
Labels and Specs to Read Before Buying Paint
You’ve decided whether to call a pro or tackle trim yourself; now check paint labels so you buy the right product for the job. Read finish (satin/eggshell/semi-gloss), sheen durability, VOC levels and surface prep instructions. Look for color matching codes and batch numbers to avoid mismatches. Note recommended tools and drying times so you plan sanding and recoats properly.
Consider eco friendly options if indoor air quality matters; low-VOC or water-based formulas often suit trim and walls.
If indoor air quality matters, choose low‑VOC or water‑based paints—especially for trim and walls.
- Finish & sheen
- VOCs & eco friendly options
- Color matching & batch code
- Prep & drying instructions
Quick Checklist: Choose Paint for Trim and Walls
When picking paint, check the sheen and finish to match trim’s gloss and wall’s subtlety.
Consider durability and wear so high-traffic trim holds up while walls resist scuffs.
Think about application and cleanup—brush or spray for trim, and how easy cleanup will be for your chosen formulas.
Sheen And Finish
Although trim and walls share a color, they usually need different sheens: trim benefits from a higher-gloss finish for durability and easy cleaning, while walls often look best in matte or eggshell to hide imperfections.
You’ll choose sheen to balance appearance and maintenance; check color matching between surfaces so gloss differences don’t make hues read oddly.
Also consider environmental impact when selecting low-VOC or water-based sheens.
Decide based on room use, light, and cleaning needs.
- High-gloss trim for easy wipe-downs
- Eggshell/matte walls to conceal flaws
- Match undertones across sheens
- Prefer low-VOC formulas
Durability And Wear
Sheen affects how paint shows wear, but durability and abrasion resistance are what really determine how long trim and walls will look good.
You’ll pick trim paint with tougher paint chemical formulations and higher solids to resist scuffs from doors, furniture, and cleaning. Walls tolerate softer sheens since impacts are rarer, but high-traffic areas still benefit from durable wall formulas.
When repainting, insist on consistent color matching between trim and wall batches; fading or sheen differences can highlight wear.
Check manufacturer abrasion ratings and scrub tests so you choose coatings that stay attractive longer with minimal touch-ups.
Application And Cleanup
Because trim gets more close-up scrutiny and tight edges require neater strokes, you’ll want tools, timing, and cleanup methods tailored to each surface. You’ll prep surfaces, choose brushes or mini-rollers for crisp lines, and plan drying time to avoid tacky smudges. Keep paint swatches for color matching between trim and walls. Consider cleanup solutions that minimize environmental impact—reuse thinner where allowed, recycle cans, and use water-based products when possible.
- Use angled brushes for trim, larger rollers for walls.
- Work from ceiling down; trim last.
- Clean tools promptly; strain and store solvents responsibly.
- Label leftover paint for touch-ups.
Recommended Paint Combos for Common Rooms
When you’re choosing trim and wall paint for each room, aim for combinations that balance contrast and cohesion so architectural details pop without clashing with the overall palette.
In living areas, pair warm neutral walls with crisp white or soft cream trim to use color psychology for inviting energy.
Bedrooms benefit from muted blues or greens with slightly warmer white trim to calm and define.
Kitchens handle bright, durable trims—consider semi-gloss—against soft gray or pale blue walls.
Bathrooms suit high-sheen white trim with light pastel walls.
Throughout, pick eco-friendly options to reduce VOCs while keeping finishes appropriate to each room’s function.
Money-Saving Tips Without Sacrificing Trim Quality
You’ve picked trims and walls that work together, now keep that look without overspending by prioritizing where quality truly matters: focus high-grade, durable paint on trim that gets touched or cleaned often—baseboards, doorframes, and kitchen/bath trims—while using more economical options on less-handled moldings.
Choose a washable semi-gloss for busy areas and a satin for low-contact trim. Use sample pots to perfect color matching and avoid costly mistakes. Consider eco-friendly options for indoor air quality and long-term savings.
For busy trim, pick washable semi-gloss; choose satin for low-contact areas and test with sample pots.
- Buy quality where contact occurs
- Test small areas first
- Match undertones, not just swatches
- Use low-VOC primers
Trim Paint Myths Debunked
Think paint for trim is just a smaller version of wall paint? You’re not alone, but that myth ignores finish, durability, and Color matching needs. You should pick trim paint for tougher cleaning and a smoother look, not because it’s “fancier.” Low-VOC trim options reduce environmental impact while keeping performance. Don’t assume sheen equals quality—gloss reflects light and hides imperfections differently. Test samples on wood and surrounding wall to confirm match and function. Use this quick comparison:
| Feature | Trim Paint | Wall Paint |
|---|---|---|
| Sheen | Higher | Lower |
| Durability | Greater | Moderate |
| Cleanability | Easier | Harder |
| Color matching | Critical | Flexible |
| Environmental impact | Variable | Variable |
One-Page Decision Guide: Wall Paint, Trim Paint, or Both
Because trim and wall paint serve different roles, deciding whether to use one, the other, or both comes down to desired look, durability needs, and maintenance habits—so grab a tape measure and a sample card, note high-traffic areas and how much sheen you want, then match paint types to function (durable, higher-sheen trim for cleanability; lower-sheen wall paint for hiding imperfections and flexible color choices).
- Choose trim-only when you want contrast, easy cleaning, and durable edges.
- Choose wall-only for a uniform, softer finish and simpler touchups.
- Choose both for polished, intentional rooms; coordinate color matching.
- Consider paint brands for quality, coverage, and warranty.
Further Resources and Next Steps for Your Painting Project
When you’re ready to move from planning to painting, gather a short list of reliable resources—local pros for estimates, manufacturer tech sheets for product specifics, and a few well-lit paint samples to test on your walls—so you can make confident choices about color, sheen, and finish. Use the table below to track contacts, samples, and priorities as you prep.
| Item | Action |
|---|---|
| Local pro | Get estimates, ask about timelines |
| Tech sheet | Confirm specs, dry times |
| Samples | Test color matching on walls |
| Supplies | Choose brushes, tape, rollers |
| Eco options | Compare eco friendly formulas and VOCs |
Then schedule work, order materials, and test before committing.
Frequently Asked Questions
Can I Tint Wall Paint to Match Specialty Trim Finishes?
Yes, you can tint wall paint to match specialty trim finishes; you’ll need professional color matching, explore tinting options like universal tints or customized formulas, and test samples because sheen and substrate can still affect the final appearance.
How Does Humidity During Application Affect Trim Versus Wall Paint Adhesion?
Like breathing through a wet cloth, humidity affects paint application and adhesion differently: you’ll find trim needs lower humidity for smoother bonding while walls tolerate more moisture, so monitor humidity effects to avoid bubbling and poor adhesion.
Are There Trim-Safe Low-Voc Options for Historic Homes With Lead Concerns?
Yes — you can choose trim-safe low-VOC paints and encapsulants for historic homes with lead concerns. You’ll follow lead safety protocols, avoid aggressive paint removal, use encapsulation or tested low-VOC primers and paints, and hire certified abatement.
Will Paint Sheen Differences Cause Mold Growth in Bathrooms?
No — paint sheen differences won’t cause mold growth; they’ll affect washability and moisture resistance. You should focus on mold prevention by ensuring good bathroom ventilation, prompt drying, and using mildew-resistant paint or additives for protection.
Can I Use the Same Paint for Exterior Trim and Interior Trim?
Yes — you can, but don’t. Like a telegram, you’ll want to match color coordination and paint durability: exterior trim needs tougher, weatherproof formulas, while interior trim prioritizes finish and low-VOC comfort for your home.
Conclusion
You’ll want trim paint for doors, baseboards and moldings because it’s tougher, glossier and hides brush marks—wall paint isn’t built for that wear. If you’re tight on budget, use trim paint just where needed and a good wall paint elsewhere; you’ll save money without sacrificing finish. Don’t overthink it—choosing the right paint is as simple as picking the right tool for the job, and it’ll make your rooms look professionally done.