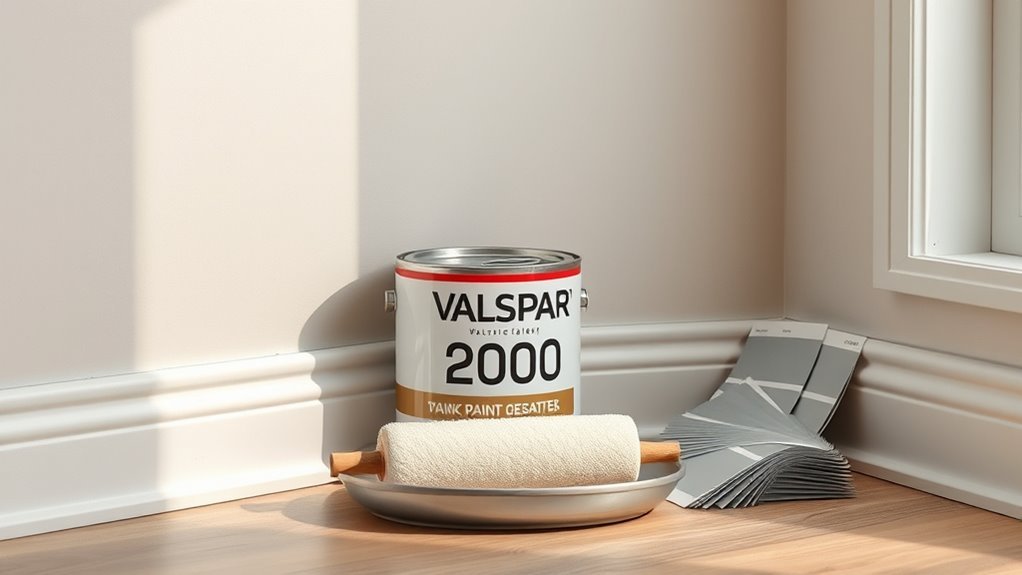
Is Valspar 2000 Latex Paint? Product Guide
Yes — Valspar 2000 is a water‑based latex interior paint that uses acrylic and vinyl‑acrylic binders for low odor and lower VOCs. You’ll get good coverage (about 350–400 sq ft/gal), three sheen choices, and easy cleanup with soap and water. It’s durable for typical rooms and trim but not ideal for very damp exteriors or high‑moisture areas. It’s budget‑friendly and widely available, and if you keep going you’ll find details on prep, application, and limits.
Quick Answer: Is Valspar 2000 Latex Paint?
Is Valspar 2000 a latex paint? Yes — you’ll find it’s a water-based option designed for interior use. You get easy cleanup, low odor, and quick drying, so you can work efficiently.
It supports smooth color blending when you mix tints or gradual shift between shades, helping you achieve consistent results.
Formulations often include eco-friendly additives that reduce VOCs and improve indoor air quality, which matters if you’re painting occupied rooms.
You’ll appreciate its balance of durability and touchability for walls and ceilings. Check labels for specific sheen and VOC levels before you start your project.
What Is Valspar 2000?
When you pick up Valspar 2000, you’re getting a water-based interior latex paint formulated for everyday residential use—offering easy cleanup, low odor, and quick drying times. You’ll find a mid-range option that balances durability and affordability, suited for walls and ceilings.
It supports Color matching at most retailers, so you can reproduce or tweak shades easily. Consider its moderate Environmental impact compared with higher-VOC products, though specifics vary by formula.
Picture typical results:
- Smooth, even wall finish in living spaces.
- Subtle sheen that hides minor flaws.
- Reliable coverage for repainting projects.
Is Valspar 2000 Water‑Based or Oil‑Based?
Because Valspar 2000 is formulated for easy cleanup and low odor, it’s a water‑based (latex) paint rather than oil‑based. You’ll clean brushes with soap and water and avoid the strong solvents oil paints require.
Because Valspar 2000 is water‑based, it cleans up with soap and water and has low odor.
You’ll find it dries faster than oil, resists yellowing, and adheres well to many interior surfaces.
Its water base supports a broad range of Color options, so you can match trims, walls, and accent pieces without switching formulas.
Because it emits fewer volatile organic compounds, choosing Valspar 2000 reduces environmental impact compared with traditional alkyd paints, making it practical for home and commercial projects.
What Does “Latex” Mean for Valspar 2000?

What exactly does “latex” mean for Valspar 2000? You’ll find it refers to a water-based finish that dries faster, cleans up with water, and supports reliable color matching at the store. It also tends to lower environmental impact versus solvent-based options, though formulations vary.
- Picture brushing smooth, even coats that level well.
- Imagine joining a color matching station to get precise hues.
- Visualize rinsing tools with water, not harsh solvents.
You’ll get durable, flexible film suited for interiors and exteriors, with easier handling and reduced fumes during application and cleanup.
Which Binders and Ingredients Are in Valspar 2000?
You’ll want to know the resin types Valspar 2000 uses, since they determine adhesion and durability. You’ll also look at common additives and solvents that affect flow, drying time, and cleanup.
I’ll summarize the main binders, plasticizers, surfactants, and any typical solvent carriers next.
Resin Types Present
When you look at Valspar 2000, you’ll find its performance comes mainly from acrylic and vinyl acrylic binders that form the paint film. You’ll notice the resin composition balances flexibility and toughness, giving good chemical stability for household wear.
The blend supports adhesion, color retention, and ease of cleaning without heavy odors. Visualize how each binder behaves on a wall:
- Smooth acrylic film that resists yellowing and holds pigment.
- Vinyl acrylic layer that adds tack and substrate bonding.
- Crosslinking zones where polymers interact to boost abrasion resistance.
These resins define durability and finish.
Additives And Solvents
Beyond the resin blend, Valspar 2000 relies on a targeted mix of additives and solvents to shape application, drying, and long-term performance. You’ll find wetting agents, defoamers, thickeners, biocides, and coalescents that control additive effects like flow, film formation, sag resistance, and mildew protection.
Those additives are balanced to optimize leveling without harming gloss or adhesion. Solvent types are primarily water plus small amounts of low‑VOC co‑solvents to aid pigment dispersion and coalescence. You can expect minimal organic solvents compared with alkyds, so cleanup is easier, fumes are lower, and drying follows predictable latex behavior.
What Sheens Does Valspar 2000 Come In?
Although Valspar 2000 is primarily known for its durable latex base, it’s offered in several sheens so you can match finish to room and trim needs. You’ll find choices that suit walls, cabinets, and trim while keeping Color options visible and Eco friendly ingredients highlighted on labels. Pick a sheen based on appearance and maintenance.
- Flat — low sheen, hides imperfections, great for ceilings and low-traffic rooms.
- Eggshell/Satin — soft luster, balances washability with subtle sheen for living areas.
- Semi-gloss — durable, easy to clean, ideal for trim, doors, and high-traffic surfaces.
How Much Coverage and Hide Does Valspar 2000 Deliver?
You’ll typically get about 350–400 sq ft per gallon from Valspar 2000 under normal conditions.
Expect good hide on smooth, previously painted surfaces but plan for extra coats on porous or heavily stained walls.
I’ll cover how many coats you’ll likely need for different situations next.
Coverage Per Gallon
A single gallon of Valspar 2000 latex typically covers about 300 to 400 square feet on smooth, primed walls, giving you reliable hide with one or two coats depending on color and surface porosity. You’ll plan quantities by measuring wall area, accounting for texture, and noting color matching needs and environmental impact choices when selecting finish and primer.
Expect lower coverage on rough or unprimed surfaces.
- Smooth bedroom wall — one gallon for ~350 sq ft, soft hue.
- Textured living room — one gallon for ~250–300 sq ft, deeper tone.
- Exterior touch-up — one gallon for ~200–300 sq ft, primer recommended.
Hide On Surfaces
When you want solid hide, Valspar 2000 delivers dependable opacity that usually hides previous colors in one to two coats on properly primed, smooth interiors. You’ll notice good surface adhesion on drywall and wood, reducing the need for aggressive paint removal. For stained or glossy surfaces, prep matters: sand, clean, prime. Sheen choice affects perceived hide; flat conceals better than semi-gloss. Use quality rollers and maintain wet edges to avoid lap marks. Below’s a quick reference to help you plan.
| Surface Type | Typical Result |
|---|---|
| Primed Drywall | Excellent |
| Raw Wood | Very Good |
| Glossy Trim | Fair |
| Stained Wall | Requires Prep |
Coat Count Needed
After planning surface prep and choosing the right sheen, estimate how many coats you’ll need based on substrate and color change. Valspar 2000 usually covers well, but you’ll assess porosity, previous color, and desired finish.
Lighter over dark may need more coats; similar tones often need one to two. Consider color options and environmental impact when deciding—low-VOC choices may still require normal coverage.
Plan for touchups and drying time between coats to guarantee uniform hide and longevity.
- Bare drywall — two coats for smooth hide.
- Fresh primer — one to two coats.
- Dark-to-light change — three coats.
How Fast Does Valspar 2000 Dry and When Can You Recoat?
Because Valspar 2000 is a water-based latex, it typically dries to the touch within 30 minutes to 1 hour and is ready for light recoat in about 2 to 4 hours under normal indoor conditions. However, cooler temperatures, high humidity, or heavy application can extend those times, so plan accordingly.
You should wait 24 hours for full cure before washing or heavy use.
If you’re doing paint mixing or adjusting color options, stir thoroughly and test a small patch to confirm drying behavior.
Improve drying by increasing ventilation, using a fan, and applying thin, even coats to avoid tacky or uneven recoats.
Which Surfaces Is Valspar 2000 Best For?
You’ll find Valspar 2000 works well on interior walls and ceilings, giving even coverage and good hide. It’s also suitable for trim and woodwork when you want a durable, low-sheen finish.
For best results, apply it over clean, previously painted surfaces that are properly prepped.
Interior Walls And Ceilings
When you’re choosing a paint for interior walls and ceilings, Valspar 2000 is best for smooth drywall, plaster, and properly primed wood surfaces where you want even coverage and a low‑sheen finish. You’ll appreciate the color options and eco-friendly ingredients that suit living rooms, bedrooms, and hallways.
Apply with a roller for a uniform appearance; thin coats hide blemishes without heavy buildup. Prep surfaces by cleaning and patching; prime bare spots. Avoid high‑moisture areas unless using an appropriate primer.
Imagine these spaces:
- A calm bedroom in muted greige.
- A bright hallway with soft white.
- A cozy living room in warm taupe.
Trim And Woodwork
Moving from walls and ceilings to trim and woodwork, Valspar 2000 works best on properly sanded and primed interior wood surfaces like baseboards, door and window casings, crown molding, and built-up trim. You’ll appreciate smooth coverage, durability against scuffs, and a finish that complements Color options across your home. It’s low-odor and aligns with Eco friendly paints trends, so you can refresh trim without harsh fumes. Choose sheen to match style: gloss for contrast, satin for subtlety. The table below evokes the joy of transformation as you pick pieces to update.
| Surface | Feel | Mood |
|---|---|---|
| Baseboards | Clean | Calm |
| Casings | Crisp | Proud |
| Molding | Elegant | Warm |
| Built-up Trim | Solid | Confident |
| Doors | Polished | Welcoming |
Previously Painted Surfaces
Although Valspar 2000 performs best on clean, sound coatings, it’s also forgiving over many previously painted surfaces if you prep them properly. You’ll remove loose flakes, scuff glossy finishes, and clean grease so adhesion’s solid. It sands well and accepts color matching, so you can refresh rooms without noticeable shifts.
Its eco friendly features mean low odor during touch-ups. Consider these typical scenarios to picture results:
- Faded living room walls sanded, primed, then unified with a matched tone.
- Glossy kitchen cabinets scuffed, deglossed, and recoated for durable sheen.
- Dormant exterior trim stripped, primed, and repainted for lasting protection.
Can You Use Valspar 2000 Indoors or Outdoors?
If you’re deciding where to use Valspar 2000, you’ll find it’s formulated primarily for interior walls and ceilings but can handle light exterior jobs if conditions are right.
You’ll use it indoors for living rooms, bedrooms, and hallways where color matching matters; it blends well with touch-ups and coordinating trims.
For outdoors, stick to sheltered areas like covered porches or shutters and apply in mild, dry weather.
The paint’s low-VOC formulation gives you eco-friendly options for indoor air quality.
Always prep surfaces properly and consult the label for temperature and surface recommendations before applying outdoors.
How Durable Is Valspar 2000 on Walls and Trim?
Now that you know where Valspar 2000 performs best, let’s look at how it holds up on walls and trim. You’ll find it offers solid adhesion and reasonable durability for everyday rooms. Trim gets a crisper edge, walls retain finish longer than bargain brands. Consider proper prep and primer for high-traffic areas. Color matching stays consistent between batches, helping touch-ups blend. Be aware of Environmental impact from VOCs—choose low-VOC options if sensitive.
- Smooth trim lines you’ll notice instantly.
- Even wall coverage with two coats.
- Touch-up blending that preserves hue.
How Stain‑Resistant and Cleanable Is the Finish?
You’ll want to know the surface durability rating to gauge how well Valspar 2000 resists everyday scuffs and stains.
I’ll cover practical stain removal techniques that work without harming the finish.
Finally, we’ll outline simple long-term maintenance steps to keep walls looking clean over time.
Surface Durability Rating
How well does Valspar 2000 hold up to everyday messes? You’ll find its surface durability rating solid for homes: it resists scuffs, wipes clean with mild soap, and keeps finish integrity after gentle abrasion.
Consider environmental impact when choosing finishes—lower-VOC formulations help indoor air quality—and color matching stays consistent after light cleaning. Visualize performance:
- A busy kitchen wall with splatters wiped away without ghosting.
- A high-traffic hallway showing minimal scuffing after months.
- A kid’s room where crayons clean off without dulling hue.
You can expect reliable wear for typical residential use.
Stain Removal Techniques
Because Valspar 2000 balances stain resistance with cleanability, you can usually remove common spills with simple household methods without damaging the finish. You’ll blot fresh spills, then wipe with a damp cloth and mild detergent; avoid abrasive pads that can dull sheens.
For tougher marks, use a paste of baking soda and water or a diluted ammonia solution, testing in an inconspicuous area first.
Repaint touchups blend well thanks to consistent color palettes, so small errors aren’t permanent.
Note Eco certifications influence formulation but don’t change routine cleaning. Regular gentle care preserves appearance without special products.
Long‑Term Maintenance
While Valspar 2000 isn’t indestructible, it stays remarkably stain‑resistant and easy to clean over time when you follow simple care routines. You’ll maintain finish performance by treating spills quickly, using mild cleaners, and avoiding abrasive tools that erode the topcoat.
If touchups are needed, make sure color matching is precise—bring a sample to the store or record the original formula. Proper paint mixing before application prevents uneven sheen that hides dirt.
Visualize routine care:
- Wipe spills within minutes with a damp cloth.
- Test cleaners in an inconspicuous spot first.
- Keep touchup cans labeled with mix info.
What Are the VOCs and Environmental Claims?
When you check Valspar 2000’s labels and technical data sheets, you’ll find it contains low—but not zero—volatile organic compounds (VOCs), meeting many low‑VOC standards for interior paints.
You should note specific VOC values on the label and compare them to local VOC regulations; they’ll tell you if the product qualifies for certain green programs.
Valspar often highlights reduced emissions and formulates to minimize environmental impact, but it’s not marketed as zero‑VOC.
If indoor air quality or certification matters, verify third‑party listings (Greenguard, etc.) and follow application guidance to keep emissions low during and after painting.
How Do You Clean Up : Soap and Water or Thinner?
If you’re working with Valspar 2000 latex, you’ll clean brushes, rollers, and most spills with warm soapy water and a quick rinse—no solvent thinner needed—while oil‑based tools or stubborn dried spots may still require a compatible mineral spirit or paint thinner.
You’ll start wet, scrub gently, and avoid harsh cleaning solvents unless necessary. For dried latex, use a designated paint remover or a solvent sparingly, testing first. Dispose of wash water and used solvent per local rules.
- Rinse under warm running water.
- Scrub nylon brush fibers with soap.
- Spot-treat dried blobs with paint remover.
Valspar 2000 Vs Signature: What’s Different?
When you compare Valspar 2000 and Signature, you’ll notice differences in coverage and durability that affect how many coats you need and how well the finish holds up.
You’ll also see variations in sheen and finish options that change the look and cleanability of painted surfaces.
Let’s look at how those factors translate to performance and cost so you can pick the right product for your job.
Coverage And Durability
Curious which one gives you better coverage and holds up longer? You’ll find Valspar 2000 covers well in two coats, while Signature often needs one fewer.
Consider color options and eco friendliness: both offer many hues and low-VOC formulas, but Signature’s pigments can boost hide slightly.
You’ll get longevity from proper prep and quality primers.
- A freshly primed wall showing even, solid coverage after one coat.
- High-traffic hallway resisting scuffs and holding color over months.
- A kitchen wall with grease wiped clean, paint intact and uniform.
Choose based on project needs and budget.
Sheen And Finish
Along with coverage and durability, the paint’s sheen determines how the color reads and how easy surfaces are to clean, so it’s worth comparing Valspar 2000 and Signature on finish options. You’ll find both lines offer flat to semi-gloss sheens, but Signature often has a smoother, more uniform finish that resists scuffs better in higher sheens.
Valspar 2000 can be more cost-effective and still provides decent washability. For precise color matching and consistent sheen across batches, Signature’s formula tends to be more reliable.
Consider environmental impact: low-VOC options exist in both, but check labels if that’s a priority.
Valspar 2000 Vs Ultra: Performance Comparison
Although both Valspar 2000 and Valspar Ultra are budget-friendly interior latex options, they perform differently in durability, coverage, and finish—so you’ll want to match the choice to your project’s needs.
You’ll find Valspar 2000 offers solid coverage and easy color matching with more eco-friendly options, while Ultra emphasizes a tougher finish and stain resistance.
Consider room use, prep time, and traffic.
- Freshly painted bedroom: soft matte, even tone, effortless color matching.
- High-traffic hallway: Ultra resists scuffs, holds sheen longer.
- Kids’ playroom: 2000 cleans well, lowers VOC exposure.
How Does Valspar 2000 Compare to Top Competitor Latex Paints?
When you compare Valspar 2000 to leading competitor latex paints, you’ll find it balances good coverage and low VOCs with a lower price point. Rivals often push harder on durability, stain resistance, or specialty finishes.
You’ll notice competitors may offer tougher scrubbability and longer warranties, but Valspar 2000 still delivers reliable application and decent hiding.
Color matching services are comparable at major retailers, though premium lines sometimes provide broader palettes and more precise custom tints.
Consider environmental impact: Valspar’s low-VOC formulation scores well, but some competitors market zero-VOC or eco-certified options if that’s a priority.
When Is Valspar 2000 the Right Budget Choice?
If you’re tackling budget-friendly interior projects, Valspar 2000 is a practical pick that lets you cover walls without overspending.
It’s also a smart choice when you need a quick, economical refresh for short-term rentals that prioritize durability over premium finish.
You’ll get acceptable coverage and easy cleanup while keeping costs down.
Budget-Friendly Interior Projects
Because you want solid results without overspending, Valspar 2000 is a smart pick for straightforward interior projects like bedrooms, hallways, and rental units where heavy-duty durability isn’t critical. You’ll appreciate easy color matching and eco-friendly ingredients that reduce odors during quick refreshes. Use it when you need a clean, attractive finish without specialty performance.
- A calm bedroom in soft neutrals, quick touch-ups, minimal prep.
- A bright hallway refreshed to lift whole-home mood, low VOC impact.
- A guest room or office updated between tenants, economical and simple to apply.
Short-Term Rental Needs
You’ll find Valspar 2000 fits short-term rental needs where quick turnover, cost control, and a fresh, neutral look matter more than heavy-duty wear resistance. You’ll appreciate its easy application for rapid repainting between guests, saving labor and downtime.
Choose neutral tones that simplify touch-ups and minimize mismatch during color blending for seamless walls. While it won’t withstand heavy scrubbing, it masks minor flaws and pairs well with simple texture effects to hide wear.
Use high-traffic accents sparingly, and consider touch-up kits for spot maintenance. For short-term rentals, it’s a pragmatic, budget-conscious choice when longevity isn’t primary.
When Should You Avoid Valspar 2000?
While Valspar 2000 works well for many interior jobs, there are clear situations where you should choose another product. You’ll want alternatives if Environmental impact is a priority, since low-VOC or eco-certified paints may suit you better.
Also skip it when precise Color matching matters for trim or commercial branding—premium lines offer tighter consistency.
Avoid Valspar 2000 on high-moisture surfaces or exterior wood that needs specialized protection; choose a mildew-resistant or exterior-grade formula instead.
- Sun-faded siding needing UV defense.
- Brand-critical logo walls requiring exact match.
- Bathroom or basement with persistent damp.
What Does a Gallon of Valspar 2000 Cost?
A single gallon of Valspar 2000 typically runs between $25 and $40 at major retailers, depending on finish and current promotions. You’ll find eggshell, satin, and semi-gloss priced differently, and specialty finishes push cost toward the high end.
Buying during sales or using store coupons lowers your outlay. Remember that custom Color options may add fees for tinting, so factor that into your budget.
If Eco certifications matter to you, certified low-VOC or GreenGuard options can affect availability but usually not price dramatically. Compare retailer warranties and return policies to get the best value.
How to Calculate How Much Valspar 2000 to Buy?
When planning paint quantities, start by measuring the room’s square footage so you know exactly how much Valspar 2000 you’ll need. Calculate wall area (length × height), subtract doors/windows, then divide by the paint’s coverage per gallon (check the label).
Factor in two coats and a 10% waste margin for touch-ups and color matching adjustments. Consider Environmental impact by buying only what you’ll use to avoid disposal.
- Measure walls and subtract openings.
- Divide area by coverage per gallon.
- Add 10–20% for waste and color matching tweaks.
What Surface Prep Should You Do Before Painting?
Now that you’ve figured out how much Valspar 2000 to buy, get the surfaces ready so the paint sticks and looks its best. Start by cleaning walls with mild detergent, rinsing, and letting them dry. Remove loose paint, sand glossy areas, and dust thoroughly. Use painter’s tape to protect trim and floors.
If you’ll do color mixing, test samples on small sections after prep to confirm coverage. For indoor projects, check product Eco certifications to verify low-VOC choices.
Prime bare or patched spots as recommended. Proper prep saves time and yields a uniform, long-lasting finish.
How to Repair Common Wall Flaws First?
Before you paint, fix dents, nail holes, cracks, and peeling spots so your finish goes on smooth and lasts—start by scraping loose material, sanding edges, and filling holes with spackling or lightweight joint compound, then sand flush once dry.
Next, assess Wall texture and replicate it with a sponge, brush, or texture spray before patching so repaired areas blend.
Match sheen and undertake Color matching by testing small swatches once patched.
Visualize the repair steps:
- Scrape, sand, fill.
- Texture to match surrounding wall.
- Prime patched spots, then retest color swatches and finish.
Which Primers Pair Best With Valspar 2000?
After you’ve prepped and primed patched areas, pick a primer that complements Valspar 2000’s latex formula and the surface you’re covering.
For interior drywall, choose a high-quality latex primer for adhesion and even color matching. It minimizes soak-in and reduces the number of finish coats.
For stained or glossy surfaces, use a bonding or stain-blocking primer to prevent bleed-through.
On metal or bare wood, select a specialty primer formulated for those substrates.
Consider low-VOC or water-based primers to limit environmental impact while maintaining performance.
Always follow manufacturer recommendations for drying times and compatibility.
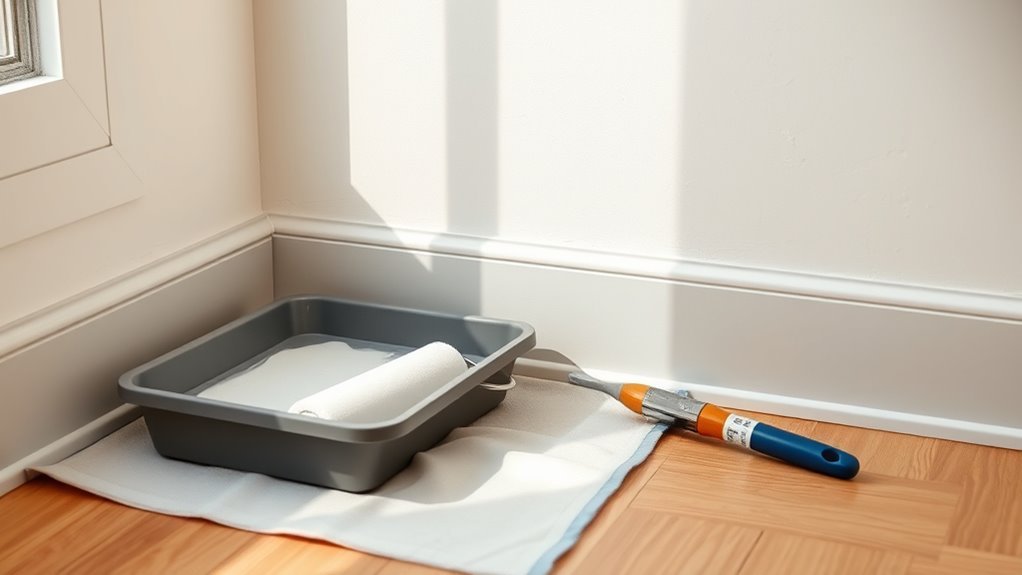
Brush, Roller, or Sprayer: Which to Use With Valspar 2000?
When you choose between a brush, roller, or sprayer for Valspar 2000, each tool needs a different approach for best results. Use a high-quality angled brush for trim. A dense-nap roller is ideal for even coverage on walls. Set up a sprayer with the right tip and thinning for smooth, fast application.
I’ll cover brush techniques, roller coverage tips, and sprayer setup so you can pick the right method for your project.
Brush Application Tips
Although Valspar 2000 works well with all three application methods, choosing between a brush, roller, or sprayer depends on the surface, finish, and your comfort level. Use a brush for trim and touch-ups, a roller for walls and ceilings, and a sprayer for fast, even coverage on large or textured areas.
For brush application tips, prep edges, sand lightly, and pick a high-quality synthetic brush to control cut-in lines and maintain color coordination with adjacent surfaces while preserving texture enhancement. Work with thin, even coats, following grain and overlapping strokes. Clean brushes promptly to extend life.
- Crisp trim lines
- Smooth corners
- Controlled accents
Roller Coverage Advice
If you want fast, even coverage on flat interior walls, reach for a medium-nap roller and load it evenly to avoid splatter and lap marks. You’ll roll in a W pattern, then fill in without overworking the paint. Keep a wet edge to prevent seams and feather pressure near edges.
For trim-adjacent areas, cut in with a brush first, then blend with the roller.
When matching colors, confirm your color matching and paint mixing are accurate before starting; stir thoroughly and strain if needed.
Clean rollers promptly to reuse them and maintain consistent texture across coats.
Sprayer Setup Guide
You’ve got the roller basics down, so next decide whether a brush, roller, or sprayer is the best tool for your Valspar 2000 job.
For smooth, fast coverage on trim or cabinets choose a sprayer; thin paint per manufacturer directions, test spray pattern, and wear a mask.
A brush gives control for edges and touch-ups; pick synthetic bristles.
Rollers suit walls—use naps matching texture.
Consider Color options and Eco friendliness when buying: low-VOC formulas reduce fumes and cleanup.
- Feathered spray mist settling on cabinet face.
- Firm brush stroking trim grooves.
- Dense roller covering a textured wall.
Which Roller Nap and Brush Types Give Best Results?
When choosing rollers and brushes for Valspar 2000 latex, match nap and bristle type to the surface.
For smooth walls and trim, use a short 1/4″–3/8″ nap and a synthetic nylon/polyester brush to get crisp edges and honor color matching, especially with lighter tones or eco-friendly formulations.
For lightly textured drywall, pick a 3/8″–1/2″ nap to hold enough paint without excess splatter.
For rough or stucco surfaces, choose a 3/4″–1″ nap.
Use high-quality synthetic brushes for latex; natural bristles swell and degrade.
Clean tools promptly with warm soapy water to maintain finish consistency and extend tool life.
How to Cut In and Roll for Even Coverage?
Start by prepping the surface so it’s clean, dry, and free of loose paint or dust.
You’ll cut in with a quality angled brush for neat edges, then immediately follow with a roller to blend and even out the finish.
Work in manageable sections and use light, overlapping passes to avoid lap marks.
Prep The Surface
Before you cut in or roll, clean and inspect the surface so the paint will adhere smoothly and look even. You’ll remove dust, grease, and loose flakes, sand rough spots, and fill holes so color matching is accurate and eco-friendly formulations perform as designed.
Tape edges where needed and let primers dry fully. Visualize the finish:
- A sanded patch feathered into surrounding paint.
- Sharp taped lines beside a dust-free base.
- A primed area waiting for its final coat.
Prep well, and your cutting and rolling will yield uniform coverage with minimal touch-ups.
Cut In With Brush
Once you’ve prepped the surface, load a high-quality angled sash brush with a modest amount of paint and cut a clean edge along trim, corners, and where walls meet the ceiling; work in long, steady strokes and keep a wet line to avoid lap marks. Keep a small container for touch-ups and note any color mixing to match tones. Wipe excess off the brush; feather into the field so you don’t leave ridges. Mind paint storage—seal cans between sessions to preserve consistency. Use the table below to plan sequence and tools.
| Area | Tool |
|---|---|
| Trim | Angled brush |
| Corners | Small brush |
| Touch-ups | Container |
Roll For Smoothness
Although you’ve already cut in the edges, keep a wet edge and work quickly so your roller blends seamlessly with the brushwork. Load a 3/8″–3/4″ nap roller appropriate for your surface, roll into the tray’s well, and back-roll lightly to remove excess. You’ll use steady, overlapping passes to maintain texture consistency and prevent lap marks. Use application techniques that favor even pressure, working in 4×4 foot sections. Finish with light, unbroken tip-offs while the paint’s wet.
- Short, controlled strokes across the panel.
- Cross-roll once perpendicular for uniform coverage.
- Feather edges toward the wet edge.
How to Fix Lap Marks, Drips, and Other Application Issues?
If you notice lap marks, drips, or other flaws while the latex is still tacky, smooth them out right away with a light, even pass of your brush or roller—don’t overwork the area—or you’ll worsen the finish.
Catch lap marks and drips while the latex is still tacky—smooth with one light, even pass; don’t overwork.
If paint has dried, sand lightly with fine-grit paper, wipe clean, then spot-prime before repainting.
For runs, scrape excess with a putty knife, sand, and feather edges.
Match sheen and color matching precisely to avoid visible patches.
Keep leftover paint sealed and upright for reliable paint storage and future touch-ups.
Work in thin, even coats and maintain consistent wet edges for best results.
How Many Coats Does Valspar 2000 Usually Need?
How many coats you’ll need with Valspar 2000 depends on your prep, the surface porosity, and the color change you’re making. One full coat often covers well on previously painted, smooth walls.
But rough or bare surfaces usually need a primer plus two coats for even coverage. Save a light trim or finish coat for edges and high-traffic areas to guarantee a uniform, durable result.
Surface Preparation Needed
Before you start rolling, consider how the surface’s condition will determine how many coats of Valspar 2000 you’ll need. You should clean, sand, and repair first; proper prep helps adhesion, evens porosity, and reduces tint surprises when color mixing or matching finishes tied to eco certifications. Prime bare or stained areas. Dust and grease ruin results.
- Scrub with degreaser, rinse, dry — smooth base.
- Sand glossy spots, feather edges — uniform texture.
- Fill cracks and sand patched areas — seamless surface.
Do this and you’ll often need fewer coats and get truer, longer‑lasting color.
Coverage Per Coat
Wondering how many coats you’ll need? You’ll typically apply two coats of Valspar 2000 for full coverage; one may suffice over similar existing colors. Strong color matching needs, dark-to-light shifts, or porous substrates often require a third coat. Consider primer to reduce extra layers and lessen environmental impact from extra paint. Use even strokes and allow recommended dry times to avoid rework.
| Surface Type | Typical Coats | Notes |
|---|---|---|
| Previously painted light | 1–2 | Good coverage |
| Dark-to-light change | 2–3 | Color matching challenge |
| Bare or patched | 2–3 | Primer helps |
Trim And Finish Coats
Curious about trim and finish coats? You’ll usually need two coats of Valspar 2000 for trim—one to lay down color and another to even sheen and hide brush strokes.
For high-traffic areas or drastic color changes, plan a third coat. Good color matching and careful paint mixing prevent redoing coats.
- A single smooth coat for coverage.
- A second coat for uniform finish and durability.
- An optional third for deep colors or touch-ups.
You should sand lightly between coats on trim, wipe dust, and allow recommended drying times for the cleanest result.
When Is Paint Dry vs Fully Cured?
Although the surface feels dry to the touch within a few hours, Valspar 2000 latex paint isn’t fully cured until weeks later. You’ll notice initial dry times allow light handling, but full cure improves color precision and reduces environmental impact through stable film formation.
Dry means tack-free; cured means solvents have evaporated and polymers crosslinked. Expect 2–4 hours to be dry under ideal conditions, but 2–4 weeks to fully cure depending on humidity, temperature, and ventilation.
Wait for full cure before heavy use or placing objects against painted surfaces to avoid marks, indentations, or incomplete toughness.
How to Touch Up and Blend Older Valspar 2000 Paint?
If you’re touching up older Valspar 2000 paint, start by matching the sheen and color. Clean the area, scuff glossy spots, and test strips first—age and paint storage change tone. Use small swatches to compare under the room’s light.
If touching up older Valspar 2000, match sheen and color, clean, scuff, and test small swatches first.
Feather the new paint into the old with thin layers and let each dry to evaluate blending.
- Visualize a soft overlap, brush strokes tapering outward.
- Imagine sanding the edge until it’s barely visible.
- Picture thin coats smoothing gradations until uniform.
Work patiently; color matching and technique beat heavy coverage.
How to Maintain and Clean Valspar 2000 Finishes Long‑Term?
To keep your Valspar 2000 finish looking its best, follow a simple regular cleaning routine with mild soap and a soft cloth.
For tougher marks, use targeted stain removal techniques like a baking soda paste or a gentle commercial cleaner, testing first in an inconspicuous spot.
Finish with protective maintenance steps—touch up chips promptly and avoid abrasive scrubbing—to extend the paint’s life.
Regular Cleaning Routine
When you keep up with a simple, regular cleaning routine, Valspar 2000’s latex finish stays looking fresh and resists buildup over time. You’ll want eco friendly options like mild vinegar solutions or plant-based cleaners to protect sheen and indoor air. Test any cleaner in a hidden spot to preserve color customization choices. Wipe gently with a soft cloth, rinse, and dry.
- Dust weekly with a microfiber cloth to prevent grime settling.
- Spot-clean light marks monthly using a diluted, eco safe cleaner.
- Deep-clean semiannually with gentle soap, plenty of water, and quick drying.
Stain Removal Techniques
Although some stains look stubborn at first, you can usually remove them from Valspar 2000’s latex finish without harming the sheen by following targeted, gentle techniques. Start with mild soap and water, blotting inward. For grease, try a degreasing dish soap; for ink, use rubbing alcohol sparingly. Test any method in an inconspicuous spot for color matching. Prefer eco friendly options like vinegar solutions or biodegradable cleaners when possible. Avoid abrasive scrubbing. If a stain persists, step back and reassess rather than overworking the area — patience preserves finish and keeps touchups minimal.
| Emotion | Result |
|---|---|
| Relief | Clean surface |
| Pride | Restored look |
| Calm | No abrasion |
| Confidence | Lasting finish |
Protective Maintenance Steps
If you want Valspar 2000 finishes to look their best for years, adopt a simple, regular maintenance routine that prevents dirt buildup and protects the sheen. You’ll clean gently, touch up chips promptly, and protect high-traffic areas while respecting Color matching and Eco friendly formulas when reapplying.
- Wipe with a soft cloth and mild soap, rinsing to avoid residue.
- Use fine-grit sanding and thin touch-up coats for small chips; store tinted samples for accurate Color matching.
- Place washable mats and felt pads; schedule quarterly inspections to catch wear early and choose Eco friendly formulas for any refresh.
How to Repair Chips and Scuffs in Valspar 2000?
Because chips and scuffs draw attention to wear and can lead to peeling, you’ll want to repair them promptly to keep Valspar 2000 looking its best. Start by cleaning, sanding, and using a primer on bare spots. Match color carefully and consider eco friendly options for low-VOC touch-up paints. Apply thin coats, feather edges, and let dry fully.
| Step | Action |
|---|---|
| 1 | Clean and sand |
| 2 | Prime if needed |
| 3 | Touch-up with matched paint |
| 4 | Feather, dry, and inspect |
Finish with a clear sealer for high-traffic areas.
What Color Options and Matching Are Available?
When you’re choosing colors for Valspar 2000, you’ll find a wide palette of ready-mixed shades plus custom-matching services that let you replicate virtually any hue from a sample. You can pick from curated palette options or bring a swatch for precise color matching at many retailers.
Expect consistent factory mixes and on-site tints that match trim, walls, or accent pieces. Consider lighting and finish when selecting to guarantee the tone reads as intended.
Visualize applications with these examples:
- Soft neutral living room beige
- Deep navy accent wall
- Bright trim in crisp white
How Do Tint Limits Affect Performance?
When you add strong colorants to Valspar 2000, tint limits help control VOC levels so the finish still meets safety and regulatory standards.
Know that certain pigments can alter durability — heavy tints may slightly affect washability and fade resistance.
We’ll look at how to stay within tint limits while preserving performance.
Tinting And VOC Levels
How much can you tint Valspar 2000 before performance changes? You’ll find tint limits affect color consistency and VOC levels. Tinting heavily can raise VOCs slightly, altering drying and odor; moderate tint keeps sheen and hide intact. Consider manufacturer limits to avoid off-spec batches and increased emissions that impact indoor air quality and environmental impact.
- Deep, dark shades: longer cure, higher VOC spike.
- Medium tones: minor change, manageable drying time.
- Light tints: minimal effect, retains original performance.
Follow label recommendations and use low-VOC colorants to maintain finish and air safety.
Colorant Impact On Durability
Why does tint level matter for durability? You should know that heavy tints change binder balance and can alter Colorant effects, thinning the film and reducing abrasion and wash resistance.
When you push pigments to achieve deep shades, you risk softer finishes and more frequent touch-ups. You’ll also see variations in drying time and adhesion on different substrates.
Follow manufacturer tint limits to maintain performance and warranty coverage. Consider environmental impact: darker colors may absorb heat, stressing exterior coatings and substrate.
Choose recommended formulas or add compatible additives to restore durability without compromising color or compliance.
How to Store Leftover Valspar 2000 for Touch‑Ups?
If you’ve got leftover Valspar 2000 after a job, store it properly so you can grab an exact color match later—seal the can tightly, keep it in a cool, dry place away from direct sunlight, and label it with the date and room.
Keep the lid clean and press a piece of plastic wrap over the surface before closing to prevent skinning.
Keep the lid clean and press plastic wrap over the paint before sealing to prevent skinning.
Note the tint formula for future color matching and that the Eco friendly formulation may settle differently over time.
Check cans annually and shake or stir well before touch‑ups.
- Clean lid
- Wrap surface
- Label and date
What Safety and Ventilation Precautions Matter?
After you’ve stored leftover Valspar 2000 for touch-ups, pay close attention to safety and ventilation when you next open the can or work with the paint. Wear gloves and goggles, keep children and pets away, and avoid eating or smoking nearby—these basic safety tips reduce skin contact and ingestion risk.
Use a respirator rated for organic vapors if sanding or working in tight spaces. Open windows and run fans to create cross-breeze; consider a window exhaust fan for prolonged jobs.
Dispose of rags in a metal container with lid. Read the label and MSDS for product-specific precautions and emergency steps.
Which DIY Projects Suit Valspar 2000 Best?
Because Valspar 2000 balances durability, easy application, and a wide color range, it’s a great choice for many home DIY projects—from repainting interior walls and trim to revitalizing kitchen cabinets and built-in shelving. You’ll appreciate simple prep, good coverage, and reliable Color matching when revitalizing rooms or accent pieces.
Valspar 2000 offers durable, easy-to-apply color options for refreshing walls, trim, cabinets, and built-ins with confidence.
It also offers Eco friendly options for lower-VOC work. Consider these project ideas to visualize results:
- Freshening living room walls and crown molding with coordinated hues.
- Updating kitchen cabinets—sand, prime, and apply for a smooth, durable finish.
- Revamping bookcases and built-ins with contrasting trim for depth.
When Do Pros Use Valspar 2000 and When Not To?
You’ve seen how Valspar 2000 works well for many DIY jobs, but professionals pick their paints based on job demands and finish requirements. You’ll find pros choose Valspar 2000 for quick-turn interior rooms, ceilings, and rental refreshes because it sprays and rolls evenly and supports common painting techniques.
You shouldn’t expect them to use it for high-traffic commercial areas, exterior siding, or specialty finishes where extreme durability or gloss control matters. When precise color matching or advanced coatings are needed, they’ll opt for premium lines with better tint stability and surface-specific formulations to meet client specs and warranty needs.
What Warranties or Guarantees Apply?
When you buy Valspar 2000, the paint is covered by Valspar’s standard limited warranty, which guarantees the product against manufacturing defects and premature failure when used and applied according to label instructions.
Valspar 2000 includes a standard limited warranty protecting against manufacturing defects and premature failure when applied per label instructions.
You also benefit from advertised Warranty coverage and a Satisfaction guarantee policy that helps resolve issues.
Read the label and retain your receipt, then contact Valspar for claims.
Expect inspection requirements and possible pro-rata remedies.
Typical exclusions include normal wear, misuse, or improper application.
- Visualize a flawless wall after correct application.
- Picture paperwork proving purchase and color match.
- Imagine customer service guiding a remedy.
Quick Decision Guide: Should You Choose Valspar 2000?
If you’re choosing paint for a typical interior project, Valspar 2000 is a solid, budget-friendly option that balances coverage, durability, and ease of application. You’ll like its reliable spread and available color matching, and it performs well on walls and ceilings. Consider sheen, prep, and ventilation; also weigh environmental impact if low-VOC is a priority. Use this quick snapshot to decide.
| Factor | Verdict |
|---|---|
| Coverage | Good |
| Durability | Moderate |
| Ease of Application | Easy |
| Color matching | Strong |
| Environmental impact | Varies by formula |
Where to Buy Valspar 2000 and What to Ask in Store?
Because Valspar 2000 is sold at big-box stores, paint specialty shops, and online retailers, you can compare prices and get color-matching options before you buy.
Visit a store to see swatches, ask about Color matching accuracy, and request sample pots for testing.
Also confirm Eco certifications if low-VOC or sustainable sourcing matters to you.
In-store questions to ask:
- Can you match this exact shade from a swatch or sample?
- Do you offer small sample sizes or returns after testing?
- What Eco certifications or VOC ratings does this specific Valspar 2000 batch carry?
Frequently Asked Questions
Can Valspar 2000 Be Used on Kitchen Cabinets With High-Traffic Wear?
Yes — you can use Valspar 2000 on high-traffic kitchen cabinets; it offers good paint durability when paired with proper cabinet finishing, and you should prep, prime, and add a clear protective topcoat to resist wear.
Is Valspar 2000 Suitable for Use on Metal Surfaces Without a Primer?
No, you shouldn’t use it bare on metal; proper metal preparation is crucial, and primer necessity is high because you’ll need a corrosion-resistant primer to promote adhesion, prevent rust, and ensure the Valspar 2000 topcoat performs well.
Does Valspar 2000 Cause Yellowing Over Time in Low‑Light Rooms?
Yes — you might notice slight yellowing over time in low‑light rooms; you’ll preserve paint durability and color longevity best by choosing lighter tones, using quality primers, and avoiding smoke or high humidity that accelerate discoloration.
Can Valspar 2000 Be Tinted to Create Custom Color Blends or Effects?
About 78% of professional painters say custom hues improve client satisfaction; yes, you can tint Valspar 2000 for color blending, and you’ll find varied tinting options to create subtle shades, glazes, or bold custom effects.
Are There Special Disposal Rules for Empty Valspar 2000 Paint Cans?
Yes — you should follow local disposal regulations: empty cans require paint removal, dry them fully, label as empty, then recycle or dispose per rules. Don’t pour residue down drains; check municipal hazardous-waste programs.
Conclusion
You’re almost ready to decide — and here’s the short version: Valspar 2000 isn’t marketed as “latex” in the old oil-vs-latex sense, but it’s a water‑based acrylic formula that behaves like modern latex paints. It’s great for many interior and exterior jobs, cleans up with soap and water, and suits DIYers and pros — though heavy‑duty or specialty needs might call for other binders. Want durability, easy cleanup, and broad availability? Valspar 2000 should be on your shortlist.