Should I Paint My Radiator the Same Colour as Wall?
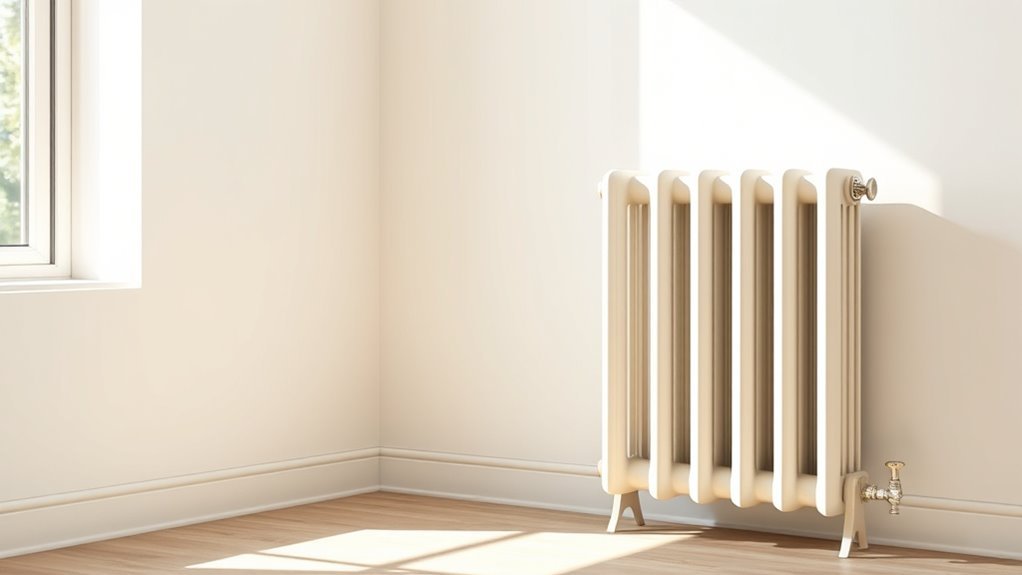
You can paint your radiator the same colour as the wall if you want it to disappear and make the room feel calmer and larger. Matching works well in minimal, contemporary, or small spaces and reduces visual clutter. Use heat‑safe paint, prep and prime properly, and apply thin coats so performance isn’t harmed. If you prefer a focal point, choose a contrasting finish instead. Keep going for guidance on materials, finishes, and practical steps.
Who This Guide Helps and Why
Who’s this guide for? You’re deciding whether to paint your radiator the same colour as the wall and need clear, practical advice. You care about radiator aesthetics and want sensible room integration without guesswork.
Maybe you’re renovating, staging to sell, or aiming for cohesive design while keeping heating efficiency intact. You’ll get straightforward criteria: when matching the wall helps hide the unit, when contrast boosts style, and when paint choice affects performance.
This guide helps DIYers, renters, designers, and homeowners who want confident choices that balance looks, function, and simple execution.
Quick Answer: Paint It or Not?
If you want the short take: yes—usually you can paint your radiator, but there are a few simple rules to follow.
You’ll boost radiator aesthetics and can influence mood through color psychology, but consider heat-safe paint, surface prep, and finish. Pick a shade that suits the room and function.
Boost your radiator’s look and mood with heat-safe paint, proper prep, and a shade that suits the room.
- Clean and sand before you paint.
- Use a high-temperature primer and enamel.
- Match or contrast with intent, not impulse.
- Test color in a small spot to check heat effect.
- Allow full curing time before turning on the system.
Follow those steps and you’ll get safe, stylish results.
When to Camouflage vs. Make a Feature
Think about your room’s mood and how the radiator fits into it.
If you want a seamless look, match the wall color so the heater fades into the background; if you want a focal point, pick a bold or contrasting finish to make it pop.
Consider scale, traffic flow, and whether you’re aiming for subtlety or swagger.
When To Blend In
When a radiator sits in a room, you can either hide it or highlight it—your choice should follow the room’s style, function, and how visible the unit already is.
You’ll blend in when the radiator competes with furniture or you want calm cohesion; use blending techniques and color psychology to match hue, tone, and finish. Prime for heat resistance, choose a subtle shade one or two steps different from the wall for depth without contrast.
Consider texture and gloss to mirror surrounding surfaces.
- Match undertones to walls
- Use matte finishes
- Keep trim consistent
- Test samples in daylight
- Prioritize heat-safe paint
When To Stand Out
Blending a radiator into the background works best in calm, furniture-heavy rooms, but there are plenty of times you’ll want it to pop instead.
If you want a focal point, pick bold contrasts—think matte black against pale plaster or vivid teal in a neutral living room—to create deliberate tension.
Use subtle harmonies when the radiator should accent rather than dominate: a muted pastel that echoes cushion tones or trim ties the look together.
Choose feature treatment in minimalist or industrial spaces where the radiator’s shape complements design.
Avoid competing patterns; let color decide whether it hides or headlines.
Will Paint Cut Radiator Efficiency or Warmth?
You’re probably wondering if paint will stop your radiator from heating a room effectively.
Basic heat-transfer principles mean color and finish can change how much heat gets radiated versus convected. The paint’s thickness and type (high-temperature, low-emissivity, or insulating) also matter.
Before you repaint, consider how the new surface temperature and emissivity will affect overall warmth.
Heat Transfer Basics
Because paint adds a thin layer to a radiator’s surface, you might worry it will block heat — but in most cases the effect is minimal. You still get efficient heat transfer because the coating is so thin; convection and radiation dominate warmth delivery.
Small changes in surface emissivity or conduction through paint rarely affect radiator efficiency noticeably. To understand practical impact, consider these points:
- Surface area matters more than coating thickness.
- Convection currents move heat into the room.
- Emissivity alters radiant heat slightly.
- Multiple thick coats can add measurable resistance.
- Proper placement and airflow preserve performance.
Paint Type Effects
Although a thin coat of paint won’t stop a radiator from heating your room, the type of paint you choose can slightly change how efficiently it gives off heat — mainly through differences in emissivity and thermal resistance.
You’ll want coatings with good heat resistance so they don’t degrade under repeated warming, and high-quality formulations improve paint durability against cracking or peeling.
Matte and satin finishes differ in emissivity but only marginally affect warmth; metallic or textured paints can alter radiation more noticeably.
Choose radiator-specific or heat-tolerant paints, apply thin even coats, and prioritize longevity over cosmetic matching for best performance.
Surface Temperature Impact
After choosing a heat-tolerant paint, you’ll want to know whether that coating will actually lower the radiator’s surface temperature and reduce warmth in the room.
You’re unlikely to lose meaningful heat: thin paint layers change emissivity slightly but don’t block convection. Focus on proper coverage and avoiding thick, insulating build-up.
- Choose paints designed for radiators.
- Keep layers thin and even.
- Maintain vents and fins clear.
- Monitor room warmth after painting.
- Repaint only with like-for-like formulations.
How Radiator Material Affects Paint Choices
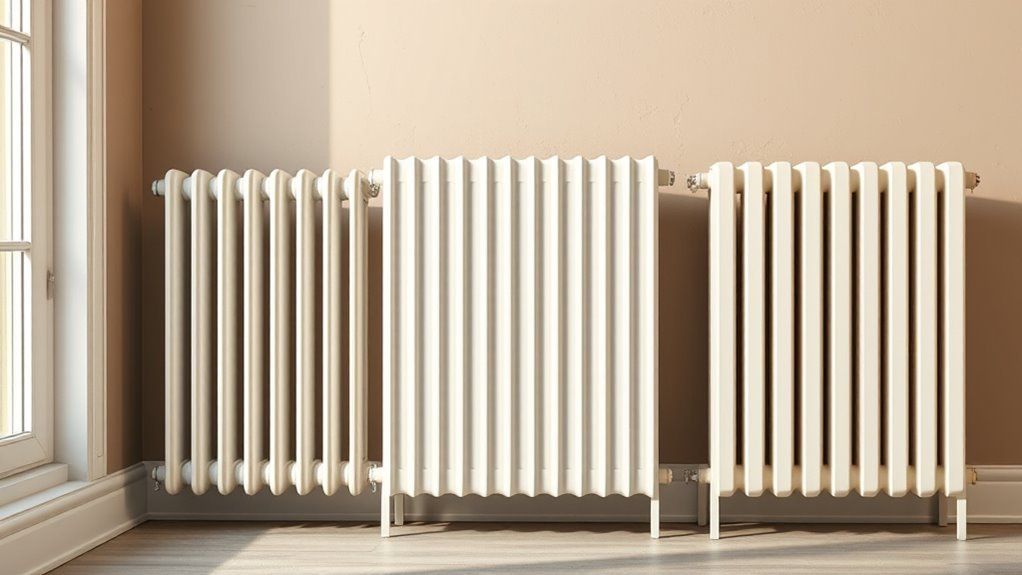
When you choose paint for a radiator, the metal it’s made from determines both the prep and the finish you should use. You’ll encounter cast iron, steel, and aluminum radiators, each demanding different attention.
With cast iron, remove old flaky layers and use rust treatment; its heat retention affects adhesion.
Steel heats quickly and benefits from degreasing and an anti-corrosion primer.
Aluminum needs gentle cleaning and non-abrasive primers to avoid damage.
Match surface preparation to radiator materials to guarantee paint compatibility and longevity.
Considering metal type upfront prevents peeling, uneven coverage, and premature failure of your finish.
Which Paints Are Safe for Radiators?
Wondering which paints you can safely use on a radiator? You’ll want heat resistant options that stick, resist yellowing, and won’t peel with temperature changes.
Choose paints labeled for metal and radiators, and follow surface prep instructions.
- High-temperature radiator enamel for direct heat exposure
- Appliance or metal paint formulated for repeated heating
- Anti-rust primers plus radiator-specific topcoats for iron units
- Water-based acrylics rated for moderate heat when manufacturer-approved
- Silicone-based paints for very high-heat areas
You can also look for eco friendly choices in these categories, but avoid standard wall paints unless explicitly rated for radiators.
Choosing Low‑VOC and Eco-Friendly Radiator Paints
If you want to minimize fumes and environmental impact, choose low‑VOC or eco‑friendly radiator paints that still handle heat and adhesion demands. You’ll prefer eco friendly options with clear heat ratings, durable binders, and primer compatibility. Look for manufacturer specs and certifications, test a small area, and ventilate while painting. Low VOC paints reduce odors and off‑gassing, making post‑paint comfort better. Compare brands for drying time and finish longevity. Use proper surface prep for adhesion. Below is a quick comparison table to help you decide.
| Brand | VOC Level | Heat Rating |
|---|---|---|
| Brand A | Low | 120°C |
| Brand B | Very Low | 150°C |
| Brand C | Low | 130°C |
How Paint Finish Affects Heat Output and Look
Think about how the paint finish can change both how your radiator looks and how it sheds heat.
Matte or satin finishes absorb more infrared and can slightly reduce radiant heat compared with high-gloss, while gloss paints reflect more and often make fins look sharper.
We’ll look at finish types and gloss levels so you can pick the best balance of performance and appearance.
Finish Type And Heat
Although the paint’s sheen won’t create or destroy heat, the finish you choose does affect both how efficiently your radiator emits warmth and how it looks in the room. You should pick a finish that balances durability and heat efficiency: flatter finishes hide imperfections but may radiate slightly differently than smooth, glossy ones.
Consider these trade-offs when deciding.
- Matte: masks flaws, minimal reflection, practical
- Satin: durable, easy to clean, good compromise
- Gloss: smooth surface, easier to wipe, may alter convection slightly
- Heat-resistant formulations: designed for radiators, safer long-term
- Primer-first: improves adhesion and consistent performance
Gloss Level And Appearance
Gloss level plays a small but noticeable role in how your radiator looks and performs: higher gloss paints create a smoother surface that’s easier to wipe clean and can slightly change convection patterns, while matte finishes hide blemishes and diffuse light for a subtler appearance.
You’ll find glossy finishes reflect more light, making radiators pop against walls and seeming warmer visually, though real heat output barely shifts.
Matte textures reduce glare and disguise uneven surfaces, helping a radiator blend into a backdrop.
Choose based on cleaning needs and aesthetics: pick gloss for standout fixtures and matte for discreet, forgiving coverage.
Measure Radiator Surface Temperature Safely
How hot is your radiator’s surface before you reach for paint? You need reliable temperature measurement for radiator safety so paint adheres and cures properly. Use safe methods and avoid burns.
- Turn off heating and let the unit cool before testing.
- Use a non-contact infrared thermometer for quick checks.
- For confirmation, wear gloves and use a surface probe thermometer.
- Record multiple spots—tops, sides, and fins—for an average reading.
- Only paint when surface temperature is within paint manufacturer’s recommended range.
Follow those steps and you’ll protect yourself, your finish, and the radiator’s performance.
When to Call a Pro (Complications)
If you spot rust eating through the metal, old leaks, damaged fins, electrical components on electric radiators, or uneven heating that won’t respond to bleeding, call a pro—these complications can hide serious corrosion, blockages, or faulty valves that DIY fixes won’t fully resolve and could make things worse.
You should arrange a professional assessment when corrosion, persistent leaks, odd smells, or visible wiring issues appear.
Pros identify potential hazards like carbon monoxide risks on gas systems, compromised structural integrity, or hidden water damage.
Don’t delay: timely expert intervention prevents larger repairs, higher costs, and safety risks.
Tools and Materials You’ll Need
Before you start, gather the essential painting tools like brushes, small rollers, and masking tape so the job goes smoothly.
Pick a heat-resistant paint formulated for radiators or metal to withstand constant warmth.
Don’t forget surface prep materials — degreaser, sandpaper, and a tack cloth — to guarantee proper adhesion.
Essential Painting Tools
Once you’re ready to tackle your radiator, gather a few reliable tools and materials so the job goes smoothly: You’ll want gear that supports precise paint application and helps you consider color psychology when choosing finishes.
Pick items that protect surfaces and let you reach tight spaces, and remember ventilation and cleanup supplies.
- Heat-resistant brush set (various sizes)
- Mini roller with smooth nap
- Sandpaper and wire brush
- Drop cloths, masking tape, respirator
- Paint tray, stirring stick, rags
With these essentials you’ll work efficiently, control coverage, and evaluate how the shade reads against your room.
Heat-Resistant Paint Types
When you’re choosing paint for a radiator, pick a formula that’s rated for continuous high heat so the finish won’t blister, yellow, or peel over time. You’ll want heat resistant coatings formulated for radiators or stoves; they improve paint durability and resist discoloration. Choose spray or brush-on enamel, high-temp acrylics, or silicone-based options. Match finish (matte, satin) to style. Below’s a quick comparison to help you decide:
| Type | Best Use | Notes |
|---|---|---|
| Enamel | General radiators | Durable, smooth finish |
| High-temp acrylic | Modern look | Good heat resistance |
| Silicone | Industrial | Maximizes paint durability |
| Spray | Tight spots | Even coverage quickly |
Surface Prep Materials
You’ll need a few essential tools and materials to prep a radiator properly: gather items that help with surface cleaning, rust removal, and primer selection so paint adheres and lasts.
Follow safety steps and work systematically.
- Wire brush or sandpaper (medium and fine grit)
- Degreaser or trisodium phosphate for surface cleaning
- Rust converter or metal filler for pitted areas
- High-heat primer chosen for metal (primer selection matters)
- Drop cloths, masking tape, gloves, and a small vacuum
Use the brush/sandpaper to remove loose paint, clean thoroughly, treat rust, then apply primer per instructions.
Step-by-Step: Prep a Radiator for Painting
Start by turning off and cooling the radiator completely, then disconnect or isolate it from the heating system so you can work safely. Clean dust and grease, use a degreaser, and sand flaky areas; good surface preparation guarantees radiator paint adheres. Wipe with a tack cloth and let dry. Check for rust and treat with rust converter. Gather brushes, primer, and heat-resistant paint. Ventilate the room and wear gloves and a mask. Work methodically from top to bottom.
| Step | Tool | Time |
|---|---|---|
| Clean | Degreaser | 15–30 min |
| Sand | Sandpaper | 10–20 min |
| Treat | Primer | 30–60 min |
Remove, Mask, or Paint the Radiator Safely
You can either remove the radiator for easier access or paint it in place if removal’s impractical.
Whichever you choose, shut off the system, drain and cool the unit before touching it.
Mask nearby walls, floors, and trim carefully to protect them from drips and overspray.
Remove Radiator First
Before you paint, remove or mask the radiator so you don’t get drips, overspray, or heat-blocking paint buildup; if removal’s practical, it gives the cleanest result, but masking works well when detaching the unit isn’t possible.
You’ll want to follow radiator removal steps carefully and observe safety precautions: shut off and cool, isolate valves, drain a little, support the unit, and avoid hot surfaces. If you remove the radiator, have a friend hold it. If you don’t, mask edges tightly. Clean and sand afterward for best adhesion.
- Turn off heating
- Close valves
- Drain small amount
- Support while loosening
- Clean and sand
Mask Surrounding Areas
When you’re getting ready to remove, mask, or paint the radiator, protect floors, walls, and fixtures so paint and dust don’t create extra work or damage; lay down a drop cloth or cardboard, tape plastic sheeting to the wall with low-residue painter’s tape, and cover nearby trim, valves, and pipes snugly to keep drips and overspray off.
Use masking techniques like precision tape for edges, paper wraps for pipe runs, and clip-on covers for valves.
Keep a defined work zone and label taped areas so you don’t peel fresh paint.
Good surrounding prep saves cleanup and guarantees a neat, professional finish.
Painting Techniques for Different Radiator Types
Although different radiator materials and styles demand specific approaches, you can confidently paint any type if you follow the right prep and product choices.
With the right prep and products, any radiator — regardless of material or style — can be beautifully refinished.
You’ll consider metal type, surface texture, and how radiator finishes affect heat retention and appearance. Choose high‑temp paint for cast iron, quick‑dry enamel for steel panels, and flexible spray for columns.
Clean, de‑rust, and prime appropriately, and use thin, even coats to avoid drips.
- Cast iron: wire‑brush, rust converter, high‑temp enamel
- Steel panels: degrease, sand, anti‑corrosive primer
- Aluminium: etch primer, compatible paint
- Old finishes: test adhesion first
- Decorative: use spray for crevices
Drying and Curing: How Long to Wait
After painting, you’ll need to follow the paint maker’s cure time—usually 24–72 hours for touch-dry and up to a week for full cure.
Before you turn the heat on, wait the recommended minimum to avoid blistering or off-gassing, and open windows if you need to speed ventilation.
When you first use heat, start at a low setting for a few hours to help the finish harden evenly.
Cure Time Guidelines
Because paint needs both surface drying and chemical curing, you should plan more time than the label’s “touch dry” estimate suggests.
You’ll want to factor in cure time and overall drying duration before considering the radiator fully ready. Follow these concise guidelines so you don’t rush the process:
- Allow at least 24–48 hours for surface drying in moderate conditions.
- Expect 7–14 days for most enamel paints to reach usable cure time.
- Increase times in high humidity or low temperature.
- Light handling is okay after a few days; avoid cleaning until cured.
- Use manufacturer guidance for exact drying duration and full cure.
When Heat Is First Used
When you switch the heat on for the first time after painting, do it gently: start with low to moderate temperatures for the first 24–48 hours so the paint can finish curing without blistering or sticking. You’ll preserve radiator functionality and honor your aesthetic preferences by avoiding sudden heat. Gradually raise temperature over several days, testing for tackiness or odor. If paint remains soft, stop and wait. Use the table to plan steps and checkpoints for safe, effective warming.
| Step | Action |
|---|---|
| 1 | Low heat 24–48 hrs |
| 2 | Check tackiness |
| 3 | Moderate heat next 24 hrs |
| 4 | Full heat if cured |
Cleaning and Touch-Up Tips
Start by giving the radiator a thorough dry dusting with a soft brush or vacuum attachment to remove loose grit. Then degrease any oily spots with a mild detergent or trisodium phosphate solution so paint will adhere. You’ll use simple cleaning techniques before any retouching.
Start by dry-dusting the radiator with a soft brush, then degrease oily spots so paint will adhere.
Sand rough areas lightly, remove rust with a wire brush, and wipe residue. For small chips, apply a matching radiator primer and paint with a thin brush using recommended heat-resistant paint.
Use these touch up methods to keep finish consistent:
- Inspect edges and seams regularly
- Sand and clean before priming
- Match paint sheen precisely
- Apply thin, even coats
- Allow full cure between coats
How Often Painted Radiators Need Repainting
You’ll typically need to repaint a radiator every 5–10 years depending on finish and wear.
Watch for peeling, flaking, rust spots, or dulled heat output—those are clear signs it’s time to repaint.
Minor chips can be touched up sooner to prevent bigger problems.
Repainting Frequency Guidelines
How often you’ll need to repaint a radiator depends mainly on its location, finish, and wear—typically every 3–7 years for high-traffic or moisture-prone spots, and 7–12 years for protected, low-use units.
You should factor in paint type, color durability, and how often you clean it. Use proper repainting techniques to extend life and avoid buildup that shortens intervals.
- Inspect annually for surface wear
- Touch up chips promptly
- Choose heat-resistant, durable finishes
- Prep and clean before repainting
- Repaint fully when multiple areas need attention
These steps keep maintenance predictable and efficient.
Signs You Need Repainting
Noticing flaking paint, rust spots, or discoloration are clear signs you need to repaint a radiator—these defects mean the existing finish is failing and can lead to corrosion or reduced heat efficiency if left untreated.
You’ll also repaint when the finish peels after humidity changes, or when scratches expose bare metal.
If radiator aesthetics no longer match your room or you’re exploring color psychology to influence mood, fresh paint restores appearance and cohesion.
Repainting every 5–10 years is typical, but check annually for issues.
Address small problems promptly to avoid costly repairs and maintain efficient heat distribution.
Common Painting Mistakes and How to Avoid Them
Ever wonder why your fresh paint job chips, peels, or looks uneven after a season? You likely rushed prep, chose the wrong finish, or used poor painting techniques without thinking about color psychology and heat effects.
Fix habits: prep thoroughly, pick heat-safe primer and enamel, and test colors against room light. Protect flooring and vents, work in thin coats, and let each dry fully. Watch for dust and rust; sand and clean before you paint.
- Skip proper priming
- Paint over rust or flaking
- Use thick, gloopy coats
- Ignore ventilation and heat cycles
- Pick incompatible finishes
Cost Breakdown: DIY vs. Professional Refinishing
You can save money by doing the prep, priming, and painting yourself, with basic supplies often under $50 and extra time for drying and cleanup.
If you’d rather skip the work, professional refinishing typically runs higher—expect several hundred dollars depending on size, condition, and finish.
We’ll compare typical DIY costs and what pros charge so you can pick the best option for your budget and time.
DIY Cost Breakdown
Tackling radiator paint as a DIY job can shave hundreds off a professional refinisher’s quote, but you’ll trade money for time, tools, and some learning curve.
You’ll want clear DIY budgeting and careful material selection up front so surprises don’t blow your savings. Estimate primer, heatproof paint, sandpaper, brushes, and masking materials; include rental or purchase of a respirator and drop cloths.
Factor labor hours for prep and curing between coats.
- Primer and heatproof paint
- Sanding and rust treatment supplies
- Brushes, rollers, masking tape
- Safety gear and ventilation
- Unexpected touch-up materials
Professional Refinishing Costs
Hiring a pro to refinish your radiator usually costs more up front but saves you time and delivers a durable, even finish with less hassle.
You’ll choose from refinishing options like powder coating, media blasting plus repaint, or spray-applied high-temp enamel.
Professionals charge for labor, prep, materials, and disposal; expect a single radiator to run considerably higher than your DIY estimate.
For a clear cost comparison, get itemized quotes and weigh warranty, finish longevity, and downtime.
If you value reliability and a flawless result, paying more often makes sense.
If budget’s tight, DIY remains viable.
Quick Styling Alternatives to Painting
Although painting can transform a radiator, there are quicker styling fixes that update its look without the mess or downtime. These options let you change color, texture, or presence in minutes to hours.
Skip the paint—try quick, removable updates to change your radiator’s look in minutes to hours.
You can refresh a radiator’s impact without repainting by choosing temporary or add-on solutions that suit your room’s mood. Try swaps that add pattern, soften edges, or reduce visual weight while staying removable.
- Use fabric panels or slipcovers for seasonal color changes.
- Apply heat-resistant peel-and-stick vinyl for pattern.
- Place a slim shelf above to redirect attention.
- Add plants or trays to integrate the unit.
- Install lightweight decorative screens or radiator covers.
Camouflage Options: Covers, Screens, and Cabinets
You can hide a radiator with a cover, screen, or cabinet, but you’ll need to balance concealment versus easy access for maintenance and safety.
Consider materials that let heat pass through—like slatted wood or perforated metal—so you don’t sacrifice efficiency.
Also match the piece to your room’s style and scale so it feels like part of the decor, not an afterthought.
Concealment Versus Access
When you want your radiator to blend with the room without losing functionality, covers, screens, and cabinets offer practical camouflage that still lets heat circulate. Choose options with slatted, perforated, or louvered designs so airflow isn’t blocked and maintenance remains easy.
You’ll balance concealment techniques with access strategies: pick hinged panels, removable tops, or quick-release grilles so you can clean, bleed, or repair without dismantling the case.
Consider sightlines, dust buildup, and safety when choosing style. Match paint to surroundings or contrast subtly, but always prioritize serviceability and proper airflow for efficient heating and longevity.
- Hinged front panels
- Removable tops
- Louvered screens
- Built-in vents
- Quick-release grilles
Material And Heat Transfer
If you pick a radiator cover, remember the material you choose directly affects how much heat actually reaches the room: metal and thin slatted wood let more warmth through, while thick, solid cases trap heat and lower efficiency.
You’ll want materials with high material conductivity if you care about output; metal grilles and perforated panels transmit heat fast.
Also consider thermal expansion—metal parts may shift with temperature cycles, so allow clearances and choose fasteners that tolerate movement.
Screens and cabinets should balance airflow and concealment: prioritize vents, reflective backings, and slim profiles to preserve heat while hiding the radiator.
Style And Room Cohesion
Material choices affect more than heat flow; they also shape how a radiator fits into your room’s look, so consider camouflage options that balance function and style.
You’ll want covers, screens, or cabinets that respect airflow while boosting cohesion. Use color psychology to match or contrast walls, and follow current design trends so the piece feels intentional.
Pick materials that reflect heat appropriately and avoid blocking registers. Measure carefully, allow service access, and choose finishes that age well.
Consider these practical styling approaches:
- Slim perforated metal cover for modern minimalism
- Slatted wooden cabinet for warmth
- Painted screen for subtle blending
- Integrated shelf unit for utility
- Removable panel for maintenance
Use Colour to Blend: Matching Radiators to Walls
Because a radiator painted the same colour as your wall can almost disappear, matching them is one of the simplest ways to make a room feel cleaner and larger.
You’ll use color psychology to calm visual clutter: muted, tonal matches reduce contrast and let furniture and artwork stand out. Matching promotes design harmony, guiding the eye smoothly across surfaces so spaces read as intentional rather than fragmented.
When you blend radiator and wall, you’ll also simplify maintenance choices—less worry about perfect trim lines or bold accents.
This subtle move enhances perceived space and cohesion without needing major renovations or extra décor.
Choose Radiator Colour for Wall Undertones
Matching a radiator to your wall color is a great starting point, but you should also consider the wall’s undertones when picking a paint for the radiator.
You’ll want a finish that respects color psychology and keeps design harmony, so test swatches in different light before committing. Look for undertones—warm, cool, or neutral—and match the radiator to the wall’s subtle hue rather than the dominant color.
Consider these practical tips:
- View swatches at different times of day
- Hold sample next to trim and furniture
- Use small test patch on radiator
- Choose a finish that reflects light similarly
- Ask for professional color advice
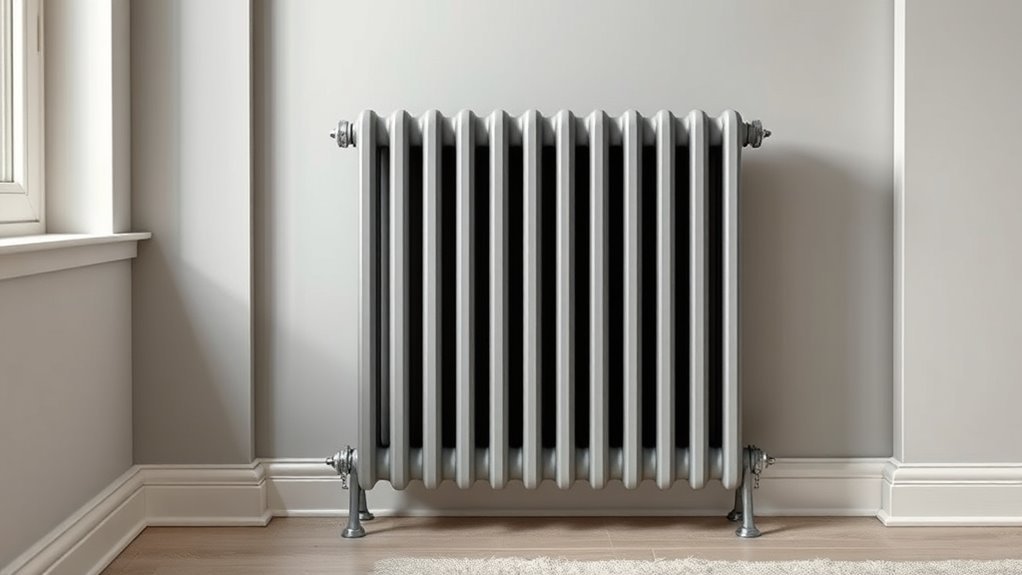
Pick a Contrasting Colour That Complements the Room
Looking for a bold focal point? You can pick contrasting colours for your radiator to add interest without upsetting room harmony.
Start by sampling two or three tones that sit opposite or a few steps away on the colour wheel, then test them against existing fabrics and finishes. Choose a shade that echoes an accent—cushions, artwork or trim—so the radiator feels purposeful, not random.
Matte or satin finishes mute intensity; gloss amplifies it. Keep surrounding walls neutral if your contrast is strong, or go softer if the room already has many competing hues.
Balance wins over bravado.
Create a Bold Design Statement With Radiator Paint
If you want your radiator to do more than disappear, paint it in a bold hue or pattern that turns it into a deliberate design feature. When done well, a standout radiator can anchor the room, draw the eye, and reinforce your overall style.
You’ll choose a bold color to create purposeful design contrast, whether you pick a matte black, jewel tone, or bright accent. Consider finishes, scale, and surrounding textures so the radiator feels intentional.
Use these ideas to make a statement without overpowering the space:
Make a bold radiator focal point—statement-making color and pattern that complements, never overwhelms, your room’s design.
- Matte bold color for modern looks
- Gloss for vintage charm
- Stripes or geometric patterns
- Metallic accents
- Two-tone contrast to frame the unit
How Radiator Colour Balances a Room’s Palette
How do you want your radiator to interact with the rest of the room’s palette? Decide whether it should blend or pop.
If you match the wall, you strengthen color harmony and let furniture and art take center stage. If you choose a contrasting shade, the radiator becomes a deliberate accent that shifts focal points and alters perceived balance.
Consider scale, finishes, and nearby textures so radiator aesthetics feel intentional rather than accidental. Use a complementary or muted tone to tie disparate elements together, or a bold contrast to create rhythm—either way, plan the hue to support the room’s overall composition.
Lighting, Shadows, and How Colour Reads on Radiators
Because light changes color and contrast more than paint does, you’ll want to reflect on how sunlight, artificial bulbs, and shadows alter a radiator’s appearance across the day.
Consider lighting effects and shadow play so the finish you choose behaves as designed in every condition.
- Morning sun can warm whites into creams and reveal texture.
- Warm bulbs deepen hues, making dark radiators recede.
- Cool LEDs can make colors read sharper and higher-contrast.
- Deep shadow play from nearby furniture exaggerates edges and highlights.
- Reflective finishes amplify highlights; matte reduces glare and softens contrast.
Check samples at different times before committing.
Living Room Tips for Painted Radiators
Wondering how a painted radiator will fit into your living room scheme? You’ll balance radiator aesthetics with colour psychology: match for cohesion or contrast for a focal point. Pick durable heat-resistant paint, test small patches, and consider finish sheen to reflect light. Place furniture to reveal or conceal your radiator intentionally. Coordinate trim and accents to tie the choice into the room palette. Maintain accessibility for servicing and avoid obstructing airflow to preserve efficiency.
| Tip | Action |
|---|---|
| Match | Seamless wall blend |
| Contrast | Create focal point |
| Finish | Matte vs satin reflection |
| Paint | Heat-resistant choice |
| Placement | Keep service access |
Kitchens and Bathrooms: Moisture and Ventilation Concerns
If your radiator sits in a kitchen or bathroom, moisture and poor ventilation can quickly undermine a paint job and promote rust.
So you’ll need to choose products and prep methods that resist humidity and allow for regular drying. You should focus on moisture control and effective ventilation tips to protect finish and metal.
Use anti-corrosion primer, satin or gloss bathroom paint, and guarantee thorough drying between coats. Clean rust, sand lightly, and keep airflow during curing.
Regularly inspect for bubbling or flaking and touch up promptly to prevent spread.
- Use anti-corrosion primer
- Opt for moisture-resistant paint
- Sand and degrease first
- Maintain airflow while curing
- Inspect and touch up regularly
Bedrooms and Children’s Rooms: Safety and Material Notes
When painting a radiator in a bedroom or child’s room, prioritize low-VOC, non-toxic paints and let the unit fully cure before letting kids play near it; this reduces fumes and the risk of sticky surfaces that attract dust or toys.
You should check safety standards for paints and coatings, follow manufacturer guidance, and guarantee proper ventilation during application.
Check paint safety standards, follow manufacturer instructions, and ensure good ventilation while applying coatings.
Consider material compatibility with cast iron or steel to avoid flaking or poor adhesion. Use heat-resistant formulations rated for radiators, apply thin even coats, and let each layer cure.
Keep paints and tools locked away, and inspect regularly for chips or corrosion.
How Radiator Colour Choices Affect Resale Appeal
How much does radiator colour influence a buyer’s first impression? You’ll affect buyer perception more than you think—colour that complements walls looks intentional, while clashing or dated tones can distract.
Thoughtful choices can subtly boost resale value by suggesting a well-cared-for home.
- Neutral tones blend with décor and appeal broadly.
- Matching walls creates a seamless, modern look.
- Contrasting finishes highlight period radiators as features.
- Bold, trendy colours risk alienating cautious buyers.
- Consistent hardware and finish suggest attention to detail.
Choose finishes that reflect your home’s style and target market to support positive buyer perception and resale value.
Eco-Friendly Maintenance and Low‑VOC Touch-Ups
Because you’ll likely need to touch up chips or refresh finishes over time, choosing eco-friendly maintenance methods and low‑VOC paints keeps indoor air healthier and reduces environmental impact.
You’ll want to select eco friendly paints formulated for metal and heat tolerance, and test adhesion on a small area first. Clean surfaces with gentle, non-toxic degreasers and sand lightly before repainting.
For touch-ups, use small brushes or spray cans labeled low VOC options to minimize fumes. Dispose of rags and leftover paint per local hazardous-waste guidelines.
Regular gentle cleaning prevents heavy abrasion, reducing the need for frequent repainting.
Real-Life Examples: Matching Wins and Contrast Wins
If you want your radiator to disappear into the room, matching it to wall or trim colors can create a seamless, calm backdrop; conversely, choosing a contrasting hue turns the radiator into a deliberate focal point that energizes the space.
You’ll see matching aesthetics work in minimalist bedrooms and period homes where unity soothes the eye. Contrast works in industrial lofts or eclectic living rooms where heat registers become design statements.
Consider scale, finish, and surrounding decor when deciding.
- Small radiator painted to match trim for subtlety
- Bold radiator as art in entryway
- Matte finish for blending
- Gloss for pop
- Tone down loud patterns with matching hues
Quick Checklist: Decide Whether to Paint Your Radiator the Same Colour as the Wall
Want your radiator to blend in or stand out? Use this quick checklist to decide.
Consider room size and sightlines: matching the wall minimizes visual clutter; contrasting creates a focal point.
Think about color psychology—calming tones make radiators recede, bold hues energize.
Check radiator aesthetics: vintage models can become features, modern units often suit subtlety.
Match finish to surroundings—matte hides imperfections, gloss highlights shape.
Factor practicality: heat-resistant paint, prep time, and maintenance.
Test a small swatch.
Finally, align with your budget and long-term plans; choose what complements daily life and overall design goals.
Frequently Asked Questions
Will Painted Radiators Affect Wi‑Fi or Smart Thermostat Signals?
No, painting radiators won’t noticeably cause signal interference; metallic surfaces can reflect signals but thin paint won’t matter. You’ll keep reliable Wi‑Fi and smart thermostat range, and heat distribution won’t be affected either.
Can I Paint Radiator Valves, Thermostats, or Sensors Safely?
Yes — you can paint valves, sensors, and thermostats carefully: keep valve painting light and precise, keep thermostat safety paramount, avoid covering vents or sensors, use heat‑resistant paint, mask moving parts, and test function afterward.
Does Paint Change the Radiator’s Warranty or Invalidate Manufacturer Support?
Yes — painting can affect warranty; manufacturers may cite paint durability and warranty limitations if coatings alter heat transfer or hide defects. You should check terms first, use recommended paints, and document work to retain support.
Are There Colorfastness Concerns for Nearby Fabrics or Artwork Over Time?
Yes — you should worry: heat absorption can accelerate color fading on nearby fabrics and artwork, so you’ll want heat-resistant finishes, maintain distance, use UV-blocking window treatments, and monitor items regularly to prevent long-term damage.
Can Painted Radiators Be Recycled or Stripped for Disposal Differently?
Yes — painted radiators can often be recycled, but you’ll need eco friendly options: remove paint via approved stripping methods (chemical or media blasting) and check local recycling rules; contractors can advise safe, compliant disposal.
Conclusion
You can paint your radiator the same colour as the wall if you want it to blend in—about 70% of homeowners prefer subtle heating finishes to keep rooms feeling cohesive, so camouflaging often boosts perceived space. If you’d rather highlight the radiator, pick a contrasting hue. Either way, use heat-resistant, low‑VOC paint and test on an inconspicuous spot. Match for calm, contrast for character; both work if you consider material, efficiency, and resale.