Should You Let Paint Dry Between Coats? Guide
Yes — you should let paint dry between coats to guarantee a smooth, durable finish and proper adhesion. Check that the surface is no longer tacky, shows uniform color, and feels firm to the touch before recoating. Dry times vary: latex often needs 1–2 hours, oils 6–24 hours, with humidity and temperature changing that. Test gently with a fingertip and follow manufacturer guidelines. Keep going to learn timing by paint type and practical testing tips.
What This Guide Will Teach You About Recoating
When you finish this guide, you’ll know when a coat is ready for recoating, how to test surface tack and dryness, and which factors—temperature, humidity, paint type, and film thickness—change recoat times.
Learn to tell when paint is ready for recoating—test tack, assess dryness, and adjust for temperature, humidity, and film thickness.
You’ll learn practical recoating techniques that minimize flaws and improve paint adhesion, including timing checks and gentle surface prep.
I’ll show how to perform quick tack tests, inspect for uniform dryness, and decide when sanding or waiting is needed.
You’ll understand how environmental conditions and layer thickness affect cure rates, so you can plan coats confidently and avoid issues like blistering, lifting, or uneven finishes.
Quick Answer: Do You Need to Wait Between Coats?
Wondering if you have to wait between coats? You usually should—wait long enough for the paint to be touch-dry so it won’t lift, but not so long that adhesion suffers.
Follow the manufacturer’s window, use proper drying techniques like airflow and moderate temperature, and test with a light touch. Fast recoat times exist for some formulas, but don’t fall for recoat myths that promise instant layering without compromise.
When in doubt, err on the side of the recommended interval: it balances tack-free handling with good bonding. That simple pause improves finish uniformity and long-term durability.
Surface Dry vs. Fully Cured: What “Dry” Means
When paint is “surface dry,” it feels dry to the touch but can still be soft underneath. You can dust or lightly handle it but shouldn’t apply heavy stress.
Fully cured means the paint has reached its maximum hardness and chemical stability, which can take days to weeks depending on the formula and conditions.
Knowing the difference helps you decide whether it’s safe to sand, recoat, or put items back on the surface.
Surface Dry Explained
A painted tabletop might feel dry to the touch long before the paint’s chemical reaction is finished. Surface dry means the top layer no longer feels tacky; you can lightly touch it without smudging.
It’s not the same as cured, so avoid heavy handling. Surface preparation and proper drying techniques shorten surface-dry time: thin coats, good ventilation, and correct temperature help solvents escape.
Test by gently pressing a fingernail—no indentation equals surface dry, but still be cautious. Use recommended recoat windows from the manufacturer to prevent adhesion problems; surface dry is a convenience cue, not a final one.
Fully Cured Differences
Surface dry tells you the paint won’t feel sticky, but fully cured is what gives the coating its strength, chemical resistance, and long-term adhesion—so don’t treat them as the same thing. You’ll learn that fully cured paint affects paint performance, finish quality, and surface interaction. Curing process time varies with application methods, environmental impact, and coating techniques. Ignore drying myths: recoat benefits depend on proper maturation, not just touch-dry. Plan coats and ventilation to optimize durability and minimize environmental impact.
| Aspect | Why it matters |
|---|---|
| Recoat benefits | Timing preserves adhesion |
| Finish quality | Cure guarantees hardness |
| Paint performance | Resistance and longevity |
Why Drying Time Matters for Finish and Durability
You want each coat to form a proper film so the layers bond and smooth out evenly.
If you rush before it’s fully set, the paint can wrinkle, peel, or trap solvents that weaken the finish.
Letting it dry correctly builds long-term durability and keeps the surface looking its best.
Proper Film Formation
While paint may look dry to the touch after a short while, letting each coat fully form into a continuous film is what gives your finish its smoothness and long-term durability.
You need proper film thickness and steady drying conditions so solvent and binders coalesce correctly; otherwise the surface can wrinkle, trap solvent, or fail to adhere.
Respect manufacturer times and thin coats to control evaporation rates. Waiting feels slow, but it prevents costly rework. You’ll appreciate the result when it’s right.
- Pride in a flawless surface
- Relief from avoidable flaws
- Confidence in longevity
- Satisfaction with smoothness
- Calm knowing you did it right
Long-Term Paint Durability
Proper film formation sets the stage, but drying time ultimately determines how long that finish will last. You’ll increase paint lifespan by letting each coat cure to its recommended tack-free state before recoating; rushing traps solvents and weakens bonds.
Slow, complete drying promotes adhesion between layers, resists cracking, and yields long lasting finishes that withstand wear and moisture. Temperature, humidity, and ventilation affect curing, so adjust schedules accordingly.
When you follow manufacturer drying times, you avoid premature peeling and uneven sheen. In short, patience during drying converts good-looking paint into durable protection that lasts years rather than months.
How Paint Type Changes Drying and Recoat Times
Different types of paint dry and recoat at very different rates, so knowing whether you’re using oil-based, water-based (latex), or specialty coatings will determine how long you should wait between coats.
You’ll want to reflect on paint chemistry, drying conditions, and desired finish because they change how tacky or cured a coat feels. Adjust your schedule to avoid lifting or uneven layers.
- Frustration when a coat stays tacky
- Relief when conditions speed curing
- Anxiety about ruining a smooth finish
- Satisfaction after perfect adhesion
- Pride in a durable, even result
Check labels and test small areas before proceeding.
Oil‑Based vs. Latex: Typical Wait Times
If you’re using oil‑based paint, expect it to feel dry to the touch in 6–8 hours but to need 24 hours or more before you can safely recoat.
Latex paints usually dry much faster on the surface—often within 1 hour—but still benefit from a 4‑6 hour window before a second coat, depending on humidity and temperature.
Knowing these typical wait times helps you plan work and avoid problems like lifting or uneven finish.
Oil‑Based Drying Time
Wondering how long oil‑based paint needs before you can recoat? You’ll usually wait 24–48 hours for tack-free and up to a week for full cure, depending on temperature and humidity.
Remember the oil based benefits—durable finish and smooth leveling—yet weigh oil based drawbacks like long wait and strong odor.
- Relief when the finish looks flawless
- Frustration if humidity slows drying
- Confidence from a hard, stain‑resistant coat
- Impatience during the long cure
- Satisfaction after a polished result
Plan coats with ventilation and temperature control to hit recommended recoat windows.
Latex Drying Window
Switching from oil‑based to latex paint shortens the wait between coats, so you can plan projects more quickly. You’ll notice latex paint characteristics—faster water‑based cure, lower VOCs, and quicker recoat times—help you move faster. Under favorable drying conditions (warm, low humidity, good ventilation), touch‑dry often occurs in 1 hour and recoating is safe in 2–4 hours. Heavy coats or cool, humid air push that to 8–24 hours. Use a light sand between coats for adhesion if needed, and test a small area before full recoating.
| Condition | Typical Recoat Time |
|---|---|
| Ideal | 2–4 hours |
| Humid | 8–24 hours |
| Thick coats | 24+ hours |
| Cool temps | 12–48 hours |
Water‑Based Enamels and Acrylics: Expectations
When you work with water‑based enamels and acrylics, expect faster surface drying but longer full cure times compared with oils; they’ll feel touch‑dry in an hour or less under good conditions, yet still need days to reach their maximum hardness and chemical resistance.
You’ll appreciate the water based advantages: easy cleanup, lower odor, and quicker recoats, while acrylic versatility gives flexible adhesion and color retention.
Plan recoats based on touch and manufacturer times, not just appearance. Don’t rush; patience avoids tacky finishes.
- Relief: you can work faster
- Pride: crisp, even coats
- Frustration: waiting for cure
- Confidence: predictable performance
- Satisfaction: durable finish
Alkyd, Lacquer, and Polyurethane: Cure vs. Recoat
How quickly should you recoat alkyds, lacquers, and polyurethanes? You’ll judge timing by alkyd properties, lacquer finishes, and polyurethane characteristics.
Alkyds may feel dry in hours but their curing process continues; wait 8–24 hours for a solid recoat.
Lacquer finishes dry very fast; you can often recoat within 20–60 minutes using tack-free checks, but spray techniques and solvent flash can affect adhesion.
Polyurethane characteristics vary: oil-modified types need longer cures (24–48 hours) than water-based ones (4–6 hours).
Use proper recoat techniques: light sanding, clean surface, and follow manufacturer cures to avoid common drying challenges.
Spray Paint and Aerosol: Safe Recoat Windows
After covering how alkyds, lacquers, and polyurethanes behave, you’ll find spray paints and aerosols follow their own timing rules because of atomization, solvent flash-off, and thinner formulations.
You should wait for tack-free feel—usually 10–30 minutes—before light recoats, and follow label windows for full recoat.
Practice good spray paint application technique: maintain distance, overlap, and thin passes.
Practice good spray technique: keep the right distance, overlap evenly, and use light, thin passes for smooth coverage.
Prioritize aerosol safety: ventilate, wear a respirator, and avoid sparks.
Emotional checklist to keep you calm and confident:
- Relief when coats level smoothly
- Pride in crisp edges
- Frustration avoided by patience
- Confidence from safe habits
- Joy at a flawless finish
Stains and Wood Finishes: Drying vs. Penetration
Because stains and wood finishes work by both drying on the surface and penetrating the grain, you’ll need to treat their drying times and penetration behavior separately: penetration depends on wood species, moisture content, and stain viscosity, while surface drying depends on solvent type and ambient conditions.
You should wait for visible tack-free surface drying before adding protective coats, but remember deep stain absorption can continue beneath that skin. Sanding too soon lifts trapped pigment; waiting improves finish longevity and adhesion.
Test on scrap to judge absorption rate, adjust thinning or wipe-off technique, and guarantee adequate drying time for both penetration and surface cure.
Primers: When to Wait Before Topcoat
With primers you’ll want to know the manufacturer’s recommended drying time before applying a topcoat so the bond is secure.
Remember that solvent-based primers usually dry faster but need more airing, while water-based primers can recoat sooner with less odor.
Also make sure the surface is clean, dry, and lightly sanded if needed before you topcoat.
Primer Drying Time
Primers usually need less time to dry than topcoats, but how long you wait before applying the finish matters: follow the manufacturer’s recoat window on the can and check for tackiness rather than guessing.
You’ll want to take into account primer application and primer benefits, plus primer types and primer adhesion to guarantee proper primer finishes.
Match primer compatibility with your topcoat, store properly for primer storage, use the right primer tools and primer techniques, and make a smart primer selection before recoating.
- Relief when it’s ready
- Frustration if you rush
- Pride in a smooth finish
- Anxiety over peeling
- Joy at durable results
Solvent Vs. Water-Based
When you’re deciding whether to recoat, remember that solvent-based and water-based primers dry and cure differently, so you can’t use the same wait time for both.
You should weigh solvent properties like faster flash-off and stronger penetration against water-based benefits such as lower VOCs and easier cleanup.
Drying challenges vary: humidity slows water-based drying, while solvent types may skin over.
Choose drying methods that match application techniques to preserve paint adhesion and finish quality.
Consider environmental impact when selecting primer, and follow manufacturer cure times so your topcoat bonds well without compromising appearance.
Surface Prep Before Topcoat
Because proper adhesion starts at the substrate, you should prep and confirm your primer is fully dry and appropriately tack-free before applying a topcoat.
Check manufacturer dry times, test tack gently, and verify temperature and humidity match guidelines. Good surface preparation prevents peeling, blotches, and wasted effort.
When ready, sand light if needed, clean dust, and proceed with confident topcoat application.
- Relief: you’ll avoid rework later.
- Pride: the finish looks professional.
- Calm: you won’t worry about bubbles.
- Satisfaction: coverage is even.
- Confidence: durability meets expectations.
Tinted Primers and Fast‑Mix Products: Timing
If you’re using a tinted primer or a fast‑mix product, pay extra attention to the recommended flash and recoat times because their pigments and accelerants change drying behavior; follow the manufacturer’s timing to avoid lifting or uneven sheen.
You’ll appreciate primer benefits like better coverage and color hold, especially with tint application aimed at reducing topcoat layers. Fast‑mix formulas let you recoat sooner, but they can trap solvents or alter sheen if rushed.
Always check label recoat windows, test a small area, and allow slightly longer in cool or humid conditions. When in doubt, wait—patience prevents costly touchups.
How the Surface Affects Drying Time
Tinted primers and fast‑mix products change how quickly paint skins over, but the surface you’re coating plays an equal role in drying and adhesion.
You’ll notice rough, porous substrates soak up product faster; smooth, sealed surfaces keep it on the top, slowing cure.
Consider surface texture and paint absorption when planning recoat windows so you don’t sand away work or trap moisture.
Prep changes timing: sealing, sanding, or priming alters absorption and promotes uniform sheen.
Think about how the wall feels and breathes before you brush on another coat.
- Frustration when uneven drying shows
- Relief after proper sealing
- Pride in smooth results
- Anxiety over blotchy spots
- Confidence with correct prep
New Drywall, Plaster, and Joint Compound Timing
When you’re working with new drywall, plaster, or fresh joint compound, let each layer fully dry and cure before recoating so you don’t trap moisture or create adhesion problems. You should prioritize surface preparation: sand, clean, and apply drywall sealing or primer. Allow plaster curing times to finish; joint compound needs full dry time between coats. Monitor moisture control with a hygrometer and avoid rushing texture application. Follow manufacturer times, longer in cool or humid conditions. Use thin coats and inspect for shrinking or cracking before sanding and priming.
| Step | Recommended Action |
|---|---|
| 1 | Drying check |
| 2 | Seal/prime |
| 3 | Sand |
| 4 | Texture |
| 5 | Recoat |
Wood: Grain, Moisture, and Recoat Tips
When painting wood, you’ll want to follow the grain to get a smoother finish and avoid visible brush marks.
Check that the wood’s moisture content is within recommended limits—too damp and paint won’t adhere properly.
Wait the suggested recoat time for your specific paint and temperature to prevent tackiness or peeling.
Grain Direction Importance
Because wood soaks up and shows finish differently along its grain, you should always sand, apply, and recoat following the grain direction to get an even look and predictable drying.
You’ll notice grain patterns guide paint absorption, so aligning strokes reduces blotches and uneven sheen.
Work with the wood, not against it: light sanding in grain direction, consistent brush strokes, and timed recoats keep texture uniform.
Follow these tips to protect your results and feel confident:
- Respect the wood’s natural flow
- Avoid cross-grain streaks that anger the eye
- Embrace patience for better finish
- Prevent surprise blotches
- Celebrate smooth, even coats
Moisture Content Limits
You’ve already learned to follow the grain, but moisture in the wood affects how paint and stain adhere and dry just as much — too much moisture will lift finishes, cause blistering, or hide adhesion problems until later.
Check moisture measurement before painting: use a moisture meter and aim for manufacturer-recommended percentages (typically 6–12% interior, slightly higher outdoors).
Monitor ambient humidity and practice humidity control in your workspace — dehumidifiers or ventilation help.
If boards exceed limits, wait or acclimate them indoors.
Proper moisture limits prevent peeling and staining issues, ensuring your subsequent coats bond and perform as planned.
Recoat Timing Tips
Recoat timing matters as much as surface prep: getting the interval right guarantees each layer bonds, levels, and cures without trapping moisture or creating tacky seams.
You’ll check wood grain, moisture content, and product labels before deciding. Use proven recoat techniques and timing strategies: feel the surface, test with a fingernail, and allow recommended tack-free windows.
Don’t rush; don’t wait too long and sand unnecessary layers away.
- You’ll feel confident when the surface is just right.
- You’ll avoid ruined finishes and wasted time.
- You’ll protect wood from trapped moisture.
- You’ll enjoy smoother, more durable results.
- You’ll finish with pride.
Metal and Masonry: Substrate‑Specific Drying Tips
When working on metal or masonry, drying times depend less on the paint brand and more on the substrate’s porosity, temperature, and moisture content—so check those first.
You’ll follow metal prep steps—degrease, sand, prime—to guarantee adhesion factors and substrate compatibility.
For masonry paint, confirm surface treatment and moisture management: old mortar traps dampness that delays cure.
Choose drying techniques suited to the substrate and paint application method, and account for environmental considerations without repeating generic advice.
After coats, perform a finish evaluation by checking tackiness, adhesion, and uniformity before recoating to prevent failures.
Temperature and Humidity Effects on Drying
Because temperature and humidity directly control how solvents evaporate and how binders crosslink, they’ll dictate whether a coat dries in minutes or takes days; higher temps speed evaporation but can cause surface skinning that traps solvents, while high humidity slows drying and increases the risk of blushing or poor film formation.
Temperature and humidity control evaporation and crosslinking—speeding drying or causing skinning, blushing, and poor film formation.
You’ll watch paint behavior shift as environmental factors change, so use humidity control and temperature impact awareness to pick drying techniques and set realistic drying conditions.
Simple steps help you stay calm:
- Frustration when fog ruins a finish
- Relief from controlled conditions
- Anxiety over unpredictable weather influence
- Satisfaction from smart moisture management
- Pride in reliable drying techniques
How Airflow and Ventilation Speed Drying
Although airflow won’t change the chemistry of paint, it helps solvents evaporate faster and evens out drying across the surface, so you’ll get shorter wait times and fewer tacky spots by directing steady ventilation over your work. You should plan Ventilation strategies that balance Drying acceleration with Humidity control and Temperature influence. Consider Surface preparation and Environmental factors before adding airflow. Choose fans and placements as part of Tool selection to avoid dust. Below is a quick reference:
| Use | Benefit | Note |
|---|---|---|
| Oscillating fan | Even airflow | Avoid direct blast |
| Exhaust | Removes moisture | Best near open window |
| Door gap | Cross-ventilation | Works with fans |
| Small diffuser | Gentle flow | Prevents dust pickup |
Using Heaters and Dehumidifiers Safely
When you speed up drying with heaters or dehumidifiers, position heaters well away from paint, flammable materials, and airflow paths to prevent hotspots and accidents.
Keep humidity at a steady, moderate level so paint cures properly without skinning or trapping solvents.
Monitor temperature changes closely, since sudden swings can affect drying time and finish quality.
Position Heaters Safely
Place heaters and dehumidifiers thoughtfully to keep your drying area safe and effective: position units where they won’t tip, stay away from paint cans, and keep cords tidy.
Choose heater types suited to the space—infrared for focused warmth, oil-filled for steady heat—and follow manufacturer guidelines. Monitor temperature and never leave portable heaters unattended.
Keep a fire extinguisher nearby and guarantee good airflow without blasting paint. If you detect smells or overheating, shut equipment off immediately.
- Heart-pounding worry when cords tangle
- Relief when devices sit securely
- Calm knowing you’ve chosen the right heater types
- Confidence in safe heater placement
- Satisfaction as paint dries peacefully
Control Humidity Levels
To keep paint drying on schedule and prevent issues like blistering or slow curing, control humidity by running a dehumidifier or using a heater with moisture-reducing settings so the air stays in the recommended range (usually 40–60% RH).
You’ll want to place dehumidifiers centrally and close windows to improve humidity control. Empty and service units regularly to avoid leaks.
Use a hygrometer to track relative humidity and adjust settings as needed for effective moisture management.
Don’t point heaters directly at wet paint or overload circuits; follow manufacturer guidelines to balance drying efficiency with safety while you wait between coats.
Monitor Temperature Changes
Although temperature swings can speed up or stall curing, you should monitor and stabilize room heat while using heaters and dehumidifiers so each coat dries evenly.
You’ll want reliable temperature monitoring to keep drying conditions consistent and avoid blistering or tackiness. Use a thermostat and quick-read thermometer, position devices safely away from paint, and run dehumidifiers at low continuous settings.
Check vents and avoid direct heat blasts. If conditions change, pause recoating until readings return to the recommended range.
- Tension when you see uneven sheen
- Relief as readings steady
- Confidence in consistent results
- Frustration avoided by vigilance
- Pride in a flawless finish
Reading Labels and Technical Data Sheets (TDS)
When you’re deciding how long to wait between coats, start by reading the paint can label and the manufacturer’s technical data sheet (TDS); they give the cure and recoat times, recommended conditions, and any surface-prep or compatibility notes you must follow.
You’ll quickly see label significance and TDS importance: paint specifications list dry times, gloss, and VOC limits, while product recommendations show compatible primers and thinners.
Use reading comprehension to extract application guidelines and user instructions like temperature and humidity ranges.
Extract and follow application guidelines—note recommended temperature and humidity ranges before you paint.
Note safety precautions such as ventilation and personal protective equipment, then plan your timing and workflow accordingly.
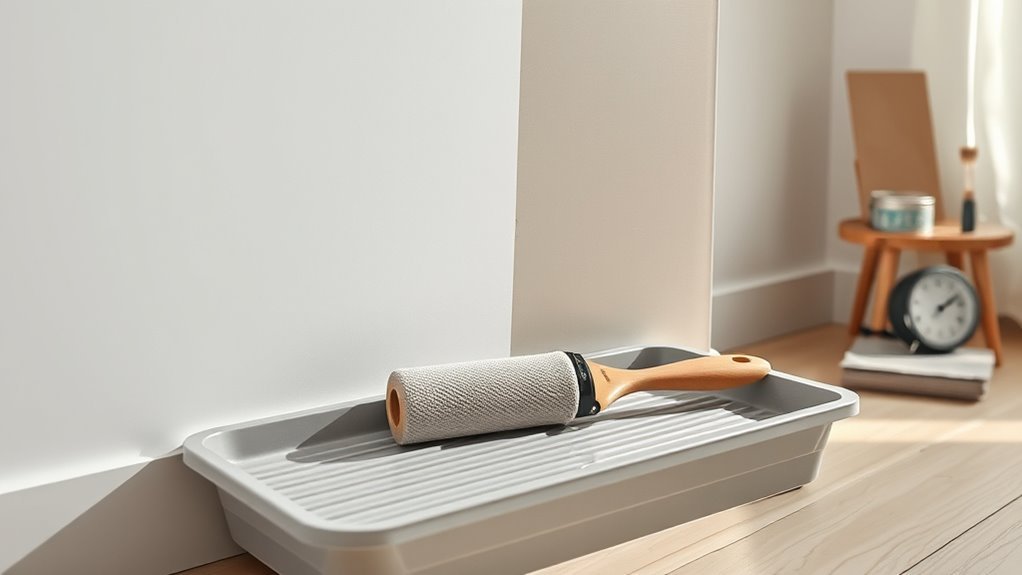
Tools to Check Recoat Readiness (Finger, Tack, Meter)
You can check recoat readiness with a few simple tools that give different kinds of feedback.
Try a gentle finger test for tack, use a tack cloth to see if it picks up residue, and consider a moisture or surface meter for a precise reading.
Each method helps you decide whether the next coat will bond properly.
Finger Test Method
Curious how to tell if paint’s ready for another coat without fancy tools? You can use the finger test to gauge paint consistency and tack.
Lightly touch an inconspicuous spot with a clean fingertip; don’t press hard. If paint feels tacky but not sticky, it’s often ready to recoat. If it drags or leaves a print, wait longer. Clean your finger before and after.
- Hope: you’ll get it right
- Relief: no mystery tools needed
- Caution: avoid ruining finish
- Confidence: simple feedback works
- Satisfaction: smooth results await
Tack Cloth Check
If you want a quick, low-cost way to remove dust and test tack before recoating, grab a tack cloth and lightly wipe an inconspicuous area—if the cloth picks up particles without smearing or leaving fibers, the surface is clean and the paint’s tack is likely low enough to recoat.
Use the tack cloth check as part of surface preparation to confirm cleanliness and tack cloth effectiveness. Work gently across the panel, then inspect the cloth and paint.
If residue remains or the cloth drags, wait longer and retest. This simple method helps you avoid trapping debris between coats.
Moisture Meter Use
A tack cloth and a finger test give quick, hands-on clues, but a moisture meter tells you what’s happening below the surface—measure wood or substrate moisture to verify it’s within the paint manufacturer’s recommended range before recoating.
You’ll get objective readings so you won’t guess and risk peeling or adhesion failure. Use moisture meter benefits to justify the small cost, and perform moisture meter calibration regularly for accuracy.
Test multiple spots and note patterns. Stop and correct conditions if readings are high.
- Relief when readings are safe
- Frustration avoided by proof
- Confidence in timing
- Control over results
- Pride in durable finish
How Film Thickness Alters Cure and Recoat Windows
Because thicker wet films contain more solvent and binder per unit area, they take longer to crosslink and mechanically harden, which narrows the practical recoat window and increases the risk of sagging or solvent entrapment if you recoat too soon. You should monitor film thickness because it directly affects cure efficiency and dictates longer recoat intervals. Consider drying factors—temperature, humidity, airflow—and adjust coats accordingly. Use the table to compare typical outcomes by thickness.
| Thickness (mil) | Expected Cure Time | Recoat Recommendation |
|---|---|---|
| 1–2 | Fast | Short intervals |
| 3–5 | Moderate | Wait longer |
| 6+ | Slow | Extended wait |
Wet‑On‑Wet vs. Full‑Dry Recoating: Pros and Cons
Curious which approach saves time without sacrificing finish? You’ll weigh wet on wet advantages against full dry disadvantages to choose wisely.
Wet‑on‑wet suits fast work and certain application techniques, letting layers blend for smooth shifts. Full‑dry can give crisper edges but risks extra labor and longer wait times.
Consider surface, temperature, and product specs to judge finish quality and durability.
- Excited by speed and flow
- Frustrated by long waits
- Confident with the right technique
- Nervous about tacky layers
- Relieved by a flawless finish
Match method to job for best results.
When and How to Sand Between Coats (Grit Guide)
If you chose wet‑on‑wet for speed or waited for full drying to get sharp edges, you’ll still often benefit from sanding between coats to remove dust nibs, level brush strokes, and promote adhesion.
Assess each coat: coat assessment and recoat evaluation tell you if finish smoothing is needed.
Assess every coat — inspect for imperfections and recoat readiness to determine if smoothing or light sanding is needed.
For surface preparation use light sanding techniques with fine grit: 220–320 for latex, 320–400 for oil or lacquer depending on paint compatibility.
Use sanding tools like sanding blocks or a random orbital sander with dust extraction.
Ideal timing is after tack loss but before full cure.
These sanding benefits improve adhesion and create a flawless final coat.
When to Degloss Instead of Sanding
Sometimes it’s better to degloss than sand—especially when the surface is smooth, the existing finish is intact, and you just need to remove sheen to help the next coat stick.
You’ll choose deglossing techniques when you want minimal dust, preserve detail, and speed up prep. Use a liquid deglosser or fine abrasive pad, wipe thoroughly, and test a small area first.
Deglossing is one of the best sanding alternatives for delicate trim or factory finishes.
- Relief: no sanding dust to chase
- Relief: faster prep, less mess
- Confidence: preserves profile
- Ease: simple, low-effort step
- Speed: quicker recoating
Fixing Laps, Sags, and Runs Before Recoating
Spot the trouble early and tackle laps, sags, and runs before you add another coat so your finish lays down smooth and even. You’ll inspect, wait per recoat timing tips, then correct: sand small sags, level runs, and feather laps. Use lap prevention techniques like consistent stroke length and wet-edge work. For sag repair methods, lift excess paint with a clean brush, let it set slightly, then sand and blend. Run correction strategies include trimming with a razor or sanding gentle high spots, then wipe and recoat when recommended.
| Issue | Fix | When to Recoat |
|---|---|---|
| Lap | Feather sand | After tack-free |
| Sag | Lift & sand | Once firm |
| Run | Trim/sand | After smooth |
Preventing Bubbles and Orange Peel When Recoating
Once you’ve smoothed laps, sags, and runs, turn your attention to surface texture: bubbles and orange peel can ruin an otherwise perfect recoating.
You want even sheen and no trapped air, so focus on technique, thinning, and environmental control. Use slow, steady passes and avoid overworking wet paint.
Aim for even sheen and no trapped air: steady, slow passes, proper thinning, and controlled conditions—don’t overwork wet paint.
For bubbles prevention, check for contamination, high heat, or roller speed. Sand lightly between coats to remove micro-texture, then tack-cloth.
If orange peel appears, thin slightly and apply with proper nap or spray settings.
- Frustration at wasted work
- Relief when texture disappears
- Pride in a smooth finish
- Anxiety about timing
- Confidence in technique
Recoating Furniture vs. Walls: Technique Differences
Although both need clean, dry surfaces and patience, recoating furniture demands more precision than walls because of scale, edges, and varied surfaces.
You’ll focus on furniture preparation: sanding, degreasing, and testing surface compatibility for primers and topcoats.
On walls, wall techniques favor rollers and faster coverage; on furniture, small brushes and foam applicators control drips.
Monitor paint absorption—porous wood soaks more, needing thin coats; painted or sealed surfaces accept quicker finish layering.
Match application methods to substrate and desired sheen so you avoid lap marks, uneven build, or adhesion failures, and always let each thin coat properly set.
Exterior Projects: Sun, Wind, and Dew Impacts
When you’re painting outdoors, direct sun, gusting wind, and morning dew each change how paint behaves and how long you should wait between coats; they can speed drying, cause uneven curing, or reintroduce moisture that ruins adhesion.
You’ll watch sun exposure effects alter sheen and tack, wind interference can blow dust and thin films, dew formation at dawn rehydrates surfaces, temperature fluctuations shift cure times, and humidity challenges slow solvent release.
In tough outdoor conditions you’ll need patience and timing.
Feel the stakes:
- Frustration when a coat blisters
- Relief when conditions cooperate
- Anxiety about ruined work
- Pride after persistence
- Calm planning ahead
Painting in Cold or Humid Climates: Adjustments
In cold or humid climates you’ll need to extend drying times so each coat cures properly before the next one.
Use heaters, fans, or dehumidifiers to control the environment and speed up drying when possible.
Check manufacturer recoat windows and err on the side of waiting longer to avoid tackiness or poor adhesion.
Extend Drying Times
If temperatures drop or humidity rises, you’ll need to plan for much longer drying times than the paint can’s label suggests. You’ll slow your pace, watch tackiness, and adjust drying techniques to avoid smudges or uneven coats. Expect patience; rushing invites frustration.
- You want crisp, confident strokes, not smeared edges.
- You dread blotchy patches after hours of work.
- You crave a finish that feels professional, not amateur.
- You fear redoing sections because you ignored cues.
- You hope each coat cures fully before the next.
Use fans, gentle heat, and timing adjustments; prioritize humidity control and careful inspection.
Control Humidity Levels
You’ve slowed your pace and used fans or gentle heat to compensate for cool temperatures; now focus on managing humidity, because moisture in the air lengthens drying and can ruin smooth finishes.
You’ll monitor humidity with a hygrometer and aim for 40–50% indoors; higher levels force extended wait times between coats.
Use dehumidifiers, increase ventilation, or run HVAC to lower moisture quickly. For short projects, silica gel packs or portable desiccant units help small spaces.
Remember moisture impact varies by paint type—latex suffers more than oil—so adjust your humidity control methods and drying schedule accordingly to avoid tacky, uneven results.
Additives to Speed or Slow Drying: Pros and Cons
When humidity or temperature threatens your schedule, additives can speed up or slow down paint drying so you finish on time and get the finish you want.
You’ll weigh additive types and drying effects: some speed benefits include faster recoats and dust resistance; slow drawbacks include extended tack time and sagging.
Use proper application techniques and follow product recommendations to avoid problems.
Consider pros and cons before altering paint chemistry.
- Relief when weather stalls you
- Frustration if finish flaws appear
- Confidence with correct dosing
- Anxiety over compatibility issues
- Satisfaction after a smooth job
When to Choose Fast‑Dry Products
If you need a room ready fast or are working on a tight schedule, choose a fast‑dry product to complete the job sooner.
They’re also a smart pick in lower humidity conditions where slower formulas can tack up or attract dust.
Keep in mind fast‑dry paints can change working time and finish, so test a small area first.
Quick Job Completion
Because deadlines and weather can force your hand, choosing fast‑dry paint makes sense when you need a clean finish in less time.
You’ll favor fast‑dry for a quick job that keeps your schedule intact and supports an efficient workflow. It lets you apply multiple coats the same day, reduce dust exposure, and finish rentals or client projects faster.
Use it when time, not just convenience, drives decisions.
- Relief: deadlines met without panic
- Pride: flawless, on‑time results
- Confidence: predictable drying windows
- Urgency: setbacks avoided
- Satisfaction: clients smiling sooner
Lower Humidity Performance
Fast‑dry paints still prove their worth in low‑humidity conditions, especially when moisture in the air would otherwise speed film formation and tack up surfaces faster than you expect. You’ll choose fast‑dry when humidity effects make standard formulas skin over unevenly. Use targeted drying techniques: increase airflow and moderate temperature so coats level before sanding. Fast‑dry products cut wait times, reduce dust pickup, and let you recoat sooner without lifting layers. Test a small area to confirm compatibility with primers and existing finishes. Monitor tack time, then proceed when the film resists fingerprinting.
| Benefit | Action |
|---|---|
| Faster recoat | Increase airflow |
| Less dust pickup | Moderate temperature |
| Predictable tack time | Test small area |
| Better leveling | Choose compatible primer |
Signs You Recoated Too Soon (What to Look For)
When you recoat too soon, the problems show up quickly: tacky spots, uneven sheen, bubbling, brush marks that don’t level, or paint that wrinkles beneath the new layer.
You’ll notice paint defects tied to poor recoat timing and altered finish quality. Surface issues often reflect adverse drying conditions or high moisture levels that ruin paint adhesion. Use correct drying techniques to avoid regret.
- Frustration when the sheen keeps shifting
- Anxiety over visible bubbles or fish eyes
- Anger at brush strokes that won’t settle
- Disappointment with peeling edges
- Regret over ruined smoothness and wasted effort
How Long for Final Cure Before Heavy Use
You’ll want to know the full cure time before putting heavy use on a painted surface, since “dry to the touch” isn’t the same as fully cured.
Cure can take anywhere from a few days to several weeks depending on paint type, temperature, humidity, and ventilation.
Consider manufacturer recommendations and the job conditions to decide when it’s safe to move furniture, install hardware, or subject the surface to wear.
Full Cure Time
Although the paint may feel dry to the touch within hours, full cure—the point when the coating reaches its maximum hardness and chemical resistance—often takes days to weeks depending on paint type, thickness, temperature, and humidity.
You should resist heavy use until the cure process completes because surface hardness and chemical resistance continue improving.
Expect patience: even fast-dry formulas need time. Monitor manufacturer cure times and avoid stressing the finish. Small tests help confirm readiness.
- Pride when you wait and get a flawless result
- Frustration if you rush and mar the finish
- Relief once it’s truly cured
- Confidence in durability
- Satisfaction in longevity
Factors Affecting Cure
Beyond knowing that full cure can take days to weeks, several variables actually determine how long you’ll need to wait before putting heavy use on a painted surface.
You should assess cure conditions: paint chemistry and drying environment set baseline times. Humidity effects and temperature influences slow or speed solvent evaporation and chemical crosslinking.
Good air circulation and appropriate drying agents help expedite film formation, while poor ventilation stalls it.
Surface texture and application techniques affect film thickness and adhesion, so thicker coats or rough substrates need longer.
Check manufacturer guidance and test a discreet area before returning items to heavy use.
Safety and Ventilation During Accelerated Drying
1 essential step when speeding up paint drying is keeping the area well ventilated to prevent fume buildup and reduce fire risk.
You’ll choose ventilation methods that move fresh air in and fumes out, and follow safety precautions like removing ignition sources. Stay alert to solvent odors and heat.
- You’ll feel safer with cross-ventilation.
- You’ll relax when fans dilute fumes.
- You’ll avoid panic by monitoring CO2 and VOCs.
- You’ll trust PPE to protect lungs and skin.
- You’ll sleep easier after isolating hot lamps.
Always read labels and prioritize ventilation over speed.
Best Practices for Spray Application and Recoats
When spraying and planning recoats, set up so each pass lays an even, wet film—keep the nozzle moving at a steady speed, overlap by about 30–50%, and hold the gun perpendicular to the surface at the manufacturer’s recommended distance to avoid runs and uneven buildup.
Use proper spray techniques: thin material to spec, adjust air pressure, and test on scrap to confirm atomization.
Time recoats per product data, not guesswork, to prevent wrinkling or adhesion failure.
Maintain cleanliness—strain paint, clean filters, and wipe surfaces.
Keep environmental conditions steady.
These application tips help you achieve uniform, durable coats with minimal defects.
Touch‑Up Strategy: Blend New Paint With Old
When you touch up paint, make sure the sheen and color match the surrounding area so the repair doesn’t stand out.
Feather the edges of fresh paint into the old surface and use thin coats to build coverage gradually. That way you’ll blend new with old smoothly without leaving ridges or visible patches.
Match Sheen And Color
Sheen matters as much as color when you touch up paint, so match both to make the repair disappear; glossy or satin finishes reflect light differently than flat paints, and a color that’s right in tone can still look wrong if the sheen doesn’t match.
You’ll check sheen consistency and color matching before you paint. Test a small patch, view it at different angles and lighting, and adjust sheen by choosing the right finish.
- Relief when the repair vanishes
- Confidence in a seamless wall
- Frustration avoided with a proper match
- Pride in a professional result
- Calm knowing you did it right
Feather The Edges
Think of feathering as the gentle overlap that makes new paint fade into the old—light, tapering strokes that thin the fresh edge so it won’t stand out.
You work toward the existing finish, keeping brush or roller pressure lighter at the perimeter to create a soft transition. Use short, controlled passes and slightly drag excess paint back into the wet area; that’s the core of feathering techniques.
Clean tools and matching viscosity help prevent ridges. Check from different angles and lighting, adjusting strokes until the seam disappears.
Edge blending is subtle: aim for imperceptible continuity rather than harsh lines.
Blend With Thin Coats
Because fresh paint sits higher than the surrounding finish, apply thin, controlled coats to blend new color into old without building a visible ridge. You’ll work deliberately: match sheen, thin the paint slightly, and stroke outward from the repair so blending techniques help disguise edges.
Watch coat thickness — too heavy and you’ll see a lip; too light and coverage fails. Let each ultra-thin layer set enough to lose tack before the next. Stay patient; touch-ups reward restraint.
- Relief when seams vanish
- Pride in an invisible fix
- Calm from steady strokes
- Confidence in subtlety
- Satisfaction in a smooth match
Recoating Old Paint: When You Can Skip Stripping
When the existing finish is sound and well-adhered, you can often recoat without stripping first. You’ll inspect for flaking, grease, or severe chalking; when clean and dulled, use proper recoating techniques to boost paint adhesion. Scuff sanding, deglossing, and a compatible primer will let you skip full stripping and save time.
| Feeling | Action | Result |
|---|---|---|
| Relief | Light scuff | Smooth finish |
| Confidence | Clean & prime | Lasting bond |
| Pride | Right technique | Fresh look |
Follow product specs and test a small area so you won’t regret rushing.
Step‑By‑Step Troubleshooting for Recoat Problems
You’ve prepped and primed as needed, but even careful recoating can hit snags—peel, brush marks, uneven sheen, or slow drying are common.
Start by evaluating adhesion and recoat consistency: lightly sand peeling areas, clean dust, and test a small patch. Adjust technique: thin coats dry faster; keep brush strokes even. Use troubleshooting techniques like humidity checks, proper temperature, and correct thinner or additive for oil or latex.
Lightly sand failing areas, clean dust, test a patch, then use thin, even coats and proper additives.
- Frustration at runs? Sand and feather.
- Panic from tacky spots? Improve airflow.
- Worry about patchy gloss? Match sheen and sand.
- Anger at brush marks? Switch tools.
- Relief after testing? Proceed cautiously.
Maintenance Tips to Protect Layers and Finish
After your final coat cures, treat the surface gently and inspect it regularly to keep layers intact and the sheen even.
Wipe dust with a soft, lint-free cloth and use pH-neutral cleaners for stains; avoid abrasive pads or harsh solvents that compromise layer protection.
Use felt pads under furniture and avoid dragging objects.
Touch up chips promptly with the same paint and technique to preserve adhesion.
Maintain consistent indoor humidity and temperature to prevent hairline cracks.
For high-traffic areas, apply a compatible clear topcoat following manufacturer dry times.
Document product details so future maintenance and finish maintenance stay straightforward.
Time vs. Longevity: Cost and Scheduling Trade‑Offs
How long will you wait between coats versus how long the finish lasts is a trade-off that affects both budget and project timing; faster turnarounds can lower labor costs and downtime but may sacrifice ideal adhesion and durability, while longer dry and cure intervals increase longevity but raise scheduling and carrying costs.
You’ll weigh cost efficiency against quality, balancing scheduling flexibility with proper cure times. Consider project planning and material considerations to decide.
Emotional reminders:
- You’ll feel proud when a durable finish lasts.
- You’ll stress less with thoughtful timing.
- You’ll resent rework from rushing.
- You’ll savor efficient, cost-effective progress.
- You’ll appreciate smart planning.
Quick Recoat Decision Checklist (Ready Now or Wait)
Wondering if you can recoat now or should wait? Check surface tackiness, temperature, humidity, and manufacturer’s minimum recoat time.
If the film’s dry to the touch and cool, you can use faster recoat techniques like light scuffing and thin subsequent coats.
If it’s tacky, blushing, or soft, wait—rushing causes lifting and poor adhesion.
Consider ventilation and how long you can leave the area undisturbed.
Use timing strategies: follow label minimums, add extra time in cool or humid conditions, and perform a small patch test before committing.
When in doubt, err on waiting for a proper cure.
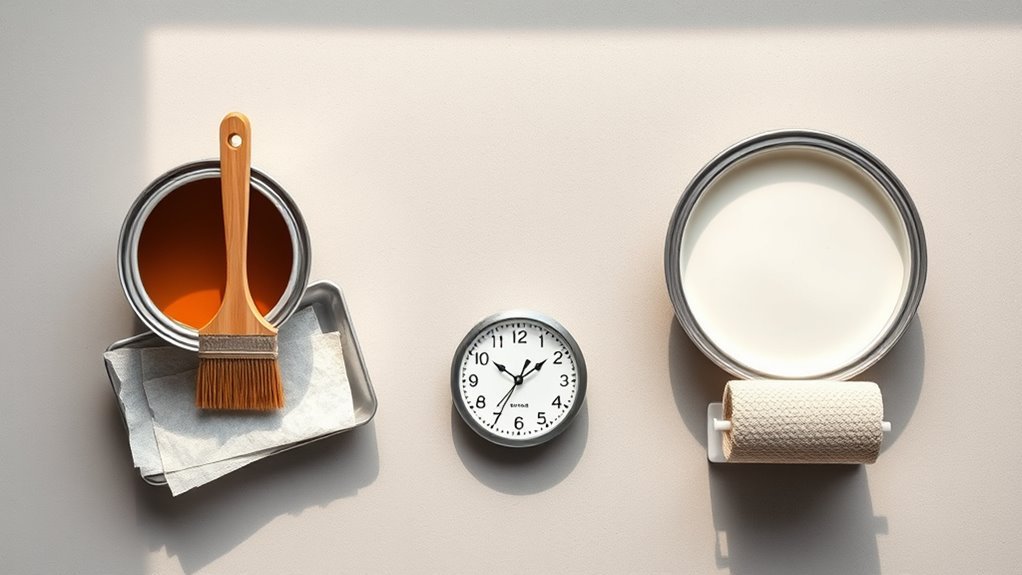
Drying Time Cheat Sheet by Paint Type
Here’s a quick cheat sheet to help you gauge drying times by paint type so you can plan recoats and avoid problems.
You’ll avoid paint myths and use simple drying techniques to get predictable results.
Check these typical touch and recoat windows, remembering humidity and temp affect them:
Check typical touch and recoat windows—humidity and temperature will change drying times, so plan accordingly.
- Water-based latex: touch 1 hr, recoat 4 hrs — quick relief, less odor.
- Alkyd/oil-based: touch 6–8 hrs, recoat 24 hrs — patient, rich finish.
- Primer: touch 30 min–1 hr, recoat 2–4 hrs — sets the stage.
- Spray coats: touch 15–30 min, recoat 1–2 hrs — fast but delicate.
- Enamel: touch 4–6 hrs, recoat 12–24 hrs — durable, needs time.
When to Call a Pro for Tricky Recoat Jobs
If your project’s paint is peeling, bleeding through, or needs precise color matching on complex surfaces, call a pro—these issues can hide moisture, adhesion, or substrate problems that simple recoats won’t fix.
You should seek professional advice when job complexity exceeds your skills: intricate trim, historic substrates, or problematic primers.
A pro assesses surface preparation, recommends quality materials, and uses expert equipment and advanced painting techniques to guarantee finish durability.
Discuss cost considerations and project timing upfront so you meet client expectations and avoid costly rework.
When risks to appearance or structure exist, hiring an expert preserves results and peace of mind.
Manufacturer Guides and Trusted Further Reading
Because manufacturers set the standards for their products, start your research with their technical datasheets and application guides—you’ll get dry time ranges, recommended recoating windows, surface prep steps, and temperature/humidity limits specific to the formula you’re using.
Follow manufacturer recommendations closely; they reduce guesswork and warranty risks. After datasheets, consult trusted further resources—trade associations, extension services, and reputable DIY sites—for practical tips and troubleshooting.
Keep a short reference list for each project so you can check specs when conditions change.
- Relief when instructions match results
- Confidence before you brush
- Clarity in humid weather
- Assurance with warranties
- Pride in a lasting finish
Frequently Asked Questions
Can I Mix Different Paint Brands in Successive Coats?
You can, but beware: brand compatibility matters, since differing formulations can harm coat adhesion. Check labels, test a small area, and prime or sand between coats when mixing brands to guarantee proper bonding and finish.
How Do VOCS Affect Drying and Indoor Air Quality?
VOCs speed or slow drying times depending on paint types and VOCs sources; they worsen air quality and pose health risks, so you’ll prioritize ventilation importance to protect your indoor environment and reduce exposure during and after painting.
Will Tinting Paint Significantly Change Recoat Times?
Yes — tinting effects can alter drying times; you’ll find deeper pigments often slow cure, much like dusk lengthening shadows, so you’ll need to wait a bit longer between coats and test a sample before proceeding.
Can Painters Accelerate Drying With Solvents or Heat Guns?
Yes — you can accelerate drying using solvent types (fast-evaporation solvents) and careful heat application, but you shouldn’t overuse them; you’ll risk film defects, solvent blooms, or scorching, so follow product guidelines and test first.
How Do Primers Affect Adhesive Strength Between Coats?
70% of adhesion gains happen with proper prep, so you’ll use primer types that optimize adhesive properties; oil, acrylic, or bonding primers each enhance surface energy differently, and you’ll improve intercoat strength by matching chemistry.
Conclusion
Think of each coat as a stepping stone across a stream: surface-dry stones let you keep moving, but only fully cured ones give you steady footing. You’ll usually wait just long enough for tack to vanish, yet respect manufacturer times for lasting results. Match paint type to conditions, and don’t rush—patience keeps your finish unblemished like a calm pond. When in doubt, call a pro to bridge the tricky gaps and secure the path.