Should You Paint Brick Exterior? Pros & Cons
You can paint brick to freshen and unify your home’s look, but weigh curb‑appeal gains against long‑term upkeep and hidden masonry risks. Inspect for mortar or moisture damage first, check local rules or HOA and consider resale impact in your market. Quality prep and paint lengthen life, but painted brick needs periodic touch‑ups and can hide problems. If you’re unsure, preserve until you’ve confirmed budget, inspections, and neighborhood fit — keep going if you want full guidance.
Should You Paint Your Brick Exterior? Quick Decision Checklist
Wondering whether to paint your brick exterior? Use this quick decision checklist to weigh goals and limits.
First, note maintenance: painted brick needs periodic touch-ups and can hide mortar issues, so inspect for damage.
Next, consider curb appeal and color psychology—pick hues that match neighborhood tone and mood you want to convey.
Consider curb appeal and color psychology—choose hues that suit your neighborhood and the mood you want to project.
Assess historic value: don’t paint if preservation rules prohibit it.
Evaluate budget versus long-term upkeep, and factor in resale impact.
Finally, test small areas to judge texture contrast between painted and unpainted sections.
If concerns remain, consult a pro before committing.
Quick Answer: Paint, Preserve, or Postpone
Need a quick call? Decide fast: if brick is sound and you want current aesthetic trends, paint for a refreshed look but plan for maintenance; paint longevity depends on prep and quality. If mortar or moisture issues exist, preserve with repairs first — painting can hide problems. If you’re unsure or budget-limited, postpone until you can inspect and plan.
| Option | When to pick |
|---|---|
| Paint | Good condition, trend-driven, budget for upkeep |
| Preserve | Structural or moisture concerns |
| Postpone | Uncertain budget or pending inspection |
| Reassess | After repairs or changing aesthetic trends |
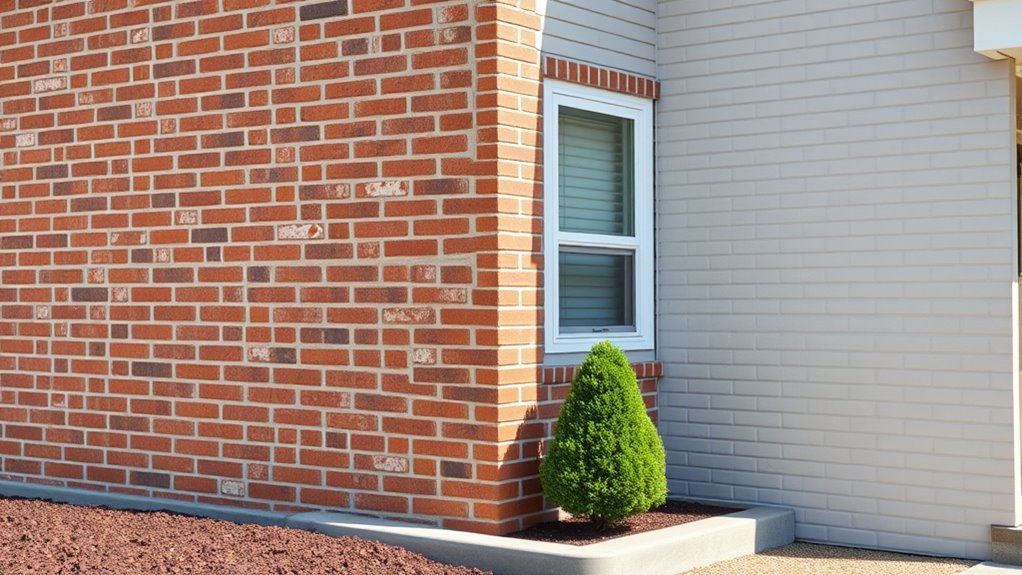
When Painted Brick Improves Curb Appeal
When your home’s brick is in good repair and the neighborhood favors modern or updated looks, painting can instantly refresh curb appeal by unifying color, hiding age-related discoloration, and providing a clean backdrop for landscaping and trim.
You’ll weigh Color impact and Neighborhood trends against Historical context and Maintenance concerns. If your Personal preferences push for contemporary style cohesion and the palette complements trim, painting sharpens aesthetics and can boost Future resale in areas buyers expect updates.
- Choose neutral tones that enhance curb appeal and respect style cohesion.
- Factor maintenance concerns: breathable paint and proper prep.
- Match trends without erasing historical context.
When Leaving Brick Unpainted Protects Value
Because buyers in traditional or historic neighborhoods often expect original materials, leaving brick unpainted can preserve your home’s perceived authenticity and market value.
You’ll want to weigh local market preferences: in neighborhoods valuing historic integrity, unpainted brick signals care and originality. That contributes to brick value preservation by maintaining original finishes buyers prize.
You’ll also benefit from unpainted advantages like lower maintenance risks tied to paint failures and easier inspections for structural issues.
If resale matters, consult local agents and preservation guidelines so your choice aligns with buyer expectations and maximizes appeal without compromising the building’s character.
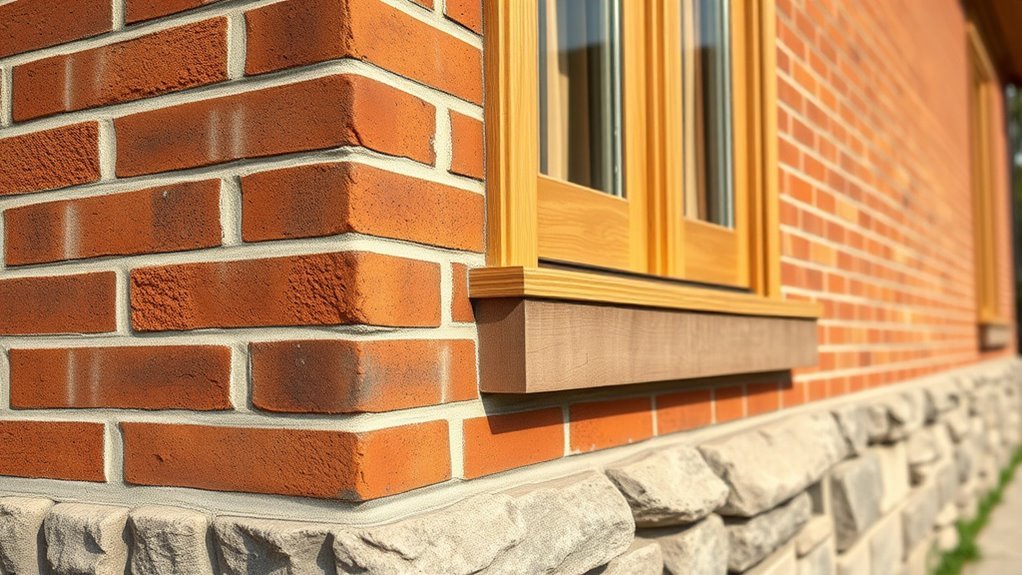
How Paint Changes Brick Color, Texture, and Mortar
Although paint can instantly change your home’s look, it does more than alter color: it transforms brick’s surface sheen, softens or hides texture, and can obscure mortar lines.
Painting brick instantly shifts a home’s look — changing sheen, softening texture, and masking mortar lines.
You should weigh color psychology and aesthetic impact when choosing finishes; darker hues feel grounding, light tones expand space.
Consider texture variations—paint fills pits, flattening character. Also mind mortar integrity: trapped moisture under paint can harm joints over time.
Think about long term effects like peeling, maintenance, or irreversible concealment of original masonry.
- Visual: change in perceived scale and style.
- Tactile: reduced grain and contrast.
- Structural: potential moisture-related risks.
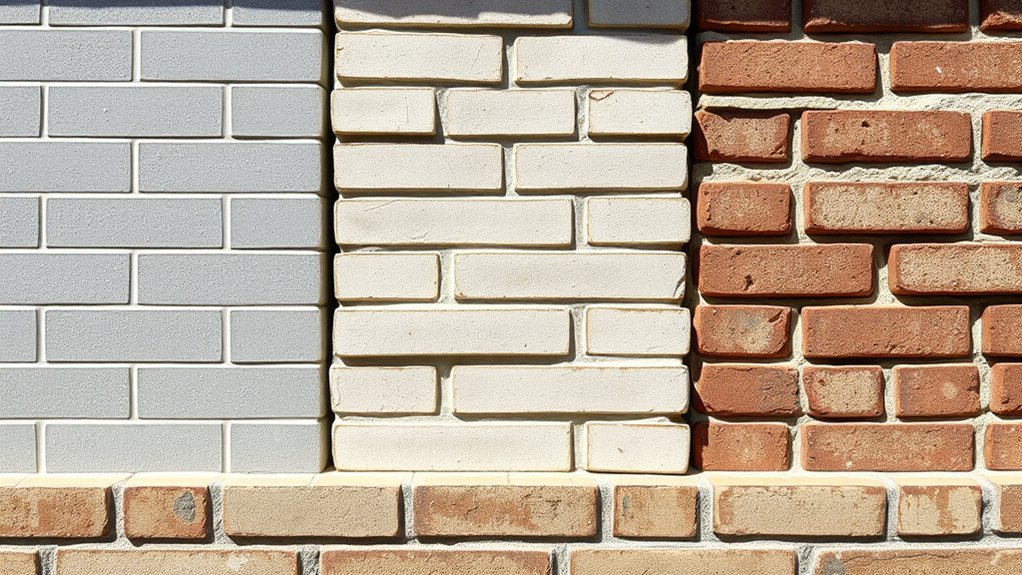
Brick Types That Take Paint Well
If you’re considering painting brick, some types take paint much better than others.
Smooth-faced bricks and calcium silicate (sand-lime) bricks offer a consistent surface that bonds well, while previously painted brick typically accepts a new coat more predictably than raw, highly porous masonry.
Knowing which type you have helps you choose the right preparation and paint for a lasting finish.
Smooth-Faced Bricks
- Prep: clean, degrease, and etch if necessary for adhesion.
- Primer: use a masonry primer to lock in paint.
- Finish: pick breathable exterior paint to avoid trapped moisture.
Calcium Silicate Bricks
When you’re choosing a brick that takes paint well, calcium silicate bricks are a solid option thanks to their uniform density and low porosity; their composition lets paint adhere evenly and resist flaking. You’ll find calcium silicate benefits include consistent texture and predictable coverage, so primers and topcoats perform reliably. Because of calcium silicate durability, maintenance cycles are often longer, and you’ll face fewer touch-ups. Consider surface cleaning and compatible breathable paints to preserve masonry health.
| Attribute | Effect |
|---|---|
| Density | Even paint absorption |
| Porosity | Reduced flaking |
| Texture | Smooth finish |
| Longevity | Fewer repaints |
Previously Painted Bricks
Calcium silicate’s paint-friendly surface gives you an idea of what to expect, but bricks that’ve already been painted are often the easiest to refresh because the substrate’s proven it accepts coatings.
If you’re dealing with previously painted bricks, you’ll find less work than bare masonry, but watch for peeling and hidden prep.
- Assess adhesion: minimal paint removal often suffices, saving time and preserving mortar.
- Plan maintenance: routine brick maintenance extends color longevity and prevents moisture issues.
- Expect texture changes: multiple layers or aggressive prep can alter texture, so test a small area before full repaint.
Brick Types You Should Avoid Painting
Although painting can refresh many brick exteriors, you should avoid coating certain types because the finish traps moisture or damages the material; specifically, soft-fired, porous, glazed, and historic handmade bricks often don’t tolerate paint well.
You’ll see paint adhesion issues on soft-fired and highly porous bricks because coatings can’t grip irregular surfaces, then peel. Glazed bricks resist bonding, so paint flakes and looks uneven.
Historic handmade bricks can lose character or suffer moisture retention concerns when covered, accelerating freeze-thaw damage.
If you’re unsure, test a small hidden area and consult an expert before committing to a full paint job.
Does Your Mortar Need Repair Before Painting?
Before you grab a brush, look closely at your mortar joints for cracks, crumbling, or gaps—these flaws let moisture in and will cause paint to fail.
You’ll want a quick mortar assessment to decide if tuckpointing or spot repairs are needed before painting. Fixing mortar first gives paint something stable to adhere to and prevents trapped moisture.
- Inspect: note loose or missing mortar and map areas needing work.
- Choose repair techniques: full repointing for widespread damage, spot tuckpointing for small sections.
- Test adhesion after repairs and before priming and painting.
Signs Your Brick Needs Repair Before Painting
When you’re planning to paint brick, look for clear signs of damage—spalling, efflorescence, large cracks, or loose bricks—that indicate repairs are needed first.
You should perform a quick brick condition assessment: tap bricks to detect hollowness, scan for crumbling mortar joints, and note staining or powdery deposits.
Repair indicators include mortar gaps wider than a pencil, bricks that wobble when pushed, and areas where water has eroded surfaces.
Look for mortar gaps wider than a pencil, loose wobbling bricks, or water-eroded areas before painting.
Address these issues before painting to guarantee adhesion and longevity.
If you’re unsure, consult a mason to prioritize tuckpointing, replacement, or sealing so paint won’t mask hidden failures.
How to Test Brick Porosity Before Painting
Before painting, you’ll want to check how porous your brick is so paint will adhere and moisture won’t get trapped.
Try a simple water absorption test—drop water on several bricks and time how quickly it soaks in—to gauge porosity.
Also inspect for efflorescence and feel the texture: powdery salts or very rough, crumbly surfaces signal problems that should be fixed first.
Water Absorption Test
Because brick soaks up paint differently depending on how porous it is, you’ll want to do a simple water absorption test to gauge porosity before you prime or paint.
Use basic water absorption methods and testing techniques to avoid wasted paint and poor adhesion. Pick a small, discreet area and follow three quick steps:
- Apply a measured splash or drop of water to the brick face and time absorption.
- Repeat on mortar and different bricks to compare rates.
- Record seconds until water disappears; slow uptake means low porosity, fast uptake means high porosity needing sealing.
Efflorescence And Texture
Although efflorescence and surface texture might seem like minor details, they tell you a lot about a brick’s porosity and whether paint will stick. You’ll inspect for white powder—efflorescence causes include moisture pulling salts out of the masonry—then scrape gently: stubborn deposits mean ongoing salt migration.
Next, run your hand over the brick: smooth faces repel primer, while rough, pitted textures improve mechanical grip. Tap with a screwdriver; hollow sounds point to porous mortars. Combine these checks with the water absorption test to confirm results.
If efflorescence or texture issues persist, address moisture sources and clean thoroughly before painting.
Surface-Prep Steps for Long-Lasting Painted Brick
Prep work determines how long your paint job will last, so take the time to clean, repair, and prime the brick properly.
You’ll focus on surface preparation to guarantee paint adhesion and durability. Follow these concise steps before painting:
- Inspect and repair: chip away loose mortar, fill cracks with compatible mortar or caulk, and replace damaged bricks.
- Clean lightly and let dry: remove dirt, dust, and salts; allow full drying to prevent trapped moisture.
- Prime and test: use a masonry primer suited for brick, spot-test adhesion, then proceed with your chosen topcoat.
Best Cleaners and Pressure Methods for Brick Prep
When you’re ready to clean brick before painting, pick cleaners that remove dirt, efflorescence, and mildew without damaging the masonry: use a mild detergent solution for general grime, a diluted muriatic or commercial efflorescence remover for salts, and a bleach solution for stubborn mildew.
Choose cleaners that remove dirt, salts, and mildew without harming masonry—mild detergent, diluted efflorescence remover, or bleach as needed.
Test cleaners on a small area first.
For cleaning techniques, scrub with a stiff nylon brush and rinse thoroughly.
Use pressure washing cautiously: keep nozzle at least 2–3 feet away, use a wide fan tip, and limit pressure to around 500–800 psi to avoid damaging brick or mortar joints.
Let the wall dry completely before painting.
When to Repoint Brick Mortar Before Painting
Before you paint, check for visible mortar cracks and any loose or missing sections that can let moisture in.
If you spot damage, you’ll want to repoint those areas so the repair has time to cure before paint goes on.
Repointing should be done well ahead of painting—typically several days to a week depending on mortar type and weather—so the surface is stable and dry.
Visible Mortar Cracks
If you spot hairline to wider cracks in your mortar, don’t paint over them—repointing is essential to keep water out and the brick sound. You’ll want to evaluate crack depth and length, then choose mortar repair techniques and crack sealing methods that match original mortar for adhesion and breathability.
Tackle visible cracks before painting to prevent trapped moisture and paint failure.
- Inspect: note width, depth, and connectivity to structural joints.
- Prep: clean debris, undercut loose mortar, and dampen the joint.
- Repoint: use compatible mortar mix, tool to finish, cure properly before painting.
Loose Or Missing Mortar
Cracks aren’t the only worry — mortar that’s loose or missing can let water and pests into the wall and will quickly undermine any paint job. So you’ll want to address gaps and crumbly joints before painting.
Check mortar condition across the facade; tap joints, probe soft areas, and look for missing sections. If mortar is sound, cleaning and priming may suffice.
For failing joints, choose repointing as a repair option: remove damaged mortar, match mix and color, and pack new mortar tightly.
Proper repointing restores structural integrity and gives paint a stable, long-lasting surface to adhere to.
Prior To Painting Timeline
When you’re planning to paint brick, schedule repointing well ahead of any cleaning or priming so the mortar has time to cure and you don’t trap moisture under paint.
You’ll want a clear timeline to follow pre painting considerations and avoid paint failure. Repoint only damaged joints, then let mortar cure fully—usually 7–28 days depending on mix and weather—before any masonry wash or primer.
- Inspect and repoint worst areas first; note curing start date.
- Wait at least one week in warm, dry conditions; extend in cool or humid weather.
- Use brick maintenance tips to plan final cleaning and priming.
How Weather and Climate Affect Painted Brick
Because brick breathes and expands with temperature and moisture, the weather around your home plays a major role in how long paint will last and how well it adheres. You’ll assess weather impact and climate considerations: moisture effects, temperature fluctuations, seasonal changes, and humidity levels determine prep and paint choice. Rain exposure and sunlight intensity fade or blister finishes; freeze thaw cycles and wind erosion worsen cracks. Plan for local patterns and pick flexible, breathable coatings suited to your climate.
| Factor | Effect |
|---|---|
| Rain exposure | Blistering, washout |
| Freeze thaw | Cracking, flaking |
How Painted Brick Affects Moisture and Breathability
Weather patterns also affect how paint changes the way brick handles moisture and airflow. You’ll notice differences in moisture retention and experience breathability concerns if paint traps water in pores. Consider these effects:
- Summer heat can drive moisture out; painted surfaces may slow drying, increasing risk of trapped damp.
- Freeze-thaw cycles worsen if hidden moisture expands beneath paint, causing flakes and cracks you’ll need to monitor.
- Humid climates raise moisture retention; breathable finishes help, but not all paints allow vapor escape, so choose carefully and inspect regularly.
Primer Choices That Boost Paint Durability on Brick
You’ll want a masonry-specific bonding primer to help paint adhere to porous brick and mortar.
Choose an alkali-resistant formula if your brick emits high pH, and check coverage rates so you know how many coats you’ll need.
Proper primer application—brush or roller into pores, backrolling for even coverage—makes the paint last.
Masonry-Specific Bonding Primers
1 clear way to make paint stick to porous brick is to use a masonry-specific bonding primer. You’ll get masonry bonding that fills pores, creates a uniform surface, and improves adhesion.
Primer benefits include reduced peeling, better coverage, and longer-lasting color.
- Choose a primer labeled for masonry to bridge uneven textures and grip dusty or chalky brick.
- Apply evenly with a brush or roller designed for rough surfaces so the primer penetrates mortar and tiny voids.
- Let the primer cure fully before painting; proper dry time prevents trapping moisture and guarantees paint bonds well.
Alkali-Resistant Primer Options
After you’ve sealed porous brick with a masonry bonding primer, consider an alkali-resistant primer to handle the high pH found in new or lime-rich masonry that can break down ordinary coatings.
You’ll choose between silicate-based, acrylic-modified, and solventborne alkali-resistant primer types depending on exposure and finish goals.
Check surface compatibility—some primers suit glazed or painted brick while others bond best to raw masonry.
Follow recommended application techniques for each chemistry to guarantee adhesion and neutralize alkali migration: light mist coats for silicates, full film for acrylics, and thinner coats for solventborne products.
Proper selection prolongs paint life.
Primer Application And Coverage
Choosing the right primer and applying it correctly sets the stage for long-lasting paint on brick, so pick a product matched to the brick type and follow coverage guidelines closely.
You’ll evaluate primer types and coverage factors, check surface compatibility, and balance adhesion properties with color matching. Consider environmental impact, follow safety precautions, and pick equipment selection that guarantees even coats.
Mind drying times and use proper application techniques for pores and mortar.
- Prep: clean, repair, test porosity to set coverage factors and surface compatibility.
- Apply: roll or sprayer choice, consistent strokes, monitor drying times.
- Finish: inspect adhesion properties, touch up as needed.
Breathable vs. Non-Breathable Paints for Brick
While breathable and non-breathable paints can both change your brick’s look, they perform very differently: breathable paints let moisture inside the masonry escape, reducing the risk of trapped water and spalling, whereas non-breathable coatings can seal moisture in and lead to damage over time.
You should choose breathable materials when moisture management matters—older or porous brick benefits most. Consider paint longevity, surface compatibility, and local climate before deciding.
Breathable coatings often need specific application techniques like thin, even coats and proper drying conditions. Non-breathable options might hide stains but risk long-term issues on damp substrates.
Latex vs. Masonry vs. Elastomeric for Brick Exteriors
You’ll find latex paint is easy to work with, dries fast, and cleans up with water, making it a convenient choice for many brick projects.
Elastomeric coatings stretch and seal hairline cracks for superior waterproofing, while masonry paints are formulated specifically for porous surfaces and offer good breathability.
Compare durability, flexibility, and vapor permeability to pick the right finish for your brick.
Latex Paint Pros
Latex paint gives you a fast, forgiving option for painting brick exteriors: it dries quickly, cleans up with water, and resists fading so your color stays truer longer.
You’ll appreciate latex paint benefits like easy application, quick recoat times, and wide color choices. It breathes reasonably well on sound brick, making maintenance simpler.
Be aware of latex paint drawbacks: it can trap moisture if applied over damaged mortar or sealed surfaces.
- Faster project timelines for DIY or contractors.
- Easier cleanup and color matching later.
- Cost-effective durability for moderate climates.
Elastomeric vs Masonry
When deciding between latex (masonry) paint and elastomeric coatings for brick exteriors, weigh flexibility and breathability against crack-bridging strength and thick-film protection.
You’ll choose latex for masonry texture preservation, easier touch-ups, and quicker drying; it lets the wall breathe and resists peeling when applied properly.
Pick elastomeric when you need superior water resistance and the elastomeric benefits of filling hairline cracks and creating a seamless barrier.
Elastomeric adds thickness and can hide imperfections but may trap moisture if the substrate isn’t dry and prepared.
Match coating to your climate, brick condition, and maintenance willingness.
Recommended Paint Finishes for Exterior Brick
Picking the right finish for exterior brick matters because it affects durability, appearance, and how well the paint handles moisture and texture.
You’ll want recommended paint types that suit porous masonry: breathable acrylic latex resists peeling and lets moisture escape, while masonry-specific elastomeric fills hairline cracks and adds flexibility.
Consider paint finish options that balance look and performance—matte hides imperfections, satin offers mild sheen and washability, and eggshell sits between.
Match finish to brick condition and maintenance willingness. Choose primers rated for masonry to improve adhesion and longevity before applying any topcoat.
- Matte
- Satin
- Eggshell
Color-Selection Tips for Brick Homes
How do you choose a color that flatters brick and fits your neighborhood? Start by testing swatches at different times of day to judge aesthetic impact. Consider current color trends but prioritize harmony with roof and landscape. Think about mortar contrast and maintenance needs; darker hues hide stains, lighter ones highlight texture.
| Feature | Tip |
|---|---|
| Swatches | View large samples outdoors |
| Contrast | Match mortar or trim |
| Season | Check in sunlight and overcast |
Pick a palette that complements rather than competes—your choice should boost curb appeal and feel timeless.
How Paint Color Shifts Perceived Home Style
When you choose warm tones for painted brick, your home will feel cozier and more traditional.
Opting for cool hues can give the same exterior a cleaner, more modern edge.
And remember, contrast—trim, shutters, and accents—often defines how the architecture reads.
Warm Tones, Cozier Feel
Although cooler bricks can feel formal or modern, painting your exterior in warm tones quickly softens the look and makes the whole house feel cozier and more inviting.
You’ll change curb appeal and mood: warm color palettes add depth, highlight architectural details, and create an inviting atmosphere that feels lived-in and welcoming.
Think beyond just color—finish and contrast matter. Consider these simple choices to get the effect right:
- Earthy neutrals (tan, ochre) for subtle warmth and timeless appeal.
- Terracotta or muted red to amplify rustic charm.
- Soft cream trims to brighten and unify the facade.
Cool Hues, Modern Edge
Want a sleeker, more contemporary look? You can shift brick’s personality with cool color palettes—think slate grays, soft blues, and muted greens—to instantly read as minimal and refined.
When you choose these tones, your home leans into modern aesthetics: cleaner lines feel emphasized, trim and metal accents pop, and curb appeal skews urban-chic.
Cool hues also visually lower warmth, creating a calm, structured facade that suits contemporary landscaping and fixtures.
Be deliberate with sheen and undertone so the brick texture stays balanced; the right cool paint will update style without erasing the material’s inherent charm.
Contrast Defines Architectural Style
Because contrast frames how we read a house, your paint choices can push a brick home toward traditional charm or crisp modernity in a single coat.
You’ll shape perceived style by balancing brick, trim, and accents; that balance creates architectural harmony and taps into color psychology to evoke warmth, calm, or drama.
Consider these practical shifts:
- High contrast (dark trim, light brick) — emphasizes lines, feels contemporary.
- Low contrast (matching tones) — softens details, reads historic or cottage-like.
- Accent contrast (bold door or shutters) — adds focal interest without losing original texture.
Accent Strategies: Trim, Shutters, and Painted Mortar
How do you make painted brick feel intentional rather than accidental? You choose accent colors that echo trim and shutters to create architectural harmony, following current design trends while trusting your eye.
Use varied paint finishes to highlight details: satin for trim, matte for brick, gloss for shutters.
Painted mortar can unify or contrast—pick texture contrasts deliberately so joints read as design, not repair.
Coordinate with seasonal palettes for curb appeal that changes subtly through the year.
Plan proportions, test swatches in daylight, and balance bold accents with neutral fields so your choices read cohesive, not random.
Tools and Equipment Needed to Paint Brick
Before you start, you’ll want to gather the essential painting tools—rollers with thick naps, masonry brushes, a sprayer if you’re covering large areas, and quality exterior masonry paint.
Don’t forget prep and safety gear like a pressure washer or stiff brush for cleaning, masonry primer, drop cloths, gloves, goggles, and a respirator.
Having the right equipment makes the job faster, safer, and guarantees a longer-lasting finish.
Essential Painting Tools
When you’re ready to paint brick, having the right tools makes the job faster, neater, and more durable.
You’ll want a concise painting checklist so you don’t forget essentials. Pick quality brushes and rollers rated for masonry, a roller extension, and a paint tray.
Use a masonry primer and exterior paint suited to brick. Choose a stiff-bristle brush for mortar lines and a high-density roller for textured surfaces.
Consider a paint edger for clean lines around trim.
- Stiff-bristle brush, masonry-rated roller, tray
- Masonry primer and exterior paint
- Roller extension, paint edger, quality brushes
Prep And Safety Gear
Start by assembling the right prep and safety gear so you protect yourself and get a lasting finish. Gather a respirator rated for paint fumes, safety glasses, chemical-resistant gloves, and knee pads if you’ll work low.
Use a sturdy ladder or scaffolding with a spotter for high walls. For surface protection, buy breathable drop cloths, painter’s tape, and plastic sheeting to shield windows and landscaping.
Include stiff brushes, wire brushes, a pressure washer or scrubber, masonry primer, and appropriate rollers.
Plan safety measures: check weather, ventilate, keep a first-aid kit nearby, and follow product instructions to avoid hazards.
DIY Painting Timeline and Realistic Time Estimates
Wondering how long a DIY brick-painting project will actually take? You’ll want diy preparation tips up front and realistic timeframe estimates so you don’t rush.
Timeline depends on wall size, weather, and curing times. Plan stages and rest days.
Timeline varies with wall size, weather, and drying—schedule stages and built-in rest days to avoid delays
- Prep (cleaning, repairs, masking): 1–2 full days for an average exterior wall.
- Priming and painting: 1–3 days, allowing recommended dry times between coats.
- Curing and touch-ups: 2–7 days for paint to fully cure before heavy contact or sealing.
Work in comfortable weather and build buffer days to avoid delays.
Step-by-Step DIY Method for Painting Brick
Now that you’ve planned timing and prepped the surface, you can move into the hands-on steps for painting brick. You’ll clean, rinse, etch if needed, prime with masonry primer, and apply two coats of exterior acrylic latex paint using brick painting techniques and sensible color selection strategies. Work top-down, keep a wet edge, and use a brush for mortar. Allow proper drying between coats and seal if desired.
| Step | Tool | Time |
|---|---|---|
| Clean | Pressure washer | 1–2 hrs |
| Prime | Roller/brush | 1–2 hrs |
| Paint | Brush/roller | 2–4 hrs |
| Detail | Small brush | 1 hr |
| Cure | None | 24–48 hrs |
Common DIY Mistakes That Ruin Painted Brick
If you skip proper surface prep you’ll trap dirt and moisture under the paint, causing peeling and mold.
Using the wrong paint—like interior latex or non-breathable masonry paint—will lead to flaking and trapped moisture too.
Addressing prep and choosing the right exterior, breathable masonry paint are the first steps to avoiding costly repairs.
Poor Surface Preparation
Because brick’s rough, porous surface holds dirt, efflorescence, and loose mortar, you can’t skip proper prep without risking peeling and uneven coverage.
You must address surface degradation and moisture retention first to protect paint adhesion and long term durability. Consider historical context—older mortar traps salts—and environmental factors like rain or sun that speed color fading.
Proper cleaning, mortar repair, and drying cut maintenance requirements and support aesthetic longevity. Match application techniques to the brick’s condition so paint can perform.
- Clean: remove salts, dirt, mold.
- Repair: repoint loose mortar.
- Dry: guarantee full moisture evaporation.
Using Wrong Paint Type
After you’ve cleaned, repaired, and allowed the brick to dry, choosing the wrong paint will still undo your work: some paints trap moisture, fail to adhere, or flake quickly on masonry.
You’ll want a breathable, masonry-formulated product that promotes paint adhesion and resists moisture transfer. Don’t grab interior latex or cheap acrylics labeled for multiple surfaces; they can blister and peel, cutting paint longevity dramatically.
Test a small area, follow manufacturer prep, and consider elastomeric only for severe substrate movement.
If you’re unsure, consult a pro or local supplier—getting the right type upfront saves time, money, and frustration.
When to Hire a Pro Painter for Brick Exteriors
When your brick shows widespread cracking, severe efflorescence, or mortar failure, hire a pro painter who can assess underlying damage and recommend repairs before painting.
You’ll also want help when the project’s scale, historic status, or specialty finishes exceed DIY skills.
Professionals deliver brick painting benefits and professional painter tips that preserve masonry and guarantee breathable, lasting coatings.
- Large surfaces or multi-story work needing scaffolding and safety expertise.
- Historic or warranty-sensitive brick where wrong prep risks value loss.
- Complex finishes (staining, limewash, or color-matching) requiring skilled application and material selection.
What to Ask and Inspect When Hiring Contractors
When you interview contractors, ask for a clear scope of work that lists every step, timeline, materials, and who’s responsible for cleanup.
Confirm their plan for surface preparation—mortar repair, cleaning method, and how they’ll handle loose or powdery brick.
Don’t hire anyone who won’t put these details in writing.
Scope Of Work
Start by clearly defining the scope of work so you and the contractor share the same expectations:
- List surfaces to be painted (full brick, trim, mortar, or accents).
- Preparation tasks (cleaning, repointing, replacing damaged bricks, sealing).
- Paint type and color.
- Number of coats.
- Primer requirements.
- Timeline for each phase.
Include Brick painting specifics:
- Color longevity estimates.
- Maintenance requirements.
- Surface preparation responsibilities.
Ask for:
- Cost analysis.
- Projected value retention.
- Aesthetic impact photos.
- Environmental considerations.
- Historic preservation limits.
Confirm how neighborhood trends affect choices.
- Deliverables and milestones
- Warranty and cleanup
- Change-order procedures
Surface Preparation Requirements
Preparation matters: you should verify that the contractor inspects and documents the brick, mortar, and adjacent materials, identifies damage (spalling, efflorescence, cracked or missing mortar), and outlines cleaning, repointing, and repair methods, plus any required moisture or salt testing before paint is applied.
Ask to see a written checklist showing mortar integrity assessment, substrate soundness, and flashing condition. Confirm proposed cleaning techniques—pressure-wash settings, chemical cleaners, or low-pressure soft wash—and how they’ll protect joints and nearby surfaces.
Require photos before and after repairs, a description of repointing mortar mix, and a moisture-readings report prior to priming and painting.
Typical Cost Ranges for Painting Brick Exteriors
Costs for painting a brick exterior typically fall between $2,000 and $8,000, depending on house size, brick condition, and finish choices.
You’ll see wide variation because cost factors like prep extent, paint quality, and access needs change totals, and regional pricing shifts labor rates and material availability.
- Small homes: $2,000–$4,000 — basic prep, standard acrylic masonry paint.
- Medium homes: $4,000–$6,000 — more prep, higher-grade paint, minor repairs.
- Large or complex jobs: $6,000–$8,000+ — extensive repairs, specialty coatings, difficult access.
Get multiple quotes so you compare specifics, not just totals.
How to Budget for Prep, Paint, and Labor
You’ll want to break the project into three clear line items—prep, paint, and labor—so you can estimate each piece and spot where to cut or invest.
For budget planning, list prep tasks (cleaning, repairs, priming) with materials and rental tools; get at least three quotes for labor.
For budget planning: itemize prep tasks—cleaning, repairs, priming—include materials, rental tools, and obtain three+ labor quotes
For cost estimation, calculate paint quantity from square footage and add waste, plus primer and sealant costs. Factor contingencies (10–15%) for hidden repairs and higher labor if scaffolding’s needed.
Compare DIY versus pro rates, and prioritize spending where longevity and finish quality matter most.
Seasonal Timing: Best Months to Paint Exterior Brick
You’ll get the best results when temperatures stay within the paint manufacturer’s recommended range—usually between about 50°F and 85°F—so pick months that reliably hit that window.
Watch humidity and recent rainfall, since high moisture will extend drying times and can trap water in the brick.
Plan enough time between coats for full drying so you’re not rushing through a cold or wet spell that ruins adhesion.
Ideal Temperature Range
Pick a clear stretch of mild weather—typically spring or early fall—when daytime temps sit between about 50°F and 85°F and nights stay above freezing.
You’ll want consistent conditions because painted brick shows temperature sensitivity: too cold or hot affects adhesion and cure times. Consider these seasonal considerations before you start.
- Prep and prime when temperatures are stable for 24–48 hours to guarantee proper bonding.
- Apply paint during the warmest part of the day, avoiding sharp drops at night that can stall curing.
- If a heat wave or cold snap arrives, postpone—proper temperature control beats rushing the job.
Humidity And Moisture
Because moisture undermines paint adhesion and long-term durability, plan your exterior brick project for months with low, steady humidity—typically late spring or early fall in most regions. You’ll want to assess humidity effects and moisture retention before painting; high humidity can reduce paint adhesion, increase mold growth risk, and accelerate surface deterioration. Choose days with rising temperature and stable forecasts to boost weather resistance once painted. Use breathable primers and sealers to manage trapped moisture. Check gutters and landscaping to limit water contact. Consult the table for quick seasonal cues and humidity ranges to guide timing.
| Month | Typical Humidity | Risk Level |
|---|---|---|
| May | Moderate | Low |
| Sep | Moderate | Low |
| Jun | High | Medium |
| Oct | Variable | Medium |
| Jul | High | High |
Drying Time Between Coats
After addressing moisture and choosing a low-humidity window, plan your coat schedule around how temperature and humidity affect drying times: warmer, drier days speed cure while cool or muggy conditions slow it.
You’ll pick seasons with steady daytime temps (50–85°F) to guarantee consistent drying conditions and avoid trapped moisture. Adjust application techniques—thin coats dry faster; thicker coats lengthen wait times. Check manufacturer times but confirm by touch.
- Apply thin, even coats; wait manufacturer’s minimum plus extra on humid days.
- Test dryness at edges before next coat; use a moisture meter if unsure.
- Schedule painting for consecutive dry days.
Eco-Friendly and Low-VOC Paints for Brick
While maintaining your brick’s breathability and long-term health, choosing eco-friendly, low-VOC paints reduces indoor and outdoor pollution and limits harmful fumes during application.
You’ll find eco-friendly options in water-based acrylics and mineral paints that let moisture escape, preventing trapped dampness and spalling.
Low VOC benefits include safer application, faster re-entry times, and reduced odor complaints from neighbors.
Pick products labeled for masonry, check for certification seals, and test a small area to confirm adhesion and appearance.
Proper surface prep and primer designed for brick still matter; green paints won’t fix poor preparation or structural issues.
Maintenance Needs for Painted Brick Over Time
If you paint your brick, expect the finish to change over years as UV and weather wear the coating and colors fade.
You’ll need to watch for moisture issues and make sure the paint system allows the masonry to breathe to avoid trapped water and damage.
Plan on periodic touch-ups and full repainting every so often depending on exposure and paint quality.
Paint Durability Over Years
Because brick and paint age differently, you’ll need regular upkeep to keep a painted exterior looking good and protecting the wall.
You should plan inspections and touch-ups because paint longevity varies with exposure, application, and brick maintenance. Expect repainting cycles and factor costs into decisions.
- Inspect annually for peeling, chalking, or cracks and spot-treat before problems spread.
- Repaint every 7–15 years depending on finish, climate, and how well you address small issues early.
- Keep mortar and masonry repairs current; untreated deterioration shortens paint longevity and raises long-term maintenance.
Moisture And Breathability
You’ve already seen how paint ages and needs regular touch-ups; moisture and breathability are the next big factors that determine how long that paint—and the brick beneath—holds up.
You’ll want to monitor for moisture damage because trapped water can swell mortar, flake paint, and promote mold. Choose coatings with proper vapor permeability to let water vapor escape; impermeable paints cause breathability issues and can accelerate deterioration.
Good surface prep improves paint adhesion, but substrate moisture control matters more. Keep gutters, flashing, and grading ideal so the wall can dry between wet cycles and avoid hidden problems.
Repainting And Repair Frequency
When you paint brick, expect more frequent upkeep than with unpainted masonry: painted surfaces typically need touch-ups every 3–7 years and full repainting every 8–15 years depending on exposure, paint quality, and prep.
You’ll track repainting frequency and schedule repairs sooner because chips, peeling, and mortar cracks show more. Plan realistic repair intervals and budget for ongoing care.
- Inspect annually for peeling, efflorescence, and mortar gaps.
- Do spot repairs and touch-ups every 3–7 years; full repaint at 8–15 years.
- Repoint or seal mortar during repaint to extend lifespan.
How to Spot and Fix Peeling or Blistering Paint
Noticing peeling or blistering paint early saves time and prevents moisture damage to your brick. You’ll spot peeling signs like flaking edges, powdery residue, and areas where paint lifts from mortar.
Blistering causes include trapped moisture, poor surface prep, or applying paint in direct sun. To fix it, chip loose paint, wash with mild detergent, rinse, and let dry fully. Use a masonry primer and compatible exterior paint; larger damaged areas may need repointing first.
For lasting results, follow repair techniques precisely and adopt simple maintenance tips: keep gutters clear, control vegetation, and inspect annually for new failures.
Repainting Frequency and Touch-Up Strategies
How often should you repaint brick exterior? You’ll typically repaint every 7–15 years depending on exposure, paint type, and climate.
Monitor for color fading, chalking, or mortar wear and act sooner if problems appear. Use targeted touch up techniques to extend intervals and keep repairs invisible.
Monitor for fading, chalking, or mortar wear and address issues early; use targeted touch-ups to keep repairs invisible.
- Inspect annually for chips, mildew, or color fading; address small areas quickly with matching paint and proper prep.
- Clean and spot-prime damaged sections before touching up to guarantee adhesion and color match.
- Recoat whole walls when multiple touch-ups accumulate or when texture and sheen no longer match.
How Painted Brick Affects Home Resale and Appraisals
When you paint brick, you’ll instantly change your home’s curb appeal and how buyers perceive its upkeep.
That fresh, modern look can boost interest, but appraisers will also weigh original materials and neighborhood norms when estimating value.
We’ll look at how painted brick can help or hurt resale and what appraisers typically consider.
Curb Appeal Impact
Curious about whether painting your brick will help sell your home? You’ll weigh resale implications against personal style and local preferences.
Color psychology and neighborhood trends shape first impressions, while architectural harmony and seasonal aesthetics influence curb appeal throughout the year.
Consider maintenance considerations too—fresh paint can read as cared-for, but peeling paint signals neglect.
- Pick colors that respect neighborhood trends and architectural harmony to attract buyers.
- Use color psychology to evoke warmth or modernity, matching seasonal aesthetics for photos and showings.
- Balance personal style with resale implications to avoid turning off potential buyers.
Appraisal Value Considerations
You’ve thought about curb appeal and buyer tastes, so next consider how painted brick can affect appraisals and resale value.
You’ll want an honest assessment: some appraisers view original masonry as higher quality; others accept tasteful paint that matches neighborhood trends.
Document the job—materials, contractor, maintenance—to show you improved durability, not masked issues.
If nearby homes are unpainted, paint might lower comparables; in streets with painted facades, it can boost appeal and sale price.
Ask a local appraiser or agent before committing. Their insight on appraisal impact and market expectations helps avoid costly surprises.
Market Preferences: Painted vs. Natural Brick in Neighborhoods
How do buyers and neighbors react when a home’s brick is painted versus left natural? You’ll notice market trends shift by area: some buyers prefer clean, modern painted brick; others value original masonry and historic charm. Neighborhood aesthetics matter—paint can unify a street or stick out.
- Curb appeal: painted brick can attract those wanting contemporary looks; natural brick draws traditionalists.
- Compatibility: buyers often compare your house to nearby homes; mismatched paint risks alienating neighbors.
- Resale: in neighborhoods trending modern, painted brick may sell faster; in classic areas, natural brick usually holds broader appeal.
How to Present Painted Brick to Prospective Buyers
If your neighborhood leans toward modern painted facades or you’ve already refreshed your brick, highlight those choices to buyers by framing them as intentional updates rather than cosmetic fixes.
Show high-quality photos emphasizing clean lines, consistent color, and sealed mortar; mention the repaint date, paint type, and maintenance history.
Tie the look to local market trends and how it aligns with curb appeal expectations.
Address buyer perceptions directly—explain durability, energy benefits, and any warranties.
Offer staging tips that complement the color and point buyers to comparable nearby homes to reinforce confidence in the painted exterior choice.
Alternatives to Full Paint: Limewash, Whitewash, Stains
While a full paint job gives a uniform, opaque finish, limewash, whitewash, and masonry stains let the brick’s texture and character show through, offering subtler changes in color and protection.
You’ll weigh limewash application for a chalky, breathable coat and whitewash effects for a washed, vintage look. Stains preserve more texture and often boast superior stain durability.
Consider eco friendly options like mineral lime and low-VOC stains. Expect color variations across bricks and note maintenance differences: limewash may need reapplying sooner, stains resist fading longer, and whitewash sits between them for periodic touch-ups.
- Limewash application
- Whitewash effects
- Stain durability
Chemical vs. Mechanical Paint Removal: Pros and Cons
When deciding whether to strip paint from brick, you’ll choose between chemical methods that dissolve coatings and mechanical approaches that physically abrade them; each has distinct trade-offs in effectiveness, speed, cost, and risk to the masonry.
You’ll find chemical paint removers offer controlled paint effectiveness on delicate mortar, often preserving surface integrity if used correctly, but they pose environmental impact concerns and require neutralization.
Mechanical paint removal—sandblasting, grinding, scraping—can be faster and cheaper yet risks etching or loosening brick, compromising surface integrity.
Compare removal techniques by testing small areas, balancing long-term masonry health, debris, safety, and environmental impact.
How to Remove Paint From Brick If You Change Your Mind
Deciding to strip paint from brick means planning carefully: you’ll pick a method based on the paint type, the brick’s condition, and how much time and money you want to spend.
Start by testing a small area with gentle paint removal methods—chemical strippers for stubborn layers, or low-pressure sanding for flaking paint—while following brick preservation techniques to avoid mortar damage.
Test a small area first, using gentle removal—chemical strippers or low‑pressure sanding—protecting brick and mortar.
After paint lifts, rinse thoroughly and let dry. Seal or repoint only if needed.
- Test a hidden spot first.
- Use appropriate PPE and contain runoff.
- Finish with a breathable masonry sealer or repair mortar.
Risks and Costs of Full Paint Removal on Brick
If you choose to remove all paint from brick rather than spot-treating, be prepared for higher risks and costs. You’ll face intensive paint removal that can damage mortar, etch masonry, or expose softer bricks.
Expect licensed contractors, specialized equipment, and repeated treatments for stubborn paint—each adds labor and disposal fees. Wet blasting, chemical strippers, or grinding require permits and proper containment to avoid contamination.
Brick restoration afterward may include re-pointing, sealing, and color-matching to restore appearance and prevent moisture issues.
Budget realistically: full removal often costs several times more than repainting and carries a greater risk of irreversible harm.
Case Studies: Successful Painted-Brick Transformations
Three real-world projects show how painted brick can be transformed into lasting, attractive finishes without tearing out masonry.
You’ll see Before Painting photos, then After Painting results that reflect Color Trends and Personal Preferences.
Expert Opinions guided prep and Historic Considerations respected original detail, while Neighborhood Examples influenced palette choices.
Expert advice shaped preparation, historic details were honored, and neighborhood styles helped steer color choices.
Environmental Impact was reduced by low-VOC paints.
Maintenance Tips were part of each plan, and Buyer Trends increased resale appeal.
Read these quick case studies:
- Urban rowhouse: neutral update, improved curb appeal.
- Craftsman: trimmed accents preserved character.
- Ranch: bold contrast modernized façade.
Case Studies: When Painted Brick Caused Problems
When homeowners rush into painting masonry without testing for moisture or using the right primers, the finish can fail fast and create costly problems you’ll have to fix. You’ll read cases where paint adhesion issues and moisture retention concerns led to peeling, trapped damp, and mold. Other stories show aesthetic mismatches that ruined curb appeal and historical preservation challenges when inappropriate colors or coatings altered character. In severe examples, structural integrity risks appeared as salts and freeze-thaw cycles worsened. Expect paint lifespan variability; some jobs lasted decades, others peeled in years.
| Scene | Emotion | Consequence |
|---|---|---|
| Peeling | Frustration | Repair costs |
| Mold | Disgust | Health worry |
| Mismatch | Regret | Value loss |
| Damage | Anxiety | Structural risk |
Local Code, HOA, and Historic-District Rules to Check
Thinking of painting your brick? You’ll need to check local regulations, HOA rules, and historic-district policies before buying paint. Don’t assume approval — some areas protect masonry or its historical significance.
- Contact your city planning or building department to confirm permits, mortar concerns, and any color restrictions.
- Review HOA covenants and neighborhood guidelines; they often dictate finish, hue, and maintenance standards.
- If you’re in a historic district, consult preservation boards — they may forbid painting or require specific approval to preserve historical significance.
Get written approvals to avoid fines, forced restoration, or community conflict.
Quick Action Plan Checklist Before You Commit to Painting
Before you buy paint or hire help, run this quick checklist so you don’t discover a costly or permanent problem after the first coat.
Inspect brick for damage, efflorescence, or loose mortar that’ll need repair first.
Test a small, inconspicuous area with your chosen paint colors and finish to confirm adhesion and look in different light.
Check moisture levels—address leaks, drainage, or rising damp before painting.
Confirm proper primers and breathable masonry paints for long-term brick maintenance.
Get written quotes, timelines, and warranty details if hiring pros.
Keep photos and permits handy to avoid surprises.
Cost/Benefit Framework: Long-Term Maintenance vs. Curb Appeal
Balance matters: painting brick changes more than curb appeal—you’re trading long-term maintenance needs for an immediate visual upgrade.
Do a clear cost analysis up front so you know paint, prep, and future upkeep versus preserving raw brick. Use a maintenance comparison to weigh repaint cycles, moisture risk, and cleaning against tuckpointing and sealing.
Do a clear cost analysis: compare paint, prep, and upkeep versus raw brick maintenance like tuckpointing and sealing.
- Initial cost: painting vs. sealing—materials, labor, time.
- Ongoing: repainting frequency, moisture mitigation, warranty impacts.
- Resale: buyer preferences, neighborhood norms, perceived value uplift.
Decide with numbers and your tolerance for maintenance rather than emotion.
Final Decision Worksheet: Paint, Preserve, or Postpone
How do you decide whether to paint, preserve, or postpone? Use this worksheet to weigh decision factors: condition of mortar, moisture risks, historical status, budget, and timeline. Score each item 1–5 for urgency and impact.
Add aesthetic considerations: color goals, neighborhood fit, resale appeal, and personal taste. Tally scores and prioritize high-urgency repairs first; if aesthetic wants outrank structural risks, preserve until fixes are complete.
If scores favor immediate paint for protection or curb appeal, plan surface prep and breathable paint. If uncertainty remains, postpone and reassess after weather, inspections, or budget changes.
Frequently Asked Questions
Will Painting Brick Affect My Homeowner’s Insurance Coverage?
Yes—you’ll usually be fine, but you should check your insurance policy details; painting rarely changes coverage limits unless it alters structural risk or violates policy terms, so contact your insurer to confirm before starting work.
Can Painted Brick Hide Structural Issues or Foundation Cracks?
No — painted brick can disguise cracks like fog hides cliffs; you’ll miss signs of compromised structural integrity, and paint longevity won’t fix underlying movement. Inspect and repair foundation issues before painting to avoid masking serious problems.
How Does Paint on Brick Influence Indoor Humidity and Allergy Triggers?
Painted brick can slightly worsen humidity control by trapping moisture, so you’ll need proper vapor barriers and ventilation; however, it can aid allergy reduction by sealing pores that trap dust, mold spores, and allergens.
Are There Tax or Appraisal Implications for Changing Brick Exterior Appearance?
Yes—you might affect appraisal value and, rarely, tax benefits; appraisers may adjust value for curb appeal changes, and some local tax assessments or historic-district rules could alter exemptions or improvements’ treatment, so check local ordinances first.
Will Painting Brick Impact Energy Efficiency or Exterior Insulation Performance?
Yes — painting brick can slightly affect energy conservation and thermal performance; you’ll trap less air infiltration and alter radiative heat reflectance, but paint alone won’t replace proper insulation or markedly change overall energy efficiency.
Conclusion
Deciding whether to paint your brick exterior comes down to curb appeal, maintenance, and rules—so paint if aesthetic gains outweigh upkeep and you’ve checked HOA or historic restrictions. Remember: painted brick can reduce breathability and trap moisture if done poorly, but a 2019 survey found 62% of buyers prefer homes with modern exteriors—meaning paint can boost resale appeal. Use the checklist, weigh costs vs. benefits, and choose paint, preserve, or postpone.