Should You Paint the Edges of a Wall First?
You’ll usually cut in (paint the edges) before rolling when you want crisp lines, better control around trim, or extra durability in high-traffic or detailed rooms. Roll-first can save time in simple, open spaces—then touch up edges for a clean finish. Use a good angled brush, keep a steady hand, and work wet-to-wet to avoid lap marks. Follow temperature and paint type guidance for drying, and keep going to learn pro tips and fixes.
Edges First Or Roll First?
Wondering whether to cut in the edges before you roll? You’ll often start with edges first: cutting techniques give you edge precision, control, and cleaner shifts around trim and corners.
If you cut in, work steadily with a steady hand, matching paint sheen and pressure to avoid lap marks. After edges dry to the touch, roll the field with a compatible roller and blend the overlap while paint is wet for uniform texture.
Skipping edges can save time but risks uneven lines and touch-ups. Choose the sequence that fits your speed, skill, and the room’s visibility needs.
Quick Decision Framework: When To Choose Each
Think about the room and how much detail it has—tight corners, trim, and fixtures push you toward edging first, while simple, open rooms suit rolling first.
Also be honest about your experience: if you’re newer, edging first gives more control; if you’re confident with a roller, you can save time by rolling the field and touching up edges later.
Use those two quick checks to pick the method that fits the space and your skill.
Room Type And Detail
Because each room works differently, let its purpose and level of detail guide whether you cut in or roll first.
If you’re painting a high-traffic space, like a hallway or kitchen, prioritize an even wall color and durable edge finish by cutting in carefully before rolling.
For bedrooms or casual rooms, you can roll broad areas first if you’ll touch up edges later.
Rooms with trim, alcoves, or complex fixtures demand meticulous cutting in to protect adjacent surfaces.
Simple, open rooms favor rolling to save time.
Match technique to room function and detail so results look intentional and hold up.
Painter Experience Level
Room type helps decide whether to cut in or roll first, but your skill level should steer the final call.
If you’re new, favor cutting in first on edges and trim; beginner tips include steady hand practice, using a quality angled brush, and painting small sections before rolling to blend.
Intermediate painters can alternate: cut risky corners, roll large expanses, then refine.
If you’re experienced, use advanced techniques like “load-and-pull” brushwork and simultaneous back-rolling for seamless edges.
Choose the method matching your confidence: simpler approaches reduce mistakes, while advanced techniques save time when you can execute them reliably.
When Cutting In Speeds The Job
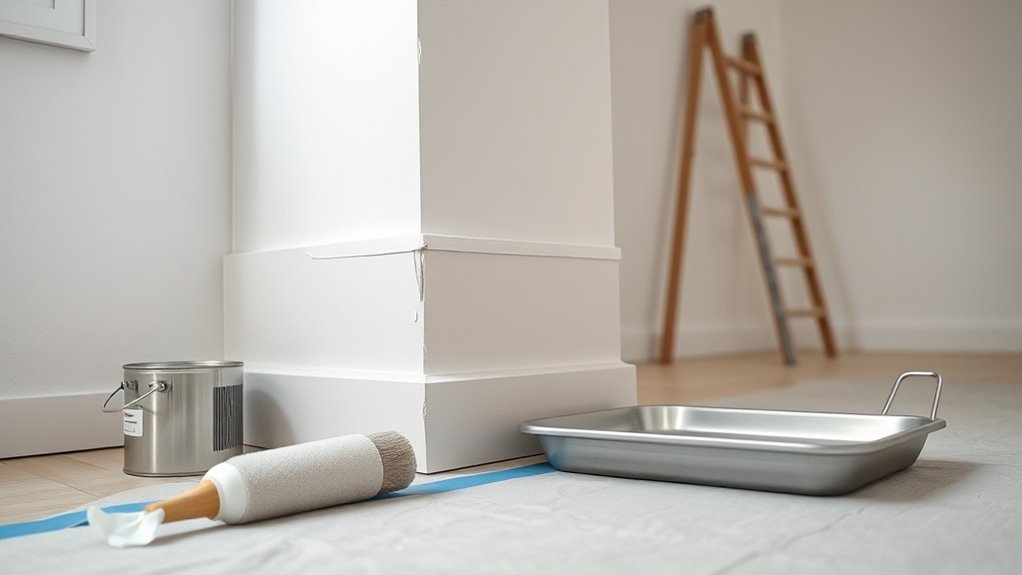
Before you start cutting in, make sure the trim is taped, the floor is protected, and your brush is loaded so you don’t stop mid-line.
Focus on steady technique rather than rushing, because a controlled hand gives cleaner, faster results overall.
Keep your edges consistent as you work so touch-ups are minimal and the rest of the job goes smoothly.
Prep Before Cutting In
Prep work makes cutting in faster and neater, so start by taping trim and protecting floors, moving furniture, and wiping dust from edges so your brush glides instead of drags.
You’ll assess edge visibility under real light, patch small imperfections, and sand rough spots so your paint application stays even.
Lay down drop cloths, label cans, and keep a damp rag nearby for quick corrections.
Use low-tack painter’s tape for crisp lines but remove it before the paint fully cures.
Organizing brushes, a steady ladder, and a loaded tray keeps momentum; good prep prevents smudges and saves touch-up time.
Technique Over Speed
Even when you’re trying to move quickly, prioritize steady technique over hurried strokes—cutting in cleanly saves time overall because you avoid runs, drips, and extra touch-ups. You should focus on control: steady wrist, correct brush load, and short strokes. The technique benefits are immediate—neater lines and fewer corrections—while speed drawbacks include wasted paint and repeated passes. Practice pacing so you work efficiently without sacrificing edge quality.
| Task | Benefit | Caution |
|---|---|---|
| Slow cutting | Cleaner line | Slower initial progress |
| Controlled brush load | Fewer drips | Needs discipline |
| Short strokes | Even coverage | Can feel tedious |
| Resting grip | Less fatigue | Breaks time |
Maintain Consistent Edges
When cutting in speeds the job, keep your edges consistent by using the same brush angle, pressure, and stroke length from start to finish so the line stays even and predictable. You’ll reduce touch-ups when you maintain rhythm and a steady hand.
Work in sections that let wet edges meet wet to preserve color consistency and avoid lap marks. Use quality brushes and don’t overload them; that improves edge durability and keeps paint from pooling.
If you pause, feather the end slightly so new strokes blend. Practice controlled movements and clean tools, and you’ll finish faster with professional-looking results.
When Rolling First Is Smarter
If your walls are mostly smooth and you’re covering a large area, start with the roller—it’s faster and gives you a more even base coat than edging first.
When you roll first, you set a consistent paint consistency across the field, then refine the edges. Load the roller evenly, use a W or M pattern, and finish with light vertical strokes to blend.
Work in manageable sections so the roller and cutter meet while wet. This roller technique minimizes lap marks and speeds the job.
After rolling, return with a steady brush to touch up trim and corners for crisp lines.
Room Size And Layout: Deciding The Order

If you’re working in a small room, paint the edges there first so you can work carefully around tight corners without stepping on wet roller strokes.
In an open layout, you might start with the largest continuous wall and work outward to keep a consistent finish and avoid visible seams.
Decide the order based on traffic flow and how much space you need to move ladders and drop cloths.
Small Rooms First
Though small rooms can feel cramped, you should tackle them first because they’re quicker to finish, easier to manage for touch-ups, and let you build momentum before moving to larger spaces.
Start by applying small space strategies: tape edges, cut in carefully, and paint ceilings last to avoid drips.
Working small lets you test color choice impact — a swatch in full light shows warmth or coolness instantly. You’ll correct mistakes faster, store equipment nearby, and clear the room for furniture sooner.
Finishing compact areas first reduces disruption and gives you confidence before tackling expansive rooms.
Open Layout Strategy
After finishing small rooms, shift focus to open layouts where one paint choice and order affects multiple zones at once.
You’ll balance open layout benefits with careful edgework to preserve spatial flow. Tackle visible changeover walls first, then paint anchors that define the room’s character, working outward to minimize overlaps.
Coordinate ceiling and trim timing so edges look intentional.
- Paint changeover walls to control sightlines.
- Do anchor walls next to set tone.
- Move to connecting walls, maintaining spatial flow.
- Finish ceilings and trim, touching edges last for crisp joins.
Painting Edges On Textured Vs. Smooth Walls
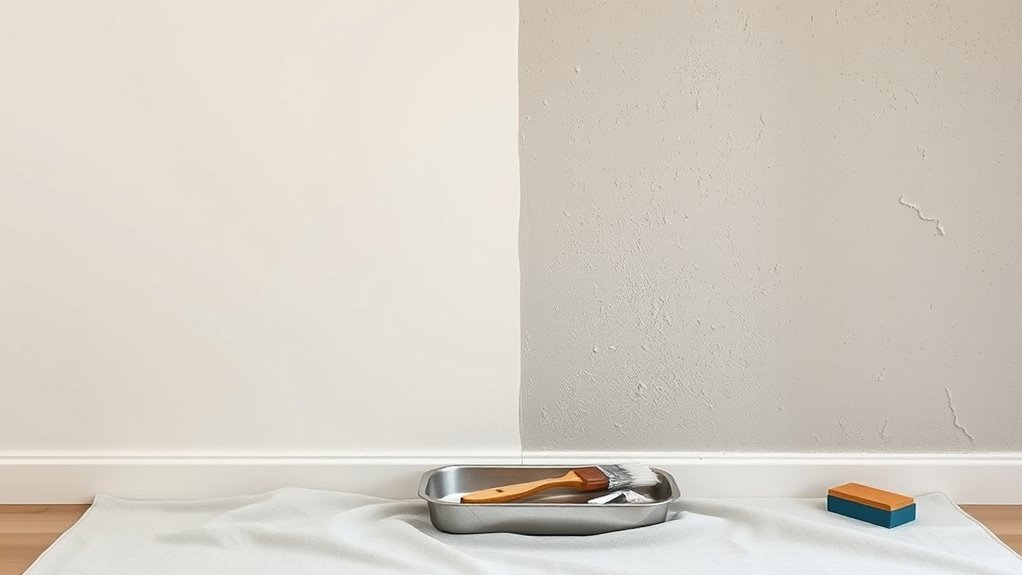
When you tackle edges on a textured wall, you’ll need a different touch than you use on smooth surfaces because the paint behaves and hides imperfections differently. Textured walls call for stippling or a thick-cut brush to push paint into crevices, while smooth walls work best with thin, even strokes and a high-quality angled brush for crisp lines.
You should adjust pressure: press more on texture to force coverage, feather less on smooth to avoid ridges. Use smaller loads of paint on the brush for control, check edges under good light, and blend from the edge into the field before the paint skins over.
Paint Type: Latex Vs. Oil And Cutting‑In Timing
Your choice of paint—latex or oil—changes how and when you should cut in. You’ll favor latex for easier cleanup and flexibility; its latex advantages mean you can work faster and recoat without fuss.
Your paint choice—latex for speed and easy cleanup, oil for smoother finish—changes when and how you cut in.
Oil offers smooth leveling but has oil disadvantages like stronger odor and tougher cleanup, so you’ll plan differently.
Cut in latex while rolling wet edges; it blends sooner. With oil, cut in carefully to avoid lap marks and wait to guarantee uniform sheen before touching the main field.
- Pick latex for speed and easy cleanup.
- Reserve oil for high-sheen needs.
- Cut in latex just ahead of rolling.
- Cut in oil with controlled strokes.
Drying Times And How They Change Your Order
Your paint’s drying time changes how you manage wet-edge timing, so plan to paint areas you’ll need to blend before they start to set.
If corners dry faster, you’ll want to cut in and finish them in an order that prevents lap marks.
Think about sequencing edges and panels to keep a consistent sheen and smooth shifts.
Wet-Edge Timing
If paint dries faster than you can blend, you’ll see lap marks where wet and dry areas meet. So plan your sequence around each product’s open time and the room’s temperature and humidity.
You’ll manage wet-edge maintenance and wet-edge consistency by adjusting pace and tool choice. Work in continuous sections, watch edges, and stop before paint skins over.
- Start where you can work outward in one pass to keep a wet edge.
- Match roller nap and pressure for even sheen.
- Monitor room temp/humidity; slow drying preserves blend time.
- Use slower-drying formulas for large walls to buy working time.
Corner Drying Order
Because corners tend to dry differently than flat expanses, plan your painting sequence so the fastest-drying surfaces don’t meet slower ones mid-job; paint the tightest corners and trim that dry quickest first, then work outward with sections that share similar open times so you can maintain a wet edge and avoid lap marks.
You’ll start with corner preparation—cleaning, sanding, and priming—to guarantee uniform absorption. Use drying techniques like thinner coats, gentle airflow, and lower humidity to equalize open time.
Sequence your strokes so adjacent areas have matched drying rates, and adjust timing when surfaces or materials change.
Essential Tools For Crisp Edges
Sharp lines start with the right gear: a quality angled sash brush, a steady edger tool, painter’s tape suited for your surface, and a small trim roller will get you crisp edges with less touch-up.
You want edge precision; smart tool selection speeds work and reduces errors. Prep surfaces, keep edges dry, and practice steady strokes. Choose tools that match paint type and trim width so you control bleed and texture.
- Painter’s tape — pick low- or medium-adhesion for your wall finish.
- Edger tool — maintains straight lines quickly.
- Angled brush — for detail and corners.
- Small trim roller — blends cut-in areas.
Choosing The Right Angled Brush
Choose an angled brush that matches your paint and trim width so you get clean cut-ins without excess bristles or drag.
Pick the right angled brush types for your job: synthetic filaments for water-based paints, natural hair for oil-based, and narrow 1–2″ brushes for tight trim versus wider 2.5–3″ for larger edges.
Choose angled brushes wisely: synthetic for water-based, natural for oil, and sizes 1–2″ for trim, 2.5–3″ for edges.
Hold the brush at a slight angle, load it lightly, and work in steady strokes. Practice on scrap material to find pressure and stroke length.
After painting, prioritize brush maintenance: rinse, comb bristles, reshape, and store flat or hanging to preserve the angle and lifespan.
Using An Edger Tool Correctly
When you’re ready to speed up cut-ins and maintain crisp lines, an edger tool lets you roll close to trim without constant brushwork. You’ll get neat results fast if you use proper edger tool techniques.
Load the pad evenly, press lightly, and test on scrap before the wall. Clean the guide wheel after each session to preserve accuracy and paint edge maintenance.
- Choose the right pad density for your paint.
- Keep a steady, overlapping motion.
- Wipe excess paint from the edge before starting.
- Store and clean components to prevent buildup and skipping.
Painter’s Tape: When It Helps And When It Hurts
An edger can save you time and keep lines tidy, but painter’s tape still has a place—especially on textured surfaces, newly painted trim, or awkward corners where a tool can’t reach.
You’ll choose tape types based on surface fragility: delicate-paper for fresh trim, medium for standard walls, and high-adhesion for rough or exterior areas.
Apply tape application carefully—press edges down, remove within the paint’s tack window, and pull back at a low angle to avoid tearing.
Don’t rely on tape for precision you can achieve with steady hands and an edger; misuse can lift finish or leave residue.
Step‑By‑Step: Cutting In First
Start by setting up a steady rhythm: load a 2–2.5 inch angled brush, hold it like a pencil for control, and work in manageable sections about 3–4 feet wide. You’ll focus on cutting techniques that deliver clean lines and edge precision before rolling.
Keep a wet edge, feather paint outward, and pause to inspect lines in different light. Practice steady strokes and don’t overload the brush.
- Tape or not: decide based on trim condition.
- Anchor stroke: paint where wall meets trim first.
- Fill stroke: move outward to blend.
- Inspect and touch up while paint’s wet.
Step‑By‑Step: Rolling First Then Touch‑Ups
Roll the broad areas with a roller first to cover most of the surface quickly, then go back and touch up the edges while the paint’s still wet.
Start by loading the roller evenly and work in overlapping W patterns to maintain consistent coverage. Keep an eye on wall texture and adjust pressure so raised areas get paint without splatter.
Once broad strokes are done, use a small angled brush to neaten corners and trim, feathering strokes into the rolled area.
Check for drips and thin spots, smoothing them immediately to protect an even paint finish.
Clean tools and inspect light from different angles.
Blending Cut‑In Paint Into Rolled Paint
When you cut in, use steady pressure and a quality angled brush to lay a smooth strip of paint along corners and trim.
Feather those edges by thinning the brush strokes at the border so the rolled paint can blend without leaving a ridge.
Match the wet edge and work quickly so the cut‑in and rolled sections fuse while both are still tacky.
Cut‑In Technique Basics
Although cutting in looks simple, blending that crisp edge into the rolled field takes a steady hand and the right rhythm. You’ll enjoy cut in benefits like cleaner lines and less masking, but you’ll face cut in challenges: drip control and matching sheen.
Work methodically: load the brush lightly, paint a confident straight line, then pull back and inspect.
- Load brush modestly to avoid drips.
- Hold brush at a slight angle for control.
- Paint a continuous stroke, not short dabs.
- Immediately roll adjacent area to marry textures.
Practice builds speed and consistent results.
Feathering The Edges
You’ll hold a loaded brush at a slight angle, drag gently outward from the cut line, then immediately follow with a light roller pass. Use short, overlapping strokes to avoid ridges; don’t press hard.
Practice feathering techniques on scrapboard to get pressure and speed right. Good edge blending keeps shifts invisible, reduces touch‑ups, and speeds up finishing without reworking dried paint.
Wet‑Edge Color Matching
If you want seamless color between your cut‑in and rolled areas, you’ll need to match wet edges by blending the fresh brushwork into the wet roller strokes before either dries.
You’ll work quickly: cut in a short section, then immediately roll out the adjacent area while both are wet. Watch edge color and adjust paint consistency if the stroke looks heavy or thin.
Feather the brush edge into the roller path to erase lap lines. Practice on scrap drywall to time your pace.
- Cut in a 2–3 foot strip.
- Load roller evenly.
- Blend brush into roller.
- Check sheen match.
Managing Wet Edges To Avoid Seams
When you work across a wall, keep a wet edge so the paint blends seamlessly and you don’t get visible lap marks; that means painting in continuous sections and keeping each pass wet enough to merge with the next before it skins over.
Keep a wet edge—paint continuous sections and merge each pass before it skins over to avoid lap marks.
You’ll control drying by working at a steady pace, loading your roller or brush consistently and overlapping by about 50% into the wet area.
Use a small window technique—finish manageable swaths before moving on. Adjust ventilation and temperature to slow drying if needed.
Focused wet edge management reduces touchups and guarantees seam prevention without reworking already painted areas.
Estimating Paint For Cutting‑In Vs. Rolling
Because cutting-in uses more brushwork and precision, you’ll often need a bit more paint per square foot along edges than you do with rolling—so plan accordingly.
When estimating paint quantity, measure perimeter length and multiply by typical coverage for trim-style passes. Account for extra coats where color changes or porous surfaces demand them. Use a steady cutting technique to minimize waste and touch-ups.
- Measure edge lengths and wall area.
- Calculate roller coverage from can specs.
- Add 10–20% for cutting-in losses.
- Buy a small extra container for touch-ups and trims.
Common Cutting‑In Mistakes And Fixes
Estimating paint and planning your cutting-in helps you avoid running short, but executing crisp edges brings its own pitfalls you’ll want to watch for.
You’ll misjudge brush load, push too hard, or move too fast; these common pitfalls cause ragged lines or excess paint. Use steady pressure, short controlled strokes, and the right brush for cutting in techniques to lay a smooth bead.
Misjudged load, heavy pressure, or haste create ragged edges—use steady pressure, short strokes, and the right brush.
Keep a wet edge and reload often rather than overloading. If paint pools, blot immediately with a clean brush.
Practice on scrap drywall to refine rhythm and wrist control before tackling visible walls.
Correcting Drips, Brush Marks, And Lap Lines
If you notice brush marks, sand them lightly once the paint’s dry and wipe away the dust before recoating.
For drips, scrape and feather the edge with a putty knife, then blend in fresh paint with a light, even stroke.
To fix lap lines, work wet edges into each other and keep a consistent pressure and paint load on your brush or roller.
Fixing Brush Marks
When you spot drips, visible brush strokes, or lap lines in freshly dried paint, address them quickly while the surrounding area is still workable; otherwise sanding and spot-priming become necessary.
You’ll want to use proper brush techniques and aim for edge smoothing: lightly sand raised drips, wipe dust, then apply a thin glaze or touch-up coat with long, even strokes. Work a slightly larger area to blend.
Keep a wet edge and feather pressure to avoid new lines. Clean brushes and maintain consistent paint load.
- Sand low spots gently
- Wipe and recoat thinly
- Use long, even strokes
- Feather pressure and keep wet edge
Blending Lap Lines
Because lap lines break the smooth look of a wall, you’ll want to blend them as soon as the paint is still slightly tacky so you can feather and redistribute the pigment without sanding.
Work small sections, dragging a clean, damp brush or roller over the edge in one direction to merge fresh paint with the tacky area. Use light pressure and overlapping strokes to erase visible seams.
For stubborn drips or brush marks, tip the brush vertically to lift excess and rework until consistent.
These blending techniques preserve color harmony across the surface, leaving a seamless finish that matches the rest of the wall.
Edge Techniques For High Ceilings And Trim
Anyone tackling high ceilings or intricate trim will want a steady plan for cutting in — these areas demand precision more than speed.
Use high ceiling techniques like extension poles with angled brushes so you stay steady and safe. For trim painting tips, load a sash brush lightly to avoid drips and keep a steady edge.
Work in manageable sections and maintain a wet edge to blend with roller-applied paint. If you need, practice steady wrist motions on scrap wood before tackling real trim.
- Use extension pole + angled brush
- Light brush loads only
- Keep a wet edge
- Practice wrist control
Working Around Windows, Doors, And Baseboards
When you’re painting around windows, doors, and baseboards, protecting the trim edges with painter’s tape and drop cloths prevents accidental drips and uneven lines.
Use a steady angled brush to cut in neatly around openings, working in short, controlled strokes to avoid paint buildup.
Take your time at corners and edges so you don’t have to touch up later.
Protecting Trim Edges
- Tape and press
- Low-tack choice
- Paint outward
- Remove at 45°
Cutting Around Openings
While you’re painting walls, cutting in around windows, doors, and baseboards demands steady hands and the right tools to get clean, professional lines without damaging trim or glass.
You’ll tape sensitive trim, score caulk joints, and use a sharp angled brush for control. Start with light passes, then fill—don’t overload the brush.
For sash and glass, press a trim guard or putty knife against the edge as you paint. Maintain consistent pressure and pace to avoid drips.
Regularly clean brushes and inspect bead lines for edge maintenance. Practice cutting techniques on scrap wood to build confidence before tackling walls.
Protecting Floors And Furniture While Cutting In
Before you start cutting in, clear a wide workspace and cover floors and nearby furniture with drop cloths or rosin paper so paint splatters won’t cause a headache later.
Before you start cutting in, clear a wide workspace and protect floors and furniture from paint splatters.
You’ll want reliable floor protection and furniture covering to prevent stains, dust, and tracked paint. Tape cloth edges, weigh corners, and move small items to another room. Keep a dedicated trash bin for used tape and paper.
- Use heavy canvas drop cloths for high-traffic areas.
- Secure seams with low-tack painter’s tape.
- Elevate furniture legs on blocks or plastic cups.
- Keep a damp microfiber cloth handy for immediate touch-ups.
Fast Edge‑Painting Techniques That Keep Crisp Lines
Once your floors and furniture are protected, start with a steady hand and the right tools to cut neat edges quickly.
Use a high-quality angled brush and a slim-edged edger for speed; these edge painting tools let you lay a consistent bead without dragging.
Work in short, confident strokes, keeping the brush tip angled away from trim to avoid paint buildup. Feather the paint inward, then roll immediately to blend.
Take breaks to reload rather than overload the brush. The edge painting benefits include reduced touch-ups and a professional look.
Practice on scrap drywall to build rhythm before tackling full rooms.
Budget Tools That Still Give Crisp Edges
You don’t need expensive gear to get sharp edges—cost-effective painter’s tape, simple cutting guides, and angled brushes can do the job.
Try a few affordable tape brands to find one that sticks without tearing paint, use a plastic or metal cutting guide for steady lines, and pick a low-cost angled brush with firm bristles for control.
With the right technique, these budget tools deliver crisp results.
Affordable Painter’s Tape Options
Looking for a budget-friendly tape that still delivers sharp lines? You’ll weigh budget brands and tape alternatives by adhesive strength and tape removal ease.
Consider surface compatibility and edge protection so paint won’t bleed. Compare multi surface tape options, cost comparisons, and durability factors before buying. Practice tape application to avoid lifting paint.
- Frogtape-style: good edge protection, moderate cost.
- Blue painter’s tape: multi surface tape, easy removal.
- Masking paper combo: tape alternative, cheaper for large jobs.
- Low-tack crepe: gentle adhesion, watch durability factors on rough surfaces.
Budget-Friendly Cutting Guides
When you need crisp edges without splurging, budget-friendly cutting guides give you predictable results by combining simple tools and smart technique. You can use a plastic putty knife, a straightedge, or a pool noodle as a spacer to keep paint off adjacent surfaces.
Clamp or press the guide firmly, paint up to it, then remove while paint’s tacky for a clean line. These budget friendly tools pair well with cost effective techniques like feathering the brush and small back-rolls to blend.
Work in short sections, keep edges clean, and you’ll get professional-looking results on a tight budget.
Low-Cost Angled Brushes
If budget guides and makeshift spacers help you paint straighter lines, a low-cost angled brush will sharpen those edges without blowing your budget.
You’ll learn budget brush selection quickly: pick synthetic bristles, a comfortable handle, and a 1–2 inch angle for control. Angled brush benefits include precise trimming, less paint waste, and easier touch-ups.
Use these tips to steady your hand and finish like a pro.
- Choose synthetic bristles for latex paints.
- Match brush width to trim size.
- Test on scrap before cutting in.
- Clean promptly to extend life.
Primer For Cutting‑In: When And How
Before you load the brush, decide whether you’ll prime the cut lines separately or start with the whole wall: priming the edges first gives you a consistent base for topcoats and helps the cut-in paint adhere and cover better, especially over bare drywall, patched areas, or previously stained surfaces. Choose primer types for adhesion and stain-blocking; oil or shellac for heavy stains, latex for general use. Practice cutting in techniques on scrap trim, maintain a steady angle, and feather edges. Allow full dry time, sand lightly if needed, then continue with topcoat.
| Step | Primer | Dry Time |
|---|---|---|
| 1 | Latex | 1–2 hrs |
| 2 | Oil | 6–8 hrs |
| 3 | Shellac | 45 min |
| 4 | Spot | 1–2 hrs |
Two‑Person Workflow: One Cuts In, One Rolls
Pair up: one person cuts in while the other follows with the roller to keep a smooth, wet edge and speed up coverage. You’ll coordinate so edges stay wet, blending cut in techniques with rolling efficiency.
One person uses steady, controlled strokes along trim; the other keeps a 2–3 foot wet band, feathering to avoid lap marks. Communicate pace and reload timing.
- Assign roles: cutter and roller.
- Establish working distance and direction.
- Keep paint loads moderate to prevent drips.
- Swap roles periodically to maintain consistency and reduce fatigue.
This method saves time and improves finish.
Handling Corner Seams And Inside Corners
When you approach corner seams and inside corners, work deliberately to avoid buildup and visible ridges: use short, controlled brush strokes and keep a thin bead of paint.
You’ll angle the brush so bristles reach the corner without packing excess. For corner techniques, feather out from the crease into each wall, then immediately smooth the paint with a light, single stroke.
For seam blending, overlap slightly and wipe the brush edge to remove ridges. Maintain a wet edge and don’t overwork the same spot.
Move methodically along the seam, checking for consistency before rolling adjacent areas.
Finishing Touches After The Second Coat
Once the second coat has dried to the touch, take a slow, focused walkaround to spot any thin areas, drip marks, or brush strokes that need correcting. You’ll make small fixes, blend edges, and confirm consistent sheen.
Use gentle sanding where needed, feathering repaired spots into surrounding paint. Edge maintenance matters: re-tape if lines need sharpening, then roll lightly to match texture. Consider these finishing techniques to finalize appearance and durability.
- Light sand and dust before touch-ups.
- Use a mini brush for tight edges.
- Re-tape and feather roller strokes.
- Inspect under varied light for uniformity.
Troubleshooting Visible Seams After Drying
If you’re seeing visible seams after the paint has dried, don’t panic — they’re usually fixable with a few targeted steps.
First, check seam visibility under good light; sometimes perceived seams fade after full drying time.
If seams persist, lightly sand the area with fine-grit paper to blend edges, wipe dust, and apply a thin skim coat or touch-up with a loaded brush or roller, feathering into surrounding paint.
Allow proper drying time between coats.
For stubborn lines, use a high-quality paint designed for uniform leveling.
Inspect again under natural light and repeat light sanding and touch-up as needed.
Pro Tradeoffs And A Final Checklist For Cutting In First
Although cutting in first adds control and cleaner edges, it also brings tradeoffs you should weigh: you’ll spend more time on detail work, may need frequent brush cleaning or replacement, and risk lap marks if your timing or technique’s off.
Use cutting strategies that match wall texture and paint type, and practice edge techniques on scrap. Before you start, confirm lighting, tape quality, and a full paint load to avoid color shifts.
Follow this checklist:
- Clean and prime edges.
- Choose the right brush and keep it wet.
- Work in consistent sections to blend laps.
- Inspect under varied light before rolling.
Frequently Asked Questions
Can You Cut in With a Roller Extension Instead of a Brush?
Yes—you can cut in with a roller extension, but you’ll trade some edge precision for speed. Use a slim foam or mini roller, steady pressure, and slow strokes to improve roller technique and minimize uneven lines.
How Do Pets Affect Drying and Order of Painting?
Like a curious breeze stirring sheets, you’ll find pet behavior can slow drying time and spread paint fumes; you should adjust order, secure surface protection, keep pets out, ventilate well, and monitor until paint’s cured.
Is It Okay to Paint Edges in Cold Weather?
Yes, you can paint edges in cold weather, but cold weather effects slow drying and can reduce paint adhesion, so you’ll need slow-curing formulas, warm, dry conditions, and proper surface prep to guarantee even coverage and bonding.
Can You Cut in Around Wallpaper Without Damage?
Yes — you can cut in around wallpaper without damage if you use careful cutting techniques and wallpaper protection like sharp blades, a straightedge, and low-tack tape; you’ll work slowly and steady to avoid tearing or lifting.
Should You Remove or Paint Over Popcorn Ceilings When Cutting In?
You should remove popcorn ceiling if it’s damaged or contains asbestos; otherwise paint over it cautiously. Picture sanding dust like gray snow drifting—use proper popcorn ceiling removal methods and careful painting techniques, protective gear, and gentle cutting-in.
Conclusion
You’ll want to cut in when precision matters and roll when speed calls—think of edges as the tailor’s neat hem versus the broad sweep of a painter’s brush. Trust your room’s shape, the paint’s temperament, and how visible seams become after drying. If you favor a tidier finish, do the edges first; if you’re racing the clock, roll and touch up. Keep a steady hand, forgive small imperfections, and finish like you mean it.