Should You Wash Down Walls Before Painting
You should usually wash walls before painting because dirt, grease, and dust block adhesion, cause poor coverage, uneven sheen, and premature peeling. Spot-treat small stains or scuffs, but give whole-room washing to kitchens, high-traffic areas, or walls with visible grime. Use a mild degreaser or TSP substitute, rinse and let fully dry, and sand only where paint is loose. Follow these steps and you’ll avoid costly touch-ups—keep going for tips on techniques and timing.
Should You Wash Walls Before Painting?
Even if the walls look fine from across the room, you should wash them before painting—dirt, grease, and dust can prevent paint from adhering properly and cause uneven finish or peeling later. You’ll remove fingerprints, kitchen splatter, and grime that alter how your chosen wall color reads once dry.
Clean surfaces let primers and topcoats bond uniformly, so your paint texture comes out consistent instead of blotchy. Use mild detergent, rinse thoroughly, and let walls dry completely.
Spot-treat stubborn stains or grease before priming. Skipping washing risks wasted paint, poor coverage, and premature failures you’ll regret.
Quick Decision: Wash, Spot‑Treat, or Paint As‑Is
When deciding whether to wash, spot‑treat, or paint as‑is, consider the surface condition, the type of paint you’re using, and how long you want the finish to last.
If stains are localized, spot‑treating saves time: clean the mark, sand lightly to match wall texture, prime that area, then paint.
For overall grime or uneven sheen, a full wash prevents adhesion problems.
If walls are mostly clean and you’re changing color, you can often paint as‑is, but factor in color coordination and whether primer is needed for coverage.
Choose the approach that balances effort, longevity, and final appearance.
How to Tell If a Wall Needs Cleaning
How can you tell if a wall needs cleaning before painting? Look closely: surface appearance, smell, and texture reveal whether prep is required. You’ll decide faster if you check these points:
How can you tell if a wall needs cleaning before painting? Inspect appearance, smell, and texture to decide.
- Visual contrast — streaks, soot, or uneven sheen that affect Color theory decisions and final hue perception.
- Tactile test — run your hand; greasy or gritty residue signals you should clean for proper paint finishing adhesion.
- Water test — mist a small area; beads indicate contaminants, while absorption suggests a porous surface needing different prep.
Use these cues to choose washing, spot‑treating, or painting as‑is with confidence.
What Dirt, Grease, and Dust Do to Paint
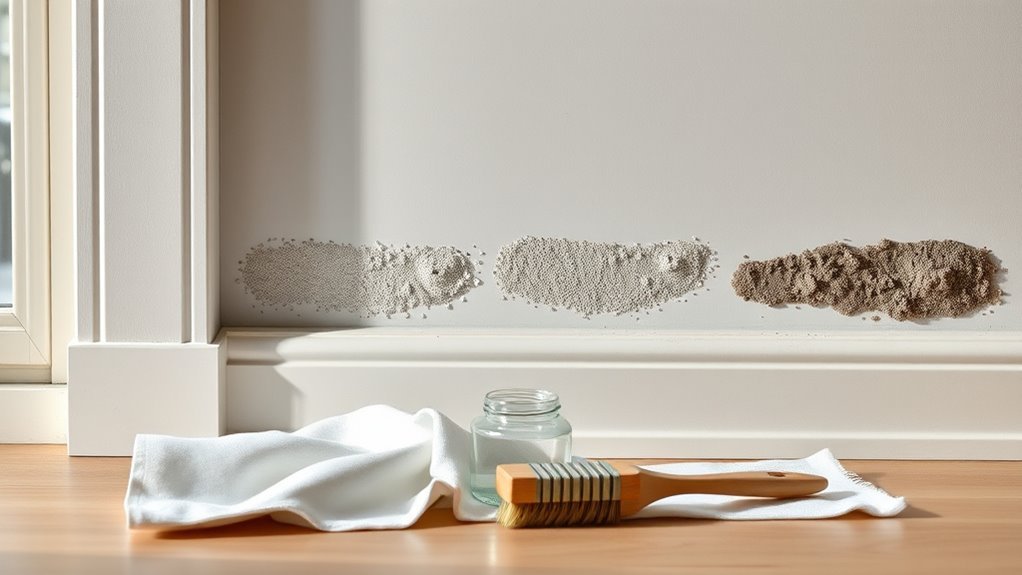
Because contaminants sit between paint and wall, they’ll keep fresh coats from bonding properly and reduce durability. You’ll notice uneven sheen, flaking, and premature peeling where grease or dust interrupts paint adhesion.
On varied wall textures, grime collects in crevices, causing thin spots or visible streaks after painting. Oils repel waterborne primers and paints, producing poor coverage and tacky finishes that attract more dirt.
Dust creates a sandy layer that weakens the bond, leading to chipping when bumped. Cleaning removes barriers so primers and paints can contact the substrate evenly, ensuring longer-lasting, uniform results across all surfaces.
When You Can Skip Washing (And When Not)
If your walls just have light dust, you can usually skip a full wash and just wipe them with a dry cloth or broom.
For previously painted glossy surfaces, a quick wipe will often suffice because the finish resists dirt, but scuffs may still need spot cleaning.
If you see grease or stains, don’t skip washing—those areas need a proper cleaner so new paint will adhere and look right.
Light Dust Only
Wondering whether you can skip washing before painting when walls only have light dust? You can often skip a full wash if dust is minimal, but consider color contrast and wall texture before deciding. Light wiping or vacuuming is a quick compromise.
- Inspect: run your hand to check for grit that affects finish.
- Test: wipe a small area—if paint adheres and looks even, proceed.
- Prep: remove cobwebs and loose particles; spot-clean greasy or stained spots.
If you’re painting a dramatic color contrast or textured surface, err on the safe side and clean thoroughly to ensure uniform coverage.
Previously Painted Glossy Surfaces
Ever painted over a glossy finish and worried about adhesion? If the sheen’s clean and you sand lightly, you can sometimes skip a full wash. Still, you should remove loose gloss and scuff with fine sandpaper or a liquid deglosser to promote bonding.
Skip washing only when no residue, smoke, or oil exists. If you’ve just done wallpaper removal, check for adhesive traces and prime those spots.
For walls with a textured surface prep, guarantee texture edges are scuffed and dusted. When in doubt, wipe with a damp cloth and let dry before priming and painting.
Grease Or Stains Present
Glossy surfaces demanded extra prep, but grease and stubborn stains call for a different approach. You shouldn’t omit washing when visible oils or dark marks sit on the surface — they ruin paint adhesion and highlight wall texture. Clean first, then reassess.
- Use a degreaser for kitchen walls; rinse thoroughly to avoid residue.
- Treat ink, nicotine, or marker with targeted cleaners before priming.
- Sand or spot-prime uneven textured areas to restore adhesion.
If stains don’t transfer after cleaning, you can skip full scrubbing next time; otherwise, always clean to ensure long-lasting, uniform results.
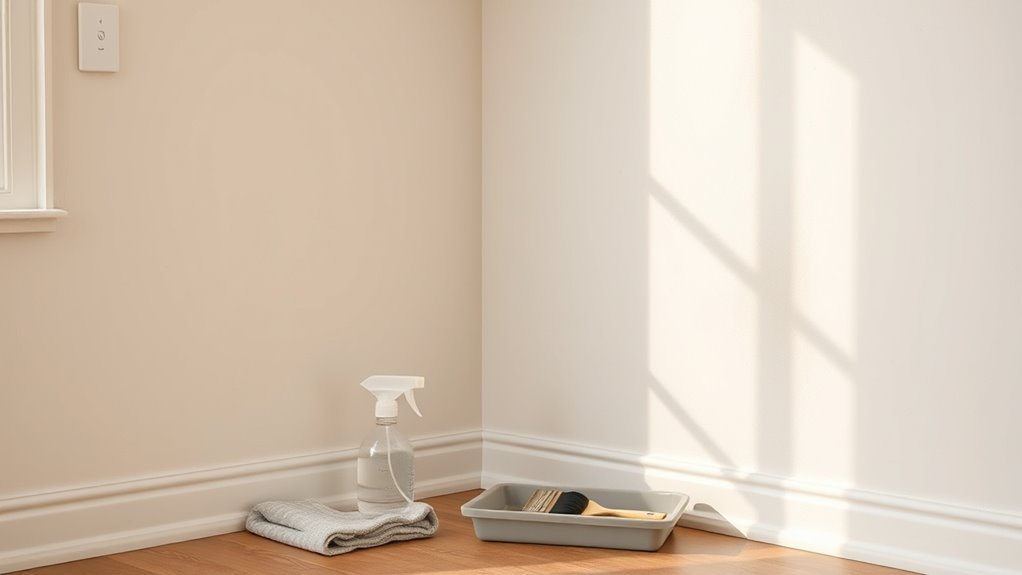
Tools You Need to Clean Walls
Before you start washing, gather the right tools: a bucket, mild cleaner, sponges or soft cloths, a scrub brush for stubborn spots, and a ladder or extension pole for high areas.
Don’t forget protective gear like gloves, goggles, and a mask to keep cleaners and dust away from your skin and lungs.
With the proper equipment and safety gear, you’ll clean efficiently and protect yourself.
Essential Cleaning Tools
What tools will make washing walls faster and more effective? You’ll need items that match wall texture and respect paint sheen to avoid damage. Start with basic supplies and scale up for stubborn grime.
- Microfiber mop or soft-bristle brush — adjustable handle reaches high areas without scrubbing gloss paint too hard.
- Bucket with a wringer and mild detergent — lets you control soap concentration for different textures.
- Sponge assortment and microfiber cloths — use denser sponges on flat walls, soft cloths for satin or semi-gloss finishes.
Use gentle pressure, test a small area, and rinse thoroughly.
Protective Safety Gear
Because cleaning walls can kick up dust, chemicals, and debris, you should gear up to protect your eyes, lungs, skin, and clothing. You’ll want Protective safety gear for scrubbing, rinsing, and handling solvents. Use goggles, a respirator rated for organic vapors if using strong cleaners, nitrile gloves, and a coverall or old clothes. Follow Paint chemical safety guidelines on labels and ventilate the room. Keep a spill kit and first-aid nearby. The table below summarizes essentials and purpose.
| Item | Purpose | Notes |
|---|---|---|
| Goggles | Eye protection | Splash-resistant |
| Respirator | Filter vapors | Cartridge type |
| Gloves | Skin barrier | Nitrile |
| Coverall | Clothing protection | Disposable |
| Spill kit | Contain spills | Include absorbent |
Best Cleaners for Painted Walls
Choosing the right cleaner matters when you’re prepping painted walls for repainting or regular maintenance, since some solutions can dull or strip finish while others lift grime without damage. Consider wall texture and paint sheen before cleaning so you pick a product that won’t alter appearance.
Try these options:
- Mild dish soap and water — gentle for flat or satin finishes, works on most textures.
- Commercial pH-neutral cleaner — safe for semi-gloss and gloss, removes oils without stripping.
- All-purpose cleaner labeled safe for painted surfaces — convenient for textured walls but test first.
Always spot-test, rinse well, and use soft cloths.
DIY TSP Alternative Recipe
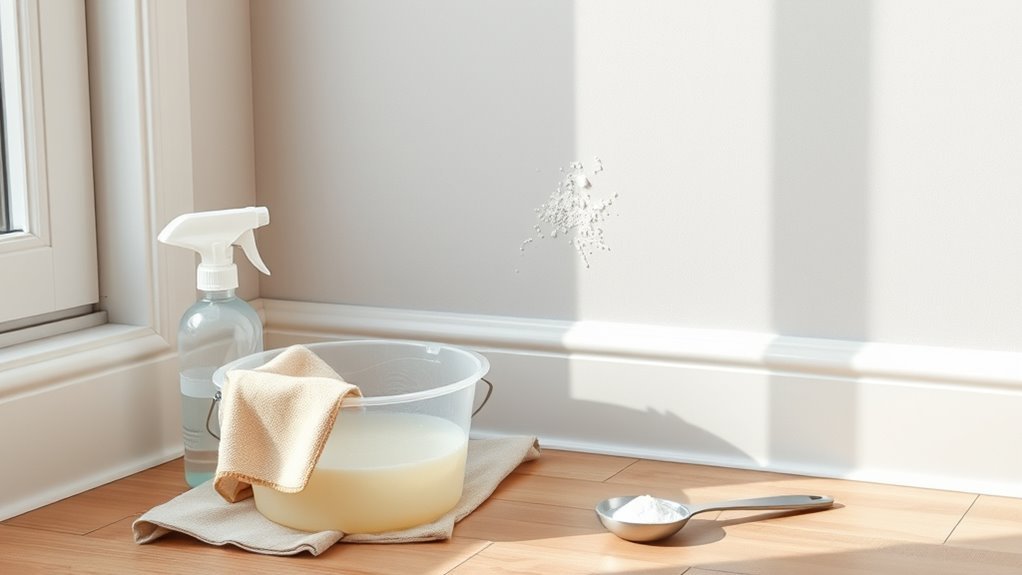
If you want a TSP substitute, you can mix a homemade degreaser with liquid dish soap, warm water, and a splash of ammonia for heavy grease.
For milder cleaning, try vinegar and baking soda—apply vinegar, sprinkle baking soda on stubborn spots, then wipe clean.
Borax also works well: dissolve a few tablespoons in warm water to cut grime without harsh chemicals.
Homemade Degreaser Mix
When you don’t have trisodium phosphate on hand, a simple homemade degreaser can cut through grease and grime without harsh chemicals; mix warm water with a few household ingredients to make an effective TSP alternative. You’ll protect wall textures while improving paint adhesion and paint durability by removing oils and residues.
Combine ingredients carefully, test a small area, and rinse thoroughly.
- 1 cup warm water + 1 tablespoon liquid dish soap
- 1/2 cup rubbing alcohol for grease breakdown
- 1 tablespoon ammonia (optional) diluted for stubborn spots
Wear gloves, ventilate the room, and avoid over-wetting porous surfaces.
Vinegar And Baking Soda
Although vinegar and baking soda won’t match commercial TSP’s strength, they make a safe, inexpensive DIY alternative for light-to-moderate dirt and grease on walls.
Mix one cup white vinegar with one gallon warm water, then add a tablespoon of baking soda cautiously to fizz away grime.
Work in small sections, rinse with clean water, and blot dry.
Test first in an inconspicuous spot to confirm your wall texture and paint sheen aren’t affected—matte finishes hide imperfections, glossy sheens show streaks.
Use soft cloths or sponge; avoid abrasive scrubbing to protect underlying drywall and existing paint.
Borax Cleaning Solution
Because borax dissolves grease and lifts grime without the harshness of commercial TSP, it’s a popular DIY alternative for prepping walls before painting. You’ll mix 1 tablespoon borax per cup of warm water; test a small area first. Consider wall texture and paint sheen when evaluating results.
- Wear gloves and ventilate the room.
- Apply gently with a sponge; avoid over-scrubbing textured surfaces.
- Rinse with clean water and let dry fully.
This solution removes oils and light stains, helping new paint adhere. Don’t use on delicate finishes; always patch-test glossy or specialty sheens first.
Cleaning Greasy Kitchen Walls Safely
If you’ve got cooking grease on your kitchen walls, tackle it with the right cleaners and a gentle method to avoid damage. You’ll start by dusting and testing a small area to verify cleaners won’t harm paint texture or expose wall insulation.
Mix warm water with a mild degreaser or dish soap; for stubborn spots, add a bit of baking soda to form a paste. Use a soft sponge, work top to bottom, and rinse with clean water to prevent soap streaks.
Dry thoroughly. Avoid abrasive scrubs and excessive moisture near trim, outlets, or seams to protect finishes and insulation.
Removing Mildew and Mold Before Painting
Before you paint, you’ll want to tell mildew and mold apart—mildew is usually powdery and surface-level, while mold can be fuzzy and may penetrate the drywall.
Use safe removal methods like a diluted bleach solution or a commercial mold cleaner, wear gloves and a mask, and ventilate the room.
If the stain or growth returns or seems extensive, you’ll need to address moisture sources or call a professional.
Identifying Mold Vs. Mildew
Wondering whether that dark patch on your wall is mold or mildew? You’ll want to identify it before painting so color matching and paint sheen decisions aren’t ruined. Look for these quick distinctions:
- Mildew: powdery, white to gray, stays on the surface; often in showers or windows.
- Mold: fuzzy or slimy, black/green/brown, can penetrate drywall or plaster.
- Smell and spread: mildew smells musty and stays localized; mold often smells stronger and spreads irregularly.
Use a flashlight and gentle scraping to inspect texture. If unsure, test a small area; identification guides your prep and final finish choices.
Safe Removal Techniques
Because mold and mildew can damage paint and your health, you should remove them safely and thoroughly before you paint. Wear gloves, goggles, and an N95 mask, ventilate the room, and test a small area first.
Use a gentle detergent or a diluted bleach solution (1 cup bleach to 1 gallon water) on nonporous surfaces. For porous areas, consider a commercial mold remover.
Scrub according to wall textures to avoid damage, rinse, and let surfaces dry fully. Dispose of contaminated rags safely.
After cleaning, prime treated areas to restore adhesion and maintain long-term paint durability.
How to Remove Crayon, Marker, and Scuffs
If kids, markers, or moving furniture left marks on your walls, you can usually remove crayon, marker, and scuffs without repainting; start with gentle methods and only step up to stronger cleaners if needed. Consider wall texture and paint sheen before scrubbing to avoid damage.
Try these steps:
Try these steps to remove wall marks gently—start mild and only use stronger cleaners if needed.
- Use a soft cloth with mild dish soap and water, blotting gently.
- Apply a magic eraser or baking soda paste for stubborn crayon; test an inconspicuous spot first.
- For permanent marker, use rubbing alcohol or lacquer thinner sparingly, then rinse.
Work from least to most aggressive until the mark’s gone.
Prepping Textured and Popcorn Walls
Before you wash textured or popcorn walls, inspect them closely for loose material, cracks, or patches that need repair so you don’t make the damage worse.
Use gentle washing methods—soft-bristled brush and mild detergent or a low-pressure sponge—to remove dust and light grime without flattening the texture.
If areas are fragile, spot-clean and let repairs dry fully before painting.
Inspect For Damage
How should you inspect textured or popcorn walls for damage? You’ll scan visually and by touch to assess wall texture and paint sheen changes, noting cracks, flaking, or soft spots. Focus on edges, ceilings, and corners where damage hides.
- Tap lightly to detect hollowness or delamination.
- Press gently to find soft or crumbly sections needing repair.
- Mark areas with painter’s tape and list severity for patching.
Document size and location, prioritize repairs that affect adhesion, and choose repair methods compatible with existing texture and paint sheen before any cleaning or painting step.
Gentle Washing Methods
When prepping textured or popcorn walls, you’ll want to clean them gently to remove dust, grease, and loose particles without damaging the texture. Use a soft-bristle brush or dry microfiber to dislodge surface dust.
Then, spot-clean stains with a mild detergent solution and a soft sponge, rinsing lightly. Avoid soaking; excess moisture can loosen adhesive and alter wall texture.
For stubborn grime, a gentle degreaser applied sparingly works. Let walls dry fully before priming.
Proper gentle cleaning preserves the substrate and improves paint adhesion, boosting paint durability and ensuring an even, long-lasting finish.
Cleaning Drywall vs. Plaster vs. Paneling
Even though all three surfaces can collect dust, grease, and stains, you’ll treat drywall, plaster, and wood paneling differently because of how they absorb moisture and how fragile their finishes are.
For drywall, spot-clean with a damp sponge; avoid saturation, and note wallpaper removal may expose paper backing that needs sanding.
Plaster tolerates gentler scrubbing; use mild detergent and test a patch first.
Paneling needs care to protect veneer—wipe with a lightly damp cloth.
Also consider ceiling preparation when working high.
- Drywall: blot, minimal water.
- Plaster: mild detergent, test first.
- Paneling: avoid soaking.
How to Protect Trim, Floors, and Outlets
Before you start washing or painting, make sure you protect trim edges with painter’s tape so you don’t get paint where you don’t want it.
Lay drop cloths or plastic sheeting to safeguard floors from drips and tracked-in dirt.
Turn off power and remove or cover outlets and switch plates to keep them clean and safe.
Protecting Trim Edges
Wondering how to keep trim, floors, and outlets spotless while you paint? Focus on crisp trim edges by evaluating wall texture and desired paint sheen first, since rough textures need wider tape and sheen affects bleeding visibility.
Then:
- Use high-quality painter’s tape, press firmly along the trim’s edge, and remove within an hour of tack-free paint.
- For detailed moldings, apply a thin coat of clear caulk or paintable sealant to fill gaps, let cure, then tape again for straight lines.
- Protect outlets with outlet covers and use angled brushes for control near trim, working slowly for neat results.
Safeguarding Floors
When you’re getting ready to paint, protect floors with layered barriers so drips, splatters, and tracked-in dirt don’t ruin them. Start with a breathable rosin paper, add drop cloths, and tape seams. Protect trim edges with low-tack painter’s tape; match tape to delicate surfaces. Consider wall textures and paint finishes—rough textures need thicker coverage underneath, glossy finishes show every speck, so be extra careful. Move furniture off floors or lift onto blocks. Use a lint-free broom before laying protection.
| Item | Purpose |
|---|---|
| Rosin paper | Base barrier |
| Drop cloth | Absorb spills |
| Tape | Secure edges |
| Blocks | Lift furniture |
| Broom | Remove debris |
Covering Outlets
How will you keep paint off outlets and trim without slowing your work? You’ll prep carefully: shut power, remove plates, and use low-tack painter’s tape on trim edges. Match protection to wall texture and paint sheen so edges stay crisp.
- Cover outlets with folded tape or pre-cut plastic sleeves for quick removal.
- Tape baseboards and floors with thin paper-backed tape to avoid residue.
- Use bleed-blocking caulk on rough seams to prevent sheen differences.
Work from top down, peel tape while paint’s tacky, and inspect for touch-ups so results look professional.
Step‑by‑Step: How to Wash Walls Before Painting
Ready to get the best paint finish? You’ll prep walls for color schemes and correct paint texture by washing methodically. Gather bucket, mild detergent, sponge, scrub brush, and drop cloths. Work top to bottom, rinsing sponge often. Spot-treat stains, grease, and mildew before rinsing. Let walls dry thoroughly and inspect for residue; repeat if needed. Tape edges and cover floors once clean.
| Step | Action |
|---|---|
| 1 | Clear room |
| 2 | Protect surfaces |
| 3 | Mix cleaner |
| 4 | Wash top→bottom |
| 5 | Rinse and inspect |
How Long to Wait After Washing Before Painting
Although drying time depends on humidity and ventilation, you should wait until walls are completely dry to the touch before painting. Moisture trapped in textured surfaces harms paint adhesion, so confirm dryness across different wall texture areas. Aim for a full drying window rather than spot checks.
- Small rooms with good airflow: 2–4 hours.
- High humidity or heavy texture: 24–48 hours.
- Latex over cleaned oil residues: 48 hours or more.
Use a moisture meter or touch test in shaded spots. If you rush, poor paint adhesion and bubbling can follow; patience ensures a lasting finish.
When Sanding Beats Washing
If you’ve already waited for walls to dry after washing, there are times when sanding is the smarter move instead of another round of cleaning.
You’ll choose sanding when surface imperfections, loose flakes, or paint peeling are obvious—washing won’t remove stubborn edges or smooth rough patches.
For textured surfaces, be careful: aggressive sanding can alter wall textures, so use a light hand or sanding sponge to blend without flattening the pattern.
Sand to feather edges, create mechanical tooth for primer, and remove loose material.
After sanding, dust thoroughly before priming or painting so your finish adheres and looks even.
Spot‑Cleaning vs. Full‑Room Washing: Which to Choose?
Wondering whether to spot-clean or wash the whole room? You’ll choose based on dirt level, wall texture, and desired paint sheen.
Spot-clean when marks are isolated and surface is fairly clean; it saves time and won’t disturb existing sheen.
Wash the full room if stains are widespread, odors persist, or you need uniform adhesion for a new finish.
- Spot-clean: targeted, quick, preserves subtle texture.
- Full wash: guarantees consistent paint sheen and adhesion.
- Hybrid: wash high-contact zones, spot-clean the rest.
Assess visibility and prep needs, then pick the method that matches your goals.
Handling Lead Paint and Old Finishes Safely
If your home was built before 1978, you should test for lead paint before you start washing or sanding.
If tests are positive, follow EPA-safe removal methods or hire a certified contractor to avoid spreading hazardous dust.
Don’t try aggressive scraping or power sanding yourself, since that can create dangerous airborne particles.
Lead Paint Testing
Because homes built before 1978 often have lead-based paint, you should test surfaces before sanding, scraping, or painting to protect yourself and others. You’ll limit exposure and guarantee proper preparation because lead paint can affect health and paint adhesion.
Use certified test kits or hire a certified inspector to confirm hazards quickly.
- Use EPA-recognized kits for initial screening.
- Hire a certified inspector for thorough sampling and lab analysis.
- Get clearance testing after any disturbance to confirm cleanup.
Follow local regulations, wear PPE during sampling, and don’t assume old finishes are safe without testing.
Safe Paint Removal
When removing old paint—especially on homes built before 1978—you’ll want to treat the work as potentially hazardous and follow strict controls. You should test for lead, isolate the area, use HEPA vacuums, and avoid sanding without containment. Protect wall texture, note paint sheen for matching, and consider chemical strippers or wet scraping to minimize dust. Hire certified professionals for extensive contamination or if pregnant occupants are present.
| Task | Tools | Risk |
|---|---|---|
| Testing | Lead kit | Low |
| Containment | Plastic, tape | Medium |
| Removal | Wet methods | Lower |
| Cleanup | HEPA vacuum | Low |
| Disposal | Sealed bags | Medium |
Common Cleaning Mistakes That Damage Walls
Though you want your walls spotless before painting, a few common cleaning mistakes can actually cause damage instead of helping. You might scrub too hard and strip delicate wall textures or dull the paint sheen. You may saturate drywall, causing swelling or soft spots. Or you could use harsh chemicals that eat finishes and leave residues.
- Over-scrubbing: wears texture, exposes base layers.
- Excess water: soaks drywall, weakens joints.
- Wrong cleaners: remove sheen, leave stains.
Work gently, test a small area, and choose mild cleaners to protect surfaces and finish.
How Cleaning Affects Primer and Paint Choice
If your cleaning leaves behind stains, soap residue, or patches of bare drywall, you’ll need a different primer and paint than for a perfectly clean surface. You should choose a stain-blocking primer for tannin or grease, and a bonding primer where residue prevents adhesion.
Sand or skim patched drywall before priming to match wall texture so the finish looks uniform. When residue is fully removed, you can select standard acrylic primer.
Also, pick paint sheen based on room use and hiding power: eggshell or satin hides minor imperfections, while flat conceals better but cleans poorly. Match primer to paint type for best durability.
Cleaning and Priming High‑Gloss Walls
High‑gloss walls demand a different prep than flatter finishes because their slick surface shows every mark and resists coatings more than eggshell or satin. You’ll need to clean thoroughly, sand lightly to scuff, and use a bonding primer so new paint adheres.
Consider color matching if you’re touching up trim or repairing patches; gloss reflects light, altering perceived hue and paint sheen. Follow these focused steps:
- Degrease with TSP substitute, rinse, dry.
- Scuff with fine sandpaper, remove dust.
- Apply high‑adhesion primer, feather edges for smooth progressions.
Let primer cure fully before recoating.
Fast Methods for Large Rooms and Exterior Walls
When you’re tackling large rooms or exterior walls, speed comes from planning: section the area, pick tools that cover more ground (rollers with extension poles, airless sprayers for exteriors), and use fast‑drying primer and paint so you can move through coats without long waits.
Prioritize surface prep: sweep or rinse to remove loose dirt, then spot-treat stains.
Match technique to wall textures—smooth walls roll fast, textured surfaces may need thicker nap or spray.
Work systematically from top down and keep wet edges.
Choose products for paint durability outdoors, and schedule jobs by weather and curing times.
Deep‑Clean Checklist for Rental Turnovers
Before you start scrubbing, walk the unit and assess wall conditions so you know what needs repair or extra attention.
Remove fixtures and hardware so you can clean edges and avoid damage.
Focus on high‑traffic stains like scuffs and kitchen splatters to make the space tenant‑ready.
Prep: Assess Wall Conditions
Although you can’t fix every issue with a scrub and a paintbrush, take a close walk‑through to identify stains, scuffs, holes, peeling paint, mold, or water damage so you know what needs deep cleaning, patching, or replacement before you paint.
You’ll check Wall texture and note how Paint sheen will read after cleaning. Prioritize repairs, plan cleaning methods, and choose primers accordingly.
Follow this quick checklist:
- Note damage type and size; flag mold/water for remediation.
- Test a small wash to assess grime removal and texture changes.
- Record areas needing filler or sanding before priming and painting.
Remove Fixtures And Hardware
If you want a smooth, professional finish and to avoid trapped grime or paint blobs, start by removing light fixtures, outlet covers, switch plates, curtain rods, and any removable hardware so you can clean and paint unobstructed.
Do fixture removal carefully: turn off power, label small parts, and keep screws in marked bags. Removing hardware exposes edges and reveals dirt that hides in crevices and behind plates.
That’s essential for textured surfaces—different wall textures hold dust and grease differently, so cleaning after fixture removal guarantees paint adheres evenly.
Reinstall hardware only after paint cures to prevent smudges.
Target High‑Traffic Stains
Where did the grime build up? You’ll focus on door frames, hallways, and the kitchen splash zone first. Target high‑traffic stains to protect wall insulation and boost paint durability before touchups. Clean methodically:
- Wipe greasy areas with degreaser, rinse, and dry.
- Treat scuffs with a melamine sponge, testing hidden spots.
- Spot‑prime stubborn stains to block bleed‑through.
Work top to bottom, using minimal water to avoid soaking drywall and compromising insulation. Let surfaces fully dry before priming or painting. That sequence saves time, guarantees even coverage, and prevents stains from reappearing after fresh coats.
Estimated Cost: DIY Wash vs. Hiring a Pro
1. When estimating costs, consider wall texture and paint sheen since rough surfaces and high-gloss finishes need more prep and materials.
Doing it yourself saves labor—you’ll spend on cleaners, sponges, trisodium phosphate alternatives, ladders, and time. Expect $20–$75 for supplies for an average room and an afternoon of work.
Hiring a pro costs more but buys speed and consistency: expect $100–$300 per room for a basic wash, more for heavily soiled or textured walls.
Factor in convenience, warranty, and risk of damage if you’re inexperienced. Compare quotes and weigh time versus expense before deciding.
When to Call a Professional Cleaner or Painter
Although you can handle light cleaning yourself, call a pro when dirt, stains, or damage go beyond what household cleaners and a sponge can fix. You should hire someone if you’re unsure how to protect outdoor plants during pressure washing, if stains penetrate paint, or if repairs exceed basic patching.
Handle light cleaning yourself, but call a pro when stains, paint penetration, or repairs exceed basic cleaning and patching.
A pro assesses wall texture, structural issues, and paint adhesion, then advises on stripping, priming, or repainting. Consider these triggers:
- Extensive mold, smoke, or oil stains covering large areas.
- Significant peeling, cracking, or substrate damage.
- Complex wall texture or hard‑to‑reach surfaces needing specialist equipment.
Eco‑Friendly Cleaners and Disposal Tips
When you want a clean surface without harming your home or the environment, choose biodegradable cleaners and simple DIY mixes like vinegar, baking soda, and castile soap. They cut grease and mildew, rinse easily, and avoid harsh fumes.
Pick Eco friendly options labeled biodegradable and phosphate-free, or dilute castile soap for painted surfaces. Test a hidden spot first.
Wear gloves and ventilate while scrubbing.
For Disposal guidelines, never pour concentrated cleaner down drains; dilute rinsewater and dispose of it with regular wastewater when local rules allow. Collect solid residue and dry paint chips, then follow municipal hazardous-waste instructions.
Real Results: What Happens If You Skip Washing
If you skip washing your walls, paint adhesion suffers and flaws you didn’t notice will shout out after the job’s done. You’ll see dirt bleed through, uneven coverage across different wall textures, and reduced paint sheen where oils or grime repel new coats. You’ll end up sanding, spot-priming, or repainting sooner than expected.
- Visible defects: stains, fingerprints, and scuffs become prominent.
- Texture mismatch: rough areas hold contaminants that stop paint from bonding.
- Finish inconsistency: glossy or satin sheens highlight unclean patches.
Skipping cleaning costs time and money; wash first to avoid redo work.
Quick Pre‑Paint Cleaning Checklist for Touch‑Ups
Because touch-ups are meant to be fast, focus on a short, targeted cleaning routine that gets paint to stick without overdoing it. Start by wiping the repair area with a damp microfiber cloth to remove dust and fingerprints.
For greasy spots use a mild degreaser, then rinse and dry. Lightly sand rough edges so the wall texture blends; wipe away dust again.
Test a small swab to check color contrast once dry. Remove loose paint flakes and vacuum nearby trim.
Keep supplies handy: cloths, mild cleaner, fine sandpaper, vacuum, touch-up paint and a small brush for quick, precise work.
How to Document Wall Condition Before Painting
Before you start painting, document the wall’s condition so you have a clear record of existing damage, stains, and repairs. Walk the room and photograph each wall from several angles, capturing close-ups of chips, cracks, and stains.
Note wall texture and any variations in paint sheen. Record locations needing patching, sanding, or priming, and date each entry.
Create a short checklist:
- Photos labeled by wall and problem
- Written notes: texture, sheen, measurements
- Repairs required and materials planned
Keep this file with receipts and contractor notes so you can compare after cleaning and finishing.
Troubleshooting Paint Problems After Cleaning
Now that you’ve documented the wall’s condition and finished cleaning, you may still encounter paint issues—blotchy coverage, adhesion failures, or visible stains—that require quick diagnosis.
First, test a small area: poor adhesion often means residue or incompatible primer; sand, re-clean, and apply a suitable primer.
Test a small patch first—poor adhesion usually signals residue or wrong primer; sand, clean, and prime correctly.
Blotchy coverage can come from uneven porosity—use primer-sealer and adjust roller nap for consistent paint textures.
For stains that bleed through, use stain-blocking primer.
If you plan wall murals, confirm underlying repairs are smooth and primed to avoid telegraphing.
Re-test before full application to guarantee success.
Frequently Asked Questions
Can Washing Walls Remove Nicotine Stains Completely?
No, washing walls won’t always remove nicotine stains completely; you’ll need aggressive nicotine removal and specific wall cleaning techniques like trisodium phosphate, degreasers, or primer-sealing to fully eliminate stains before repainting or restoring surfaces.
Will Washing Cause Wallpaper Adhesive to Fail?
Like a slow unraveling thread, yes — soaking can loosen adhesive and prompt wallpaper removal. You’ll avoid that by using minimal water, gentle cleaners, and targeted spot cleaning so paint adhesion isn’t compromised.
How Do I Dry Walls Quickly in Humid Climates?
You’ll speed drying with wall drying techniques: use high‑capacity fans, dehumidifiers, and air movers, open windows for cross‑ventilation, heat slightly, and run moisture meters. These humidity control methods prevent mold and accelerate paint readiness.
Are Steam Cleaners Safe on Painted Surfaces?
Yes — but cautiously: like a careful chef testing heat, you’ll use low steam and gentle passes. Follow wall cleaning techniques, test a hidden spot first, and wear safety precautions to avoid paint blistering or surface damage.
Can I Use Bleach on Colored Walls?
You can, but you shouldn’t use straight bleach on colored walls because it can fade paint; dilute bleach for mild wall cleaning, test a hidden spot first, and use alternatives for delicate stain removal like oxygen bleach or mild detergent.
Conclusion
You’ve probably heard you must always wash before painting — but the truth is more useful: sometimes cleaning really matters, sometimes spot‑treating’s enough, and sometimes you can paint as‑is. Trust what you see and test: greasy, dirty, or chalky walls need washing; smooth, clean surfaces don’t. That revelation should calm and empower you — now you’re not stuck doing needless work, just doing the right prep so your paint job actually lasts and looks great.