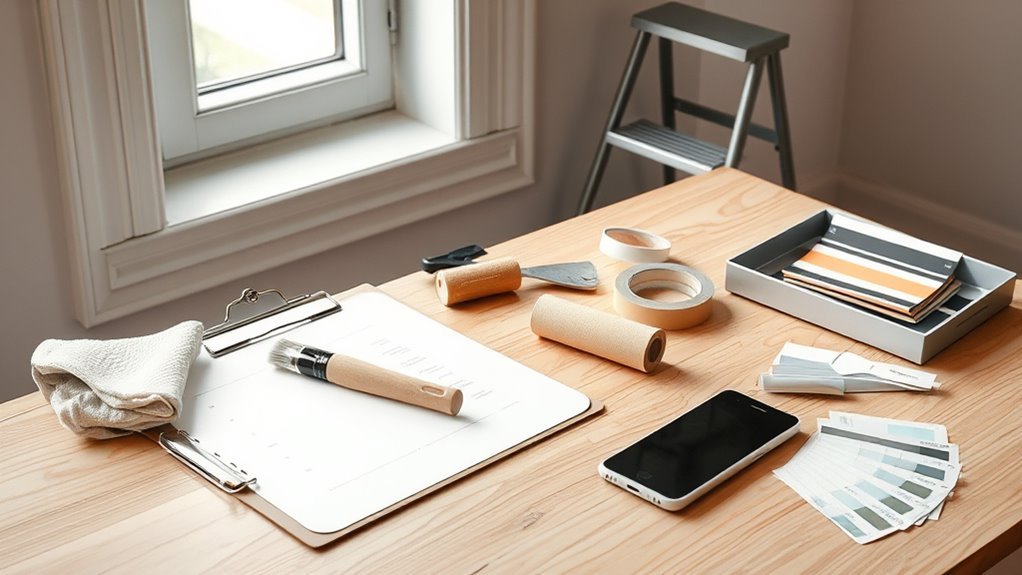
What Do I Need to Paint My Walls? Complete Checklist
You’ll need paint (choose latex or oil and a finish like eggshell or semi-gloss), primer for repairs or stains, rollers and covers (match nap to texture), angled brushes for cutting in, painter’s tape, drop cloths, sandpaper, spackle and putty knives, a paint tray and stirrer, plus cleaning supplies and gloves, masks, and goggles. Plan sections, test colors in different light, and prep surfaces thoroughly; keep a checklist handy so you won’t run back to the store and to learn smart tips for each step.
How to Use This Painting Checklist
Start by scanning the checklist to get a quick sense of tasks and supplies, then work top to bottom so you don’t miss steps. You’ll mark items you already have, group tools by task, and prioritize must-haves versus nice-to-haves.
That checklist organization reduces backtracking and boosts painting efficiency. As you prep, tick off stages—surface repair, priming, cutting in, rolling, cleanup—so you stay focused and on schedule.
Use a phone photo of completed items for reference and adjust quantities based on room size. Keep the list accessible during the job to avoid pauses and unnecessary trips to the store.
Quick Printable Painting Checklist
Grab this quick printable checklist so you can make sure you’ve got all the essential painting supplies—rollers, brushes, paint, trays, and tape—before you start.
It also lists prep and cleanup items like drop cloths, sandpaper, spackle, gloves, and garbage bags so nothing gets missed.
Keep the sheet handy during the job to stay organized and finish faster.
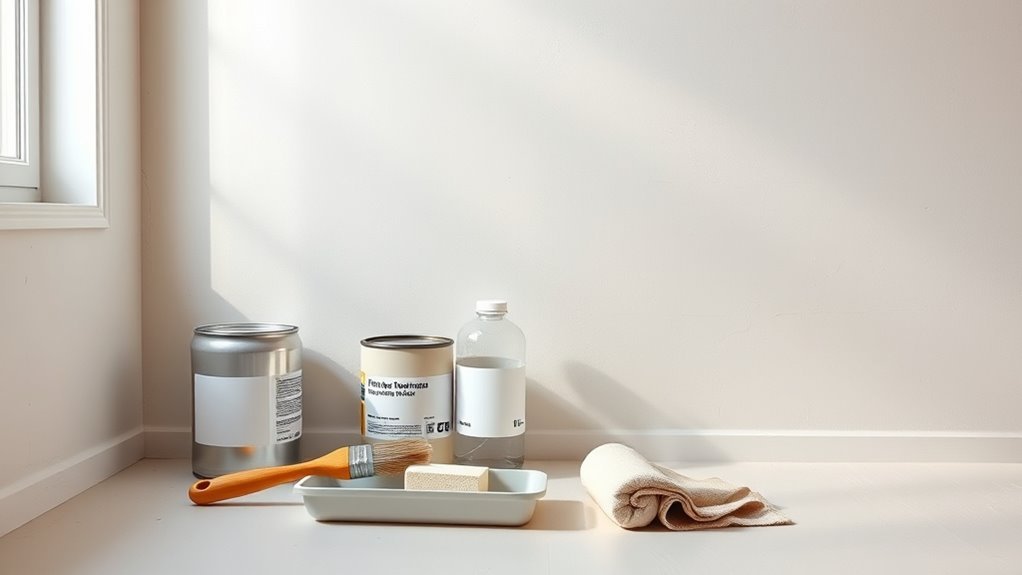
Essential Painting Supplies
Before you open a can of paint, gather a compact set of essentials so the job goes smoothly: select your paint color and note wall textures to choose proper tools.
You’ll need rollers (different naps for smooth vs. textured surfaces), angled brushes for edges, a roller tray, extension pole, and a sturdy ladder.
Include painter’s tape, a paint stirrer, and quality drop cloths. Have a small bucket for mixing and a paint can opener.
Opt for a brush comb, sanding block for minor fixes, and replacement roller covers. Keep a damp rag handy for quick smudges and drips.
Prep And Cleanup Items
Because a tidy workspace keeps your paint job looking professional and your floors intact, prep and cleanup items should be on your checklist before you open a can.
Gather drop cloths, painter’s tape, sandpaper, spackle, putty knives, and a vacuum for surface preparation.
Have rags, buckets, mild detergent, and a scrub brush for cleanup techniques.
Keep used brushes and rollers in sealable plastic to prevent drying, and label cans for storage solutions.
Don’t forget gloves, goggles, and masks as safety precautions.
Plan disposal of rags and rinse water responsibly.
A bit of prep saves time and prevents damage.
Plan Your Project: Scope, Timeline, and Budget
Once you decide which rooms to paint, set a clear scope, timeline, and budget so the job stays manageable and on track.
Define project goals: which walls, finish level, and any repairs. Break tasks into phases and allow timeline flexibility for drying, supply delays, or touch-ups.
List budget considerations: paint quantity, primer, tools, tape, and unexpected expenses.
Plan resource allocation—who paints, when, and what you’ll hire out. Schedule work around furniture moving and daily routines.
Track progress and costs so you can adjust scope or schedule quickly without compromising quality or overspending.
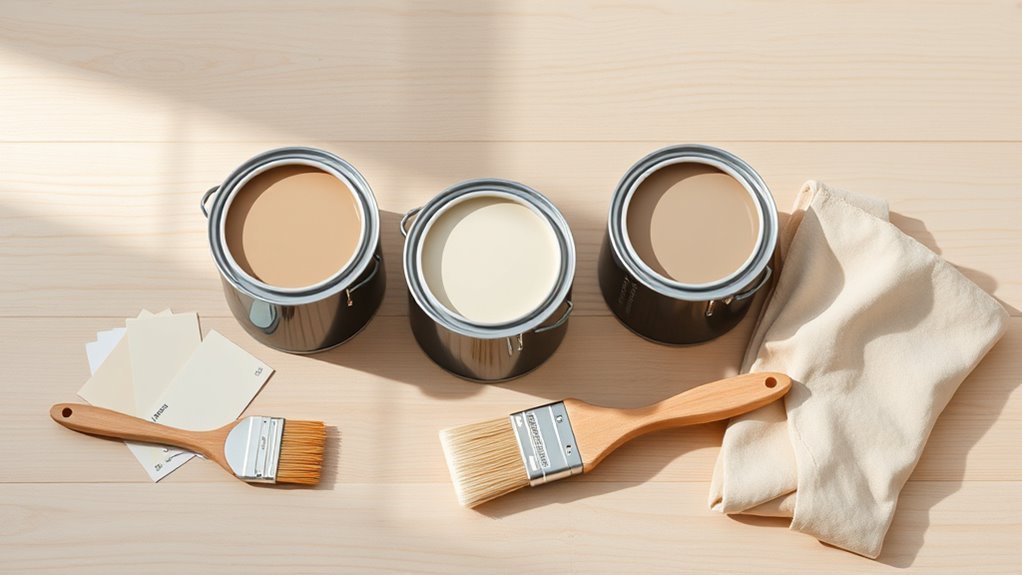
What Type of Paint Do You Need for Interior Walls?
Now that you’ve set the scope, timeline, and budget, pick the right paint to match your goals and room conditions.
Decide between water-based (latex) and oil-based for durability, dry time, and cleanup.
Pick water-based (latex) or oil-based paint based on durability, drying time, and ease of cleanup.
Consider finishes: flat or matte hides flaws, eggshell and satin suit living areas, semi-gloss or gloss works for trim and high-moisture spots.
Factor room use, traffic, and ventilation when choosing low-VOC or fast-dry formulas.
Test paint types on small patches to judge appearance and wear.
Finalize color selection with swatches in different light, then buy enough gallons plus a bit extra for touch-ups.
When to Use Primer and Which Kind to Buy
Primer matters whenever the surface will affect paint adhesion, hide stains, or require uniform coverage. You’ll choose primer types based on substrate and goals: oil-based for raw wood or stains, latex for drywall, bonding primers for slick surfaces, and shellac for severe stains. Consider primer applications: sealing new drywall, covering smoke or water marks, or priming glossy finishes before repainting. Match primer to paint (water-based paint with latex primer). Use stain-blocking or high-adhesion formulas as needed.
| Surface | Recommended Primer |
|---|---|
| New drywall | Latex primer |
| Stained walls | Shellac or oil |
| Glossy surfaces | Bonding primer |
| Raw wood | Oil-based |
| Water damage | Stain-blocking primer |
How Many Gallons of Paint Do I Need for a Room?
Wondering how much paint you’ll actually need for a room? Start by measuring room dimensions—length, width, and wall height—to get total wall square footage.
Subtract areas for windows and doors. Use paint coverage calculations from the can (usually 350–400 sq ft per gallon) to divide total paintable area by coverage.
Factor in one or two coats and the condition of surfaces; rough or unprimed walls absorb more. Round up to avoid running short. Keep a small extra amount for touch-ups.
If you’re painting trim or ceilings, calculate those areas separately to choose the right quantities.
Which Paint Finish Is Right for Each Room?
Because different rooms face different demands, pick a finish that balances appearance and durability for each space. You’ll match paint finish to room types by weighing sheen levels against durability needs and maintenance requirements.
Use flat or matte where you want minimal light reflection and soft texture options in bedrooms and ceilings. Eggshell or satin work well in living areas — they hide imperfections while suiting many aesthetic choices and style preferences.
Semi-gloss or gloss handle bathrooms and kitchens because they resist moisture and clean easily. Always consider color compatibility with sheen and light reflection to keep finishes cohesive across rooms.
Top Paint Brands Worth Splurging On
Which brands should you consider when quality matters most? When you’re after flawless coverage, durability, and color fidelity, premium paint options like Benjamin Moore and Farrow & Ball deliver exceptional results.
You’ll pay more, but the richer pigments, smoother application, and lasting finish justify it in high-use rooms and feature walls.
Other luxury paint brands—Sherwin-Williams’ high-end lines and Clare’s designer palettes—offer professional-grade formulas and curated hues.
Choose based on color depth, VOC levels, and finish uniformity. Test samples on your wall, evaluate drying behavior, and pick the brand that gives the coverage and longevity you expect.
Budget-Friendly Paint Options That Still Perform
You don’t have to break the bank to get paint that holds up—affordable latex options offer easy cleanup and decent coverage for most walls.
If you need something with a bit more durability and quicker drying, budget-friendly acrylic paints are a smart pick.
Compare coverage, finish, and VOC levels to choose the best value for your project.
Affordable Latex Options
If you’re working with a tight budget, affordable latex paints give you good coverage, durability, and easy cleanup without breaking the bank. You’ll find affordable colors and low cost finishes that still resist stains and hold up in high-traffic rooms. Choose eggshell for living areas or satin for kitchens. Test samples on your wall, check hiding power, and prioritize water-based formulas for easy soap-and-water cleanup. Compare warranties and VOC levels before buying.
| Brand | Finish | Coverage |
|---|---|---|
| Brand A | Eggshell | 350 sq ft/gal |
| Brand B | Satin | 300 sq ft/gal |
| Brand C | Flat | 325 sq ft/gal |
Budget-Friendly Acrylic
When you want a step up from basic latex without blowing your budget, budget-friendly acrylics give stronger adhesion and better color retention while still costing less than premium lines.
You’ll get acrylic advantages like faster drying, mildew resistance, and easier cleaning, which makes them ideal for high-traffic rooms.
Look for budget-friendly brands with good reviews on coverage and VOC levels. Test a sample on your wall to check sheen and true color under your lighting.
Apply with proper prep—cleaning, patching, and priming—so the paint performs like a more expensive option and lasts longer.
Essential Brushes: Types and When to Use Them
Choosing the right brush cuts your work time and improves finish quality, so you’ll want a small toolkit that covers edges, flat areas, and detail work.
Pick brush types for trim, sash, and broad cuts; match brush sizes to the task. Consider brush materials—synthetic for latex, natural for oil—and pick reliable brush brands and comfortable brush handles.
Learn basic brush techniques for crisp lines, feathering, and smooth fills.
Practice brush care and regular brush maintenance: clean promptly, reshape bristles, and store flat or hanging.
With proper selection and upkeep, your brushes’ll deliver consistent, professional results.
Rollers and Roller Covers: Sizes and Naps to Choose
You’ll pick roller sizes based on the area you’re painting—wide rollers for large walls and narrow ones for trim or tight spots.
Choose nap length for the surface texture: short naps for smooth walls and longer naps for textured or rough surfaces.
Matching size and nap to your job will save time and improve finish.
Roller Sizes Overview
Because the right roller makes coverage faster and finish smoother, pick sizes and naps that match the surface and paint type. You’ll choose between mini (4–6″), standard (9″), and specialty widths to suit trim, walls, and textured areas.
Consider roller material options for the paint you’re using and plan your roller application techniques to reduce splatter and guarantee even coats. Match handle length to reach and control.
Visualize these scenarios:
- 4″ mini for tight corners and cabinets.
- 6″ for small patches and trim-adjacent spots.
- 9″ for most walls and ceilings.
- 18″ for high-production or large, flat expanses.
Nap Length Guide
After picking the right roller width, the next decision is nap length—it’s what decides how smoothly paint lays down and how well the roller holds and releases paint.
You’ll choose short naps (1/4″) for smooth surfaces like plaster or gloss, medium naps (3/8″–1/2″) for lightly textured drywall, and long naps (3/4″–1″) for rough surfaces like stucco or textured walls.
A synthetic roller cover suits latex; natural fibers work with oil-based paints.
Match nap length to surface texture to avoid streaks or excess splatter.
Use this nap length guide to pick the right roller cover for consistent, efficient coverage.
Paint Trays, Liners, and Tray Alternatives
One reliable paint tray can speed up your work and cut cleanup time, especially when you use disposable liners or simple alternatives.
You’ll pick from paint tray options like sturdy multi use trays or low-cost disposable trays; tray liners save rinse time.
Consider eco friendly alternatives—silicone trays, washable trays, or recycled cardboard liners—to balance budget considerations and waste.
Consider eco-friendly paint tray choices—silicone, washable, or recycled liners—to save money and reduce waste.
Organizing supplies near your station keeps rollers and brushes tidy.
Efficiency tips: pour small amounts, swap liners between colors, and store trays upright to dry.
Picture these setups:
- Silicone tray with drain
- Cardboard disposable tray
- Reusable plastic tray
- Tray turned tool caddy
Extension Poles and Ladders for Safe Access
Grab the right extension pole or ladder and you’ll reach high walls safely and work more efficiently. Choose extension poles with secure roller or brush attachments to avoid leaning; telescoping poles save space and adjust height fast.
Pick ladder types—step, extension, or multi-position—to match ceiling height and task. Inspect locks, feet, and rungs before use; wear non-slip shoes and keep three points of contact as basic safety measures.
Position ladders on stable ground and don’t overreach—move the ladder or shorten the pole instead. Store poles and ladders dry and clean to prolong life and reliability.
Drop Cloths and Masking to Protect Floors and Furniture
Cover the floor and furniture before you open a can of paint so drips and splatters won’t turn into hours of cleanup.
You’ll choose drop cloths types for the job—canvas for reusability, plastic for budget, paper for smooth floors, and rosin-coated for traction.
Masking tape and plastic sheeting secure edges, while taped seams stop seepage.
For furniture protection, wrap legs and cushions, remove hardware, and move delicate items out.
Keep a small brush and sponge handy for immediate touchups.
Proper masking saves time and prevents stains, so don’t skip measuring coverage and fastening edges tightly.
- Canvas pile
- Plastic roll
- Kraft paper
- Taped seams
Temporary Covers and Drop Cloth Alternatives for Small Jobs
For small touch-ups or quick paint jobs, you don’t need a full canvas drop cloth—several temporary covers and household alternatives will protect floors and furniture while saving space and money.
Use plastic sheeting, old bedsheets, garbage bags, or folded newspapers as temporary covers. Place cardboard under ladders and tape seams with painter-friendly tape to reduce trips.
Use plastic sheeting, old sheets, trash bags, or newspapers; tape seams and put cardboard under ladders for protection.
For furniture, wrap legs with plastic or move pieces to center of room and cover with a sheet. These drop cloth alternatives are ideal small job solutions when you want fast setup and quick cleanup.
Keep a small hand broom and disposable wipes handy for final touch-ups.
Painter’s Tape Types and How to Use Them Cleanly
Pick the right painter’s tape for the surface and paint type to get crisp lines and easy removal—use delicate-surface tape for wallpaper and freshly painted surfaces, multi-surface tape for general use, and high-adhesion tape for rough exterior trim.
Choose tape based on tape adhesion and planned tape removal timing: lower tack for delicate finishes, stronger for textured areas. Apply smoothly, pressing edges to prevent bleed. Remove at a 45° angle while paint is tacky or fully dry per manufacturer guidance.
- Clean, dry edge.
- Smooth with a credit card.
- Paint, avoid heavy buildup.
- Pull slowly for clean lines.
Sandpaper and Sanding Blocks: Grits and Uses
You’ll want to know what grit numbers mean so you can pick the right paper for stripping, smoothing, or feathering edges.
Choose between aluminum oxide, garnet, or foam-backed sanding blocks based on the surface and how aggressive you need to be.
Use coarse grits to remove material, medium to shape, and fine grits to finish for a truly smooth paint-ready surface.
Grit Numbers Explained
Grit numbers tell you how coarse or fine a sandpaper or sanding block is, and choosing the right grit makes the difference between a smooth finish and visible scratches.
You’ll learn grit types and sanding techniques by matching grit to the task: heavy removal, smoothing joints, prepping for primer, or fine finishing. Start coarse, progress finer, and keep pressure even to avoid gouges.
- 40–60: remove old paint or shape wood.
- 80–120: smooth rough patches and seams.
- 150–220: prep for primer and skim coats.
- 320+: final buffing for ultra-smooth surfaces.
Choosing Sandpaper Types
When selecting sandpaper types, consider the material you’re sanding and the finish you want: aluminum oxide works well for general-purpose sanding on wood and painted surfaces, silicon carbide excels on metal and plastic, and garnet gives a fine, controlled cut on raw wood.
Choose open- or closed-coat depending on clogging risk, and pick grit ranges based on tasks: coarse for stripping, medium for shaping, fine for prepping.
Match sandpaper grades to project stages and use sanding blocks for even pressure.
Follow manufacturer recommendations and keep replacement sheets handy to maintain consistent sanding techniques and results.
Techniques For Smoothness
Because smooth walls start with the right touch, match sandpaper grit and sanding-block technique to each stage: you’ll prep, refine, and finish so paint, brush techniques, and roller methods look flawless.
Visualize each pass:
- Coarse 60–80 grit on a block for heavy burrs and old paint—press firmly, remove peaks.
- Medium 100–150 grit to level patches—use even strokes, keep block flat.
- Fine 180–220 grit to feather edges—light, circular motions for uniform texture.
- Extra-fine 320+ for final smoothing before priming—wipe dust, inspect under raking light.
Change direction between grits; don’t oversand.
Spackle, Joint Compound, and Patching Supplies
Patch small holes and smooth damaged drywall with the right patching supplies: spackle for nail holes and minor dents, and joint compound for larger repairs and seamless finishing.
You’ll choose spackle types—lightweight for quick fixes, vinyl for durability—and learn joint compound techniques like feathering and multiple thin coats.
Use patching methods suited to hole size: mesh patches for medium holes, full drywall patches for big damage.
Essential repair tools include a putty knife set, sanding block, hawk, and mud pan.
Work cleanly, let compound dry fully, and sand between coats so paint adheres evenly.
Caulk and Sealants for Gaps and Trim Seams
If gaps around trim, baseboards, or window casings let drafts, moisture, or paint lines show through, caulk and sealants are the quick fix that makes joints look finished and holds out air and water.
You’ll choose caulk types (acrylic latex for paintable indoor work, silicone for moisture-prone areas) and follow basic sealant application steps: cut tip, steady bead, smooth with wet finger or tool.
Work in small sections, wipe excess, and let cure per label.
Visualize the result:
- Narrow gap along baseboard filled cleanly.
- Window seam sealed against rain.
- Trim joint gone.
- Smooth paint-ready edge.
Putty Knives, Scrapers, and Rust Removers You’ll Need
You’ll want a few different putty knives—narrow for tight spots and wide for smoothing large areas—so you can apply and feather filler cleanly.
Use rigid and flexible scrapers to strip old paint or remove loose material without gouging the surface.
For metal fixtures and fasteners, pick a wire brush, sandpaper, or a chemical rust remover to get a clean, paint-ready finish.
Essential Putty Knife Types
Tools matter when you want smooth, paint-ready walls, and putty knives, scrapers, and rust removers are the small but essential implements you’ll rely on most.
Know putty knife types and putty knife uses so you pick the right blade for each job. Flexible knives spread compound smoothly; stiff knives scrape stubborn paint; tapered knives get into corners; and wide blades level large patches.
You’ll switch between them as defects demand precision.
- Flexible 2–3″ blade for smoothing joint compound.
- Stiff 1–2″ for scraping loose paint.
- Tapered 4″ corner blade.
- Wide 6–8″ finishing knife for large repairs.
Effective Rust Removal Tools
Rust is a common nuisance on metal trim, fasteners, and old tools, and removing it properly keeps surfaces paint-ready and durable.
You’ll want a selection of putty knives and stiff scrapers to chip loose scale without gouging surrounding metal. Use wire brushes and a rotary wire wheel for stubborn rust, keeping firm, even pressure.
Apply chemical rust removers or convertors as directed to neutralize corrosion; these rust treatment solutions save time on pitted areas.
Finish with rust prevention methods: clean, prime, and coat with rust-inhibiting primer. Replace badly damaged fasteners for lasting results.
Paint Stirrers, Strainers, and Mixing Tips
Because paint separates and solids settle quickly, you should always stir and strain before you pour—this keeps color consistent and prevents clogs.
Because paint settles, always stir and strain before pouring to maintain color consistency and prevent clogs.
Use proper paint mixing techniques: long, slow strokes with a flat wooden stirrer or drill-mounted paddle to fully reincorporate pigments and binders.
Then run paint through disposable paint strainers into your roller tray or pour pot to catch skin and lumps.
- Wooden stirrer: scrape sides, lift settled pigment.
- Drill paddle: fast, thorough for large cans.
- Disposable strainer: catches skins and debris.
- Funnel strainer: precise pouring without spills.
Buckets, Pails, and Paint Can Openers That Help
Buckets and pails give you a stable, spill-resistant way to transport and mix paint on the job, and a good can opener saves time and protects lids for resealing.
Choose buckets types by capacity and material: lightweight plastic for small jobs, metal for durability, and tapered liners for easy cleanup.
Use a 5-gallon bucket with a grid when rolling large walls, and smaller pails for touch-ups.
Keep a magnetic hook or lip for brushes and a pour spout to reduce drips.
For lids, carry reliable paint can openers that pry without bending cans so you can reseal airtight.
Respirators, Masks, and Ventilation for Paint Safety
When you’re cutting in or sanding before painting, proper respirators, masks, and ventilation keep you safe from inhaling fumes and dust. You’ll choose based on paint type, solvent level, and task duration.
Know respirator types (disposable N95, half-mask with cartridges, or powered units) and their protection limits. Mask benefits include filtering particulates and reducing VOC exposure when combined with correct cartridges.
Always create airflow: open windows, run box or window fans, and use an exhaust fan for continuous exchange. Replace filters often and test fit seals so contaminated air won’t bypass your protection.
Create steady airflow—open windows, run fans, exhaust continuously; change filters and check seals to keep air clean.
- N95 for dust
- Cartridge for solvents
- PAPR for long jobs
- Fans for airflow
Gloves, Eyewear, and Clothing to Protect You
You’ll want the right gloves, eyewear, and clothing to keep paint and chemicals off your skin and out of your eyes.
Choose glove materials (nitrile, latex, or neoprene) based on the paint and solvents you’re using, pick safety glasses or goggles that seal against splashes, and wear layered, washable clothing you don’t mind ruining.
Proper selection and fit make cleanup easier and reduce the chance of irritation or injury.
Protective Gloves Types
Picking the right protective gloves, eyewear, and clothing keeps you safe and makes painting quicker and cleaner.
You’ll choose gloves based on solvent exposure, temperature, grip, and reuse. Latex gloves fit snug but aren’t chemical resistant; nitrile gloves resist solvents and punctures; vinyl gloves work for low-risk tasks.
Disposable gloves suit short jobs; reusable gloves handle heavier work. For textured surfaces pick textured gloves for grip; for cold spaces choose insulated gloves.
Consider chemical resistant gloves when using strong strippers or cleaners.
Visualize options:
- thin nitrile disposable
- thick reusable chemical resistant
- textured insulated pair
- vinyl backup pack
Safety Eyewear Options
Because paint chips, splatter, and chemical fumes can all harm your eyes, choosing the right safety eyewear is essential before you start any job.
You should pick from safety eyewear styles such as goggles, safety glasses, and face shields based on task and fit. Look for lens protection types like polycarbonate for impact resistance and anti‑fog or UV coatings for visibility and comfort.
Guarantee side protection and a snug seal when sanding or using solvents. Inspect for scratches and replace damaged lenses. Fit straps or adjustable temples prevent slippage.
Clean lenses after each use and store eyewear in a case.
Clothing And Layering
One simple rule: layer your clothing so you can adapt to spills, splatters, and temperature changes without exposing skin.
You’ll wear paint clothing that you don’t mind ruining, breathable base layers, and a washable outer layer. Use proper gloves and safety eyewear tucked under a hood or cap.
Practice layering techniques to trap warmth or shed heat quickly, keeping sleeves tight at the wrist to avoid drips.
- Cotton tee under disposable coveralls for quick changes.
- Long-sleeve shirt with elastic cuffs to block splatters.
- Nitrile gloves under work gloves for grip and protection.
- Cap or hood to shield hair and goggles.
Cleaning Supplies for Brushes and Rollers
When you finish a painting session, having the right cleaning supplies makes brush and roller care quick and effective. You’ll need containers for rinsing, mild detergent or brush cleaner for water-based paints, and solvent (mineral spirits) for oil-based paints.
Add a wire comb or brush spinner to remove trapped paint, plus disposable gloves and rags. For roller maintenance, use a roller cleaner or a firm brush to spin out excess paint, then rinse thoroughly.
Store tools dry and reshaped—wrap brushes in paper, stand rollers on end. Proper cleaning extends tool life and guarantees better results next time.
Trash Disposal, Odor Control, and Cleanup Checklist
When you finish painting, seal used rags, empty cans, and masking waste in sturdy trash bags to prevent spills and accidental fires.
Keep windows open and run fans or an air purifier to clear fumes quickly and control odors.
Use a simple cleanup checklist—bag waste, wash tools, ventilate for several hours—to make sure nothing hazardous gets left behind.
Trash Bag Disposal
Before you haul anything out, seal paint-soaked rags and used rollers in heavy-duty trash bags to prevent leaks and fumes from spreading; double-bag items that are damp or solvent-soaked and tie them tightly.
Choose trash bag types rated for puncture and chemical resistance, and check local disposal methods — some communities treat paint waste as hazardous.
Label bags if required and keep them outside in a shaded, secure spot until pickup.
- Thick black contractor bag bulging with rollers
- Clear labeled bag showing sealed cans
- Small tied pouch of tack cloths
- Covered bin awaiting collection
Ventilation And Odor-Control
Although you’re wrapping up trash and sealing used materials, you still need to clear the air: open windows and doors, run fans to push fumes outside, and use a window exhaust or box fan near the work area to create a steady cross-breeze.
After painting, keep ventilation methods running for several hours, swapping in fresh air and lowering VOC concentration.
Place activated charcoal or baking soda in shallow bowls as simple odor neutralizers, or use commercial products labeled for paints.
Dispose of rags and cans properly, and avoid confined spaces until smells fade.
You’ll breathe easier and finish cleanup safely.
Preparing Walls: Cleaning and Mildew Treatment
If your walls are dusty, stained, or showing any signs of mildew, you’ll want to clean and treat them thoroughly so paint will adhere and look its best.
You’ll start with wall cleaning using a mild detergent or trisodium phosphate substitute, scrub gently, and rinse.
For mildew prevention, apply a diluted bleach solution or commercial mildew remover, let it sit, then rinse and dry completely.
Wear gloves and ventilate the room.
Prime treated areas with a mildew-resistant primer before painting.
Visualize the process:
- Sponge scrub grime away
- Apply mildew remover
- Rinse and air-dry wall
- Prime for protection
Repairing Holes, Cracks, and Damaged Drywall
First, you’ll assess how deep and widespread the damage is so you know whether a simple patch or a drywall replacement is needed.
Then you’ll apply the appropriate filler or patch kit, let it dry, and sand it smooth.
Once the surface is even and dust-free, you’re ready to prime and paint.
Assess Damage Extent
Before you grab a brush, take a close look at every wall to identify holes, cracks, and any damaged drywall so you know what repairs are required and how much time and material you’ll need.
You’ll perform a focused damage assessment and a careful wall inspection to prioritize fixes. Note size, depth, location, and whether moisture or mold is present.
Decide if studs, trim, or outlets are affected and if a pro is needed for structural issues. Use this mental checklist to plan supplies and time.
- Hairline crack near ceiling
- Small nail holes in trim
- Quarter‑size drywall hole
- Water‑stained panel
Patch And Sand Smooth
Start by clearing loose debris and sanding the damaged area so patching materials adhere properly.
You’ll choose patching methods based on size: spackle for hairline cracks, joint compound for larger gouges, and a drywall patch for holes.
Apply compound in thin layers, letting each dry before sanding. Use progressive sanding techniques—start with 120-grit, finish with 220-grit—to blend edges into surrounding wall.
Feather the compound beyond the repair to prevent ridges. Clean dust with a damp cloth, prime patched spots, and inspect under good light.
Proper patch and sand work guarantees a seamless finish when you paint.
Priming Problem Surfaces: Stains, Wood, and New Drywall
When you’re dealing with stains, bare wood, or fresh drywall, priming is the step that makes paint adhere properly and gives you an even finish. Skip it and you’ll likely see tannin bleed-through, uneven absorption, or poor coverage.
You prep each problem surface differently: treat grease or water marks with stain removal products, clean and sand wood, and follow drywall preparation steps to seal pores.
Choose a stain-blocking or shellac primer for tannins, a latex primer for new drywall, and an oil-based or bonding primer for bare wood to guarantee lasting surface adhesion.
- Stained wall before primer
- Sanded wood grain
- Fresh taped drywall
- Primer rolling finish
Taping and Edging Techniques for Crisp Lines
You’ll get the sharpest edges by picking the right painter’s tape for your surface and using a proper putty knife to press it down.
Use caulk sparingly and tool it smooth for invisible seams before paint.
When cutting in, steady your brush and paint away from the tape to keep lines clean.
Choosing The Right Tape
Pick a high-quality painter’s tape that matches your surface and finish—masking tape for rough surfaces, delicate-surface tape for freshly painted walls, and specialty tapes for textured or glossy areas—to get the sharpest edges with the least bleed.
You’ll learn tape types, tape application, and how pressure, removal angle, and timing affect results. Apply tape along a straight guide, press the edge firmly, and paint in thin coats to avoid seepage. Remove tape while paint is tacky for crisp lines.
- Straight edge against trim
- Pressed adhesive edge
- Thin paint layers
- Slow, diagonal pull
Knife And Caulk Tips
After you’ve taped and sealed edges, use a putty knife and caulk to tidy gaps and create a razor-sharp paint line. You’ll press caulk into seams, smooth with the knife techniques that leave no ridges, and wipe excess before it skins. Work in short sections, keeping a wet edge. Use a finger or damp rag for final smoothing if needed. Let caulk cure fully before painting.
| Tool | Purpose |
|---|---|
| Putty knife | Smooths caulk |
| Caulk gun | Controls bead |
| Damp rag | Cleans excess |
| Sandpaper | Light touch after cure |
Cutting In With Brushes
One steady hand and the right brush will make cutting in faster and cleaner: you’ll master brush techniques and cutting styles that give crisp edges without relying solely on tape.
Choose a sash brush for control, load it properly, and anchor your wrist against the wall. Work in short, confident strokes, feathering paint toward the center.
When using tape, press seams firmly and remove before paint fully cures. Practice corners and trim, adjusting angle and pressure.
Visualize a steady horizon line as you paint so your hand stays true and your rooms look professionally finished.
- Sash brush poised
- Short confident strokes
- Feather toward center
- Firm tape removal
Cutting-In With a Brush: Step-by-Step Supplies
Before you cut in, gather the essential supplies so you won’t stop mid-line: a 2–2.5-inch angled sash brush, a small paint tray or bucket, high-quality painter’s tape, a steadying pad or rag, and the paint thinned slightly if needed for flow.
Lay drop cloths, secure tape along trim, and pour a modest amount into your tray. Load the brush, removing excess on the tray edge.
Use controlled brush techniques: short, decisive strokes and a pivoting wrist to maintain a crisp edge. Keep a damp rag for quick corrections and a small container for touch-up paint during paint application.
Rolling Techniques for Even Coverage
When you roll, work in manageable 3×3 to 4×4 foot sections and keep a wet edge so the finish stays smooth and uniform.
Use a high-quality roller cover and load it evenly to avoid drips. Hold the roller at a slight angle, press lightly, and use consistent overlapping passes. Finish each section with a light “half-roll” upward to blend.
- Start with an M or W pattern to distribute paint.
- Fill by rolling vertically, then horizontally to level.
- Re-load before the roller runs dry to prevent streaks.
- Step back often to check for missed spots.
These rolling techniques guarantee even coverage.
How Many Coats Will You Likely Need?
Coverage depends on a few key factors: the paint’s quality and opacity, the color change you’re making, and the surface’s texture and condition.
You’ll judge paint coverage by testing a small area—dark to light color changes or porous wall material often need extra coats.
Coat thickness and application technique affect uniformity; thin, even coats usually beat thick globs.
Paint type and finish level influence hide and sheen.
Consider surface texture and color choice when estimating two versus three coats.
Account for environmental factors like humidity when planning recoat timing, and adjust counts after your test patch.
Drying Times and How Weather Affects Results
Because paint dries in stages—tacky to touch, hard enough for a second coat, then fully cured—you’ll need to plan your schedule around both the product’s stated recoat time and the current weather conditions.
Check label times, note humidity and temperature, and expect slower drying in high humidity or low temps. Weather impact can extend tackiness; drying conditions determine dust pickup and adhesion.
Use ventilation or dehumidifiers indoors, avoid painting before rain or extreme heat outdoors.
- Damp morning slows drying.
- Hot, dry afternoon speeds surface skin.
- Cold nights delay cure.
- Windy days increase dust risks.
Recoat Tips: When and How to Apply the Next Coat
Check the paint can for recommended drying times and don’t rush the next coat—temperature and humidity change those numbers.
Before recoating, run your hand over the surface to feel for tackiness, bumps, or dust and sand any imperfections.
If the first coat’s fully dry and the surface is clean and smooth, you’re ready to apply the next coat.
Drying Time Guidelines
When the first coat feels dry to the touch, don’t assume it’s ready for another—you’ll want to follow specific recoat times based on paint type, temperature, and humidity to avoid peeling, lap marks, or uneven sheen.
Check manufacturer drying times: latex often needs 2–4 hours, oil-based 24 hours. Remember weather impact: cooler or humid conditions lengthen curing.
Test by lightly fingering an inconspicuous spot; if it smudges, wait. Plan coats for proper adhesion and uniform finish.
- Warm, dry day: faster cure, smoother recoat.
- Cool, damp day: extended wait, risk of tackiness.
- Thick application: longer drying.
- Ventilated room: speeds curing.
Surface Preparation Check
After confirming the first coat has fully set, inspect the surface before you apply the next one: look for dust nibs, roller marks, drips, or areas of thin coverage that will affect adhesion and the final look.
Do a careful wall inspection, marking imperfections with a pencil. Lightly sand shiny spots and feather edges where thicker paint pooled.
Remove dust with a tack cloth or vacuum to guarantee proper surface cleaning. If stains bleed through, spot-prime them.
Wait the recommended recoat time on the paint can; don’t rush. Apply the next coat only when the surface is clean, dry, and smooth for best results.
When to Hire a Pro Versus DIY for Whole-House Painting
Deciding whether to hire a pro or tackle a whole-house paint job yourself comes down to your time, skill level, and tolerance for disruption.
Decide to hire professionals or DIY based on your time, skill, and tolerance for disruption.
You’ll weigh painting professionals’ expertise against DIY considerations, evaluating time efficiency and performing an honest skill assessment.
If you lack experience, complex surfaces, or want flawless results, hire pros.
If you enjoy projects, have basic tools, and limited rooms, DIY can save money.
- Long ladders, high ceilings, exterior trim.
- Detailed trim, color matching, flawless finish.
- Small rooms, basic walls, weekend project.
- Safety risks, scaffolding, heavy prep.
Estimating Time and Manpower for Your Project
To plan well, you’ll want a realistic estimate of how long each room will take and how many people you’ll need.
Single rooms usually take a day or less for one experienced painter, while whole-house jobs can require a crew to finish on schedule.
Match crew size to job scope—more hands speed things up, but coordination and workspace crowding matter too.
Project Duration Estimates
When you plan the timeline for painting a room, factor in surface prep, drying times, and the number of coats so you don’t underestimate how long the job will take.
Estimate project duration by creating a task breakdown: list prep, priming, cutting in, rolling, and cleanup with realistic hours per task.
Account for ventilation and curing between coats. Check light and weather for exterior jobs.
Use the list below to visualize a typical day:
- Patch and sand: 2–4 hours
- Prime: 1–2 hours + dry time
- Paint coats: 2–6 hours
- Cleanup: 1 hour
Crew Size Recommendations
A small crew of two to three people usually keeps a room-painting job efficient without overcrowding the space: one person handles cutting in and detail work while one or two roll and manage supplies. You’ll assign crew roles clearly, so team dynamics stay smooth and productive. For larger jobs, add members for prep, taping, and cleanup to speed phases without causing bottlenecks. Balance experience and stamina when estimating hours per room. Communicate break schedules and tool ownership to avoid downtime. Use this quick matrix to plan staffing by room size and complexity.
| Room Size | Typical Crew | Hours |
|---|---|---|
| Small | 2 | 3-5 |
| Medium | 3 | 5-8 |
| Large | 4 | 8-12 |
Cost Breakdown for Interior Painting: Materials, Tools, Labor
Budgeting for an interior paint job means breaking costs into three clear buckets: materials, tools, and labor, so you can see where your money goes and where you can save.
Break costs into materials, tools, and labor to budget smartly and find savings.
Do a cost analysis up front and get labor estimates if you’re hiring help. Know which supplies you need and when to hire pros for speed or tricky spots.
- Drop cloths and tape draped across floors
- Buckets of primer and paint lined up
- Brushes and rollers on a workbench
- A crew painting trim with steady hands
Compare prices, factor time, and prioritize quality.
Where to Buy Paint and Tools
You can shop for paint and tools at local paint retailers where you’ll get hands-on color advice and in-person help with specialized products.
If you prefer convenience, online paint suppliers offer wider selections, user reviews, and home delivery.
We’ll compare benefits, costs, and how to choose the right source for your project.
Local Paint Retailers
Finding paint and tools locally makes the process faster and lets you see colors and test products before committing.
You’ll visit local retailers to compare paint selection, feel brushes, and ask staff about finishes and prep. Look for stores with sample pots and demo boards so you can try swatches at home.
- A neighborhood hardware: racks of cans, helpful clerks, color charts.
- Specialty paint shop: expert advice, custom tinting, high-end finishes.
- Big-box store: wide inventory, tool aisle, bulk options.
- Independent dealer: niche brands, personalized service, local recommendations.
Online Paint Suppliers
If you liked checking swatches in person but want more variety or better prices, online suppliers expand your options without extra trips. You can compare brands, read reviews, and order samples to your door.
Look for reputable online paint suppliers that show true-color photos, detailed product specs, and delivery timelines. Buy brushes, rollers, tape, and drop cloths alongside paint to save on shipping.
Check return policies and color-matching services in case a shade’s off. If you want lower VOCs, search specifically for eco friendly options and certifications so your project stays healthy and sustainable.
Storing Leftover Paint and Labeling Cans Correctly
Keep leftovers tightly sealed and stored in a cool, dry place out of direct sunlight to preserve color and prevent skinning.
You’ll want clear paint storage habits and accurate can labeling so you can touch up later without guessing. Note date, room, color name, and mixing details on the lid and side.
Use plastic wrap under the lid for an extra seal, and keep cans upright on a shelf away from temperature extremes.
- Small can with bright label: bedroom blue, 2026-03
- Medium can: trim white, mixed sheen
- Quart jar: sample swatch taped
- Backup: primer, sealed tightly
Reusing and Recycling Paint and Supplies Responsibly
When you’re done with a project, don’t toss usable paint or tools—store, reuse, or recycle them to save money and cut waste.
Keep small amounts for touch-ups in airtight containers and label them with date and room. Donate unopened or nearly full cans to community groups or Habitat for Humanity.
Save small amounts for touch-ups in airtight, labeled containers; donate unopened or nearly full cans to community groups.
Stir and strain old paint before using for primer or craft projects to extend its life—that’s smart paint reuse. Clean brushes and rollers promptly; let metal tools dry to prevent rust.
Use local hazardous-waste programs and store drop-off info so you can arrange proper supply recycling when materials aren’t reusable.
Specialty Paints: Mildew-Proof, Washable, Low-VOC
Although specialty paints target specific problems, choosing the right type is simple once you know their strengths: you’ll pick mildew-proof, washable, or low-odor products based on room use and ventilation.
Look for mildew resistance in bathrooms and basements, washable finishes for high-traffic walls, and low VOC options if you’re sensitive to fumes.
Specialty coatings often combine benefits, so read labels and test small patches.
Visualize results:
- Smooth, scrubbable kitchen wall resisting stains.
- Bright, low-odor nursery with breathable paint.
- Damp bathroom free of mildew spots.
- Finished basement with durable, cleanable surfaces.
Painting Trim, Doors, and Baseboards: Tool List
After picking the right paint for rooms and surfaces, you’ll need a focused tool kit to get crisp lines and smooth finishes on trim, doors, and baseboards.
Grab angled sash brushes (1–2″), foam rollers for doors, small trim rollers, high-grit sandpaper, wood filler, caulk and a caulk gun, painter’s tape, a mini roller tray, and a sanding block.
Include a quality screwdriver, drop cloths, and tack cloths for dust removal.
These tools support trim painting techniques, door finishing tips, baseboard installation methods, and color matching strategies so you’ll achieve professional-looking edges and durable results.
Accent Walls and Feature Finishes: Extra Supplies
If you want striking accent walls or textured feature finishes, you’ll need a few specialty supplies beyond basic paint tools: quality primer for deep or bright colors, sample pots for testing, painter’s pyramids or spacers for raised panels, and specialty rollers or brushes for faux finishes and textures.
Plan accent wall techniques—stencils, color blocking, metallic glazes—and gather drop cloths, level, painter’s tape, and adhesive templates. Test feature finish ideas on boards first.
Coordinate paints and tools so edges are sharp and textures consistent. Stay organized: label samples, note techniques, and keep cleanup supplies handy.
- Stencils and templates
- Metallic/texture glazes
- Painter’s pyramids/spacers
- Specialty rollers and brushes
Final Inspection Checklist Before You Declare the Job Done
Before you call the job done, run a focused final inspection to catch missed spots, uneven edges, drips, or tape lines so the room looks professional and finished. You’ll do a final walkthrough with fresh eyes, checking trim, corners, and consistency. Use a bright light, step back, and touch surfaces for texture. Note fixes, sand small drips, and touch up with a fine brush. This is your quality assurance moment—don’t rush it.
| Area | What to look for | Fix |
|---|---|---|
| Corners | Thin coverage | Touch-up brush |
| Baseboards | Paint drips | Sand & wipe |
| Ceiling edge | Tape lines | Light sanding |
Maintenance Tips to Keep Painted Walls Looking New
While regular care won’t replace a fresh coat, it will keep your walls looking sharp longer; make a simple routine of gentle cleaning, prompt touch-ups, and preventative habits to preserve finish and color.
Regular care won’t replace a fresh coat, but gentle cleaning, prompt touch-ups, and simple habits keep walls looking sharp.
You should schedule routine inspections to spot scuffs, chips, or early color fading. Use mild cleaning products for wall cleaning and test a hidden spot first. Control humidity to prevent mildew and paint peeling.
Keep wall protection like corner guards in high-traffic zones and address scuff removal quickly with gentle erasers. For paint touch-ups, store a small sample and match sheen and pigment precisely.
- Inspect corners and high-traffic areas.
- Wipe marks with mild cleaning products.
- Maintain humidity control with vents or dehumidifiers.
- Keep touch-up kit and wall protection handy.
Room-by-Room Cheat Sheet: What to Buy for Each Space
As you plan each room, focus on the specific surfaces, traffic patterns, and moisture levels so you buy the right paint, primer, and tools for the job. You’ll pick finishes and brushes based on color selection, durability needs, and wall textures. Use this quick cheat sheet to buy smart.
| Room | Paint/Finish | Extras |
|---|---|---|
| Living | Eggshell | Roller, brush, mild primer |
| Kitchen | Semi-gloss | Stain-block primer, degreaser |
| Bathroom | Satin | Moisture-resistant primer |
| Bedroom | Matte | Sample pots, good tape |
| Hallway | Durable eggshell | Extra touch-up paint |
Follow recommendations per room and test samples.
Frequently Asked Questions
Can I Paint Over Wallpaper Without Removing It First?
Yes — you can often paint over wallpaper if you do proper wallpaper preparation: clean, repair seams, sand glossy surfaces, and apply a quality primer. That’ll improve paint adhesion and reduce bubbling or peeling later.
How Do I Fix Paint Smell Lingering After Ventilation?
Like opening a window in a stuffy attic, you’ll speed removal: use activated charcoal, baking soda bowls, and houseplants to absorb paint odor; keep cross-ventilation, a fan, and ventilation tips like airing several hours daily until scent fades.
Will Wall Texture Affect Color Appearance After Painting?
Yes — texture influence changes color perception: when light hits bumps or grooves, shadows and highlights alter hue and saturation, so you’ll see variations; smoother walls show truer color, while heavy texture can mute or shift tones.
Can I Use Exterior Paint for Interior Accent Walls?
You can, but you shouldn’t—exterior paint’s formulation can off‑gas, smell, and finish differently indoors. For best results choose proper interior paint matched to your color selection goals, ensuring durability, true color, and healthy air quality.
How Long Should Newly Painted Rooms Be Left Empty?
You should wait at least 24–48 hours before returning furniture, longer if paint’s heavy; full cure can take 2–4 weeks. Keep room ventilation strong to speed drying time and reduce odors, and avoid heavy use.
Conclusion
You’ve got a solid plan and checklist, so you’re ready to paint with confidence. Did you know homeowners who prep properly—cleaning, priming, and taping—cut touch-ups by about 60%? That prep saves time and money and makes your finish look professional. Follow the room-by-room cheat sheet, pick the right paint and primer, and keep the maintenance tips handy. With careful planning, your walls will look great and last longer.