What Does a Primed Wall Look Like? Visual Guide
You’ll see a flat, even surface with a neutral, matte tone and minimal sheen that makes flaws easier to spot. It feels smooth and slightly velvety to the touch, with no visible stains, streaks, or blotchy patches. Edges and corners should be crisp and seams seamless, and raking light will reveal any thin spots or high areas. Keep going to learn specific checks, common fixes, and when to re-prime instead of spot-treat.
Quick Answer: What a Primed Wall Looks Like
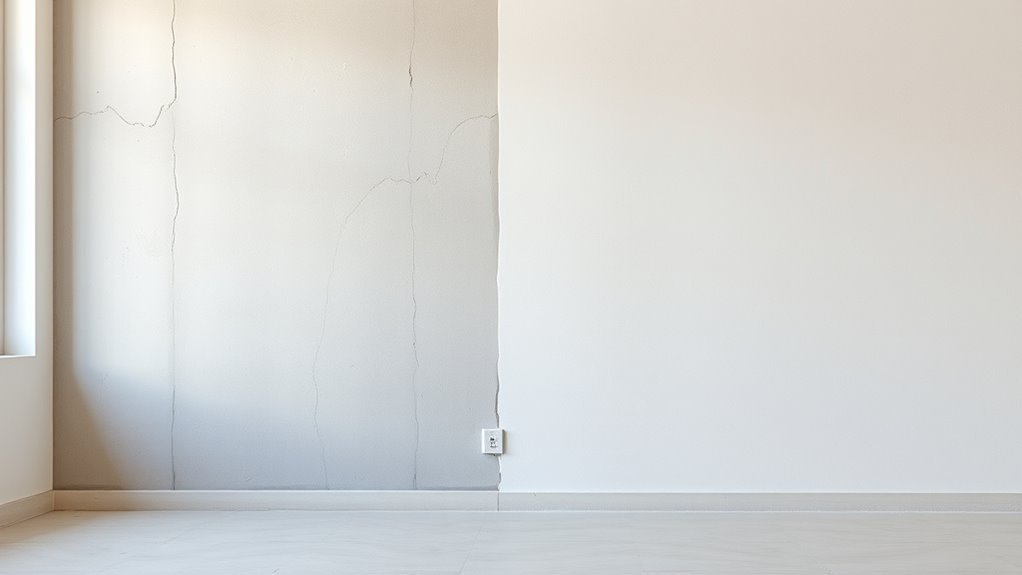
When you look at a primed wall, you’ll notice a flat, uniform surface with no visible stains, nail pops, or raw drywall showing through; the primer evens out color and texture so the wall appears matte and consistent.
You’ll see a neutral base that hides imperfections and simplifies color matching when you later pick paint. Light reflects evenly, revealing subtle surface flaws you can address before finishing.
Depending on primer types—oil, latex, shellac—the wall may dry to slightly different sheens, but all deliver that subdued, ready-to-paint look.
You can now assess readiness and choose your topcoat confidently.
Who This Guide Helps and What It Covers
This guide helps homeowners, renters, DIYers, and pros who want a clear, practical understanding of primed walls and the steps that follow.
You’ll learn to spot primed wall aesthetics—uniform matte finish, sealed joint lines, and consistent texture—so you can judge readiness at a glance.
The guide covers simple visual assessment techniques, common issues to watch for (streaks, missed spots, uneven sheen), and quick fixes you can handle without specialized tools.
Spot common primed-wall problems—streaks, missed areas, uneven sheen—and learn easy fixes you can do without special tools.
You’ll also find tips for documenting conditions before painting and deciding when to proceed or prep more, all aimed at saving time and avoiding surprises.
Why Primer Matters Before Painting
You’ll notice primer matters because it helps paint stick better, reducing peeling and touch-ups.
It also creates a uniform base so your topcoat goes on with even coverage and true color.
Plus, primer adds a layer of protection that seals stains and shields porous surfaces before you paint.
Improved Paint Adhesion
Because paint sticks better to a properly primed surface, you’ll get a smoother, longer-lasting finish with less peeling and flaking. You’ll notice primer creates a consistent base, so adhesion techniques work effectively. Choose primer types for the substrate—latex for drywall, oil-based for stained wood—to improve bonding and reduce prep time. Proper sanding, cleaning, and using the right roller all boost adhesion. Below is a quick comparison to guide choices.
| Surface | Recommended Primer |
|---|---|
| Drywall | Latex primer |
| Wood | Oil-based primer |
| Previously painted | Bonding primer |
Even Paint Coverage
Good adhesion helps, but primer also evens out the surface so your topcoat lays down uniformly and covers in fewer coats.
When you focus on primer application during wall preparation, you reduce blotchy color, flashing, and uneven sheen. You’ll notice touch-ups blend better because the primer creates a consistent base that tames porous patches and old paint variations.
Apply primer in thin, even passes and let it cure fully before rolling on color; that disciplined primer application prevents soak-in and patchiness.
With proper wall preparation, you’ll achieve truer color, smoother coverage, and fewer repeat coats overall.
Surface Protection Benefits
When you prime before painting, you shield the wall from stains, moisture, and tannin bleed-through so your finish stays cleaner and lasts longer.
You’ll improve surface durability, reduce peeling, and create a uniform base that needs less topcoat. Proper application techniques—brushing edges, rolling in consistent passes, and allowing recommended dry times—lock in protection.
Primer also seals porous substrates and blocks odors, so your paint adheres predictably and resists wear.
- Seal porous surfaces to prevent uneven absorption
- Block stains and tannins before topcoat
- Improve adhesion for longer-lasting results
- Follow application techniques for consistent protection
How To Inspect a Primed Wall: Overview
If you want a quick, reliable check of a primed wall, start by inspecting its surface under good light and at different angles to spot coverage issues, drips, thin spots, and texture inconsistencies.
For an effective wall inspection, move close to examine edges, corners, and seams, then step back to assess overall uniformity.
Run your hand gently to feel for rough patches or sanding residue. Note any sheen variation that signals uneven primer application.
Gently run your hand over the primed wall—feel for rough spots or sanding grit and watch for sheen changes.
Record areas needing touch-up, mark them lightly, and plan a focused primer evaluation before applying topcoat so you get a smooth, consistent finish.
Telling Primer vs. Paint
When you’re comparing primer and paint, pay attention to surface texture since primer often feels slightly chalky or powdery while paint lays smoother.
Also note color and sheen—primer is usually flatter and more muted, whereas paint has the true hue and finish. Those two clues will help you tell them apart quickly.
Surface Texture Differences
Because primers are formulated for adhesion and coverage rather than finish, you’ll often notice a different surface texture compared with topcoat paint: primer usually feels slightly rougher or chalkier and looks flatter, while finished paint appears smoother and more uniform with a subtle sheen.
You’ll run your hand and see texture variations that reveal sanding marks, joint compound ridges, or tiny debris trapped in primer. Those surface imperfections stand out more before the topcoat fills and evens them.
Check these quick indicators to tell primer from paint:
- Slightly gritty feel
- Matte, flat appearance
- Visible sanding lines
- Uneven patch contrast
Color And Sheen Variations
Although primer’s job isn’t aesthetics, you’ll notice clear differences in color and sheen that help you tell it from finished paint: primer typically dries to a flat, chalky tone—often slightly off-white, gray, or pink-tinted—while topcoat paint delivers the true chosen hue and a deliberate sheen (matte, eggshell, satin, semi-gloss).
You’ll spot primer’s muted base under a sample color, which helps coverage but won’t reflect light like a finish.
When you evaluate a wall, consider color psychology—how a final color feels in a space—and sheen effects, which change perceived depth, durability, and cleanability.
Surface Tone: An Even, Neutral Base Color
A good primed wall gives you an even, neutral base color that hides previous hues and sets a true starting point for paint.
You’ll notice color consistency across the surface, which helps you judge final shades accurately. Pay attention to application technique—smooth, overlapping strokes create that uniform tone. Light should reflect evenly without warmer or cooler patches.
- Inspect under natural light for tonal uniformity.
- Feel for blotches or raised texture that alter tone.
- Note any seams or edges needing feathering.
- Reprime small zones rather than spot-painting to maintain neutrality.
Coverage Check: No Thin or Patchy Spots
Start by scanning the wall from a few feet away to spot any thin or patchy areas where the primer looks transparent or uneven.
You’ll move closer to confirm spots that need touch-ups, using consistent lighting to reveal coverage gaps.
Apply recommended coverage techniques—overlapping strokes, proper roller nap, or a brush for edges—matching them to the primer types you used (water- or oil-based).
Feather edges of touch-ups to avoid visible seams.
Let the primer dry fully before rechecking; damp or tacky areas can appear thin.
Repeat a light second coat only where necessary for uniform opacity.
Texture Feel: Smooth but Not Glossy

Run your hand over the primed wall and you’ll notice a slightly velvety touch rather than a slick finish.
It shouldn’t have any reflective sheen, so light won’t bounce off like it does on glossy paint.
You’ll feel an even surface resistance that tells you the primer laid down uniformly.
Slightly Velvety Touch
Think of velvet without the sheen—your hand glides over the surface and feels soft, not slick.
You notice a smooth finish that still gives subtle tactile feedback, like a muted whisper beneath your fingertips.
This primed wall invites touch without looking glossy, conveying refinement and readiness for paint.
You’ll detect tiny, uniform resistance—pleasant and controlled—rather than coarse grit or slippery gloss.
Use these cues to judge preparedness before painting.
- Soft, even texture
- Gentle tactile feedback
- No rough patches
- Consistent surface quality
No Reflective Sheen
While you can feel the wall’s smoothness, it won’t catch the light—no glossy reflection breaks the even matte finish. You’ll notice a non reflective sheen that keeps highlights subdued, so imperfections aren’t emphasized.
This finish comes from careful paint preparation: sanding lightly, dusting, and applying primer evenly. Run your hand to confirm uniform texture; it should feel smooth but not slick.
Under normal lighting, the surface reads flat and consistent, helping subsequent coats sit evenly. You’ll appreciate how the muted look makes color true and predictable, creating a reliable base without glare or distracting shine.
Even Surface Resistance
Even though a primed wall feels smooth, you’ll notice it isn’t slick—the surface gives a slight, consistent resistance under your hand.
You’ll feel an even surface that’s slightly toothy, not glossy, so paint adheres better. Those resistance characteristics tell you the primer created a uniform tooth without roughness.
Run your palm and you’ll sense subtle grip, confirming readiness for topcoat. Inspect visually and by touch to confirm consistency.
- Light drag when you glide your hand
- No shiny spots or slippery patches
- Uniform texture across panels and joints
- Predictable adhesion for finish coats
Primed Wall Sheen Clues
When light hits a primed wall at an angle, you’ll often spot a subtle, even sheen that sets it apart from raw drywall or unsealed plaster. You can use sheen variations to judge coverage and spotting; smoother primer shows a consistent faint glow, while texture differences make highlights patchy. Run your hand close to the surface and view from different angles to confirm uniformity. The table below helps you compare quick visual cues.
| Condition | Look | Tip |
|---|---|---|
| Uniform sheen | Soft, even glow | Good coverage |
| Patchy sheen | Irregular highlights | Reprime spots |
| Matte look | No reflectivity | Might be unprimed |
| Glossy areas | Bright reflections | Overworked primer |
Edge Work: Crisp Lines at Trim and Ceilings
Noticing the primer’s sheen across a wall helps you spot uneven coverage, but getting clean edges at trim and ceilings demands a different focus: careful edging and steady handwork.
You’ll check wall edges for edge alignment, work toward trim precision, and maintain ceiling contact without smudging trim visibility.
Focus on corner finishes that meet consistently and produce clean shifts between surfaces.
Steady strokes, quality edgers, and masking where needed improve edge consistency while avoiding lumps or stray primer on trim.
- Use a steady brush for tight trim precision.
- Tape carefully for crisp ceiling contact.
- Feather to guarantee clean shifts.
- Inspect corner finishes and wall edges.
Seam Visibility: Taped Joints and Drywall Seams Blended
Since seams and taped joints can telegraph through primer and paint, you’ll want to smooth and feather them so they disappear under finish coats. You inspect taped joints and drywall seams for ridges, gaps, or bulges, then sand and apply skim coats until changes vanish. Light from different angles reveals flaws, so check in varied lighting. A clean, even primed surface feels calm and finished, giving you confidence before color. Use patience—thin layers beat heavy fills. The table below captures the emotional shift as seams go from visible to seamless.
| Tension | Process | Relief |
|---|---|---|
| Noticeable | Sanding | Hope |
| Obvious | Skimming | Calm |
| Faint | Feathering | Pride |
Nail and Screw Heads: Countersunk and Filled
A few well-countersunk nails and screws make a primed wall read as professional rather than patched up; you’ll want every fastener driven slightly below the surface, filled flush, and sanded smooth so they don’t telegraph through primer and paint.
You’ll check screw placement and nail visibility, use proper tool selection for consistent countersinking, and perform surface preparation before filler application.
Allow adequate drying time, then sand and inspect for paint compatibility.
Consider finish options—matte hides minor flaws, satin reveals more.
Keep fastener spacing consistent and repairs minimal so the primer lays down evenly.
- Countersink depth
- Filler choice
- Sanding method
- Final inspection
Stain Blocking: Absence of Bleed-Through Marks
When you prime a wall properly, stain blocking prevents discoloration from tannins, water stains, smoke, or marker from bleeding through the finish coat.
You’ll notice a uniform, clean surface free of yellowing or dark spots where stains once showed.
Use stain prevention techniques like spot-priming affected areas before full coverage and choosing a solvent- or shellac-based blocking primer for severe tannin or water stains.
Proper primer application methods—thin, even coats with adequate drying time—seal contaminants and stop bleed-through.
Inspect under good light; absence of shadowy or haloed marks means the blocking primer did its job.
Adhesion Signs: Primer That Resists Scuffing
Beyond stopping stains, a good primer also bonds firmly to the wall so the finish coat won’t scuff or rub off.
You can spot strong adhesion by checking uniform matte coverage, absence of flaking, and consistent color where primer materials were applied.
Proper adhesion techniques—cleaning, sanding, and choosing compatible primer materials—matter.
You’ll know the surface’s ready when it accepts light abrasion without losing film.
- Even, matte film with no peeling
- No powdery residue after gentle wipe
- Seamless edges where primer meets trim
- Consistent color indicating full substrate contact
Touch Test: What to Feel With Your Fingertips
Curious how a primer should feel under your fingertips? Use a gentle glide to test: you want smoothness without waxy residue.
Rely on finger sensitivity to detect subtle rough spots, raised grit, or soft powdering that signals poor sealing. Move fingertips across the surface in short passes, noting consistent texture and even tack—never sticky or slick.
Use your fingertips—short, gentle passes reveal rough spots, grit, or powdering; texture should feel even, not sticky.
Texture awareness helps you judge whether the primer filled tiny imperfections or left uneven film. If you feel bumps or loose particles, sand lightly and recoat.
Trust your touch as a quick, reliable check before painting.
Light Test: Inspecting Under Different Lighting Angles
Want to catch flaws you couldn’t feel? Use controlled lighting techniques during a wall inspection to reveal subtle surface issues. Move a portable light low and along the wall, then raise it high; tilt it side to side. You’ll see shadows that indicate unevenness and milling variations before painting.
- Raking light: low angle to emphasize texture.
- Overhead light: reveals broad tonal differences.
- Side lighting: highlights edges and joints.
- Rotate light positions: compare views for consistency.
Inspect slowly, noting areas that consistently show shadow or sheen differences for targeted touch-up before finishing.
Common Imperfections to Spot Immediately
When you scan a primed wall, look first for visible surface blemishes like bumps, dust specks, or nail pops that’ll show through paint.
Check for uneven primer coverage—patchy or thin spots can cause blotchy finish later.
Catching these issues now lets you sand, spot-prime, or recoat before you paint.
Visible Surface Blemishes
Even before you pick up a roller, inspect the primed wall for common surface blemishes—small flaws can become glaring once paint goes on.
You’ll spot blemish types like pinholes, scuffs, stains, and raised spots; link blemish causes to poor preparation techniques or old repairs.
Use inspection tips: view under varied lighting effects and compare comparison examples against a clean section.
Choose repair methods—filling, sanding, spot-priming—then select paint choices and finishing touches accordingly.
Follow maintenance advice to prevent recurrence.
- Pinholes and tiny pits
- Scuffs and abrasion marks
- Stains and bleed-through
- Raised texture or repair ridges
Uneven Primer Coverage
After checking for blemishes like pinholes and stains, you should scan the wall for uneven primer coverage—the most visible flaw once paint goes on.
Uneven areas show streaks, patchy spots, or thin zones where the substrate peeks through. Run your hand lightly to feel texture changes and use raking light to reveal differences.
Uneven results usually come from rushed primer application, improper primer consistency, or poor roller technique.
Fix thin patches by reapplying a thin, even coat and feathering edges. Let the primer fully dry, inspect again, and only then proceed with your topcoat for a uniform finish.
Pinholes and Why They Matter
Why do tiny pinholes matter on a freshly primed wall? You’ll notice how pinhole causes like poor surface preparation, inconsistent primer consistency, or incompatible paint compatibility create tiny voids that affect aesthetic impact and long-term adhesion.
Use visual assessment and inspection methods to catch them early.
- Identify: visual assessment for distribution and size.
- Diagnose: link pinhole causes to application techniques or substrate issues.
- Fix: repair options—fill, sand, re-prime with correct primer consistency.
- Prevent: surface preparation, correct application techniques, and choosing compatible primer/paint for lasting results.
Lap Marks and Streaks: Causes and Visual Cues
Pinholes can tell you a lot about surface prep and primer consistency, but lap marks and streaks reveal problems in how the coating was applied and how it dried. You’ll spot lap marks where overlapping passes dried unevenly; lap marks causes include slow drying, reworking edges, or poor technique. Streaks cues are linear differences in sheen or thickness, often from dragging a partially dry tool or inconsistent pressure.
| Visual cue | Likely cause |
|---|---|
| Uneven sheen bands | Recoat before tack-free |
| Thin linear streaks | Uneven pressure or load |
| Dark overlap lines | Slow drying or excess rework |
Brush vs. Roller Evidence: Telltale Patterns
When you inspect a primed wall, the tool marks tell a clear story: brushes leave short, directional strokes and visible bristle ridges near trim or corners, while rollers produce a more uniform, stippled texture with faint nap lines that run the length of the pass.
You’ll spot brush techniques where edges need control, showing variable coverage and texture effects; roller patterns reveal faster application methods and better coverage consistency over flats.
Use finish comparisons to decide touchups.
- Corners: brush techniques, precise but textured.
- Flats: roller patterns, even stipple.
- Edges: application methods contrast.
- Overall: coverage consistency signs.
Spray Application Signs: Fine Texture and Overspray
Look for a fine, even texture and occasional misty edges—spray application lays down a thin, consistent film that reads smoother than brush or roller work, but it can leave subtle orange-peel dimples or a light haze where overspray settled.
You’ll note that a good spray technique gives uniform coverage with minimal directional marks; texture uniformity is the sign the nozzle, pressure, and fans were set right.
Check corners and trim for tiny speckles or a softer edge where mist drifted. If you see consistent micro-dimples and fine speckling, you’re likely looking at a properly executed spray-primed surface.
Uneven Sheen From Drying Problems
When a primer dries unevenly, you’ll notice patchy sheen areas that don’t match the rest of the wall.
You might also see visible dry streaks where brush or roller marks dried differently.
Flashed or cloudy spots can appear where the drying rate varied, so check those areas closely.
Patchy Sheen Areas
- Inspect lighting angles to reveal patchy sheen and map affected zones.
- Check humidity and temperature history that could’ve caused uneven drying.
- Feel the surface for tackiness; lingering damp spots indicate problems.
- Reprime only after full drying and light sanding to blend sheen and restore uniformity.
Visible Dry Streaks
If paint dried unevenly, you’ll see visible dry streaks where the sheen changes along brush or roller paths; these streaks signal that different areas cured at different rates.
You’ll notice alternating bands of dull and shinier finish that act as visual cues of the drying process. Inspect under good light and at varying angles to reveal the pattern.
Dry streaks often follow application direction, so you can trace back to technique problems, tool load, or environmental shifts during drying.
You can sometimes fix them by sanding lightly and recoating with consistent application and stable temperature and humidity.
Flashed Or Cloudy Spots
Besides streaks, you may also spot flashed or cloudy areas where the sheen looks uneven in blotches rather than lines.
You’ll see flashed imperfections when primer dries unevenly—often from temperature, humidity, or overworking the surface.
Cloudy residue can form where solvent evaporates too fast or too slow, leaving dull patches.
To fix or prevent them, address drying conditions and application technique quickly.
- Control humidity and temperature to promote even drying.
- Thin primer per manufacturer to avoid trapped solvent.
- Use consistent brush or roller pressure and direction.
- Recoat only after full cure, sanding lightly if needed.
Dry Patches and Blushing: Humidity-Related Signs
Notice uneven, dull spots on your freshly primed wall? You’ll spot dry patches where humidity effects halted curing, creating blushing signs—milky, whitish haze from trapped moisture.
These moisture issues often stem from poor primer application or sudden environmental factors like high humidity or temperature swings. You’ll notice surface imperfections that feel powdery and may invite mildew growth if left unchecked.
Addressing priming techniques—apply thinner coats, improve ventilation, and wait longer between coats—helps restore paint adhesion and prevent recurrence.
Inspect early: catching humidity-related defects lets you correct conditions and reprime before topcoat problems multiply.
Residue and Dust Trapped in the Primer
Humidity problems can leave behind telltale blotches, but another common flaw you’ll run into is residue and dust trapped in the primer.
You’ll see specks, tiny bumps, or a gritty texture where surface contaminants weren’t cleaned. That interferes with adhesion and finish, so prioritize residue removal before priming and practice dust prevention during application.
If you spot trapped particles, sand lightly and re-prime small areas. Consider tack cloths, filtered air, and wiping with appropriate cleaners to avoid repeating the issue.
- Inspect under good light
- Clean with detergent or solvent
- Use tack cloths before priming
- Sand and spot-prime as needed
Mold or Mildew Spots Missed Before Priming
Ever checked a primed wall and wondered why dark, fuzzy spots are showing through? You probably missed mold or mildew patches before priming. Those spots can bleed or texture-show despite primer.
Use mold identification: look for irregular black, green, or gray clusters with fuzzy edges and a musty smell. Scrub affected areas with appropriate cleaners, let fully dry, then apply a mold-killing primer.
For future jobs, mildew prevention matters: control humidity, fix leaks, and clean surfaces before priming so growth won’t reappear. Catching and treating mold beforehand keeps your primed wall looking uniform and sound.
How Substrate Type Changes the Primed Look
Missing mold or mildew is one example of how the surface under primer alters the finished look; different substrates—drywall, plaster, wood, concrete, or previously painted surfaces—will each accept primer and topcoat in their own way.
You’ll notice substrate impact in texture, sheen, and coverage. Some surfaces soak primer; others repel it, changing the primed appearance and how many coats you’ll need.
Inspect and prep each substrate to predict results. Consider sealer or bonding primer when needed to equalize absorption and finish.
- Dry, porous: absorbs more, matte primed appearance
- Smooth, slick: needs bonding primer
- Grainy wood: shows texture
- Concrete: may require masonry primer
Primed Drywall vs. Primed Plaster Appearance
You’ll notice primed drywall often looks smoother, while primed plaster can show more subtle texture.
The primer soaks into each surface differently, affecting how much sheen and color the topcoat will reveal.
Compare both for finish uniformity before you start painting so you know whether you need extra smoothing or a sealing coat.
Surface Texture Differences
When you look closely at a primed wall, primed drywall and primed plaster reveal different textures: you’ll notice texture variations and varying surface uniformity that affect appearance.
Drywall generally shows smoother, flatter planes with faint seams; plaster often displays subtle trowel marks and slight undulations. You can spot these differences by feeling and viewing in raking light.
- Drywall: mostly smooth, consistent grain, high surface uniformity.
- Plaster: mild ridges, trowel patterns, less uniform in small areas.
- Joints: taped drywall seams can be visible under certain primers.
- Repair spots: patch texture contrasts more on plaster.
Primer Absorption Rates
Because drywall and plaster absorb primer differently, you’ll see noticeable effects on finish and coverage.
Drywall’s paper face soaks up less than porous plaster, so primer types with sealing properties work differently on each. You’ll notice plaster needing more coats or higher-build primers to achieve uniform opacity, while drywall often needs only a single sealer coat.
Your choice of primer types and application techniques—roller nap, brush, or sprayer—affects penetration and drying.
Adjust technique: back-roll plaster to force primer into pores; use thinner coats on drywall to avoid lap marks.
Inspect after drying and recoat where absorption looks uneven.
Finish Uniformity Comparison
Although both primed drywall and primed plaster aim for a flat, even base, you’ll notice differences in surface consistency and sheen: drywall typically shows a smoother, more uniform appearance after one sealer coat, while plaster often reveals subtle texture and slight sheen variations that need additional filling or higher-build primer to level out.
- Drywall: consistent surface, easier color matching, works with standard finish types.
- Plaster: varied texture, may show shadowing under low light.
- Prep: sand and skim coats reduce plaster irregularities for better match.
- Final tip: test paint samples to confirm color matching and desired finish types.
Primed Wood and Trim Visual Differences
If you compare primed wood and primed trim side by side, you’ll notice the primer’s finish and texture can look quite different even though they’re the same product.
You’ll see primed wood often absorbs more, showing grain and a slightly duller, matte feel, while primed trim tends to appear smoother and more uniform because of tighter sanding and denser profiles.
Primed wood often shows grain and a duller, matte look, while primed trim appears smoother and more uniform.
These trim differences come from substrate density, sanding, and application technique.
When you inspect both, look for absorption marks, brush strokes, and edge coverage. That tells you whether additional sanding or a second coat will be needed before topcoating.
Primed Previously Painted Surfaces: What to Expect
Seeing how primer behaves on raw wood and trim helps you predict how it’ll look over an existing paint layer. When you prime previously painted surfaces, you’ll notice more uniform sheen and color, reduced stain show-through, and better adhesion if you did proper paint preparation.
Expect texture and imperfections to remain visible until sanded or filled.
- Surface feel: smoother where old gloss was sanded.
- Coverage: primer evens out color differences.
- Stains: knots or tannins may need spot treatment.
- Adhesion: clean, deglossed surfaces bond best.
These primed surfaces reflect your prep work, so don’t skip steps.
Primer Types and How They Look Differently
When you look closely, oil-based primers usually dry to a smooth, slightly glossy surface that can hide stains and seal porous areas.
Water-based primers tend to have a more matte, paper-like finish and dry faster with less odor.
Knowing these visual and tactile differences helps you pick the right one for your project.
Oil-Based Primer Appearance
Oil-based primer has a noticeably thicker, more enamel-like finish than water-based primers, so you’ll often spot a slight sheen even before the topcoat goes on.
You’ll notice oil based characteristics like stronger adhesion, stain blocking, and a smoother surface that masks minor imperfections.
During primer application, you’ll work slower to avoid lap marks and allow longer drying time.
Expect a durable, satin-to-semigloss look that accepts oil or latex topcoats well.
- Slight sheen and enamel feel
- Excellent stain blocking and sealing
- Slower drying, careful primer application needed
- Smooth, durable base for topcoat
Water-Based Primer Finish
Water-based primer dries to a flatter, matte finish that feels more powdery than enamel, and you’ll notice it soaks into porous surfaces rather than sitting on top. You’ll see a uniform, low-sheen base that makes topcoats adhere and display true color. Compared with oil options, water based benefits include quicker drying, easier cleanup, and less odor. When choosing primer types, pick water-based for drywall and light stains, or hybrid formulas for tougher stains. Below is a quick comparison to guide you.
| Feature | Water-Based |
|---|---|
| Sheen | Matte |
| Dry Time | Fast |
| Cleanup | Soap and water |
| Best Use | Drywall, light stains |
Latex Primer Visual Traits
Although latex primer dries to a smooth, matte film that mutes the surface beneath, you’ll quickly notice its even, slightly velvety finish and uniform color that helps paint adhere and cover better.
You’ll see minimal brush marks, quick drying, and a surface that reduces bleeding from stains. Consider these latex primer benefits and latex primer applications when evaluating a primed wall.
- Consistent, low-sheen base that hides minor imperfections.
- Fast drying—so you can repaint same day.
- Flexible film that resists cracking with temperature changes.
- Water-cleanup compatibility for easy tools and maintenance.
Oil-Based Primer Visual Traits
Finishers and pros will notice that oil primers dry to a slightly glossier, more robust film than latex, giving the wall a subtle sheen and a harder, almost enamel-like feel.
You’ll see smoother coverage on porous surfaces because oil absorption is slower, so the coat levels out instead of sinking in.
Finger tests reveal a firmer surface once cured; it resists scuffs more than untreated primer.
Expect longer drying time compared with water-based primers, so plan recoat intervals accordingly.
Color appears slightly deeper under oil primer, and minor surface imperfections are filled, creating a solid base for topcoats.
Stain-Blocking Primer Visual Traits
You’ll notice stain-blocking primer where previous marks are no longer visible and the affected areas look uniformly covered.
Check for an even film thickness—no thin patches or glossy ridges—so the primer can seal stains consistently.
If coverage or thickness seems uneven, you’ll want to recoat or sand before topcoating.
Visible Stain Coverage
When you inspect a primed wall for stain-blocking performance, look for a uniform, opaque layer where previous discolorations—water marks, smoke stains, tannin bleed—are no longer visible through the primer.
You’ll check that stain types are sealed and that coverage techniques produced consistent opacity. Touch the surface lightly; a well-blocked area won’t show ghosting or shadowing.
If stains peek through, another coat or targeted spot-priming is needed. Note color uniformity and matte finish that hides underlying contrast.
- Confirm no visible bleed-through
- Check edges for feathering
- Assess spot-primed areas
- Verify consistent opacity across the wall
Even Film Thickness
An even film thickness means the primer lays down a uniform, continuous coat so every square inch blocks stains and accepts topcoat evenly; you’ll see no thin streaks or globby spots. Watch for consistent sheen and feel—smooth, slightly satiny, and free of texture jumps. Use proper application techniques, maintain wet edges, and consider light color matching to avoid tint shifts under the topcoat. Inspect in raking light and touch-dry tests to confirm coverage. The simple table below imagines visual cues.
| Area | Look | Feel |
|---|---|---|
| Edge | Smooth | Slightly tacky |
| Corner | Even | Thin |
| Center | Uniform | Dry |
| Overlap | Blended | Consistent |
Shellac and Specialty Primer Looks
Because shellac and specialty primers dry hard and seal surfaces quickly, they create a very smooth, almost glossy base that’s easy to spot against drywall or latex-primed areas.
You’ll notice shellac characteristics like rapid tack-free time, strong stain blocking, and a satin sheen. Specialty applications—metal, odor control, or high-moisture spots—leave a uniform, dense film that resists bleeding and shows fewer imperfections.
When you inspect a wall, look for subtle sheen, firm texture, and consistent coverage. Consider these visual cues:
- Even, low-porosity surface
- Slight gloss under light
- Minimal texture or nap
- Clean cut lines at trim
When a Primed Wall Needs a Second Coat
If you can spot thin spots in the primer where the original surface shows through, you’ll want a second coat to guarantee even coverage.
You should also plan another coat if the texture looks blotchy or the surface flaws are still visible after the first application.
A quick recoat fixes thin areas and smooths out texture issues so your final paint goes on uniformly.
Visible Primer Thin Spots
When you spot faint, uneven patches through the primer, those thin spots are a clear sign you’ll need a second coat to achieve full coverage and consistent color.
You should review primer application techniques—insufficient overlap or too-fast drying can cause thin areas. Inspect under varied light to aid detecting primer imperfections.
Apply a second, even coat with correct roller nap and steady pressure, letting proper dry time pass.
- Scan walls in angled light for translucence.
- Feather edges where primer looks streaky.
- Use consistent roller strokes and overlap.
- Recoat only after recommended drying time.
Texture Or Surface Issues
Although primer’s job is to create a smooth, uniform base, you’ll still see surface issues that call for another coat—raised nap, brush marks, roller stipple, or areas where grit and dust settled before it dried.
You’ll spot uneven texture consistency across the wall where some sections feel rough and others glassy. Those surface imperfections show up under light, casting tiny shadows that telegraph through finish coats.
Sand the high spots, wipe away dust, and apply a thin, even second coat to unify the nap and hide brush or roller tracks. That restores an even substrate for your topcoat.
How To Photograph a Primed Wall for Assessment
Start by positioning yourself so the camera faces the wall squarely; this gives an accurate view of coverage, texture, and any flaws you need to document.
Use even lighting techniques—natural side light and a soft fill avoid harsh shadows.
Use even side lighting with a soft fill to eliminate harsh shadows and reveal true surface details.
Set camera settings to low ISO, moderate aperture (f/5.6–f/8), and a shutter speed that prevents blur; use a tripod if needed.
Frame consistently, include a scale reference, and take multiple angles for context.
- Even light sources
- Stable camera settings
- Include a scale or reference
- Shoot multiple, evenly spaced shots
10 Checks for a Primed Wall
How do you know a primed wall is ready for paint? You perform clear inspection techniques: a visual assessment for even color consistency, texture analysis for smoothness, and coverage evaluation to spot thin areas. Check adhesion testing results and confirm paint compatibility with the primer. Consider surface preparation records and other quality indicators before painting.
| Check | What to look for |
|---|---|
| Visual assessment | Uniform color consistency, no streaks |
| Texture analysis | Even texture, no sanding marks |
| Adhesion testing | Primer bonds, no peeling |
| Coverage evaluation | Full coverage, no substrate show-through |
Short Fixes for Common Priming Flaws
When you spot small priming flaws—like drips, thin spots, or light sanding scratches—you can fix them quickly without redoing the whole wall:
You’ll want to assess each flaw, sand or level as needed, and touch up using proper primer application techniques to avoid repeating common primer mistakes. Address spots promptly so texture and adhesion match.
Assess flaws, sand or level, then touch up with correct primer techniques so texture and adhesion match.
- Lightly sand glossy drips, wipe dust, feather with a small brush and reapply primer sparingly.
- Fill tiny gouges with spackle, sand smooth, prime the patch.
- Thin spots get a thin, even touch-up coat.
- Blend edges with a damp sponge.
When to Strip and Re-Prime Instead of Spot-Fixing
Spot repairs work for small blemishes, but there are times you’ll need to strip and re-prime the whole surface. You should choose full stripping over spot fixing techniques when stains bleed through, texture varies, old primer peels, or multiple patches create visible seams. Re prime scenarios include water damage, heavy nicotine staining, or inconsistent sheen across walls. Consider overall surface integrity and future finish durability.
| Issue | Action |
|---|---|
| Bleed-through stains | Strip & re-prime |
| Peeling primer | Strip & re-prime |
| Multiple patches | Strip & re-prime |
| Water damage | Strip & re-prime |
| Minor scuffs | Spot fix techniques |
Professional vs. DIY Priming: Visual Quality Differences
You’ll usually notice pros achieve smoother, more even coverage with fewer visible roller marks or thin spots.
You’ll also see crisper edges and neater trim lines from their careful cutting-in and tools.
Compare a close-up of a DIY job to a pro job and the differences in smoothness and edge precision become obvious.
Smoothness And Coverage
Although a primed wall can look uniformly flat at a glance, professionals usually achieve noticeably smoother, more even coverage than most DIY efforts. They use high-quality rollers, consistent thinning and spray techniques, and quick touch-ups to eliminate lap marks and roller stipple.
You’ll see a true smooth surface when primer types match the substrate and application method. If you’re priming, watch for texture, sheen consistency, and missed spots. Compare your results against professional standards and adjust technique or product choice.
- Uniform nap and pressure
- Correct primer types selection
- Thin, even coats
- Immediate spot blending
Edge And Trim Precision
After checking overall smoothness and coverage, turn your attention to edges and trim—where sloppy work shows up fastest.
You’ll spot pro-level edge detailing: crisp lines, no bleed, consistent primer thickness where wall meets ceiling and corners. In DIY jobs, you might see feathered edges, uneven tapering, or stray primer on baseboards.
Check trim finishing too: professionals mask and cut in cleanly so trim stays paint-free; amateurs often skip adequate taping or steady brushwork.
When you inspect edges and trim, you’re judging control and prep. Precision here predicts how well the final paint will look and last.
Frequently Asked Questions
Can Primer Hide Smell-Causing Contaminants Like Smoke or Pet Odor?
Yes — you can’t fully rely on primer alone, but odor-blocking primers with sealant qualities improve primer effectiveness by trapping smoke and pet odor molecules. You’ll still need cleaning and sometimes multiple coats for best results.
How Long After Priming Should You Wait Before Installing Trim?
Think of drying like a gentle sunset: you should wait 24–48 hours after priming before trim installation. That primer duration guarantees adhesion and paint won’t tack, so your trim installation goes smooth and stays secure.
Does Primed Drywall Require a Different Caulk Than Painted Walls?
No, primed drywall doesn’t require a special caulk; you’ll use typical caulk types (latex, acrylic, or silicone) after proper surface preparation. Clean, dry, and sanded primed surfaces help caulk adhere and finish smoothly.
Can Primer Affect Indoor Air Quality or VOC Levels?
Yes — primer types can affect indoor air quality and VOC levels; you’ll release more VOCs with solvent-based or high-VOC primers, so you should choose low-VOC options and boost indoor ventilation to reduce odors and exposure.
Will a Primed Wall Change Thermal Insulation or Moisture Behavior?
No, priming won’t markedly change thermal insulation; it mainly affects surface sealing. You’ll reduce moisture absorption slightly and improve paint adhesion, but don’t expect meaningful changes in overall insulation or long-term moisture control.
Conclusion
You’ve learned what a properly primed wall looks like, how to spot issues, and when to repair or start over. Trusting primer protects your paint, hiding stains, sealing porous surfaces, and evening texture. Inspect for even sheen, full coverage, and proper adhesion; fix small flaws quickly, strip and re-prime when problems persist. Choose pros for speed and uniformity, choose DIY for control and savings—either way, prioritize prep, patience, and precision.