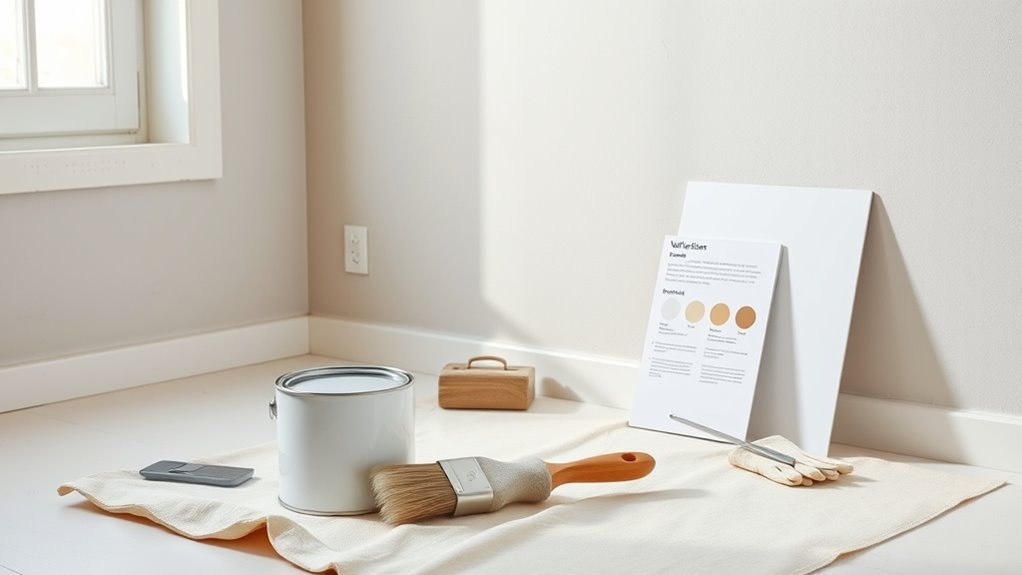
What Does Wall Primer Do? Benefits Explained
You get a smoother, longer‑lasting paint job when you prime first because primer seals porous surfaces, evens out color, and helps paint stick so coats go on evenly and don’t peel. It also blocks stains, tannins, and moisture so problems don’t bleed through your finish. Using the right primer cuts the number of topcoats you need and speeds the job, and if you keep going you’ll learn how to choose and apply the best one.
Who This Guide Is For
If you’re planning to paint interior or exterior walls—whether you’re a DIYer revitalizing a room, a contractor prepping multiple homes, or a renter wanting temporary improvements—this guide will help you choose and use the right wall primer.
You’ll get clear primer benefits so you can decide when priming matters, save time, and prevent common finish problems.
Whether you face stained drywall, bare plaster, or glossy surfaces, you’ll learn which primer types suit each situation: stain-blocking, bonding, mildew-resistant, or high-build.
Stained drywall, bare plaster, or glossy walls—choose the right primer: stain-blocking, bonding, mildew-resistant, or high-build.
This guide’s practical focus helps you pick and apply the right primer confidently and efficiently.
Quick Answer: What Wall Primer Does
Primer helps your paint stick better so coats go on smoothly and last longer.
It seals porous surfaces to prevent uneven absorption and wasted paint.
It also blocks stains and tannins so old marks or wood discoloration don’t bleed through.
Improves Paint Adhesion
When you want your paint to stick and last, applying a wall primer creates the proper surface by sealing porous areas and providing a uniform texture for the topcoat to grip.
You’ll notice paint flows smoother and covers better because primer evens out sheen and blocks troublesome surfaces that repel coatings.
Choose primer types that match your substrate and finish—alkyd for tough spots, latex for general use, or bonding primers for slick surfaces—to use proven adhesion techniques like scuff-sanding and thin, even coats.
Doing this reduces peeling, saves paint, and gives a durable base that keeps color true longer.
Seals Porous Surfaces
Because porous drywall, bare plaster, and fresh masonry soak up paint like a sponge, a wall primer seals those surfaces so your topcoat goes on evenly and uses less paint.
You’ll notice primer application evens texture and prevents blotchy color by filling tiny voids and reducing suction.
As part of surface preparation, you’ll clean and repair the wall, then roll or brush on primer to create a consistent base that improves coverage and durability.
Sealing porous substrates also cuts drying time variability and helps subsequent coats spread smoothly, so you get a professional-looking finish with fewer coats and less waste.
Blocks Stains And Tannins
Besides sealing pores, a good primer also stops stains and tannins from bleeding through your finish coat.
You’ll avoid ugly brownish streaks from wood knots, water marks, or smoke when you use a primer formulated for stain prevention and tannin blocking.
Apply it to raw wood, patched drywall, or stained walls; the primer bonds and isolates contaminants so the topcoat lays down evenly and true.
That saves time and reduces coats of finish paint.
For best results, pick a high-quality, oil- or shellac-based primer for severe stains, or a stain-blocking latex primer for light to moderate discoloration.
Why Primer Matters Before Painting
Although you might think paint alone can do the job, applying primer first creates a uniform surface that helps paint adhere, hide imperfections, and last longer. You’ll appreciate how proper surface preparation and choosing the right primer types reduce soak-in, blotches, and finish inconsistency. Primer evens porosity, seals stains, and gives thin paint coats better coverage, so you save time and money. Before rolling, inspect for repairs, clean, and sand; then pick a primer suited to substrate and finish.
| Benefit | When to Use | Result |
|---|---|---|
| Sealing | New drywall | Even finish |
| Stain blocking | Water/tannin | No bleed-through |
| Adhesion | Glossy surfaces | Better bond |
| Coverage | Porous walls | Fewer coats |
How Primer Improves Paint Adhesion

You’ve prepped the surface and chosen the right primer type; now let’s look at how primer actually helps paint stick.
Primer creates a uniform, slightly porous layer that improves mechanical bond and reduces peeling. By sealing small imperfections and filling micro-voids, it gives paint something consistent to grip, enhancing adhesion techniques you’ll use.
Good surface preparation—cleaning, sanding, and removing contaminants—lets primer bond properly, so topcoat adhesion is reliable.
Primer also evens out porosity differences between patched and intact areas, preventing uneven sheen or absorption.
In short, primer turns varied surfaces into a consistent substrate for long-lasting paint adhesion.
Priming to Seal Porous Drywall and Plaster
When you prime porous drywall or plaster, you’re sealing tiny holes so the surface won’t keep sucking up paint.
That cut in absorption helps your topcoat go on more evenly and use less product.
It also gives the paint something firmer to grip, so adhesion strength improves and finishes last longer.
Seal Surface Porosity
If your drywall or plaster soaks up paint like a sponge, prime it first to seal the surface and prevent uneven absorption.
You’ll start with basic surface preparation: clean dust, repair holes, sand rough spots, and remove loose material so the primer bonds uniformly.
During primer application, choose a product designed for porous substrates; it penetrates and fills tiny voids, creating a consistent base. That sealed surface reduces blotchy coverage, improves topcoat appearance, and saves paint.
Work methodically in thin, even coats, allowing proper drying time between passes, and you’ll get a smooth, reliable finish ready for painting.
Reduce Paint Absorption
Start by sealing porous drywall or plaster with a quality primer so your finish coats don’t vanish into the substrate.
You’ll stop uneven paint absorption that makes colors look patchy or thin. Primer evens out porosity, so a consistent sheen and true color come through with fewer coats.
During surface preparation, wipe dust and repair major gouges first, then apply primer to absorbent areas. That controlled base prevents overuse of finish paint and reduces visible lap marks.
You’ll save time and money while achieving a uniform result, because the primer does the heavy lifting before you roll on topcoats.
Improve Adhesion Strength
Because porous drywall and plaster can’t hold finish paint well on their own, a quality primer bonds to the substrate and gives your topcoat something solid to grip.
You’ll notice improved adhesive properties immediately: the primer soaks into pores, creates a uniform film, and prevents peeling or patchy wear.
During surface preparation, you’ll clean, sand, and fill imperfections so the primer can work effectively.
Apply primer evenly and allow proper drying time to maximize bond strength.
That stronger adhesion reduces maintenance, extends finish life, and guarantees your paint resists chipping and blistering under normal use.
Blocking Stains and Tannin Bleed-Through
When stains from water, smoke, or wood tannins threaten to show through your new paint, a quality primer blocks them and gives your finish coat a clean, consistent look.
You’ll pick primers formulated for specific stain types — water, smoke, grease, and ink — so pigments and residues can’t migrate.
For wood, tannin sources like cedar or redwood can leach color; a shellac- or oil-based primer seals those compounds.
Apply according to label directions, spot-priming heavy-stained areas first. That targeted approach stops bleed-through, reduces repeat coats, and preserves the final color without masking problems with more paint.
Evening Out Color for Better Coverage
Lay down a primer to neutralize bold or uneven hues so your topcoat covers evenly with fewer passes.
You’ll get color consistency across walls that previously showed streaks, patches, or old paint undertones.
Primer evens surface porosity, so pigments don’t soak in unevenly and your chosen shade reads true.
That uniform base reduces touch-ups and makes color decisions reliable, especially with dramatic or saturated tones.
Expect coverage improvement without guessing how many layers you’ll need later, and enjoy a smoother finish as your topcoat levels out on the consistent substrate primer provides.
How Primer Cuts the Number of Paint Coats
When you prime first, paint sticks better so you often need fewer coats.
Primer also seals porous surfaces that otherwise drink up paint and force extra layers.
Plus it gives a uniform color base so topcoats cover evenly.
Improved Paint Adhesion
Because primer bonds to both the wall surface and the paint, you’ll need fewer topcoats to reach full coverage and even color.
You’ll notice improved paint adhesion because the primer creates a consistent, receptive layer that grips the finish coat.
With proper surface preparation—cleaning, sanding, and repairing—you’ll allow primer to work as an effective adhesion technique that minimizes peeling and blistering.
That stronger bond means you can apply fewer expensive topcoats while achieving uniform sheen and color hold.
You’ll save time and material, reduce touch-ups, and get longer-lasting results when you prioritize primer and correct prep before painting.
Seals Porous Surfaces
If a wall’s surface soaks up paint like a sponge, a primer seals those pores so your finish coat goes on smooth and true.
You’ll notice fewer coats are needed because primer’s sealing efficiency blocks tiny voids that otherwise gulp paint. That saves time, money, and reduces waste while ensuring an even sheen.
Choose a primer with proven surface compatibility for drywall, plaster, or masonry so it bonds properly and forms a consistent base.
Apply per instructions, let it cure fully, and you’ll spend less effort achieving full coverage with your topcoat—without sacrificing appearance or durability.
Uniform Color Base
Although a fresh coat of paint can mask light flaws, a good primer gives you a uniform color base so your topcoat needs fewer coats to reach true coverage. You’ll save time and paint because primer evens out porosity and blocks previous colors, improving color consistency. With proper surface preparation you avoid blotchy patches and reduce soak-in, so each topcoat lays down true pigment. Think of primer as the blank canvas that prevents hidden tones from showing through.
| Surface state | Result with primer |
|---|---|
| Stained | Neutralized |
| New drywall | Even porosity |
| Dark color | Requires fewer coats |
Must-Prime Cases: New Drywall and Plaster
When you install new drywall or fresh plaster, you should always prime it before painting to seal porous surfaces and guarantee even paint absorption. Unprimed new work soaks up paint unevenly, wasting finish coats and leaving blotchy results.
You’ll pick primers based on drywall types and surface porosity: gypsum board, greenboard, blueboard, or lime plaster each need appropriate primer applications. Use a drywall-specific or PVA primer on bare gypsum, and a breathable alkali-resistant primer on fresh lime or cement-based plaster.
Proper priming saves paint, improves adhesion, and creates a consistent base so your topcoat performs and looks its best.
Must-Prime After Patching and Repairs
Because patched areas absorb paint differently than surrounding surfaces, you should always prime repairs before applying your topcoat.
When you patch holes or cracks, varied repair materials and patching techniques create spots that soak up finish unevenly, causing sheen and color differences.
Apply a compatible primer to seal joint compound, spackle, or wood fillers so the topcoat lays down uniformly. Use a stain-blocking primer where needed and feather the edges for a smooth changeover.
Seal patched areas with a compatible primer—use stain-blocking where needed and feather edges for a seamless topcoat finish.
Let the primer dry fully, sand lightly if required, then repaint.
Priming guarantees durability and a professional-looking, consistent finish across repaired areas.
When You Can Skip Primer (Paint-and-Primer Products)
If you’re repainting a well-sealed, uniform surface, a quality paint-and-primer can save you time by combining steps. You can skip a separate primer on previously painted walls with good adhesion, smooth drywall, or lightly stained areas.
However, be cautious with raw wood, heavy stains, or patched spots. Know the product limits and manufacturer’s recommendations so you don’t sacrifice coverage or durability.
When Paint-And-Primer Works
Although primers still matter for many jobs, paint-and-primer products can save you time and effort on surfaces that are clean, previously painted, and in good condition.
You’ll want to check paint compatibility with existing finishes and pick a product rated for adhesion and coverage.
Minimal surface preparation—washing, light sanding, and filling small defects—helps the combined formula bond and hide minor imperfections.
Use them when color change is modest and stains aren’t severe.
For best results, follow manufacturer instructions for drying times and number of coats so your finish performs like a separate primer-plus-paint system.
Surfaces That Allow Skipping
When you’re repainting walls that are clean, previously painted, and structurally sound, you can often skip a separate primer by using a quality paint-and-primer product. These surfaces accept the combined formula well and let it deliver good adhesion and hide with minimal prep.
You can rely on paint-and-primer when paint types match (latex over latex, oil over oil) and surface conditions are stable—no peeling, heavy stains, or raw drywall. Smooth, intact plaster, sealed wood, and existing enamel finishes typically take the combined product fine.
Still, follow manufacturer guidance and test a small area to confirm coverage.
Limitations To Consider
Because paint-and-primer combos won’t fix every problem, you should know their limitations before skipping a dedicated primer. You can save time and money on routine jobs, but weigh cost considerations against long-term performance.
If stains, drastic color changes, or porous surfaces are involved, a true primer gives better adhesion and sealing. Also, some application techniques require primer for uniform finish and durability.
Consider these specific limits:
- Severe stains or smoke: primer needed to block bleed-through.
- Porous or patched drywall: primer guarantees even absorption.
- High-moisture or glossy surfaces: primer improves adhesion.
Latex vs. Oil-Based Primers for Interior Walls
If you want a fast-drying, easy-cleanup primer for most interior walls, latex is the practical choice; it soaks into drywall and breathes well, while oil-based primers excel at sealing stains and smoothing chalky surfaces for tougher jobs.
You’ll pick latex when you want quick turnaround, low odor, flexible film, and the latex primer advantages of mildew resistance and easy water cleanup.
Choose oil when sealing severe stains or blocking tannins, but be mindful of oil based primer drawbacks: longer cure, strong fumes, and harder cleanup.
Match primer type to surface, stain severity, and ventilation for best results.
When to Choose Shellac or Bonding Primers
While shellac and bonding primers both solve tricky adhesion and stain problems, you’ll pick shellac for its unmatched stain-blocking and fast drying and a bonding primer when you need adhesion on glossy, slick, or previously painted surfaces.
You’ll choose based on the issue: stains, smell, or slickness. Consider shellac benefits for sealing nicotine, water stains, and tannins quickly; it sands smooth and takes topcoat fast.
Use bonding advantages when paint won’t stick or surfaces are glossy; it creates a grip without heavy sanding.
Evaluate odor tolerance, cleanup (denatured alcohol vs. soap), and required dry time before topcoating.
- Stain blocking
- Quick dry time
- Adhesion boost
Picking Primer by Surface Material (Drywall, Wood, Metal)
When you pick a primer, match it to the material: drywall needs a sealing, easy-to-sand drywall primer.
Wood often benefits from an oil- or shellac-based primer to block tannins and stabilize grain.
For wood, use an oil- or shellac-based primer to block tannins and stabilize the grain before finishing.
Metal requires a rust-inhibiting, adhesion-promoting primer formulated for bare metal or galvanized surfaces.
You’ll choose by evaluating drywall types (regular, moisture-resistant, or compound-taped), selecting primers that hide joints and accept topcoats.
For wood, consider existing wood finishes and whether stain-blocking or grain-fill is needed.
For metal, confirm compatible metal coatings and treat rust.
Proper surface preparation—cleaning, sanding, and deglossing—ensures adhesion and longevity.
Matching Primer to Your Paint Finish
Now that you’ve matched primer to the surface—drywall, wood, or metal—pick a primer that complements the paint finish you plan to use.
You’ll improve adhesion and final appearance by considering primer types and paint compatibility. For glossy paints choose a primer that sands well; for eggshell or satin, use a general-purpose bonding primer; for flat or matte finishes, a stain-blocking primer helps even out sheen and prevent flashing.
Match solvent base (water- or oil-based) to your paint. Test a small area to confirm adhesion and sheen uniformity before tackling the whole room.
- Glossy — sandable primer
- Satin — bonding primer
- Flat — stain-blocking primer
Priming for Dramatic Dark-to-Light Changes
When you’re switching from a dark wall to a light one, a quality primer will block stain bleed-through so the old color doesn’t ghost through.
It also improves paint opacity, meaning you’ll need fewer topcoats to get full coverage. That creates a more even color shift and saves you time and paint.
Block Stain Bleed-Through
If you’re covering a dark, stained wall with a much lighter paint, you’ll want to prime first to block bleed-through and avoid ghosting that ruins the new color.
You’ll prevent stains from seeping through and save time retouching. Choose a stain-blocking primer suited to the stain source, and follow proper primer application techniques for even adhesion.
Apply thin, consistent coats and let drying times finish between layers.
- Select a high-quality stain-blocker for oil, water, or smoke.
- Clean and sand the surface before priming.
- Use roller and brush combos for full coverage and edge control.
Improve Paint Opacity
Besides blocking stains, priming also dramatically improves coverage when you’re painting a light color over a dark one.
You’ll use primer to neutralize strong base tones so a single topcoat can hide them, reducing multiple coats and waste.
Think of it as prepping a blank canvas: primer evens porosity and creates consistent adhesion for paint layering, so pigments bind uniformly.
That consistency boosts color enhancement, making the new shade truer to swatch and more vibrant.
You’ll save time, money, and effort because proper priming prevents undercoat show-through and guarantees the lighter finish looks solid and consistent.
Even Color Transition
Because dramatic dark-to-light shifts demand uniform coverage, you’ll prime surfaces to create an even base that prevents the darker tone from bleeding through the lighter finish.
You get reliable color consistency and reduce the number of finish coats needed. Use primers formulated for high-hide situations and allow full drying before finish coats.
For smooth gradients, follow precise shift techniques and blocky-edge masking where needed. Consider these steps:
- Apply a high-hide primer in thin, even coats.
- Sand lightly and spot-prime any flaws for uniform absorbency.
- Use controlled overlap and feathering during finish coats for seamless shifts.
Priming for Light-to-Dark Color Transitions
When you’re switching from a light to a dark paint, priming is the single most effective step to get true color and cut down on coats. A quality primer seals the old shade and provides a neutral base so the new pigment lays down evenly and opaquely.
You’ll save time and money by choosing a high-hide primer and following color shift techniques: spot-prime stains, roll full coats, and back-brush edges.
For best results, follow primer application tips like thinning slightly for porous surfaces and allowing full dry time before topcoat. That disciplined approach prevents bleed-through and guarantees rich, consistent dark coverage.
Primer in High-Moisture Rooms and Bathrooms
1 key consideration in bathrooms and other high‑moisture rooms is choosing a primer that resists mildew and moisture infiltration so your topcoat stays put and looks good longer.
You’ll want a primer formulated for moisture resistance and bathroom application to prevent peeling and staining. Apply to cleaned, dry surfaces and follow curing times before painting.
- Use a mold- and mildew-resistant primer designed for humid spaces.
- Seal porous surfaces (drywall, plaster) to block moisture transfer and uneven finish.
- Spot-treat stains and apply a full coat for consistent adhesion and long-term protection.
Primer VOCs, Odors, and Indoor Air Quality
Although primers with strong solvents can off-gas for days, you can minimize their impact by choosing low‑ or zero‑VOC formulas and ventilating the space during and after application.
You’ll reduce VOCs effects by picking water‑based primers labeled low‑VOC or zero‑VOC and by airing out rooms with fans and open windows.
For sensitive occupants, wear a respirator and allow longer drying times.
Odor reduction comes from proper product choice, temperature control, and keeping HVAC filters clean so smells don’t circulate.
Track lingering odors and avoid high‑VOC touch‑ups near infants, elderly, or those with respiratory issues.
How Primer Improves Long-Term Paint Durability
When you prime a wall, the paint sticks better because the primer improves adhesion to the surface.
It also seals against moisture so you’re less likely to get bubbling or staining over time.
That combined protection helps prevent paint flaking and keeps your finish intact longer.
Improved Adhesion To Surfaces
Because a primer bonds to both the substrate and the topcoat, it creates a stable bridge that helps your paint stick more securely and resist peeling, chipping, or premature wear.
You’ll notice improved adhesion when primer evens porosity, fills tiny imperfections, and provides consistent chemistry for coatings. Good surface preparation activates adhesion mechanisms, letting the primer mechanically and chemically lock to the substrate so the topcoat performs longer.
Consider these practical effects:
- Uniform absorption: prevents patchy bonding.
- Mechanical keying: fills pores and creates grip.
- Chemical compatibility: neutralizes mismatched surfaces for stable coating bonds.
Sealant Against Moisture
Moisture protection is one of a primer’s most important jobs: it seals porous surfaces and blocks water vapor pathways so your topcoat stays sound longer.
When you apply primer, it forms a consistent moisture barrier that prevents dampness from migrating through drywall, plaster, or masonry and reaching the paint film.
That barrier improves long-term durability by reducing blistering, mildew risk, and color changes caused by humidity.
You get reliable surface protection that keeps coatings adhering and looking fresh in variable climates.
Choose a primer rated for the substrate and moisture conditions, and you’ll extend the life of your paint job.
Prevents Paint Flaking
If paint is peeling or flaking, it’s usually due to poor adhesion between the coating and the surface, and a good primer stops that problem before it starts.
You want flaking prevention that lasts, so apply primer to create a uniform bond, block stains, and seal porous substrates.
Primer evens porosity, helps topcoat grip, and reduces surface movement that causes lifting. That improves paint longevity and cuts maintenance cycles.
Use targeted primers for tricky areas like bare wood or patched drywall to maximize durability.
- Improve adhesion
- Seal porosity
- Prevent moisture-driven lift
Preventing Peeling and Blistering With Primer
When you prep and prime properly, you stop paint from peeling and blistering before it starts. You create a stable, sealed base that locks paint to the wall, enabling effective peeling prevention and blistering avoidance.
Primer penetrates porous areas, evens porosity, and blocks moisture migration that otherwise lifts finish coats. By improving adhesion and reducing substrate-driven vapor pressure, primer prevents bubbles and flakes that lead to costly repairs.
Use a compatible primer for problematic surfaces—stains, bare drywall, or patched spots—and follow drying times. That disciplined step saves time, extends finish life, and keeps painted surfaces looking uniform and intact.
How Primer Hides Minor Surface Imperfections
When you roll on primer, it fills tiny pits and hairline scratches so the wall looks smoother.
You’ll notice the texture evens out, making patchy spots less visible.
That smoother, consistent surface helps your topcoat go on more uniform and professional-looking.
Smooths Minor Blemishes
Because primer creates a uniform, slightly textured layer over your walls, it fills tiny pits and feathered edges so paint lays on smoothly and looks consistent.
You’ll notice minor scratches and nail holes become less visible because primer evens out reflectivity and offers blemish coverage before color goes on.
Good surface preparation—cleaning, sanding, and sealing—helps primer perform, so you won’t need heavy skim coats.
Apply properly and let dry; primer bonds loose dust and stabilizes porous spots.
You get a truer final color, reduced touch-ups, and a longer-lasting finish.
- Reduces tiny defects
- Hides hairline flaws
- Improves paint adhesion
Evens Surface Texture
If you want a consistently smooth finish, primer evens out surface texture by filling tiny pores and evening reflectivity so paint lays on uniformly.
You’ll notice how modest dents, hairline cracks, and sanding scratches become less visible because primer creates a uniform base that masks micro-imperfections.
During surface preparation, you’re not hiding major damage, but you’re reducing light variation that makes flaws pop.
This texture improvement means fewer coats of finish paint and a more professional look.
Apply primer evenly, let it dry fully, then inspect and spot-sand where necessary before topcoating for best results.
Priming Over Glossy or Previously Painted Walls
Though glossy or previously painted walls might look smooth and finished, they often resist new paint and compromise adhesion. Priming creates a uniform, bondable surface that prevents peeling, flashing, and uneven sheen.
You’ll find primer improves paint adhesion on glossy walls and painted surfaces, letting new coats level and last. Use a bonding or adhesion primer for slick finishes and a stain-blocking formula when discoloration’s present.
Skip topical prep details here—focus on why primer’s necessary to guarantee longevity. Consider these benefits:
- Promotes reliable paint adhesion across slick areas.
- Hides minor inconsistencies.
- Reduces need for multiple finish coats.
Prepping Walls: Cleaning, Sanding, and When to Prime
Before you paint, clean the walls thoroughly to remove dirt, grease, and loose particles so the primer can bond properly.
Lightly sand rough spots and glossy finishes to create a smooth, keyed surface.
Prime any repaired areas, raw drywall, or drastic color changes to guarantee even coverage and adhesion.
Clean Surfaces Thoroughly
Start by removing dirt, grease, and loose paint so the primer can bond properly to the wall. You’ll use targeted cleaning techniques for effective surface preparation: degrease kitchen areas, wash with mild detergent, and rinse thoroughly.
Let surfaces dry completely before priming. Address stains with appropriate cleaners or stain-blocking primers when needed. Avoid over-wetting drywall; blot rather than soak.
After cleaning, inspect for residual contaminants and repeat spot-cleaning as necessary. Proper cleaning improves adhesion, prevents peeling, and guarantees a uniform finish.
Follow manufacturer guidance for cleaners and protective gear, and proceed to sanding only when surfaces are dry and contaminant-free.
Sand For Smoothness
Once surfaces are clean and dry, sand them lightly to knock down rough spots, feather edges of old paint, and create a slightly toothy surface so primer will grip evenly.
You’ll use sanding techniques suited to the job: coarse grit to level high spots, medium to smooth connections, and fine to finish.
Sand with the grain where possible, keep a consistent pressure, and use a sanding block or orbital sander for flat areas.
Remove dust between steps with a vacuum and tack cloth.
Good surface preparation prevents show-through, improves adhesion, and reduces the need for extra coats later.
Prime Before Painting
Although you’ve cleaned and sanded the wall, you should still apply a primer to seal surfaces, hide imperfections, and give paint something to bond to.
You’ll improve adhesion, reduce soak-in on patched areas, and create an even base during paint preparation. Apply primer after dusting; let it dry fully before painting.
Choose a primer matched to the substrate—stain-blocking for marks, bonding for glossy surfaces.
- Seal porous drywall to prevent uneven sheen.
- Mask stains and guarantee uniform topcoat coverage.
- Promote long-term durability by stabilizing the surface treatment before finish coats.
How to Test Whether a Surface Needs Primer
Want to know if a surface really needs primer? Start with a quick surface assessment: look for stains, uneven sheen, peeling paint, bare drywall, or repaired patches.
Press your fingernail to check for loose paint.
For primer testing, tape a small square of painter’s tape, paint over it with your chosen topcoat, and remove the tape after drying to see adhesion and color uniformity.
Also try a damp cloth: if paint soaks in or darkens the area, it’s porous and needs primer.
If the test shows good adhesion, consistent coverage, and no bleed-through, you can likely skip priming.
How Much Primer You Need (Coverage Estimate)
Most primers cover about 300–400 square feet per gallon, but check the label since formulations vary.
Measure each wall’s height and width to calculate total surface area, including doors and windows you’ll skip.
Divide your total square footage by the primer’s coverage to know how many gallons to buy, and add 10–15% for touch-ups.
Primer Coverage Per Gallon
A single gallon of primer typically covers about 300 to 400 square feet, but the exact amount you’ll need depends on surface texture, porosity, and whether you’re doing one or two coats.
You should adjust estimates for rough or highly porous walls; smooth surfaces use less. Different primer types vary in hide and spread rate, so check manufacturer coverage figures before purchase.
For efficient primer application, work methodically and keep a consistent wet edge to avoid waste.
- Smooth drywall: ~350–400 sq ft/gallon
- Textured plaster: ~200–300 sq ft/gallon
- Bare wood or repaired areas: ~150–250 sq ft/gallon
Calculating Surface Area
Before you buy primer, measure each wall and significant ceiling area so you can calculate the exact square footage you’ll cover; record surface dimensions for every plane, subtract doors and windows, then total them. Use area calculations (height × width) for each rectangle and add extras for closets or alcoves. Divide total square footage by the primer’s stated coverage per gallon to find gallons needed, then round up for safety. Consider one versus two coats based on porosity.
| Item | Action |
|---|---|
| Walls | Measure height × width |
| Ceilings | Measure separately |
| Openings | Subtract doors/windows |
| Total | Divide by coverage/gallon |
Best Tools and Techniques for Applying Primer
Choose the right tools and you’ll save time and get a smoother, more even primer coat. You want the best application methods tailored to surface type, and essential priming tools ready before you start.
Prep thoroughly: clean, sand, and tape edges. Use steady strokes and maintain a wet edge to avoid lap marks.
Prep well—clean, sand, and tape edges. Use steady strokes and keep a wet edge to prevent lap marks.
- Roller: high-density nap for drywall, low nap for smooth plaster.
- Brush: angled sash brush for corners and cutting in.
- Spray: airless sprayer for large areas; practice on scrap first.
Work methodically, overlap passes, and keep tools clean for consistent results.
Drying Times and Recoat Windows for Primers
While primers often feel dry to the touch within an hour, their true cure and the safe window for recoating depend on type, temperature, and humidity, so check the manufacturer’s recoat time and wait accordingly.
You’ll notice oil-based primers usually require longer drying times than water-based ones; expect several hours to overnight for oils and one to four hours for acrylics under ideal conditions.
Cooler temps or high humidity extend recoat windows, while warm, dry air speeds them.
Follow label directions, test a small area before full recoating, and avoid sealing in tackiness by respecting recommended intervals.
Common Primer Mistakes to Avoid
Don’t skip surface prep—you’ll end up with peeling or uneven finish no matter how good the paint is.
Don’t use the wrong primer type, because adhesion and stain-blocking will suffer.
Addressing these two mistakes up front saves time and prevents costly touch-ups.
Skipping Surface Prep
If you skip surface prep, the primer won’t adhere properly and problems like peeling, uneven color, and trapped stains will show through the finish.
You’ve got to clean, sand, and repair surfaces so primer bonds and topcoat looks right. Use basic surface preparation techniques: remove dust, degrease, and scuff glossy areas before priming.
Follow primer application tips: apply thin, even coats and allow proper drying time. Skipping these steps wastes paint and time, and can force costly rework.
Be methodical up front so your finish lasts and performs as designed.
- Clean thoroughly
- Sand and repair
- Apply thin coats
Using Wrong Primer Type
Because primers are formulated for specific surfaces and problems, picking the wrong type will undo all your prep work and ruin the finish. You’ll see bubbling, poor adhesion, or stain bleed-through — classic wrong primer effects. When choosing primers, match formulation to substrate: oil-based for knots, shellac for heavy stains, latex for drywall.
| Surface | Recommended Primer |
|---|---|
| Knots/wood | Oil-based |
| Stains | Shellac |
| Drywall | Latex |
| Glossy surfaces | Bonding primer |
Check labels, test a small patch, and don’t assume one primer fits all — that saves time and money.
Priming Over Stains, Smoke, or Water Damage
When walls show stains from smoke, nicotine, or water, you’ll want to seal them before painting so discoloration and odors don’t bleed through the finish.
You should assess stain types and moisture levels first, addressing active leaks or dampness. Use a high-adhesion, stain-blocking primer designed for tannin and smoke penetration.
Assess stains and moisture first, fix leaks, then prime with a high-adhesion, stain-blocking primer for tannins and smoke.
Apply primer evenly, allowing full cure to guarantee the seal holds.
- Identify source: stop leaks and reduce moisture levels before priming.
- Select primer: choose solvent- or shellac-based blockers for heavy stains.
- Test and finish: spot-check cured primer, then topcoat for uniform color and odor control.
Priming Over Wallpaper and Textured Surfaces
After sealing stains and fixing moisture issues, you’ll often face walls covered in wallpaper or heavy texture that still need proper priming before repainting. You’ll weigh wallpaper removal versus priming over intact paper; priming techniques can stabilize surface adhesive and seal texture, improving paint adhesion and hiding minor flaws. Use a high-adhesion primer for embossed surfaces or a bonding primer after stripping stubborn paper. Test a small area first. Choose products that match your repainting plan and finish.
| Emotion | Reaction |
|---|---|
| Relief | Confidence |
| Frustration | Resolve |
| Anticipation | Satisfaction |
| Doubt | Clarity |
Primer’s Role in Mold and Mildew Prevention
If you want to keep mold and mildew from taking hold, choose a primer formulated to resist fungal growth and to block moisture before you paint. You’ll limit spore colonization, improve mold resistance, and create a drier surface that supports mildew prevention.
Applying the right primer is proactive: it seals porous drywall, stops moisture wicking, and gives topcoats a stable base. For best results, prep surfaces, fix leaks, and follow manufacturer dry-time guidance.
Consider these practical primer attributes:
- Antimicrobial additives to inhibit spores.
- High-quality sealing power for porous substrates.
- Vapor-control properties to reduce surface dampness.
Is Primer Worth the Cost? Cost vs. Benefit
Wondering whether primer is worth the extra expense? You’ll run a simple cost analysis: compare primer price, additional labor time, and paint saved against potential rework costs from poor adhesion or uneven coverage.
In a value assessment, primer often reduces total paint needed, improves finish longevity, and prevents stains from bleeding through, so you avoid repainting sooner. For high-porosity surfaces or drastic color changes, primer’s benefits usually outweigh its price.
If surfaces are already uniform and in good condition, you might skip it. Weigh upfront costs versus long-term savings to decide what makes sense for your project.
Safety and Environmental Tips for Using Primer
Cost and value matter, but you also need to protect yourself and the environment when using primer. You should follow safety precautions: ventilate areas, wear gloves and eye protection, and avoid skin contact.
Cost and value matter, but prioritize safety and the environment when using primer—ventilate, wear protection, avoid skin contact.
Consider environmental concerns by choosing low-VOC or water-based primers and disposing of cans and rags properly.
- Read labels for hazards and first-aid steps before you start.
- Use containment and drop cloths to limit spills and waste.
- Recycle empty containers and take leftover hazardous waste to a proper facility.
These steps keep you safe, reduce impact, and guarantee compliant, responsible priming.
Troubleshooting: Flaking, Lap Marks, Poor Coverage
Three common problems you’ll run into with primer are flaking, visible lap marks, and poor coverage, and each has distinct causes you can fix before repainting.
If you see flaking issues, scrape loose primer, sand to feather edges, clean dust and grease, then use a bonding primer.
For lap mark solutions, maintain a wet edge, work in consistent sections, and adjust roller nap and thinning to match drying time.
When coverage problems appear, check primer type, apply correct spread rate, and add a second coat if needed.
These troubleshooting tips help you avoid rework and get an even finish.
When and Why to Use Tinted Primer
After fixing flaking, lap marks, or coverage issues, you’ll often find that the primer’s color still affects how many topcoats you need and how the final paint looks.
You should use a tinted primer when shifting between strong hues, covering stains, or aiming for rich finishes. Tinted primer benefits include fewer topcoats, truer color payoff, and better stain masking.
Use a tinted primer when switching strong hues, covering stains, or seeking richer, truer color with fewer coats
When choosing colors, match primer tone to the new paint’s undertone—warm to warm, cool to cool—to reduce glazing.
Consider these practical situations:
- Bold color change (light to dark)
- Stain or tannin blocking
- Deep or saturated accent walls
Primer Choices: DIYers vs. Professional Painters
When you’re choosing a primer, DIYers and professional painters often pick different products and methods based on time, budget, and desired outcome.
You’ll notice DIY Techniques favor convenience: all-in-one primers, easy-rolling formulas, and quick-dry options that fit weekend schedules and modest budgets. You’ll accept simple surface prep and fewer coats to save time.
Professional Tips lean toward project-specific primers, stronger adhesion, and stain-blocking systems; pros test substrates, use targeted products, and plan drying and recoating for durability.
You should match your choice to the job: weigh cost, skill, and longevity to get consistent, lasting results.
Product Picks: Primers for Common Problems
If you’re tackling a specific problem—stains, peeling, or bare drywall—pick a primer designed for that challenge rather than a one-size-fits-all product.
You’ll save time and get better adhesion when you match primer types to the issue. Consider stain-blocking for nicotine or water marks, bonding primers for glossy or peeling surfaces, and high-build drywall primers for new plaster.
Think about primer application—roller for smooth coverage, brush for edges, sprayer for large areas. Choose based on surface and room use.
Compare drying time, VOCs, and tinting ability to pick a product that fits your project needs.
- Stain-blocking primer types
- Bonding primers for peeling
- High-build drywall primers
Step-by-Step Primer Checklist for a Flawless Job
1 clear checklist keeps your primer job on track and prevents costly mistakes—start by gathering the right primer, tools, and safety gear so you’re ready to prep, apply, and clean up without interruptions.
Inspect walls for damage, wash surfaces, and repair cracks—surface preparation guarantees adhesion. Sand glossy spots and remove dust.
Inspect walls, wash and repair cracks—proper surface prep ensures primer adhesion; sand glossy areas and remove dust.
Select from appropriate primer types for stain blocking, adhesion, or sealing porous drywall. Stir primer, test a small area, and use appropriate rollers or brushes.
Apply even coats, allow full drying time between layers, and ventilate. Clean tools promptly and store leftover primer following label directions for safe disposal.
How to Tell if Primer Made the Difference
You’ve followed the checklist, prepped the surface, and applied primer—now check whether it actually improved the paint job. Look for uniform color, fewer coats needed, and better adhesion. Compare primed and unprimed patches under good light.
- Reduced soaking: If paint sits on top instead of sinking, your primer application blocked stains and sealed porous areas.
- Coverage: Achieving even color with fewer topcoats shows the right primer options were chosen.
- Durability: Rub and scratch tests revealing less paint loss prove improved adhesion and a successful primer application.
These checks confirm primer made the difference.
Frequently Asked Questions
Can Primer Help Reduce Paint Odor After Application?
Yes — primer can help reduce paint odor after application because it aids odor absorption and seals substrates, so you’ll notice less smell and improved paint longevity as coatings adhere better and volatile compounds are contained.
Will Primer Affect the Texture or Sheen of Final Paint?
Want consistent results? You’ll find primer influences texture impact by smoothing surfaces and can cause slight sheen variation if it differs from the topcoat; choose matching primer type and sand or adjust finish to control final appearance.
Is Tinted Primer Necessary When Using Washable Paints?
You don’t always need a tinted primer with washable paints, but tinted benefits include better coverage and fewer topcoats; choose primer types based on surface color and stain blocking, and you’ll save time and achieve truer final hues.
How Does Primer Interact With Caulked Joints and Trim?
Primer improves caulk adhesion at joints and guarantees trim compatibility by sealing surfaces, promoting paint bond, and preventing shrinkage gaps. You’ll get smoother shifts, reduced peeling, and longer-lasting seams when you prime before caulking.
Can Primer Improve Insulation or Thermal Properties of Walls?
Absolutely not—you won’t turn walls into super-blankets with primer, but you can slightly boost insulation enhancement and thermal efficiency by sealing pores, reducing drafts, and improving paint performance, so your room holds heat a bit better.
Conclusion
Now you know primer isn’t just extra work—it’s your paint job’s backbone. Skip it, and colors may peel, stain, or need more coats; use it, and you’ll get truer color, better adhesion, and longer-lasting results. Pick the right primer for your surface, prep carefully, and apply evenly. Think of primer as the silent partner that does the heavy lifting so your paint can shine—investing a little time here saves you a lot later.