What Happens When You Paint Latex Over Oil Paint?
You can paint latex over oil paint, but you’ll need to prepare the surface so the new coat sticks and lasts. Check for glossy, loose, or contaminated areas, clean and sand to dull the sheen, apply a bonding or stain-blocking primer, then test adhesion in a few spots. Skipping prep often causes peeling, blistering, or uneven finish. Follow proper temperature and drying times, and keep going to learn specific primers, tests, and repair steps.
Quick Answer: Can You Paint Latex Over Oil Paint?
Yes — you can paint latex over oil paint, but you need to prepare the surface first.
You’ll assess oil paint types to determine age, adhesion, and finish; glossy or aged oil often resists latex. Sanding and cleaning remove gloss and contaminants so the new coat bonds.
Use a high-adhesion primer rated for latex over oil to bridge differences in latex paint characteristics like flexibility and breathability. Apply primer thinly, let it cure, then repaint with latex.
If you skip prep, expect peeling or flashing; with correct steps, latex will perform well and last.
Quick Checklist Before You Roll Latex Over Oil Paint
Before you roll latex over oil paint, run through a quick checklist to make certain the new coat will stick: inspect for loose, cracked, or glossy oil surfaces.
Clean thoroughly with degreaser, sand glossy areas to dull the sheen, and wipe away dust.
Clean with a degreaser, scuff glossy spots until dull, then wipe away all dust before priming.
Repair any peeling oil paint; remove unstable sections.
Prime with a bonding primer designed for oil-to-latex conversion.
Perform adhesion testing by taping and pulling or applying a small latex patch to confirm bond after primer dries.
Ascertain surfaces are dry and temperatures meet product specs.
If any test fails, address surface preparation before proceeding.
When You Can Skip Stripping Old Oil Paint
If the existing oil paint is well-bonded, stable, and shows no peeling, you can often skip stripping and prime directly with a bonding primer.
This is usually safe in low-risk, non-critical areas where the finish isn’t load-bearing or exposed to heavy wear.
Still, check for underlying issues first so you’re not trapping problems under the new latex coat.
When Adhesion Is Good
You can skip stripping old oil paint when the existing finish is clean, sound, and properly abraded so the new latex can bond.
If the oil layer isn’t chalky, flaking, or contaminated, you can use adhesion strategies like scuff sanding, solvent cleaning, and a quality bonding primer to guarantee surface compatibility.
Test a small area: sand, prime, and paint, then monitor for lift after 24–48 hours. Good adhesion shows firm, even bite and no wrinkling.
When tests pass, you’ll save time by painting directly, but always address any localized failures before completing the job.
Stable, Intact Oil Layers
When the oil paint layer is stable and intact, you can often skip full stripping and move straight to surface prep and priming. You should confirm stable adhesion by checking for cracking, lifting, or flaking; tap and score discreet spots.
Understand oil paint properties—cured oil provides a less porous, slick substrate that affects latex compatibility. Clean thoroughly with degreaser, sand lightly to dull the sheen, and remove dust; this surface preparation promotes mechanical bonding.
Use a high-quality, oil-blocking primer rated for latex over oil to bridge chemistry differences. Proceed only if the oil layer remains firmly adhered and sound.
Low-Risk, Non-Critical Areas
Because the stakes are low and appearance isn’t critical, you can often skip stripping old oil paint in areas like garages, basements, sheds, or behind built-ins—provided the oil layer is sound, clean, and well-adhered.
In low traffic areas, prep by degreasing, scuff-sanding, and using a quality bonding primer before applying latex. That approach preserves paint durability enough for utility spaces where appearance and lifespan demands are modest.
You accept some risk of eventual adhesion loss or flaking, but maintenance is simple: spot-sand and touch up.
Skip stripping when convenience outweighs longevity and the substrate shows no failure signs.
How to Test Adhesion Before Repainting
Want to know if that old oil paint will hold a new latex coat? You’ll perform simple adhesion tests to check surface compatibility before committing.
Clean the area, remove loose flakes, then press a strip of 3M test tape or duct tape onto the paint, rub firmly, and peel sharply. If paint lifts, adhesion’s poor.
For a spot check, sand a small square to key the surface, apply a latex touch-up, and observe after 24–48 hours for lifting, bubbling, or edge failure.
Repeat tests in several spots and record results so you can choose priming or full stripping confidently.
Signs an Oil-Painted Surface Needs Special Treatment
If old oil paint is flaking, chalky, or showing solvent soft spots, you’ll need to treat the surface before applying latex.
Check for visible oil paint deterioration: peeling edges, blistering, or a powdery residue that indicates breakdown.
Feel the surface texture—smooth, glossy areas repellent to touch contrast with brittle, rough patches.
Tap gently; hollow sounds can mean delamination.
Look for yellowing or staining that might bleed through new latex.
If multiple signs appear, don’t skip prep. Properly addressing compromised sections prevents adhesion failure, uneven finish, and premature peeling once you’ve painted latex over oil.
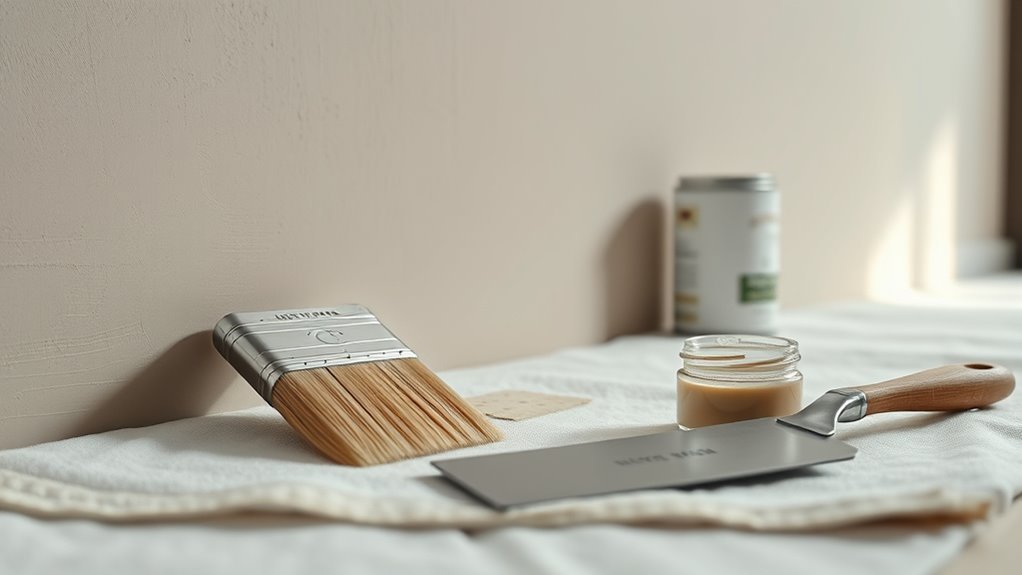
Tools and Materials for Prepping Oil-Painted Surfaces
Before you slap on latex, you’ll need the right cleaning tools—degreaser, rags, and brushes—to remove dirt and wax.
Then you’ll abrade the surface with sandpaper or a scuff pad to promote adhesion.
Finally, pick an appropriate primer or sealer designed for oil-to-latex changes to lock in the old finish and guarantee a stable topcoat.
Surface Cleaning Tools
A sturdy brush and a few good rags are the backbone of prepping oil-painted surfaces—you’ll also want a putty knife, a mild degreaser, and fine-grit sandpaper on hand.
Choose surface cleaners and cleaning agents suited to grease and old residue; test in a hidden spot. Use cleaning tools for gentle scraping and wiping; avoid aggressive solvents unless specified by paint removers guidance.
For effective surface preparation, combine proper cleaning materials with deliberate cleaning techniques: wipe with degreaser, rinse, and dry thoroughly.
Keep a small bucket, scrub brush, and lint-free cloths ready as your basic surface solutions toolkit.
- Bucket and scrub brush
- Putty knife and scraper
- Mild degreaser and rags
Sanding And Abrasion
Start sanding with the right grit and tools to create a toothy surface that helps a new latex coat stick to old oil paint. You’ll use sanding techniques that balance removing gloss and avoiding deep scratches; start with medium grit, finish with fine for even abrasion effects.
Focus on surface preparation to address adhesion challenges and guarantee paint compatibility without over-sanding. Hand sanding and a DA sander both work—control pressure and movement for layer durability. Clean dust between steps.
For finishing touches, inspect for smooth changes and restored adhesion. Proper sanding supports surface restoration and long-lasting latex over oil.
Primers And Sealers
Once you’ve sanded the surface to a dull, toothy finish, pick primers and sealers that’ll bridge oil-based paint to latex—these products lock in old binders, block stains, and create a uniform surface for adhesion.
Consider primer types (oil-alkyd, shellac, or high-bond latex) and sealer options to address compatibility and staining. Focus on adhesion factors during surface preparation, follow recommended application techniques, and note drying times.
Weigh environmental impact when choosing products. For product recommendations and troubleshooting tips, test a small area.
- Shellac primer: fast drying, stain block.
- Oil-alkyd: strong adhesion, longer cure.
- High-bond latex: low VOC, flexible.
Cleaning Oil-Painted Walls Before Repainting

Before you repaint, clean oil-painted walls thoroughly so new latex will adhere and finish evenly. You’ll remove grease, dust, and chalking with a degreaser or trisodium phosphate substitute, rinsing well and letting surfaces dry.
Test for surface compatibility by wiping a small area with denatured alcohol; if residue lifts, clean further. Address mildew with a diluted bleach solution, then rinse.
Remove loose or flaking paint to prevent failures in paint layering. After cleaning, inspect for stains or repairs, spot-prime as needed with a bonding primer, and wait full drying time before applying latex topcoat.
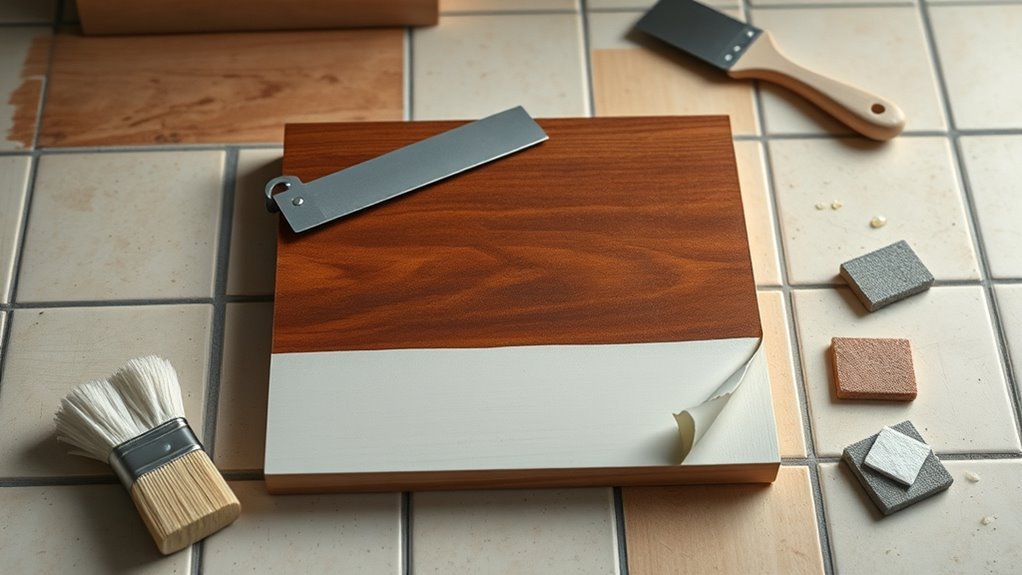
How to Sand Oil Paint for Better Latex Adhesion
Start by preparing the surface: clean off grease, loose paint, and dust so the sandpaper can do its job.
Use a medium-grit (120–150) to scuff the oil paint, then finish with a finer grit (180–220) for a smoother profile that helps latex bond.
Wipe away sanding residue before priming.
Prepare The Surface
1 simple step you shouldn’t skip is scuff-sanding the oil-painted surface so latex can grip it. You’ll clean, roughen, and inspect to improve surface texture and guarantee paint compatibility before priming.
Work methodically; remove gloss without stripping to bare wood.
- Wipe the area with a degreaser and let it dry.
- Lightly sand until the sheen dulls, then vacuum and tack cloth to remove dust.
- Check for peeling or failing oil paint; scrape and feather edges before priming.
These steps make latex adhesion reliable and reduce the risk of future peeling or uneven finish.
Use Proper Grit
Once you’ve scuffed the surface and removed loose paint, picking the right sandpaper grit will determine how well latex paint bonds to oil-based layers.
You’ll choose sanding techniques that create enough tooth without damaging the oil paint—start with 120–150 grit for glossy oil paint, then finish with 180–220 grit for smooth adhesion.
In project planning, match grit selection to surface condition and desired finish. Combine this surface preparation with proper cleaning, then perform adhesion testing by applying a small latex patch.
If it peels, repeat sanding with slightly coarser grit. Good grit choice boosts paint compatibility and long-term adhesion.
When to Use Chemical Deglossers Instead of Sanding
When sanding would gouge delicate profiles, generate hazardous dust, or take too long, reach for a chemical deglosser instead; it softens and dissolves the old oil finish so you can clean and paint without aggressive abrasion.
You’ll choose chemical alternatives when intricate trim, brittle substrate, or confined spaces make abrasives impractical. Use them as part of surface preparation—wipe, neutralize per instructions, and rinse if required. Always test a small area first.
- Trim and moulding: preserves profiles.
- Lead or asbestos risk: avoids dust.
- Time constraints: faster prep for repainting.
Repairing Cracked or Peeling Oil Paint Before Painting
Start by evaluating the damage so you know whether you’re dealing with isolated flakes or a widespread adhesion failure.
If you spot cracked paint or peeling issues, remove loose material, clean the area, and degrease surfaces. You’ll use proper surface preparation to feather edges and expose sound oil paint.
Apply repair techniques like filling gouges and sanding smooth; address adhesion problems by removing any contaminant layers.
Test paint compatibility on a small patch before proceeding.
Follow restoration methods that stabilize the substrate and guarantee a uniform surface.
Proper repairs reduce future failure and make subsequent latex coatings more reliable.
Choosing the Right Primer for Latex Over Oil Paint
After you’ve stabilized and smoothed the surface, pick a primer that bonds oil to latex and blocks stains so your topcoat sticks and looks even.
After stabilizing and smoothing, choose a stain‑blocking primer that bonds oil to latex for a smooth, lasting topcoat.
You’ll evaluate primer types and surface compatibility before buying. Choose a product formulated for adhesion to oil finishes and for the substrate—wood, metal, drywall—so you avoid peeling.
Apply per instructions: clean, sand, tack, and let dry fully. Consider breathability for interior walls and stain-blocking for tannin-rich wood.
Test a small area to confirm adhesion and finish. If it fails, stop and reassess prep rather than layering more paint.
- Oil-adhesive primer
- Latex adhesion primer
- Specialty surface primers
Shellac vs. Bonding Primer: Which to Pick?
Wondering whether to use shellac or a modern bonding primer? You’ll weigh shellac benefits like rapid drying times and strong adhesion properties to stubborn oil paint, valuable when surface compatibility is limited.
Bonding primer excels across primer types for porous or glossy substrates, offering broader surface compatibility and improved finish durability with latex paint topcoats.
Consider solvent sensitivity, odor, and cleanup: shellac uses alcohol; bonding primer typically cleans with water or mineral spirits.
Match primer choice to the specific condition of the oil paint layer and your performance priorities—fast cure and stain blocking versus versatile adhesion and longer open working time.
How to Apply Primer for a Durable Bond
While you’re prepping the surface, focus on cleanliness, dryness, and proper sanding to give the primer something to grip; these steps determine whether the bond holds.
Focus on cleanliness, dryness, and proper sanding so the primer has something solid to grip.
Choose primer types suited for oil-over-oil or oil-to-latex swaps, like shellac or a dedicated bonding primer. Mix and stir per label, work in thin, even coats, and maintain recommended recoat times.
- Degrease, sand to dull gloss, and remove dust.
- Apply a thin, uniform coat with a high-quality brush or roller.
- Inspect, sand light between coats if needed, then allow full cure before topcoating.
Best Latex Topcoats for Primed Oil-Painted Surfaces
If you’ve prepped and primed an oil-painted surface correctly, choosing the right latex topcoat is the next step to guarantee durability and appearance.
Pick high-quality 100% acrylic latex formulas for superior elasticity and oil paint compatibility; they resist yellowing and flex with substrate movement. Satin or semi-gloss sheens offer cleanability without highlighting imperfections.
Use products labeled for adhesion over primed oil surfaces and follow latex adhesion techniques: scuff, clean, and apply thin, even coats. Avoid cheap flat finishes that trap moisture.
Test a small area first, then apply two coats for consistent coverage and long-term performance.
How Environmental Conditions Affect Latex Over Oil
After you’ve sealed and topcoated an oil-painted surface, remember that the surrounding environment will strongly influence how that latex layer performs over time.
After sealing and latex topcoat, remember the surrounding environment will strongly affect the finish’s long-term performance.
You’ll need to take into account environmental effects like humidity impact and temperature fluctuations, since moisture concerns and adhesion challenges can emerge despite proper surface compatibility.
Plan application timing to avoid extremes and improve paint longevity. Monitor conditions during cure to reduce blistering or peeling risks.
- Choose windows with stable temperature fluctuations for application.
- Avoid high humidity periods to limit moisture concerns.
- Confirm surface compatibility and allow full cure before topcoating.
How Temperature & Humidity Change Adhesion Risk
When you paint latex over oil, temperature has a big say in how well the layers bond—too cold and the latex won’t cure properly, too hot and it can skin over without forming a strong film.
Humidity also matters because high moisture slows drying and can trap solvents, weakening adhesion, while very low humidity can cause rapid surface drying and poor intercoat bonding.
You’ll want to control both factors to reduce the risk of peeling or blistering.
Temperature Effects On Bonding
Because paint chemistry and surface tension shift with the air around you, temperature and humidity directly change how well latex will stick to oil. You’ll notice temperature effects immediately: cold slows film formation, warm speeds it, and extremes can ruin bonding strength. Adjust your timing and environment to reduce risk.
- Cold temperatures: latex cures slowly, increasing chance of poor adhesion and trapping solvents.
- Moderate warmth: promotes even coalescence and better bonding strength if you follow manufacturer temps.
- High heat: accelerates skinning and can yield brittle adhesion or bubbles, undermining long-term hold.
Humidity Influences Drying
Temperature sets the pace, but humidity controls how fast latex dries and how well it locks onto an oil surface.
You’ll notice humidity effects immediately: high humidity slows water evaporation, extending tack time and increasing the risk of contamination or poor film formation.
Low humidity speeds curing but can cause skinning before proper adhesion develops. Those drying challenges change your timing for sanding, recoating, or forcing adhesion with primers.
To minimize failures, work when relative humidity is moderate, ventilate to control moisture, and use slow-drying additives or bonding primers when conditions aren’t ideal.
Monitor conditions; small adjustments prevent peeling and blistering.
Common Application Mistakes That Cause Peeling
If you skip proper surface prep, paint adhesion will fail regardless of product quality. You must check surface compatibility and remove gloss, dirt, and loose oil paint; that’s basic peeling prevention.
Sand, degloss, and clean until the surface is dull and dry.
- Skip sanding: wet or glossy oil paint repels latex, so adhesion weakens and flakes.
- Use wrong primer: don’t skip a bonding primer formulated for oil-to-latex conversion.
- Paint too thick or in cold conditions: films that cure slowly are more likely to lift.
Follow those steps to avoid peeling and guarantee lasting results.
How Moisture Problems Sabotage Latex Adhesion
When moisture’s present in or behind a surface, latex can’t form a strong bond and will peel, blister, or fail to dry properly. You’ll meet moisture sources like leaks, condensation, or rising damp that undermine adhesion challenges when latex sits over oil.
Proper surface preparation removes salt, mildew, and trapped water so coatings stick. Consider environmental impact: high humidity or cold slows cure and raises failure risk.
Check paint compatibility—oil layers can hide moisture and repel latex—so test adhesion first. Use application techniques that allow breathability and drying, and fix underlying moisture before repainting to avoid repeat failure.
How Paint Thickness and Coats Influence Failure Risk
Although a single thick coat might seem like a shortcut, it actually raises the risk of adhesion problems and surface defects when you paint latex over oil. You should focus on layer thickness, even coats, and proper preparation methods to protect surface integrity and coating durability.
Do a risk assessment before starting and follow application techniques that favor multiple thin layers.
- Feather thin layers to improve paint adhesion and speed safe curing.
- Allow full dry times between coats for better failure prevention and bonding.
- Use sanding and cleaning in prep to enhance surface integrity and long-term coating durability.
Troubleshooting Flaking, Bubbling, and Fisheyes
If your latex topcoat is flaking, bubbling, or showing fisheyes, first check the surface for oil, grease, or old wax that can prevent adhesion.
Use an adhesion promoter or a proper bonding primer when sanding and deglossing aren’t enough to guarantee a firm bite.
Also confirm the substrate was fully dry and cured—moisture or painting too soon after priming will cause bubbles and fisheye defects.
Surface Contamination Check
1 quick inspection can save you a lot of headache: before blaming incompatible paint, check the surface for contaminants—dust, grease, silicone, or old wax—that cause flaking, bubbling, and fisheyes; clean, degloss, and solvent-wipe the area, then test a small patch to confirm adhesion and smooth finish.
You’ll focus on surface preparation to reduce contamination risks and reveal whether the issue is contamination or coating failure. Follow these steps quickly and methodically to avoid wasted time and materials.
- Wipe with TSP or degreaser, rinse, dry.
- Sand to dull gloss, remove residues.
- Solvent-wipe, test a 6″ patch.
Adhesion Promoter Use
When flaking, bubbling, or fisheyes appear after you paint latex over oil, an adhesion promoter can often rescue the job by creating a stable bridge between the old oil finish and the new latex coat; choose a promoter labeled for oil-to-latex use.
You’ll clean and degloss first, then apply thin even coats of the promoter per instructions.
These adhesion techniques rely on bonding agents that chemically link surfaces, improving paint hold and preventing recurrent defects.
Test a small area to confirm compatibility, allow proper cure time, and then topcoat with latex.
If issues persist, strip and restart with appropriate primers.
Moisture And Drying
Because trapped moisture and improper drying can undermine even the best surface prep, you should always check humidity, substrate dampness, and drying times before laying down latex over oil.
You’ll prevent flaking, bubbling, and fisheyes by managing moisture impact and respecting drying time.
Prepare the surface: remove loose paint, sand glossy oil, and test for damp spots.
Follow product drying time and cure recommendations; don’t rush recoats.
If you see blisters or fisheyes, strip to sound layers and let the substrate fully dry.
- Test humidity and substrate moisture.
- Wait full drying time per label.
- Use primer if needed.
When to Strip Oil Paint Completely Before Repainting
If the old oil finish is failing, contaminated, or too thick to sand feather-smooth, you should strip it completely before repainting; leaving compromised oil beneath new latex will almost always cause adhesion problems, discoloration, or blistering down the line.
You should strip when you detect flaking, soft or chalky surfaces, persistent yellowing, or incompatible oil paint types that won’t bond with latex even after primers.
Also strip if repair patches expose different layers or solvents reveal hidden contamination.
Choosing appropriate stripping methods matters: after removal, clean, neutralize residues, and make certain the substrate is fully dry before priming.
Safe Methods for Removing Oil-Based Paint
Removing oil-based paint safely means choosing the right method for the surface, extent of coating, and your exposure limits. You’ll assess finish, ventilation, and whether chemical strippers, heat, or mechanical abrasion fit the job.
Use PPE, work outdoors or with strong ventilation, and test a small area first.
- Chemical strippers: pick a low-VOC, biodegradable stripper, follow directions, and neutralize surfaces after stripping.
- Heat/infrared: soften paint for scraping, avoid scorching, and wear heat-resistant gloves and eye protection.
- Mechanical sanding: use dust extraction, HEPA mask, and wet-sanding when practical for minimal dust.
Prioritize oil paint removal and safe disposal.
How to Dispose of Oil Paint and Contaminated Rags
After you’ve stripped or sanded off old oil paint, you’ll need to handle leftover paint and any contaminated rags safely to prevent fires, environmental harm, or code violations.
For oil paint disposal, never pour solvents or paint down drains. Seal small amounts in original cans with lids; take them to a household hazardous waste facility. For large quantities, contact local waste services for pickup or approved drop-off.
For rag contamination, air-dry rags flat outdoors or spread them singly on metal to avoid unplanned combustion. Then place them in a metal container with a tight lid or follow local disposal rules for hazardous textiles.
Prep vs. Full Strip: Cost and Time Comparison
You’ll spend less upfront prepping oil paint for latex—sanding, deglossing, and priming takes labor and time but saves on materials.
Stripping to bare substrate raises material and disposal costs, and often stretches the timeline.
Consider that prepping can mean more long-term maintenance, while a full strip usually gives a more durable finish with lower ongoing upkeep.
Prep Labor And Time
Because proper prep determines the job’s success, you’ll want to weigh the labor and time differences between spot prepping and a full strip carefully.
You should start with a surface assessment to estimate prep time and labor intensity, then use project planning to schedule tasks and supply tool selection.
Include cost evaluation and time management in your plan, and apply efficiency tips to reduce downtime.
- Estimate: measure area, rate per hour, and expected prep time.
- Decide: spot prep vs. full strip based on wear, adhesion risk, and labor intensity.
- Organize: tools, sequence, and time buffers for unexpected repairs.
Full Strip Materials Cost
1 key factor in choosing full strip over spot prep is the upfront materials cost: a full strip typically demands more primer, solvent, sandpaper, and protective gear, while spot prep limits supplies to localized touch-up items. You’ll weigh material costs, tool investment, and labor expenses against the project timeline. A full strip raises initial outlay but can simplify future coats; spot prep lowers immediate expense but may extend labor. Use this expense breakdown to guide budget considerations and cost comparison before committing.
| Item | Typical impact |
|---|---|
| Materials | Higher for full strip |
| Labor | Increased with full strip |
Long-Term Maintenance Burden
While a full strip demands more upfront time and money, it usually cuts your long-term maintenance burden by creating a uniform, well-bonded base that needs fewer touch-ups. Conversely, spot prep can save you in the short run but often means more frequent repairs, patching, and labor over the life of the finish.
You’ll weigh maintenance strategies: a full strip improves surface stability and paint longevity, reducing repaint frequency and adhesion issues. Spot prep risks ongoing upkeep challenges and uneven aesthetic considerations.
- Full strip: higher initial cost, lower repaint frequency.
- Spot prep: lower start cost, higher upkeep.
- Hybrid: targeted stripping where adhesion issues appear.
When to Call a Pro: Complex Surfaces & Historic Finishes
If you’re dealing with ornate moldings, lead-based paints, or layered historic finishes, call a pro instead of tackling the job yourself—these surfaces demand specialized knowledge, tools, and permits to avoid damaging the work or exposing you to hazards.
For ornate moldings, lead paint, or layered historic finishes, hire a specialist—these require conservation skills, permits, and care.
You’ll want an expert familiar with historic preservation standards who can assess paint compatibility, remove or stabilize hazardous layers, and document conditions.
A pro will test substrates, choose appropriate primers or reversible treatments, and use conservation-safe techniques.
Don’t risk irreversible harm or code violations; hire a qualified conservator or contractor who carries insurance and understands regulatory requirements for sensitive projects.
Case Studies: Successful Latex-Over-Oil Projects
When you want real-world proof that latex can successfully go over oil, these case studies show practical approaches and common pitfalls to avoid; each example highlights surface prep, primer choice, and long-term performance so you can see what methods worked and why.
1. Kitchen cabinets: You strip loose gloss, sand lightly, apply a bonding primer, then use a high-quality latex enamel.
Project highlights: durable finish, minimal yellowing—successful techniques: adhesion first.
2. Trim work: Clean, degloss, prime with oil-anchoring primer, topcoat latex semi-gloss.
Project highlights: crisp edges, low peel.
3. Exterior door: Scuff, oil-based primer, two latex coats.
Successful techniques: weatherproofing and proper curing.
Long-Term Maintenance to Prevent Latex Failure
To keep latex from failing over oil, you’ll want to start with proper surface preparation: clean, degloss, sand, and prime any oil-based areas before coating.
After painting, set a regular inspection schedule—check for cracking, lifting, or moisture every few months and after extreme weather.
Address any small issues immediately so they don’t become larger adhesion problems.
Surface Preparation Steps
Because oil and latex bond differently, proper surface prep is the single most important step you can take to prevent latex failure over oil paint. You’ll assess surface types and guarantee paint compatibility before you start.
Clean, degloss, and mend imperfections so the new coating adheres.
- Clean and sand: Remove grease, chalk, and glossy sheen to promote mechanical bonding.
- Prime correctly: Use a high-quality bonding or oil-blocking primer matched to surface types and paint compatibility.
- Repair and feather: Fill cracks, sand smooth, and remove dust so the primer and latex finish lay down evenly and last.
Regular Inspection Schedule
Set a simple inspection routine and stick to it: check painted surfaces every 3–6 months for signs of peeling, cracking, blistering, or discoloration, and after any severe weather events.
You should note problem areas, photograph them, and compare over time to track deterioration.
Determine inspection frequency based on exposure—sun, moisture, and freeze–thaw cycles demand closer attention.
For maintenance tips, keep a small kit: mild cleaner, primer for touch-ups, and compatible latex paint.
Address small failures promptly: sand loose edges, apply primer to bare oil spots, and repaint.
Regular checks prevent larger repairs and extend the finish’s life.
Myths About Painting Latex Over Oil Paint : Busted
Think it’s impossible to successfully roll latex over old oil paint? You’d be surprised. Myth debunking clears common misconceptions: it’s not outright doomed, but success depends on prep, adhesion, and product choice. Don’t believe blanket rules.
- You can paint latex over oil if you sand and prime—it’s not an automatic failure.
- A quality bonding primer often prevents peeling—so skipping it isn’t wise.
- Fresh oil needs curing time; immediately topcoating invites trouble.
You should assess surface condition and use appropriate cleaners and primers. These facts bust myths without promising every job will succeed.
Quick Failure-Avoidance Checklist for Applicators
If you want your latex over oil job to last, follow a tight checklist every time: inspect the surface for loose film or blistering, test for solvent resistance, and confirm paint compatibility.
Clean thoroughly—remove grease, wax, and chalk with a degreaser; rinse and dry.
Clean thoroughly—degrease, remove wax and chalk, then rinse and dry before proceeding.
Sand glossy oil to dull the sheen and vacuum dust.
Spot-prime bare or damaged areas with an appropriate bonding primer.
Allow proper dry times and work in recommended temperature/humidity ranges.
Use quality tools and apply correct film thickness.
Monitor for early adhesion issues and address them immediately rather than covering with more coats.
Materials & Primer Product Picks by Scenario
Now that you’ve got routine checks and surface prep locked in, you’ll want to match the right materials and primers to the specific job.
Choose primer types based on surface compatibility and projected paint finishes. Do adhesion testing on small areas, consider paint layering and drying times, and account for environmental factors.
Tailor application techniques to surface textures to reduce risk of peeling; flexible primers suit slight movement, high-build primers mask roughness.
- Bare wood/porous: oil-based or bonding primer — roughen, test adhesion.
- Previously oiled: specialty bonding primer — thin layers, monitor drying times.
- Glossy/oily finish: degloss + high-adhesion primer, slow cure.
Legal and Safety Notes for Oil-Paint Work
When working with oil-based paints, you need to follow local regulatory safety requirements for ventilation, PPE, and work hours to avoid fines and health risks.
Dispose of solvents, rags, and unused oil paint as hazardous waste according to your municipality’s rules—never pour them down drains or into regular trash.
Check local guidelines before you start so you can plan for legal disposal and compliant handling.
Regulatory Safety Requirements
1 important thing to know about working with oil-based paints is that local, state, and federal regulations often dictate ventilation, disposal, and labeling practices you must follow; failing to comply can lead to fines, health risks, or enforced remediation.
You need to prioritize regulatory compliance and meet published safety standards before starting work. Check labels, safety data sheets, and local building codes. Train workers on PPE and ventilation requirements. Keep records of inspections and permits.
- Confirm required permits and local codes.
- Follow SDS guidance and labeling rules.
- Document PPE use, ventilation, and training.
Hazardous Waste Disposal
Because oil-based paint and its cleanup materials can meet hazardous-waste definitions, you’ll need to handle, store, and dispose of them according to law to protect people and the environment. Follow local rules: label containers, use sealed metal cans for rags and solvents, and never pour leftovers down drains. Contact your local hazardous waste facility for disposal or collection events. For small quantities, allow solvents to evaporate outdoors in approved containers per guidance.
| Item | Storage | Action |
|---|---|---|
| Rags | Metal can | Incinerate/Dispose |
| Solvent | Sealed bottle | Take to facility |
| Leftover paint | Labeled can | Hazardous waste pickup |
Plan Your Project: Timeline, Costs, and Next Steps
Planning your project now will save time and money later: estimate a realistic timeline based on surface prep, drying and curing times, and factor in weekend or weather constraints; budget for primer, sandpaper, tools, and contingency for unexpected repairs; and outline clear next steps—confirm substrate adhesion, schedule work in stages (prep, prime, paint, cure), and decide whether you’ll hire a pro or DIY.
Use project budgeting and timeline management to set deadlines and cost limits. Inspect surfaces, list supplies, and get quotes. Communicate stages to helpers or contractors. Prioritize adhesion tests before committing to full paint.
- Prep checklist
- Cost estimate
- Work schedule
Frequently Asked Questions
Can Latex Over Oil Be Used on Exterior Trim With Lead-Based Primer?
You shouldn’t — latex over oil with lead-based primer can cause adhesion issues outdoors; it’s more suited for interior applications. You’ll need proper encapsulating primer or remove/rehab the lead primer before exterior latex use.
Does Painting Latex Over Oil Affect VOC Regulations or Permits?
Yes — you’ll need to check VOC regulations and permit requirements, because switching to latex can change allowed VOC content, reporting, or ventilation rules; you should confirm local limits, paperwork, and inspection conditions before repainting.
Will Latex Over Oil Change the Original Color or Sheen Significantly?
Like a thin veil, you’ll likely notice a modest color shift and some sheen alteration if latex goes over oil; you’ll often see slightly dulled color and reduced gloss unless you properly prime and prep the surface first.
Can Textured or Stippled Oil Surfaces Accept Latex Without Sanding?
You can sometimes apply latex to textured or stippled oil without sanding, but texture compatibility varies and poor surface adhesion risks peeling; you’ll want to clean, degloss, and use a bonding primer to guarantee reliable results.
How Soon After Oil Paint Application Is It Safe to Switch to Latex?
You should wait until the oil’s drying time finishes — usually 24–72 hours for touch dry, up to weeks for full cure — or prime first; otherwise you’ll risk adhesion issues and paint failure when switching to latex.
Conclusion
You can often put latex over oil paint, but only if you prepare the surface properly—would you want your new finish peeling off in months? Scuff, clean, degrease, and use a quality bonding primer on sound oil layers; strip or use special primers on glossy or compromised surfaces. Test a small area, follow safety guidance, and plan time and cost realistically. With careful prep, latex can perform well over oil without drama.