What Is Difference Between Interior and Exterior Paint?
You should use interior paint indoors because it’s made for low odor, easy cleaning, and softer finishes that handle scrubbing and less extreme temperatures, while exterior paint’s formulated to resist UV fading, mildew, moisture, and wide temperature swings with tougher binders and longer cure times. Prep and primers differ, and wrong paint outdoors will peel and crack. Keep this guide open and you’ll learn how formulations, binders, testing, and project planning affect your final results.
Quick Answer: Interior or Exterior Paint – Which Should You Use?
Need paint for a room or the outside of your house? You’ll pick interior paint for walls, ceilings, and trim because it handles scrubbing, low VOCs, and indoor light better.
Choose exterior paint for siding and trim exposed to weather; it resists mildew, UV fading, and temperature swings.
Pick exterior paint for weather-exposed siding and trim — it fights mildew, UV fade, and temperature extremes.
For paint application, use brushes and rollers matched to surface and finish—spray for large exteriors, small rollers for smooth interiors.
Let color selection reflect durability needs: lighter tones show less fading outside, while indoor hues can be richer.
Match product type to location to guarantee lasting results.
Who This Guide Helps and What You’ll Learn
Now that you know when to choose interior versus exterior paint and how application affects results, let’s clarify who will get the most value from this guide and what you’ll learn. You’ll get practical tips whether you’re revitalizing rooms for improved interior aesthetics or protecting siding for long-term exterior durability. Expect decision criteria, prep steps, and coating recommendations tailored to DIYers, renters, and pros.
| Who it’s for | What you’ll learn |
|---|---|
| DIYers | Prep, coverage, finish choices |
| Home pros | Durability tips, job efficiency |
You’ll leave confident in selecting the right paint for each job.
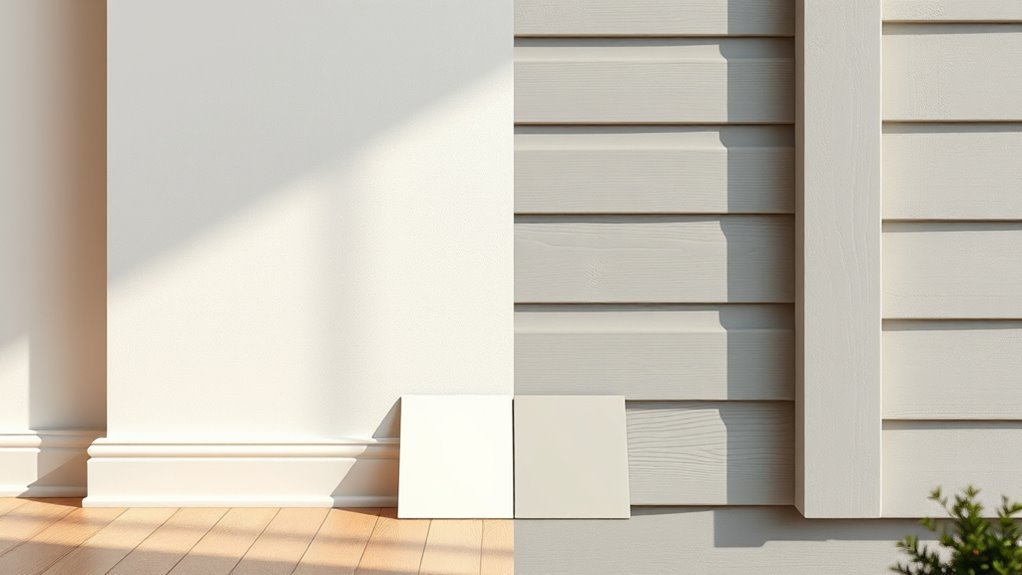
Interior vs Exterior Paint: How Formulations Differ
Because interior and exterior paints face different challenges, manufacturers tweak their formulas for specific performance: exterior paints prioritize UV resistance, flexibility, and mildew inhibitors to stand up to sun, temperature swings, and moisture, while interior paints emphasize low odor, scrubbability, and softer binders for a pleasant finish and easy cleaning.
You’ll notice formulation differences in resin choice, pigment stability, and additives that control drying and adhesion. That affects application techniques: exterior coats often need thicker films, longer cure times, and elastomeric properties, while interior work favors fast touch-ups, smoother leveling, and easy cleanup with mild solvents or water.
Why Choosing Interior vs Exterior Paint Matters
When you pick the wrong paint for a job, you’ll likely face peeling, fading, or premature failure that costs time and money to fix.
You want coatings that match purpose: interior paints prioritize interior aesthetics, smooth finishes, low odor, and washability so rooms look and feel right.
Exterior paints focus on exterior durability, resisting UV, moisture, and temperature swings to protect siding and trim.
Choosing correctly prevents frequent repainting, protects surfaces, and preserves value.
You’ll save labor and materials by matching paint type to location, and you’ll avoid compromises that undermine performance and appearance.
What Binders Do in Interior and Exterior Paints
Choosing the right paint type matters, but understanding what’s inside the can explains why. You’ll find that binder types determine durability, adhesion, and how the paint cures.
In interior paints, softer binders prioritize feel, scuff resistance, and ease of cleaning; in exterior formulas, tougher binders resist UV, moisture, and temperature shifts.
Binder functions include holding pigment particles together, forming a protective film, and anchoring the coat to the substrate.
Binders lock pigment into a film, create a protective layer, and secure the paint to the surface.
When you pick paint, check binder labels—acrylics for flexibility and weather resistance, alkyds for hardness and flow—so you match performance needs to the job.
How Pigments and Color Stability Differ
As you compare interior and exterior paints, pigments and their lightfastness play a big role in how long colors stay true; interior pigments can prioritize hue and tinting strength, while exterior formulas favor UV-stable, weather-resistant pigments and additives that slow fading.
You’ll notice pigment types differ: organic dyes give vivid interior shades but fade faster outdoors, while inorganic pigments like titanium dioxide and iron oxides deliver superior color stability under sun and moisture.
Manufacturers adjust particle size, coatings, and stabilizers to enhance durability. When choosing paint, match pigment performance to exposure to maintain consistent appearance over time.
Why VOCs and Odor Matter for Interior Paint
Pigment choice affects how a color holds up outside, but indoor paint performance hinges more on what the formula off-gases and how it smells to people living in the space.
You should prioritize low-emitting products because VOC regulations aim to reduce harmful off-gassing that affects indoor air and health impacts like headaches or respiratory irritation.
Check product labeling for VOC levels and certifications, and choose eco friendly options when possible. Good odor control reduces complaints and speeds reoccupation.
For painting safety, ventilate, use respirators if needed, and follow manufacturer guidance during paint selection and application to protect occupants.
How Weatherproofing Ingredients Work in Exterior Paint
When you pick exterior paint, you’ll want to know how UV resistance additives shield color and binders from sun damage so the finish lasts.
You’ll also learn how water-repellent binders form a barrier that sheds moisture while still letting trapped vapor escape.
Together these ingredients keep siding and trim looking good and structurally sound longer.
UV Resistance Additives
Because sunlight breaks down binders and fades colors, exterior paints include UV resistance additives to protect both film and finish.
You’ll get clear uv protection benefits: stabilizers, absorbers, and antioxidants intercept UV rays, slow polymer breakdown, and reduce pigment fade.
These additives work with paint longevity factors like binder quality and pigment stability to extend service life.
You’ll notice less chalking, cracking, and color loss over years when formulations contain effective UV packages.
Apply per label directions and choose products rated for sun-exposed surfaces so those additives can perform; proper prep and maintenance help them deliver maximum lifespan.
Water-Repellent Binders
If you want exterior paint to shrug off rain, snow, and moisture-driven damage, look to water-repellent binders—the polymer backbone that keeps water from penetrating the film.
You’ll rely on them for water resistance benefits like reduced absorption, slower mildew growth, and longer substrate protection.
Different chemistries—acrylic, styrene-acrylic, and elastomeric blends—offer varied elasticity, UV stability, and breathability.
A binder types comparison helps you match performance to climate: choose highly elastic binders for siding that moves, and UV-stable acrylics for sun-exposed areas.
Read labels for solids content and compatibility; proper prep and application still determine durability.
Which Mildewcides and Fungicides Are Used in Exterior Paint
Although exterior paints are formulated to withstand moisture and sunlight, they still need added mildewcides and fungicides to prevent biological growth on your home’s surfaces.
You’ll find common fungicide types like zinc pyrithione, chlorothalonil, and IPBC blended into latex and acrylic formulas.
Manufacturers balance mildewcide effectiveness with environmental and regulatory limits, so labels note contact-kill versus residual protection.
Some products use polymer-bound biocides for longer life; others favor water-dispersible actives for easier cleanup.
When choosing paint, check technical data sheets for listed organisms controlled, recommended service life, and any application or disposal precautions to protect you and the environment.
How Sheen Options Differ for Interior and Exterior Use
When you pick a sheen for exterior paint, durability is the top concern because higher sheens resist weathering and are easier to clean.
Indoors, sheen choice is more about appearance and how light highlights texture and imperfections.
We’ll look at which sheens perform best outside and how different finishes read inside.
Sheen Durability Differences
Because exterior surfaces face harsher elements, their available sheens are formulated for greater durability than most interior options.
You’ll notice sheen types for exteriors lean toward satin, semi-gloss, and high-gloss with tougher binders and UV-resistant additives. Durability factors include weather, moisture, and cleaning frequency, so exterior formulas resist chalking, fading, and mildew.
Indoors, you can pick flatter sheens for concealment because conditions are milder.
When choosing, match sheen performance to exposure: use harder, easier-to-clean exterior sheens where abrasion or moisture is common, and reserve softer interior sheens where touchability and subtle finish matter.
Sheen Appearance Indoors
Exterior sheens are built to survive harder conditions, but indoors you’ll choose finishes mainly for look and feel. You’ll pick sheen types based on room use, light, and cleaning needs. Flat hides flaws in low-traffic spaces; eggshell adds slight luster for living areas; satin balances sheen and washability for kitchens; semi-gloss suits trim and moisture-prone spots; gloss is bold for accents. Consider aesthetic impact: higher sheen reflects more light and highlights texture. Use the table to compare quickly.
| Sheen | Best Use | Aesthetic Impact |
|---|---|---|
| Flat | Ceilings | Subtle |
| Eggshell | Living rooms | Soft |
| Satin | Kitchens | Balanced |
| Semi-gloss | Trim | Noticeable |
| Gloss | Accents | Bold |
How Finish Choice Affects Durability and Cleaning
If you want paint that stands up to scrubbing and everyday wear, finish matters as much as color — higher-sheen paints are tougher and easier to clean, while flat or matte finishes hide flaws but soak up stains and scuff more readily.
You’ll choose satin or semi-gloss where finish durability and cleaning ease matter most: kitchens, bathrooms, trim, and high-traffic hallways. Those finishes resist moisture, wipe without ghosting, and tolerate repeated cleaning.
Use eggshell or matte in low-traffic rooms to conceal imperfections, but expect more gentle care and occasional touch-ups to maintain appearance over time.
Why Adhesion Needs Vary by Surface and Climate
Surfaces and climates demand different levels of paint adhesion, so you need to match your product and prep to the job.
You’ll assess adhesion factors like substrate porosity, existing coatings, and surface contaminants because smooth or glossy surfaces need more etching or primer, while raw wood or masonry absorb differently.
Climate impact also matters: humidity, temperature swings, and UV exposure change how paint bonds and cures.
Climate matters—humidity, temperature swings, and UV exposure all affect how paint bonds and cures.
You’ll choose primers and cleaners appropriate for the surface and local conditions, allow proper drying times, and schedule work when weather supports adhesion, reducing peeling, blistering, and premature failure.
How Flexible Resins Help With Temperature Changes
Because paints expand and contract with heat, using flexible resins helps your coating move with the substrate instead of cracking or peeling.
You’ll notice flexible resins maintain cohesion as surfaces swell in summer and shrink in winter, reducing stress at the film edge. That elasticity supports temperature adaptation by absorbing dimensional change instead of transferring it to adhesion points.
When you choose exterior formulations with higher resin flexibility, you lower maintenance needs and extend service life on siding, trim, and painted metal.
For interiors, flexibility is still useful in areas with fluctuating temperatures or humid conditions.
Why UV Resistance Is Critical for Exterior Coatings
When sunlight hits a painted exterior, UV radiation starts breaking down binders and pigments. You’ll see chalking, fading, and loss of film integrity long before other weathering signs appear.
When sunlight hits paint, UV breaks down binders and pigments, causing chalking, fading, and film failure.
You need UV protection strategies to extend color life and preserve adhesion, so pick coatings with UV absorbers and stable pigments. That reduces maintenance, keeps coatings functional, and limits environmental impact by lowering repaint frequency.
Consider these benefits:
- Longer-lasting color and gloss retention for less frequent repainting
- Reduced surface degradation that prevents substrate damage
- Lower life-cycle emissions and waste from extended coating service
How Moisture Resistance Is Engineered Into Exterior Paints
In exterior paints, manufacturers engineer moisture resistance by combining water-repellent binders, tightly packed pigment particles, and additives that block water uptake so your coatings stay intact through rain, dew, and humidity.
You rely on hydrophobic polymers that shrug off surface water while forming a continuous film that reduces moisture penetration into wood, masonry, or metal.
Fillers and pigments are graded to minimize capillary paths, and mildewcides and film-strengthening agents improve paint durability.
Proper film thickness and flexible binders let the coating expand and contract without cracking, so you preserve substrate protection and extend maintenance intervals.
When to Use Water-Based vs Oil-Based Paints
Moisture resistance shapes whether a coating needs flexibility, breathability, or tight water-shedding properties. Those same performance needs help decide between water-based and oil-based formulas.
You’ll pick water-based when you want easy cleanup, lower odor, and fast recoat—those water-based advantages suit indoor trim, siding, and surfaces needing breathable films.
Choose oil when you need hard, long-lasting films for high-wear areas; oil-based durability helps on doors, metal, and some exterior trim.
Choose oil-based coatings for hard, long-lasting protection in high-wear areas like doors, metal, and exterior trim.
- Pick water-based for flexible, low-odor jobs.
- Pick oil-based for tough, high-traffic surfaces.
- Match substrate and exposure for best results.
How Drying and Curing Times Compare
You’ll notice interior and exterior paints can feel dry at different speeds, but that “dry to the touch” isn’t the same as fully cured.
Curing usually takes much longer and varies with the paint type, while environmental factors like temperature, humidity, and airflow can speed up or slow both drying and curing.
Keep those differences in mind when planning recoats, handling, or exposing surfaces to the elements.
Drying Time Differences
Drying and curing times differ noticeably between interior and exterior paints because each is formulated for distinct environments and performance needs.
You’ll notice interior paints dry faster to touch, letting you recoat sooner, while exterior formulas resist weather and often feel tacky longer.
Use proper drying techniques and account for temperature effects to speed things safely without compromising finish.
- Monitor humidity and airflow to optimize drying techniques.
- Adjust project timing when temperature effects slow solvent evaporation.
- Choose low-VOC interior or fast-dry exterior options when you need quicker touch-dry times while respecting manufacturer guidelines.
Curing Process Length
Because curing involves chemical changes beyond just surface drying, exterior paints usually need much longer to reach full hardness than interiors, and you should plan projects around that extended timeline.
You’ll notice interior latex can be recoated and lightly used within days, while exterior formulations may feel dry yet still require weeks for full curing time. That extended cure yields paint durability against abrasion, moisture, and UV stress.
When you schedule touch-ups or move furniture, account for manufacturer cure windows to avoid scuffs. Follow recommended drying and curing times to guarantee the finish performs as expected and achieves maximum paint durability.
Environmental Influences
Although indoor and outdoor paints can feel dry in similar timeframes, their actual drying and curing respond very differently to temperature, humidity, and airflow, so you should plan accordingly.
You’ll notice climate effects faster outdoors: heat speeds solvent evaporation, while high humidity slows film formation.
Indoors, controlled HVAC stabilizes curing but limits ventilation, so you must allow longer tack-free times for some low-VOC formulas.
Also consider material compatibility—porous masonry vs. smooth drywall demand different absorption and curing behavior.
To manage timing, monitor conditions and adjust schedule:
- Check temperature and humidity before starting.
- Improve airflow without drafts.
- Match paint to substrate for predictable cure.
How Surface Prep Differs for Interior Walls vs Exterior Siding
When prepping surfaces, you’ll find interior walls and exterior siding demand different priorities: surface preparation and paint adhesion rely on your cleaning, sanding, and repair choices.
Indoors, you’ll focus on filling nail holes, smoothing imperfections, removing dust, and ensuring a consistent porosity for even coverage.
Outdoors, you’ll tackle mildew, flaking old coatings, loose trim, and weathered wood or metal, plus thorough power-washing and rust treatment where needed.
Temperature and moisture considerations affect drying times and product selection outside.
In both settings, proper prep prevents premature failure; you’ll select methods and materials that address the specific contamination and substrate challenges each presents.
When Is Primer Required for Interior Surfaces?
When you’re working with new drywall or plaster, you’ll want to prime first to seal the surface and guarantee even paint absorption.
If you’re covering a dark color with a lighter one, primer helps block bleed-through and reduces the number of topcoats needed.
Both situations save time and improve the final finish.
New Drywall Or Plaster
If you’ve just installed new drywall or had fresh plaster skimmed, you should prime before painting to seal the porous surface and guarantee even paint adhesion.
You’ll lock in joint compound, reduce flashing, and create a uniform base after drywall installation or plaster finishing. Use a high-quality PVA or acrylic primer suited for interiors.
- Seal new seams and repaired areas to prevent uneven sheen.
- Improve topcoat coverage so you need fewer paint coats.
- Block moisture and dust absorption that weaken finish longevity.
Prime as soon as surfaces are dry; skip primer only with manufacturer-approved paint systems.
Dark-To-Light Color Change
How much primer you need depends on the contrast between the old dark shade and your new light color; you’ll usually want to prime when moving from deep tones to pale ones.
If you skip primer, the underlying pigment may show through, altering light color perception and undermining coverage. Primer seals tannins, evens sheen, and reduces the number of finish coats you’ll need.
Consider the room’s mood: dark color psychology can influence whether you accept subtle undertones or need true brightness.
Use a high-hide primer for strong contrasts, spot-prime stains, and test a sample before committing to full coverage.
When Is Primer Required for Exterior Surfaces?
Wondering whether you need primer on an exterior surface? You should decide based on primer types and surface conditions: oil or bonding primers for slick surfaces, stain-blocking primers for tannin bleed, and acrylic primers for porous siding.
Use primer when the substrate is bare, patched, or shows previous stains; when switching from oil to latex; or when covering a drastic color change.
- Bare wood, new masonry, or patched drywall
- Weathered siding with chalking or peeling paint
- Surfaces with stains, rust, or tannin bleed
Priming guarantees adhesion, uniform coverage, and longer-lasting exterior paint.
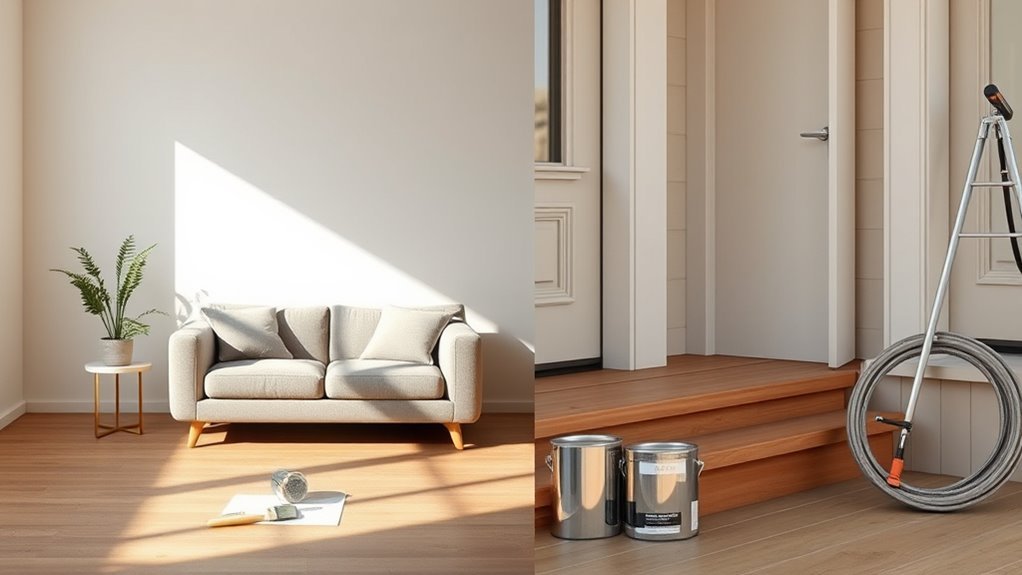
How Application Methods Change Between Interior and Exterior Projects
When you switch from interior to exterior work, your prep changes dramatically—cleaning, sanding, and weatherproofing exterior surfaces take more time and different products.
You’ll also choose different tools and equipment, like heavy-duty sprayers or rust-resistant rollers, to handle rougher textures and larger areas.
Finally, remember that drying times and conditions vary with temperature, humidity, and sunlight, so plan your schedule and coatings accordingly.
Surface Preparation Differences
Because interior and exterior surfaces face different stresses, you’ll change your prep and application methods to match the conditions. You’ll assess surface types—drywall, plaster, wood, brick—and pick preparation techniques that address moisture, dirt, and adhesion.
Outdoors you’ll remove mildew, repair cracks, and use primers for weather exposure; indoors you’ll focus on patching, sanding, and ensuring a clean dust-free surface.
Follow these quick prep reminders:
- Clean and degrease surfaces thoroughly for proper adhesion.
- Sand and feather edges where old paint peels to create smooth transitions.
- Use appropriate filler and allow full curing before applying primer and paint.
Tool And Equipment Choices
One key difference you’ll notice between interior and exterior painting is the toolkit: indoor jobs favor smaller, finer tools for precision—angled brushes, mini rollers, sanding blocks, and tack cloths—while exterior work calls for heavy-duty gear like power washers, extension poles, large rollers, and weather-resistant sprayers to cover big surfaces and handle grime.
You’ll select brush types and roller options based on texture and detail, adapt spray techniques for speed outdoors, and follow surface preparation before painting.
Prioritize safety gear for ladders and sprayers, learn specific application tips, plan cleanup methods, and manage paint storage properly between coats.
Drying Times And Conditions
Although drying depends on temperature and humidity, you’ll notice interior paints cure faster and more consistently than exterior finishes because indoor conditions are more controllable. Outdoors you’ll have to account for wind, direct sun, overnight dew, and wider temperature swings that slow or unevenly accelerate drying.
You should plan application methods around drying conditions and temperature impact: brush and roller indoors for smooth, even curing; spray outdoors for speed but expect variable tack times. Monitor forecasts and avoid painting when rain or frost’s possible.
Use longer recoat intervals outside and accelerate indoor drying with ventilation and mild heat.
- Check humidity before starting
- Time coats to avoid temperature swings
- Use products rated for specific drying conditions
How Environmental Conditions Affect Exterior Painting
When you paint the exterior, weather conditions directly determine whether the job will look professional and last, so you need to plan around temperature, humidity, wind, and sun exposure.
You’ll assess weather impact and seasonal considerations to schedule work when temperature fluctuations and humidity effects won’t compromise adhesion.
Consider environmental exposure and climate variations that threaten surface integrity; prepping surfaces properly prevents peeling and mold.
Wind and sun create preparation challenges like dust and rapid drying.
Choose coatings rated for outdoor durability to maximize paint longevity.
Monitor forecasts, avoid extremes, and allow adequate curing time for a resilient exterior finish.
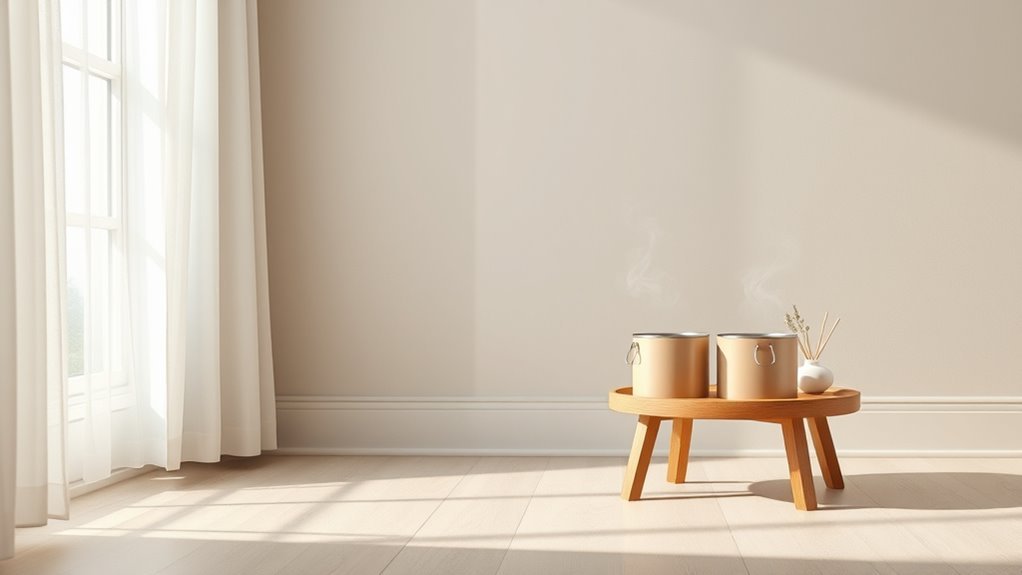
How Indoor Air Quality Concerns Shape Interior Paint Selection
Because indoor air quality affects your health and comfort, you should pick paints that minimize pollutants and off-gassing.
You’ll evaluate paint ingredients and product labeling to find low VOC options and check safety standards.
Consider environmental factors like temperature and air circulation during and after application to reduce exposure and speed curing.
Think about health impacts for sensitive occupants and limit indoor pollutants by choosing certified, low-emission formulas.
Balance aesthetics with responsibility: durable, low-VOC paints often meet safety standards without sacrificing finish quality.
- Read product labeling for VOCs and certifications
- Improve air circulation while painting
- Prioritize formulas with minimal harmful paint ingredients
How to Choose Paint for Wood: Interior vs Exterior
When choosing paint for wood, you’ll first consider surface preparation needs like sanding and priming to guarantee adhesion.
You’ll also weigh durability and finish—harder, more washable coatings for high-traffic interior wood, tougher, UV-resistant formulas for exterior.
Finally, think about environmental exposure factors such as moisture, temperature swings, and sunlight when picking your product.
Surface Preparation Needs
Although both interior and exterior wood demand solid prep, the steps you take differ sharply based on exposure and finish needs. You’ll use different surface preparation techniques: interior wood needs cleaning, light sanding, and primer suited to indoor VOC limits, while exterior wood demands deeper cleaning, mildew treatment, and primers that block moisture.
Always make substrate consideration part of your plan—sound, painted, bare, or rot-damaged wood changes products and prep steps. Follow recommended drying times and remove contaminants. Be methodical to guarantee adhesion and prevent failures before painting.
- Clean and degrease
- Sand and feather edges
- Treat and replace damaged wood
Durability And Finish
Once your wood’s prepped and solid, focus on how long the finish must hold up and what look you want—durability and finish drive your choice between interior and exterior paints.
You’ll weigh durability factors like abrasion resistance, flexibility, and UV protection against the room’s wear patterns. Interior paints favor softer, washable formulations and varied sheen for aesthetic control; exterior paints add binders and mildewcides for tougher service.
Consider finish types—flat conceals flaws, satin and semi-gloss clean easier, high-gloss highlights trim.
Match the paint’s durability factors and finish types to function: choose tougher exterior formulas for high-use or moist areas, interior for controlled environments.
Environmental Exposure Factors
If your wood will face rain, sun, temperature swings, or indoor humidity, pick a paint formulated to handle those specific stresses. You’ll assess exterior factors like UV exposure, moisture, and freeze–thaw cycles for outside wood, while indoor pieces need resistance to humidity and wear.
Also consider environmental impact: low-VOC options reduce indoor pollution and outdoor runoff harm. Choose primer and topcoat systems matched to exposure to prevent peeling and rot.
- For siding: pick UV- and moisture-resistant exterior formulations.
- For trim: prioritize flexible, breathable coatings.
- For furniture: use low-VOC, durable finishes.
How to Choose Paint for Metal: Interior vs Exterior
Wondering whether you should use interior or exterior paint on metal? You’ll choose based on exposure and substrate.
For indoor metal, focus on metal surface preparation—cleaning, de-rusting, and priming—to guarantee paint adhesion. Interior formulas prioritize low odor and flexibility; exterior coatings emphasize UV, moisture, and corrosion resistance.
Check paint compatibility with primers and existing finishes to avoid peeling.
For outdoor metal, pick rust-inhibiting primers and exterior-grade enamel or acrylics designed for metal.
Always follow manufacturer cure times and apply thin, even coats. Proper prep and matching primer/paint types guarantees durable, attractive results.
How to Choose Paint for Masonry and Stucco
How do you pick the right paint for masonry and stucco so it lasts and breathes properly? You’ll assess masonry paint types and stucco paint options, consider surface treatment methods, and follow curing requirements.
Factor weather conditions before you paint, and match application techniques to texture considerations. Use color selection tips that hide imperfections and resist UV.
Prep includes cleaning, patching, and priming; choose breathable, elastomeric or mineral paints for durability. Apply with brushes, rollers, or sprayers suited to the substrate, and allow proper cure time to prevent trapping moisture and causing failure.
- Inspect substrate before selecting paint
- Match finish to texture and climate
- Follow manufacturer curing and application instructions
What Happens If You Use Interior Paint Outside?
If you use interior paint outside, you’ll likely see peeling and cracking as the coating can’t flex with temperature changes.
It won’t stand up to rain, humidity, or UV exposure, so weather resistance will be poor.
Expect colors to fade much faster than with exterior-grade formulas.
Peeling And Cracking
When you use interior paint on exterior surfaces, the finish will often start to peel and crack within months because it’s not formulated to flex or resist moisture and UV exposure; interior paints lack the binders, mildewcides, and weatherproofing agents that keep exterior coatings adhered and intact.
You’ll notice peeling causes tied to poor adhesion and substrate movement, and small fissures that expand into larger cracks.
To limit damage before repainting, remove loose flakes, sand edges, and prime with a suitable exterior primer.
For cracking prevention long-term, choose exterior-grade products that accommodate temperature shifts and repel moisture.
- Remove loose paint and sand
- Apply exterior primer
- Use exterior-grade paint
Poor Weather Resistance
Because interior paint isn’t formulated for sun, rain, or freezing temperatures, it won’t stand up on exterior surfaces and will fail quickly.
If you use it outside, you’ll notice moisture penetration, blistering, and accelerated breakdown because interior formulas lack additives for weather durability.
That compromises protective barriers, so wood, metal, or masonry get exposed to cycles of wetting and drying.
You won’t get reliable exterior longevity; maintenance intervals shorten and structural materials can suffer.
For lasting results, choose coatings designed to resist UV, moisture, and temperature swings—otherwise you’ll spend more time and money repairing premature weather-related damage.
Faster Color Fading
Although interior paint can look fine at first, sun and UV exposure will quickly strip away its pigments and binders. You’ll see colors dull, shift, and chalk far faster outdoors than they’d inside.
You’ll notice accelerated fading because interior formulas lack UV stabilizers and tougher resins used outdoors. Consider fading factors like sunlight intensity, surface prep, and local climate — they all cut color longevity.
If you use interior paint outside, expect uneven washing away, color shifts, and shorter maintenance cycles. To avoid disappointment, choose exterior-specific coatings or UV-resistant topcoats.
- Increased pigment breakdown
- Faster binder degradation
- Reduced color longevity
What Happens If You Use Exterior Paint Inside?
Curious what happens if you bring exterior paint indoors? You’ll notice stronger fumes and higher VOCs, so consider paint toxicity and health risks before using exterior paint inside. It’s durable and mildew-resistant but not formulated for indoor air quality.
| Advantage | Concern | Tip |
|---|---|---|
| Tough finish | Higher VOCs | Ventilate well |
| Moisture resistant | Odor lingers | Use respirator |
| Durable | Can stain surfaces | Test small area |
If you proceed, ventilate, wear protection, and allow extended curing to reduce lingering odors and minimize health risks.
How Cost and Lifecycle Affect Paint Choice
You’ll want to weigh upfront cost differences against how long the paint will last.
Exterior paints often cost more per gallon but offer greater durability and a longer lifespan, which can cut down on repainting frequency.
Factor in long-term maintenance costs to decide which option saves you money and hassle over time.
Upfront Cost Differences
When comparing interior and exterior paint, you’ll want to balance sticker price against how long the finish will last and what maintenance it’ll demand.
You’ll notice interior paint often costs less per gallon, while exterior formulas include additives for weather resistance that raise the upfront cost; keep budget considerations in mind when planning projects.
Consider total project cost, not just paint price, since prep and labor vary.
- Interior: lower upfront cost, simpler prep
- Exterior: higher upfront cost, weatherproofing additives
- Accessories: primers, caulk, and tools affect budget considerations
Durability And Lifespan
Because exterior paint faces sun, rain, and temperature swings, it’s formulated to last longer under harsh conditions, while interior paint prioritizes cleanability and low odor over extreme durability.
You’ll choose exterior coatings for superior paint performance against UV, moisture, and freeze-thaw cycles; they contain binders and additives that slow breakdown.
Inside, you’ll pick formulas that resist scuffs and clean easily but won’t withstand constant weather stress.
Consider environmental factors—direct sunlight, humidity, pollutants—when estimating lifespan.
Balancing upfront cost and expected service life helps you pick the right product so repainting schedules match real-world exposure and performance needs.
Long-Term Maintenance Costs
Although a cheaper paint may seem like a smart short-term save, you’ll pay more over time in touch-ups, repainting, and repairs if it fades, peels, or fails to resist moisture.
You should weigh upfront cost against long term paint durability and how often you’ll need to redo surfaces.
Exterior formulas resist weather and extend cycles; quality interior paints resist stains and cut maintenance frequency.
Consider total lifecycle cost, including labor and materials, not just cans.
- Choose paints with proven warranties and mildew resistance.
- Track maintenance frequency over seasons.
- Factor in prep and labor for accurate budgeting.
How to Read Product Data Sheets and Technical Labels
Start by locating the product data sheet and technical labels—these documents tell you what a paint can actually do and how to use it safely. Read product specifications for sheen, coverage, VOCs, and recommended substrates. Decode label terminology like “exterior,” “mildew-resistant,” and “UV-stable.” Check drying times, temperature ranges, and surface prep. Note safety symbols and disposal instructions.
| Item | What to look for |
|---|---|
| Sheen | Matte, eggshell, gloss |
| Coverage | Sq ft per gallon |
| VOCs | Indoor air impact |
| Prep | Primer, cleaning |
| Limits | Temp and humidity |
How Warranty and Manufacturer Claims Differ for Exterior Use
When you choose paint for exterior use, check the warranty fine print—manufacturers often limit coverage to specific substrates, installation methods, and environmental conditions, so what they promise indoors may not apply outside.
You’ll want to understand warranty specifics and verify manufacturer claims before you paint. Look for exclusions, required prep, and maintenance obligations. Ask for written confirmation if conditions differ from the label.
- Confirm required substrate and prep to keep the warranty valid.
- Note weather, application temperature, and drying-time conditions tied to claims.
- Understand required maintenance intervals and documentation to support any future claim.
How to Match Paint Performance to Climate Zones
Because different climates stress coatings in different ways, you should choose paints formulated for your local conditions—humidity, UV exposure, freeze-thaw cycles, and salt air all affect durability and performance. You’ll assess climate considerations and key performance factors: pick UV-stable resins for sun, breathable formulations for humid regions, flexible coatings for freeze-thaw, and corrosion-resistant finishes near salt air. Match product datasheets to local weather patterns and maintenance expectations. Use the table below to compare priorities quickly.
| Climate Zone | Key Stress | Recommended Performance |
|---|---|---|
| Hot/Sunny | UV | UV-stable |
| Humid | Moisture | Breathable |
| Cold | Freeze-thaw | Flexible |
How to Select Low‑VOC and Non‑Toxic Interior Options
Before you pick a color, get clear on VOCs—what they are, how they’re measured, and why lower levels mean better indoor air.
Read ingredient labels to spot solvents, additives, and hidden chemicals, and don’t hesitate to ask manufacturers for full disclosures.
Look for recognized certifications and independent test results to confirm a product’s low‑toxicity claims.
VOC Definitions Explained
If you’re choosing paint for indoor spaces, understanding VOCs—volatile organic compounds—is essential to picking low‑toxicity options that won’t compromise air quality.
You should know VOC Sources (solvents, additives), VOC Emissions over time, and how VOC Measurement guides compliance with VOC Regulations and VOC Standards.
Think VOC Health: short‑term irritation to long‑term risks. Use labels and product data to compare numbers, but remember off‑gassing varies by application and ventilation.
Choose low‑emission products and ventilate during and after painting.
- Check certified low‑VOC or zero‑VOC claims.
- Compare measured TVOC values.
- Prioritize well‑ventilated application.
Ingredient Labels Decoded
Start by scanning the ingredient label for three key sections: the listed solvent types, any declared VOC content (usually g/L), and the presence of known hazard ingredients like formaldehyde, phthalates, or amines. You’ll use that info to judge paint toxicity and ingredient sourcing transparency. Prefer waterborne solvents, low g/L numbers, and explicit resin and pigment origins. Ask retailers about undisclosed additives. Compare brands using this quick table:
| Feature | Good sign | Red flag |
|---|---|---|
| Solvent | Waterborne | Glycol ethers |
| VOC | ≤50 g/L | >150 g/L |
| Disclosure | Ingredient sourcing listed | “Proprietary blend” |
Certification And Testing
Now that you know what to look for on ingredient labels, use certification and third‑party testing to verify those claims when choosing low‑VOC, non‑toxic interior paints.
You’ll want to check certification standards like GREENGUARD, EcoLabel, or Green Seal and confirm independent testing procedures backed by labs. Look for scope, limits, and test dates.
Ask manufacturers for lab reports or chain‑of‑custody documentation. Compare product data sheets and safety data sheets to the certifications.
Use a habit of verifying claims before buying so you reduce indoor pollutants and protect occupants.
- Verify certification standards listed
- Request testing procedures and reports
- Cross‑check product data sheets
How to Select High‑Performance Exterior Coatings
When you’re choosing high-performance exterior coatings, focus on durability, weather resistance, and the substrate you’ll be covering.
You’ll want coatings with clear high performance features — UV blockers, flexible binders, and mildew inhibitors — matched to wood, metal, masonry, or engineered panels.
Consider surface prep, primer compatibility, and the manufacturer’s recommended application techniques to guarantee adhesion and longevity.
Ensure proper surface prep, use compatible primer, and follow the maker’s application guidance for lasting adhesion and durability.
Pick finishes designed for thermal movement and moisture shedding, and verify VOC limits and warranty terms.
Test a small area for adhesion and appearance.
Buy from reputable suppliers and follow instructions closely to maximize service life and minimize maintenance.
How Exposure Affects Color Fading
Although paint colors can look great fresh, prolonged exposure to sun, moisture, and pollution will steadily break down pigments and binders, causing noticeable fading and color shifts.
You’ll notice exposure impacts color longevity and reduces fade resistance faster on exterior surfaces. Choose formulas with UV stabilizers and mildew inhibitors for longer life.
Position, climate, and surface texture change how quickly pigments degrade. Monitor vulnerable areas and pick shades that tolerate light loss.
- South- and west-facing walls get the most sun, so fade is faster.
- Humid climates accelerate binder breakdown and color dulling.
- Rough textures scatter light and expose more pigment.
How Maintenance Schedules Differ for Interior vs Exterior Paint
Because interior and exterior paints face different stresses, their maintenance schedules look very different: you’ll check and touch up indoor surfaces based on visible wear and cleanliness, while outdoor paint needs seasonal inspections for weather damage, mildew, and UV-related issues. You’ll set maintenance frequency for interiors around traffic and humidity—typically every 3–7 years for repainting high-use rooms—and for exteriors around climate cycles, often every 5–10 years. Properly timed upkeep preserves paint longevity. Use inspections to prioritize repairs and cleaning.
| Task | Typical Interval |
|---|---|
| Interior touch-ups | 1–3 years |
| Interior repaint | 3–7 years |
| Exterior inspection | Seasonal |
| Exterior repaint | 5–10 years |
How to Spot Common Failure Modes: Peeling, Chalking, Blistering
How can you tell whether paint is failing or just dirty? You do a quick surface inspection: peeling paint flakes away, chalking surfaces leave powder under your hand, and blistering issues show bubbles under the film.
These symptoms point to paint deterioration and guide whether you’re facing interior failures or exterior concerns. For paint maintenance, note location, pattern, and extent before repairing.
Look for moisture stains, poor adhesion zones, and UV‑exposed areas. Check these three signs closely:
- Peeling paint: edges lifting, layers separating.
- Chalking surfaces: powdery residue when rubbed.
- Blistering issues: rounded bubbles under the finish.
How to Test Adhesion, Moisture, and Porosity Before Choosing Paint
Before you pick a paint, you’ll want to run simple adhesion tests like the tape or crosshatch method to see if the old coating will hold.
Check surface moisture with a moisture meter or the plastic-sheet test so paint won’t trap dampness and fail.
Finally, assess porosity by splashing a few drops of water—if it soaks in quickly, you’ll need a different primer or sealer.
Adhesion Test Methods
When you’re choosing paint, testing adhesion, moisture, and porosity first saves time and prevents coating failures. Simple methods like the tape pull test, moisture meter readings, and a porosity spray or water-drop check tell you whether a surface needs stripping, priming, or different paint chemistry.
You’ll focus here on adhesion tests and quick checks that guide surface preparation. Perform a crosshatch tape pull, inspect pullback, and note any flaking.
Use a solvent or water spot to see if existing coatings soften. Check porosity by observing absorption of a small water drop—fast absorption usually means you’ll need a primer.
- Crosshatch/tape pull test
- Solvent or water spot check
- Water-drop porosity observation
Check Surface Moisture
After you’ve checked adhesion and porosity, measure surface moisture to make sure paint will cure and stick properly.
You’ll use a moisture meter for quick, reliable readings on wood, drywall, and masonry; follow manufacturer guidance for placement and calibration.
For a simple check, tape a plastic sheet to the surface overnight and inspect condensation to confirm dampness.
Record readings as part of your surface assessment and compare them to paint manufacturer limits—typically below 12–15% for wood and low RH for interior substrates.
If moisture’s too high, delay painting, improve ventilation, or repair leaks before proceeding with moisture testing.
Assess Surface Porosity
Because porosity determines how paint soaks in and bonds, you should evaluate it alongside adhesion and moisture before choosing a coating.
You’ll inspect surface characteristics visually and by touch, feeling for chalking, dust, or powder that indicate high porosity.
Perform a simple water droplet test: a bead that soaks in signals absorbent substrate; one that beads suggests low porosity.
For adhesion, try a tape pull or small scratch to see if paint lifts.
- Water droplet test for porosity assessment
- Tape pull for adhesion check
- Moisture meter reading for hidden dampness
Use results to pick primer and paint type.
How DIY Pros Should Plan Interior vs Exterior Projects
Although interior and exterior jobs share tools and basic techniques, you should plan them differently to account for surface prep, weather, timing, and safety. You’ll set clear project timelines, track material budgets, and stage work to minimize disruption. Inspect surfaces, choose appropriate primer and paint, and schedule exterior coats for dry, mild days. For interiors, plan ventilation and furniture protection. Use proper ladders and PPE for height and chemical risks, and allow adequate cure time before finishing.
| Task | Interior | Exterior |
|---|---|---|
| Prep | Clean, sand | Power wash, repair |
| Timing | Flexible | Weather-dependent |
| Safety | Ventilate | Fall protection |
When to Hire a Pro for Exterior Painting
If your home’s exterior has extensive rot, multi-story access, or complex trim and siding, hire a pro—you’ll save time, guarantee safe scaffold and ladder use, and get durable results that protect your investment.
When hiring professionals for exterior painting, you benefit from expert surface assessment, reliable quality assurance, and informed color selection.
Pros manage equipment rentals, track project timeline, and factor weather conditions into scheduling.
Consider cost considerations versus DIY risk: long-term value often favors pros.
Weigh upfront costs against DIY risks—hiring pros often delivers better long-term value and peace of mind
Prioritize safety precautions for heights and lead paint.
Ask for references, written estimates, and a clear warranty before signing.
- Confirm insurance and credentials
- Review sample finishes
- Set firm start/end dates
Quick Decision Checklist: Choose Interior or Exterior Paint
When you’re choosing paint, start by matching the job to the formula: pick exterior paint for surfaces exposed to sun, rain, or temperature swings and interior paint for rooms where stain resistance, low odor, and washability matter.
Next, check exposure: outdoor surfaces need UV and moisture protection; interiors need easy-clean finishes.
Assess substrate: wood, metal, or drywall may require specific primers. Consider climate and drying time.
For aesthetics, review color selection and finish options to guarantee durability and look. Budget for prep, tools, and maintenance.
If you’re unsure, test swatches and consult product datasheets before you buy.
Frequently Asked Questions
Can Interior and Exterior Paints Be Mixed Together Safely?
No — you shouldn’t mix interior and exterior paints; compatibility varies and mixing precautions matter. You’ll create adhesion, durability, and VOC problems. If you must, test small batches, match binders, and follow manufacturers’ guidance.
Do Paint VOC Regulations Differ Between States or Countries?
Yes — VOC regulations vary by state and country; you’ll see strict state comparisons and differing international standards, and you’ll consider health impacts accordingly, so check local rules before buying, using, or disposing of paints.
How Should Paint Leftovers Be Stored Long-Term?
You should store leftover paint in original paint container types with lids sealed, label with date; keep cool, dry, away from sunlight; use airtight cans or plastic pails; shelf life varies, so rotate and inspect before reuse.
Are There Specialty Paints for Garages or Basements?
Yes — you can use specialty paints for garage floor coatings and basement walls; they’ll resist moisture, stains, oil, mold, and abrasion, so you’ll get durable, easy-to-clean surfaces tailored to those demanding environments.
Can Paint Color Affect Indoor Temperature or Energy Use?
Yes, color matters: lighter hues reflect heat, darker hues absorb heat. You’ll influence comfort, energy use, and color psychology; you won’t change thermal insulation, but paint color can modestly alter indoor temperatures and cooling loads.
Conclusion
Choose the right paint: it matters. Interior and exterior formulas differ in binders, pigments, and additives to handle humidity, UV and wear—and choosing wrong can cost time and money. For example, 60% of homeowners report repainting sooner than expected because they used the wrong product, so picking interior paint for outdoors or vice versa often leads to premature failure. Plan tests for adhesion and moisture, follow the checklist, and call a pro when conditions or scale demand it.