What Is Exterior Acrylic Latex Paint? Guide
Exterior acrylic latex paint is a water-based finish you’ll use for siding, trim, and masonry because it blends acrylic polymers for strong adhesion, flexibility, and UV resistance. It dries fairly fast, resists mildew and fading, cleans up with soap and water, and has lower VOCs than oil paints. Prep with cleaning, priming, and proper temps for best results. Keep going and you’ll find tips on application, primers, coverage, maintenance, and troubleshooting.
Is Exterior Acrylic Latex Right for Your Project?
Wondering if exterior acrylic latex is the right choice for your project? You’ll find it suits siding, trim, and masonry with good flexibility and weather resistance.
Consider exterior color trends to pick durable, fade-resistant pigments that stay current longer. You’ll appreciate easy cleanup and lower VOCs, plus faster drying that speeds project timelines.
Pick fade-resistant, on-trend exterior colors—easy cleanup, lower VOCs, and quicker drying to keep projects moving.
For best results follow paint application tips: prep surfaces, use quality brushes or sprayers, maintain recommended temperatures, and apply even coats.
If you need mildew resistance or extreme durability for metal, evaluate specialty options, but for most homes acrylic latex works well.
What Exterior Acrylic Latex Paint Is
If you liked how acrylic latex handled siding and trim, here’s what it actually is: exterior acrylic latex is a water-based paint that uses acrylic polymers as the binder, combining good adhesion, flexibility, and UV resistance in a low-VOC formula.
You’ll find it dries reasonably fast, resists chalking, and tolerates temperature swings without cracking. Choose durable primers and focus on color selection for long-term performance and curb appeal.
For best results, use proper application techniques: clean and prime surfaces, apply in compatible weather, maintain consistent film thickness, and follow manufacturer dry times to guarantee lasting coverage and protection.
How Acrylic Resins and Latex Binders Work
Think of acrylic resins as the glue and latex binders as the delivery system: the resin forms the tough, flexible film that grips the surface and resists UV and moisture, while the latex—tiny, water-borne polymer particles—carries that resin in a paint you can roll or spray.
You apply, water evaporates, and those polymer particles coalesce into a continuous film.
Acrylic Resins determine adhesion, hardness, and paint clarity; Latex Binders control application properties like flow and leveling.
Together they set drying behavior, film formation, and compatibility with pigments and additives, so you get consistent coverage and easy cleanup.
Durability, Flexibility, and UV-Resistance Benefits
Durability in exterior acrylic latex paint means you get a protective skin that stands up to abrasion, moisture, and temperature swings, while its built-in flexibility lets that skin stretch with siding, trim, and wood without cracking.
You’ll notice durability factors like film hardness, binder quality, and proper film thickness determine how well the coating resists wear and mildew.
Flexibility advantages let joints and substrates expand and contract without failure, reducing maintenance.
UV protection from modern pigments and stabilizers slows fading and binder breakdown, so you achieve a long lasting finish that keeps color and protection season after season.
When Exterior Acrylic Latex Isn’t Ideal
When you need an oil-based finish for raw metal, high-heat surfaces, or floors subject to heavy chemical exposure, exterior acrylic latex isn’t the best choice.
You should also avoid it on surfaces with persistent moisture issues unless combined with specialized waterproofing techniques, because latex can’t substitute for true moisture barriers.
Check surface compatibility: some plastics, glossy metals, and oil-stained concrete resist adhesion even after prep.
Check surface compatibility—some plastics, glossy metals, and oil-stained concrete may resist adhesion even after prep.
If substrate demands extreme abrasion resistance, prolonged solvent exposure, or specific adhesion chemistry, pick a product formulated for that environment.
Always test a small area and consult manufacturer data to confirm suitability before committing to a full project.
Acrylic Latex vs. Oil-Based and 100% Acrylic Paints
Comparing acrylic latex, oil-based, and 100% acrylic paints helps you pick the right product for the job: acrylic latex dries faster, cleans with soap and water, and delivers many acrylic benefits like flexibility and UV resistance.
Oil-based paints level nicely and resist wear, but they yellow, need solvents, and take longer to cure.
100% acrylic offers superior adhesion, breathability, and paint longevity on varied substrates, making it ideal where durability matters.
You’ll weigh drying time, maintenance, environmental impact, and surface movement.
Match the paint type to conditions and expectations to get lasting, professional results.
Best Surfaces for Exterior Acrylic Latex
Having compared acrylic latex with oil-based and 100% acrylic options, you’ll want to pick surfaces where acrylic latex performs best.
You’ll follow best practices for prep and application to get durable results. Acrylic latex adheres well to common exterior surface types and tolerates expansion and contraction.
Follow proper prep and application for durable results—acrylic latex sticks well to exteriors and handles expansion.
- Wood siding and trim — sand, prime where needed, and use acrylic latex for flexibility and breathability.
- Masonry and stucco — use a masonry primer; acrylic latex resists mildew and allows moisture vapor transfer.
- Fiber cement and engineered boards — clean thoroughly, prime cut edges, and finish with acrylic latex for long-lasting protection.
Climate and Weather Effects on Paint Longevity
Because exterior paint faces direct sun, wind, rain, and temperature swings, you should choose products and application timing that match your local climate to maximize longevity.
You’ll assess climate impact by noting UV intensity, humidity, freeze-thaw cycles, and salt exposure; each demands different formulation or prep.
Pick acrylic latex with proven weather resistance for UV fading, flexible binders for thermal movement, and mildewcide in humid zones.
Apply during recommended temperature and low-humidity windows, follow manufacturer dry-time guidance, and use proper priming and caulking to prevent moisture intrusion.
Regular washing and timely touch-ups preserve finish and extend service life.
Inspecting Siding: What to Look For
All that climate-aware prep pays off only if the siding itself is sound, so before you pick paint or schedule work you should do a careful siding inspection.
You’ll identify problems specific to siding materials and choose appropriate inspection techniques to spot rot, delamination, or loose panels. Check paint adhesion, fasteners, and seams. Note moisture entry points and insect damage. Record areas needing repair or replacement so paint won’t just mask defects.
- Examine seams, trim, and flashing for gaps or decay.
- Probe suspicious spots gently for soft wood or hollow areas.
- Scan for blisters, chalking, or uneven adhesion.
Surface Prep Checklist Before Painting
Before you paint, inspect and repair any damaged siding, trim, or caulking so the surface is sound.
Then thoroughly clean to remove dirt, mildew, and chalking so paint will adhere.
Finally, spot-prime bare wood, patched areas, and any stains to guarantee even coverage and durability.
Inspect And Repair Surfaces
Start by closely inspecting every surface you’ll paint—look for peeling, cracks, mildew, loose caulk, and soft or rotted wood—and note what needs repair or replacing.
Use surface assessment to map problem areas and prioritize fixes. Accurate damage identification helps you choose fillers, replacement boards, or new caulk.
Address structural rot first, then gaps, then loose trim.
Follow this quick repair list:
- Remove loose material and replace rotten wood; secure trim.
- Fill small cracks and sand smooth; prime bare spots.
- Reseal joints with exterior-grade caulk; verify straight edges and adhesion.
Clean And Remove Contaminants
Once repairs are made, you’ll want to thoroughly clean surfaces so paint can bond properly; remove dirt, chalk, mildew, and loose particles with a stiff brush, pressure washer (on low setting), or a detergent solution, then rinse and let everything dry completely. Use targeted cleaning techniques for surface contaminants: pressure washing for grime, degreasing solutions for oil, mildew removal with appropriate cleaners, and stain treatments where needed. Consider environmental factors like temperature and humidity when you apply cleaning agents. Follow safety guidance and test a small area first to confirm effectiveness before full treatment.
| Task | Cleaner | Purpose |
|---|---|---|
| Wash | Water/soap | Remove dirt |
| Degrease | Solvent | Remove oil |
| Treat | Fungicide | Mildew removal |
Prime Bare Or Problem Areas
1 essential step is to prime any bare or problem areas so the new acrylic latex paint adheres evenly and resists stains, rust, and tannin bleed-through.
Before priming, do a surface evaluation to identify bare wood, rust, peeled paint, and water stains.
Choose priming techniques suited to each issue: oil-based for rust, stain-blocking for tannins, and bonding primers for glossy spots.
Apply evenly, feathering edges to blend with surrounding paint.
Let primers cure fully before topcoating.
Follow manufacturer’s recoat times and sand glossy primer lightly for best adhesion.
- Bare wood: stain-blocking primer
- Rust: rust-inhibiting primer
- Glossy: bonding primer
Repairing Cracks, Rot, and Mildew
Before you paint, you’ll need to repair any wood rot and stop mildew to guarantee a lasting finish.
Cut out and replace rotten wood or use a wood epoxy for small areas, and sand smooth before priming.
For mildew, scrub with a mildew cleaner or diluted bleach, rinse thoroughly, and let the surface dry completely.
Fixing Wood Rot
When you spot cracked, soft, or discolored wood, act quickly to stop further damage and restore the surface: remove loose material, probe to assess extent, and decide between repair or wood replacement.
You’ll want solid tools, epoxy or patching compounds, and exterior-grade primer and acrylic latex paint for protection. Follow rot prevention by correcting moisture sources and ensuring proper ventilation before finishing.
- Excise rotten sections to reach sound wood; treat edges and fill small voids with epoxy.
- Replace severely compromised boards and fasten securely.
- Prime, sand, and paint with high-quality exterior acrylic latex for lasting protection.
Treating Mildew Growth
If you spot gray or black streaks on painted wood, act quickly to remove mildew before it damages the finish and underlying material.
You’ll scrub affected areas with a brush and a mild cleaning solution—use diluted bleach or a store mildew cleaner, rinse thoroughly, and let wood dry completely.
Sand any stubborn spots, then prime with a mildew-resistant primer before repainting.
For mildew prevention, improve drainage, trim vegetation, and guarantee ventilation to reduce moisture.
Reinspect annually and touch up damaged paint to keep surfaces sealed.
Prompt removal and proper prep protect both appearance and structural integrity.
Primer: When to Use It and Which Type
Even on well-prepared surfaces, a quality primer can make the difference between paint that lasts and paint that peels, so you’ll want to choose one that matches your substrate and conditions.
Even on prepped surfaces, the right primer — matched to substrate and conditions — prevents peeling and ensures lasting paint.
You’ll use primer when switching from oil to latex, covering stains, or sealing porous surfaces. Consider primer types and appropriate application techniques to guarantee adhesion and uniform topcoat appearance.
Pick an alkyd/oil-based primer for raw wood or metal, a high-build acrylic for chalky siding, or a stain-blocking latex for tannin bleed.
Apply with proper tools, maintain recommended dry times, and sand lightly before topcoating.
- Alkyd/oil primer
- Acrylic high-build primer
- Stain-blocking latex
Choosing the Right Sheen for Siding, Trim, and Furniture
Because sheen affects durability, appearance, and touch-up needs, you should match finish to function: choose lower sheens for siding to hide imperfections and reduce glare, satin or eggshell for broad walls where weather resistance and moderate washability matter, and semi-gloss for trim to resist scuffs and simplify cleaning.
For outdoor furniture, pick satin or semi-gloss for easy maintenance without overly shiny surfaces.
In your sheen selection, weigh exposure, cleaning frequency, and the aesthetic impact you want. Test small areas to confirm harmony between pieces and note that higher sheen shows flaws more readily.
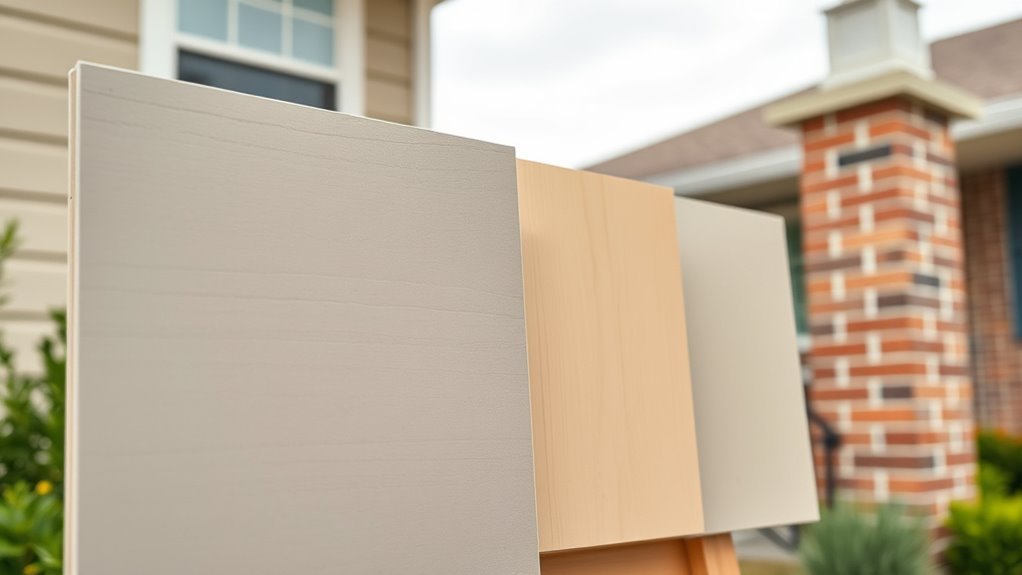
Picking Durable Colors and UV-Resistant Formulas
Pick colors that stay true longer and choose formulas made to resist UV breakdown: lighter, less-saturated hues reflect more sunlight and heat, while high-quality exterior acrylics include UV stabilizers, pigments rated for lightfastness, and flexible binders that prevent chalking and fading.
You’ll balance aesthetics, color psychology, and longevity when selecting shades. Also consider environmental impact: low-VOC, durable coatings reduce repainting frequency.
Prioritize tested brands and read lightfastness data.
- Choose lighter, muted palettes for sun-exposed areas.
- Select UV-resistant, low-VOC formulations.
- Verify pigment and binder durability from product specs.
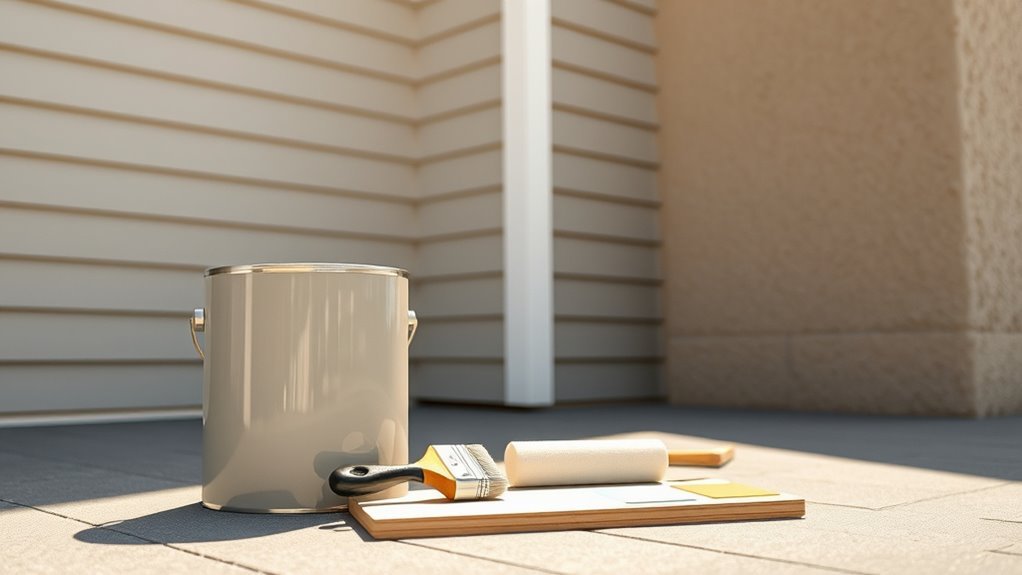
Tools and Supplies for a Pro Finish
1 essential kit sets the stage for a professional exterior finish: quality brushes and rollers, a powered sprayer if the job’s large, sturdy drop cloths and masking materials, plus the right primers, caulks, and cleaners for proper surface prep.
You’ll choose brush types for trim and detail, use paint rollers for broad areas, and deploy paint sprayers for speed on siding.
Gather surface cleaners and other prep tools to remove dirt and mildew before priming.
Pack finishing touches like trim brushes and touch-up kits, cleanup supplies for proper disposal, and protective gear to keep you safe and efficient.
Step-by-Step Exterior Acrylic Latex Process
Now that you’ve got the right tools, you’ll follow clear surface preparation steps to remove dirt, loose paint, and mildew so the coating bonds properly.
Next, you’ll apply primer and two coats of acrylic latex using consistent strokes and the right drying times between coats.
I’ll walk you through each stage so you know what to do and when to move on.
Surface Preparation Steps
Preparing the surface is the single most important step, because a clean, dry, and sound substrate guarantees your exterior acrylic latex will adhere, wear evenly, and last.
Start with Surface evaluation—inspect for rot, loose paint, and stains.
Do Surface cleaning to remove dirt, mildew, and chalk using detergent or a pressure washer at low pressure.
Perform Surface smoothing by sanding rough spots and scraping blistered paint.
Seal repairs with appropriate fillers, then do Surface priming where needed.
Finally, guarantee thorough Surface drying before you paint.
- Inspect and repair
- Clean and sand
- Prime and seal
Application And Drying
Begin by laying out your tools and working in manageable sections so you can maintain a wet edge; acrylic latex dries quickly, so plan strokes, overlap, and shifts before you start.
Choose high-quality brushes, rollers, or an airless sprayer and test your application techniques on scrap.
Cut in edges first, then fill large areas with consistent, even passes, keeping a wet edge to avoid lap marks.
Monitor drying times on the can and conditions—temperature, humidity, and wind affect cure.
Wait recommended recoat intervals, sand if needed between coats, and inspect for drips or thin spots before final touch-ups.
Brushing, Rolling, and Spraying Techniques
When you pick up a brush, roller, or sprayer, match the tool to the surface and the job so you get an even, durable finish without wasting time or paint.
You’ll use brushing techniques for edges and detail, rolling methods for broad, textured areas, and spraying tips for smooth, fast coverage.
Follow application strategies: maintain a wet edge, work top to bottom, and avoid overloading tools.
Prep, back-brush or back-roll when needed, and keep consistent pressure. Clean equipment promptly to preserve performance.
Choose naps, nozzle sizes, and stroke patterns that suit the surface and paint consistency.
- Brushing techniques
- Rolling methods
- Spraying tips
Weather Windows and Optimal Application Conditions
After you’ve chosen the right tool and technique, pick your weather window carefully so the paint can cure properly and bond to the substrate.
You’ll want consistent weather conditions: no rain forecast, low wind, and moderate humidity. Aim for ideal temperatures recommended by the manufacturer—usually between 50°F and 90°F—both during application and for several hours after.
Avoid painting in direct midday sun on hot surfaces or when temperatures will drop below limits overnight. Check local forecasts and surface temps, and postpone work if dew or rapid temperature swings threaten adhesion.
Planning your window prevents run, sag, and poor film formation.
Drying, Recoat, and Curing Times
Because acrylic latex dries by water evaporation and polymer coalescence, you’ll see surface dry quickly but need to respect longer recoat and full cure times to avoid problems.
You should check label drying times—typically 1–4 hours to touch, 4–24 hours between coats depending on temperature and humidity. Curing processes continue for days to weeks; avoid heavy cleaning or stress until full cure.
- Plan coats around manufacturer recoat windows to prevent lifting or poor adhesion.
- Accelerate drying times with warm, low-humidity conditions and good airflow.
- Monitor curing processes; full hardness often takes 7–30 days.
Maintenance to Keep Exteriors Looking New
To keep your exterior paint looking new, set up a simple regular cleaning routine to remove dirt and mildew before they stain.
Check the siding, trim, and caulk annually and make small touchups where paint has chipped or worn.
Those quick steps will extend the life and appearance of your acrylic latex finish.
Regular Cleaning Routine
When you keep a simple, regular cleaning routine, your exterior acrylic latex paint will stay brighter and resist grime longer.
You’ll set a cleaning frequency based on weather impacts—more often in wet or windy areas—and choose cleaning products that balance stain removal with surface protection.
Use soft brushes, low-pressure rinses, and mild detergents to avoid damage.
- Wash siding seasonally for general dirt and mold control.
- Spot-clean stains promptly using recommended cleaning products and gentle scrubbing.
- Rinse after storms and remove debris to reduce long-term wear and uphold maintenance tips.
Annual Inspection Touchups
Cleaning keeps paint looking good day-to-day, but an annual inspection lets you catch small issues before they become costly. You should walk your exterior yearly, note cracks, peeling, and faded spots, and plan annual maintenance tips into your calendar. Use seasonal touchup strategies: touch peeling areas in spring, seal trim before winter, and match sheen and base to avoid visual patches. Keep a small repair kit with matching acrylic latex for quick fixes.
| Issue | Action |
|---|---|
| Peeling | Scrape, prime, repaint |
| Cracks | Caulk, prime |
| Fading | Spot-repaint |
| Stains | Clean, assess repaint |
Cleaning and Storing Brushes, Rollers, and Paint
Rinse brushes and rollers promptly after use so paint doesn’t harden and ruin the tools; you’ll save time and money by keeping them in good shape.
Use warm water and mild soap, work bristles from ferrule to tip, and spin brushes between your palms to remove moisture.
For roller storage, remove excess paint, wrap in plastic or sealable bags, and hang or lay flat to keep nap intact.
Store leftover paint tightly sealed, label with date and color, and keep in a cool, dry place.
- Brush maintenance: comb bristles and reshape.
- Roller storage: prevent flattening.
- Paint sealing: airtight lids.
Common Mistakes and How to Avoid Them
Keeping your tools and leftover paint in good shape makes your job easier, but mistakes can still cost time and money if you’re not careful.
Watch common pitfalls: preparation errors like skipping cleaning or priming create adhesion problems. Avoid selection oversights by matching paint to surface and climate.
Prevent application blunders—overloading brushes or rolling too fast—so you don’t get drips and finish inconsistencies.
Mind environmental factors and drying issues; don’t paint in extreme heat, cold, or humidity.
Reduce maintenance neglect by scheduling touch-ups.
Finally, stop tool misuse and monitor for color fading to keep results durable and attractive.
Estimating Paint Quantity and Coverage Calculations
Before you start painting, you’ll want to calculate the total surface area so you know how much paint to buy.
Measure walls, trim, and subtract windows and doors, then multiply by the number of coats you’ll apply.
Use the paint’s coverage rate (usually on the can) to convert square footage into gallons required, rounding up to account for touch-ups.
Calculating Surface Area
To estimate how much exterior acrylic latex you’ll need, measure the walls, trim, doors, and windows and subtract openings so your coverage calculations reflect only paintable surface.
Use simple surface measurement techniques and area calculation methods: measure height × width for rectangles, add triangles for gables, and account for siding texture that alters effective area.
Record each plane separately, label measurements, and convert inches to feet before multiplying.
Sum totals for walls, trim, and features. Double-check your math and note rough vs. smooth finishes.
These disciplined steps make your subsequent paint-quantity decisions accurate and repeatable.
- Measure systematically
- Label planes
- Sum totals
Determining Paint Needed
Once you’ve totaled the paintable square footage, convert that number into gallons by dividing by the manufacturer’s coverage rate (usually listed as square feet per gallon).
Then adjust for surface texture, number of coats, and waste. Next, factor primer needs and whether you’ll apply two finish coats; rough surfaces or new wood can increase consumption by 10–30%.
Compare paint type comparison notes—different formulations vary in spread rate—so check specs before buying.
Account for color selection: dark-to-light shifts may require extra primer or coats.
Round up slightly to cover touch-ups and unexpected absorption for a smoother job.
Cost: DIY vs. Hiring a Pro
You can often save several hundred dollars by painting your home’s exterior yourself, but that doesn’t always mean it’s the better choice—time, skill, and equipment add real costs.
Weigh DIY Costs against Professional Fees in a clear Cost Comparison to make smart Budget Considerations.
- DIY Costs: paint, primer, brushes, ladders, and time—factor in learning curves and possible redo work.
- Professional Fees: crew labor, insurance, surface prep, and warranty—pros work faster and may avoid mistakes.
- Cost Comparison: get multiple quotes, estimate hours saved, and balance immediate savings with long-term value.
Environmental and Safety Tips for Exterior Acrylic Latex
When you’re painting, keep fresh air moving by opening windows and using fans to push fumes away from your work area.
Wear a mask and gloves, and don’t leave containers open where rain or pets can contaminate them.
When you’re done, follow local guidelines for recycling or disposing of leftover acrylic latex and rinsate to protect the environment.
Proper Ventilation Practices
Good ventilation is essential whenever you’re working with exterior acrylic latex—especially in enclosed spaces like attached garages or under eaves—because it disperses fumes, speeds drying, and reduces the risk of headaches or dizziness.
You should recognize ventilation importance for maintaining air quality and preventing solvent buildup.
Follow practical steps to keep yourself safe and your paint job efficient:
- Open windows/doors and run fans to create cross-breeze; position exhaust fan toward outdoors.
- Use respirators rated for organic vapors if ventilation is limited; change cartridges per manufacturer.
- Pause work in high humidity or stagnant air; wait for better conditions to protect health and finish.
Eco-Friendly Disposal Methods
Although exterior acrylic latex is less hazardous than oil-based paints, you still need to handle leftover paint and rinse water responsibly to protect waterways and soil.
You can use leftover paint on touch-ups or partner with community groups rather than tossing it. Check local recycling options for paint drop-off events or reuse programs; many municipalities accept latex at household recycling centers.
Never pour rinse water or excess paint down drains. When disposal options aren’t available, dry small amounts with kitty litter and dispose per local rules.
For larger quantities, treat as hazardous waste and contact your local waste authority for pickup guidance.
Warranties, Labels, and Troubleshooting Fading/Peeling
If you want reliable protection and clear recourse when issues arise, start by reading the paint can label and warranty terms carefully—they tell you what’s covered, for how long, and what voids the guarantee.
Do a label inspection before buying so you know recommended substrates, prep, and application conditions that affect warranty coverage. If fading or peeling appears, document dates, conditions, and photos.
Inspect the paint label before buying—note substrates, prep, and application requirements; document any fading or peeling with dates and photos.
- Check prep and adhesion — poor priming or dirty surfaces cause peeling.
- Verify application temp and coats — extremes can cause fading.
- Contact manufacturer with your documentation for claim guidance and remedies.
Frequently Asked Questions
Can Exterior Acrylic Latex Be Tinted to Match Historical Colors?
Yes — you can tint exterior acrylic latex to match historical colors. You’ll work with color matching systems and professionals focused on historical preservation, ensuring pigments, finish, and durability respect period accuracy while protecting the façade.
Will It Adhere to Previously Painted Lead-Based Surfaces?
Yes — acrylic latex can adhere to previously painted lead paint if you follow strict surface preparation: remove loose paint, clean, sand glossy areas, prime with a lead-blocking primer, and use proper safety measures to avoid lead dust.
Can I Use Exterior Acrylic Latex on Metal Gutters and Downspouts?
About 85% of painted gutters fail from poor prep, so yes—you can use exterior acrylic latex on metal gutters and downspouts if you perform proper metal surface preparation and consider paint durability factors like primer, adhesion, and corrosion protection.
How Long Before Painted Surfaces Are Rain-Safe After a Storm?
You should wait at least 24–48 hours after application before heavy rain; rain exposure effects can extend curing, so expect full drying time of 7–30 days depending on temperature and humidity, though surface dries sooner.
Do VOC Levels Vary Between Brands of Acrylic Latex Paint?
Yes — you’ll find VOC levels do vary between brands, and that’s governed by VOC regulations; you’ll want low-VOC options because they can boost paint durability and lower emissions, though formulation differences still affect performance.
Conclusion
So, should you select exterior acrylic latex? Sure — it’s sturdy, stretchable, and sun-smart for siding, stucco, and trim. Still, steer clear when surfaces stay perpetually damp or when you need specialized coatings. Scout surface soundness, select suitable sheen and primer, and seal small splits before you start. With sensible steps, acrylic latex saves time, trims costs, and treats your home to long-lasting, lively color — a smart, strong, and savvy siding solution.