What Is Exterior Latex Paint? Uses Explained
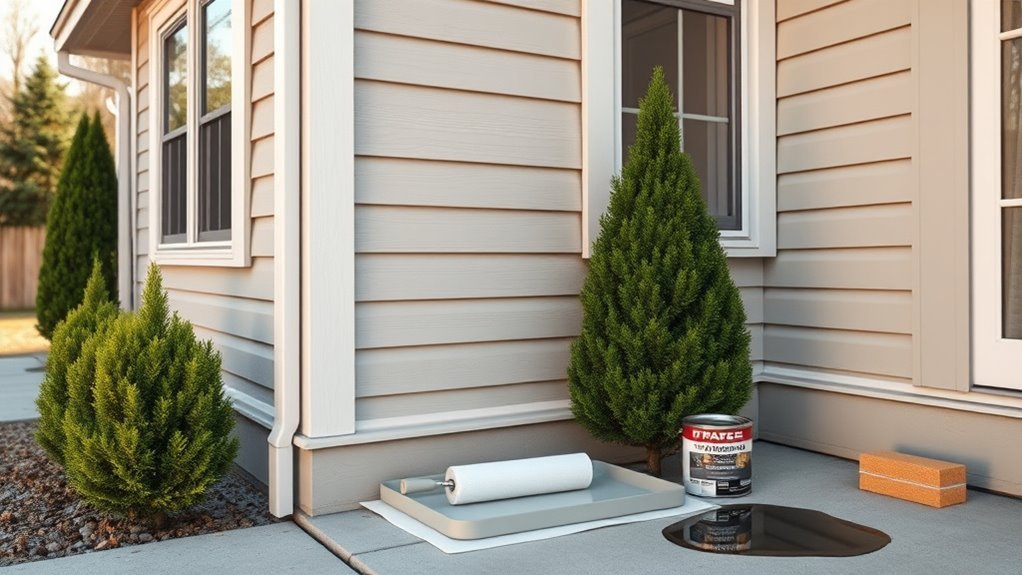
Exterior latex paint is a water-based, flexible coating you’ll use on siding, trim, stucco and properly primed metal; it combines acrylic or vinyl binders, pigments and additives so it dries fast, resists weather, mildew and fading, and cleans up with soap and water. You’ll prep by cleaning, patching and priming, apply with brush, roller or sprayer, and usually use two coats for best durability—keep going to learn about grades, sheens, timing and pro vs DIY choices.
Quick Answer: When to Choose Exterior Latex Paint
When do you pick exterior latex paint? You choose it when you need durable, flexible protection for siding, trim, or masonry that resists fading and peeling.
Consider surface compatibility: wood, fiber cement, stucco, and properly primed metal accept latex well.
Use application tips like cleaning, repairing cracks, priming porous areas, and avoiding painting in extreme heat or cold.
Roll or brush for smooth surfaces, use a high-quality sprayer for large areas, and apply two coats for longevity.
You’ll appreciate faster drying, easier cleanup with water, and less odor compared with oil-based alternatives, making projects quicker and cleaner.
What Is Exterior Latex Paint?
Exterior latex paint is a water-based coating formulated for outdoor surfaces that combines acrylic or vinyl resins with pigments and additives to provide flexible, weather-resistant protection.
Exterior latex paint: a water-based, resin-rich coating offering flexible, weather-resistant protection for outdoor surfaces.
You’ll find it designed for exterior applications like siding, trim, doors, and masonry because it resists UV, moisture, and temperature swings.
It dries faster than oil paint, cleans up with soap and water, and offers good adhesion and color retention.
You can expect improved paint longevity when you prep surfaces properly and use quality primers and topcoats.
How Exterior Latex Paint Is Made
You’ll learn how exterior latex paint starts with forming a polymer binder that gives the coating its film and durability.
Then you’ll see how pigments and additives are blended in to provide color, opacity, and weather resistance.
Finally, you’ll follow the manufacturing and quality-control steps that guarantee consistent performance before the paint ships.
Polymer Binder Formation
Think of the polymer binder as the paint’s glue: it forms when tiny plastic particles in the latex disperse in water during manufacture, then coalesce into a continuous film as the water evaporates after application. You’ll learn how polymer chemistry drives binder properties, affecting adhesion strength and durability factors. Consider formulation challenges and environmental impact when choosing resins; they shape performance metrics and application techniques for exterior conditions.
| Aspect | Concern | Outcome |
|---|---|---|
| Chemistry | Resin type | Adhesion strength |
| Durability | Weathering | Longevity |
| Impact | VOCs | Environmental impact |
Pigment And Additives
Color and performance in latex paint come from pigments and additives that you mightn’t notice but rely on heavily.
You choose pigments for hue, hiding power, and pigment stability so color endures sun and weather. Titanium dioxide provides opacity; organic pigments give vivid shades.
Additives fine-tune drying, flow, mildew resistance, and UV protection. You’ll see surfactants, defoamers, thickeners, and biocides working behind the scenes.
Each ingredient has specific additive functions to balance application and durability without changing the binder’s role.
When you pick exterior latex, you’re trusting a precise mix of pigments and additives tailored for long-term performance.
Manufacturing And Quality Control
Making exterior latex paint starts with precisely measured raw materials and a controlled sequence of mixing, milling, and quality checks to guarantee consistency batch after batch.
You see raw pigments, binders, solvents, and additives combined under monitored temperatures and shear rates. Modern production methods use high-speed dispersers and bead mills to ensure uniform particle size and color strength.
Lab technicians sample viscosity, tint accuracy, gloss, and freeze-thaw stability against established quality standards. If a batch fails, you adjust formulation or reprocess.
Final packaging includes lot codes so you can trace production history and confirm the paint meets performance expectations.
Latex vs Oil-Based Exterior Paint
When you’re choosing exterior paint, the main trade-offs between latex and oil-based formulas are durability, drying time, and maintenance.
You’ll notice latex advantages: faster drying, easier cleanup with soap and water, and better flexibility for expanding siding, which helps exterior durability in freeze-thaw cycles.
Oil based drawbacks include longer cure times, yellowing risk, and tougher cleanup needing solvents; however, oil can level nicely on trim.
For color retention, modern exterior latex holds pigments well against UV and chalking.
Choose latex for low-maintenance walls and oil for specific trim or historical restoration needs.
Latex Vs 100% Acrylic and Hybrids
When choosing between standard latex, 100% acrylic, or hybrid exterior paints, you’ll weigh cost against long-term performance.
Acrylics usually cost more but offer superior UV resistance and color retention, while hybrids try to balance price with improved durability.
Also compare film flexibility—acrylics stay more elastic in temperature swings, which helps prevent cracking and peeling.
Cost And Performance
Although pure acrylics usually cost more up front, you’ll often recoup that premium through better long-term performance and fewer repainting cycles.
Latex blends and economy latex formulas are cheaper initially but can need touch-ups or full recoats sooner, especially in harsh climates or on porous surfaces.
In your cost analysis, weigh initial price, expected life, and maintenance frequency.
For performance evaluation, consider adhesion, fade resistance, and mildew resistance—acrylics typically excel.
Hybrids can balance value and durability, giving midrange longevity at moderate cost.
Choose based on budget, climate exposure, substrate, and how often you’re willing to repaint.
Film Flexibility Comparison
Because exterior paint must move with your siding and trim, film flexibility becomes a key factor in long-term performance; you’ll notice fewer cracks and better adhesion on flexible films. 100% acrylics generally form the most elastic film, stretching and recovering with temperature swings and substrate movement, while basic latex (vinyl-acrylic) tends to be stiffer and can craze or flake earlier on rigid or shifting surfaces. You’ll weigh film flexibility benefits against film flexibility limitations: choose acrylics for high-movement areas, hybrids for balance, and standard latex where cost matters but movement is minimal.
| Type | Flexibility |
|---|---|
| 100% Acrylic | High |
| Hybrid | Moderate |
| Vinyl-Acrylic | Low |
| Application | Match to substrate |
When to Choose Latex Over Other Coatings
If you want a durable, low-odor finish that dries quickly and resists cracking, choose latex for most exterior surfaces; it’s especially smart for wood siding, trim, and masonry where flexibility and UV resistance matter.
You’ll pick latex when you prioritize easy cleanup, lower VOCs, and the latex paint benefits that simplify maintenance and repainting.
Consider outdoor project considerations like temperature, humidity, and substrate preparation.
Evaluate these common scenarios:
- Fast turnaround and low odor for inhabited homes.
- Areas needing flexible, UV-resistant coating.
- Projects where soap-and-water cleanup and lower VOCs matter.
Common Surfaces for Exterior Latex: Siding, Trim, Masonry
Think of exterior latex as the go-to choice for three high‑traffic surfaces—siding, trim, and masonry—because it balances flexibility, adhesion, and weather resistance.
You’ll pick different siding types—vinyl, wood, fiber cement—based on durability and desired paint colors. For trim materials like PVC, wood, or composite, latex adheres well and tolerates expansion.
Masonry textures such as brick, stucco, and concrete need breathable latex that resists moisture penetration.
Consider local weather conditions when prepping and choose proper application techniques: pressure washing, priming, and using brushes, rollers, or sprayers to guarantee even coverage and long-lasting results.
How Sheens Affect Durability and Look
When you pick a sheen, you’re balancing appearance and performance: matte hides imperfections but shows wear faster, while gloss stands up to scrubbing and weathering.
Higher sheens usually resist moisture and UV better, making them a smart choice for exposed areas.
Also consider hiding power and texture—flat sheens mask surface flaws, whereas smoother, glossier finishes highlight them.
Matte Versus Gloss Durability
Although matte and gloss finishes both protect your siding, they do it in different ways that affect how long they last and how your home looks. Your choice should balance appearance and performance.
You’ll weigh matte durability against gloss longevity while considering sheen impact on stains and highlights. Gloss shows blemishes less and boosts surface resilience; matte hides imperfections and guides aesthetic choices.
Think about maintenance needs too: gloss wipes clean easier, while matte may require gentler care.
Consider these quick points:
- Matte: hides flaws, softer look, moderate durability.
- Gloss: high resilience, easier cleaning, longer life.
- Choose by exposure and style.
Sheen And Weather Resistance
Because different sheens reflect and repel moisture differently, your finish choice directly affects both how well your exterior stands up to weather and how it looks over time.
You’ll notice sheen impact immediately: higher sheens shed water and resist staining, making cleaning easier and prolonging paint life. Lower sheens hide imperfections but absorb more moisture, which can shorten weather durability on exposed surfaces.
Choose satin or semi-gloss for trim and high-traffic areas, and use lower sheen where appearance matters more than exposure.
Match sheen to substrate and climate to balance appearance, maintenance needs, and long-term protection.
Hiding Power And Texture
Sheen choices don’t just change how a surface sheds water—they also affect how well paint covers flaws and how texture reads from a distance.
You’ll pick sheen to balance durability and appearance: flatter sheens hide imperfections, while glossier finishes resist dirt.
- Flat/matte: best hiding techniques for uneven substrates, minimizes light reflection.
- Eggshell/satin: modest hiding with subtle texture options; easier to clean.
- Semi-gloss/gloss: low hiding power but high durability and washability; emphasizes texture.
Match sheen to substrate and desired look, using primer or texture-enhancing additives when hiding power needs a boost.
Paint Grades and Labels Explained
When you’re choosing exterior latex paint, the grade and the label tell you more than just color—they explain durability, coverage, and where the product performs best.
You should read labels for VOC levels, recommended substrates, and warranty details because label importance guides proper application.
Paint quality varies by resin, pigment load, and filler—higher grades hide better and resist chalking.
Know the difference between contractor-grade and premium formulas so you can match project needs and budget.
Look for specific terms like “exterior,” “masonry,” or “trim” on cans, and follow manufacturer prep and application notes to get promised results.
Weather Resistance: Rain, Sun, Freeze
When you pick exterior latex, consider how it stands up to rain and how long it resists fading from sun exposure.
You’ll want a formula that beads water and prevents penetration during storms, and one with UV stabilizers that keep color from chalking.
Also check freeze-thaw ratings so the film stays flexible and doesn’t crack in cold spells.
Rain Resistance Performance
Although rain is just one element of weather, it’s one of the toughest tests for exterior latex paint because water exposure can reveal weaknesses in film formation, adhesion, and pigment stability.
You’ll want paint that sheds rainwater runoff, resists moisture penetration, and cures to a flexible, continuous film.
Consider these practical checks:
- Drying time — faster rain-safe recoat windows reduce washout risk.
- Water repellency — look for formulations or additives that bead and drain.
- Substrate prep — sealing gaps and using primers stops capillary-driven penetration.
Choose products rated for exterior wet conditions and follow application guidelines for best results.
UV And Freeze Durability
Since sunlight and freeze–thaw cycles attack paint in different ways, you’ll want exterior latex formulated to resist both UV-driven breakdown and the mechanical stress of ice expansion.
You’ll look for UV resistance via stabilized pigments and flexible binders that slow chalking, fading, and brittleness.
For freeze tolerance, pick formulations that stay elastic at low temperatures so they won’t crack when water within substrates freezes and expands.
Proper primers and flexible topcoats enhance adhesion and accommodate movement.
Maintenance—cleaning, touch-ups, and recoat intervals—preserves both UV resistance and freeze tolerance, extending color and protective performance.
Moisture Management and Breathability
If your home’s exterior can’t shed moisture effectively, paint won’t stop underlying rot or mold growth; breathable latex paints let trapped vapor escape while still repelling liquid water, so siding and masonry dry out between wetting events.
You’ll choose systems that work with existing moisture barriers rather than sealing them in. Breathable coatings balance permeability and protection, reducing blistering and decay.
- Select finishes rated for vapor transmission to avoid trapped moisture.
- Prep surfaces and repair drainage to minimize prolonged wetting.
- Use breathable coatings over compatible substrates, monitoring humidity and curing conditions to guarantee performance.
How Latex Adheres to Wood, Metal, Masonry
Different substrates demand different adhesion strategies, so you’ll want to match your latex system to wood, metal, or masonry based on surface chemistry and porosity.
On wood, latex bonds via mechanical interlocking and hydrogen bonding; you’ll remove loose fibers and control moisture so the coating can penetrate grain.
On metal, adhesion mechanisms rely on a clean, oxide-free surface and often a primer that promotes chemical bonding to prevent corrosion.
Masonry’s porosity requires a breathable latex that fills pores and cures into a flexible film; proper substrate preparation manages dust and efflorescence so the paint adheres uniformly.
Preparing Surfaces for Exterior Latex Paint
Before you paint, you’ll need to thoroughly clean and degrease the surface so the latex can bond properly.
Fix any cracks, holes, or loose material, then sand smooth to create an even profile.
These prep steps cut down on failures and give your topcoat a longer life.
Clean And Degrease
Start by removing dirt, mildew, grease, and chalking so the latex paint can adhere properly; you’ll get a smoother, longer-lasting finish when the surface is truly clean.
You’ll focus on surface preparation using appropriate cleaning agents and simple degreasing techniques to boost paint adhesion. Work from top to bottom, rinse thoroughly, and let surfaces dry fully before priming or painting.
Follow this quick checklist:
- Wash with water and mild detergent for general grime.
- Use a mildew cleaner (bleach solution) where needed, then rinse.
- Apply a citrus-based or alkaline degreaser for oily spots, then rinse and dry.
Repair And Sand
Patch and sand any damaged areas so your exterior latex paint will stick and look professional.
Begin with a damage assessment to identify cracks, rot, or loose old paint. Use repair techniques like epoxy fillers or wood patches, then follow proper sanding methods to remove high spots and feather edges.
Prioritize surface preparation to guarantee paint adhesion; clean dust before priming. Apply primer application suited to substrate and verify paint compatibility to prevent peeling.
Sand lightly between coats for texture uniformity, and choose products rated for exterior conditions.
These steps give you a durable, even finish.
Removing Old Paint Before Recoating
Scrape and sand away loose or peeling paint so your new coat will adhere properly — failing to remove compromised layers can lead to bubbling and flaking later.
You’ll focus on paint scraping and surface preparation, choosing between mechanical removal and chemical removers for stubborn areas. Follow sanding techniques that leave a keyed, smooth surface without over-sanding.
- Wear PPE and follow safety precautions when scraping, sanding, or using chemical removers.
- Contain and collect debris to prevent contamination; wet-sanding reduces dust.
- Use approved disposal methods for lead-containing or hazardous waste per local regulations.
Then wipe clean and dry before recoating.
Best Primers to Use With Latex
Choosing the right primer makes all the difference when you’re painting with exterior latex, because it guarantees adhesion, blocks stains, and provides a uniform surface for topcoat coverage.
For bare wood, use an oil-based or shellac-based primer to seal tannins and resist moisture; these are among the best primer types for durability.
For previously painted surfaces, a high-quality acrylic latex primer offers excellent latex compatibility and flexibility.
For metal or galvanized surfaces, pick a rust-inhibitive epoxy or bonding primer.
Spot-prime stains with shellac primers.
Always match primer performance to substrate and local climate for long-lasting results.
Application Methods: Brush, Roller, Spray
When you pick between brush, roller, or spray, think about the surface texture, the size of the job, and how much prep you want to do; brushes give control for trim and detail, rollers speed coverage on flat areas, and sprayers deliver the fastest, most uniform finish on complex exteriors.
You’ll choose based on surface compatibility and desired finish options.
Use proper brush techniques for edges and caulking touch-ups, follow roller application for consistent lay-in on siding, and master spray methods for fences or decorative trim.
Keep paint maintenance in mind: clean tools, touch up promptly, and store leftover paint correctly.
- Brush techniques
- Roller application
- Spray methods
Calculating Coverage and Paint Quantities
You’ll start by measuring the surface area you need to paint so you know what you’re covering.
Then use the paint’s coverage rate to estimate how many gallons you’ll need.
Finally, add an allowance for waste and touch-ups to avoid running short.
Surface Area Measurement
Measuring the surface area accurately is the first step to knowing how much exterior latex paint you’ll need, since coverage rates and the number of coats determine your total gallons.
You’ll measure walls, trim, and features, subtracting windows and doors. Use measurement tools like a tape measure, laser distance meter, and calculator to capture dimensions quickly and reduce errors.
Record lengths and heights, then multiply to get square footage for each plane. Convert irregular shapes into rectangles or triangles for easier math.
Finally, total the areas and note any textured surfaces that might affect material needs.
- Tape measure
- Laser meter
- Calculator
Coverage Rate Estimates
A paint can’s label gives a starting point, but you’ll need to translate that coverage rate into real gallons based on your measured square footage and number of coats. Measure carefully, factor paint efficiency and surface preparation, and adjust for application techniques like rolling or spraying. Consider paint thinning, environmental factors and drying time; they change yield and product lifespan. Estimate: total sq ft × coats ÷ labeled coverage = gallons, then round up.
| Factor | Consideration |
|---|---|
| Coverage rate | Labeled sq ft/gal |
| Paint efficiency | Tool and technique |
| Surface prep | Porosity impacts use |
| Environmental factors | Temp/humidity affect drying |
| Paint thinning | Lowers coverage rate |
Allowances For Waste
Now that you’ve translated coverage rates into gallons, plan for waste so you don’t run short. Include realistic waste estimates in your paint calculations: factors like trimming, drips, surface texture, and extra coats raise needs. Use a small buffer to avoid mid-job delays.
- Measure surfaces, then add 10–15% for cutting-in and errors.
- Increase to 15–25% for rough siding, porous materials, or multiple coats.
- Round up to the nearest available can size and stash a pint for touch-ups.
Track actual usage to refine future waste estimates and keep projects on schedule.
Dry Time, Recoat Windows, and Curing
Because weather and coating thickness affect it, exterior latex paint dries in stages: it’ll feel dry to the touch within an hour or two under ideal conditions but still needs more time before you can recoat or subject it to wear.
Exterior latex paint dries in stages—touch-dry in an hour or two under ideal conditions, but requires more time before recoating.
You should learn drying factors like film thickness, airflow, and sun exposure so you can plan recoat timing realistically.
Follow manufacturer guidelines for minimum recoat windows and test small areas before heavy use.
Remember the curing process continues after recoat, building hardness and resistance over days to weeks.
Protect fresh work from rain, dirt, and abrasion until fully cured.
Temperature, Humidity, and Drying Performance
Although latex paint can feel dry in warm, breezy conditions, temperature and humidity have a big impact on how quickly it actually dries and cures.
You should monitor environmental factors because temperature effects and humidity impact change drying times considerably. Consider seasonal considerations and local weather conditions before painting exterior surfaces.
- Lower temps slow chemical curing; avoid painting near freezing.
- High humidity prolongs surface tackiness and extends recoat windows.
- Direct sun and wind speed can speed surface dry but hinder full cure.
You’ll get consistent results by planning around these environmental factors and timing your project.
Common Problems and How to Fix Them
Changes in temperature and humidity can make a paint job go off-schedule, and weather-related issues are only part of what can cause problems; you’ll also run into adhesion failures, blistering, peeling, mildew, and uneven coverage.
When you spot peeling paint or mildew growth, address the root: poor surface preparation, improper adhesion, or lingering moisture. Clean mildew with a bleach solution, sand and prime bare spots, and use quality exterior latex suited to weather conditions.
Fading colors often stem from UV exposure and environmental factors; choose UV-resistant formulas.
Avoid application mistakes like thin coats or painting in unsuitable temperatures.
Touch-Up Techniques for Exterior Latex
Start by matching the existing paint as closely as possible—clean the area, feather the edges with fine sandpaper, and use the original paint (or a close match) at the same sheen to minimize noticeable differences.
You’ll apply basic touch up techniques to blend repairs smoothly and preserve finish. Prep matters: remove loose paint, degrease, and let surfaces dry. Use small brushes or mini rollers for control.
Follow this sequence:
- Prime bare spots and let cure.
- Apply thin coats, allowing full dry time between layers.
- Lightly sand and inspect; add another thin coat if needed.
Practice color matching on a hidden patch first.
Color Selection: Fading and UV Resistance
When you pick an exterior latex color, consider UV resistance factors like binder formulation and additives that slow degradation.
Check pigment lightfastness ratings since some pigments fade faster under sun exposure.
Also remember that the right protective topcoat can greatly extend color life and reduce chalking.
UV Resistance Factors
Because sunlight breaks down pigments over time, choosing the right color is one of the most important steps you’ll take to preserve exterior latex paint.
You’ll want to balance UV exposure with protective additives to limit sunlight degradation and maintain color retention. Consider environmental factors and weather extremes that stress coatings, and match coatings for surface compatibility to avoid peeling.
- Check labels for UV inhibitors and resin quality to boost long term performance.
- Select lighter tones where high UV exposure occurs to reduce fading rate.
- Prepare and prime surfaces to improve adhesion and resistance under harsh conditions.
Pigment Lightfastness
Although pigment choice might seem purely aesthetic, it directly determines how well your exterior latex paint will resist fading under sunlight. Pigments with higher lightfastness keep color longer and cut maintenance.
You should pick pigments tested for pigment stability and rated for outdoor exposure. Organic dyes often look vivid but can lose color quickly, while inorganic pigments like iron oxides offer superior color retention.
Check manufacturer lightfastness ratings and weathering data before deciding. Proper pigment selection reduces repaint frequency and preserves curb appeal.
Protective Topcoats Impact
If you want your exterior paint to hold its color longer, applying the right protective topcoat makes a big difference: it shields pigments from UV rays, limits chalking, and reduces color shift over time.
You’ll pick products that enhance protective benefits and improve topcoat longevity without changing sheen or hue.
Consider these practical choices:
- UV-resistant clear coats — maximize pigment protection and delay fading.
- Alkyd or polyurethane overcoats — add abrasion resistance and weatherproofing.
- Breathable siloxane blends — repel moisture while allowing substrate drying.
Apply per manufacturer directions, maintain surfaces, and recoat as recommended to preserve color.
Cleaning and Maintaining Painted Exteriors
When you keep painted exteriors clean, the finish lasts longer and looks better, so regular maintenance pays off in saved time and money.
For effective exterior care, focus on paint longevity by addressing weather effects promptly and following clear maintenance tips. Start with proper surface preparation—remove dirt, mildew, and loose paint—then use gentle cleaning techniques like low-pressure washing and mild detergent.
Schedule seasonal upkeep: inspect after winter thaw and fall leaf drop, touch up chips, and reseal caulk as needed.
These steps preserve color retention, prevent deterioration, and make repainting less frequent, saving effort and expense.
Specialty Latex Products: Masonry, Trim, High‑Build
Specialty latex paints are formulated to solve specific challenges—masonry coatings resist moisture and efflorescence, trim paints offer tough, smooth finishes for wood and PVC, and high‑build systems fill and level irregular surfaces—so you can pick the right product for the job.
Specialty latex paints tackle specific problems—masonry repels moisture, trims resist wear, and high‑build systems smooth uneven surfaces.
You’ll choose specialty formulations based on substrate, exposure, and desired appearance. Consider these common uses:
- Masonry coatings: breathable, water‑repellent options for brick, block, and stucco.
- Trim finishes: abrasion‑resistant, satin or semi‑gloss coatings for wood and PVC.
- High build applications: thick films for leveling rough walls and hiding imperfections.
Match product to task for lasting results.
Product Label Claims That Matter (VOC, Mildew, Adhesion)
Having picked the right specialty formulation, you should next scan product labels for claims that affect performance and safety.
Look for VOC regulations compliance to limit environmental impact and meet safety standards where you work.
Check mildew resistance ratings and any testing methods cited so you know how the paint will handle damp climates.
Evaluate adhesion strength and listed surface compatibility to guarantee long-term bond on wood, masonry, or metal.
Compare performance metrics like drying time and expected product lifespan.
These concise label claims help you choose a coating that’s safe, durable, and suited to the specific job.
Cost Comparison: Latex vs Alternatives Over Time
Although initial purchase price matters, you should weigh long-term costs like durability, maintenance, and labor when comparing exterior latex to oil-based and specialty coatings.
Although sticker price matters, prioritize lifecycle costs — durability, maintenance, and labor — when comparing exterior coatings.
You’ll consider initial investment versus long term savings, factoring performance longevity and resale value.
Compare:
- Latex: lower maintenance costs, quicker application, good performance longevity.
- Oil-based: higher initial investment for materials and labor, sporadic maintenance but durable in some uses.
- Specialty/coatings: highest cost, niche benefits, variable maintenance costs.
Balance immediate budget with projected upkeep and potential resale value.
Choosing alternative materials hinges on lifecycle costs, not just sticker price.
Environmental & Health: VOCs, Disposal, Safety
Because the chemicals in exterior paints can affect indoor air and the surrounding environment, you should weigh VOC levels, proper disposal, and safe handling before starting a job.
Choose low-VOC or zero-VOC formulations to reduce VOC emissions and protect your family and neighbors.
Wear gloves, eye protection, and a respirator when sanding or spraying, and guarantee good ventilation.
Follow local regulations for safe disposal of leftover paint, contaminated rags, and empty cans to prevent soil and water contamination.
Consider health considerations like asthma triggers and skin irritation, and minimize environmental impact by buying only what you’ll use.
Longevity Expectations and Warranty Tips
When you pick a quality exterior latex and follow proper surface prep and application, you can generally expect a durable finish that lasts 5–15 years depending on exposure, climate, and maintenance.
High-UV, coastal, or heavily shaded areas will shorten that span while well-primed, sun-protected walls can sit at the upper end.
You should track longevity factors and document conditions to validate any warranty.
Check manufacturer coverage, required prep, and approved application methods.
Keep records and photos for claims.
- Note warranty terms and exclusions.
- Retain receipts and application details.
- Perform recommended maintenance on schedule.
Hiring a Pro vs DIY: When to Call a Contractor
Decide whether your project’s complexity and the time you can commit make DIY realistic, because intricate repairs or large surfaces often need a pro.
If you’re short on time or won’t be available for prep and curing, hiring a contractor will keep the schedule and quality on track.
Also consider warranties and guarantees—pros can offer coverage you won’t get doing it yourself.
Project Complexity Limits
If your siding or trim needs more than a straightforward cleaning and two coats of paint, it’s time to weigh calling a contractor.
You should assess project scope and whether specialized application techniques or equipment are required. Complex surfaces, lead testing, structural repairs, or high-access work push you toward pros.
- Structural or rot remediation beyond cosmetic fixes.
- Intricate textures, spray systems, or specialty primers needed.
- Safety or code-related constraints like scaffolding or permits.
If two people and common tools won’t finish it safely and correctly, hire a contractor to protect the finish, warranty, and your investment.
Time And Availability
After you weigh scope and safety, consider whether your schedule and energy match the job. If time constraints press you, hire a pro who can mobilize crews and secure product availability quickly. DIY works when you have flexible weekends and steady stamina; pros help when weather windows or large surfaces demand speed. Compare costs against lost time and stress.
| Situation | Recommendation |
|---|---|
| Tight deadline | Hire contractor |
| Limited product availability | Pro sources or waits |
| Ample time | DIY if confident |
Pick the route that keeps the project on schedule without risking quality.
Warranty And Guarantees
While DIY gives you control and savings, calling a contractor pays off when you need warranties and solid guarantees that protect your investment.
You’ll want clear warranty terms and explicit guarantee coverage before work starts, since pros often offer longer paint lifespan assurances and workmanship guarantees.
Compare offers and get them in writing so you know remedies if issues arise.
Consider calling a contractor when you want transferability, weather-specific coverage, or documented maintenance schedules.
- Verify warranty terms in the contract.
- Confirm guarantee coverage limits and exclusions.
- Keep records and photos for any future claims.
Best Months and Seasonal Timing to Paint
When choosing the best months to paint your home’s exterior, aim for a stretch of consistently mild, dry weather—typically late spring through early fall—so paint can cure properly without rain or extreme temperatures interrupting the job. You should monitor ideal temperatures and humidity levels, avoiding hot afternoons or overnight freezes. Plan around forecasted rain and wind; mornings with steady warmth and low humidity give best adhesion and drying.
| Season | Temp Range | Humidity |
|---|---|---|
| Late Spring | 50–75°F | Low–Moderate |
| Summer | 60–85°F | Moderate |
| Early Fall | 50–75°F | Low–Moderate |
Quick Decision Checklist: Pick the Right Latex Product
If you need to choose a latex exterior paint fast, focus on four essentials: surface type and prep, weather and curing needs, finish and durability, and any extra performance like mildew resistance or tint stability—match those to the product’s label and data sheet so you’re buying the right formulation for your conditions.
You’ll make quicker choices by checking:
- Surface preparation required and adhesion on wood, stucco, or masonry.
- Drying time, recommended temperature/humidity, and UV/mildew resistance.
- Finish sheen, longevity, and how color psychology affects curb appeal.
Compare specs, test a swatch, and follow prep instructions to succeed.
Frequently Asked Questions
Can Exterior Latex Paint Be Tinted at Home for Precise Color Matching?
Yes — you can tint exterior latex paint at home for precise color matching. You’ll use color mixing and tinting techniques, measure carefully, test small batches, and adjust gradually until you achieve the desired shade and coverage.
Can Latex Paint Be Applied Over Exterior Stucco Without Specialized Additives?
Yes — but wait: unless you do proper stucco preparation, you’ll risk failure. You’ll clean, repair cracks, prime with a masonry primer, then apply latex so paint adhesion holds; otherwise it won’t last.
How Do Coastal Salt Spray and Salt Corrosion Affect Latex Paint Lifespan?
Salt spray accelerates paint breakdown and salt corrosion eats finish and substrate, so in coastal environments you’ll see reduced paint durability; you’ll need high-quality, corrosion-resistant formulations, regular washing, and more frequent recoating to maintain protection.
Are There Biodegradable or Compostable Disposal Options for Leftover Latex Paint?
Want biodegradable options or paint recycling? You can’t compost most latex paint, but you can use biodegradable additives for cleanup, solidify leftovers for safe disposal, or take cans to paint recycling programs near you.
Can Exterior Latex Paint Be Safely Used on Outdoor Furniture or Playgrounds?
Yes — you can use exterior latex paint on outdoor furniture and playgrounds if you pick durable formulas and primer; you’ll improve furniture durability and maintain playground safety by choosing low-VOC, non-toxic, slip-resistant finishes and proper surface prep.
Conclusion
In short, exterior latex paint gives you durable, flexible protection that’s easy to clean and quick to apply—perfect for most home siding and trim. Imagine repainting your weathered porch in late May: the new latex coat dries fast, resists cracking through summer storms, and still looks great when your neighbors compliment the fresh color at the block party. Pick a high-quality acrylic-latex, follow prep steps, and you’ll extend your home’s curb appeal for years.