What Is Flat Latex Paint Used For? Best Uses
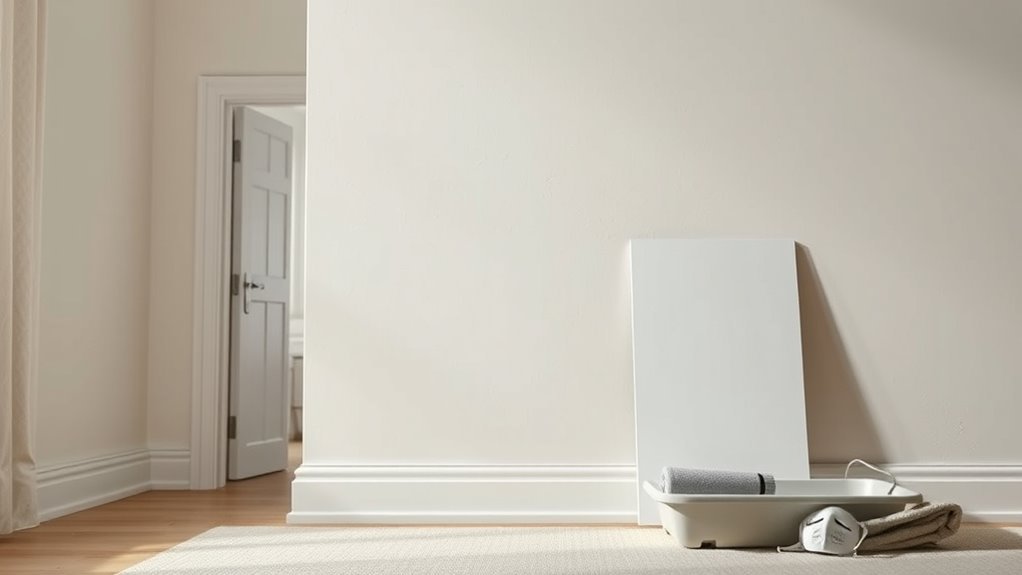
You’ll choose flat latex when you want a soft, nonreflective finish that hides dents, bumps, and surface flaws while creating a cozy, low-glare backdrop. It’s great on ceilings, bedrooms, formal living or dining rooms, textured walls, and new drywall where touch-ups should blend invisibly. Avoid it in kitchens, bathrooms, or exterior spots because it resists scrubbing and moisture poorly. Use gentle cleaning and planned repainting, and keep going to learn practical application and prep tips.
When to Choose Flat Latex: Quick Answer
When should you choose flat latex? You’ll pick it when you want a smooth, non-reflective finish that hides surface imperfections and gives rooms a calm, sophisticated look.
Consider flat latex advantages: excellent matte coverage, easy touch-up blending, and reduced glare in low-traffic areas like adult bedrooms or ceilings.
Balance that against flat latex disadvantages: lower scrub resistance, susceptibility to scuffs, and less moisture tolerance, so it’s poor for kitchens, bathrooms, and trim.
Use it where aesthetics and concealment matter more than durability.
Test a small area first to confirm the look and maintenance needs before committing.
What Flat Latex Paint Is
You’re looking at a water-based paint that dries to a non-reflective, matte finish ideal for hiding surface imperfections.
It’s low-sheen, easy to touch up, and not very durable against scrubbing. Those key properties make it best for low-traffic walls and ceilings where appearance matters more than washability.
What It Is
Flat latex paint is a water-based finish with no noticeable sheen, formulated to hide surface imperfections and provide a smooth, matte appearance. You’ll choose it when you want understated, non-reflective walls that mask minor flaws.
It’s ideal for interior spaces, ceilings, and textured surfaces where uniform look matters. In considering flat latex applications, think bedrooms, living rooms, and hallways where touch-ups are infrequent.
You’ll appreciate flat latex advantages like easy application and a soft, velvety finish that reduces glare. While not ideal for high-moisture or heavy-traffic areas, it delivers a refined, low-profile aesthetic for most rooms.
Key Properties
Having covered where it’s best used, let’s look at what makes flat latex paint behave the way it does.
You’ll notice its low sheen hides surface flaws and reduces glare, making rooms feel calm. It dries to a matte surface that softens light and conceals imperfections. You can explore color variations but expect less reflectivity than glossier paints.
Finish options are limited compared with satin or semi-gloss, yet flat’s velvety look is intentional.
Consider:
- Texture: it masks dents and minor flaws, giving peace of mind.
- Mood: it creates cozy, understated spaces.
- Maintenance: it’s less scrub-friendly, so choose wisely.
Why Flat Latex Hides Wall Flaws
Because it scatters light instead of reflecting it straight back at you, flat latex makes dents, bumps, and patched areas less obvious on a wall.
You’ll notice irregularities blend because the low-sheen paint finish minimizes highlights and shadows that glossy paints emphasize. When you apply flat latex over uneven wall texture, the surface reads more uniform from typical viewing distances.
It also hides small repair marks without heavy sanding or skim coats, saving prep time.
Keep in mind heavy-soiled areas still show wear, and flat finishes can be harder to clean, so reserve them where concealment matters more than scrubbability.
Best Rooms for Flat Latex: Ceilings & Bedrooms
On ceilings, flat latex hides imperfections so you won’t notice seams or texture issues when you look up.
It also cuts glare by minimizing light reflection, which keeps rooms feeling soft and even.
In bedrooms, that low sheen helps create a cozy, restful atmosphere you’ll appreciate at the end of the day.
Conceals Ceiling Imperfections
A flat latex finish hides hairline cracks, joint lines, and textured inconsistencies on ceilings better than glossier paints, so you’ll get a smoother, more uniform look without extensive prep work.
You’ll notice ceiling texture looks calmer, and simple painting techniques mask flaws that previously drew your eye. Use flat latex in bedrooms and living spaces where comfort matters.
- Relief — flaws fade, room feels restful.
- Confidence — you won’t fret over every imperfection.
- Pride — a neat, cohesive ceiling lifts the whole space.
Apply even coats, feather edges, and touch up seams for best results.
Minimizes Light Reflection
When you want a calm, cozy room, flat latex is ideal because it soaks up stray light instead of bouncing it around; that reduced reflection keeps ceilings and bedroom walls from appearing shiny or washed out.
You’ll notice superior light absorption compared with glossier finishes, which makes overhead fixtures gentler and prevents glare on painted surfaces. That subtle control improves visual comfort and helps artwork and textiles read truer.
Choosing flat latex also boosts aesthetic appeal by delivering a smooth, even look that hides minor texture differences. Use it on ceilings and bedroom walls when you want understated, glare-free surfaces.
Creates Cozy Bedroom Feel
Beyond cutting glare, flat latex helps you craft a cozy bedroom by muting reflections and softening walls so light feels gentle and rooms read warmer.
You’ll notice an immediate cozy ambiance that invites rest; textures look richer, colors feel deeper, and imperfections fade so nothing distracts from sleep.
Use flat latex on walls and ceilings to enhance bedroom tranquility, creating a peaceful backdrop for linens and lighting.
Consider these simple touches to deepen comfort:
- Warm neutrals to soothe senses.
- Matte ceilings to blur edges and broaden space.
- Soft accent walls for intimate, enveloping warmth.
Flat Latex in Formal Living and Dining Rooms
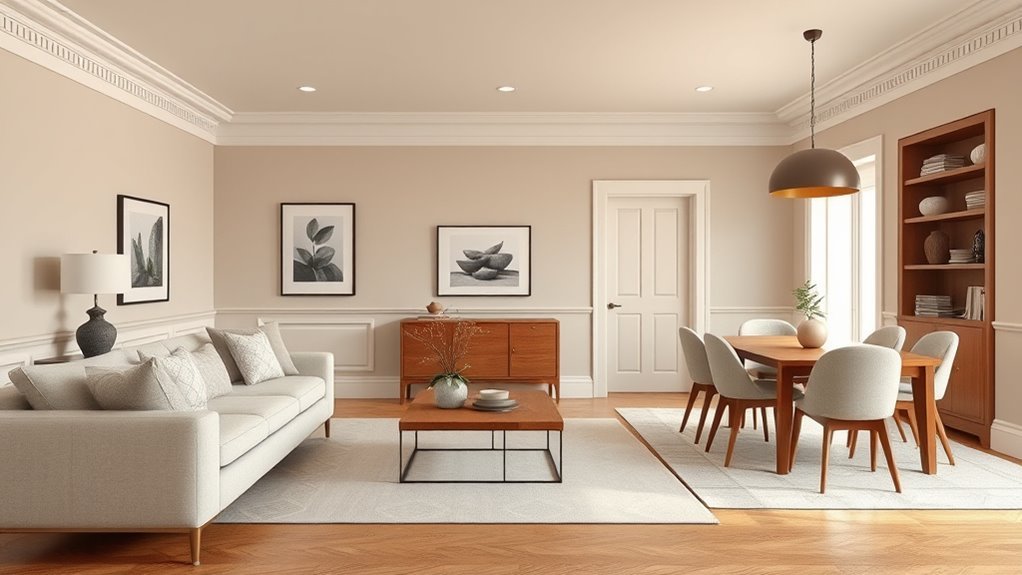
You’ll use it to foster an elegant atmosphere and sophisticated ambiance that lets furniture, artwork, and textiles take center stage. Because it absorbs light, colors read deeper and more refined, so choose rich neutrals or muted jewel tones for a timeless effect.
Flat latex won’t reflect flash from chandeliers, keeping mood lighting gentle. Touch-ups are forgiving for low-traffic areas, but plan on periodic repainting to maintain an impeccable, formal appearance.
Flat Latex on Textured Walls
If you’re working with textured walls, flat latex is a smart choice because its low sheen helps conceal irregularities and creates a more uniform appearance across bumps and ridges.
You’ll appreciate how textured surfaces look softer and less busy, making rooms feel cozy.
Use proper application techniques: a thick-nap roller or brush fills crevices and reduces missed spots.
Use a thick-nap roller or sturdy brush to fill crevices and avoid missed spots for even coverage.
Prep by dusting and spot-priming stained areas. Apply two even coats, letting the first dry fully.
Emotional payoff:
- Relief — imperfections fade away.
- Comfort — spaces feel calmer.
- Pride — your room looks intentionally finished.
Flat Latex on New Drywall and Patched Areas
When you paint new drywall or patched spots with flat latex, it often hides minor imperfections better than glossier finishes.
You’ll want to learn simple touch-up blending techniques so repairs don’t stand out.
Also use a quality primer to seal seams, improve adhesion, and guarantee even color and texture.
Hides Drywall Imperfections
Because flat latex lacks sheen, it masks seams, sanding marks, and small patch repairs better than glossier finishes, so you’ll get a more uniform look on new drywall and patched areas.
You’ll appreciate how drywall texture blends into surrounding surfaces during paint application, reducing the odds of spotting repairs.
Use flat latex when you want understated walls that hide flaws without fuss. Choose proper prep and thin coats for best results.
Consider these emotional benefits:
- Relief — imperfections fade from view.
- Confidence — rooms look finished.
- Calm — surfaces feel smooth and consistent.
Touch-Up Blending Techniques
Now that you’ve seen how flat latex hides drywall flaws, you’ll want simple touch-up methods that keep patched areas invisible. You’ll feather edges, use minimal paint, and match sheen to avoid halos. Try light cross-hatch strokes, let thin coats dry fully, and sand very lightly between coats for seamless texture. These touch up techniques and blending methods rely on careful approach, not heavy coverage. Use a small brush or mini-roller and blend outward from the patch. Patience matters: multiple thin layers beat one thick one. Below’s a simple visual guide to help you picture the steps.
| Tool | Action |
|---|---|
| Brush | Feather edges |
| Roller | Match texture |
| Sandpaper | Smooth connections |
| Layering | Thin coats, dry between |
Primer Use And Benefits
Although flat latex hides lots of surface imperfections, you’ll want a good primer on new drywall and patched areas to seal porous surfaces, promote adhesion, and prevent patch “flashing.”
You’ll pick primer types for the job—shellac, oil-based, or waterborne—based on stain blocking and drying time. Use proper application techniques: thin, even coats with a roller for broad areas and a brush for seams.
Don’t skip sanding between coats on patches. The right primer calms contrast, guarantees uniform sheen, and saves repainting time, so you’ll feel confident the flat latex finish looks seamless and durable.
Flat Latex for Popcorn and Acoustic Ceilings
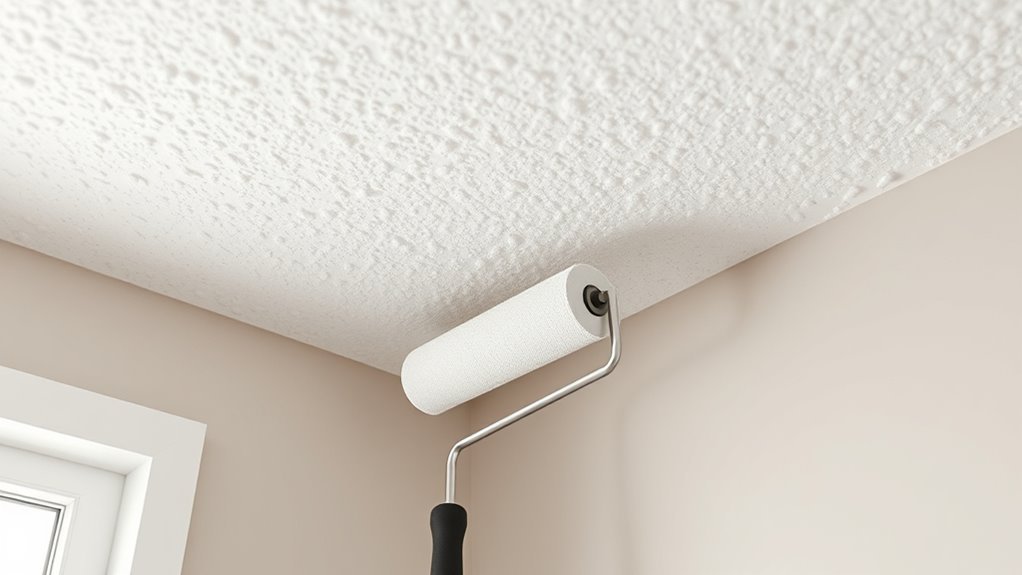
When you’re refinishing popcorn or acoustic ceilings, flat latex is often the go-to because it hides texture and imperfections better than any other finish.
You’ll find flat latex blends into textured ceilings and mutes glare, making popcorn ceilings look cleaner without emphasizing bumps. It’s easy to roll on and covers stains if you prime first, but avoid heavy scrubbing that can remove texture.
Use a good-quality flat latex formulated for ceilings to minimize drips and splatter. For repairs, patch and feather before painting so the finish reads uniform across the surface and doesn’t call attention to fixes.
Trim and Millwork: When Flat Latex Works (And When It Doesn’t)
If you’re painting trim and millwork, flat latex can work in low-traffic, decorative areas where you want to minimize sheen and hide minor imperfections, but it’s not the best choice for surfaces that get handled or need frequent cleaning.
You’ll appreciate trim benefits like subtle finish and forgiving coverage on carved millwork aesthetics, yet durability suffers. Use flat on seldom-touched baseboards, picture rails, and ornate moldings.
For practical areas, pick satin or semi-gloss.
Consider:
- Quiet elegance—emotional calm.
- Fragile finish—frustration if scuffed.
- Strategic use—satisfaction when chosen wisely.
Flat Latex for Rentals and Staged Homes
If you’re prepping a rental or staging a home, flat latex can help hide wall flaws and wear so spaces look move-in ready.
It’s inexpensive and lets you make quick touchups between tenants or showings without breaking the budget.
You’ll get a durable, low-contrast finish that keeps repairs discreet and fast.
Durable Conceals Imperfections
A flat latex finish hides surface flaws so renters and stagers can present cleaner-looking walls without repainting every season.
You’ll appreciate how durable finishes mask scuffs, hairline cracks, and uneven patches while maintaining subtle aesthetic appeal. That concealment keeps spaces photo-ready and welcoming.
- Relief — you won’t stress over minor damage.
- Confidence — showings feel polished even with wear.
- Simplicity — walls look cohesive without costly prep.
You’ll still need proper cleaning and occasional spot repairs, but flat latex gives you a forgiving, low-profile backdrop that protects appearances and supports quick turnover between tenants or staging clients.
Cost-Effective Quick Touchups
When you need to fix scuffs and small marks between tenants or showings, flat latex lets you make quick, inexpensive touchups that blend in without sanding or heavy prep.
You’ll appreciate budget friendly solutions for rentals and staged homes because flat finish hides imperfections and dries matte, matching aged walls.
For efficient results, keep small containers of matched paint, a damp cloth, and a sponge brush handy.
Use quick repair tips: dab excess, feather edges, and let multiple thin coats dry fully.
This approach saves time and money while keeping spaces show-ready between occupants or viewings.
Flat Latex for Large Open-Plan Backgrounds and Accent Walls
Because flat latex minimizes glare and masks minor surface flaws, it’s an excellent choice for large open-plan backgrounds where you want a calm, cohesive look; you’ll create a soft, enveloping backdrop that unifies large spaces and lets furniture and art pop.
Flat latex mutes glare and conceals flaws, creating a calm, cohesive backdrop that lets furniture and art shine.
Use flat on accent features to add depth without shiny distraction.
Consider these simple emotional anchors:
- Serenity — a muted field that soothes and reduces visual noise.
- Focus — accent features stand out, drawing the eye naturally.
- Warmth — matte tones feel intimate, making big rooms cozy.
You’ll find flat latex balances subtlety and presence in open layouts.
Exterior Uses: Why Flat Latex Usually Fails Outside
You probably wouldn’t pick flat latex for exterior walls because it doesn’t stand up well to sun, rain, and temperature swings.
It also shows dirt and stains more readily, so your once-clean finish will look tired fast.
For long-lasting outdoor protection you’ll want a tougher, more washable finish.
Poor Weather Resistance
Flat latex looks great on interior walls, but it usually fails outdoors because it can’t resist weathering—rain, UV, temperature swings, and moisture all penetrate its low-sheen film, causing chalking, peeling, and mildew far sooner than a satin or semi-gloss would.
You’ll find flat latex simply won’t stand up to harsh weather conditions or prolonged moisture exposure. It soaks up water, then flakes when temperatures change, and UV breaks binders, so color fades fast.
That fragility leaves you frustrated and repainting sooner. Consider durable alternatives for exteriors:
- Loss of protection
- Accelerated degradation
- Increased maintenance
Dirt And Stain Visibility
Weathering doesn’t just wear paint down—it also makes grime and stains more obvious on low-sheen finishes.
When you’re using flat latex outside, dirt visibility skyrockets because the matte surface scatters light and highlights smudges and streaks. You’ll notice mud splatters, pollen, and handprints stick out more than on satin or semi-gloss.
Flat finishes also offer poor stain resistance; contaminants can penetrate and bond with the surface, making cleaning tough without damaging the paint.
For exterior areas prone to marks—trim, doors, siding—you’ll want a finish with better stain resistance and lower dirt visibility to keep maintenance manageable.
Limited Durability Outdoors
Because exterior surfaces face constant moisture, sunlight, and abrasion, flat latex just doesn’t hold up the way tougher finishes do.
You’ll notice peeling, chalking, and color fade sooner than with satin or semi-gloss. Flat sheen lacks the outdoor longevity and weather resistance needed for siding, trim, or doors, so maintenance becomes frequent and frustrating.
- Peeling — it makes your home look neglected and forces repainting.
- Chalking — it dulls color and signals breakdown.
- Fading — it steals curb appeal and prompts costly fixes.
Choose a more durable finish outdoors to avoid disappointment.
Cleaning Limits and Maintenance of Flat Latex
While flat latex gives walls a smooth, non-reflective finish, it isn’t built for heavy scrubbing—you’ll need gentler care and realistic expectations to keep it looking good.
You should use soft cleaning techniques: a dry dusting, mild soap with a damp microfiber, and blot stains instead of rubbing. Avoid abrasive pads and harsh chemicals that remove pigment.
For maintenance tips, touch up scuffs with small brushes and keep high-traffic areas painted with sturdier sheens if needed.
Accept that frequent washing will wear flat paint faster; spot-clean promptly and plan periodic repainting rather than aggressive cleaning.
How to Prep Walls for Flat Latex
Before you paint, get the surface clean, dry, and smooth so the flat latex will adhere and look even.
Start with wall cleaning: wipe dust and grime using a mild detergent, rinse, and let dry.
Repair holes and cracks with spackling, sand rough spots until smooth, and remove sanding dust.
Mask trim and cover floors. Good surface preparation guarantees a uniform finish and fewer touchups.
When you’re ready, test a small area to confirm adhesion and appearance.
Follow safety: ventilate, wear a mask during sanding, and dispose of waste properly.
Best Primers to Pair With Flat Latex
Now that your walls are prepped and smooth, pick a primer that promotes adhesion, blocks stains, and creates a uniform base for flat latex. You’ll choose among primer types—latex, oil-based, and shellac—based on surface and stain severity. Primer benefits include better coverage, fewer coats, and improved durability. Match primer to substrate: drywall favors latex; knots or severe stains need shellac or oil. Apply evenly and allow full cure to avoid finish issues. Use the table below to compare quick specs and pick the right product for your flat latex project.
| Primer Type | Best Use |
|---|---|
| Latex | Drywall |
| Oil-based | Wood |
| Shellac | Stains |
Applying Flat Latex: Brush, Roller, Spray
Choose the right application method—brush, roller, or sprayer—based on the surface, project size, and the look you want, because each tool affects coverage, texture, and drying behavior.
Choose brush, roller, or sprayer to match surface, size, and desired texture—each changes coverage and drying.
You’ll master brush techniques for trim and touchups, use roller application for walls to control texture considerations, and consider spray methods for speed on large areas.
Follow practical application tips: keep edges wet, maintain consistent strokes, and clean tools promptly.
Emotional reminder in three quick points:
- You’ll feel pride when corners look sharp.
- You’ll relax watching even coverage appear.
- You’ll be thrilled with a smooth finish.
How Many Coats of Flat Latex You Need
How many coats you need depends on the surface type—smooth, previously painted walls usually need fewer layers than rough or porous drywall.
You’ll also factor in the coverage level you want: one coat can hide minor flaws, but two or more may be needed for full, even color.
Check the surface and do a test coat to decide the right number for your job.
Surface Type Matters
Because the surface you’re painting controls how much paint it’ll absorb and hide imperfections, the number of flat latex coats you need can vary widely.
You’ll assess surface texture first — smooth drywall often needs fewer coats, while porous plaster or raw wood soaks paint and may demand more.
Your chosen application techniques — roller nap, brush, or sprayer — change spread and coverage, too.
Consider these emotional cues as you decide:
- Relief — when a single coat evens a smooth wall.
- Frustration — when porous surfaces keep drinking paint.
- Satisfaction — after proper prep and technique deliver a uniform matte finish.
Desired Coverage Level
Coverage matters: you’ll usually need one to three coats of flat latex depending on the color change, surface porosity, and paint quality.
You’ll apply one coat over similar colors on smooth, primed walls; choose two coats for moderate color depth shifts or slightly porous surfaces.
Go for three coats when covering deep colors, heavy texture variation, or when using lower-quality paint.
Let each coat dry fully and inspect under consistent lighting to judge coverage.
Sand lightly between coats on rough patches.
Proper technique and appropriate coat count guarantee an even finish and hide imperfections without overloading the surface.
Touch-Up Strategies for Uniform Flat Latex Finishes
When you’re touching up flat latex, match sheen and texture as carefully as color so the patch blends invisibly with surrounding areas.
You’ll prep by gently sanding glossy spots, cleaning dirt, and feathering edges to aid uniform application. Use the same batch or mix a mini-batch to match tone. Apply thin coats, let them dry fully, and assess in different light.
- Start small to avoid overdoing it.
- Blend edges with a dry brush or sponge.
- Protect the area once cured to keep it flawless.
These touch up techniques help you restore surfaces without obvious repairs.
When to Upgrade: Eggshell or Satin Instead of Flat Latex
If your walls see regular traffic, moisture, or need a bit of sheen to hide imperfections, consider upgrading to eggshell or satin instead of sticking with flat latex.
You’ll want to think about upgrading finishes when cleaning, durability, or slight light reflection matters. Eggshell offers low luster and easier wiping for living areas; satin adds more durability and moisture resistance for kitchens, bathrooms, or trim.
Choose based on how often you clean surfaces, the room’s humidity, and desired paint sheen. Switching improves longevity and maintenance without jumping to high-gloss options that emphasize texture.
Flat Latex vs Eggshell, Satin, and Semi-Gloss
You’ve already seen why eggshell or satin can be a smarter choice for higher-traffic or moisture-prone areas; now let’s compare flat latex directly with eggshell, satin, and semi-gloss so you can pick the best finish for each space.
Flat latex benefits include superb matte hide and forgiveness of wall flaws, making it calming in low-traffic rooms. Flat latex drawbacks are poor scrub-ability and lower moisture resistance.
Flat latex hides imperfections with a soothing matte finish—ideal for low-traffic rooms but less washable and moisture-resistant.
Compare emotionally:
- Eggshell: warmer, slightly durable — cozy confidence.
- Satin: more durable, wipeable — practical relief.
- Semi-gloss: bright, cleanable — assertive clarity.
Choose by room use and mood.
Cost and Coverage Expectations for Flat Latex Projects
Expect to spend less on flat latex per gallon than on higher-sheen coatings. For cost estimation, factor in primer, number of coats, and surface prep. You’ll want accurate coverage calculations to avoid surprise purchases: flat latex often covers 300–400 sq ft per gallon depending on porosity.
| Item | Typical Value |
|---|---|
| Coverage per gallon | 300–400 sq ft |
| Primer needed | Often yes |
| Coats recommended | 1–2 |
Plan budget: multiply room area by coats, divide by coverage, then add primer and misc supplies. That gives a realistic project cost estimate.
Color Choices for Flat Latex Finishes
When you pick a flat latex finish, start by identifying neutral undertones that will anchor the room and keep the flat sheen from looking muddy.
Then consider bold accent pairings—think a charcoal or navy trim against warm neutrals—to add visual interest without competing with the finish.
Test swatches together under your room’s lighting to confirm the undertones and accents work in real life.
Choosing Neutral Undertones
Because flat latex shows light and shadow differently than glossier sheens, choosing the right neutral undertone matters for how a room reads; pick a warm, cool, or true neutral based on the lighting and adjacent colors so the flat finish doesn’t skew gray, green, or pink under changing daylight.
You’ll use neutral color psychology and undertone selection to set mood without glare. Consider these quick prompts to guide you:
- Warm neutrals: cozy, welcoming—choose if sunlight is strong.
- Cool neutrals: calm, spacious—choose for north-facing rooms.
- True neutrals: balanced, versatile—choose when unsure.
Bold Accent Pairings
Pair one bold accent with a flat latex backdrop to create striking contrast without overwhelming the room; let that accent—a deep teal, burnt sienna, or charcoal—anchor a focal wall, trim, or piece of furniture while keeping surrounding surfaces muted so the flat finish absorbs light and reads rich.
You’ll pick palettes that favor bold color contrasts against soft neutrals, using flat latex to mute glare and emphasize hue. Introduce textured accents—woven rugs, matte ceramics, or matte-painted wood—to add depth without shine.
Balance is key: one vivid element, restrained surroundings, and purposeful repetition to tie the scheme together.
High-Moisture Areas: Risks and Alternatives to Flat Latex
If you’re painting bathrooms, basements, or laundry rooms, high humidity and frequent condensation can cause flat latex to fail quickly: it absorbs moisture, stays vulnerable to mold and mildew, and doesn’t stand up well to repeated wiping.
You should prioritize moisture resistance and meticulous surface preparation. Consider alternatives like satin, semi-gloss, or specialized bathroom paints that resist mildew and clean easily.
Choose coatings that dry to a harder film and bond better on damp-prone walls.
- Satin feels durable and forgiving.
- Semi-gloss offers easy cleaning and protection.
- Bathroom-specific formulas fight mold and humidity.
Common Flat-Latex Mistakes and Quick Fixes
After choosing the right finish for humid rooms, you’ll want to avoid common mistakes that undo good paint choices.
You might apply flat latex too thinly, causing patchy coverage; roll with a proper nap and use two coats.
Painting over glossy surfaces without sanding or priming leads to peeling—sand lightly and prime first.
Using dirty brushes or high humidity creates streaks and delayed curing; clean tools and wait for drier conditions.
For scuffs, touch up with feathered edges and match sheen.
Keep these common application errors in mind and use quick correction tips to restore a smooth, durable finish.
Quick Checklist: Is Flat Latex Right for Your Room?
Wondering whether flat latex is the right choice for your room? Use this quick checklist to decide fast.
Consider room suitability first: low-traffic, intimate spaces like bedrooms or formal dining rooms benefit from a soft, non-reflective paint finish that hides imperfections.
Ask yourself three emotional questions:
- Do you want a cozy, matte look that feels calm?
- Will the space avoid frequent scrubbing or spills?
- Are imperfections something you’d rather conceal than highlight?
If you answered yes to most, flat latex suits you.
If durability or cleanability matters more, choose a sturdier, glossier finish instead.
Project Ideas and Real-World Flat Latex Scenarios
Now that you know where flat latex works best, let’s look at concrete projects where it shines. You can tackle project transformations like smoothing textured ceilings, revitalizing matte-accent walls, or toning down glare on large murals.
Use flat latex for bedrooms, libraries, and dining rooms where reduced sheen makes colors feel cozy. For creative applications, try chalkboard walls, backdrop panels, or DIY art canvases that absorb light and hide imperfections.
Remember prep matters: prime glossy surfaces, repair flaws, and use quality brushes. These real-world scenarios show flat latex’s strength in subtle, elegant finishes that minimize distraction.
Frequently Asked Questions
Can Flat Latex Be Used on Kitchen Cabinets?
Yes — you can, but expect less sheen and tougher cleaning. For example, you painted rental kitchen cabinets with flat latex for muted look; you’ll trade some cabinet durability for softer finish options, so consider sealers or topcoat.
Is Flat Latex Safe for Nursery and Children’s Rooms?
Yes — you can use flat latex in a nursery, but prioritize low-VOC formulas for nursery safety; be aware flat has lower paint durability and may scuff easily, so plan for touch-ups or a washable finish in high-traffic areas.
How Long Does Flat Latex Take to Fully Cure?
Flat latex typically takes 2–4 weeks to fully cure, though surface drying is faster. You’ll get quicker drying time by ventilating, applying thin coats, avoiding high humidity, and following application tips like proper prep and drying between coats.
Can I Glaze or Faux-Finish Over Flat Latex?
Boldly blend: yes—you can glaze or faux-finish over flat latex once it’s fully cured. Use glazing techniques and faux finishing methods, but prep properly, prime if needed, and test small sections for adhesion and durability.
Does Flat Latex Fade in Direct Sunlight?
Yes — flat latex can fade in direct sunlight; you’ll notice reduced color retention because its UV resistance is lower than glossy finishes, so expect faster fading on sun-exposed walls unless you use UV-protective additives or topcoats.
Conclusion
You’ll often pick flat latex when you want walls that hide imperfections and don’t glare—about 40% of homeowners prefer flat or matte finishes for living spaces for that very reason. It’s great for ceilings, bedrooms, and low-traffic rooms, but steer clear in high-moisture or scuffed areas. If you use it where appropriate and touch up carefully, flat latex gives a soft, sophisticated look that keeps rooms feeling calm and refined.