What Is Flat Wall Paint? Features & Benefits
Flat wall paint gives you a low-sheen, non-reflective finish that hides surface flaws and creates a soft, velvety look. It scatters light instead of producing glare, so colors appear rich and muted. You’ll want it in low-traffic areas like bedrooms, living rooms, and ceilings because it isn’t as washable or durable as satin or eggshell. Modern formulas can be more scrub-resistant, and if you keep going you’ll find tips on selection, prep, and care.
What Is Flat Wall Paint?

Flat wall paint is a low-sheen interior finish that dries to a smooth, non-reflective surface, masking imperfections and giving walls a velvety look. You’ll notice its matte finish hides dents and uneven patches better than glossier options.
When you choose flat paint, you’re prioritizing subtlety: color reads richer without glare, and light scatters softly. Consider its paint characteristics—low reflectance, limited washability, and excellent touch-up blending.
For surface applications, it’s best on ceilings and low-traffic walls where aesthetic uniformity matters more than frequent cleaning. You’ll accept trade-offs for that muted, sophisticated backdrop in your space.
When Should You Use Flat Paint?
If you want a soft, non-reflective backdrop that hides surface flaws, choose flat paint for areas where appearance matters more than frequent cleaning.
Use it in low-traffic rooms—living rooms, bedrooms, ceilings, and adult-only spaces—where you want a calm, uniform finish. You’ll appreciate how it minimizes imperfections and supports subtle color selection without distracting sheen.
Avoid kitchens, bathrooms, and high-contact hallways because flat finishes are harder to clean.
When applying, follow recommended application techniques: thin even coats, correct roller nap for texture, and proper drying time to prevent marks. Touch-ups are simple when matched accurately.
How Does Flat Paint Differ From Matte, Eggshell, and Satin?
When you compare finishes side by side, you’ll notice flat paint sits at the lowest sheen level, offering the most matte, non-reflective look and the best ability to hide surface imperfections. Compared to matte, it’s similarly dead-flat but often more forgiving on flaws.
Eggshell adds a faint luster and slightly better washability, while satin gives more sheen and durability for higher-traffic areas. You’ll pick flat when you want minimal reflection and subtle color variations without emphasizing texture.
Consider application techniques too: flat tolerates touch-ups and rolling irregularities, whereas eggshell and satin demand smoother prep and careful brushing to avoid visible lap marks.
How Is Paint Sheen Measured and Labeled?
You’ll learn how sheen is quantified using gloss meters and standard measurement scales so you can compare finishes objectively.
Labels follow industry standards that translate those measurements into familiar names like flat, eggshell, or satin.
This makes it easy to compare gloss levels and pick the right look and durability for your walls.
Sheen Measurement Scales
Although sheen can seem like a simple label, it’s actually measured with instruments that quantify how much light a painted surface reflects at specific angles; you use gloss meters to get numerical results.
Scales range from flat (very low) to high gloss (very high), letting you compare sheen types objectively. Results report percentages or units at 20°, 60°, and 85° angles, revealing sheen characteristics like diffuse reflection versus specular highlight.
Knowing these numbers helps you choose finishes that hide flaws or resist cleaning. Manufacturers publish measured values so you can match products and predict appearance under different lighting.
Labeling Standards Explained
Because sheen affects both a paint’s look and performance, standards bodies and manufacturers use precise measurement and labeling to make finishes comparable. You’ll rely on labeling clarity and standard definitions to choose the right flat finish. Labels state gloss percentages measured at specific angles, test methods, and trade names so you can compare products easily. Look for numeric gloss values and referenced standards (e.g., ASTM) to avoid ambiguity. Below is a quick reference you can scan before buying.
| Label Element | What It Means |
|---|---|
| Gloss % | Measured reflectance value |
| Test Method | Standard used (angle) |
| Trade Name | Manufacturer’s finish name |
| Usage | Recommended locations |
Gloss Levels Comparison
Gloss levels let you compare sheens objectively by measuring how much light a dry paint film reflects at set angles. Manufacturers report those readings as gloss percentages so you can match a finish to its designed use.
When you do a sheen comparison, you’ll see flat, matte, eggshell, satin, semi-gloss, and high-gloss ranked by increasing reflectance. Labels often list percent values at 20°, 60°, or 85°; 60° is the standard for general finishes.
Use lower gloss for hiding imperfections and higher gloss for durability and washability. Reading gloss levels helps you pick the right balance of appearance and performance.
Why Does Flat Paint Absorb Light Instead of Reflecting It?
You notice flat paint soaks up light because its matte surface texture scatters rays instead of sending them back.
The pigments and their light-scattering particles break up reflections, reducing shine.
Plus the micro-porous finish traps light in tiny crevices, so less is reflected to your eye.
Matte Surface Texture
When light hits a matte wall, its rough, microscopic surface scatters rays in many directions instead of sending them straight back to your eye, so the finish looks soft and non-reflective.
You’ll notice the matte finish reduces glare, enhancing aesthetic appeal while enabling perceived light absorption without changing actual light levels. Because the surface diffuses highlights, colors gain apparent color richness and subtle depth.
Texture variety—from smooth to slightly stippled—affects how much scattering occurs, so choose application techniques carefully to match desired effect.
You can control mood and conceal imperfections by selecting the right texture and applying the paint with consistent, deliberate strokes.
Pigment Light Scattering
Pigment particles in flat paint scatter incoming light so it doesn’t return to your eye as a coherent reflection; instead, tiny, irregular pigment grains and added fillers redirect photons in many directions and trap some within the film.
You notice reduced sheen because pigment composition and particle shape increase internal scattering and light absorption, turning reflected rays into diffused, muted visual energy. This matters when you choose flat paint for hiding wall flaws and minimizing glare:
- Irregular pigment composition breaks up specular highlights.
- Multiple scattering events boost apparent color depth.
- Light absorption by fillers and binders reduces bounce, creating a soft, nonreflective finish.
Micro-Porous Finish
Because flat paint’s surface contains countless microscopic pores, light doesn’t come back to your eye as a clean reflection; instead, those tiny voids trap and scatter photons so more energy is absorbed by the film.
You’ll notice a muted, even appearance because scattered light diffuses across the wall rather than producing glare. For micro porous applications, that means blemishes and texture get hidden, creating a forgiving finish in living spaces.
You’ll also gain micro porous advantages like reduced sheen and improved touch-up blending.
When choosing flat paint, consider these optical effects to match the room’s lighting and maintenance needs.
How Does Flat Paint Hide Wall Imperfections?
If you’re trying to minimize the look of dents, hairline cracks, or uneven texture, flat paint works by scattering light instead of reflecting it directly, which makes flaws less noticeable.
You get imperfection camouflage because flat finishes absorb light, reducing shine that highlights defects. They also offer subtle texture enhancement, letting minor surface variations blend in.
Use light prepping, like filling deep gouges, since flat paint won’t mask major damage.
Benefits include:
- Soft visual masking that reduces contrast
- Even appearance across patched areas
- Easier touch-ups without sheen mismatch
Apply thoughtfully for best results.
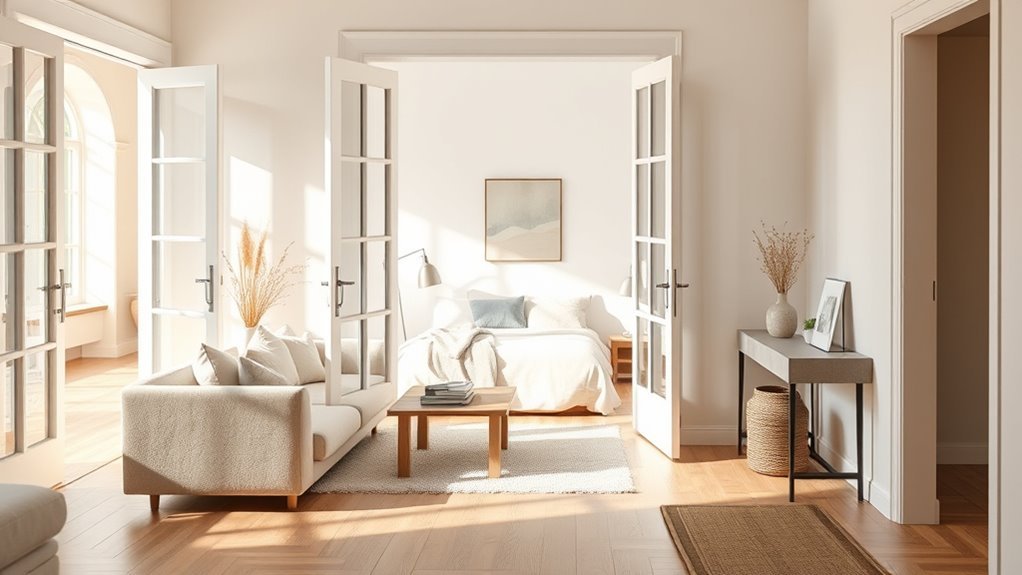
Which Rooms Benefit Most From Flat Wall Paint?
Now that you know flat paint helps hide minor flaws, think about where that benefit matters most in your home.
You’ll appreciate flat finishes in living rooms and bedrooms where a soft, cozy look masks texture. Use it in dining areas and entryways to create calm, elegant backdrops that minimize wall blemishes.
In playrooms and hallways, flat paint keeps surfaces looking uniform without reflecting sticky fingerprints or scuffs.
For home offices, it reduces glare on Zoom and keeps focus on your work.
Bathrooms can tolerate flat paint in low-moisture zones for a spa-like finish, though ventilation matters.
When Should You Avoid Flat Paint in High‑Traffic Areas?
When should you skip flat paint in busy spots? You should avoid it when wear and maintenance matter most.
Flat finishes hide imperfections but lack the resilience you need in corridors, kids’ rooms, or entryways. Consider alternative sheens if you want easier cleaning and longer-lasting color.
Flat paint hides flaws but won’t withstand heavy use; pick a tougher sheen for easy cleaning and lasting color.
- In hallways and stairwells where scuffs and bumps are constant
- Around doors and trim that get frequent contact and require wipe-downs
- In mudrooms or laundry areas exposed to dirt and moisture
Choose paints with higher paint durability for high traffic areas so surfaces stay cleaner and require fewer touch-ups.
How Have Modern Formulations Improved Flat Paint Durability?
You’ll notice modern flat paints last longer thanks to advanced binder chemistry that holds pigment and film together more effectively.
Improved pigment technology gives truer color with less fading, while enhanced mildew resistance keeps surfaces cleaner in humid areas.
Together these innovations make flat finishes more durable without sacrificing their low‑sheen look.
Advanced Binder Chemistry
Because binders form the backbone of flat paint, advances in their chemistry have directly boosted durability without sacrificing matte appearance.
You’ll notice formulation innovations that enhance binder durability through crosslinking and tougher polymer backbones. Chemistry advancements also reduced volatile solvents, improving environmental impact while keeping feel and finish consistent.
Consider how application techniques interact with binders; proper film formation matters. Review performance comparison and cost analysis when choosing products—higher upfront cost can mean longer life and less maintenance.
- Better crosslinked polymers increase scrub resistance.
- Lower-VOC resins cut emissions and odors.
- Optimized rheology aids spread and leveling.
Improved Pigment Technology
Although pigments once served mainly for color and opacity, modern formulations make them active contributors to flat paint durability. You’ll see modern innovations where pigment advancements reduce fading, increase film cohesion, and resist abrasion. These refined particles disperse evenly, improving coverage so you use less paint and get stronger, longer-lasting finishes. You’ll notice better tint stability and chemical compatibility with advanced binders, which cuts peeling and chalking. Below is a quick reference to key benefits and examples.
| Benefit | Effect | Example |
|---|---|---|
| Fade resistance | Longer color life | Titanium dioxide blends |
| Abrasion resistance | Less scuffing | Ceramic-modified pigments |
| Cohesion | Reduced peeling | Nano-dispersed organics |
Enhanced Mildew Resistance
When moisture and organic buildup meet a porous flat finish, mildew can take hold quickly.
So modern formulations add targeted biocides and antimicrobial agents that stop spores from colonizing the film. You’ll notice better mildew resistance because manufacturers blend stable preservatives with improved binders that resist breakdown.
Enhanced moisture control reduces water absorption, keeping surfaces drier and less hospitable to growth. You get longer-lasting aesthetics and easier cleaning without harsh scrubbing.
- Preservatives that inhibit fungal enzymes
- Water-repellent binders for reduced uptake
- Particles that maintain film integrity under humidity
These advances make flat paint more durable in damp spaces.
Which Flat Paints Are Marketed as Washable or Scrubbable?
Curious which flat paints actually stand up to cleaning? You’ll find manufacturers now label some as washable flat or scrubbable finishes for low-traffic rooms. Look for terms like “washable flat,” “scrubbable flat,” and product testing standards on the label. These formulas use tougher binders and matting agents so you can remove stains without sheen loss. Test a small patch first. Below is a quick visual guide to imagine options:
| Type | Example Room |
|---|---|
| Washable flat | Dining room |
| Scrubbable finishes | Hallway |
| Standard flat | Bedroom |
How Does Flat Paint Perform on Ceilings Versus Walls?
When you use flat paint on ceilings, its low sheen minimizes glare and helps hide imperfections under various lighting.
On walls, flat finishes can show wear more quickly and aren’t as durable against frequent cleaning as eggshell or satin.
Consider ceiling light reflection and the higher durability needs of walls when choosing where to apply flat paint.
Ceiling Light Reflection
Ceilings painted with flat finish reflect light more subtly than walls, so you’ll notice softer, more diffused illumination overhead that hides minor imperfections but reduces brightness compared with glossier ceilings.
You can use this to control ceiling brightness and achieve balanced light diffusion throughout a room. Consider how fixtures and natural light interact with the matte surface so you don’t unintentionally dim spaces.
Practical tips:
- Place stronger task lighting where you need contrast, since flat ceilings cut glare.
- Use layered lighting to compensate for lower overhead brightness without raising wattage.
- Choose flat on ceilings to minimize visible flaws while keeping overall ambiance calm.
Wall Durability Differences
Durability matters: flat paint tends to wear differently on ceilings than on walls because ceilings see less direct contact but more exposure to dust, humidity, and settling particles.
You’ll find ceilings usually maintain an even wall finish longer since they avoid scuffs and fingerprints, yet patching stains or water marks can be harder to blend.
On walls, flat paint shows wear sooner in high-traffic areas, reducing paint lifespan where hands, furniture, and cleaning occur.
To extend longevity, choose quality flat formulas, control humidity, and limit abrasion.
Touch-ups will differ: blending on ceilings is easier; walls demand careful prep for seamless results.
What Substrate Types Are Best for Flat Paint (Drywall, Plaster, Concrete)?
Although flat paint works well on many surfaces, you’ll get the best results on smooth, low-traffic substrates like drywall and plaster because they hide imperfections and provide even coverage.
Concrete can be painted flat too, but it often needs extra prep—sealing and smoothing—to prevent absorption and uneven sheen. You should consider substrate porosity and traffic when choosing flat finishes.
Key points to guide your choice:
- Drywall suitability: ideal for bedrooms and living rooms where matte hides minor flaws.
- Plaster compatibility: smooth, historic walls take flat well if stable.
- Concrete application: use sealing and patching to guarantee a uniform look.
How Does Primer Choice Affect Flat Paint Adhesion?
When you pick the right primer, flat paint will stick better and look more consistent. Primers seal porous surfaces, block stains, and create a uniform base so the low-sheen finish doesn’t soak in or show blotches.
You should consider primer types based on adhesion science and paint compatibility: oil, acrylic, and specialty primers each bond differently to wall surfaces. Proper surface preparation and application techniques—cleaning, sanding, and correct spread rate—maximize primer benefits.
Use adhesion testing on tricky substrates to confirm bonding before full coats. Choosing primers with matched chemistry and following recommended techniques reduces peeling, uneven sheen, and premature failure.
Which Primers Are Recommended Under Flat Paint?
When you’re prepping for flat paint, choose a latex-bonding primer for smooth adhesion on glossy or previously painted surfaces.
Use a stain-blocking primer where tannins, water stains, or smoke could bleed through your finish.
Both types help your flat paint look even and last longer.
Latex-Bonding Primers
One key step before applying flat paint is using a latex-bonding primer to guarantee proper adhesion and a uniform finish. You’ll find latex adhesion is vital on glossy or previously painted surfaces, and choosing the right primer types prevents peeling and uneven sheen.
Apply bonding primer to clean, dry walls, sanding glossy spots first. It levels porosity for smooth flat paint laydown.
- Use water-based bonding primers for easy cleanup and low odor.
- Spot-prime repairs to maintain consistent absorbency.
- Follow manufacturer recoat times to guarantee full cure.
This approach gives you a durable, consistent flat finish.
Stain-Blocking Primers
You should choose primers emphasizing stain resistance and clear primer benefits: adhesion, sealing, and uniform absorption.
For product selection, compare formulation advancements like shellac, oil-based, and high-performance acrylics. Check surface compatibility—drywall, plaster, or wood—before applying.
Use proper application techniques: thin, even coats, recommended dry times, and sanding if needed.
Also weigh environmental impact: low-VOC and waterborne options reduce fumes without sacrificing performance.
How Do Pigments and Coverage Affect Your Choice of Flat Paint?
Pigments determine more than just color—they affect opacity, durability, and how many coats you’ll need—so pick a flat paint with strong pigments to get better coverage and fewer touch-ups.
You’ll notice pigment effects in color intensity and light absorption; richer pigments hide imperfections and boost finish durability.
Consider surface compatibility—porous walls need different formulations than smooth ones.
Match application techniques to coverage importance: thicker films cover better but may alter sheen.
For upkeep, follow maintenance tips to preserve flat finishes without recoat.
Balance pigment strength, coverage, and surface prep for ideal results.
- Pigment effects
- Coverage importance
- Color intensity
How Do VOC Levels and Eco‑Friendly Formulations Compare?
Because VOCs affect indoor air quality and regulatory compliance, you should weigh their levels when choosing flat paint for living spaces.
You’ll compare VOC regulations across regions to know legal limits and label claims. Prioritize eco-friendly options that list low-VOC or zero-VOC formulas and display green certifications for verification.
Consider health considerations like asthma triggers and off-gassing timelines when deciding between traditional and reformulated paints.
Also assess environmental impact: manufacturing emissions, biodegradability, and packaging.
Choose brands that follow sustainable practices, transparent ingredient listings, and third-party verification so your walls look good without compromising health or the planet.
Which Brands Make High‑Quality Flat Wall Paint?
When you’re choosing flat wall paint, you’ll want to know which professional brands deliver consistent performance and which budget-friendly lines give you the best value.
I’ll compare top pro names known for durability, coverage, and color accuracy with affordable options that still perform well.
That way you can pick a brand that matches your priorities and budget.
Top Professional Brands
Although every project has different needs, a few professional brands consistently deliver high-quality flat wall paint you can trust. You’ll find top brands backed by professional recommendations, clear quality comparisons, and solid user reviews.
Check brand histories and market trends to see who leads paint innovations and who follows.
- Benjamin Moore: expert tips favor consistent pigments and durability.
- Sherwin-Williams: known for wide palette, professional-grade formulations.
- Farrow & Ball: premium finishes, heritage and modern innovation.
You’ll make better choices by combining expert tips, user reviews, and concise quality comparisons when selecting a brand.
Affordable Quality Options
If you want high-quality flat wall paint without overspending, several mainstream and store brands deliver reliable coverage, good hide, and decent durability at a fraction of premium prices.
You’ll find affordable brands like Glidden, Behr (store-exclusive lines), and Valspar offering consistent finishes. Compare tinting limits, VOCs, and coverage per gallon in quality comparisons to pick the best paint value for your space.
For tighter budgets, look to store-label formulas labeled as budget friendly options; they often match midrange performance when applied correctly.
Test samples on your wall, evaluate touch-ups, and choose the product that balances cost with real-world results.
How Do You Read Technical Data Sheets for Flat Paint?
Wondering how to get useful information from a flat paint technical data sheet? You’ll scan for key technical specifications, surface prep, and recommended paint application methods. Focus on performance numbers and instructions that affect your finish.
- Check drying time, coverage rates, and VOC limits to match project needs.
- Note surface recommendations, primer requirements, and temperature/humidity constraints.
- Review cleanup, recoat windows, and warranty or safety notes for proper handling.
Use the sheet as a checklist: follow prep, apply within specified conditions, and observe recoat intervals. That way you’ll avoid problems and get the desired flat finish.
How Do You Calculate How Much Flat Paint You Need?
Start by measuring the surface area of each wall and adding them together so you know the total square footage.
Check the paint can for its coverage rate, then divide your total area by that rate to estimate how many gallons you’ll need.
Don’t forget to multiply by the number of coats you’ll apply and add a small buffer for touch-ups.
Measure Surface Area
To figure out how much flat paint you’ll need, measure the height and width of each wall and multiply them to get square footage. Then add up all the wall areas and subtract openings like doors and windows.
Use surface measurement techniques and area calculation methods to stay precise. Record each wall’s dimensions, note trim you won’t paint, and keep measurements handy.
- Measure walls wall-by-wall for accuracy.
- Subtract windows and doors from total area.
- Convert inches to feet before multiplying.
This gives a reliable total square footage so you can choose the right amount of paint without guessing.
Account For Coats
Now that you’ve totaled the paintable square footage, factor in how many coats you’ll need—this determines the real amount of flat paint required.
Decide if one or two coats will suffice; new drywall or drastic color changes usually need two. Check the paint can for coverage per gallon and multiply by your coat count.
Account for coats application loss from rollers, brushes, and touch-ups—add about 10% extra.
Factor in coats drying time between layers to schedule purchases and avoid rushed re-coating.
Round up your final gallon count to guarantee you have enough for consistent color and future touch-ups.
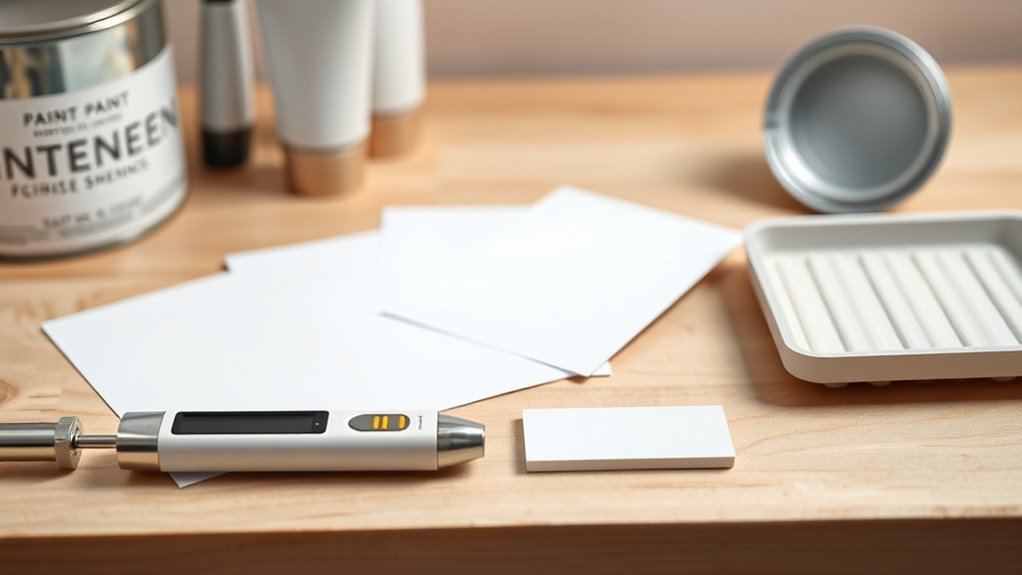
What Tools and Supplies Do You Need to Apply Flat Paint?
You’ll need a few basic tools and supplies to apply flat paint efficiently and get a smooth, even finish: gather the right tools needed and paint supplies before you start.
Focus on prep essentials and surface preparation so application techniques and painting methods work best.
- Roller types: choose nap length for texture and room size.
- Brush selections: use angled brushes for corners and trim.
- Cleaning tools and protective gear: drop cloths, tape, buckets, rags, gloves, and respirator.
Organize supplies, practice consistent application techniques, and clean tools promptly to preserve brush life and guarantee neat, lasting results.
How Do You Prepare Walls Before Applying Flat Paint?
Before you grab the roller, clean and degrease the walls so paint will stick and look even.
Patch holes and cracks, then sand smooth to remove rough spots.
Finally, prime any repaired or stained areas to guarantee consistent coverage with flat paint.
Clean And Degrease
Start by removing dust, dirt, and any greasy residues so the flat paint will stick evenly and look uniform. You’ll use straightforward cleaning techniques and degreasing methods to guarantee adhesion.
Begin with a dry wipe, then a wet clean, and finish with targeted degreasing where needed. Follow this simple sequence:
- Wipe surfaces with a microfiber cloth to remove loose dust and cobwebs.
- Wash walls with mild detergent and water, rinse thoroughly to avoid soap film.
- Apply a degreaser to oily spots, then rinse and let the wall dry fully before priming or painting.
Repair And Patch
1. You’ll inspect for holes, cracks, and loose texture, choosing repair techniques that suit each flaw. Use appropriate patch materials—spackling for small dents, joint compound for bigger gaps, and mesh tape for seams. Apply patches smoothly, pressing out air and feathering edges so repairs sit flush.
| Pain | Relief | Pride |
|---|---|---|
| Frustration | Confidence | Satisfaction |
| Mess | Order | Calm |
Let repairs dry fully, then check for levelness and repeat if needed. Proper patching prevents telegraphing under flat paint and gives you a flawless finish.
Sand And Prime
Scuff and sand patched areas lightly, then wipe the walls clean so primer can bond properly and your flat paint won’t show imperfections.
You’ll want consistent sanding techniques to feather edges and remove gloss; use fine-grit sandpaper and a sanding block for control.
After dusting, choose priming methods suited to the substrate—stain-blocking primer for repairs, bonding primer for glossy surfaces, or latex primer for drywall.
Prep steps:
- Sand until connections are smooth and wipe with a damp cloth.
- Apply primer evenly, following manufacturer’s instructions and drying times.
- Lightly sand primer if needed, then clean before painting.
How Do You Patch, Sand, and Smooth Walls for Flat Paint?
Wondering how to get a perfectly smooth surface for flat paint? You’ll begin by evaluating wall imperfections, then gather repair tools: putty knife, joint compound, mesh tape, and sanding block.
For patching walls, fill holes and seams, feather edges, and let compound dry fully. Use progressive sanding techniques—start with 120–150 grit, finish with 220 grit—to blend repairs without gouging. Wipe dust between steps to guarantee surface preparation is flawless.
For smooth finishes, sand in even strokes, check with raking light, and repeat minor touch-ups as needed. Follow application tips: keep repairs low-profile and seamless before painting.
How and When Should You Apply Primer (And When to Skip It)?
Because primer bonds paint to the wall and hides stains, you should treat it as an essential step whenever the surface is new, repaired, heavily stained, or changing from a dark to a light color.
Because primer bonds paint and hides stains, always prime new, repaired, or heavily stained surfaces before painting.
You’ll choose primer types based on surface and goal—stain-blocking for marks, bonding for slick surfaces, or tinted for color shifts.
Primer application is quick insurance: one coat often suffices. Skip priming only when the existing finish is sound, the color is similar, and the paint manufacturer allows it.
Consider these guidelines:
- New drywall or patched areas: always prime.
- Stained or repaired walls: use stain-blocking primer.
- Glossy surfaces: use bonding primer.
How Do You Cut In and Roll Flat Paint for Even Coverage?
Once your primer has dried (or you’ve decided it’s okay to skip it), you’ll want to cut in around trim, corners, and ceilings before rolling the main wall areas so you get crisp edges and consistent coverage.
Use a quality angled brush, steady your hand against the wall, and apply paint in smooth, continuous strokes—this cutting techniques approach prevents lap marks.
Load a nap roller evenly, work in a W pattern, then fill in without pressing too hard.
Maintain a wet edge, overlap each pass slightly, and feather out at the border with the brush.
Clean tools promptly to preserve finish quality.
How Many Coats of Flat Paint Are Typically Required?
You’ll usually get good coverage with one to two coats of flat paint, since most formulas cover about 250–400 square feet per gallon per coat.
Dark colors, high-contrast repairs, or porous surfaces can push you to apply an extra coat for uniformity.
Check the first coat for thin spots and tackiness so you know whether a second or third coat’s needed.
Typical Coverage Per Coat
Most flat paints cover roughly 250–400 square feet per gallon per coat, but the exact number depends on surface texture, porosity, and application method. You’ll plan paint application around that typical coverage, but expect variations.
Generally you’ll need:
- One coat often suffices over a similar existing color on smooth, sealed walls.
- Two coats are common for new drywall or color changes to guarantee a uniform finish and hide previous tones.
- Touch-up or spot coats address scuffs or uneven absorption without recoating entire walls.
Estimate gallons by dividing wall area by the lower coverage number for conservative planning.
Factors Increasing Coat Count
Several common factors can push you to apply extra coats of flat paint beyond the typical one or two, and knowing them helps you plan time and materials. Surface porosity, color change, and finish uniformity all affect coat count. If you’re covering dark with light or rough drywall, expect more coats. Thinner paint or low paint thickness per coat also raises the number. Primer reduces coats. Environmental conditions (humidity, temperature) influence drying and film build. Use this quick reference:
| Factor | Effect on Coats |
|---|---|
| Surface porosity | Increases |
| Color contrast | Increases |
| Paint thickness | Reduces if higher |
How Long Does Flat Paint Need to Dry and Cure?
A flat paint usually feels dry to the touch within 1 to 2 hours, but it can take 24 hours to be safe to handle and up to 30 days to fully cure depending on humidity, temperature, and ventilation.
You’ll notice two stages: initial drying time and the longer curing process that builds hardness. Plan activity around those stages so you don’t scuff or trap moisture.
Key points to remember:
- Humidity slows drying time; warm, ventilated rooms speed curing.
- Thin coats dry faster; multiple thin layers cure better than one thick coat.
- Avoid heavy traffic until the full curing process completes.
How Do You Handle Lap Marks and Uneven Sheen in Flat Paint?
Why are lap marks and uneven sheen so noticeable on flat paint? You’ll see them because flat finishes reflect light inconsistently; poor application shows.
Prevent lap marks by maintaining a wet edge, working in small sections, and matching paint flow with consistent brush or roller pressure.
Fix uneven sheen by feathering edges while wet and re-rolling with a light touch to blend.
Choose high paint quality with uniform pigment and binder for smoother coverage.
If problems persist after drying, sand lightly and spot-prime before repainting.
Good application techniques and quality paint greatly reduce visible flaws and guarantee a uniform matte look.
How Do You Maintain and Clean Flat‑Painted Walls Without Damaging the Finish?
You’ll keep flat walls looking their best by sticking to a gentle dusting routine with a microfiber cloth or soft broom.
For marks and stains, test a mild soap-and-water solution on an inconspicuous spot and use a light, circular motion for spot cleaning to avoid scuffing the finish.
And take simple preventative measures—chair rails, washable mats in high-traffic areas, and prompt spill cleanup—to reduce the need for aggressive cleaning.
Gentle Dusting Routine
Because flat paint shows dust more readily than glossier finishes, you’ll want a gentle, regular dusting routine that won’t abrade the surface. You’ll protect the finish with gentle cleaning and dust prevention habits that preserve texture and color.
Start with a soft tool and work methodically.
- Use a microfiber cloth or electrostatic duster, sweeping downward to lift dust without rubbing.
- Vacuum with a brush attachment for high walls and corners, keeping suction moderate to avoid scuffing.
- Schedule brief dusting weekly and a thorough pass monthly to prevent buildup and reduce need for harsher cleaning.
Spot Cleaning Technique
After a regular dusting routine, address fingerprints and smudges with a careful spot‑cleaning method that preserves flat paint’s texture. You’ll test a hidden area first, use a soft sponge dampened with mild soap and water, and blot—don’t scrub—to lift marks. Rinse with a clean damp cloth and pat dry. For stubborn stains, try a baking soda paste gently, then rinse. Repeat only when necessary to avoid sheen changes. Keep tools soft and pressure light; flat paint tolerates minimal abrasion.
| Problem | Action |
|---|---|
| Fingerprints | Blot with damp sponge |
| Scuffs | Gentle paste |
| Grease | Mild soap |
| Marks | Rinse and dry |
Protective Preventative Measures
While flat paint gives walls a smooth, low-sheen look, it’s also more fragile, so take preventive steps to keep it looking fresh: You’ll want to limit contact, control humidity, and use gentle cleaning.
Consider light protective coatings or preventative treatments in high‑traffic zones to add subtle durability without altering appearance.
For routine care:
- Dust and vacuum the wall surface regularly to remove grit that causes abrasion.
- Spot-clean with a soft sponge, mild detergent, and minimal water; blot, don’t scrub.
- Apply a breathable clear protective coating on scuffs-prone areas, testing first on a hidden patch.
How Do You Touch Up Scuffs and Stains on Flat Paint?
Need help removing scuffs and stains on flat paint? Start by cleaning the area with mild detergent and a soft sponge; gentle agitation often handles basic stain removal without harming finish.
For scuff repair, use a clean eraser or a melamine sponge lightly—test an inconspicuous spot first. If marks persist, spot-prime with a stain-blocking primer, let dry, then apply thin coats of matching flat paint, feathering edges to blend.
Use a small brush or mini roller for smooth coverage. Allow full drying between coats. Finish by inspecting under varied light to guarantee an even, invisible touch-up.
How Do You Repaint Over Existing Glossier Finishes With Flat Paint?
If you’re painting flat over a glossier finish, start by scuffing and cleaning the surface so the new paint will stick.
Pick a high-adhesion primer designed for glossy substrates to prevent peeling and show-through.
When you paint, use even strokes, thin coats, and sand lightly between coats for the smoothest, most uniform result.
Surface Preparation Steps
Because glossy surfaces resist adhesion, you’ll need to prep them carefully before applying flat paint so the new coat sticks and looks even.
Start with surface cleaning: wash walls with mild detergent or trisodium phosphate substitute, rinse, and let dry.
Next, scuff gloss with fine sandpaper or a sanding sponge for wall smoothing and better bite.
Repair dents or cracks with spackle, sand smooth, and remove dust.
Finally, wipe surfaces with a tack cloth and mask trim.
Follow these steps methodically so your flat paint adheres evenly and delivers the muted, uniform finish you want.
Choosing The Right Primer
Wondering which primer will help flat paint stick to a glossy surface? You’ll evaluate primer types—bonding, oil-based, and high-adhesion latex—based on primer benefits like improved paint adhesion and sealing.
Prioritize surface preparation: clean, degloss, and repair before priming.
Consider color compatibility to prevent bleed-through and to choose tintable primers for fewer topcoats.
Use coverage estimation to size cans accurately; check spread rate on labels.
Factor cost considerations alongside environmental impact—low-VOC options exist.
Read brand comparisons and reviews to match quality and warranty.
Don’t skip manufacturer instructions; they guide application techniques without replacing them.
Application Techniques And Tips
Start by scuffing and cleaning the glossy surface so the flat paint has something to grip—soap and water, a degreaser for kitchens, followed by light sanding or a liquid deglosser will remove sheen and contaminants without excessive abrasion.
For application techniques, follow prep essentials and choose primer suited to wall types. Use these practical steps:
- Rolling methods: use a short-nap roller for even coverage; work wet edge to wet edge.
- Cutting tips: sharp angled brush for clean lines; feather edges into the wet roll.
- Color selection and finish comparison: test swatches; flat hides flaws but limits washability.
Mind drying times and texture options; maintenance advice follows on touch-ups.
What Common Application Mistakes Shorten Flat Paint Lifespan?
When you rush preparation, skip proper cleaning, or apply paint too thinly, you’ll noticeably shorten a flat paint job’s lifespan.
You’ll also harm durability factors by ignoring surface preparation, choosing poor primer types, or mismatching sheen preferences to room use.
Bad application techniques—overworking, uneven rollers, inadequate drying time—create thin, porous films that stain and scuff easily.
Neglecting paint maintenance and cleaning methods lets dirt embed in wall textures, accelerating wear.
Poor color selection that needs frequent repainting, or ignoring environmental considerations like humidity and temperature during application, will all reduce longevity.
Follow correct steps to maximize life.
How Do Lighting Choices Affect Perceived Flat Paint Color?
How will lighting change the way your flat paint reads across a room? You’ll notice lighting effects shift color perception: different bulbs, angles, and intensities alter warmth, depth, and contrast.
Consider how each choice interacts with flat finishes.
Consider how each lighting decision interacts with flat finishes, revealing undertones, depth, and shadow.
- Natural light: reveals true undertones but varies by time of day.
- Warm bulbs: make neutrals feel cozier, mellowing cool hues.
- Cool bulbs: sharpen tones, increasing perceived contrast and brightness.
You should test paint samples under your fixtures at several times. Move swatches around the space, note directional shadows, and pick lighting that supports the look you want without relying on finish to hide flaws.
How Does Flat Paint Influence Room Mood and Style?
Lighting affects how flat paint looks, and that visual shift directly shapes a room’s mood and style. You’ll use color psychology and light absorption to control emotional impact: darker flat hues absorb light, reducing perceived space dimension and creating cozy atmosphere enhancement; lighter flats reflect subtle light, adding visual depth and calm. Flat finishes offer design versatility by highlighting texture contrast—wall imperfections become intentional character. Choose tones to set tone: energizing, soothing, or neutral.
| Effect | Result |
|---|---|
| Color choice | Emotional impact |
| Finish | Texture contrast |
| Lighting | Space dimension, visual depth |
How Do You Pair Flat Paint Colors With Trim and Ceilings?
Where should you place contrast to make flat walls and trim sing together? You’ll use color coordination to balance flat wall paint with trim contrast and ceiling harmony.
Choose a slightly lighter or glossier finish for trim to protect edges and define shapes. For ceilings, keep tones subtle so the room feels cohesive, not chopped.
Consider these simple approaches:
- Match undertones between wall and trim for seamless flow.
- Use a soft white or muted tint on the ceiling to lift without competing.
- Select complementary paint finishes deliberately: flat walls, satin or semi-gloss trim for durability and definition.
How Should You Use Flat Paint in Rental Properties and Staging?
Want to make a rental look fresh without constant touch-ups? Use flat paint strategically: its low sheen hides imperfections and creates a calm backdrop that improves rental aesthetics.
Apply it in living areas and bedrooms where durability concerns are moderate, and choose washable formulations for high-traffic zones.
For staging strategies, pair flat walls with brighter accents, good lighting, and clean furnishings to emphasize space and neutral appeal.
Keep trim and entryways in higher-sheen paints to resist scuffs.
When prepping, patch and prime thoroughly—flat finish conceals flaws but reveals poor surface work—so tenants and buyers see a polished, inviting property.
How Do Textured Walls Interact With Flat Paint?
Although textured walls can add depth and hide minor flaws, flat paint interacts with them in specific ways you should know: it soaks into crevices, mutes highlights, and emphasizes shadow lines, which can make texture look more pronounced from certain angles.
You’ll notice how textured interaction changes perception: flat paint reduces sheen, so rough spots read darker and subtle peaks disappear. Consider finish choice, lighting, and application technique to control contrast and uniformity.
- Apply thin, even coats to avoid pooling in grooves.
- Test swatches under real light before committing.
- Use proper rollers to minimize lap marks and maintain consistency.
How Do Specialty Flat Finishes (Chalky, Velvety) Differ?
Textured walls change how flat paint reads, and specialty flat finishes take that effect further by offering distinct surface feels and optical properties.
You’ll notice chalky finishes give a matte, slightly powdery look that hides imperfections and evokes vintage or rustic styles. They absorb light, reducing sheen and softening contrasts.
By contrast, velvety textures yield a plush, depth-rich appearance that feels smoother to the eye while still remaining non-reflective.
You’ll pick chalky finishes for aged character and easy touch-ups, and choose velvety textures when you want subtle luxury and dimensional color without shine.
How Does the Cost of Flat Paint Compare to Other Sheens?
Curious how flat paint stacks up cost-wise against eggshell, satin, or semi-gloss? You’ll find flat finishes often cost similarly or a bit less per gallon, but regional price trends and brand affect totals.
For a clear cost comparison, consider coverage, coats required, and prep work.
- Flat paint typically needs fewer sheen additives, so base price can be lower.
- Eggshell and satin may cost more due to durability additives that boost longevity.
- Semi-gloss often carries premium pricing for washability and trim use.
You’ll weigh upfront price trends against long-term maintenance to choose the best value.
How Do You Evaluate Warranty and Return Policies for Flat Paint?
When you’re evaluating warranty and return policies for flat paint, focus on coverage scope, duration, and any conditions that can void protection—like improper surface prep or mixing with other products. You should read fine print for finish guarantees, fade resistance, and applicability to interior walls. Ask about proof requirements, pro vs. DIY application limits, and who pays shipping or labor for replacements. For return policies, check time windows, unopened-can rules, and restocking fees. Use warranty evaluation to compare brands and keep receipts. Below is a quick comparison of common policy elements:
| Policy Item | Typical Terms |
|---|---|
| Coverage | Limited to defects |
| Duration | 1–10 years |
| Exclusions | Misuse, poor prep |
| Returns | 30–90 days |
How Do You Decide Between Flat Paint and Washable Matte for Families?
After checking warranties and return rules, you’ll want to weigh practical performance and lifestyle needs when choosing between flat paint and washable matte for family spaces.
Consider how your family preferences affect daily wear and tear: flat hides imperfections, washable matte improves paint durability and eases wall maintenance.
Think about color selection—flat can look richer, matte stays truer after cleaning.
Match cleaning routines to finish: light spot-cleaning favors washable matte; low-traffic rooms suit flat.
Use this finish comparison to prioritize what matters most—appearance, ease of upkeep, or longevity—then pick the option that fits your household.
How Do You Test Flat Paint Samples at Home?
Want to be sure a flat paint will look and wear well in your space? Pick small sample pots for your color selection and test on multiple walls—north-, south-, and artificial-light areas.
Apply at least two coats using your planned application techniques: roller for texture, brush for trim. Let samples cure 24–48 hours, then view at different times and distances to judge depth and sheen.
Tape a 6×6” card beside each swatch to compare. Try a washable matte sample too for contrast.
Note how scuffs, fingerprints, and touch-up visibility appear; record results before committing to a full purchase.
How Do You Troubleshoot Common Flat Paint Problems on the Job?
Start by diagnosing the issue: inspect the surface, the paint film, and your application technique to pinpoint whether you’re dealing with adhesion failure, visible brush or roller marks, lap streaks, bubbling, or uneven sheen.
Check surface preparation and primer options first; poor prep causes most failures. Consider gloss differences and lighting impact—low sheen hides flaws but highlights texture compatibility problems under raking light.
Adjust paint application: slow strokes, proper nap, and consistent wet edges. Balance color selection and specialty finishes with durability factors.
For ongoing care, follow maintenance tips and touch-up procedures to restore uniform appearance.
- Reprep and spot-prime.
- Sand and feather edges.
- Match finish and application.
How Do You Choose the Right Flat Paint for Your Project?
Troubleshooting showed you where flat paint can fail, and now you’ll pick a product that avoids those problems from the outset: assess the surface (new drywall, previously painted, plaster, or masonry), the room’s use and moisture level, and the expected wear so you can choose a formulation that matches adhesion, durability, and touch-up needs.
Then handle color selection and finish options based on lighting effects and wall texture; match application techniques to your skill and tools.
Consider lighting and texture when choosing color and finish, and pick application methods suited to your skills and tools.
Use project planning, brand comparisons, and cost analysis to balance performance and budget.
Include maintenance tips and eco friendly choices when finalizing.
Frequently Asked Questions
Can Flat Paint Be Tinted to Deep, Saturated Colors Without Performance Loss?
Yes — you can tint flat paint to deep, saturated colors, but you’ll want a controlled tinting process and high-quality pigments so you don’t sacrifice color retention, hiding power, or washability; expect some reduced durability compared with sheen.
Will Flat Paint Darken or Change Shade as It Cures Over Weeks?
Yes — you might notice slight darkening as flat paint cures over weeks; you’ll see most change during early cure time, but proper pigments and application keep long-term color stability strong, so shifts are minimal and predictable.
Are There Allergy or Asthma Concerns Specific to Flat Paint Formulas?
Yes — you might react, and coincidentally the same low-VOC flat paint that gives a muted look can still trigger sensitivities; choose low-VOC, allergen-free formulas and guarantee ventilation to protect asthma sufferers while preserving paint longevity.
How Does Humidity During Application Affect Flat Paint Adhesion and Drying?
High humidity slows drying, reduces adhesion, and can cause blistering or streaks; you should wait for lower humidity, use dehumidifiers or fans, and adjust application techniques like thinner coats and longer between-coat drying times.
Can Flat Paint Be Sprayed Using HVLP or Airless Equipment Effectively?
Yes — you can spray flat paint effectively with HVLP or airless systems; you’ll use proper spraying techniques, adjust viscosity and tip size, and verify equipment compatibility to avoid orange peel, overspray, or poor adhesion.
Conclusion
Flat wall paint quietly soaks up light and hides flaws, while glossier sheens shout durability and washability — and you’ll choose between them based on setting, traffic, and aesthetics. When you want subtle elegance in low-traffic rooms, flat delivers; when you need practical resilience for active households, washable matte or satin wins. Balance beauty with function, test samples under real conditions, and pick the finish that best aligns with your lifestyle and surfaces.