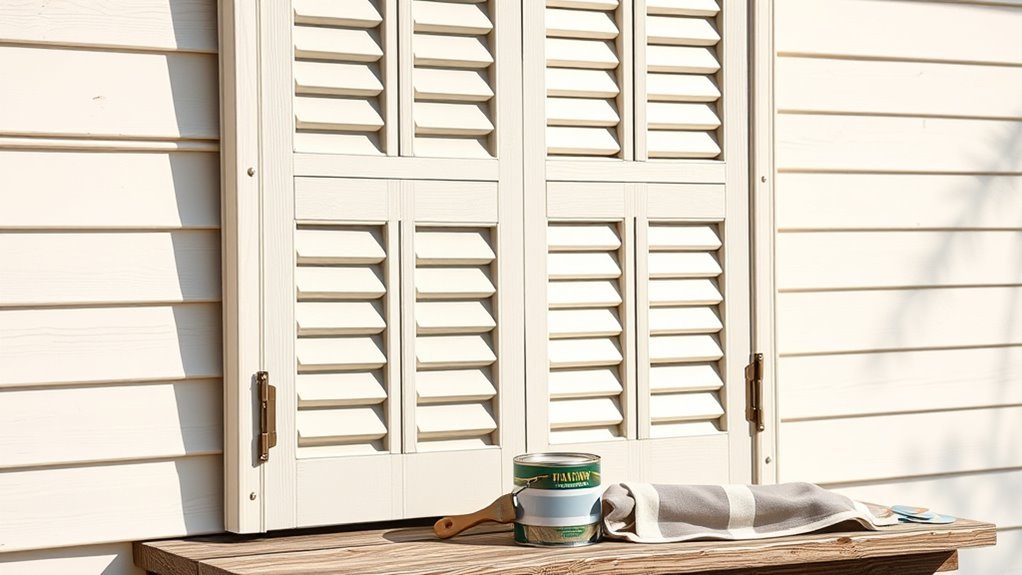
What Is the Best Paint for Exterior Shutters?
Use a high-quality 100% acrylic exterior latex in a satin or semi-gloss sheen for the best mix of durability, weather and UV resistance, and easy cleanup—you’ll get good adhesion on wood, composite and properly prepped metal, while vinyl may need a specialty acrylic designed for flexible plastics. Pick a color and gloss that hide dirt but clean easily, sand and prime as needed, and spot-test a small panel first. Keep going to learn material-specific prep and maintenance tips.
Quick Answer: Best Paint for Exterior Shutters Today
If you want shutters that resist weather, fade, and peeling, go with a 100% acrylic exterior latex paint formulated for trim and siding—it’s durable, flexible, and cleans up with water.
You’ll choose satin or semi-gloss sheens for easy cleaning and subtle highlights; those sheens handle paint textures well and show brushwork less than flat finishes.
Use color theory to pick contrast or harmony with siding and trim—cool neutrals recede, warm tones pop.
Prep, prime, and apply thin, even coats for longevity.
Pick high-quality brushes or a sprayer to keep edges crisp and finishes uniform.
Who This Guide Is For and How to Use It
Wondering whether this guide is for you? If you care about curb appeal, maintenance ease, or matching shutter styles to your home, this guide’s aimed at homeowners, renters with permission, and DIYers weighing options.
You’ll get clear comparisons, actionable steps, and visual tips so you can pick colors and finishes confidently. Use the quick answer for instant decisions, then read deeper sections when you need technique, prep, or durability details.
Keep an eye on current paint trends to modernize looks without overcommitting. Skip material-specific chapters until you’re ready to match paint to substrate.
How Shutter Material Affects Paint Choice
Now that you know who this guide serves and how to use it, the next step is matching paint to shutter material—because what works on wood won’t always work on vinyl, metal, or composite.
You’ll check paint compatibility for each shutter material: oil-based or acrylic for wood, specialized vinyl formulas, and corrosion-resistant coatings for metal.
Prioritize weather resistance and finish selection to limit color fade.
Do proper surface preparation—cleaning, sanding, priming—then use application techniques suited to the substrate.
Follow maintenance tips like periodic inspection and touch-ups so your shutters keep their look and protect the underlying material.
Decision Framework: Durability, Adhesion, Color, Finish
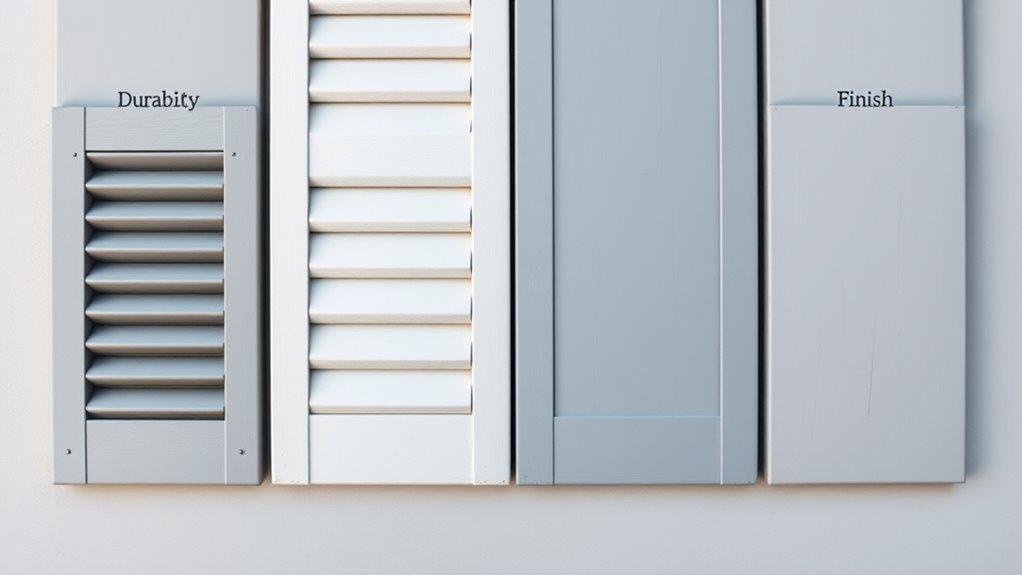
When choosing paint for your exterior shutters, you’ll want to weigh durability, adhesion, and the right color and finish together.
Think about how the coating will resist weather and UV over time and whether it bonds well to your shutter material.
Also consider how gloss level and pigment affect appearance and long-term maintenance.
Durability Over Time
Because shutters take the brunt of sun, rain, and temperature swings, you should prioritize coatings that deliver long-term durability without frequent maintenance.
Look for products with proven weather resistance and documented paint longevity so your shutters resist fading, chalking, and moisture intrusion.
Consider high-quality exterior acrylics or elastomeric finishes for flexible protection over time; they shed water and recover from minor substrate movement.
Also pick pigments and UV inhibitors that slow color loss.
Schedule inspections every few years to touch up chips and recoat before degradation accelerates.
That proactive approach extends service life and keeps shutters looking sharp.
Adhesion To Surfaces
Good surface adhesion keeps the durability you just reviewed from going to waste, so you’ll want to assess how well a paint bonds to shutter materials before picking color or finish.
Start by cleaning, sanding, and using a primer matched to substrate; those adhesion techniques reduce peeling and blistering.
Check surface compatibility—wood, PVC, and metal accept different primers and prep.
Test a small area to confirm bond and cure time.
Use products labeled for exterior use and follow manufacturer instructions for recoat windows and temperatures.
Proper prep and matching primer to material are the simplest ways to guarantee long-lasting adhesion.
Color And Finish
Semi-gloss and satin finishes shed moisture and clean easily, while flat paints hide imperfections but sacrifice durability.
Consider color psychology to match curb appeal and consult color trends and seasonal colors for timely choices.
Evaluate finish types and paint formulas for finish durability and adhesion.
Balance aesthetic appeal with practical maintenance frequency—durable paints reduce repainting and protect wood or composite substrates.
Acrylic-Latex Paint: Overview and Shutter Use
Acrylic-latex is a smart choice for shutters because it combines durability and flexibility to handle temperature swings and wood movement.
It dries quickly, so you can coat and recoat without long wait times.
Cleanup is simple with soap and water, making touch-ups easier on the job.
Durability And Flexibility
Because shutters face sun, rain, and temperature swings, you’ll want a paint that stands up without cracking or peeling—qualities where acrylic-latex excels.
You’ll appreciate flexible coatings that stretch with boards and resist blistering, so joints and edges stay sealed. Acrylic-latex offers superior paint elasticity, letting surfaces expand and contract without stress fractures.
That durability reduces maintenance and keeps color uniform over seasons. You should still prep surfaces—clean, sand, prime—to maximize adhesion and longevity.
For wood or composite shutters, this balance of toughness and flexibility makes acrylic-latex a practical, long-lasting choice that protects and preserves curb appeal.
Fast Drying Time
Fast drying times are another reason many pros pick acrylic-latex for shutters, since you’ll get usable surfaces sooner and lower the window for dust, bugs, or drips to mar the finish.
You’ll appreciate how quickly multiple coats go on, letting you finish a set between weather windows. Fast drying doesn’t mean brittle — modern acrylic-latex maintains flexibility and strong weather resistance, so the film resists cracking and fading.
Workability stays high: you can sand light imperfections and apply touch-ups the same day. For efficient, durable shutter jobs, the balance of quick cure and protective performance makes acrylic-latex a smart choice.
Ease Of Cleanup
When you finish painting shutters, cleanup should be quick and painless because acrylic-latex is water-based—brushes, rollers, and spills rinse out with soap and water instead of harsh solvents.
You’ll save time by wiping excess paint into a disposable tray liner, then soaking tools briefly before a gentle scrub removes residue.
For drips on siding, dampen a cloth and blot; avoid scrubbing wet paint into grain.
If paint has dried, soften it with warm soapy water before scraping gently.
These cleanup techniques minimize waste and eliminate strong paint solvents, making post-project chores easier and safer for you.
Alkyd (Modern Oil) Paint: Overview for Shutters
Choose alkyd (modern oil) paint when you want a tough, smooth finish that handles wear and weather better than traditional latex. You’ll appreciate alkyd benefits like superior leveling, resistance to brush marks, and durability against frequent handling and moisture.
For shutters, surface prep is key: clean, sand, and prime any bare wood or previously painted spots. Use proper application techniques—thin coats, longer open time, and a high-quality synthetic-bristle brush or foam for smooth results.
Drying is slower than latex, so avoid tacky recoat conditions. Expect excellent adhesion and a hard, long-lasting finish ideal for exterior shutters.
Acrylic-Latex vs Oil-Based Paint for Shutters
Alkyds give you a hard, durable finish, but you’ll want to compare them directly with acrylic-latex to pick the best match for your shutters’ needs. You’ll weigh durability, drying time, and maintenance.
Acrylic-latex resists yellowing, cleans up with water, and flexes with temperature changes; oil-based (alkyd) bites into wood and levels out for a smoother surface.
Consider shutter color selection—darks show wear faster—and plan paint application techniques: thin coats, light sanding, proper primer.
Match finish to exposure and maintenance willingness so your shutters stay attractive and protected for years.
- Durability vs flexibility
- Dry time considerations
- Cleanup and tools
- Primer and sanding
Exterior Enamel Paints: When to Use Them on Shutters
Although exterior enamel paints dry to a tougher, glossier film than standard house paints, they’re best suited for shutters that need extra abrasion resistance and a more finished look.
You’ll choose enamel when shutters face frequent contact, harsh weather, or you want crisp, durable trim.
Prep matters: sand, clean, and prime compatible substrates to lock adhesion.
Prep matters: sand smooth, clean thoroughly, and prime compatible surfaces to ensure lasting adhesion and finish.
Use proper exterior enamel benefits—longer wear, harder surface, easier cleaning—without sacrificing flexibility.
Apply thin, even coats with brush or spray; follow recommended paint application techniques like light overlap and proper drying times.
Finish with two coats for consistent protection and appearance.
Top Brands for Shutter Paint (Performance Roundup)
When you’re choosing shutter paint, look at brands that prove their acrylic latex durability for flexible, weather-resistant coats.
You’ll also want to compare oil-based finish longevity if you need hardwearing protection and gloss retention.
Finally, check each maker’s specialty exterior formulas for UV resistance and mildew control to match your climate.
Acrylic Latex Durability
Durability matters most for exterior shutters, and acrylic-latex finishes deliver a dependable balance of flexibility, weather resistance, and color retention.
You’ll notice acrylic benefits like UV stability and resistance to chalking, while latex advantages include quick drying and easy cleanup. These coatings flex with temperature changes, reducing cracking and peeling on wood or composite shutters.
- Strong adhesion to primed wood and PVC
- Fade-resistant pigments for longer color life
- Breathable film that sheds moisture yet resists mildew
- Easy maintenance: simple wash and occasional touch-up
Choose high-quality acrylic-latex for lasting, low-maintenance shutters.
Oil-Based Finish Longevity
If you want the longest-lasting, hard-wearing finish for traditional shutters, oil-based paints still lead the pack for longevity and depth of color. You’ll get superior leveling, richer sheen, and strong adhesion that resists chipping on wood or metal shutters.
Consider oil based advantages: exceptional durability, smoother application, and stain-blocking properties that extend repaint intervals.
Weigh oil based disadvantages too: longer dry times, stronger fumes, and trickier cleanup requiring solvents.
For best results, prep thoroughly, use quality primers, and apply thin coats. That approach maximizes life span without dipping into specialty exterior formulas.
Specialty Exterior Formulas
Several top brands now offer specialty exterior formulas designed specifically for shutters, so you can pick a product tuned to your substrate and climate.
You’ll find specialty paint types that resist fading, mildew, and chipping while maintaining crisp edges. Choose flexible acrylics for vinyl, alkyd blends for wood, or high-build coatings for textured shutters.
Plan seasonal application for best adhesion and curing — spring or fall typically works. Test samples and follow prep instructions.
- Flexible acrylics for vinyl
- Alkyd blends for traditional wood
- High-build coatings for textured surfaces
- UV/mildew-resistant topcoats for sunny, humid climates
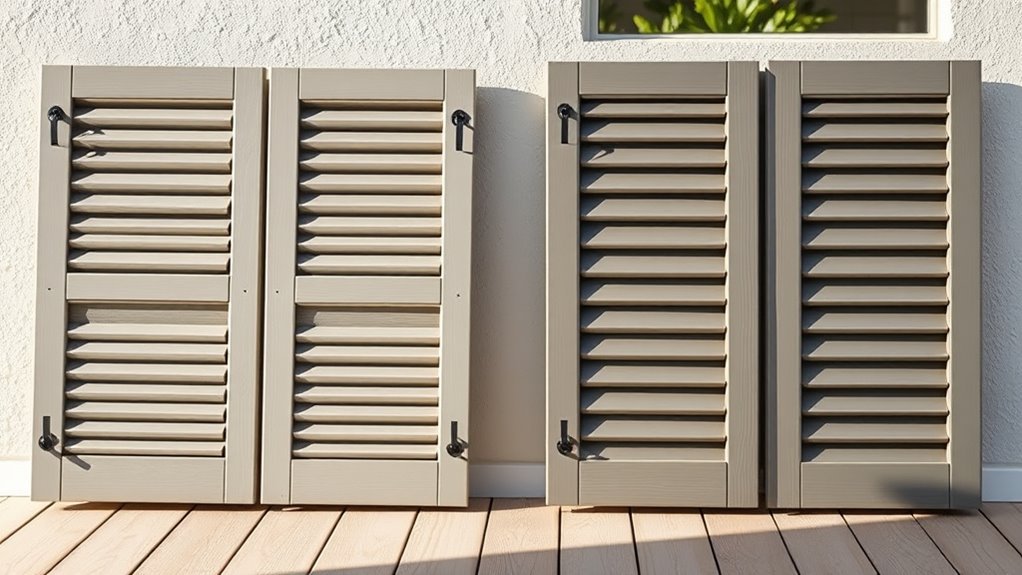
Best Paints for Wood Shutters
When you paint wood shutters, pick products that balance protection, adhesion, and a finish that matches your home’s style. You’ll want high-quality exterior acrylic latex or an oil-modified acrylic for durability, flexible coatings to resist cracking, and primers that block tannin bleed. Match sheen to wood shutter styles—satin hides imperfections, semi-gloss cleans easier. Consider current paint color trends to coordinate with siding and trim, but choose timeless contrast for curb appeal. Test patches in sunlight.
| Feature | Recommendation |
|---|---|
| Primer | Stain-blocking exterior primer |
| Finish | Satin or semi-gloss |
Best Paints for Vinyl Shutters
For vinyl shutters you’ll want durable, low-gloss finishes that resist scuffs and weathering without looking plastic.
Choose paints formulated to flex with vinyl so they won’t crack or peel as the material expands and contracts.
I’ll cover top product types and application tips next.
Durable Low-Gloss Finishes
Because vinyl shutters face sun, rain, and frequent cleaning, you’ll want a durable low-gloss finish that resists fading, chalking, and scuffs while still hiding surface imperfections.
You’ll choose acrylic-latex formulas with UV inhibitors and mildewcides, and follow precise paint application techniques to guarantee even coverage.
Low-sheen finishes mask flaws and suit current shutter color trends, from deep charcoal to muted blues.
Clean and sand lightly, use a quality primer if needed, and apply thin, overlapping coats for durability.
Consider these options and steps for long-lasting results:
- 100% acrylic latex low-gloss
- UV-stable exterior enamel
- Mildew-resistant formulations
- Thin, overlapping coats
Paints That Flex
Flexibility matters most when painting vinyl shutters: choose paints formulated to expand and contract with the plastic so your finish won’t crack, peel, or pop off as temperatures change.
You should pick flexible coatings designed for PVC or vinyl; they adhere better and tolerate thermal movement. Look for descriptions noting paint elasticity and UV resistance to prevent chalking and fading.
Prep the surface with a mild cleaner and compatible primer to improve bond strength.
Apply thin, even coats and allow full curing between layers. That approach gives you a durable, smooth finish that moves with the shutter instead of against it.
Best Paints for Metal and Aluminum Shutters
When you’re painting metal or aluminum shutters, choose coatings that stick well and resist corrosion, since those surfaces shed moisture and expand with temperature changes.
You’ll want primers and topcoats designed for metal shutter textures and aluminum paint types to prevent flaking and chalking. Clean, de-rust, and prime before coating. Use products with corrosion inhibitors and UV stabilizers for lasting color.
- Oil-based alkyd primer for bare metal
- Acrylic latex topcoat formulated for metal
- Rust-converting primer for flaky areas
- Two-part epoxy or urethane for high-durability needs
Choosing the Right Finish for Exterior Shutters
Although it’s easy to focus just on color, the finish you pick for exterior shutters greatly affects durability, appearance, and maintenance, so choose based on exposure, material, and style.
You’ll weigh finish types like durable acrylics, oil-modified formulas, and protective primers that suit wood, vinyl, or metal.
Consider how much weather and sunlight shutters face, then pick surface-specific coatings that resist fading, moisture, and mildew.
Look at sheen options for visual impact and cleanability without overemphasizing gloss.
Test samples on a small area to confirm adhesion and look before committing to the whole house.
Satin vs Semi-Gloss vs Gloss for Exterior Shutters
When you pick between satin, semi-gloss, and gloss for your exterior shutters, consider how each sheen changes the look—satin is soft, semi-gloss has more pop, and gloss is the shiniest.
You’ll also want to weigh durability and maintenance, since higher sheen often cleans easier and resists weathering better.
Finally, remember that gloss highlights surface flaws while satin hides imperfections more effectively.
Sheen Appearance Comparison
Choosing the right sheen for your exterior shutters affects both their look and durability, so you’ll want to weigh satin, semi-gloss, and gloss based on appearance, maintenance, and how much wear they’ll face.
You’ll compare sheen types and see distinct sheen effects: satin gives a soft, modern look with subtle depth; semi-gloss highlights edges and trim for a crisp, balanced sheen; gloss creates a bold, reflective finish that emphasizes color vibrancy.
Pick based on the style you want and how much visual contrast you prefer. Consider lighting and architectural details when choosing the final sheen.
- Satin: soft, muted reflection
- Semi-gloss: clean, balanced shine
- Gloss: high reflectivity, bold color
- Consider lighting and trim contrast
Durability And Maintenance
Beyond how each sheen looks, think about how it holds up and how much upkeep you’ll face over time. You want a finish that balances weather resistance and cleanability; gloss and semi-gloss shed water and resist mildew better than satin.
Semi-gloss offers strong paint longevity with moderate hiding of flaws and easier washing, while gloss maximizes durability and scuff resistance but can call attention to minor surface issues.
Satin hides imperfections and looks softer but needs more frequent touch-ups in harsh climates. Choose based on exposure: high-traffic, wet areas favor gloss/semi-gloss for longer-lasting results.
Surface Imperfections Visibility
Because light highlights every bump and scrape, the sheen you pick greatly affects how visible surface flaws on your shutters will be.
You’ll notice that glossier finishes emphasize surface texture and can worsen visibility issues, while flatter sheens hide imperfections better.
Choose based on condition: if shutters are smooth and well-prepped, gloss or semi-gloss gives easy cleaning; if they’re rough or older, satin or low-sheen softens flaws.
- Gloss amplifies reflections and shows every dent
- Semi-gloss balances shine with moderate flaw visibility
- Satin reduces glare, masking minor texture
- Low-sheen minimizes visibility issues on imperfect surfaces
How Color Choice Affects Heat and Fading on Shutters
While a bold color can make your shutters pop, darker hues absorb more sunlight and raise surface temperatures, which speeds paint breakdown and increases fading over time.
You should weigh color psychology and aesthetic impact against heat absorption when choosing shades. Lighter tones aid temperature regulation and improve color retention, while strategic shade selection can complement your home without accelerating wear.
Consider environmental factors like local sun exposure and nearby reflective surfaces for fading prevention. Pick finishes and maintenance schedules that match your chosen color to extend lifespan.
That balance preserves looks and minimizes thermal stress on shutter paint.
UV Resistance: Why It Matters for Shutters
Color choice affects how fast paint fades, but UV resistance determines how well that color — and the paint film beneath it — holds up over years of sun exposure.
You’ll want coatings with strong UV protection to improve Color retention and slow Surface degradation from constant Sun exposure. That boosts Paint longevity and reduces Maintenance frequency.
Choose formulations with proven Weather resistance and Fading prevention properties, and inspect finishes annually for chalking or loss of vibrancy.
- Pick UV-stable pigments and additives
- Favor durable binders for Paint longevity
- Consider coatings tested for Weather resistance
- Monitor Color retention to time touch-ups
Mildew and Moisture Resistance for Humid Climates
In humid climates you’ll want shutters coated with paints formulated to resist mildew and block moisture, since persistent dampness accelerates mold growth and paint failure. You’ll choose products with mildew resistance strategies and moisture barrier solutions, apply proper primers, and maintain ventilation to keep surfaces dry. Pick paints labeled for exterior mildew protection, recoat as recommended, and clean affected spots promptly to prevent spread. Emotional reassurance comes from proactive care and durable finishes that protect your home’s curb appeal.
| Protect | Pride | Peace |
|---|---|---|
| Clean | Restore | Smile |
| Seal | Shield | Relief |
| Prime | Maintain | Confidence |
| Recoat | Prevent | Comfort |
Temperature Resistance for Cold and Hot Regions
Whether your shutters face subzero winters or blistering summer sun, choose paints that stay flexible and bonded across temperature swings so they won’t crack, peel, or chalk.
You want coatings formulated for temperature extremes that resist shrinkage in cold and softening in heat. Look for UV inhibitors and resin systems designed to maintain paint flexibility without sacrificing color retention.
Proper application—right temperature range, thin coats, and adequate cure time—helps performance. Test a small area if seasons vary dramatically.
- Choose exterior acrylic or elastomeric blends
- Verify manufacturer temperature range
- Prioritize UV-stable pigments
- Apply per label for best results
Adhesion and Flexibility: Preventing Peel and Crack
Get the surface right first—clean, sand, and prime so paint can grip instead of flaking off.
Choose flexible formulations that expand and contract with your shutters to resist cracking.
And remember to paint when temperature and humidity are within the product’s recommended range to guarantee proper adhesion and cure.
Surface Preparation Importance
One clear step separates a paint job that lasts from one that flakes: preparing the shutter surface so paint can properly bond and flex.
You’ll clean, repair, and measure conditions so adhesion holds and finishes move with temperature changes. Focus on surface cleaning, primer selection, and paint compatibility while noting weather considerations before you start.
- Use tool recommendations for sanding, scraping, and washing to remove loose paint.
- Apply repair techniques to fix rot, cracks, or holes and allow proper drying.
- Choose application methods and paint layering that suit finish options.
- Plan maintenance strategies to prolong results.
Flexible Paint Formulations
Because shutters expand, contract, and take bumps, you’ll want a paint that bonds firmly yet stretches without cracking. Choose paint formulations designed for exterior movement—acrylic-latex hybrids and elastomeric coatings offer flexibility benefits while maintaining adhesion.
You’ll get resistance to peeling around edges and fasteners, and reduced surface crazing as wood or composite shifts. Apply compatible primers to improve bond and follow manufacturer recoat windows to preserve elasticity.
Avoid brittle enamels on movable parts. When you pick flexible paint formulations, you’re protecting appearance and minimizing maintenance, so shutters stay intact longer and resist common wear that causes flaking.
Temperature And Humidity
If you paint shutters when temperatures are too low or humidity is high, the finish can fail to bond or cure properly, leading to peeling, bubbling, or cracking as the wood moves.
You’ll want paint that tolerates temperature fluctuations and resists humidity effects; flexible acrylics and elastomeric coatings absorb movement and maintain adhesion.
Time your project for stable, moderate weather, and avoid painting at night or before rain.
Prime damp-prone wood and allow full dry time between coats.
Monitor forecasts and store paint at recommended temperatures to preserve chemistry and performance.
- Choose flexible formulations
- Paint during stable temperatures
- Account for humidity effects
- Prime and dry fully
Primer Types for Wood Shutters
Primer choice makes a big difference in how well your wood shutters hold paint and resist moisture, mildew, and peeling. You’ll pick primers that match wood treatment needs, enhance paint adhesion, and provide moisture barriers and weather resistance. During primer application, focus on surface compatibility and sealing options—oil-based for tannin bleed control, shellac for stubborn stains, or acrylic for flexibility. Primer benefits include longer topcoat life and reduced maintenance. Choose based on exposure and wood type, and sand between coats for best adhesion.
| Primer Type | Strength |
|---|---|
| Oil-based | Tannin control, sealing |
| Acrylic | Flexibility, weather resistance |
Primer Types for Vinyl Shutters
When you’re painting vinyl shutters, choose a primer that bonds to slick, non-porous surfaces and prevents topcoat peeling; specialty vinyl or adhesion primers and a high-quality acrylic bonding primer are your best bets.
When painting vinyl shutters, use a primer made for slick, non-porous surfaces—specialty vinyl or acrylic bonding primers work best.
You’ll want primer benefits that include improved adhesion, UV resistance, and flexibility so the coating moves with the shutter. Confirm vinyl compatibility by selecting formulations labeled for PVC or vinyl.
Apply per manufacturer instructions and scuff-sand lightly first.
- Specialty vinyl adhesion primer
- Acrylic bonding primer for plastics
- Low-VOC formulations for exterior use
- Primer with UV inhibitors and flexibility
Primer Types for Metal Shutters
Anyone painting metal shutters should pick a primer formulated for ferrous or non‑ferrous substrates to prevent rust, improve adhesion, and block corrosion under the topcoat.
You’ll first focus on metal surface preparation: remove dirt, grease, and old loose paint with a degreaser and wire brush, then sand or scuff to create profile.
For bare steel, use a rust‑inhibiting etch or zinc‑rich primer; for aluminum, choose a self‑etching or adhesion promoter.
Apply thin, even coats using brush, roller, or spray—follow primer application techniques like wet‑edge work and proper flash times.
Let primer cure fully before topcoating.
When You Can Skip Primer (And When You Can’t)
You can skip primer on shutters that are already painted, in good condition, and made of materials that accept paint well, like previously coated wood or properly cleaned metal.
You should use primer when you’re covering bare wood, rusted or pitted metal, glossy surfaces, or dramatic color changes.
Picking the right approach up front saves you time and prevents peeling, staining, or poor adhesion.
When Primer Isn’t Necessary
Although primer often boosts durability and adhesion, you can skip it in a few clear situations: you’re using high-quality exterior paint labeled “self-priming,” painting previously painted, well-adhered shutters, or matching an existing color without drastic tint changes.
Use primer alternatives like bonding agents or paint additives when substrate conditions aren’t ideal. Test a small area first to confirm adhesion and coverage.
Limit skipping primer to sound surfaces in good weather. If you’re unsure about porosity, stains, or bare wood, don’t skip—those scenarios need proper priming to prevent failures.
- Self-priming exterior paints
- Previously painted, sound surfaces
- Bonding agents as primer alternatives
- Paint additives for improved adhesion
When Primer Is Required
When shutters are bare wood, chalky, stained, or show flaky paint, prime them before painting to guarantee adhesion and long-lasting protection.
You’ll choose primer types based on substrate preparation and surface compatibility—oil-based for raw wood, latex for previously painted surfaces, and stain-blocking for tannin bleed.
Consider primer color to improve topcoat coverage and reduce coats.
Primer benefits include sealing, adhesion, and corrosion inhibition on metal.
Match primer brands to your paint system, and mind environmental factors like temperature and humidity during application.
Use proper application techniques—brush, roller, or sprayer—and follow drying times for best results.
Best Primers for Wood Shutters
Because wood shutters face moisture, sunlight, and temperature swings, picking the right primer matters for durability and finish. You’ll want the best wood primers that seal tannins, block stains, and promote paint adhesion.
Choose oil-based or high-quality latex bonding primers for exterior use, and guarantee proper primer application: clean, sand, and apply thin, even coats. Let drying times and manufacturer’s recommendations guide you.
- Seal tannin bleed and knots
- Improve adhesion for topcoat longevity
- Resist moisture and mildew growth
- Sandable surface for smooth finish
Proper prep and the right primer extend paint life and appearance.
Best Primers for Vinyl Shutters
Switching from wood to vinyl shutters means you’ll need a different primer approach since vinyl doesn’t absorb paint the way wood does. You should pick primers with vinyl compatibility and flexible bonding to prevent peeling. For best primer application, clean and degloss the surface, then apply thin, even coats. Look for acrylic or vinyl-specific primers that resist chalking and UV.
| Primer Type | Benefit |
|---|---|
| Acrylic | Good adhesion, breathable |
| Vinyl-specific | Optimized vinyl compatibility |
| Bonding | Strong hold on smooth surfaces |
| Flexible | Resists cracking with temperature changes |
Finish with quality exterior paint for lasting results.
Best Primers for Metal Shutters
For metal shutters, pick a primer formulated for metal to guarantee strong adhesion, corrosion resistance, and a stable base for topcoat paint.
You’ll want primers that address rust inhibition, promote surface compatibility with your chosen topcoat, and suit the metal primer types available like epoxy, zinc-rich, and acrylic-alkyd hybrids.
Choose based on exposure, finish, and whether you’ll use oil- or water-based paint. Apply according to manufacturer directions and recoat windows.
Select primers by exposure, desired finish, and paint type; follow manufacturer instructions and recoat as directed.
- Epoxy primers for heavy corrosion resistance
- Zinc-rich primers for galvanic protection
- Acrylic-alkyd primers for good topcoat bonding
- Rust-converting primers for pitted areas
Surface-Prep Checklist Before Painting Shutters
Before you paint, gather the right tools and materials—sandpaper, primer, brushes or sprayer, rags, and rust or filler products—so you won’t stop mid-job.
Clean shutters thoroughly with a degreaser and rinse, then sand and make any repairs to cracks, loose joints, or corrosion.
Proper prep saves time and guarantees the paint bonds and lasts.
Tools And Materials
A solid toolkit makes surface prep straightforward and prevents headaches down the line, so gather the right supplies before you touch a shutter: drop cloths, painter’s tape, a sturdy scraper, medium- and fine-grit sandpaper, a chemical stripper or heat gun if needed, rust remover for metal fasteners, a tack cloth or vacuum, exterior primer, cleaning solution (trisodium phosphate or a mild detergent), and safety gear like gloves and goggles.
You’ll match tools to shutter materials and paint types, consider application techniques, and account for weather conditions and environmental factors to optimize surface preparation and future maintenance routines while respecting color psychology.
- Sanding and scraping tools
- Primers and compatible paints
- Protective gear and tapes
- Brushes, rollers, sprayers
Cleaning And Repairs
Once you’ve gathered your tools, tackle cleaning and repairs systematically so paint will adhere and shutters last: start by removing loose dirt and cobwebs, degrease with a TSP solution or mild detergent, then strip flaking paint with a scraper or chemical remover and sand smooth with medium- then fine-grit paper. Patch holes with exterior filler, tighten or replace hardware, and prime bare wood or metal. For shutter maintenance and paint selection, test a small area for adhesion and color.
| Task | Tip |
|---|---|
| Clean | Use mild detergent/TSP |
| Repair | Fill, sand, prime |
Safely Removing Old Paint From Shutters
When you tackle old paint on shutters, work methodically: assess the finish, test for lead, and choose a removal method that fits the material and paint condition.
You’ll pick between chemical strippers, heat, sanding, or scraping based on substrate and coatings. Prioritize paint removal techniques that minimize damage and follow safety precautions: ventilate, wear a respirator, and contain debris.
Take small sections, clean residue, and prep for primer.
- Test for lead before starting
- Use gentle methods on delicate wood
- Employ PPE and proper ventilation
- Collect and dispose of waste per regulations
Repairing Rot, Dents, and Pitting on Shutters
Before you repaint, fix any rot, dents, and pitting so your shutters look solid and the finish lasts.
Inspect edges and louvers, probe soft spots, and remove decayed wood. For small rot, cut back to sound wood and treat with a wood hardener; then apply an epoxy filler shaped to match profiles.
Use automotive body filler for deeper dents, and a fine-grit block to refine contours.
For pitting, fill shallow holes with exterior-grade filler and smooth flush.
These shutter maintenance repair techniques prevent moisture intrusion and guarantee paint bonds to stable surfaces, extending shutter life and appearance.
Sanding and Deglossing for Better Adhesion
Although sanding and deglossing seem small, they’re essential steps to guarantee your paint adheres and lasts. You’ll use sanding techniques to dull glossy layers and smooth imperfections. Then apply deglossing methods to remove sheen without harsh abrasion. Good surface preparation boosts paint adhesion and reduces peeling.
After that, follow primer application guidelines, let it cure, then proceed with application tips for even coats. For finishing touches, sand lightly between coats and inspect edges. Maintain longevity with simple maintenance practices like periodic inspections and touch-ups.
- Sanding techniques: grit progression
- Deglossing methods: chemical or scuff
- Primer application: compatible primer
- Finishing touches: light sand between coats
Cleaning Shutters: Degreasers and Mild Washing
Start by removing loose dirt and cobwebs with a soft brush or hose, then tackle grease and grime with a gentle degreaser or a mild detergent solution. You’ll rinse thoroughly, work in sections, and let shutters dry fully before painting. Use light pressure to avoid damaging finishes; repeat degreasing for stubborn oil. These cleaning techniques are essential in shutter maintenance to guarantee paint adhesion and a uniform finish.
| Before | After |
|---|---|
| Dusty | Clean |
| Greasy | Rinsed |
Follow manufacturer directions on cleaners and wear gloves for safety.
Recommended Tools: Brushes, Rollers, Sprayers
You’ll want three main tools on hand—brushes for detail, rollers for flat surfaces, and a sprayer for fast, even coverage—so you can match the tool to the shutter material and the finish you want.
Choose quality handles and protective gear. A paint sprayer speeds large jobs, while rollers cut time on louvers. Reserve small brushes for edges and hardware.
- Small angled brush for trim and corners
- Mini roller for slats and panels
- Paint sprayer for smooth, consistent coats
- Sanding block and tack cloth for prep
Consider brush types and sprayer tips compatible with your chosen paint.
Brush Types and Bristle Choices for Exterior Paint
Choosing the right brush for exterior shutters makes a big difference in finish and durability: synthetic bristles work best for water-based (latex) paints, natural bristles suit oil-based enamels, and blended brushes give you versatility for mixed jobs.
Consider brush types for edges, panels, and trim; bristle choices affect stroke smoothness and paint application. Use coverage techniques like long, even strokes and feathering to avoid lap marks.
Follow handling tips to maintain control and reduce drips. After painting, cleaning brushes promptly preserves paint finishes and meets maintenance intervals.
Plan project planning around color matching and brush selection.
Using a Paint Sprayer: Tips for Even Coverage
If brushes give you control on edges and panels, a paint sprayer can speed the job and deliver a very smooth, even finish on shutter surfaces—when used correctly.
You’ll prep by cleaning and masking, choose a sprayer and tip sized for exterior latex or acrylic, and test spray to dial pressure. Use consistent strokes, overlap passes by 50%, and keep the gun perpendicular to avoid runs.
These paint sprayer techniques help with achieving uniformity across louvers and rails.
- Clean and mask thoroughly
- Adjust tip and pressure on scrap
- Maintain steady, overlapping strokes
- Thin paint per manufacturer guidance
Should You Remove Shutters or Paint Them Installed?
You can paint shutters while they’re installed to save time and avoid ladder work, and with proper taping and a steady hand you’ll still get good results.
Removing shutters gives you better access for thorough prep, even coverage on edges, and a cleaner finish.
Consider the shutter size, your comfort with ladders, and how perfect you want the final look when choosing which approach to take.
Paint On Installed Shutters
Decide whether to paint shutters on or off the house by weighing convenience against coverage: painting them installed saves time and avoids hassle, but removing them gives you cleaner edges, better access to all sides, and a more durable finish.
If you choose to paint on installed shutters, prepare surfaces well, mask perimeters, and use quick, even paint application to avoid drips. Consider shutter color choices that complement siding and trim.
Work in mild weather, use a quality brush or small roller, and apply thin coats for durability.
- Mask edges and hardware
- Sand lightly and clean
- Use thin, even coats
- Inspect for missed spots
Remove For Better Access
Removing shutters gives you full access and makes it easier to achieve clean edges, consistent coverage, and a longer-lasting finish.
You’ll work on a flat surface, sand and prime thoroughly, and avoid drips or missed spots that happen on mounted pieces.
Take photos or mark hardware so reinstallation matches original placement.
Removing lets you test paint on different shutter styles and try trending hues without affecting siding.
If weight or ladder work worries you, recruit help or hire pros.
Reinstall with new stainless fasteners for durability.
Hanging, Masking, and Taping Tips When Installed
Once your shutters are hung, take time to mask and tape carefully so paint lines stay sharp and hardware stays clean. You’ll use hanging techniques that keep shutters stable while you work, and follow masking methods and taping strategies to protect hinges, bolts, and siding.
Focus on clean edges and easy peel-off tape to avoid damage. Keep a rag and solvent handy for drips, and check alignment before painting.
- Use painter’s tape along hardware seams
- Cover surrounding siding with drop cloths
- Support shutters during touch-ups with temporary blocks
- Label and protect exposed fasteners during installation tips
How Many Coats Do Shutters Need and Why
Most shutters do best with two thin coats of paint because a single heavy coat can drip, hide detail, and take longer to dry. The first coat primes and seals, while the second builds even coverage and durability.
You’ll apply two thin coats to control paint thickness, avoid runs, and preserve molding detail. That approach improves adhesion and weather resistance, which extends shutter lifespan versus one sloppy application.
If you spot thin or bare areas after two coats, add a focused third coat only where needed. Keep coats even and light so you don’t sacrifice finish or longevity.
Drying Times and Recoat Windows for Common Paints
When you’re choosing paint for exterior shutters, drying time and the recoat window matter as much as durability because they determine how quickly you can finish the job and how well each layer bonds.
Latex typically dries to the touch in 1–2 hours with a recoat window of 4–6 hours, while oil-based paints need 6–8 hours to dry and often require 24 hours before recoating.
You’ll plan around drying conditions—temperature, humidity, and ventilation—to hit proper recoat timing. Cooler or humid days slow cure, so extend intervals.
Follow manufacturer recommendations and test a small panel before proceeding.
- Monitor temperature and humidity
- Note manufacturer recoat timing
- Allow extra time in poor drying conditions
- Test a small panel first
Avoiding Drips, Runs, and Lap Marks on Shutters
A few simple techniques will keep paint from dripping, running, or leaving lap marks on your shutters: Use thin, even coats, work top-to-bottom, and keep a wet edge to apply drip prevention techniques and run control methods. Use a quality angled brush or foam applicator for lap mark solutions. Wait recommended recoat windows and sand lightly between coats. Follow these application tips and monitor humidity and temperature.
| Step | Tool | Result |
|---|---|---|
| 1 | Angled brush | Smooth edge |
| 2 | Thin coat | No drips |
| 3 | Wet edge | Fewer laps |
| 4 | Light sanding | Better bond |
Troubleshooting Peeling, Blistering, and Flaking Paint
If your shutter paint starts peeling, blistering, or flaking, don’t assume it’s just cosmetic — it’s a sign of adhesion or moisture problems that you can diagnose and fix.
Inspect for trapped moisture, failed primer, or incompatible coatings; these paint adhesion issues often show where water collects or where previous paint wasn’t removed.
Consider environmental factors like sun, humidity, and temperature swings that stress finishes.
Repair by stripping loose paint, sanding to sound surfaces, drying thoroughly, priming with a compatible sealer, and repainting with exterior-grade paint.
Monitor and maintain to prevent recurrence.
- Identify moisture sources
- Check substrate adhesion
- Address environmental factors
- Use correct primer and timing
How to Match New Paint to Existing Shutter Color
Wondering how to blend fresh paint with your existing shutters so the repair disappears? Start by inspecting color fading and take a clean shutter photo in natural light.
Bring paint swatches and color samples to compare hue selection; test small areas to confirm color matching before committing.
Use color theory to judge undertones and avoid unintended color contrast with siding. Match paint finish to existing sheen for visual harmony and consistent aesthetic appeal.
If exact match fails, layer thin glazes or tint primers to adjust hue. Record formulas so future touch-ups keep shutters seamless and durable.
Accent and Contrasting Color Ideas for Curb Appeal
When you pick accent or contrasting colors for shutters, think about creating a focal point that complements your home’s architecture and landscape. Bold contrasts can make shutters pop, while subtle accents can unify the facade.
You’ll use accent colors and contrasting hues to boost curb appeal, respect neighborhood trends, and reflect seasonal themes. Consider shutter styles and color psychology to match mood and era, and practice color matching with trim and doors.
Choose finishes that suit material and exposure. Experiment with small samples before committing.
- Deep navy on white trim
- Soft sage with wood tones
- Charcoal against brick
- Coral for cottage homes
Color Durability Strategies: Pigments and UV Topcoats
To keep your shutter color looking fresh, choose pigments rated for fade resistance so they hold up under sun exposure.
You’ll also want a UV-protective topcoat to block harmful rays and slow color breakdown.
Combining durable pigments with a quality UV topcoat gives the best long-term results.
Pigment Fade Resistance
Although shutters face constant sun and weather, you can greatly slow color loss by choosing fade-resistant pigments and pairing them with UV-blocking topcoats.
You’ll want to know which pigment types resist fading best and how color retention varies by formulation. Inorganic pigments like iron oxides and titanium dioxide hold up well, while some organic pigments offer vivid hues but weaker resistance.
Check pigment lightfastness ratings and manufacturer data. Proper surface prep and application thickness also improve longevity.
Consider testing small areas to compare real-world performance before committing to a full repaint.
- Inorganic vs organic pigments
- Lightfastness ratings
- Application thickness
- Field testing
UV Protective Topcoats
Think of UV-blocking topcoats as a sunscreen for your shutters: they absorb or deflect harmful ultraviolet rays that would otherwise break down pigments and binders. You’ll get clear uv protection benefits—slower fading and extended gloss—if you choose a quality topcoat and follow proper topcoat application steps. Apply thin, even coats, allow full cure, and recoat as recommended. Maintenance washes remove contaminants that accelerate degradation. Below is a quick comparison to guide choices.
| Type | Longevity | Notes |
|---|---|---|
| Acrylic | 5–8 yrs | Good balance |
| Polyurethane | 8–12 yrs | Durable, slight ambering |
| Fluoropolymer | 12+ yrs | Best uv protection benefits |
Cost Comparison: Budget vs Premium Paint Options
When you compare budget and premium exterior paints, the upfront price is just the start — you’ll also want to factor in coverage, durability, and how often you’ll need to repaint.
You’ll weigh budget options against premium options by considering paint longevity, maintenance costs, surface compatibility, finish types, and color options. Think about how environmental factors affect wear so you choose wisely.
- Budget options: lower upfront cost, shorter paint longevity
- Premium options: higher cost, longer intervals between repaints
- Surface compatibility: primers and prep may alter total cost
- Finish types and color options influence touch-up frequency
Eco-Friendly and Low-VOC Paint Options for Shutters
You’ll want to evaluate low‑VOC paint choices that cut harmful emissions without sacrificing coverage.
Water‑based eco finishes are a great option for shutters because they dry quickly, clean up with soap and water, and resist yellowing.
Look for durable natural pigments to keep color vibrant longer while keeping your project healthier for you and the environment.
Low‑VOC Paint Choices
Because shutters face sun, rain, and frequent handling, choosing low‑VOC paint helps protect your family and the environment without sacrificing durability or color.
You’ll find eco friendly options that reduce fumes and lower environmental impact while still offering good adhesion and UV resistance.
Pick paints labeled low‑VOC or zero‑VOC from reputable brands, check for durability ratings, and test a small panel.
Expect slightly longer drying times than high‑VOC formulas but easier cleanup and safer indoor air.
Consider primer compatibility and maintenance instructions to extend finish life.
- Look for certified low‑VOC labels
- Prioritize durability ratings
- Test color and adhesion
- Follow maintenance guidance
Water‑Based Eco Finishes
If you want an eco-friendly finish that still stands up to sun and rain, water‑based paints are a smart choice for exterior shutters. You’ll get faster drying, easier cleanup, and lower VOCs without sacrificing durability.
Choose formulations labeled for exterior use and look for eco friendly options certified by reputable programs. Apply in thin, even coats with proper priming to prevent peeling and mildew.
These finishes support sustainable practices by reducing harmful emissions and minimizing solvent runoff. For best results, test a small section, follow manufacturer temperature and humidity guidelines, and maintain shutters with gentle cleaning.
Durable Natural Pigments
Natural pigments offer a tough, low‑VOC option for exterior shutters that still gives you rich, lasting color.
You’ll find eco friendly options made from earth and plant-based minerals that resist fading and withstand weather. They bond well to properly prepped wood and metal, need fewer coats, and release minimal odor during application.
Choose formulations labeled durable exterior or UV-resistant, and always test a small panel first.
Maintenance is simple: clean and touch up as needed to keep color vivid.
- Earth-based iron oxides for strong, lasting hues
- Plant-derived pigments for subtle tones
- Mineral whites for crisp contrasts
- Low-VOC binders for durability
Longevity Expectations for Common Shutter Paints
When you choose a paint for exterior shutters, expect durability to vary widely by formula and conditions. Vinyl-safe acrylics and high-quality acrylic-latex blends typically last 8–15 years, while oil-based enamels can hold up 6–10 years but may yellow or crack sooner in harsh climates.
You’ll notice color fading and reduced color retention faster under intense sun, salt, or moisture. Paint bonding depends on surface texture and proper paint application; smooth, clean substrates bond best.
Weather resistance and environmental factors drive weathering effects and overall paint lifespan. Estimate maintenance frequency based on exposure and expected degradation.
Maintenance Tips to Keep Shutters Looking Fresh
Because shutters face sun, rain, and dirt every day, a simple routine will keep them looking fresh and extend paint life. You should perform regular shutter cleaning with mild detergent and a soft brush, inspect for chips, and touch up quickly to prevent color fading.
Clean hinges and hardware, tighten fasteners, and remove mildew with a vinegar solution. Avoid harsh scrubbing that strips finish.
- Wash gently every few months
- Touch up chips with matching exterior paint
- Lubricate moving parts and tighten screws
- Remove mildew and stains promptly
Consistent care preserves appearance and delays repainting.
Seasonal Care: Winterizing and Summer Upkeep
As winter approaches, you’ll want to seal any chips, tighten hardware, and apply a protective coat to keep moisture and freezing temps from damaging the paint.
In summer, focus on UV-resistant finishes and regular cleaning to prevent fading and heat warping.
A seasonal checklist will help you switch from cold-weather prep to heat protection quickly and efficiently.
Prep For Cold Months
If you want your exterior shutters to survive cold months without cracking, peeling, or warping, take a few targeted prep steps now so they’re ready for winter’s freeze-thaw cycles.
You’ll inspect paint, caulk gaps, and add shutter insulation where air leaks occur. Prioritize winter maintenance tasks now so moisture and cold won’t undermine finishes or substrate.
Clean off dirt, sand rough spots, and touch up with exterior-grade paint and primer compatible with your shutter material. Store removable shutters indoors if possible.
Follow a simple checklist:
- Check and recaulk seams
- Clean and sand surfaces
- Apply insulation strips to gaps
- Touch up with quality exterior paint
Protect Against Heat
Heat can be harder on exterior shutters than cold, so you’ll want to take a few targeted steps to shield them from sun, UV, and high temperatures.
Choose paints and finishes with good heat reflection to reduce surface temperatures; lighter colors and reflective coatings keep material stable.
Apply high-quality exterior paint that offers UV inhibitors and flexible binders to prevent cracking and chalking.
Add weatherstripping or breathable sealants to improve thermal insulation without trapping moisture.
Inspect and touch up finishes each spring, clean surfaces to remove grit that boosts heat stress, and replace failing hardware to maintain proper ventilation and longevity.
When to Repaint vs Replace Shutters
When deciding whether to repaint or replace your exterior shutters, look first at their condition and how long repairs will hold up. Small chips, peeling paint, or faded color usually justify a fresh coat, while warping, rot, extensive cracking, or broken louvers mean replacement is smarter.
If shutters show only chips or fading, repaint; but warping, rot, or broken louvers call for replacement
You’ll weigh repainting strategies against long-term savings from shutter replacement: touch-ups work for cosmetic wear, but structural failure needs new units. Consider material, local weather, and cost.
- Cosmetic damage: repaint and seal
- Minor repairs: hinge, louver fixes plus paint
- Significant rot: replace
- Recurring problems: opt for replacement
Quick Pre-Paint Checklist and Patch Test Method
Before you raise a brush, run a quick pre-paint checklist and a small patch test so you know the shutters are ready and the color and finish will hold up.
Inspect for loose hardware, rot, peeling paint, and mildew; sand glossy spots and clean with a mild detergent. Note substrate type—wood, PVC, or metal—because pre paint considerations affect primer choice.
Choose a discreet area for testing methods: apply primer and your topcoat, then let it cure 48–72 hours.
Check adhesion, color in sunlight, and water resistance. If issues appear, adjust prep, primer, or paint before tackling all shutters.
Frequently Asked Questions
Can I Paint Shutters While They’Re Wet From Rain or Dew?
No, you shouldn’t paint shutters while they’re wet from rain or dew; you’ll ruin finish adherence. For proper shutter maintenance, wait for dry weather conditions, clean and dry surfaces, then prime and paint for durable results.
How Does Paint Smell Affect Indoor Air When Painting Shutters on Ladders?
Paint fumes act like a sly fog creeping indoors; you’ll smell them, breathe them, and they can irritate you. Wear a respirator, ventilate well, and maintain ladder safety so you don’t inhale while balancing aloft.
Are Magnetic or Snap-On Faux-Shutter Panels Paintable?
Yes — you can paint magnetic or snap-on faux-shutter panels if their shutter materials accept paint; you’ll prep surfaces, sand lightly, use primer suited to plastic or PVC, and guarantee paint adhesion for durable, even coverage.
Can I Use Reflective or Heat-Reducing Coatings on Black Shutters?
Absolutely — you can, though you’ll feel very superior applying science to aesthetics. You’ll find reflective coatings and heat reducing options formulated for dark finishes; they’ll cut heat gain while keeping your black shutters looking sleek and dramatic.
How to Paint Shutters With Intricate Cutouts or Decorative Louvers?
You’ll mask and disassemble shutters, use cutout techniques—brush tiny areas and a foam brush for crevices—sand and repair, then prime; for louver preparation, clean, tape edges, and apply thin, even coats for smooth, durable finish.
Conclusion
You’ve got the tools to choose and care for exterior shutter paint like a pro, so pick a durable acrylic-latex formula that matches your shutter material and climate. Stay vigilant about adhesion and finish, and treat maintenance like insurance: a little attention now saves big headaches later. Follow the pre-paint checklist, run a small patch test, and paint when temperatures are mild—your shutters will thank you by boosting curb appeal and lasting longer.