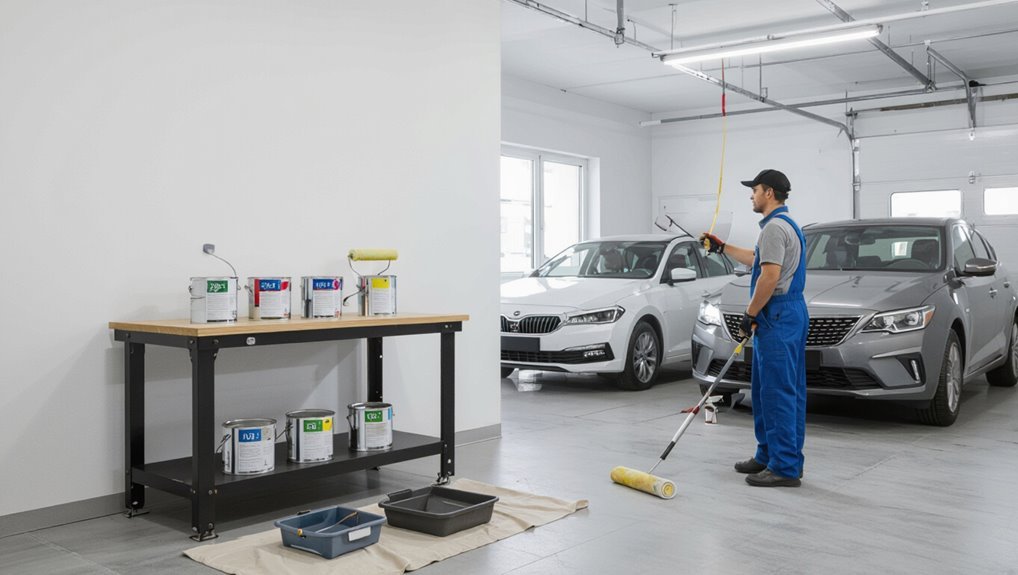
What Paint to Use for Garage Walls? Guide
Use a durable acrylic latex paint in a satin or semi-gloss finish for garage walls; it handles moisture, temperature swings, and scrubbing better than flat paints. Patch and sand surfaces, prime porous areas, and keep a wet edge while you roll two thin coats with the appropriate nap for your wall texture. Swap to semi-gloss enamel for trim and doors for extra durability. Follow label drying times and ventilate — keep going to learn prep, application tips, and maintenance.
Quick Answer: Best Paint for Garage Walls?

For most garages, choose a durable, washable acrylic latex paint with a semi-gloss or satin finish—it stands up to moisture, scrubbing, and temperature swings better than flat paints and cleans easily.
You’ll want reputable paint brands that list exterior-grade acrylic formulations and mildew resistance.
Prep thoroughly: patch, sand, and prime porey surfaces.
Use short-nap rollers for smooth drywall and thicker naps for textured walls.
Maintain a wet edge, work in sections, and apply two thin coats rather than one heavy coat.
For trim or doors, switch to a semi-gloss enamel.
Follow label-recommended drying times and proper ventilation.
Why Choice of Paint Matters for Garages
Now that you know which paints work best, it helps to understand why your selection matters: the right paint protects surfaces, affects durability, and influences how usable and safe the space will be.
You’ll pick paint that balances appearance and function—garage aesthetics matter, but so does paint longevity. Consider how moisture, stains, and impact will wear the finish and how easy it’ll be to clean.
Think about ventilation and slip resistance for floors. Key reasons to choose carefully:
- Prevents moisture damage and mold
- Resists stains and scuffs
- Simplifies cleaning and maintenance
- Enhances light reflection
- Extends overall lifespan
Latex vs. Oil-Based Paints: Quick Comparison
When you pick between latex and oil-based paint, think about durability and how the finish will stand up to wear in your garage.
Also consider cleanup and VOCs, since latex wipes up with water and has lower fumes, while oil-based needs solvents and often emits more VOCs.
We’ll compare those trade-offs so you can choose what fits your use and ventilation.
Durability And Wear
Although both latex and oil-based paints can protect garage walls, they differ in how they handle traffic, stains, and long-term wear. You’ll pick based on color selection and surface texture: latex resists cracking and flexes with drywall, oil-based films toughen against scuffs and repeated contact.
Consider these trade-offs:
- Latex resists fading and holds pigments well.
- Oil-based cures harder, repels oily stains.
- Latex rebounds from impacts better on textured surfaces.
- Oil-based may chip less on metal fixtures.
- Both benefit from proper priming and multiple coats.
You’ll choose latex for flexibility or oil-based for maximum abrasion resistance.
Cleanup And VOCs
Because cleanup and VOCs affect both your health and maintenance time, choose the paint that fits your priorities: latex cleans with soap and water, dries fast, and generally emits fewer VOCs, making it better for paint safety and easier maintenance.
Oil-based paints need mineral spirits for cleanup, take longer to cure, and often release higher VOCs, so you’ll need good ventilation and protective gear.
Check local VOC regulations before buying; some areas restrict high-VOC formulas.
If you’re sensitive or want simpler cleanup, pick low-VOC latex. If durability matters more, weigh cleanup effort against VOC compliance carefully.
When to Choose Latex Paint for a Garage
If your garage has dry, finished interior walls, you’ll often find latex paint is the easiest and most practical choice.
It handles typical household humidity in a mild climate and dries quickly for faster project completion.
Choose latex when you want low odor, easy cleanup, and reliable durability without heavy-duty chemical resistance.
Dry, Finished Interior Walls
When your garage has clean, dry, finished drywall or plaster, latex paint is usually the best choice because it dries fast, resists yellowing, and cleans up with just soap and water.
You’ll want to check drywall texture and prep for ideal paint adhesion: lightly sand glossy spots, patch imperfections, and prime if stained. Choose a washable latex with the sheen you prefer (eggshell to semi-gloss) for easier maintenance.
- Inspect for dust and loose compound
- Sand high spots and feather edges
- Apply stain-blocking primer where needed
- Use quality rollers for even coverage
- Allow proper dry time between coats
Mild Climate Durability
After you’ve prepped and painted dry, finished walls, consider how your local climate affects paint choice. In mild climates, choose latex for garages: it breathes, resists mildew, and offers easy cleanup. You’ll get good paint longevity with less need for specialty formulations. If humidity and temperature swings are minor, latex handles expansion and contraction well. Still, pick a quality latex with mildew inhibitors and proper primer. Use this quick checklist:
| Condition | Recommendation |
|---|---|
| Stable temperatures | Latex paint |
| Low humidity | Standard latex |
| Occasional dampness | Latex with mildew inhibitor |
| Desire for longevity | High-quality latex and primer |
When to Choose Oil-Based Paint for a Garage
Although water-based paints dominate garages today, you’ll choose oil-based paint when you need exceptional durability, solvent resistance, and a hard, glossy finish that stands up to heavy use and chemicals.
You’ll prefer oil based advantages for tool benches, high-traffic walls, or areas exposed to fuel and solvents. Prepare surfaces thoroughly; ventilation and proper brushes matter.
Consider these application techniques and conditions before committing:
- Heavy wear zones needing a tough, scrubbable surface
- Exposure to oil, grease, or chemical spills
- Smooth, glossy finish requirements for easy cleaning
- Longer recoat and cure times acceptable
- You can control sheen and hardness with primers and additives
Are Enamel Paints Right for Your Garage?
Curious whether enamel paint suits your garage? You’ll like enamel paint benefits: durability, easy cleanup, and a hard finish that resists scuffs. Enamel works well on trim, doors, and cabinets, and you can pick oil- or water-based formulas from common garage paint types.
| Feature | When to Use |
|---|---|
| Durability | High-traffic areas |
| Finish | Cabinets, doors |
| Cleanup | Water-based for easier cleanup |
| Touch-ups | Oil-based for longevity |
You’ll weigh appearance against maintenance. If you want a tough, long-lasting surface and don’t mind ventilation during application, enamel’s a solid choice.
Why Moisture Resistance Matters in Garage Paint
If you picked enamel for its toughness, remember that garages face more than scuffs—moisture can ruin paint and underlying surfaces over time.
You need coatings that resist humidity, condensation, and occasional water intrusion so moisture impact is minimized and paint longevity improves.
Consider these practical benefits:
Consider these practical benefits: moisture protection that prevents peeling, mold, deterioration, rust, and lowers repainting needs.
- Prevents peeling and blistering in damp corners
- Reduces mold and mildew growth on walls
- Protects drywall and joint compound from deterioration
- Keeps metal fixtures from rusting through protective barriers
- Lowers maintenance frequency and repainting costs
Choose formulations labeled for moisture resistance and you’ll preserve both appearance and structure.
Flat vs. Satin vs. Semi-Gloss: Finish Comparison
When choosing a finish for your garage walls, think about how each sheen handles durability, concealment, and cleaning: flat hides imperfections best but scuffs easily. Satin offers a balance of washability and subtle sheen, and semi-gloss stands up to scrubbing and moisture but highlights flaws.
You’ll pick flat if you prioritize hiding texture and want a matte paint aesthetics, though you’ll trade durability. Satin suits most garages—it’s forgiving, easy to clean, and improves finish selection flexibility.
Choose semi-gloss only where heavy cleaning or moisture resistance is essential, accepting that it reveals surface flaws more readily.
Pick Finish by Garage Function (Workshop, Storage, Showroom)
Think about how you use the space—if you run a workshop you’ll want a durable, washable finish that stands up to grime and scrubbing.
For storage areas, a mid-sheen offers easy maintenance without being overly reflective, while a showroom calls for a glossier, more reflective finish to boost aesthetics and light.
Match finish level to function so your garage looks good and performs well.
Durable, Washable Finishes
Pick a finish that matches how you actually use the garage: a high-gloss or semi-gloss latex for a workshop that needs scrubbable walls, a satin or eggshell for a storage-focused space where marks are occasional, and a low-luster, washable enamel or epoxy for a showroom-like area that needs both durability and a clean, finished look.
Choose durable finishes that resist stains and abrasions, and guarantee washable surfaces for easy maintenance.
Consider these options and benefits:
- High-gloss latex: maximum scrubbability
- Semi-gloss: balanced durability and sheen
- Satin/eggshell: hides imperfections
- Enamel: hard, impact-resistant
- Epoxy: seamless, long-lasting protection
Aesthetic, Reflective Options
If you want your garage to feel brighter and more finished, choose a finish that suits how you use the space: glossy or semi-gloss paints bounce light and resist stains for a busy workshop. Satin or eggshell softens surfaces and hides flaws in a storage area, and low-luster enamel or epoxy gives a showroom-ready, reflective sheen that still stands up to traffic.
You’ll pick aesthetic finishes that match function: glossy for task lighting, satin for blended storage zones, and epoxy for display spaces. Reflective surfaces increase perceived space and cleanliness, but consider maintenance, color choice, and slip-resistant floor coatings.
Choosing Paint for Drywall Garage Walls
Anyone prepping drywall in your garage should choose a paint that balances durability, moisture resistance, and ease of cleanup.
When prepping garage drywall, choose paint that balances durability, moisture resistance, and easy cleanup.
You’ll want to match finish and formulation to drywall types and consider tested paint brands for garages. Pick semi-gloss or satin for washability; use mildew-resistant formulas if humidity’s an issue.
Consider low-VOC options if you work in the space often. Match primer to drywall type and paint for adhesion.
- Choose finish for cleanability
- Prioritize moisture and mildew resistance
- Compare warranties among paint brands
- Pick low-VOC if ventilation’s limited
- Confirm compatibility with drywall types
Prep for Drywall: Repairs, Sanding, and Priming
Now that you’ve chosen a paint and finish, get the drywall surface ready so that the paint performs and lasts.
Start with a drywall assessment: look for nail pops, cracks, dents, and moisture stains. Use repair techniques like filling gaps with joint compound, embedding tape, and sanding once dry.
Follow proper sanding methods—start with medium grit, finish with fine grit, and vacuum dust between steps. Clean the wall, then apply priming essentials: stain-blocking primer for spots, full-seal primer for new drywall.
Proper wall preparation guarantees adhesion, hides imperfections, and gives a uniform finish for your garage walls.
Choosing Paint for Painted Concrete Block Walls
When you’re working with painted concrete block walls, start by scrubbing, patching mortar joints, and sealing any efflorescence so the surface will accept new paint.
Choose a high-build masonry or acrylic latex paint for breathability and durability, or an elastomeric coating if cracks and moisture are recurring problems.
Also use a masonry primer on bare or chalky areas to guarantee adhesion and even coverage.
Surface Preparation Needs
Because painted concrete block can hide cracks, efflorescence, and flaking paint, you should inspect and prep it thoroughly before choosing a new coating.
Start by identifying surface types (smooth mortar joints vs. porous block faces) so you can plan patching and primer needs. Use appropriate cleaning techniques to remove dirt, grease, and salt deposits.
- Scrub with stiff brush and mild detergent
- Rinse and let fully dry, 48+ hours if humid
- Treat efflorescence with a masonry cleaner
- Fill cracks and blow out mortar joints
- Sand loose paint and feather edges
Proper prep guarantees adhesion and longevity.
Best Paint Types
With the surface cleaned, repaired, and fully dry, pick a paint formulated for masonry so it bonds to the varied texture of concrete block and resists moisture.
Choose acrylic latex masonry paint for durability, breathability, and easy cleanup; it handles freeze-thaw cycles and lets trapped moisture escape.
For higher durability in busy garages, consider epoxy or elastomeric coatings—epoxy resists stains and abrasion, elastomeric bridges hairline cracks and boosts waterproofing.
Match sheen to use: flat hides imperfections, semi-gloss cleans easier.
Test samples on your wall to check paint color against lighting and reveal how surface texture affects appearance before committing.
Choosing Paint for Poured Concrete Walls
If your garage walls are poured concrete, pick a paint system that tackles moisture, adhesion, and durability from the start. You’ll need a breathable masonry primer followed by a high-quality acrylic or epoxy topcoat formulated for concrete.
You’ll also weigh surface texture and surface treatment to guarantee paint adhesion and a reliable moisture barrier. Consider wall insulation and temperature regulation impacts on paint longevity when choosing finish options and color selection.
- Use breathable masonry primer for poured concrete
- Match finish options to texture and traffic
- Prioritize epoxy for high durability
- Account for insulation and temperature shifts
- Test adhesion on a small patch
Prep for Concrete Walls: Cleaning and Etching
Before you paint poured concrete, you’ll need to clean the surface thoroughly—sweep, scrub with a degreaser, and rinse to remove dust, oil, and efflorescence.
If stains or a slick surface remain, you’ll use an acid etch to open the pores and improve paint adhesion, following product instructions and safety precautions.
After rinsing and neutralizing the etch, let the wall dry completely before priming or painting.
Surface Cleaning Steps
Start by removing dust, grease, and loose particles with a stiff broom or shop vacuum so the etching solution can work directly on the concrete.
For effective surface preparation, you’ll choose appropriate cleaning solutions and follow a simple sequence to guarantee paint adhesion. Clean methodically, rinse thoroughly, and let the slab dry.
- Sweep or vacuum corners and edges
- Apply degreaser to oil spots, scrub with a stiff brush
- Rinse with a pressure washer or hose and high-flow nozzle
- Spot-treat stubborn stains and re-scrub
- Allow 24 hours drying in warm, ventilated conditions
These steps prepare concrete for the next etching stage.
Acid Etching Process
When you’ve removed dirt and grease, etching the concrete opens its pores so paint will stick; you’ll follow safe acid etching techniques to guarantee reliable surface preparation.
Put on gloves, goggles, and a respirator, then dampen the floor. Mix muriatic acid per label directions or use a commercial etcher, apply evenly with a pump sprayer or brush, and agitate stubborn spots with a stiff broom.
Neutralize with a baking soda solution, rinse thoroughly, and allow full drying. Inspect for chalking or residue; repeat light etch if necessary.
Proper etching creates consistent adhesion for garage wall paint.
Best Paint for Plywood and OSB Garage Walls
Plywood and OSB have different textures and porosities, so pick a paint system that bonds well and resists moisture: use an exterior-grade or high-quality interior acrylic latex primer designed for wood panels, followed by a durable acrylic or enamel topcoat with mildew resistance and good adhesion to rough surfaces.
You’ll favor plywood advantages like smoother grain and better hold for nails, while acknowledging osb disadvantages such as edge swelling and uneven absorption. Choose mid-sheen for washability. Check for compatible primers and topcoats.
Favor plywood for smoother grain and nail-holding; note OSB’s edge swelling and uneven absorption—use mid-sheen for washability.
- Use acrylic latex for flexibility
- Consider oil-based enamel for durability
- Select mildew-resistant formulas
- Match primer to substrate
- Choose washable finish
Prep for Wood Walls: Sealing and Priming
Before you paint, check the plywood or OSB for rot, loose fasteners, and surface contamination so you know what needs repair.
Sand rough spots, tighten screws, and replace any damaged boards to create a stable substrate.
Then apply a quality primer-sealer to lock in tannins and provide an even base for topcoat adhesion.
Assess Wood Condition
A quick inspection of your wood walls will tell you whether you need minor touch-ups or a full restoration before sealing and priming; look for rot, loose boards, raised grain, knots, and old finishes that could interfere with adhesion.
You’ll perform a moisture assessment first, then decide on wood treatment and repairs.
Check these things:
- Surface softness or crumbling indicating rot
- Nail pops, loose or warped boards
- Raised or splintered grain needing sanding
- Old paint or varnish that won’t bond
- Signs of mold or staining from leaks
Address issues now so sealing and priming work effectively.
Apply Primer Sealer
Start by wiping the wood clean and letting it fully dry. Then choose a high-quality primer-sealer formulated for exterior or interior wood depending on your garage environment.
You’ll apply a bonding primer that blocks tannin bleed and evens porosity, which are key primer benefits for durable topcoat adhesion.
Select sealer types based on moisture exposure: water-based for low humidity, oil-based or shellac for stubborn stains and high-moisture areas.
Use a brush for corners and a roller for flats, keeping coats thin and even.
Sand lightly between coats, follow manufacturer dry times, and inspect coverage before painting.
Best Paint for Metal Garage Walls
If your garage has metal walls, pick a paint that bonds to metal, resists rust, and stands up to moisture and temperature swings.
You’ll want coatings formulated for metal substrates that accommodate metal wall textures and offer appropriate paint finish types. Choose oil-based enamel, acrylic latex with metal adhesion, or specialty rust-inhibiting formulas.
Consider UV resistance and flexibility to prevent cracking. Apply with a brush, roller, or sprayer suited to corrugated surfaces. Benefits include durability and easier cleaning.
Choose UV-resistant, flexible coatings and apply with tools suited to corrugated metal for durable, crack‑resistant, easy‑to‑clean walls.
- Oil-based enamel for toughness
- Acrylic latex for easier cleanup
- Rust-inhibiting specialty paints
- High-build coatings for texture
- UV-resistant finishes
Prep for Metal: Rust Treatment and Primer
Because metal rusts quickly where moisture collects, you’ll need to remove corrosion and lock in protection before painting.
Start by scrubbing loose rust with a wire brush or abrasive pad, then wipe surfaces clean and dry.
Apply a rust converter to stubborn spots to neutralize remaining corrosion.
For lasting results, follow rust prevention methods like sealing seams and improving ventilation to limit future moisture.
When ready, use proper primer application techniques: thin even coats, maintain recommended flash times, and sand lightly between coats for adhesion.
Let the primer cure fully before topcoating to guarantee a durable finish.
Which Primer to Use on Garage Walls and Why?
When choosing a primer for your garage walls, pick one that matches the surface and the conditions—use a high-adhesion, stain-blocking primer for drywall or plaster, a bonding primer for glossy surfaces, and an oil-based or rust-inhibiting primer for bare metal.
You’ll want primer types that improve adhesion, seal porous substrates, and control stains. Primer benefits include better topcoat coverage and longer-lasting finishes.
Consider these choices:
- High-adhesion latex for interior drywall
- Bonding primer for previously painted or slick surfaces
- Oil-based primer for stubborn stains
- Rust-inhibiting primer for exposed metal
- Shellac primer for extreme stain blocking
Match primer to surface and conditions.
Pick a Stain-Blocking Primer for Garage Walls
Now that you’ve matched primer types to surfaces, focus on stain-blocking primers to stop tannins, smoke, grease, and watermarks from bleeding through your topcoat.
Choose a solvent- or oil-based stain-blocker for heavy discoloration; water-based primers work for light stains and faster cleanup.
For heavy stains, use solvent- or oil-based blockers; water-based primers suffice for light stains and easier cleanup.
Check labels for stain resistance ratings and adhesion to drywall, concrete, or wood.
Apply according to manufacturer instructions—temperature, drying time, and recommended tackiness matter.
Spot-test stubborn stains and seal with a dedicated blocker before priming the entire wall.
Picking the right product upfront saves time and prevents frustrating bleed-through that ruins your final paint finish.
How Many Coats of Primer and Paint You Need?
If your garage walls are in good shape and you’ve used a quality stain-blocking primer, one coat of primer and one to two coats of paint will usually do the job.
Rougher surfaces, heavy stains, or a dramatic color change often require an extra primer coat or a third topcoat.
You’ll plan primer application and paint layering based on wall texture and coverage.
Check the primer’s hide and the paint’s coverage rating.
Apply thin, even coats and allow full drying between layers.
Consider these factors:
- Surface texture
- Previous stains or repairs
- Color change severity
- Primer quality
- Desired durability
How to Calculate Paint Quantity for a Garage
Start by measuring the walls and ceiling you’ll paint so you can convert surface area into gallons. Calculate total wall area, subtract windows/doors, then divide by paint coverage (check can). Use a paint calculator or do it manually: total square feet ÷ coverage per gallon = gallons needed. Account for primer and two coats if required; round up and add 10% for touch-ups. Keep a note of ceiling separately if painted. Use the table below to visualize key steps.
| Item | Action |
|---|---|
| Measure | Get wall area and ceiling |
| Subtract | Deduct openings |
| Calculate | Divide by coverage, round up |
Tools and Rollers That Work Best for Garage Walls
Choosing the right tools makes the job faster and gives a cleaner finish, so pick rollers, brushes, and accessories matched to your wall material and paint type.
You’ll want sturdy roller frames and specific roller types: 3/8″ for smooth drywall, 1/2″–3/4″ for textured block, and foam for enamel finishes.
Use extension poles for ceilings and respirators in enclosed garages. Quality trays and painter’s tape reduce mistakes, and a sanding block smooths joints before paint application.
- 3/8″ nap for smooth walls
- 1/2″–3/4″ nap for textured surfaces
- Foam roller for glossy paints
- Extension pole
- Quality tray and tape
Brush and Sprayer Tips for Garage Paint
When tackling trim or tight corners, use a high-quality angled brush and load it sparingly so you can control the stroke without drips.
For sprayers, test nozzle size, pressure, and thinning on a scrap board to get even coverage and minimal overspray.
Work steadily and overlap passes slightly so brush marks and spray lines blend smoothly.
Brush Technique Tips
Although a roller covers large areas faster, you’ll rely on brushes and a sprayer for tight corners, trim, and smooth, even edges—so get comfortable with both tools and a few key techniques before you begin.
Use proper brush techniques: pick brush types suited to your paint, hold brushes at correct angles, and apply even strokes with proper pressure to avoid lap marks.
Focus on corner techniques and paint layering for consistent coverage. Keep touch up tips handy.
Maintain brush cleaning and brush maintenance routines after each session to extend tool life and guarantee crisp, professional results.
- Choose right brush types
- Control correct angles
- Use even strokes
- Practice proper pressure
- Follow brush cleaning
Sprayer Setup Advice
Because a sprayer can cut your painting time and give a smoother finish than a roller, you’ll want to set it up carefully: pick the right tip size for your paint, thin or strain as recommended, adjust pressure for even atomization, and test spray on cardboard before you touch the walls.
You’ll choose sprayer nozzle selection based on paint viscosity and desired fan width; latex usually needs a larger tip than thinner enamels. Keep lines clean, use strainers, and follow sprayer maintenance tips after each job to prevent clogs.
Practice steady passes, overlap 30–50%, and move at consistent speed for even coverage.
Step-by-Step Garage Wall Painting Workflow
If you want a durable, professional-looking finish, follow a clear, step-by-step workflow that takes you from prep through cleanup without skipping key tasks.
You’ll plan for garage wall aesthetics and consider paint color psychology to match light and function. Prepare surfaces, mask, and prime where needed.
Use the right roller or sprayer, apply even coats, and watch edges for drips. Finish with appropriate trim work and ventilation.
- Clear, dust-free surface prep
- Proper priming for adhesion
- Smooth, consistent application technique
- Edge and corner cutting before rolling
- Thorough cleanup and tool care
Drying vs. Curing: What to Expect After Painting
When paint feels dry to the touch, don’t assume it’s ready for heavy use—drying and curing are separate processes: drying means solvents or water have evaporated, while curing means the paint’s resins have fully chemically bonded to reach their full hardness and durability.
You’ll notice surfaces feel dry within hours, but true curing often takes days to weeks depending on product. During that period avoid scrubbing, hanging heavy items, or parking vehicles against fresh walls.
Following manufacturer curing times guarantees ideal paint durability and resistance to stains, chipping, and abrasion.
Be patient—proper curing preserves your garage finish for years.
How Temperature and Humidity Affect Garage Paint
Although garage paint can look fine right after you apply it, temperature and humidity play a big role in how it sets and performs, so you’ll want to control both during and after painting.
Although garage paint may look fine initially, temperature and humidity crucially affect how it sets and performs.
You’ll notice temperature impact and humidity effects in drying time, finish, and paint adhesion. High moisture levels can cause blistering or poor bond; too cold slows curing.
Manage your environment and pick products rated for your climate.
- Paint dries slower in high humidity
- Low temps delay chemical cure
- Rapid swings cause cracking
- Excess moisture reduces paint adhesion
- Ventilation mitigates humidity effects
Painting Latex Over Oil-Based Paint: The Safe Method
Because oil-based paint forms a hard, fuel-resistant layer, you’ll need to prep the surface before applying latex to guarantee proper adhesion and a durable finish.
Start by cleaning grease and dirt, then sand glossy areas to dull the sheen.
Test paint compatibility with a small spot: apply latex primer, then latex paint after it dries.
Use a high-adhesion bonding primer formulated for oil-to-latex shifts—this step solves most adhesion problems.
Prime evenly, allow full cure per product instructions, then paint with quality latex.
Proper surface preparation and the right primer secure long-lasting results without blistering or peeling.
How to Remove Flaking or Peeling Paint Safely
Now that you’ve prepped and primed surfaces for a latex-over-oil job, address any flaking or peeling paint before you apply new coats.
You’ll improve paint adhesion and longevity by removing loose material safely. Follow these focused steps and safety precautions:
- Wear a respirator, goggles, and gloves; control dust and ventilate.
- Use a scraper or putty knife to remove loose paint; avoid gouging substrate.
- Sand feathered edges with medium grit to smooth transitions.
- Clean debris and dust; apply primer designed for your paint types.
- Patch gaps with exterior filler, sand, then re-prime.
Good surface preparation prevents future failure and guarantees a durable finish.
Dealing With Efflorescence on Concrete Walls
If you spot a chalky white powder on your concrete, that’s efflorescence and you should brush and rinse it off before painting.
Let the wall dry fully and treat any ongoing moisture issues to prevent recurrence.
When you’re ready to paint, pick a breathable masonry paint so moisture can escape through the surface rather than getting trapped behind the coating.
Identify And Remove Efflorescence
Spotting efflorescence on your garage’s concrete walls is usually straightforward: it shows up as a powdery white or gray deposit that flakes off when scratched.
You’ll want to identify efflorescence causes—typically moisture moving through concrete carrying salts—and act before painting. Inspect sources of damp, then use proper removal methods: dry brushing, vacuuming, mild acid wash, or commercial cleaners.
After cleaning, let walls dry fully. Don’t seal or paint until salt migration stops.
- Check for leaks or ground moisture
- Scrape and brush loose deposits
- Test a small acid wash area
- Rinse thoroughly and neutralize
- Allow several days to dry
Choose Breathable Masonry Paint
After you’ve removed efflorescence and confirmed the wall’s dry, pick a breathable masonry paint to let trapped salts and moisture escape while still protecting the surface.
You’ll want a product labeled vapor-permeable or breathable masonry paint to prevent future salt buildup and peeling.
Apply a masonry primer compatible with lime or cement substrates when recommended.
Breathable benefits include reduced blisters, longer adhesion, and improved moisture management through controlled vapor flow.
Clean, patch, and allow full cure between coats.
Test a small area first, and follow manufacturer instructions for temperature and humidity to guarantee durable, effective protection of your concrete walls.
Handling Mildew and Mold Before Painting
Before you paint, tackle any mildew or mold so your finish will stick and last; left untreated, these growths will reappear through new paint.
You’ll inspect, clean, and dry surfaces, using mold removal solutions like diluted bleach or commercial cleaners. Protect yourself with gloves and a mask, then rinse and let walls fully dry.
Apply mildew prevention techniques afterward.
- Scrub affected areas with a scrub brush
- Use a 1:3 bleach-to-water mix or labeled cleaner
- Rinse thoroughly and ventilate well
- Repair leaks and improve ventilation
- Consider a mold-resistant primer before painting
How to Test Existing Paint Before Recoating
With mildew cleaned and repairs made, you’ll want to confirm the old paint can accept a new coat so your work lasts.
Start with a visual surface analysis: look for crazing, peeling, chalky residue, or inconsistent gloss.
Perform simple paint adhesion tests—press sticky tape over a scored square, pull sharply, and inspect for lift.
Spot-sand suspicious areas to see if paint flakes or sands smoothly; flaky results mean poor adhesion and likely require removal or a bonding primer.
Clean tested zones, note results, and plan primer or strip work accordingly before recoating for a durable finish.
Moisture Testing: Methods and Acceptable Levels
If you’ve prepped surfaces and want your new paint to last, test the wall moisture before you coat: Use reliable testing equipment to check surface moisture and deeper readings.
Know acceptable moisture levels for your paint type, account for moisture sources, and control humidity before painting. Establish testing frequency during and after remediation.
Consider moisture barriers if levels stay high. Watch environmental factors like season and ventilation.
- Pin-type probe for depth checks
- Non-destructive moisture meter for surface moisture
- Calcium chloride test for vapor drive
- Relative humidity sensor for humidity control
- Infrared scan to find hidden dampness
Low-VOC and Zero-VOC Paint Options for Garages
After confirming moisture levels and fixing any damp spots, you’ll want paint that protects without off-gassing strong odors—low‑VOC and zero‑VOC formulas offer that balance. You’ll get good durability, easier indoor application, and improved paint safety for frequent garage use. Consider semi-gloss or satin for washability. Check labels for true VOC ratings and third-party certifications to reduce environmental impact.
| Option | Best for |
|---|---|
| Low‑VOC acrylic latex | Durability, moderate odor |
| Zero‑VOC latex | Minimal fumes, lighter stains |
| Low‑VOC enamel | Tough surfaces |
| Zero‑VOC primer | Seals and primes |
Budget-Friendly Paint Choices That Still Perform
While you don’t need premium-brand paint to get solid garage performance, choosing the right budget options matters—look for affordable acrylic latex or economy enamel formulas that balance durability, washability, and coverage.
You’ll want to weigh cost against expected lifespan and stain resistance in a quick performance comparison. Consider primers and higher-sheen finishes where spills happen.
- Choose acrylic latex for easy cleanup
- Use enamel where scuffs are frequent
- Pick paints labeled for trim or high-traffic
- Compare coverage (sq ft/gal) to reduce coats
- Buy sample quarts to test adhesion and color
These budget options can perform well with proper prep.
Premium Paint Options and When They’re Worth It
If you’re weighing premium paint for your garage, consider how much extra durability you’ll get for the cost and whether that offsets replacements down the road.
Specialty finishes—like epoxy, high-build acrylics, or stain-resistant formulations—can give you easier cleaning and better chip resistance.
We’ll look at when those long-term maintenance savings make the upgrade worth it.
Durability Versus Cost
Durability matters when you’re choosing garage paint because the space takes more abuse than most rooms, and spending more upfront can cut maintenance and repainting down the road.
You’ll weigh paint longevity against sticker shock; aim for cost efficiency by matching performance to your use.
- Higher-end acrylic latex resists scuffs and cleans easily
- Epoxy systems offer superior durability for heavy-use garages
- Satin or semi-gloss balances hide imperfections and withstand washing
- Consider warranty length as a proxy for long-term value
- Factor in prep and labor; cheaper paint can cost more over time
Choose based on traffic, tools, and budget.
Specialty Finishes Benefits
After weighing durability against cost, you might find that specialty finishes repay their premium by matching specific needs you have for the garage.
You’ll choose epoxy for superior chemical and abrasion resistance when you store solvents or work on cars. Moisture-resistant coatings help if humidity or occasional flooding’s a concern.
Stain-blocking and washable finishes suit high-traffic walls or hobby zones. Advanced paint technology now offers low-VOC, fast-cure options that cut downtime and improve indoor air.
Pick based on function: protection level, ease of cleaning, and exposure. Specialty finishes make sense when standard options can’t meet those demands.
Long-Term Maintenance Savings
When you factor in reduced touch-ups, fewer full repaints, and less time spent cleaning, premium garage paints often pay for themselves over the years; choosing higher-quality epoxy, urethane, or moisture-resistant coatings can cut maintenance frequency and labor costs, especially in garages used for projects, vehicle work, or storage of corrosive materials.
You’ll see long term benefits in durability, stain resistance, and easier cleaning. Smart paint selection upfront reduces downtime and replacement expense.
Consider these advantages when budgeting:
- Fewer touch-ups and spot repairs
- Extended intervals between full repaints
- Improved resistance to spills and chemicals
- Easier surface cleaning
- Higher resale appeal
Epoxy and Garage-Grade Coatings: Pros and Cons
If you want a hard, chemical-resistant finish that stands up to cars, oil, and heavy foot traffic, epoxy and other garage-grade coatings are the go-to options.
You’ll get epoxy benefits like superior chemical resistance and excellent surface adhesion, boosting coating longevity. Downsides include prep work, strict application techniques, and curing time.
Expect varied color options and texture finishes—from smooth high-gloss to slip-resistant flakes—but repairs can be tricky.
Consider maintenance requirements: regular sweeping, prompt spill cleanup, and periodic recoat in high-wear zones.
When to Use Waterproofing Paints vs. Sealers
If your garage walls get water from outside or have recurring damp spots, you’ll want a waterproofing paint that creates a continuous barrier.
If moisture is occasional or you just need to block efflorescence and minor seepage, a breathable sealer is usually enough.
We’ll compare their performance, longevity, and best-use scenarios so you can pick the right product.
When To Choose Waterproofing
Because garage walls face different moisture risks, you’ll want to match the product to the problem: choose waterproofing when you need active protection from water penetration and durable moisture barriers.
Waterproofing benefits include long-term resistance, paintable finishes, and protection for porous masonry. Pick waterproofing if you notice chronic dampness, efflorescence, water stains, basement-style seepage, or exterior exposure.
Consider application method, substrate preparation, and compatibility with topcoats. Avoid confusing this with simple sealing (covered later). Use waterproofing where water intrusion is recurring or structural; it stops migration rather than just repels surface moisture.
- Chronic damp walls
- Efflorescence present
- Visible water stains
- Exterior-facing walls
- Porous masonry
When To Choose Sealers
While waterproofing stops active water intrusion, sealers are your go-to when you just need to block surface moisture and stabilize porous surfaces rather than fix leaks. You’ll pick sealers for hairline dampness, chalky concrete, or to prep before paint. Consider sealer types—penetrating vs. film-forming—and follow recommended application techniques: clean, repair cracks, then apply even coats. Use penetrating sealers for breathability; choose film-forming when you want added surface protection. Maintain ventilation and cure times. Quick comparison:
| Situation | Best Sealer | Notes |
|---|---|---|
| Slight damp | Penetrating | Breathable |
| Chalky wall | Film-forming | Smooths surface |
| Pre-paint | Primer sealer | Improves adhesion |
| Leaks | Not suitable | Use waterproofing |
How to Paint Garage Ceilings and Trim
Anyone tackling garage ceilings and trim should work from top to bottom so dust and drips fall onto areas you’ll cover later; start by cleaning, repairing cracks or nail pops, and priming bare drywall or raw wood before you apply your finish coats.
Focus on ceiling preparation then move to trim painting. Use proper tools and techniques to get clean lines and even coverage.
- Choose a roller nap suited to texture
- Use angled brushes for trim edges
- Mask junctions with low-tack tape
- Sand and vacuum between coats
- Allow recommended dry times for adhesion
Work steadily; good prep saves touch-ups.
Using Semi-Gloss for Easy Cleaning and Durability
If you want walls that stand up to scuffs, grease, and frequent cleaning, choose a semi-gloss finish for your garage walls.
You’ll get semi-gloss benefits like enhanced durability, moisture resistance, and a smoother surface that hides fewer imperfections but resists stains.
Use simple cleaning techniques: wipe spills quickly with a mild detergent, rinse with clean water, and avoid abrasive scrubbers that dull shine.
For greasy spots, a degreasing cleaner works well before rinsing.
Apply two thin coats for even coverage and full protection.
This finish keeps maintenance low and prolongs wall life in active garages.
Paint Colors to Make Garages Feel Brighter
Semi-gloss gives you easy cleaning and durability, but the color you pick will do more to brighten a garage than sheen alone.
Use brightening techniques and color psychology to choose hues that reflect light and lift mood. You’ll want practical, crisp options that read clean and spacious.
Choose light, reflective hues that boost brightness and mood—practical, crisp colors that feel clean and spacious.
- Pale warm whites for a soft, reflective backdrop
- Cool whites with blue undertones for crispness
- Very light greys to hide scuffs yet stay luminous
- Soft pastels (mint, pale blue) for subtle color without darkening
- High-reflectance trim or ceiling paint to bounce light back
Test samples in different garage lighting before committing.
How Color Affects Perceived Temperature and Light
When you pick paint for your garage, remember that light colors boost brightness by reflecting more light.
Dark colors absorb heat and can make the space feel warmer, especially if the garage gets sun.
Midtones give you a balance, moderating both light levels and perceived temperature.
Light Colors Boost Brightness
1 simple change—painting your garage walls a light color—can make the space feel brighter and warmer without altering lighting or insulation.
You’ll notice improved light reflectivity and a psychological lift; color psychology shows pale tones expand space and reduce harsh shadows.
Choose durable, washable finishes to keep brightness long-term.
Consider these practical effects:
- White or soft beige maximizes reflected light for task areas.
- Pastel blues create a calm, airy feel without dark absorption.
- Light grays mask dirt while keeping luminosity.
- Satin finishes balance sheen and durability.
- High-reflectivity paints amplify existing fixtures’ output.
Dark Colors Absorb Heat
Because darker paints absorb more light, they also trap and radiate heat, so choosing a deep hue for your garage walls can make the space feel warmer and dimmer.
You’ll notice increased heat retention near dark surfaces, especially if your garage gets direct sun or poor ventilation.
Use color psychology to match mood and function: deep blues feel cozy, charcoal feels industrial, and browns add warmth.
Remember darker walls reduce perceived brightness, so plan lighting accordingly.
If you want warmth without sacrificing visibility, avoid pure black and consider strategic accents rather than painting the entire space in a dark tone.
Midtones Balance Light Temperature
If you liked the warmth of darker hues but worried about brightness and heat, midtones offer a practical middle ground. You’ll find midtone temperatures shift perceived warmth without hogging light, so your garage feels balanced and usable.
Choose mid shades to maintain contrast with trim while keeping glare down.
- Midtones reduce contrast strain.
- They reflect enough light for visibility.
- They temper heat absorption vs dark colors.
- They pair with cool or warm accents.
- They simplify maintenance and touch-ups.
Use midtones to manage light balance and comfort, giving a functional, inviting workspace without extremes.
Safety Gear and Ventilation for Garage Painting
When you prep and paint your garage, prioritize personal protective gear and proper ventilation to keep fumes, dust, and paint particles from harming your lungs and eyes.
Wear a respirator rated for organic vapors, safety goggles, nitrile gloves, and long sleeves. Use disposable coveralls if sanding or stripping.
Follow safety precautions: read labels, keep a fire extinguisher nearby, store solvents sealed, and avoid open flames.
For ventilation tips, open doors and windows, position box fans to push air out, and run an exhaust fan if available.
Take frequent breaks outdoors and stop if you feel dizzy or nauseous.
Common Painting Mistakes and How to Avoid Them
Good safety and ventilation habits set you up for a smoother paint job, but common mistakes can still ruin the finish or cost you time and money.
Good ventilation and safety make painting easier, yet common mistakes can still spoil the finish or waste time.
You’ll avoid common errors by prioritizing preparation tips: clean, repair, and choose finish choices that suit the garage.
Focus surface treatment and correct paint application technique, and follow safety precautions.
- Test color selection with samples in different light
- Don’t skip sanding or patching before priming
- Use recommended tool recommendations for even coverage
- Apply thin, consistent coats; let dry fully
- Plan project planning and follow maintenance advice schedules
How to Maintain and Clean Painted Garage Walls
To keep your garage walls looking fresh, you should dust and sweep regularly to prevent grime buildup.
When spills or stains happen, act fast with a mild detergent and a soft brush to avoid permanent marks.
With consistent care you’ll extend the life and appearance of your paint.
Regular Dusting And Sweeping
Start by brushing off dust and cobwebs at least once a month so dirt doesn’t build up and dull your paint’s finish.
For effective garage cleaning and wall maintenance, use a soft-bristle broom or microfiber duster, working top to bottom. Sweep floors to prevent grit from recontaminating walls. Pay attention to corners and vents where dust collects.
- Use an extendable duster for high areas
- Vacuum baseboards and trim with a brush attachment
- Replace or clean air filters to reduce airborne dust
- Don’t use harsh scrubbing that can damage paint
- Schedule quick touch-ups after heavy dust events
Removing Stains And Spills
When a spill happens, act quickly to limit staining and make cleanup easier: blot liquids with a clean cloth, scrape solids with a plastic putty knife, and avoid rubbing which can spread the mess or abrade the paint.
For stain removal, start with mild dish soap and warm water, using a soft sponge in gentle circular motions. For oil or grease, apply a degreasing cleaner designed for painted surfaces, rinse thoroughly, and dry. Test stronger cleaners on an inconspicuous spot first.
Practice spill prevention by keeping absorbent mats, sealing shelves, and addressing leaks promptly to protect your garage walls.
How Often to Repaint Garage Walls
Although garage walls don’t need repainting as often as living spaces, you’ll typically want to refresh them every 3–7 years depending on use, exposure, and the paint type.
You should monitor finish wear, staining, and mildew; heavy use or sunlight can shorten repainting frequency. Good wall prep extends life—clean, repair, and prime before painting.
Signs you need repainting: peeling, visible stains, chalking, mildew, or faded color.
Consider this checklist:
- Inspect annually for damage or discoloration
- Clean stains and grease promptly
- Repair cracks and holes before painting
- Use mold-resistant paint in damp garages
- Repaint high-traffic areas sooner
Cost Comparison: DIY vs. Professional Painting
Deciding whether to paint your garage yourself or hire a pro comes down to balancing time, skill, and money: DIY cuts labor costs but demands more of your time and may risk uneven results, while professionals charge more upfront but deliver speed, warranty, and often higher-quality finishes.
If you’re budget conscious, DIY offers cost effective solutions—only pay for paint, primers, and tools—but factor in your time and possible mistakes.
Professional pricing varies by region, prep needs, and paint quality; paying more can save time and provide a durable finish.
Compare quotes, watch for hidden fees, and choose what fits your budget.
Quick Checklist for a Successful Garage Paint Project
You’ve weighed DIY versus pro costs, now focus on practical steps that keep the project on budget and on schedule.
Start by choosing appropriate paint types for garage walls—durable latex or epoxy—for the environment and finish you want. Prep thoroughly: clean, repair, and prime.
Gather tools and test application techniques on a small area. Schedule work in blocks so coats dry properly.
- Clean and degrease surfaces
- Patch holes and sand smooth
- Prime with recommended product
- Choose paint types and test color
- Use correct application techniques and allow full curing
Stick to this checklist and you’ll finish efficiently.
Frequently Asked Questions
Can I Paint Garage Walls While Storing Hazardous Chemicals Inside?
You can, but you shouldn’t without precautions; you’ll ventilate thoroughly, remove or tightly seal chemical storage, use low-VOC paint, wear respirators and gloves, and keep ignition sources away to protect yourself and prevent hazardous fumes or reactions.
Will Garage Paint Interfere With Car Paint if Triggered by Exhaust Fumes?
Like a friend whose jacket stained at a BBQ, you shouldn’t worry much: exhaust fumes rarely damage car paint directly, but poor paint adhesion on garage walls can flake, creating particles that might abrade or dull vehicle finishes over time.
Can Painted Garage Walls Affect Home Insurance or Building Codes?
Yes — painted garage walls can affect insurance coverage and code compliance; you’ll want fire‑rated, VOC‑compliant finishes and proper ventilation, because using incorrect materials or hidden hazards could void claims or fail inspections, so check policies and codes.
How to Prepare Garage Walls for Vehicle Lifts or Heavy Wall Mounts?
You’ll reinforce studs, add blocking and use heavy‑duty anchors, ensuring wall insulation isn’t compressed; run mounts through studs, use backing plates to spread weight distribution, and consult lift specs and a pro for safe installation.
Are There Paint Options That Reduce Garage Noise/Echoing?
Yes — you can cut echo with textured paints and add soundproofing materials; imagine muffled footsteps as acoustic panels and thick elastomeric paint soak up noise. You’ll combine coatings and panels for best results.
Conclusion
Think of your garage as a hardworking ship—it needs the right coat to weather storms and stay seaworthy. Choose latex for flexibility and easy upkeep, or oil-based for stubborn stains and extra toughness. With proper prep, regular cleaning, and timely touch-ups, your walls will keep performing like a well-rigged hull. You’ll save time and money, and every repaint will feel like giving that reliable vessel a fresh, protective sail for the journeys ahead.