What Paint to Use for Projector Wall? Best Options
Use a neutral mid‑gray paint (about 18–40% reflectance) with a low‑sheen, high‑quality matte finish or a premixed projector screen coating to preserve contrast and color accuracy. Avoid bright whites or colored walls that shift color temperature or wash out blacks, and prefer velvet or flat finishes in dedicated theaters to cut glare and hotspotting. Match tint to your projector’s brightness and room lighting, and keep ambient light controlled—keep going to learn practical picks and setup tips.
What Searchers Mean by “Projector Wall Paint”?
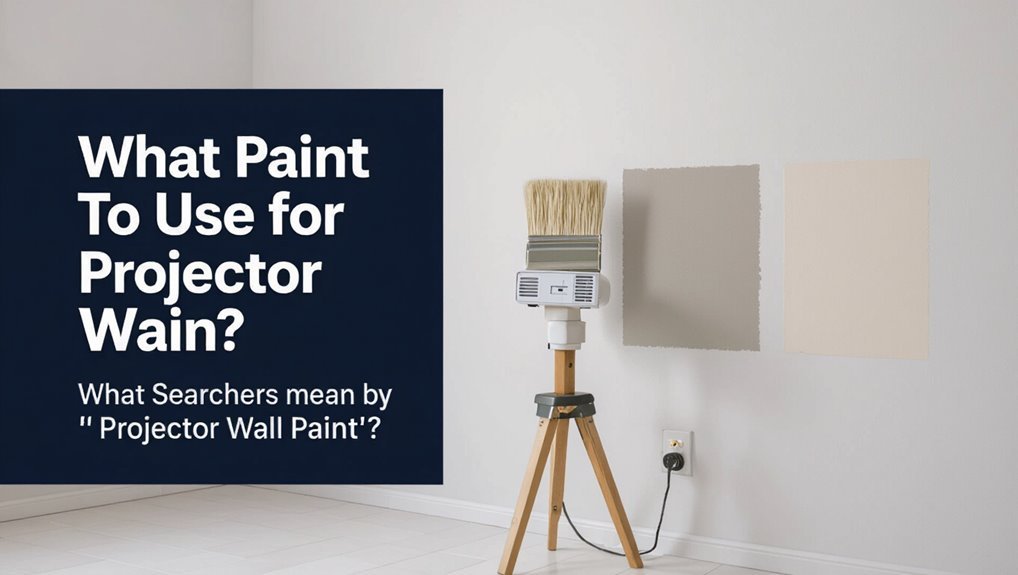
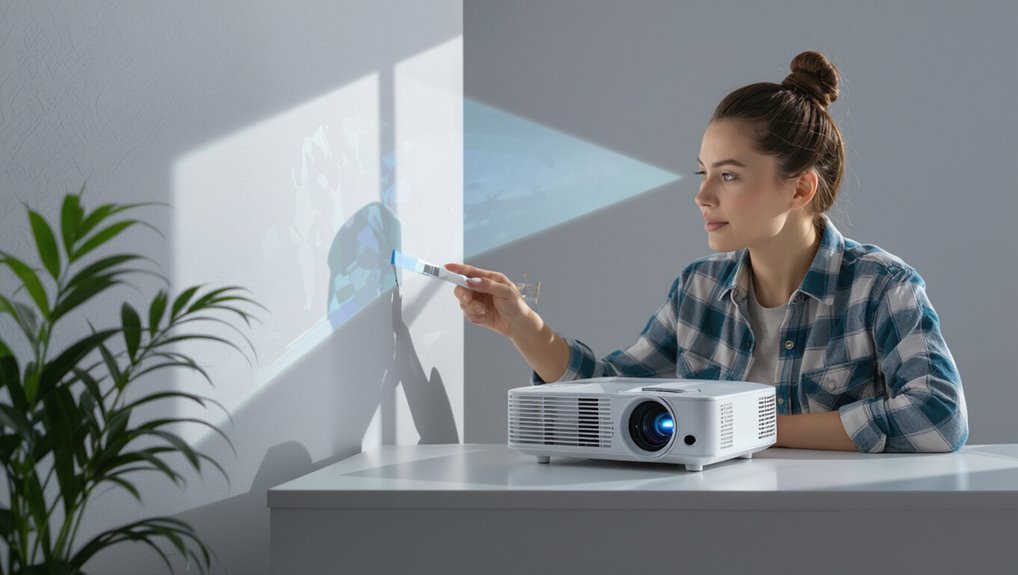
When people search for “projector wall paint,” they’re usually asking how to turn an ordinary wall into a reliable projection surface—meaning paint formulated or applied to improve brightness, color accuracy, contrast, and texture for projected images.
You want a projector wall that delivers vivid detail without hotspotting or muddied blacks. That means choosing appropriate sheen, tint, and application technique. You’ll consider ambient light, projector brightness, and viewing distance.
Color psychology matters because neutral grays preserve contrast while subtle warm or cool tints can affect perceived mood.
Pick paint that balances reflectivity and color fidelity for your room’s purpose.
Quick Answer: Best Projector Wall Paint Options
1 clear choice for most rooms is a neutral-gray, low-sheen paint specifically formulated for projection—either a premixed projector paint or a high-quality flat/matte interior paint tinted to a midpoint gray (18–40% reflectance) so you preserve contrast without hotspots.
You’ll also consider blackboard or velvet-finish specialty paints in dedicated home theaters where ambient light’s minimal.
For flexible setups, look at neutral-light gray screen coatings or two-tone systems that combine a darker surround with a mid-gray screen.
When choosing paint types, prioritize low sheen, uniform pigment, and durable matte binders so your projector wall stays consistent and easy to clean.
Why Wall Color Changes Projector Brightness
Your wall color directly affects how bright your projected image looks because it changes perceived brightness—lighter walls reflect more light, while darker or tinted walls absorb it.
It also shifts the color temperature of the image, making whites look warmer or cooler depending on the paint hue.
Finally, color interacts with contrast and ambient light: certain paints will preserve black levels better in a lit room, while others wash out detail.
Perceived Brightness Shift
Although projector luminance is fixed, the wall color you choose can make the image look noticeably brighter or dimmer because our eyes judge contrast against surrounding tones.
You’ll notice perceived brightness shifting as visual perception adapts: darker walls boost contrast, lighter walls soften highlights. Choose paint to match your goal—vivid cinema or gentle family viewing.
- Imagine deeper blacks that pull you into scenes.
- Picture washed-out whites that drain excitement.
- Feel relief with muted tones that reduce eye strain.
- Enjoy punchy colors that make details pop.
Control perceived brightness by balancing wall tone with projector output and room lighting.
Color Temperature Influence
Perceived brightness sets the stage, but color temperature explains why a wall’s hue shifts how you read whites and blacks on screen.
You’ll notice warm walls (yellowish) pull whites toward cream, while cool walls (bluish) make whites look crisper. Those color temperature effects alter perceived contrast and color accuracy, so pick a paint tone that complements your projector’s white point.
Neutral grays minimize bias and keep projector wall aesthetics understated, letting images stay true.
When you choose paint, match the wall’s tint to your source and projector calibration, and you’ll avoid unintended color casts that distract from the image.
Contrast And Ambient Light
Because ambient light and wall color interact directly with the projector’s output, they can make the same image look dimmer or punchier depending on surroundings.
You’ll notice ambient light effects wash out blacks on pale walls, while darker or neutral tones preserve shadow detail and deliver contrast enhancement.
Choose paint that controls reflection without adding color bias so your picture stays true.
Consider these emotional cues when deciding:
- Calm: soft neutral absorbs stray light, keeps scenes intimate
- Bold: deep gray boosts perceived contrast, feels cinematic
- Warm: subtle beige softens highlights, cozy atmosphere
- Clinical: bright white maximizes brightness but feels sterile
How Paint Sheen Affects Contrast and Glare
When you pick a paint sheen for your projector wall, remember that glossier finishes reflect more ambient light and can wash out blacks and fine detail, while flatter sheens absorb light and preserve contrast.
You’ll weigh sheen types—matte, eggshell, satin, semi-gloss—each balancing reflectivity and cleanability.
Matte gives best glare reduction and deepest perceived blacks but’s harder to clean; satin or eggshell handle occasional wiping with modest reflectivity.
Semi-gloss boosts durability but risks hotspotting under bright projectors or room lights.
Choose the lowest practical sheen that you can maintain; positioning lights and reducing stray illumination will further protect contrast and minimize glare.
High-Gain vs Low-Gain Paint : What It Means
Gain describes how much light a paint surface reflects back toward the viewer, and choosing high-gain or low-gain paint determines whether your projector image looks brighter or retains wider viewing angles.
You’ll weigh trade-offs: high-gain benefits include brighter perceived image and improved punch in dim rooms, while low gain drawbacks are reduced brightness but smoother off-axis color and contrast.
Pick based on seating and room lighting. Consider mood and viewing habits:
- Excitement when highlights pop with high gain
- Comfort from consistent color across the room
- Frustration if hotspotting appears unexpectedly
- Relief knowing you matched paint to space
Which Paint Works Best for HDR Content?
For HDR content you’ll want a paint that preserves high dynamic range so shadows stay deep while highlights pop.
Pick a finish that can handle peak brightness without blooming or hotspotting.
Also choose a formulation with neutral color reproduction so hues stay accurate across the range.
High Dynamic Range Preservation
HDR content relies on a wider brightness and color range than standard video, so you’ll want paint that preserves those expanded highlights and deep blacks without crushing contrast or shifting color.
You’ll choose low-GL paint with neutral tint to maintain high dynamic fidelity and avoid hue shifts. Matte or velvet sheens minimize glare, keeping shadow detail intact.
Consider projector-calibrated screen paints that balance color accuracy and reflectance so range impact stays truthful.
- Feel the scene’s depth restored.
- Experience richer, truer blacks.
- Watch highlights breathe, not blow out.
- Embrace vivid color without artificial warmth.
Peak Brightness Handling
When you’re dealing with HDR’s intense highlights, pick a paint that manages peak brightness without blooming or losing detail: choose a low-gain, matte formulation with controlled reflectance so specular highlights stay tight.
You want surface consistency that prevents hot spots while preserving peak brightness benefits for bright scenes. Neutral, slightly warm grays with measured reflectivity balance highlight retention and shadow depth.
For projector wall enhancements, avoid glossy or textured finishes that scatter light or exaggerate bloom.
Prep and smooth application matter as much as formula; even small imperfections can distort HDR highlights, so sand, prime, and apply evenly for best results.
Color Accuracy Maintenance
Although preserving peak brightness matters, maintaining true color reproduction takes priority if you want faithful HDR images; you’ll choose paints that won’t shift hues under varying color temperature or ambient light.
Matte, neutral-gray projection paints with high color neutrality preserve saturation and contrast without glare. You’ll test samples under evening and daylight conditions, checking skin tones and highlights.
Prefer paints labeled for color accuracy and low spectral bias. Balance room light with controlled fixtures to protect HDR highlights.
- You’ll feel relief when colors match the source
- You’ll trust neutral grays for fidelity
- You’ll dread unnatural skin tones less
- You’ll enjoy immersive, accurate HDR
Matte White Paint: Pros and Cons for Projectors
Matte white paint is the most common choice for projector walls because it gives you neutral color reproduction and wide viewing angles without distracting reflections.
You get matte finish advantages like minimal glare and consistent diffusion, so projector image quality stays true to the source. It’s inexpensive, widely available, and easy to touch up, which helps long-term maintenance.
Downsides: whites can show blemishes, highlight uneven surfaces, and wash out contrast in very bright rooms or with low-contrast projectors.
If you prioritize color fidelity and broad viewing, matte white works well; just prep the wall and control ambient light.
Light Gray Paint for Projector Walls: When to Pick Gray
If you liked matte white for its neutrality but worry about washed-out contrast in bright rooms, consider light gray as a practical middle ground. You’ll keep a clean look while gaining subtle depth that improves perceived contrast without heavy grading.
Light gray helps manage ambient light and reduces glare, letting colors feel firmer. It’s forgiving for imperfect projector alignment and easier to touch up than specialty screens.
Gray paint benefits include balanced tonality and versatile decor matching.
- Calm, refined viewing
- Less eye strain in bright scenes
- Flexible for changing room light
- Simple, budget-friendly upgrade
Dark Gray (Screen Gray) Paint: Boost Contrast Without Losing Brightness
When you want deeper perceived contrast without sacrificing highlight detail, dark gray (often called screen gray) is a smart choice for projector walls.
You’ll gain dark gray benefits like improved black levels and reduced washout while preserving bright highlights, useful in rooms with controllable lighting.
Choose a neutral, mid-to-deep gray with low reflectance; avoid blue or brown undertones that skew color.
Pick a neutral mid-to-deep gray with low reflectance; steer clear of blue or brown undertones.
For paint application, use a matte or low-sheen finish and apply two even coats with a roller for consistent texture.
Test a sample patch under projector light before committing to the full wall to confirm image quality.
Black or Very Dark Walls: Who Should Use Them
Stepping down from screen gray, black or very dark walls push contrast further by eliminating most reflected ambient light, so they’re worth considering if you want the deepest blacks and the most cinematic feel.
You’ll choose them if you prioritize projector image quality above room brightness and accept tradeoffs: reduced perceived brightness and a more cave-like room.
The dark wall benefits include striking contrast and immersive mood. Consider whether you use the room for daytime viewing or multi-purpose living.
- Awe: cinema-level depth that grabs you
- Focus: fewer distractions, eyes stay on-screen
- Mood: dramatic, intimate atmosphere
- Commitment: permanent aesthetic choice
Specialty Projector Paint vs Regular Interior Paint: Performance and Cost
You’ll weigh upfront cost against image quality when choosing specialty projector paint or standard interior paint.
Specialty formulas usually boost brightness and color accuracy but cost more and often need smoother, primed surfaces.
Regular paint can work if you’re on a budget, though you’ll spend more time prepping and sacrificing some contrast.
Cost Versus Performance
A handful of dollars per gallon can buy ordinary interior paint, while specialty projector paints often cost several times more.
So you’ll want to weigh the price against the actual improvement in image quality. You’ll run a cost benefit analysis, compare performance metrics like gain, color neutrality, and durability, and decide if incremental brightness justifies the premium.
Consider your room, projector strength, and viewing expectations. Emotional factors matter too — pride, frustration, satisfaction, or regret.
- Excitement at crisp contrast
- Frustration over wasted money
- Pride in a cinema feel
- Regret if results underwhelm
Surface Preparation Needs
1 important difference you’ll notice between specialty projector paint and regular interior paint is how much prep each requires before you ever open a can.
You’ll assess surface materials and repair imperfections so wall textures don’t scatter light. Specialty formulas demand smoother substrates and stricter installation techniques to control light reflectivity for maximum image clarity and color saturation.
Regular paints tolerate rougher walls and simpler prep but sacrifice contrast with some projector types.
Follow manufacturer guides: prime, sand, and level surfaces for specialty paint; use high-quality flat finishes for budget options.
Proper prep, not just paint, determines final performance.
Cost vs Performance: Is Specialty Paint Worth It?
While specialty projector paint can dramatically boost contrast and color accuracy, you should weigh that gain against its higher price and limited flexibility.
You’ll consider specialty paint benefits and run a clear cost analysis: is the uplift in brightness, black level, and color fidelity worth the premium versus high-quality matte or screen fabric?
Think about room lighting, viewing habits, and projector power. If you want cinematic perfection, specialty paint may satisfy; if you’re budget-conscious, alternatives often suffice.
Consider your room lighting, viewing habits, and projector power—specialty paint delivers cinematic perfection, but budget options often suffice.
- Excitement: imagine deeper blacks and punchy color.
- Hesitation: sticker shock for a single wall.
- Pride: owning a true home-theater finish.
- Relief: cheaper options still perform well.
Popular Projector Paint Brands Compared
Choosing between projector paint brands comes down to what you value most—contrast, color accuracy, ease of application, or budget—and knowing how each brand performs helps you pick the right fit. You’ll compare popular options by finish, gain, and price, and consider projector paint types plus application techniques for best results. Some brands favor high-gain for brighter rooms; others aim for neutral color fidelity. Test small swatches, follow recommended primers, and use proper rolling or spraying methods. Below is a quick comparison to help you decide.
| Brand | Strength | Best for |
|---|---|---|
| Brand A | High gain | Bright rooms |
| Brand B | Neutral color | Color fidelity |
| Brand C | Budget | DIY novices |
Paint Colors That Improve Shadow Detail and Blacks (Which Hues and Why)
When you want richer blacks and better shadow detail, choose deep, neutral grays that don’t shift toward warm or cool extremes.
You can also try very dark, slightly blue-tinged blacks to tame magenta casts and preserve contrast.
Test swatches under your projector’s light to see which hue keeps shadow texture without crushing highlights.
Deep, Neutral Grays
If you want the deepest blacks and the most nuanced shadow detail from your projector, pick a truly neutral, deep gray paint rather than a warmer or cooler shade; color casts in the wall hue will skew perceived contrast and crush subtle tones.
You’ll gain deep gray advantages: improved black depth, consistent shadow gradients, and reduced eye fatigue.
Consider neutral gray considerations like undertone-free pigments and matte finishes to avoid glare. Choose a mid-to-high darkness (but not absolute black) so detail remains visible.
- Calm, cinema-like immersion
- Precise, faithful blacks
- Fewer distracting reflections
- Balanced, natural shadows
Cool, Slightly Blue Blacks
Although neutral grays work well, a cool, slightly blue-black can subtly enhance perceived contrast and bring out shadow detail without introducing harsh color casts. You’ll notice cool undertones deepen blacks on screen, improving shadow separation and minimizing muddiness. Choose a blue-leaning black for richer color depth and balanced highlights; it keeps skin tones natural while sharpening dark scenes. Test swatches under your projector light to confirm effect. Quick reference:
| Paint Type | Effect | Recommended Use |
|---|---|---|
| Blue-Black | Enhanced contrast | Dedicated home theaters |
| Slate-Black | Neutral depth | Multipurpose rooms |
| Navy-Black | Warmth control | Rooms with warm lighting |
How Paint Affects Perceived Sharpness and Color Accuracy
Because your wall’s paint sets the baseline for every pixel, it directly shapes perceived sharpness and color accuracy, so choosing the right finish and tint matters as much as your projector’s specs.
Your wall’s paint defines every pixel—finish and tint shape perceived sharpness and color accuracy as much as specs
You want paint that preserves edge detail and neutral tones. Matte or low-sheen surfaces reduce glare and maintain contrast, boosting perceived sharpness. Slight color casts shift whites and harm color accuracy, so pick neutral grays or balanced whites.
Texture blurs fine detail; smooth application helps. Consider emotional impact too:
- Pride when images look crisp
- Calm from neutral, accurate colors
- Confidence in your setup
- Joy watching true-to-life scenes
Choosing Paint by Room Ambient Light Level
If your room gets a lot of light, you’ll want a high-gain paint to boost brightness and combat washout.
In dim rooms, a neutral gray finish preserves contrast and color fidelity.
For spaces where you can control lights, consider ambient-enhancing coatings that balance gain and color accuracy.
Bright Rooms: High-Gain Paint
When your room gets a lot of ambient light, choose a high-gain projector paint to boost brightness and preserve contrast; these specialized coatings reflect more light toward the seating area so images stay vivid even with windows or bright fixtures.
You’ll notice high gain benefits immediately: brighter whites and stronger color pop without cranking projector power. Pick a finish rated for viewing angle and avoid glossy textures that create hotspots. Install carefully for uniformity.
- Excitement as colors snap to life
- Relief when daylight no longer washes scenes out
- Confidence in consistent image brightness
- Pride in a polished, theater-like look
Dim Rooms: Neutral Gray
High-gain paints help in bright spaces, but in dim rooms you’ll get better contrast and more accurate colors with a neutral gray screen paint.
When you control ambient light, neutral gray benefits become obvious: blacks deepen, color saturation improves, and hotspots reduce.
Choose a mid-tone gray (18–30% reflectance) matched to your projector’s brightness and throw distance for ideal lighting balance.
Apply a smooth, matte finish to avoid sheen that can skew tones.
Prime properly and use consistent coats to maintain uniformity.
In dim environments, neutral gray gives a truer image than white, enhancing contrast without boosting perceived brightness.
Controlled Lighting: Ambient-Enhancing Coatings
1 key factor in picking ambient-enhancing coatings is the room’s actual light level: you’ll choose very different paint types for rooms you can fully darken versus spaces with steady daylight or multiple light sources.
You’ll balance ambient light, reflective surfaces, and color temperature to preserve image clarity. Choose coating types with controlled light diffusion and suitable paint texture; consider viewing angles and thorough wall preparation to avoid hot spots.
Emotional guidance:
- Feel confident with muted sheens that calm glare.
- Love the warmth when color temperature matches content.
- Relax knowing diffusion preserves contrast.
- Trust preparation to protect projection quality.
Budget Paint Options That Still Perform Well
You don’t need to splurge on specialty paints to get a good projector surface; several budget-friendly options deliver solid color uniformity, low sheen, and decent light reflectance for most living-room setups.
Choose matte or eggshell interior latex labeled as high-hide for affordable finishes that reduce hotspots. Test a small swatch to confirm contrast and color temperature with your projector.
Look for brands offering good paint durability and scrubbability—this keeps the surface easy to clean without altering reflectance.
Apply two thin, even coats and let them cure fully; a smooth roller finish prevents texture from degrading image clarity.
Premium Projector Paint: When It’s Worth the Cost
Consider premium projector paints when your setup demands the best color accuracy, contrast, and uniformity—these formulations use calibrated gray or high-reflectance pigments and precise sheens to minimize hotspots and preserve black levels under brighter ambient light.
Consider premium projector paints for superior color, contrast, and uniformity—engineered pigments and sheens that minimize hotspots and preserve blacks.
You’ll notice sharper detail, truer colors, and reduced blooming versus standard wall paint. Premium paint benefits include engineered reflectivity and surface smoothness that let your projector perform closer to its spec.
Use cost justification: weigh hours spent watching, room lighting, and gear quality. If you want cinematic results, it’s often worth the upgrade.
- excitement of vivid color
- pride in a polished setup
- relief from hot-spotting
- satisfaction in investment
Paint for Short-Throw and Ultra-Short-Throw Projectors
If you’re using a short-throw or ultra-short-throw projector, you’ll need paint that accounts for very close placement and steep projection angles.
Choose a surface with consistent reflectivity to avoid hotspots and color shifts at those angles.
Also favor paints formulated to handle high ambient light so your image stays contrasty in brighter rooms.
Placement And Throw Distance
When using short-throw or ultra-short-throw projectors, placement changes how paint choice affects image quality, so you’ll want paints that handle steep projection angles and bright hotspotting.
Consider throw distance and projector placement: ultra-short setups project at sharp angles, so choose a low-gloss, high-gain-tolerant paint that keeps contrast and avoids sheen.
You’ll also want uniform texture to prevent sparkle. Think about maintenance and touch-ups since these walls sit close to viewers.
- Excited by crisp, shadow-free images
- Relieved when hotspots vanish
- Confident in color fidelity
- Comfortable with durable finishes
High Ambient Light Handling
Short-throw and ultra-short-throw setups already demand paint that tames angle-dependent hotspots and sheen, but you’ll also need finishes that fight washout from room light.
You’ll choose low to medium paint reflectivity to avoid glare while preserving contrast; ultra-matte or specialty ambient light paints absorb stray illumination yet return projector color accurately.
Positioning still matters: pair paint with controlled fixtures and blackout options to minimize ambient light hitting the surface.
Test samples at the projector’s angle and distance—look for balanced blacks and vivid hues without sheen.
That practical testing guarantees your wall paint performs with short-throw projection in real rooms.
Paint for Outdoor Projector Walls and Screens
Because outdoor screens face weather, ambient light, and rough surfaces, you’ll want paint that’s durable, weather-resistant, and has the right reflectivity for nighttime viewing.
Choose exterior-grade projector paint or a satin acrylic with UV blockers to balance contrast and brightness while preserving outdoor durability and weather resistance.
Use exterior-grade projector paint or satin acrylic with UV blockers for balanced contrast, brightness, and durable outdoor protection.
Prep and seal surfaces to prevent moisture, and consider light-gray tones for better black levels. You’ll also want mildew-resistant finishes if you live in humid areas.
- Imagine cozy movie nights under stars
- Picture crisp, readable subtitles
- Feel confident against rain and sun
- Enjoy long-lasting, worry-free viewing
Using Textured Paint: Risks and How to Avoid Them
Textured paint can warp your image by creating tiny peaks that distort the projected picture and scatter light, lowering contrast and sharpness.
If you’re set on texture for aesthetic reasons, prep the wall carefully by sanding high spots, filling deep grooves, and using a flatter texture profile.
Also test a small, primed patch with your projector to confirm acceptable image quality before committing to the whole wall.
Texture Causes Image Distortion
If you apply paint with a noticeable texture, your projector image will suffer from uneven brightness, loss of fine detail, and visible hotspots.
You’ll notice texture impact immediately: bumps scatter light, reduce image clarity, and blur edges. To protect your viewing, avoid heavy knockdown or popcorn finishes and prefer smooth, low-sheen paints.
If you already have texture, sand and skim-coat before repainting. Don’t assume thicker paint hides flaws—it can worsen pooling and hotspots.
Feel the surface, test with a projector, and act before installation.
- Frustration when details vanish
- Anger at speckled highlights
- Sadness over wasted investment
- Relief after smoothing
Light Scattering Issues
When light hits an irregular paint surface, it scatters unpredictably, causing washed-out colors, reduced contrast, and visible hotspots that steal detail from your projected image.
You should avoid textured paints because uneven peaks create uncontrolled light diffusion, which lowers projector efficiency and makes blacks look gray.
If you already have texture, consider smoothing methods or apply a purpose-made projection coating that minimizes scattering without boosting gloss.
Test samples at projector brightness to judge results.
Keep finishes flat and uniform so the projected picture stays sharp, contrasty, and true to color—don’t let surface texture undermine your setup.
Surface Preparation Tips
Before you paint, inspect and decide whether the textured surface is worth keeping—most textures scatter light and will degrade image quality, so you’ll usually want to smooth them first.
You’ll evaluate Surface types and Wall finishes, then pick Paint brands and Application methods that suit a flat canvas.
Consider Color selection and Light conditions to avoid contrast loss from Texture effects.
Use proper Adhesion techniques and Repair strategies: sand, fill, prime.
Follow concise Maintenance tips to preserve the screen surface.
If you must keep texture, test small areas first to measure image degradation and emotional disappointment.
- Frustration at fuzziness
- Relief after smoothing
- Pride in clarity
- Confidence in choice
How to Measure Wall Reflectivity Before Painting
Want to know how reflective your wall really is before you paint? Start with simple reflectivity measurement: use a light source and a lux meter or smartphone app, measure incident light and reflected light at projector angle, then calculate reflectance percentage.
For quick paint testing, apply small swatches of candidate paints, let them dry, and repeat measurements under projector-like lighting. Record values and view projected images to judge contrast and color fidelity.
Aim for mid-range reflectance (about 70–85%) depending on ambient light. These steps let you choose paint confidently without guessing, ensuring ideal screen performance.
Preparing Drywall and Plaster for Projector Paint
Before you paint, clean and repair the drywall or plaster so dirt, holes, and loose material won’t show through the finish.
You’ll want to prime the surface to guarantee even paint absorption and consistent reflectivity.
Finish by sanding any rough spots and doing a final inspection to catch imperfections before coating.
Surface Cleaning And Repair
Once you’ve cleared the room, tackle drywall and plaster by removing dust, grease, and loose paint so the projector finish will adhere evenly; use a vacuum with a brush attachment, a damp microfiber cloth, and a mild detergent for stubborn grime.
For effective surface preparation, pick cleaning techniques and cleaning solutions that don’t soak the wall. Assess wall imperfections, sand rough spots, and use appropriate repair methods and repair tools to fill holes and cracks.
Restore surface texture to match surrounding areas, then perform routine wall maintenance. You’ll want the smoothest canvas possible before moving on.
- You’ll feel relief seeing flaws disappear.
- You’ll gain confidence in your repair skills.
- You’ll enjoy a calm, ready surface.
- You’ll anticipate crisp projected images.
Priming For Even Absorption
Since drywall and plaster absorb paint unevenly, prime the surface so your projector paint lays down uniformly and colors stay true.
Choose a high-quality, stain-blocking primer—shellac or acrylic—depending on moisture and previous finishes.
Apply one even coat with a roller suited to the surface texture to avoid pooling in low spots. Let full cure time pass before additional coats.
For darkscreen or high-gain finishes, use a tinted primer matching your color selection to reduce topcoat coats and improve opacity.
Primer also seals dust and minor repairs, giving you a consistent base for accurate image reproduction.
Sanding And Final Inspection
When you’ve let the primer cure, sand the surface gently with fine-grit paper to knock down high spots, feather seams, and remove any dust nibs so your projector paint lays flat and even.
You’ll use careful sanding techniques to avoid gouges; keep a light, even touch and change grits only as needed. Wipe with a tack cloth, then follow an inspection checklist to confirm smoothness, uniform texture, and no stray debris.
If flaws appear, spot-skim, sand again, and recheck. This final prep guarantees your projector image stays sharp and colors remain consistent.
- Relief: you’re almost ready
- Pride: craftsmanship shows
- Confidence: flawless projection
- Calm: room is set
Fixing Cracks, Bumps, and Imperfections for a Smooth Image
Although a fresh coat of projector paint can work wonders, you’ll only get a truly smooth image if you first fix cracks, bumps, and other surface flaws; addressing these issues prevents shadows, hotspots, and texture-induced distortion that degrade contrast and detail.
Start with crack repair using a flexible filler, then sand for surface smoothing until the wall feels uniform. Spot-prime repaired areas so your paint selection matches sheen and color.
Check under planned lighting considerations—projector and room lights—to reveal residual imperfections. Repeat filling and sanding as needed; a perfectly flat substrate guarantees the projector shows maximum sharpness and uniformity.
Primers That Improve Adhesion and Color Accuracy
Before you paint, pick a primer that bonds well to glossy or enamel finishes so the topcoat won’t peel.
You can ask for tintable primers to guarantee the projector image reflects the true hue you want.
A high-build primer also helps smooth surface imperfections for a sharper picture.
Bonding With Gloss/Enamel
If you’re planning to top your projector wall with a glossy or enamel finish, choose a primer that promotes strong adhesion and prevents sheen-related color shift.
You’ll want bonding agents that lock glossy layers to drywall or previously painted surfaces so the finish stays smooth and true. Use primers formulated for gloss finishes to minimize flashiness and preserve contrast.
Prep thoroughly: clean, sand, and spot-prime problematic areas. Consider a high-build bonding primer for challenging substrates.
- Relief knowing your finish won’t peel
- Confidence in sharp, stable images
- Pride in a mirror-like surface done right
- Joy in long-lasting, vibrant projection
Tinting For True Hue
Once you’ve locked in a glossy or enamel finish, consider how primer tinting can make the projected colors read truer on screen.
You’ll tint primers slightly toward the display’s neutral gray or warm bias to reduce color cast and boost saturation. Use controlled tinting techniques—small increments, test patches, consistent lighting—to match your projector’s profile.
Perform basic color calibration after priming: project color charts, tweak tint, and recoat if needed.
Tinting improves adhesion to glossy bases while aligning base hue with your calibration targets, so images retain accurate tones without needing heavy post-processing or frequent repainting.
Primer For Smooth Finish
1 essential step to a smooth, color-accurate projector wall is choosing a primer that bonds well and lays down a neutral, consistent base.
You want primer types that seal porous surfaces, hide stains, and prevent color shift so your projection stays true. Focus on surface prep, drying times, and even primer application to avoid texture or sheen variation.
The right primer reduces the number of paint coats and improves contrast. Pick a high-hide, low-VOC option for indoor use.
- Feel confident about uniform color
- Avoid frustration with blotches
- Enjoy crisper image contrast
- Save time and paint
How Many Coats Do You Need for a Projector Wall?
Curious how many coats you actually need for a projector wall? You’ll usually apply two coats for full coverage and ideal coating application; a third coat can boost paint durability and color depth for high-contrast rooms. Let the first coat dry fully, inspect for streaks or thin spots, then add another. Use multiple thin coats rather than one thick coat.
| Surface Type | Recommended Coats | Reason |
|---|---|---|
| Smooth drywall | 2 | Even coverage, minimal texture |
| Previously painted | 2–3 | Covers old color, improves durability |
| Dark or high-glare | 3 | Deepens color, reduces hotspots |
Rollers and Brushes That Avoid Texture and Streaks
When you want a smooth, streak-free projector wall, pick a high-density foam or short-nap microfiber roller and a high-quality synthetic brush—they lay down paint evenly without leaving texture.
Choose roller types that match your paint sheen and apply light, consistent pressure. Use brush techniques like cutting in with steady, shallow strokes and tip-off to blend edges.
Work wet-edge to wet-edge and keep a consistent pace so overlap disappears.
- Imagine an ultra-clear image, no distractions
- Feel the satisfaction of flawless application
- Avoid frustration from visible strokes
- Enjoy a professional-looking finish
Spray Application: Pros, Cons, and Tips
If you’re thinking about spraying your projector wall, know that spray guns give the most uniform coverage but demand careful surface prep to avoid visible flaws.
You’ll need to clean, sand, and prime thoroughly so the finish lays down evenly.
Also plan for overspray control with masks, drop cloths, and proper fan or ventilation placement to protect nearby surfaces.
Spray Coverage Uniformity
Spray application gives you the fastest way to lay down paint for a projector wall, but getting uniform coverage depends on technique, nozzle choice, and distance—hold the sprayer 6–12 inches from the surface, overlap passes by about 50%, and keep a steady, even speed to avoid stripes or buildup.
You’ll focus on spray technique and coverage consistency to achieve a smooth image-ready finish. Control movement, maintain even wet edges, and test spray pattern first.
Emotional cues help you stay patient and deliberate:
- Calm focus keeps strokes steady
- Pride in a flawless coat motivates care
- Relief comes with visible uniformity
- Confidence grows as imperfections vanish
Surface Preparation Steps
Although prepping the wall feels like extra work, you’ll get a far smoother, more durable projector surface if you follow a few clear steps: clean the wall thoroughly, repair dents and holes, sand glossy or textured areas to a uniform sheen, wipe away dust, and mask off trim and outlets.
For spray application, choose a compatible surface treatment—primer suited to your paint type reduces soak-in and improves adhesion. Test a small spray patch to confirm finish and coverage.
Keep humidity low and temperature stable while painting. After drying, inspect for runs or thin spots and touch up with light, even passes.
Overspray Control Techniques
Once your wall’s prepped and primed, controlling overspray becomes the next priority when using a sprayer—especially in rooms with trim, furnishings, or nearby walls you don’t want misted.
You’ll want clear overspray prevention: choose low-pressure settings, test spray patterns, and aim perpendicular to the surface. Use masking techniques—tape, plastic sheeting, and paper—to protect floors and adjacent walls.
Work from top to bottom and keep a consistent distance. If possible, remove small items. Ventilate and wear a respirator.
Emotional checklist:
- Relief: no accidental speckles on your trim
- Pride: clean, crisp edges
- Confidence: steady, even coat
- Calm: protected furnishings
Masking and Edging for a Clean Projector Surface
Proper masking and crisp edging keep your projector surface looking professional and prevent stray paint from altering contrast or color.
You’ll use masking techniques and edging tools to define the image area based on projector alignment, marking exact borders during wall preparation.
Apply painter’s tape straight, press edges for clean lines, and protect surrounding walls and ceilings before paint application.
Choose a roller that preserves surface smoothness and avoid texture near the image.
Coordinate color selection with light reflection properties to maintain contrast.
Remove tape while paint’s slightly tacky to prevent peeling, and inspect edges for touchups only where necessary.
Quick Painting Guide for Projector Walls (Step-by-Step)
Start by laying out your supplies—paint, primer (if needed), rollers, brushes, tape, drop cloths, and a level or straightedge—so you can work methodically and avoid interruptions during painting.
Clean and sand the wall, patch holes, then prime if surface or color needs it. Roll two thin coats for even projector brightness and avoid brush marks; maintain consistent paint texture.
Tape edges, cut in with a brush, then roll in overlapping strokes. Let each coat fully dry.
- Excited anticipation
- Satisfying precision
- Calm confidence
- Bright reveal
Inspect for flaws, touch up, and remove tape slowly.
Test Patches: How to Compare Paint Samples in Your Room
Put a few small test swatches of your top paint choices on the projector wall so you can see how each color performs.
Check those patches under your normal viewing lighting and with the room dimmed to mimic actual projection conditions.
Compare how the colors affect contrast and perceived brightness before you commit.
Small Test Swatches
When you’re ready to see how a projector paint behaves in real lighting, apply several small swatches directly on the wall where you’ll project. Testing in place shows how color, sheen, and contrast interact with your room’s light and furniture.
You’ll perform a focused test swatch comparison and color sample evaluation to pick the best option. Paint 4–6 inch patches of each candidate, label them, and let them cure. Live with them for a few days, observing at different times. Note perceived contrast, tint shifts, and hotspots.
- Excitement: seeing choices come alive
- Relief: narrowing options fast
- Confidence: trusting real results
- Satisfaction: choosing the right finish
Compare Under Lighting
Because light changes everything, compare your test patches under the same lighting conditions you’ll use for viewing: dim the room to movie level, then raise lights to typical daytime brightness and check again.
Place samples where the projector image will fall and project identical test patterns onto each. Note how ambient light washes contrast and how paint reflectivity alters perceived brightness and color.
Watch for hotspots, glare, and loss of shadow detail in brighter settings. Repeat with side lamps and window light to mimic real use.
Record results and photos so you can choose a paint that balances contrast, color accuracy, and usable brightness.
Calibrating Your Projector to Match the Painted Wall
Calibrating your projector to the painted wall guarantees colors, contrast, and brightness look as designed on that specific surface; start by setting the projector to its natural or cinema color mode.
Then adjust brightness and contrast so black bars look truly black and whites aren’t blown out.
Use calibration techniques and careful projector adjustments to match your wall’s tint and gain.
Run test patterns, tweak color temperature, and lock settings once happy.
Consider ambient light and seating angle.
- Feel the image come alive
- Delight in accurate skin tones
- Enjoy deeper blacks
- Relish consistent color fidelity
Measuring Contrast Ratio and Brightness After Painting
After you’ve painted and let the surface cure, measure the screen’s contrast ratio and brightness to confirm the paint delivered the expected improvement; grab a light meter and contrast test patterns to get objective numbers you can compare to your projector’s specs. Use contrast measurement techniques like black/white patch sequences and ambient-light control to isolate surface performance. For brightness evaluation methods, record lumens or cd/m² at center and edges, noting uniformity. Compare before/after readings and adjust room lighting or projector settings if needed.
| Metric | Measurement |
|---|---|
| Contrast | Ratio (e.g., 1000:1) |
| Brightness | cd/m² or lumens |
Common Color Casts and How to Correct Them
Once you’ve verified contrast and brightness, you’ll likely spot color shifts that weren’t obvious before—those are color casts, and they can tint whites and skew skin tones or movie colors.
You’ll correct them by identifying warm (orange), cool (blue), green, or magenta biases, then adjust projector settings or room lighting for neutral color balance.
Use test patterns and a gray card to target shifts, and consider minor paint tweaks if wall hue interferes.
Emotional cues help you act:
- Frustration fades when skin tones look right
- Relief arrives with restored whites
- Confidence grows as image clarity returns
- Joy comes back to movie nights
DIY Screen Alternatives If You Don’t Want to Paint the Wall
If you don’t want to paint your wall, you can still get a great picture by building or buying a DIY screen—options range from simple tensioned fabric frames to retractable canvases or blackout curtains mounted on a track.
You can choose DIY screen materials like PVC, wood, or aluminum for DIY projector frames, and pair them with projector screen fabrics or reflective screen options for brightness control.
Use screen tensioning systems for a flat image, and learn screen mounting techniques for stability.
Portable projector screens and ambient light blockers help you adapt rooms without permanent paint changes.
Combining Paint With Fixed or Retractable Screens
You can blend painted projector walls with fixed or retractable screens to get the best of both worlds: paint boosts ambient-room contrast and a mounted screen gives a perfectly flat, uniform surface for critical viewing.
You’ll plan screen integration so the screen covers the most-used viewing area while preserving painted margins for everyday contrast.
Check paint compatibility with screen material and avoid glossy finishes that change color. Use a neutral, low-gain paint around the screen to match tones.
Consider mounting height, retractable mechanism noise, and edge alignment to keep images seamless and immersive.
- Excited anticipation
- Satisfying precision
- Calm confidence
- Practical pride
Painting for Multi-Use Rooms and Renter-Friendly Options
If you use the room for more than movies, pick dual-purpose paints that balance projection gain with a neutral look for everyday use.
You can also choose temporary solutions like removable wallpaper, peel-and-stick projection sheets, or low-tack paints that won’t damage rental walls.
These renter-friendly options let you switch between living space and home theater without long-term changes.
Dual-Purpose Paint Choices
When a room has to serve as both a home theater and a living space, pick a paint that balances projection quality with everyday aesthetics and easy removal—think low-sheen, neutral-toned projector paint or a washable, renter-friendly option you can cover later with primer and a new color.
You’ll want dual purpose materials that respect aesthetic considerations while boosting contrast and minimizing glare. Choose mid-gray or warm beige bases, durable eggshell finishes, and easy-clean formulas. Consider how light and furnishings interact.
- Comforting evenings
- Crisp movie nights
- Stress-free updates
- Pride in your space
Temporary & Removable Options
Because renters and multi-use rooms demand flexibility, choose temporary and removable paint solutions that give great picture quality without committing to a permanent finish.
You’ll like temporary paint or peel-and-stick projector sheets as removable options for easy application and quick installation. They work on versatile surfaces—smooth drywall, plaster, or doors—offering wall protection and minimal prep.
For rental solutions, pick neutral tones or gray screens to improve contrast; they’re low commitment and ideal for color testing.
Budget choices include projector-specific coatings in sample sizes or magnetic/adhesive screens you can take with you when you move.
Safety and VOC Considerations for Projector Paints
Although projector paints focus on color and reflectivity, you should also weigh safety and VOC levels before you buy or apply them.
Check safety standards on labels, compare VOC emissions, and avoid products that raise health risks. You’ll want low-odor, low-VOC or zero-VOC choices, especially in small rooms.
Use ventilation, wear a mask, and keep kids and pets away during application and curing. Prefer eco friendly options when possible.
- You’ll feel better choosing certified low-VOC paint.
- Don’t ignore strong smells — they matter.
- Protect loved ones during application.
- Small steps prevent long-term harm.
Cost Breakdown: Materials and Labor for a Painted Screen
1 main cost to contemplate is the paint itself, but you’ll also pay for primer, rollers or sprayers, masking tape, and any surface prep materials like filler or sandpaper. You’ll weigh material choices against labor considerations: higher-grade paint and smooth surface prep reduce rework. Consider cost comparison between DIY and pro installation—labor rates vary by region and surface types. Painting techniques and paint finishes affect quantity and time. Keep budget constraints tight by planning tools and tests. Installation tips include measuring accurately and choosing right primer.
| Item | Typical Cost |
|---|---|
| Paint & primer | $30–$150 |
| Tools | $10–$80 |
| Prep materials | $5–$40 |
| Labor (pro) | $100–$400 |
Troubleshooting Washed-Out or Dim Images After Painting
If your projected image looks washed-out or dim after painting, start by checking the basics: paint color and finish, projector brightness and gain, ambient light, and surface texture.
You’ll want to methodically isolate causes so you can restore image quality quickly. Verify projection settings, confirm the paint isn’t too light or glossy, and make sure the wall is smooth.
Try bumping lumen output and reducing room light. If problems persist, test a different surface or temporary screen.
- Frustration when contrast disappears
- Relief when a simple setting fixes it
- Annoyance at glossy reflections
- Satisfaction after ideal brightness
Maintaining and Cleaning a Painted Projector Wall
Once you’ve confirmed paint, finish, and settings give you a good image, keep that performance by following a simple maintenance routine.
You’ll extend wall durability by avoiding abrasive cleaners and using soft microfiber cloths for dusting. For spills, blot immediately and apply gentle cleaning techniques—mild detergent diluted in water—testing a hidden spot first to preserve stain resistance and color fidelity.
Schedule regular upkeep: dust weekly, spot-clean monthly, and inspect for scuffs.
Apply a breathable surface protection like a matte clear coat only if compatible with your projector paint.
Proper paint maintenance keeps image quality consistent and the wall looking great.
Installer Tips From AV Pros and Home Theater Builders
When you hire an AV pro or a home theater builder, expect them to start by measuring sightlines, throw distance, and ambient light rather than guessing—those quick checks determine screen size, projector placement, and the right paint profile.
You’ll benefit from installer experiences and proven home theater techniques that cut rework and optimize contrast. They’ll advise paint sheen, color temperature, and placement tweaks, and you’ll see why precision matters.
- Relief when everything aligns
- Confidence from tested choices
- Excitement at the first clear image
- Satisfaction knowing pros minimized compromises
Follow their guidance for predictable, repeatable results.
Case Studies: Small-Room, Living-Room, and Theater Builds
Three compact case studies show how paint choices shift between a small multipurpose room, a bright living room, and a dedicated theater so you can pick the right approach for your space.
In a small multipurpose room you’ll prioritize small room considerations: neutral, slightly warm projector paint to preserve contrast while keeping the room feeling larger.
For a bright living room, balance living room aesthetics with a mid-gray or tinted finish to reduce washout without clashing with décor; seating placement and blackout curtains help.
In a dedicated theater you’ll choose darker, low-reflectance paint to aid theater acoustics and optimized projection techniques for peak image quality.
Buyer Checklist for Choosing Projector Wall Paint
Start by listing your room’s priorities—ambient light level, seating distance, and whether you need the wall to match décor or maximize contrast—so you can narrow choices quickly.
Use a checklist of buyer specifications: screen gain, color temperature, sheen, and durability.
Consider projector brightness versus paint reflectance and test samples on the wall.
Prioritize wall paint longevity for fewer touch-ups and consistent image quality.
Don’t forget surface prep and primer compatibility.
Emotions matter too—choose a finish that makes you proud every viewing.
- Excitement: seeing colors pop
- Relief: minimal maintenance
- Confidence: accurate tones
- Pride: polished setup
Resources for Color Matching and Calibration Tools
You’ll want a concise toolkit for color matching and calibration: a reliable colorimeter or spectrophotometer, calibration software (like CalMAN, HCFR, or DisplayCAL), manufacturer ICC profiles, and a few printed or painted swatches to compare under your room’s lighting.
Start by learning basic color matching techniques: measure wall swatches, capture ambient light, and record projector output. Use calibration tools to create or apply ICC profiles, adjust gamma, white point, and color balance, then re-measure to verify.
Keep notes and photos of each setup. Repeat after lighting or paint changes to maintain consistent, accurate projection color.
Decision Flowchart to Pick the Right Projector Wall Paint
When choosing paint for your projector wall, follow a simple decision flowchart that guides you from room lighting and projector brightness to desired contrast and color accuracy, so you can pick the right finish and tint without guesswork.
Start by evaluating ambient light and projector lumen output, then decide between neutral gray for contrast or light tones for brightness.
Consider color reflection and surface texture—matte minimizes glare, satin adds mild sheen. Use calibration swatches to confirm.
- Imagine deeper blacks that draw you in
- Picture vibrant hues that thrill
- Feel relief from annoying glare
- Enjoy effortless, accurate images
Frequently Asked Questions
Can You Paint Over Wallpaper to Make a Projector Wall Safe?
Yes—you can paint over wallpaper for a projector wall if wallpaper durability is good and you address paint adhesion; you’ll prime, sand loose edges, use a quality primer, and choose a matte projector-friendly paint for best results.
How Long Before Use Can You Project Onto Freshly Painted Walls?
You can project onto freshly painted walls after 24–72 hours, depending on paint drying considerations and projector wall preparation; wait longer for high humidity, low temps, or thicker coats so paint fully cures and won’t emit odors or tackiness.
Will Wall Paint Fade or Yellow From Projector Bulb Heat?
No, your paint generally won’t fade or yellow from projector bulb heat; projectors emit low heat, and if you choose heat resistance and paint durability-rated coatings, you’ll avoid discoloration while maintaining consistent image quality over time.
Can Furniture or Decorations Near the Wall Affect Image Quality?
Yes, furniture can block light, decorations can reflect glare, and fabrics can absorb contrast; you’ll lose image brightness, and you’ll change viewing angle performance, so arrange items to avoid obstructions and minimize reflective surfaces.
Is It Okay to Use Magnetic or Peel-And-Stick Decals on a Projector Wall?
Yes — you can use magnetic or peel-and-stick decals on a projector wall, but you’ll want smooth, compatible projector wall materials so decals don’t texture the surface or alter image clarity factors like reflectivity, contrast, and uniformity.
Conclusion
You’ve got the tools to choose paint that makes your projector sing; think of your wall as a canvas and the paint as the orchestra tuning the sound. Pick a color and sheen that match your room’s light, screen size, and viewing habits, and favor neutral grays or purpose-made projector paints for best contrast. Test samples, consider gain, and calibrate color/brightness after painting to get crisp, consistent images every time.