What Paint to Use on Basement Walls? Expert Guide
You should use moisture-resistant, mold-inhibiting paints on basement walls, like epoxy or elastomeric coatings for concrete and masonry paints or acrylic latex with biocides for drier, finished spaces. Prime with a masonry or epoxy primer after cleaning and repairing cracks, and apply two thin coats with proper ventilation and dehumidification. Choose sheen based on washability and flaws, and pick light colors to brighten the space — keep going to learn practical prep, product picks, and application tips.
What Search Intent Does This Guide Serve?

What’re you hoping to find with this guide? You’re after clear recommendations for basement wall paint, practical pros and cons, prep tips, and moisture-resistance advice.
This page targets informational and transactional intent: you want to learn then decide. I use search engine optimization to match queries about durability, mildew resistance, and finish choices, and I lean on user behavior analysis to prioritize answers people click first.
You’ll get concise comparisons, maintenance notes, and links to where to buy specific products. That way you won’t waste time experimenting—you’ll choose paint that fits your basement’s conditions and budget.
Quick Answer: Best Paints for Basement Walls
You’ll want paints that resist moisture and stand up to basement humidity.
Choose formulas labeled moisture-resistant and look for mold-inhibiting additives to protect surfaces.
These two features are the quickest way to guarantee a durable, low-maintenance finish.
Moisture-Resistant Paints
Because basements are prone to dampness and occasional water seepage, choosing a moisture-resistant paint is essential to prevent peeling, mildew, and odors.
You should pick epoxy or elastomeric coatings for concrete or masonry; they create effective moisture barriers and improve paint longevity. Water-based masonry paints also work if the surface is dry and primed with a high-quality masonry primer.
Apply two thin coats, follow manufacturer instructions, and address any active leaks first. Proper ventilation during and after painting speeds curing and reduces trapped moisture.
Regular inspections and touch-ups will keep the barrier intact and extend the life of your finish.
Mold-Inhibiting Formulas
When moisture’s a concern, pick paints formulated with mold inhibitors to keep spores from taking hold on your basement walls. These products combine antimicrobial additives with durable binders so the finish resists mildew growth and stays cleaner longer.
You’ll want to combine them with solid mold prevention strategies and proper paint application techniques to get lasting results. Consider these options:
- Acrylic latex with biocides — breathable, easy to apply, great for painted block or drywall.
- Epoxy or moisture-blocking primers — use before topcoat to seal porous surfaces.
- Mildew-resistant elastomeric coatings — flexible for hairline cracks and damp conditions.
Quick Decision Guide: Which Paint for Your Basement Walls?
Start by checking your basement for moisture so you know whether you need a waterproofing primer or dehumidifying solutions first.
If you see any dampness or past mold, pick a mold-resistant paint to keep problems from returning.
Finally, choose a finish that balances durability and washability—semi-gloss or satin are usually best for basement walls.
Assess Moisture Levels
Before you pick a paint, check how much moisture your basement walls are holding so you won’t trap water and cause peeling or mold.
You’ll want quick moisture detection and ongoing humidity control before painting. Use a pin or non‑pin moisture meter, look for efflorescence or damp patches, and note seasonal humidity swings.
Based on findings, delay painting until readings are low and leaks fixed.
- Test: take multiple meter readings across walls and near floor.
- Inspect: look for stains, salt deposits, or soft mortar.
- Monitor: run a dehumidifier and recheck over several days.
Choose Mold-Resistant Paint
Since basements stay damp more than other rooms, you’ll want paint formulated to resist mold and mildew growth—especially if moisture tests showed any risk.
Choose a labeled mold-resistant or anti-microbial interior masonry paint to improve mold prevention; these contain additives that inhibit spores. Focus your paint selection on products rated for basements or high-humidity areas and check manufacturer claims and third-party test results.
Apply a compatible masonry primer first if recommended, and follow surface-prep instructions to eliminate existing mold.
If persistent moisture exists, address it before painting—no paint will work long-term against ongoing water intrusion.
Pick Finish And Durability
Pick a paint finish that matches how you’ll use the space and how durable you need the walls to be: flat or matte hides imperfections but resists cleaning poorly.
Eggshell or satin balances washability and subtle sheen for finished basements, and semi-gloss or gloss offers the toughest, easiest-to-scrub surface for high-traffic areas or near utility sinks.
Consider finish types and durability factors when deciding. Think about moisture, abrasion, and cleaning frequency. Match sheen to function.
- Flat/matte: hides flaws, low cleanability.
- Eggshell/satin: moderate durability, good for living spaces.
- Semi-gloss/gloss: best for utility areas.
Why Basement Walls Need Special Paint
Because basements sit below grade and face constant moisture, you need paint that resists dampness, mold, and efflorescence rather than ordinary interior paint.
You’ll choose products designed for moisture management so water vapor doesn’t degrade coatings or indoor air. Special formulations block salts and inhibit mildew, protecting porous masonry and preserving paint adhesion.
That focus boosts paint longevity, reducing peeling, blistering, and frequent recoats. You’ll also pick paints that tolerate temperature swings and limited ventilation common below grade.
Using standard wall paint risks hidden damage and costly repairs, so opt for basement-specific coatings to safeguard structure and indoor air quality.
Paint for Concrete vs. Cinderblock
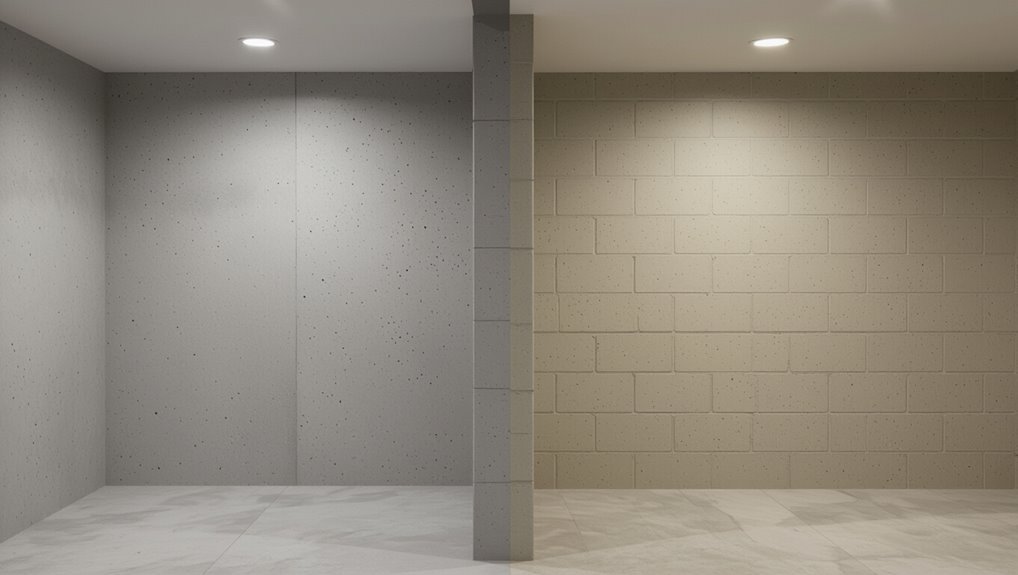
When you’re tackling concrete versus cinderblock, prep makes a big difference because cinderblock’s hollows and concrete’s smooth face need different cleaning and patching.
You’ll want breathable masonry paints or elastomeric coatings chosen for the specific substrate and expected wear.
Also check for moisture and vapor—use a vapor-permeable option on damp-prone walls or address leaks before painting.
Surface Preparation Differences
Although both are masonry, concrete and cinderblock demand different prep steps: you’ll assess surface types and choose preparation techniques that match porosity and condition.
Clean, repair, and profile each wall before painting to guarantee adhesion and durability.
- Clean: power wash or scrub to remove efflorescence, mold, and dust; use a trisodium phosphate solution for greasy spots.
- Repair: fill cracks in concrete with hydraulic cement; tuckpoint or patch cinderblock cores and mortar joints to stop moisture routes.
- Profile & prime: etch smooth concrete or abrade block faces, then apply a masonry primer suited to the prepared surface.
Paint Type Recommendations
Choosing the right paint for concrete versus cinderblock matters because their porosity, texture, and moisture behavior differ; pick products formulated for masonry and matched to your wall’s condition.
For smooth poured concrete, use a high-solids acrylic masonry paint for durability and easier cleaning. For rough cinderblock, choose elastomeric or thick-body masonry coatings that fill tiny voids and resist chipping.
Masonry primers improve adhesion and hide unevenness. Pick finishes with suitable paint textures—flat hides flaws, satin adds washability.
Don’t forget color psychology: lighter hues open basements, warm tones add coziness, cool tones feel spacious and modern.
Moisture And Vapor Considerations
Now that you’ve matched paint types to concrete or cinderblock and considered finish and color, address how moisture and vapor affect your choice.
You need breathable paints for cinderblock and tougher coatings for poured concrete; both require attention to moisture barriers and vapor control to avoid peeling or trapped damp.
Follow these steps:
- Test for moisture: use a meter or tape method; if high, install moisture barriers before painting.
- Choose vapor control primers for concrete, and breathable masonry paints for cinderblock to let vapor escape.
- Seal joints, fix leaks, and guarantee drainage so your paint performs long-term.
Masonry Paint vs. Interior Latex: When to Use Each
When should you pick masonry paint over interior latex?
Choose masonry paint when walls show efflorescence, hairline cracks, or frequent dampness; it delivers a masonry finish that breathes and resists moisture penetration better than standard latex.
Choose masonry paint for efflorescence, hairline cracks, or frequent dampness—breathable, moisture-resistant protection for vulnerable masonry.
Use interior latex when walls are dry, smooth, and in living spaces where aesthetics and easy cleanup matter—it’s versatile among interior options and applies fast.
If the basement has prior waterproofing or is finished with drywall, interior latex is fine.
For raw concrete, cinderblock, or repeated moisture cycles, lean toward masonry paint to reduce peeling and salt migration while maintaining durability.
Epoxy and Elastomeric Coatings: Pros and Cons
If you want a tough, long-lasting surface for basement walls, epoxy and elastomeric coatings each offer clear advantages: you get hard, chemical-resistant epoxy advantages for floor-to-wall durability, while elastomeric adds flexible waterproofing that bridges hairline cracks.
Choose based on moisture and movement.
- Epoxy: provides a rigid, stain-resistant barrier, easy to clean, but needs a dry, well-prepared surface and can chip.
- Elastomeric: stretches with substrate, excellent for damp walls, but elastomeric drawbacks include less abrasion resistance and longer cure times.
- Application: both require proper ventilation, temperature control, and following manufacturer instructions.
Primer Essentials for Basement Concrete
Before you paint, you’ll clean, patch cracks, and etch or sand the concrete so the primer can bond properly.
Pick a primer formulated for masonry or concrete—one that handles moisture and seals porous surfaces.
Doing the prep and choosing the right primer will make your topcoat last and resist peeling.
Surface Preparation Steps
Start by choosing a primer formulated for masonry and concrete—this creates the essential bond between damp-prone basement walls and your paint.
Next, focus on Surface cleaning and Mold testing before priming so you don’t lock in grime or hidden spores.
Follow these concise steps to prep the concrete properly:
- Scrub walls with a stiff brush and trisodium phosphate or a masonry cleaner; rinse thoroughly and let dry.
- Perform Mold testing in suspect areas; treat any growth with a fungicide and allow full drying.
- Patch cracks and smooth flaky surfaces with a concrete patching compound.
Choosing The Right Primer
Now that the concrete’s clean, dry, and patched, pick a primer made for masonry and high-moisture environments to guarantee proper adhesion and mildew resistance.
You’ll choose between acrylic, latex, or epoxy-based primer types depending on porosity and moisture risk. Acrylic and latex work for typical basements; epoxy handles chronic dampness and offers stronger sealing.
Test a small area, then follow application techniques: roll with a short-nap roller for texture, use a brush for joints, and apply even coats at the manufacturer’s recommended spread rate.
Allow full cure before painting, and ventilate the space to speed drying and reduce fumes.
Water-Based vs. Oil-Based Primer: Which to Choose?
Choosing between water-based and oil-based primer comes down to the condition of your basement walls and what you want the paint job to do—seal moisture, block stains, or create a smooth finish.
Choosing water- or oil-based primer depends on your basement walls’ condition and the finish you need.
You’ll favor water-based when you need faster drying, easier cleanup, and mildew-resistant primer benefits; it accepts topcoats quickly and suits masonry.
Pick oil-based for stubborn stains or extremely chalky surfaces where superior adhesion matters.
Consider these points and application techniques to decide:
- Water-based: quick dry, low odor, great for most concrete.
- Oil-based: stronger stain blocking, longer open time.
- Surface prep: clean, patch, then prime.
Label Checklist for High-Humidity Paints
Because basement humidity can wreck a paint job, you should read labels carefully to pick products formulated for damp spaces.
Check for “mildew-resistant” or “mold-inhibiting” claims, and confirm the product lists high humidity solutions or similar terminology.
Look for masonry or concrete compatibility, and verify VOC levels match your ventilation.
Note recommended surface prep and primer pairing to guarantee paint adhesion.
Examine warranty or performance data for paint durability and resistance to peeling or blistering.
Finally, confirm application conditions (temperature and humidity range) so you apply within the manufacturer’s guidelines for best results.
Choosing Paint Sheen for Low-Light Basements
When light is limited, the sheen you pick matters more than the color—sheen controls how paint reflects available light and affects how bright and spacious your basement feels.
You’ll choose based on function: durability, hiding imperfections, and boosting light reflection without glare.
Consider these sheen types and their effects:
- Flat/matte hides flaws and softens light reflection, good for uneven walls.
- Eggshell/satin offers subtle sheen, balances brightness and washability.
- Semi-gloss adds noticeable light reflection and is easy to clean, but can highlight texture.
Pick the least shiny option that still meets cleaning and moisture needs.
Moisture Test Methods for Basement Walls (Calcium Chloride, IR, Damp-Proof)
Before you pick paint, test for moisture so your finish lasts.
You can use a calcium chloride kit to measure vapor transmission, infrared moisture imaging to spot wet areas quickly, and a damp-proofing assessment to see if the wall needs a membrane or sealer.
Run the right tests and you’ll know whether to prep, repair, or choose a moisture-tolerant coating.
Calcium Chloride Test
If you need a reliable way to measure moisture vapor coming through a basement slab, the calcium chloride test gives you a simple, standardized snapshot of emitted moisture over 24–72 hours.
You’ll set a dish with dry calcium chloride under a sealed dome, note weight gain, then calculate pounds per 1,000 sq ft per 24 hours. Use results to judge moisture testing needs and whether basement sealing, vapor barriers, or drainage fixes are required before painting.
Follow kit instructions, test multiple spots, and avoid testing after heavy rain for accurate guidance.
- Prepare and place kit per instructions.
- Record weights and compute rate.
- Repeat across the slab.
Infrared Moisture Imaging
Curious how hidden damp spots show up without peeling paint or a probe? Infrared moisture imaging uses thermal imaging cameras to reveal temperature differences that often indicate moisture behind or within basement walls.
You’ll scan walls after creating a temperature contrast—typically with humidity or ambient cooling—to spot cool, damp areas as darker patches. This noninvasive moisture detection helps you prioritize where to test further or seal before painting.
It won’t measure salt content or long-term vapor pressure, so follow up with targeted tests if you find suspicious zones. Hire a trained operator for accurate interpretation and to avoid false positives.
Damp-Proofing Assessment
When you’re evaluating basement walls, damp-proofing tests help you decide whether surface treatments will work or if you need more substantial repairs. They combine simple in-situ methods like calcium chloride and moisture meters with infrared scans and visual inspections to pinpoint moisture sources.
You’ll use tests to confirm humidity levels, locate leaks, and plan damp proofing techniques or moisture barriers. Combine results to choose paint or remediation.
- Calcium chloride: measures vapor emission; short test, tells if moisture barriers or interior sealants will hold.
- Infrared: finds thermal anomalies tied to leaks.
- Probe/meters: verify depth moisture.
Fixing Efflorescence on Basement Walls Before Painting
Tackle efflorescence before you paint: those white, powdery deposits are mineral salts left by water and they’ll push paint off if you don’t remove and address their source. Start with efflorescence removal: dry-brush, wash with a mild acidic solution, rinse, and let fully dry. Improve drainage and consider basement wall treatments like sealers or waterproofing paint after testing a small area. Monitor for recurrence; persistent salts mean moisture intrusion that needs fixing.
| Task | Tool | Frequency |
|---|---|---|
| Brush off | Stiff brush | Once |
| Clean | Vinegar or muriatic dilute | As needed |
| Seal | Masonry sealer | After drying |
Repairing Cracks and Spalled Concrete Before Painting
Before you paint, check cracks to see if they’re hairline, structural, or linked to moisture so you know how aggressively to repair them.
For small cracks, you’ll want to clean, fill with a masonry patch or epoxy, and smooth the surface; larger or active cracks may need a structural fix from a pro.
Spalled concrete should be chipped back to sound material, treated for corrosion if rebar is exposed, and patched with a compatible repair mortar before priming and painting.
Assessing Crack Severity
Although a few small hairline cracks might seem harmless, you should evaluate each crack’s size, depth, and pattern to decide if it’s cosmetic or structural.
For clear crack identification and quick severity assessment, document length, width, direction, and nearby displacement. Note moisture or active seepage.
- Measure: record crack width (hairline <1/16", small 1/16–1/8", large >1/8″) and length.
- Inspect: look for stair-step patterns, horizontal breaks, or separation indicating movement.
- Monitor: mark ends and recheck over weeks to detect widening.
If unsure, consult a structural pro before painting or proceeding with repairs.
Fixing Spalled Concrete
Once you’ve identified cracks and loose concrete, repair spalled areas so paint will adhere and the wall stays protected.
You’ll chip away loose fragments, clean dust and debris, then apply a bonding agent. For small pits use a patching compound; for deeper spalled concrete choose a hydraulic cement or epoxy mortar.
Follow manufacturer cure times, then sand to a smooth, even surface. Seal repaired zones with a masonry primer before painting.
These repair techniques prevent moisture migration and paint failure. Work methodically, keep surfaces dry, and address structural issues first so your finish lasts and looks professional.
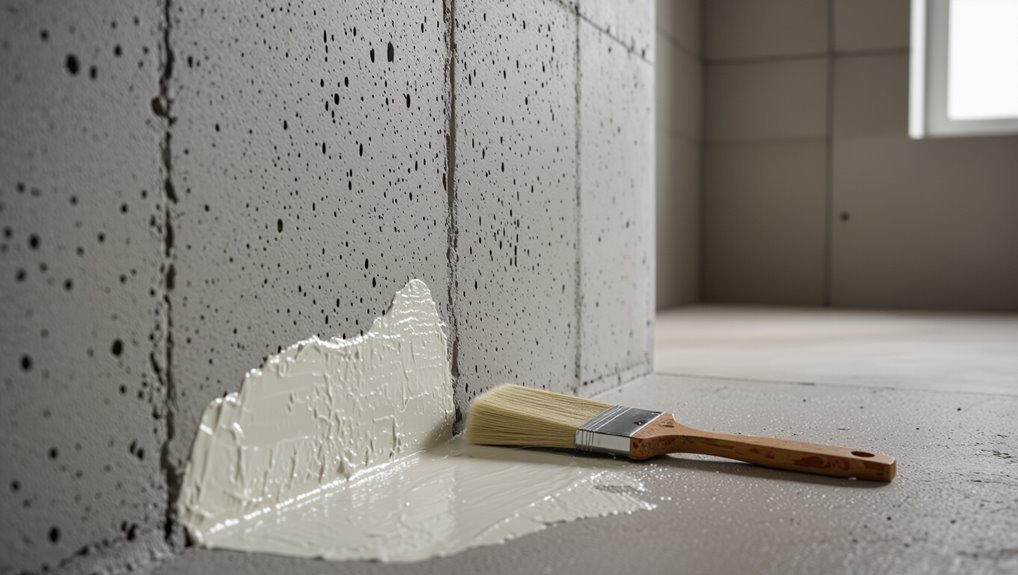
Cleaning and Degreasing Cinderblock and Concrete Walls
Start by removing loose dirt, spider webs, and flaking paint with a stiff-bristled brush or wire brush so the surface’s pores are exposed for cleaning.
You’ll use simple cleaning techniques and degreasing solutions to prep cinderblock and concrete walls before painting. Rinse with water, scrub stubborn spots, and let the wall dry fully.
- Mix a trisodium phosphate (TSP) or mild detergent solution for general cleaning.
- Apply a degreaser for oil or grease stains, scrub, then rinse thoroughly.
- Use a stiff brush and repeat cleaning until residue’s gone, then dry completely before priming.
When to Use a Masonry Sealer Instead of Paint
If you see visible water seepage, you should skip paint and treat the wall with a masonry sealer to stop moisture from coming through.
When the block or concrete is porous or crumbling, a sealer will penetrate and stabilize better than paint.
Also opt for a sealer instead of paint if your basement faces high moisture or flood risk so you’re addressing water first.
Visible Water Seepage Present
When you see damp streaks, bubbling paint, or salt deposits on your basement walls, don’t reach for regular paint—those signs mean water’s getting through the masonry and you need a concrete/masonry sealer instead.
You should halt painting and address moisture with waterproof sealants and proper surface treatments that block water, not trap it.
- Clean the area, remove efflorescence, and let it dry so sealers adhere.
- Apply a breathable masonry sealer that repels liquid while allowing vapor to escape.
- Recheck after heavy rain; if seepage continues, consult a foundation specialist.
Porous Or Crumbling Masonry
Because porous or crumbling masonry won’t hold paint and will only get worse, you should use a masonry sealer instead of regular paint to stabilize and protect the surface.
Inspect for loose mortar, powdery concrete, or flaking brick; don’t paint over instability. Clean debris, apply appropriate masonry treatment options like penetrating silane/siloxane or acrylic consolidants, and follow manufacturer cure times.
Use basic wall repair techniques—repointing, patching with compatible mortar, and injecting epoxy into fractures—before sealing.
After repairs and sealer application, you can finish with breathable masonry paint if desired.
Prioritize structural soundness; sealing preserves, painting prematurely hides failure.
High Moisture Or Flood Risk
Although basement walls might look dry, high moisture or flood risk calls for a masonry sealer instead of regular paint, since paint can trap water and peel or hide ongoing damage.
You should treat walls that show efflorescence, recurring damp spots, or a history of flooding with a breathable, penetrating sealer that complements exterior moisture barriers and aids flood prevention.
- Inspect: check for leaks, rising damp, and previous flood lines before any finish.
- Seal: apply a masonry sealer that repels liquid but allows vapor transmission.
- Protect: combine internal sealing with exterior moisture barriers and landscaping for flood prevention.
Best Paints for Below-Grade vs. Above-Grade Basement Walls
Since basement walls face different moisture and pressure conditions depending on whether they’re below-grade or above-grade, you’ll want paints formulated for each situation rather than a one-size-fits-all choice.
For below grade choices, pick masonry primers and waterproofing elastomeric coatings that resist hydrostatic pressure, vapor transmission, and efflorescence; use 100% acrylic or cementitious waterproofers designed for subterranean use.
For above grade recommendations, choose high-quality acrylic latex with mildew resistance and good breathability to handle occasional dampness without trapping moisture.
In both cases, prep surfaces, repair cracks, and follow manufacturer specs for adhesion and warranty compliance.
Painting Poured Concrete vs. Cinderblock: Technique Differences
When you’re tackling poured concrete and cinderblock, you need different surface prep and application techniques because their textures, porosity, and joint profiles behave differently; you’ll adjust approach for technique variations and surface challenges.
Follow focused steps so paint adheres and looks even.
- Poured concrete: fill hairline cracks, etch if smooth, prime with masonry sealer, and roll with a nap suited to low porosity.
- Cinderblock: brush mortar joints, backroll recessed cores, use higher-build masonry primer to bridge rough porosity.
- Finish: apply two coats, inspect for pinholes, and touch up joints to prevent moisture pathways.
Preparing Previously Painted Basement Walls for Repainting
Before you repaint, inspect the existing finish for peeling, blistering, efflorescence, or mold so you can address problems that will ruin a new coat.
Remove loose paint with a scraper or wire brush, wash surfaces with a trisodium phosphate solution, and rinse thoroughly.
Treat mold with a bleach solution and allow complete drying.
Fill cracks and holes with a hydraulic cement or masonry patch, then sand rough spots.
Prime stained or patched areas with a masonry or stain-blocking primer.
These wall preparation techniques guarantee adhesion; follow paint application tips like working in sections and maintaining consistent wet edges for a uniform finish.
How Many Coats Will You Need : And Why?
Decide on the number of coats based on wall condition, paint type, and the look you want: generally you’ll need two coats for even coverage, but rough masonry, dark-to-light color changes, or stain-blocking primers can require a third.
You’ll assess porosity, existing stains, and finish sheen to plan coat application and guarantee paint durability. Apply full, consistent coats and let proper dry times improve adhesion and longevity.
Follow manufacturer guidance for recoats. Check after drying for uniformity; thin spots mean another coat. Maintain ventilation and clean rollers between coats to avoid defects.
- Inspect surface and porosity.
- Apply two consistent coats.
- Add third for stains or texture.
Tools and Rollers for Rough Basement Surfaces
For rough basement walls you’ll want heavy-duty roller covers with a thick nap to reach into pores and texture.
Pair them with a sturdy extension pole so you can keep steady pressure without straining.
Use brushes rated for concrete to cut in and work paint into crevices.
Heavy-Duty Roller Covers
One or two heavy-duty roller covers can make the difference between a smooth, efficient job and a patchy mess when you’re painting rough basement walls.
You’ll notice heavy duty roller benefits immediately: thicker naps hold more paint and reach into crevices, reducing passes.
When selecting roller materials, choose woven or woven-knit covers for durability and shed resistance.
Match nap length to texture—longer for rough concrete, shorter for smoother block.
Maintain pressure and keep rolls loaded to avoid skipping.
Replace covers when they mat or shed to preserve finish quality and speed.
- Choose nap length.
- Prefer woven materials.
- Replace when worn.
Sturdy Extension Poles
A sturdy extension pole lets you reach high or awkward basement walls without straining, so you can keep a steady, even stroke across rough concrete or block. You’ll attach compatible rollers or brushes to maintain consistent paint application pressure, reducing fatigue and ensuring uniform coverage. Choose twist-lock or quick-lock poles rated for the weight of heavy-duty roller covers. Extend gradually to avoid wobble, and lock securely before painting. Clean threads and joints after use to preserve rigidity. Proper pole choice speeds work, improves finish, and protects your back.
| Feature | Benefit |
|---|---|
| Material | Durability |
| Lock type | Stability |
| Length | Reach |
| Weight rating | Safety |
Concrete-Appropriate Brushes
Think about bristles and nap when picking brushes and rollers designed for rough basement concrete — they’ll hold up to abrasive surfaces and carry more paint into pores and crevices.
You’ll want durable brush types and firm nap rollers that resist shedding and load plenty of paint.
Use proper application techniques: angle brushes into pits, work rollers in a crosshatch for coverage, and keep a brush handy for edges.
Clean tools promptly to maintain stiffness. Match solvent compatibility to your paint, and rotate tools to avoid fatigue.
Good tools and technique cut touch-ups and guarantee a lasting, even finish.
- Selection
- Technique
- Maintenance
Application Tips for Tight Spaces and Low Ceilings
Small spaces and low ceilings call for thoughtful planning to keep your painting efficient and clean.
Position a slim roller and angled brush to reach corners without overextending; use extension poles sparingly to avoid bumping fixtures.
Work from the top down, cutting in along ceiling lines before rolling walls in manageable sections.
Protect floors and stored items with thin drop cloths and painter’s tape on ledges.
Keep a small step stool handy instead of a tall ladder to reduce collisions.
Use bright task lighting and take short breaks to reassess progress, ensuring even coverage in tight spaces and low ceilings.
Drying Times and Ventilation Strategies in Basements
Expect paint to take longer to dry in a cool, humid basement than on an upstairs wall, so check the manufacturer’s recommended recoat and cure times before you start.
You’ll speed drying by increasing airflow with fans, opening windows when possible, and running a dehumidifier to lower moisture levels.
Plan your schedule around these ventilation steps to avoid tacky finishes or trapped moisture.
Drying Time Expectations
Because basements are often cooler and more humid than upper floors, paint will take longer to dry there than you’re probably used to, so plan accordingly.
You’ll want to understand drying time factors and humidity effects so you can schedule coats and avoid tacky finishes. Consider temperature, paint type, and substrate moisture before you start.
- Oil vs. latex: oils dry slower; latex cures faster but still slows in cool, damp air.
- Temperature: aim for at least 50–60°F; colder delays chemical curing.
- Surface moisture: test walls and only paint when masonry reads low for reliable adhesion and drying.
Basement Ventilation Tips
Good ventilation will speed drying and prevent tacky finishes, so after checking temperature and surface moisture you’ll want a plan for moving air and controlling humidity in the space.
Use fans to create cross-ventilation: place an exhaust fan near a window or doorway and an intake fan on the opposite side to circulate air across painted walls.
Run dehumidifiers to maintain humidity control between 40–60% so paint cures properly and basement air quality stays healthy.
Avoid sealing the room until paint feels dry to touch and follow manufacturer dry times.
Monitor conditions with a hygrometer and adjust airflow as needed.
What to Do About Recurring Dampness After Painting
If damp patches keep reappearing after you paint, don’t just repaint and hope for the best—you’ll need to find and fix the moisture source first.
Inspect for leaks, rising damp, or poor exterior drainage. Choose dampness solutions that address root causes before refinishing. Use proper painting techniques—breathable masonry primers and waterproofing paints only after repairs.
- Repair: fix cracks, gutters, and exterior grading to stop water entry.
- Diagnose: use a moisture meter and check plumbing to pinpoint issues.
- Prepare: dry thoroughly, apply a masonry primer, then finish with appropriate paint.
Mold-Resistant Additives: When and How to Use Them
When moisture problems are controlled, you can add a mold-resistant additive to paint to give surfaces extra protection against mildew and mold growth. These concentrated agents are mixed into latex or masonry paints and work by inhibiting fungal spores on the paint film.
Use them when humidity, previous mold, or poor ventilation raise risk despite fixes. Follow manufacturer dosage, stir thoroughly, and apply to clean, cured masonry for best results.
Combine additives with broader mold prevention strategies—ventilation, dehumidifiers, and waterproofing—to avoid relying solely on chemistry. Test a small area first, note any finish changes, and reapply only per recommended schedules.
Color Choices That Brighten Dark Basements
Adding a mold-resistant additive can help protect paint, but color choices do a lot to make a basement feel brighter and more welcoming.
You’ll want bright color palettes that reflect limited light, like warm whites, soft yellows, or pale blues. Use contrast sparingly and consider accent wall options to add depth without overpowering the space.
Think about texture and furnishings to complement paint and keep a cohesive look. Here are three practical approaches to try:
- All-over pale neutral to maximize perceived light.
- Single muted accent wall to introduce personality.
- Two-tone scheme with lighter upper walls and slightly warmer lower walls.
How Sheen Affects Perceived Space and Durability
Because sheen changes how light bounces off walls, choosing the right finish can make a basement feel larger or highlight imperfections, and it also affects how durable the surface will be.
Sheen alters light and durability—choose flatter finishes for cozy, uniform walls and glossier ones for washability.
You’ll notice sheen effects immediately: flat finishes hide texture and minimize reflections, improving space perception in low ceilings, while eggshell or satin adds subtle light that suggests depth without emphasizing flaws.
Semi-gloss and gloss boost cleanability and resist moisture but amplify bumps and seams.
Pick flatter sheens for cozy, uniform walls and glossier sheens for high-traffic or damp areas where durability and washability matter most.
Budget-Friendly Basement Paint Options That Perform
You don’t need to spend a lot to get durable basement walls—low-cost masonry paints give good adhesion and breathability for poured concrete or block.
Pick mold-resistant formulas if your space is prone to dampness, since they include mildewcides that help keep stains and odors down.
For a tougher finish on a budget, consider DIY epoxy alternatives that boost durability without the price of professional systems.
Low-Cost Masonry Paint
If you’re working with a tight budget but still want durable, moisture-resistant coverage, low-cost masonry paints are a smart choice for basement walls.
You’ll get affordable options that resist flaking and help paint longevity when applied to clean, dry masonry.
Consider these practical choices:
- Acrylic masonry paint — fast-drying, breathable, and easy to roll on for concrete or block.
- Cement-based masonry paint — very durable for raw or pitted surfaces; needs proper prep.
- Elastomeric concentrate (budget blend) — fills hairline cracks and stretches with temperature shifts.
Prep, primer, and proper curing time keep results lasting without overspending.
Mold-Resistant Options
When basements stay cool and damp, mold can take hold quickly, so pick paint that fights growth while staying affordable. You’ll want paints labeled mold-resistant or mildew-resistant; they contain biocides and breathable resins that limit mold growth on surfaces.
Choose water-based masonry or latex formulations with antimicrobial additives—these dry fast, resist peeling, and work with sealers for added protection. Combine paint selection with prevention strategies like improving ventilation, fixing leaks, and using dehumidifiers to keep humidity below 50%.
Apply two coats, follow manufacturer instructions, and repeat inspections annually to catch any returning issues before they spread.
DIY Epoxy Alternatives
Because epoxy kits can be pricey and tricky to apply, many DIYers look for budget-friendly alternatives that still hold up in basements, resist moisture, and look good.
You can choose practical epoxy alternatives that give durability without professional tools. Consider these DIY coatings and tips to prep and protect concrete walls:
- High-quality masonry paint with a built-in waterproofing agent—easy roll-on application and breathable finish.
- Concrete stain sealed with a water-based polyurethane—adds color and a moisture-resistant topcoat.
- Elastomeric basement paint—flexible, thick coverage that bridges hairline cracks and blocks dampness.
Prep surfaces well and follow drying times.
When to Invest in Premium or Specialty Basement Paints
Although budget paints can work for clean, dry basements, you’ll want premium or specialty options when moisture, mold risk, or heavy wear are likely—these products offer better adhesion, mildew inhibitors, and moisture-blocking formulas that protect surfaces and reduce maintenance.
You should choose premium paint benefits when you need long-lasting coverage, stain resistance, and easier cleaning. Pick specialty paint features for high-humidity areas, masonry sealing, or basement floors that face abrasion.
Inspect for dampness, efflorescence, and traffic patterns before buying. Investing up front saves repainting and repairs later, so match product performance to the specific challenges your basement presents.
Eco-Friendly and Low-VOC Paints for Basements
If you want healthier indoor air and lower environmental impact, choose low-VOC or zero-VOC paints formulated for basements—these reduce odors and off-gassing while still offering mildew-resistant and moisture-tolerant options for below-grade spaces.
You’ll find eco friendly options that don’t sacrifice durability. Low VOC benefits include quicker reoccupancy and less lingering smell.
You’ll find eco-friendly paints that keep durability intact, with low VOCs meaning faster reoccupancy and less lingering odor
Pick a breathable finish to manage basement moisture and combine it with proper prep. Consider these practical choices:
- Water-based masonry paint with mildew inhibitors.
- Zero-VOC primer plus moisture-tolerant topcoat.
- Natural, low-odor sealers for minor damp areas.
These keep air quality high and maintenance low.
How to Test a Small Area Before Repainting
Before you commit to a full repaint, test a small area to confirm adhesion, color, and moisture response—especially after choosing low-VOC or breathable products for basement walls.
Pick an inconspicuous spot reflecting typical conditions; good area selection includes a corner and a central wall patch. Clean and prime as you’ll for the full job, then apply the chosen product and note drying time, sheen, and any efflorescence or damp reaction over 48–72 hours.
Document results and take photos. If the sample performs, proceed; if not, adjust prep, product, or consult a pro before scaling up your paint testing.
Common Painting Mistakes That Cause Peeling or Blistering
Moisture and poor surface prep usually trigger peeling and blistering on basement walls, and you’ll want to address the most common mistakes before you paint. You can prevent problems by focusing on preparation, product choice, and application technique.
- Skipping moisture checks — Failing to test for dampness ignores blistering causes; use a moisture meter and fix leaks for peeling prevention.
- Painting over efflorescence or loose paint — You must clean, wire-brush, and use a concrete primer; otherwise paint won’t adhere.
- Applying paint too thick or in high humidity — Thin coats and proper ventilation reduce blisters and guarantee durable adhesion.
Maintaining Painted Basement Walls Long-Term
Now that you’ve fixed leaks, removed efflorescence, and chosen the right products, keep your basement paint looking good by inspecting and caring for it regularly. Check for hairline cracks, recoat high-traffic areas, and control maintaining humidity with a dehumidifier to protect long term durability. Clean walls with mild detergent, dry thoroughly, and touch up blisters immediately. Use breathable masonry paints to avoid trapped moisture. Monitor seasonally and after storms.
| Task | Frequency |
|---|---|
| Visual inspection | Monthly |
| Dehumidifier check | Weekly |
| Cleaning | Quarterly |
| Touch-ups | As needed |
| Full recoat | 5–10 years |
When Painting Isn’t Enough: Signs You Need Waterproofing
If paint keeps peeling, efflorescence returns, or you see damp spots even after repairs, it’s a sign you need waterproofing rather than another coat.
You shouldn’t ignore recurring moisture: it indicates water intrusion, rising damp, or poor drainage that paint alone won’t fix.
Consider professional assessment and effective waterproofing techniques to stop the source, not just the symptom.
Monitor basement humidity and odors—persistent high readings mean deeper issues.
- Visible leaks or pooling after rain.
- White powdery efflorescence that reappears.
- Persistent musty smell or humidity above recommended levels.
Cost Breakdown: Materials, Tools, and Labor Estimates
One clear way to plan your basement paint job is to break costs into three parts: materials, tools, and labor.
Start by tallying paint (use moisture-resistant options), primers, sealers, and patching compounds—compare brands for cost effective solutions.
List essential tools: rollers, brushes, tape, drop cloths, and a dehumidifier if needed; consider renting specialist gear.
For labor, get quotes from pros and weigh hourly rates against your skill level.
Apply budgeting strategies: prioritize repairs and moisture control, buy quality where it prevents rework, and bundle purchases to lower unit costs.
Track expenses to stay on budget.
DIY Timeline: Weekend Repaint Step-by-Step
Pick a weekend when you’ve blocked off at least two full days and you’ll be able to complete a reliable basement repaint from start to finish.
You’ll prep, paint, and finish without rushing. Focus on moisture checks, patching cracks, and choosing paint color trends that suit your basement design.
Work efficiently: mornings for prep, afternoons for painting, evening for cleanup and drying.
- Saturday morning: clear space, test for damp, patch, sand, and tape.
- Saturday afternoon–evening: prime high-moisture areas and apply first coat.
- Sunday: apply second coat, reinstall trim, ventilate, and inspect final finish.
Hiring a Pro: Questions to Ask a Basement-Paint Contractor
Why hire a pro for your basement repaint? You’ll get expertise on moisture issues, prep, and finishes.
When interviewing contractors, ask about contractor qualifications: licenses, insurance, references, and examples of basement work.
Request a written scope detailing surface prep, repairs, primer use, and ventilation.
Ask for a written scope covering surface prep, repairs, primer selection, and required ventilation.
Get multiple bids to compare cost considerations—break down labor, materials, disposal, and potential mold remediation.
Ask about timelines, warranties, and cleanup.
Verify who’s on site and how change orders are handled.
Insist on a written contract and clear payment schedule so you avoid surprises and guarantee a durable, safe finish.
Top-Rated Primers and Paints for Basements (Product Picks)
Choosing the right primer and paint makes a big difference in how well your basement stands up to moisture, mildew, and wear.
So we’ll focus on products that combine adhesion, mold resistance, and breathability. You want primer options that seal porous concrete, block stains, and promote paint adhesion.
Look for paint brands with low-VOC formulas and mildew inhibitors. Consider these top-rated picks:
- Zinsser Bulls Eye 1-2-3 Plus (seals, versatile primer)
- Kilz Basement & Masonry Waterproofer (concrete primer and coating)
- Behr Premium Plus Ultra (paint + primer, mildew resistant)
Test small areas before full application.
Comparing Paint Warranties and Performance Claims
When you’re comparing paint warranties and performance claims, focus on what’s actually covered, how long the coverage lasts, and any conditions that void the guarantee—like improper surface prep or using the wrong primer. You should check warranty comparisons for mold resistance, adhesion, and waterproofing limits. Read performance evaluations from independent labs and user reviews. Note exclusions, transferability, and required maintenance. Use this quick reference:
| Claim | Typical Coverage | Caveats |
|---|---|---|
| Mold/mildew resistance | 5–10 years | Requires dry substrate |
| Adhesion | 3–7 years | No peeling from poor prep |
| Waterproofing | Varies | Not a structural fix |
Ask sellers for written terms.
Real-World Case Studies: Common Basement Paint Outcomes
Although basement paint labels promise protection, real homeowners often see mixed results because site conditions, prep, and product choice shape outcomes more than marketing does.
You’ll learn from real life experiences that outcomes vary: some coatings hold up, others show paint failures. Study these brief cases to set realistic expectations.
- Sealed concrete with epoxy: looked great for years, but trapped moisture later caused peeling where prep missed hairline cracks.
- Masonry primer plus latex: easy application, resisted mildew until a sump overflow tested adhesion and caused flaking.
- Breathable masonry paint: managed moisture better, though aesthetic touch-ups were needed after heavy condensation.
Quick Pre-Paint Checklist for Your Basement
Before you open a can, run a quick checklist so you don’t trap moisture, miss damage, or buy the wrong product.
Check basement humidity with a hygrometer; if over 60% fix ventilation or a dehumidifier first.
Check basement humidity with a hygrometer; if it’s above 60%, improve ventilation or use a dehumidifier first.
Inspect walls for cracks, efflorescence, mold, and active leaks—repair and treat before painting.
Test wall texture: smooth concrete, cinderblock, or drywall need different primers.
Clean surfaces of dust, grease, and mildew with appropriate cleaners.
Choose a masonry or mold-resistant primer and paint rated for basements.
Gather proper tools, ventilation, and safety gear so your finish lasts and won’t fail.
Frequently Asked Questions
Can I Paint Basement Walls Over Active Water Leaks?
No — you shouldn’t paint over active water leaks. You’ve got to stop leaks first with leak repair and waterproofing techniques, then dry and prep surfaces before painting to avoid failure and mold growth.
Will Painted Basement Walls Affect Home Insurance or Resale Value?
Painted basement walls usually won’t change insurance implications, but insurers may note water damage risk; for resale considerations, clean, dry, well-finished basements can boost appeal—just disclose past issues and fix leaks before painting.
Can I Use Exterior House Paint for Basement Walls?
Yes — but don’t. Exterior paint’s like raincoat fabric; it’s made for outdoors. You should use interior paint with moisture resistance instead, because it’s formulated for indoor humidity, adhesion, and fumes, protecting your basement properly.
How Do I Paint Basement Walls With Radiant Floor Heating Present?
You can paint with water-based masonry primer and breathable latex paint, but check radiant heat considerations: wait until floor’s cool, use low-VOC products, avoid impermeable moisture barriers that trap condensation, and test adhesion on a small area first.
Are There Special Ventilation Requirements During Winter Painting?
Yes — you need proper ventilation: open windows when possible, run exhaust fans, and use portable HEPA or inline fans for consistent airflow; these ventilation methods speed paint drying, reduce fumes, and keep your workspace safer and drier.
Conclusion
You’ve got the know-how to choose paint that fights moisture, sticks to concrete or cinderblock, and keeps your basement looking fresh — now it’s time to act. Pick a moisture-resistant primer, match paint type to your wall material, and seal the deal with proper prep; small steps now will save big headaches later. Like planting a slow-growing tree, the right paint gives steady protection and pays off over years, not weeks.