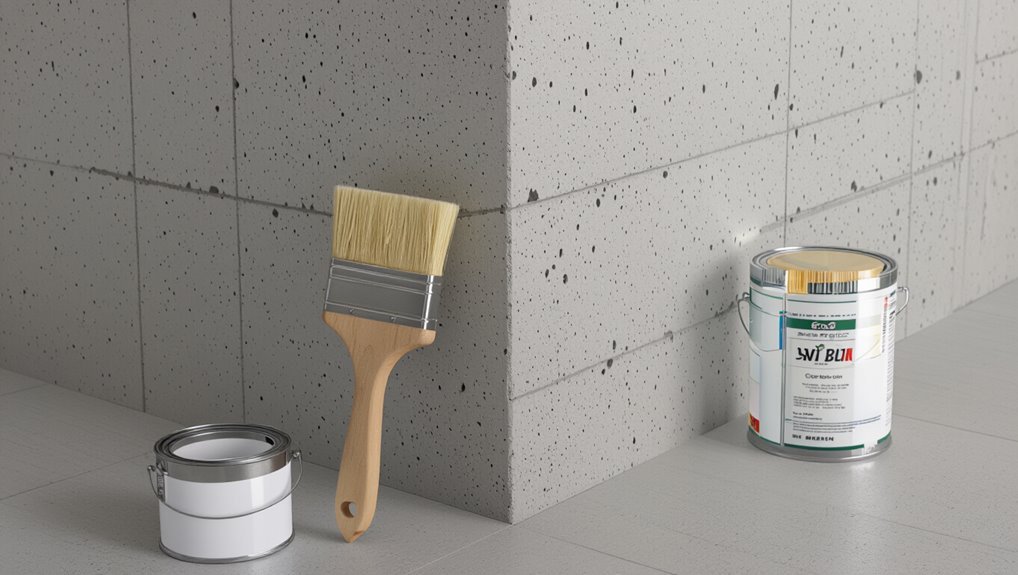
What Paint to Use on Concrete Walls? Best Choices
You’ll want breathable masonry acrylic for most concrete walls because it handles moisture and lets vapor escape, elastomeric coatings where hairline cracks or heavy weathering occur, and epoxy or high-build acrylic for garages and high-wear areas; prep by cleaning, repairing cracks, and using the right primer for porosity; avoid impermeable paints over damp concrete; factor in drying conditions and flexible finishes for movement — keep going to get specific product choices, prep steps, and troubleshooting tips.
Quick Answer: Which Paint to Use on Concrete Walls?
Which paint should you use on concrete walls? You’ll typically pick either masonry acrylic, elastomeric, or epoxy, depending on durability needs.
Masonry acrylic suits interior and exterior walls, offering breathability; elastomeric bridges small cracks and gives heavy protection; epoxy’s best for garages and high-wear areas.
Consider concrete paint types and match them to location and traffic.
Prep matters: clean, repair, and prime as needed.
Use proper paint application techniques—roller for texture, brush for edges, and sprayer for speed—maintaining even coats and recommended drying times.
Choose based on performance, not just color.
How Moisture, Porosity, and Movement Affect Paint Choice
You’ll need to evaluate moisture vapor transmission, since trapped water can blister or peel paint.
Check surface porosity because highly porous concrete soaks up primers and changes coverage and adhesion.
Also account for thermal and structural movement—flexible coatings resist cracking on walls that expand, contract, or settle.
Moisture Vapor Transmission
Because concrete breathes, moisture vapor moving through walls is the single biggest factor that determines what paint will last. If you ignore vapor transmission, even the best coatings can blister, peel, or trap moisture and cause damage.
You’ll need a paint system that supports moisture management, allowing vapor to pass without degrading the coating. Avoid impermeable paints unless you’ve eliminated substrate moisture and installed proper vapor barriers.
Choose breathable masonry paints or elastomeric coatings rated for vapor permeability when humidity or ground moisture is present. Test for rising damp and let concrete dry; proper prep and breathable products prevent failure.
Surface Porosity Considerations
When evaluating concrete for paint, consider how porosity and movement work together to affect adhesion and durability.
You’ll inspect surface texture—smooth, troweled areas absorb less; rough, porous concrete soaks primers and paints. High porosity increases moisture uptake and can drive blistering or flaking if you use impermeable coatings.
Test with water: quick absorption means a penetrating primer or breathable masonry paint is needed to improve paint adhesion.
Fill deep pores and repair cracks before coating to reduce uneven absorption.
Choose flexible, vapor-permeable systems where moisture risk exists, matching product specs to measured porosity and site conditions.
Thermal And Structural Movement
If concrete expands, contracts, or shifts—due to temperature swings, moisture changes, or structural load—you need coatings that can move with it without cracking or delaminating. You should choose flexible elastomeric or high-build acrylics that accommodate thermal expansion and protect structural integrity. Sealers and breathable primers help manage moisture and porosity, reducing blistering. Monitor joints and use compatible caulks. Match paint elasticity to expected movement and avoid rigid epoxy on unstable walls. Below is a quick guide to help you decide.
| Feature | Recommendation |
|---|---|
| Flexibility | Elastomeric coatings |
| Breathability | Vapor-permeable primers |
| Joints | Movement-capable caulks |
| Rigid surfaces | Avoid brittle epoxies |
Quick Guide: Indoor vs. Exterior vs. Decorative Concrete Paint
Although concrete looks the same whether it’s inside or out, you’ll need different paint types to get durable, attractive results; indoor paints prioritize low odor and stain resistance, exterior formulas focus on weather protection and breathability, and decorative options emphasize texture and finish.
For indoor walls, pick low-VOC acrylics that resist stains and scrub cleanability; consider color selection and subtle finish types like eggshell or satin for living spaces.
Outdoors, choose flexible, UV-resistant coatings that shed water and allow vapor escape.
For decorative projects, use specialty coatings—stains, microtoppings, or textured paints—to achieve pattern, depth, or faux effects.
Masonry Latex: Best for Exterior Concrete Walls
If you’re painting exterior concrete, masonry latex is a top choice because it stands up to harsh weather and resists cracking and fading.
It also lets moisture escape from the wall, so trapped vapor won’t blister the finish.
Before you roll it on, you’ll need to clean, repair, and prime the surface for proper adhesion and long-lasting results.
Durability And Weather Resistance
When you need exterior concrete to stand up to rain, sun, freeze-thaw cycles and dirt, masonry latex delivers the durability and weather resistance required for long-lasting performance.
You’ll choose it because it resists peeling, chalking and UV breakdown across varied weather conditions while preserving surface integrity. Its flexible film moves with the substrate, reducing hairline cracks and water intrusion that degrade concrete.
Apply over clean, sound masonry with proper primers and sealers; maintenance is simple — occasional washing and touch-ups.
For most climates, masonry latex balances toughness and adhesion so your exterior walls stay protected and attractive longer.
Breathability And Vapor Permeability
Good weather resistance matters, but you also need a paint that lets trapped moisture escape from the concrete.
When you choose masonry latex, you get breathable materials that permit vapor permeability without sacrificing exterior protection. That breathability supports effective moisture management, reducing blistering, peeling, and freeze-thaw damage by letting water vapor pass outward.
You’ll want a finish rated for high vapor transmission so interior humidity won’t push moisture into the substrate.
Breathable paints pair with good drainage and sealants at joints, but they won’t trap water.
Pick formulations labeled for masonry that balance permeability with durable weather resistance.
Surface Preparation And Application
Because proper adhesion starts with a clean, sound surface, you should remove loose paint, efflorescence, dirt, and mildew before applying masonry latex. You’ll inspect for cracks, patch with a compatible filler, and pressure-wash for thorough surface cleaning. Primer helps paint adhesion on porous or repaired areas. Apply masonry latex with a roller or brush, working top-down, maintaining a wet edge, and follow manufacturer drying times.
| Step | Tool | Tip |
|---|---|---|
| Inspect | Flashlight | Find hairline cracks |
| Clean | Pressure washer | Remove salts |
| Repair | Masonry filler | Match substrate |
| Paint | Roller/brush | Two coats for durability |
Acrylic Latex: Best for Basements and Foundations
Although basements and foundation walls face moisture and temperature swings, acrylic latex paint handles those conditions better than most alternatives. You’ll appreciate acrylic advantages: breathability, mildew resistance, and long-term color retention.
Choose a high-quality masonry acrylic or latex-masonry blend to let trapped moisture escape while resisting dampness. For best results, follow careful application techniques: clean and etch surfaces, repair cracks, use a masonry primer, and apply two thin coats with a roller or sprayer.
Drying times vary with humidity, so wait fully between coats. You’ll get durable, low-maintenance walls that balance moisture control and aesthetic appeal.
Elastomeric Coatings: For Cracks and Flexible Surfaces
If your concrete has hairline cracks or moves with temperature changes, elastomeric coatings will bridge and seal them with flexible film.
You’ll get a waterproof surface membrane that sheds water while still stretching with the wall.
Because most formulations remain breathable, moisture vapor can escape so you won’t trap dampness behind the coating.
Flexible Crack Sealing
Elastomeric coatings give concrete walls a flexible, waterproof skin that bridges hairline and larger cracks, so you’re less likely to see leaks or paint failure as the slab moves.
You’ll prep surfaces, clean and repair active leaks, then apply a quality elastomeric product that offers crack prevention and flexible solutions for thermal and structural movement.
Work in thin, even coats, following manufacturer cure times between layers. For wider gaps, embed fiberglass or mesh before topcoating to maintain elasticity.
Inspect periodically and touch up stress points; kept in good condition, elastomeric seals extend paint life and protect substrate integrity.
Waterproof Surface Membrane
When you want a durable, flexible barrier that keeps water out and moves with the wall, a waterproof surface membrane offers the best protection for concrete surfaces. You’ll choose elastomeric coatings for waterproof benefits and crack bridging; they stretch, seal hairline cracks, and resist ponding. For proper membrane application, clean and prime the concrete, apply recommended thickness, and inspect seams. Maintenance is minimal but periodic checks catch damage early.
| Feature | Benefit | Tip |
|---|---|---|
| Flexibility | Bridges cracks | Apply at temp range |
| Durability | Long-lasting seal | Use specified mils |
| Water resistance | Prevents seepage | Check flashings |
| Ease | Single-coat options | Follow cure times |
Breathable Elastic Finish
Because breathable elastic finishes combine flexibility with vapor permeability, they’re ideal for exterior concrete that needs crack-bridging without trapping moisture.
You’ll get breathable benefits that let vapor escape while preventing water intrusion, so substrate deterioration reduces.
Apply elastomeric coatings to hairline and moderate cracks; their elastic properties stretch and recover with temperature shifts and settling.
Surface prep matters: clean, repair major voids, and prime if recommended.
Use multiple thin coats for uniform coverage and test adhesion on a small area.
Maintenance is straightforward—inspect seals and recoat when elasticity diminishes—to extend protection and appearance.
Epoxy & Polyaspartic: Garage and High-Traffic Concrete Walls
If you need a tough, long-lasting finish for garage or other high-traffic concrete walls, epoxy and polyaspartic coatings are top choices.
You get epoxy benefits like chemical resistance, strong adhesion, and a hard, washable surface that handles oil, grease, and abrasion.
Polyaspartic features include extremely fast cure times, UV stability, and flexibility in thin layers, letting you return spaces to use quickly.
Prep matters: clean, etch, and repair cracks so coatings bond.
Apply primer if manufacturer recommends, work in proper temperature and humidity, and follow recoat windows for durable, low-maintenance walls.
When to Choose Mineral (Silicate) or Lime-Based Paints
Although they look simple, mineral (silicate) and lime-based paints perform very differently from modern acrylics, so you’ll want them when you need breathability, chemical-free mineral chemistry, and a finish that bonds into the masonry rather than just sitting on top. You’ll choose mineral paints for durability and mineral paint benefits like deep bonding; pick lime for alkalinity, antimicrobial action, and lime paint advantages. Use them on porous, historic, or damp-prone concrete where vapor permeability matters. Imagine choices visually:
| Surface | Benefit | Look |
|---|---|---|
| Silicate | Bonding, longevity | Matte crystalline |
| Lime | Breathable, sterile | Soft, chalky |
| Rough concrete | Best | Authentic finish |
Which Concrete Primer to Use and Why
Now that you’ve picked a paint chemistry that meets breathability and bonding needs, you’ll want a primer that complements it and the concrete’s condition.
Choose acrylic or alkyd primers for painted or sound concrete; they offer versatile primer types and fast drying.
Opt for acrylic or alkyd primers on sound, painted concrete for versatility and quick drying
Use silicate or lime-based primers where mineral paints are planned to preserve vapor permeability.
For porous, dusty, or weak surfaces, apply a penetrating silane/siloxane or acrylic sealer-primer to consolidate and improve surface adhesion.
Always match primer chemistry to topcoat and substrate moisture profile.
Test a small area to confirm compatibility, adhesion, and the final appearance before full application.
When to Seal Concrete Before Painting
When concrete is damp, powdery, or prone to efflorescence, seal it before painting to prevent adhesion failures and moisture problems down the line.
You should seal when the surface shows staining, salts, or visible water penetration, and before applying primer or paint.
Choose sealing methods based on porosity and location: silane/siloxane for water repellency, acrylic penetrating sealers for mild protection, or epoxy/urethane for high-moisture interiors.
Test a small area and allow proper cure times.
Prioritize moisture management—use a moisture meter to confirm acceptable levels and address leaks or high vapor drive before sealing and painting.
Concrete Surface Prep to Prevent Peeling and Blistering
After sealing or deciding a seal isn’t needed, prepare the concrete surface carefully to stop peeling and blistering before you paint.
Remove dirt, efflorescence, loose paint, and grease with appropriate surface cleaning—pressure wash, scrub with trisodium phosphate, or use a masonry cleaner.
Clear away dirt, efflorescence, loose paint, and grease using pressure washing, TSP scrubbing, or a masonry cleaner.
Repair cracks and spalls, then etch smooth concrete to improve substrate bonding.
Allow full drying; moisture trapped under paint causes blisters. Test for dampness with a plastic sheet if unsure.
Prime with a breathable concrete primer suited to your chosen finish to equalize suction and promote adhesion.
Proper prep prevents common failures and extends paint life.
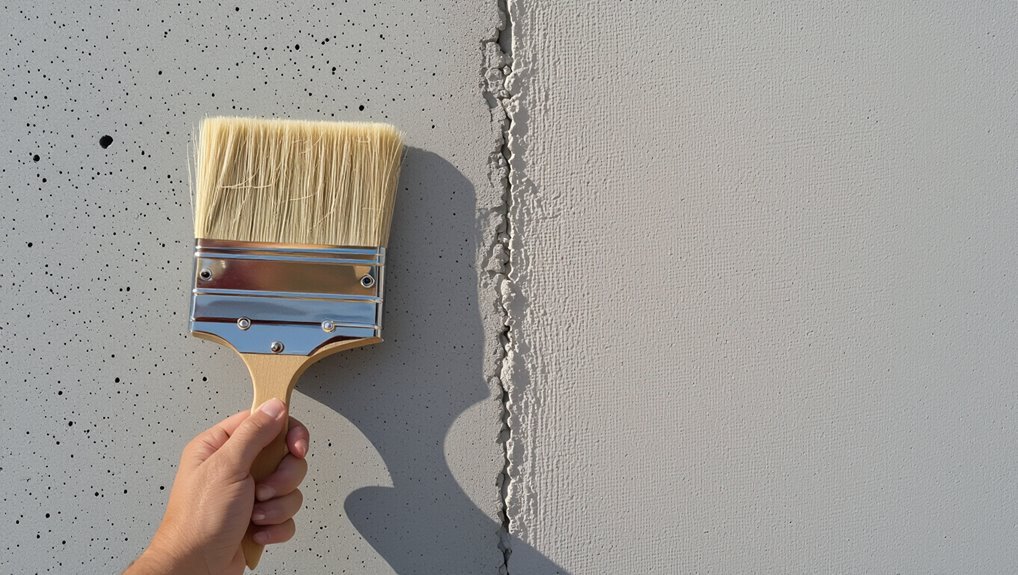
How to Apply Paint for Even Coverage and Adhesion
Before you paint, make certain the concrete is clean, dry, and free of loose material by sweeping, scrubbing, and patching cracks or holes.
Use a consistent application method—roller for broad areas, brush for edges and corners—and work in manageable sections to avoid lap marks.
Finish with proper drying times and a second coat if needed to guarantee strong adhesion and uniform coverage.
Surface Preparation Steps
Good surface prep makes the difference between paint that peels and paint that lasts, so start by cleaning, repairing, and priming your concrete thoroughly. You’ll use surface cleaning techniques—pressure wash, degrease, and etch—to remove contaminants. Patch cracks, grind high spots, and guarantee dryness before priming. Choose primers that match substrate and address paint adhesion factors: alkali resistance, porosity control, and bonding strength. Follow manufacturer dry times. Test a small area to confirm adhesion. Use the table to track steps and timing.
| Step | Purpose | Dry Time |
|---|---|---|
| Clean | Remove dirt/oil | 24h |
| Repair | Fill cracks | 12h |
| Etch | Improve profile | 1–2h |
| Prime | Seal surface | 4–24h |
Application Techniques For Consistency
When you’re ready to paint, work methodically in manageable sections and use the right tools—rollers for broad areas, brushes for edges and texture, and a sprayer for large, rough walls—to apply thin, even coats that build coverage without runs; maintain a wet edge, overlap each pass by about 50%, and use slow, consistent strokes to press paint into pores and cavities so adhesion and finish stay uniform.
Check porosity with a test patch, back-roll sprayed areas, and sand between coats if needed. Follow manufacturer recoat times, keep humidity and temperature stable, and use these application tips and consistency techniques to guarantee a durable, even finish.
Drying Times, Recoat Windows, and Temperature Tips
Because concrete absorbs moisture differently than drywall, you’ll need to factor longer drying times and wide recoat windows into your painting schedule, and plan around temperature and humidity to get consistent results.
Monitor drying conditions closely; colder, damper air slows cure and increases recoat windows. Avoid painting during rapid temperature fluctuations that can trap moisture or cause poor adhesion.
Monitor drying closely—cold, damp air lengthens cure and recoat times. Avoid rapid temperature swings that trap moisture and harm adhesion.
Use heaters or dehumidifiers when needed, and wait longer between coats than label minimums.
- Aim for stable temps (50–85°F) and low humidity.
- Check tack and hardness before recoating.
- Extend cure time before heavy use or sealing.
Treating Efflorescence, Mold, and Trapped Moisture
1 common issue with concrete walls is efflorescence, mold, or trapped moisture, and you should tackle them before painting to guarantee adhesion and a healthy finish. You’ll remove salts and mold with a stiff brush, diluted muriatic or specialist cleaner, then rinse and dry. For trapped moisture, test with a plastic sheet and use vapor barriers or improved drainage. Prioritize efflorescence treatment and moisture management to prevent paint failure.
| Problem | Cause | Fix |
|---|---|---|
| Efflorescence | Salt migration | Clean, seal |
| Mold | Humidity | Clean, ventilate |
| Moisture | Leakage | Repair, drain |
Cost vs. Longevity: Pick Paint Based on Budget and Lifespan
Although a higher upfront price can sting, choosing longer-lasting paint usually saves you time and money down the road. So weigh immediate budget limits against replacement frequency.
You’ll run a cost analysis: compare initial price, prep and labor, and expected life. Use a longevity comparison to decide if premium masonry paint or epoxy justifies higher cost for fewer recoats.
Consider exposure, maintenance ability, and resale value. Choose the option that meets your budget and lifespan goals.
- Calculate total cost per year.
- Assess warranty and expected durability.
- Factor in maintenance and touch-up frequency.
Common Mistakes That Ruin Concrete Paint Jobs (And Fixes)
When you skip proper prep or use the wrong products, your paint job won’t last and you’ll end up redoing work you thought was finished. You’ll face peeling from improper surface preparation, bubbling from trapped moisture, or streaks from paint application errors. Fix these by cleaning, etching, and repairing cracks; testing for dampness; and using rollers or sprayers suited to masonry. Prime with a breathable masonry primer and follow cure times. Quick reference:
| Problem | Cause | Fix |
|---|---|---|
| Peeling | Poor prep | Clean, etch, prime |
| Bubbling | Moisture | Dry, seal, vent |
Inspect, test, and correct before painting.
Quick Decision Checklist: Choose the Right Paint for Your Wall
Now that you know how to prevent common paint failures, pick the right paint so your repairs and prep actually hold up. Use this quick checklist to decide efficiently:
- Assess surface and exposure: choose breathable masonry paint for damp areas, acrylic for interior concrete, and epoxy for high-traffic spots—match durability to use.
- Consider color selection and light: darker colors hide stains but show heat effects; test swatches under real lighting before committing.
- Pick finish types by function: flat hides imperfections, satin eases cleaning, semi-gloss or epoxy offers maximum washability.
Follow these steps and you’ll avoid mismatched products and premature failure.
Frequently Asked Questions
Can I Paint Over Painted Concrete Without Removing the Old Coating?
You can usually paint over painted concrete without removing the old coating if it’s sound; choose compatible paint types, clean, etch or sand for proper surface preparation, prime as needed, and repair cracks before applying new paint.
Will Radiant Heating Behind Concrete Affect Paint Adhesion?
Yes — even though warmth suggests comfort, radiant heat effects can challenge adhesion; you’ll need primers, breathable masonry paint, and control of moisture. Consider temperature cycling, surface prep, and paint adhesion factors to guarantee a lasting finish.
Are Voc-Free Paints Suitable for Exterior Concrete in Cold Climates?
Yes — you can use VOC-free paints on exterior concrete in cold climates, but you’ll need proper application techniques, extended cure times, and excellent substrate prep to guarantee paint durability and resistance to freeze–thaw cycles and moisture intrusion.
Can Colored Concrete Stains Be Mixed With Paint for Unique Finishes?
Yes — you can mix colored concrete stains with paint for unique finishes, but you’ll need to test stain application techniques and watch paint compatibility issues; otherwise you’ll get uneven color, adhesion problems, or unexpected sheens, so trial first.
How Long Before Hanging Heavy Fixtures on Newly Painted Concrete Walls?
Wait at least 48–72 hours for paint drying time, but let it cure 7 days before hanging heavy fixtures. For very high fixture weight, you’ll want a full 28-day cure and secure anchors into concrete, not just paint.
Conclusion
You’re standing at the crossroads of color and concrete—pick a paint that breathes, bonds, and bends with your wall like a trusted coat. Whether you choose hardy masonry latex for exterior skin, acrylic for damp basements, or a specialty sealer for decorative drama, prep and moisture control are your compass. Invest for longevity over shortcuts, fix issues early, and your concrete will wear its new finish proudly, not crack or weep beneath the surface.