What Paint to Use on Garage Walls? Best Options
Pick paint based on how you use the garage: use moisture‑resistant acrylic latex or epoxy coatings for workshops and car care, standard interior latex for climate‑controlled storage, and oil‑based or enamel on trim and metal for extra durability. Choose satin or semi‑gloss for easy cleaning, flat or eggshell to hide flaws, and a mold‑resistant formula in humid spaces. Prep and prime properly for adhesion and longevity — keep going to get practical tips and product picks.
Quick Decision Checklist for Garage Paint
Start by matching paint to the room’s purpose and conditions: pick moisture-resistant, washable paint for a working garage, and a standard latex for a clean, climate-controlled space.
Decide durability needs, prepping surfaces, and expected stains. Choose paint finishes that suit traffic — satin or semi-gloss for wipeability, flat for hiding imperfections.
Consider ventilation and dry times. Pick color schemes that reflect light if you need brightness, or darker tones to hide marks.
Budget for primer and testers. Confirm tools, curing time before heavy use, and cleanup materials.
This checklist helps you finish efficiently and avoid costly rework.
Quick Answer: Best Paint Types for Garage Walls
One clear rule: choose paint based on how you use the garage—use moisture- and stain-resistant acrylic latex for a working garage, and standard interior latex for a clean, climate-controlled space.
For durability, go with semi-gloss or satin acrylic latex on walls you’ll wipe down; flat finishes hide imperfections but won’t clean as well. If humidity’s an issue, pick mold-resistant formulas.
You can follow garage wall trends without sacrificing function—muted neutrals and durable mid-tones work best.
Think about color psychology when selecting hues: light colors expand space, while cool tones calm and bright tones energize your workspace.
How to Choose Paint by Garage Use (Storage, Workshop, Car Care)
If your garage is just for storage, you’ll want a durable, low-maintenance paint that resists scuffs and hides marks.
For a workshop or workspace, pick a tougher, washable finish with good stain resistance and bright, light-reflecting color to improve visibility.
If you do car care, prioritize chemical- and oil-resistant coatings that clean up easily and stand up to spills.
Storage-Only Garages
For a storage-only garage, you’ll want paint that prioritizes durability, mildew resistance, and easy cleaning over high-performance finishes meant for workshops or car bays.
You’ll focus on bright, washable acrylic or satin latex that resists stains and molds, helps with storage organization by improving visibility, and pairs with simple trim for a tidy look.
Choose mid-tone neutrals to hide scuffs; avoid specialty oil-based car paints.
- Shelves lined with light-reflective satin walls.
- Pegboard area framed by washable trim.
- Stacked bins against a mildew-resistant backdrop.
- Clear aisle lit by neutral, easy-clean paint finishes.
Workshop And Workspace
Anyone turning a garage into a workshop or dedicated workspace will want paint that stands up to heavy use, spills, and bright task lighting.
Pick a durable, washable satin or semi-gloss that resists stains and scrubs clean without fading. Choose light, neutral hues to maximize task lighting and reduce eye strain; add an accent wall for contrast near benches.
Use moisture- and chemical-resistant primers on bare drywall or concrete.
Coordinate color zones with garage organization tips—tool areas, storage, and workbenches—for visibility.
Proper paint supports workspace ergonomics by improving light reflection and making cleanup faster and safer.
Moisture & Humidity: How They Change Paint Choice
Because garages often sit near the ground and lack climate control, moisture and humidity can change how paint performs over time.
You’ll notice moisture impact in peeling, blistering, and mold growth, so choose mildew-resistant, breathable coatings that handle humidity effects without trapping water.
Consider waterproof primers and paints labeled for basements or exterior use when walls face dampness.
You should also improve ventilation and fix leaks to protect any finish.
- Damp concrete showing efflorescence
- Dark, musty corners with condensation
- Paint bubbling after a rainstorm
- Pale mold spots along the baseboards
Prep: Unfinished Drywall & Concrete Block Walls
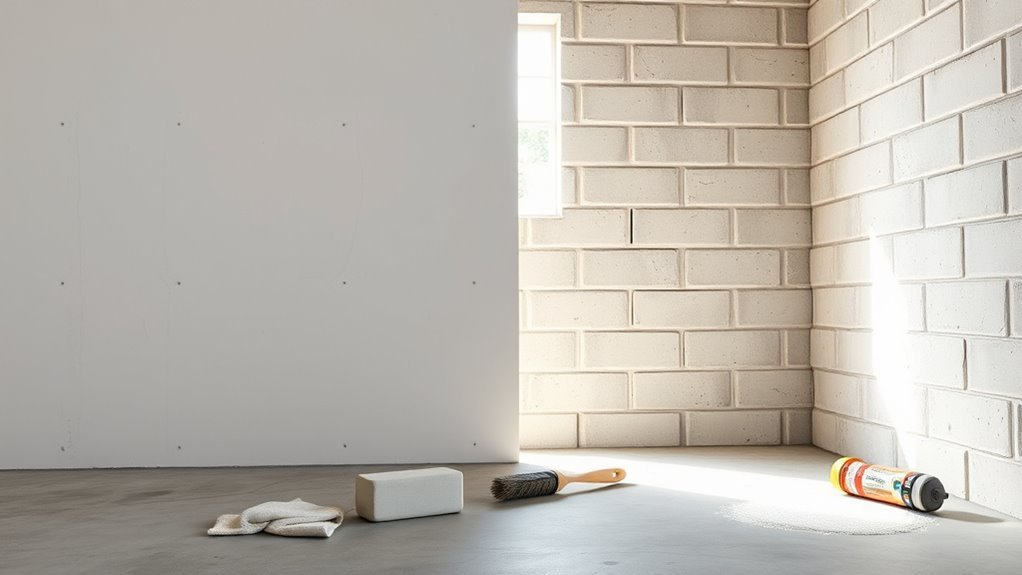
Before you paint unfinished drywall or concrete block, clean the surface and fix any holes, cracks, or loose material so the finish will stick.
Because these materials are porous, you’ll want to apply a suitable primer to seal and even out absorption.
Taking these steps will give your topcoat a smoother, more durable result.
Clean And Repair Surfaces
Start by clearing dust, cobwebs, and loose debris from unfinished drywall and concrete block walls so paint will stick properly. You’ll focus on surface cleaning first, then wall repair: vacuum, scrape flaking material, and wash with a mild detergent solution.
Patch holes and cracks with an appropriate filler, let it cure, then sand smooth. Check block mortar joints for deterioration and tuckpoint if needed.
Visualize the finished surface:
- A drywall seam smoothed and ready.
- A patched hole blended into texture.
- Clean block with no grime.
- Tight, intact mortar lines.
You’ll create a sound base for paint adhesion.
Prime For Porous Materials
Now that the walls are clean and repaired, prime them to seal porous drywall and concrete block so paint lays down evenly and lasts longer.
You’ll choose a high-quality acrylic or masonry primer designed for porous surface preparation; these penetrate and block dust, efflorescence, and moisture.
Mix and test the primer, then apply with roller for broad areas and brush for joints and edges.
Use primer application techniques like two thin coats rather than one heavy coat, maintain wet edges, and follow recommended dry times.
Proper priming reduces paint use, improves adhesion, and prevents patchy finish on unfinished garage walls.
Sealing and Priming Damp or Porous Garage Walls
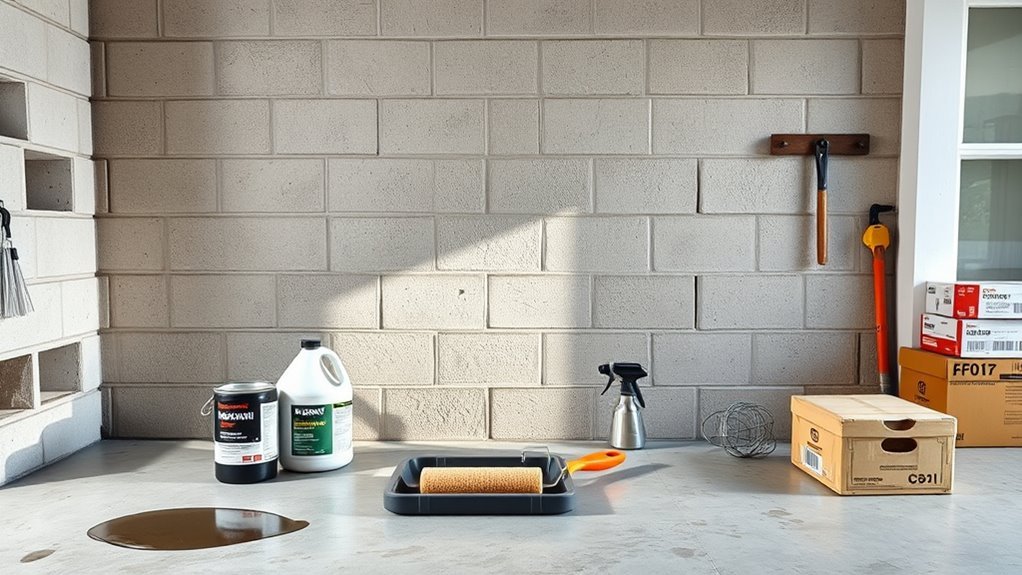
If your garage walls are damp or very porous, you’ll need to seal and prime them before painting to guarantee adhesion and prevent moisture-related problems; a proper masonry sealer or stain-blocking primer creates a stable surface, reduces paint soak-in, and blocks efflorescence and mold stains.
You’ll first assess moisture levels, fix leaks, and choose products that support damp prevention strategies and act as wall moisture barriers. Then clean, repair cracks, and apply sealer per instructions.
Visualize the process:
- Sponge away salt deposits and dirt.
- Patch and smooth hairline cracks.
- Roll on masonry sealer evenly.
- Let cure fully before priming.
Best Primers for Garage Walls and Why They Matter
Before you paint, you’ll want to properly prepare the surface so the primer can bond and hide imperfections.
Compare latex, oil-based, and specialty primers to pick one that matches your wall material and the kind of protection you need.
For damp, stained, or high-humidity garages, choose a primer with strong moisture and stain-blocking properties to prevent tannin bleed and mold.
Surface Preparation Importance
Good surface prep can make the difference between a paint job that lasts a season and one that lasts a decade; you’ll want to clean, repair, and prime garage walls before painting.
You do a surface assessment to spot stains, flaking, or moisture, then plan wall preparation steps. Proper prep boosts adhesion, hides imperfections, and prevents mold or peeling.
- Scrub greasy spots until the surface looks uniform.
- Sand rough patches to smooth connections.
- Patch holes and cracks with appropriate filler.
- Apply a bonding primer to create an even base for paint.
Primer Types Compared
Because primers create the bond between your wall and the topcoat, choosing the right type matters as much as picking the paint color.
You’ll pick from latex, oil-based, bonding, or specialty primers depending on surface and paint. Latex works for clean, previously painted drywall; oil-based grips chalky or glossy finishes; bonding primers adhere to tricky surfaces like concrete or metal; specialty primers target specific needs.
Consider primer types against texture, porosity, and the topcoat chemistry.
Primer benefits include improved adhesion, uniform sheen, and longer-lasting finish so your garage walls stay durable and look consistent.
Moisture And Stain Blocking
If your garage gets damp or has stains from oil, mold, or rust, pick a primer that blocks moisture and seals stains so the topcoat sticks and looks uniform.
You’ll want primers rated for moisture barriers and stain prevention—waterproofing and shellac-based primers work differently but both stop bleed-through.
Apply evenly, repair cracks first, and let curing time finish before painting.
Picture results:
- A sealed concrete wall with no salt stains.
- An oil-splattered patch hidden under a uniform coat.
- A mold-prone corner kept dry and paint intact.
- A rusted metal beam locked from weeping stains.
When to Choose Interior Latex for Garage Walls
When your garage is mainly a clean, climate-controlled storage or workshop space, choose interior latex for the walls; it dries quickly, cleans up with soap and water, and resists fading and yellowing over time.
You’ll pick interior latex when moisture is low, fumes are a concern, and you want easy maintenance.
Consider color selection carefully: lighter hues brighten the workspace, while mid-tones hide minor scuffs.
Evaluate finish types—flat hides imperfections, eggshell balances durability and sheen, satin or semi-gloss offers easy cleaning near workbenches.
Apply with proper primer on bare drywall and repaint as needed for upkeep.
When to Choose Oil-Based Paint for Garage Walls
Although oil-based paints take longer to dry, you should pick them when your garage sees heavy wear, chemical exposure, or frequent washing because their hard, durable finish resists stains, solvents, and scuffs better than most latex options.
You’ll weigh oil-based advantages like superior adhesion, lasting sheen, and easier spot cleaning against oil-based disadvantages such as strong odor, longer cure, and tougher cleanup.
Choose oil-based when you need maximum toughness on trim, metal cabinets, or lower walls that suffer impact.
- Scuffed lower wall after moving tools
- Chemical splatter near a workbench
- Metal shelving prone to rust
- High-traffic door frames
Epoxy Wall Paint: Benefits for Heavy-Use Garages
If your garage sees heavy use, epoxy wall paint gives you superior durability and protection that stands up to bumps and abrasion.
It’s highly resistant to chemicals and stains, so motor oils, cleaners, and spills won’t leave permanent marks.
Plus the seamless, easy-to-clean finish makes maintenance quick and keeps the space looking sharp.
Superior Durability And Protection
Because epoxy forms an ultra-tough, chemical- and stain-resistant coating, it’s the go-to choice for garages that see heavy traffic, tools, and spills.
You’ll notice a clear durability comparison with epoxy versus standard latex: fewer chips, less abrasion, and longer life. Its protection features include impact resistance, abrasion resistance, and a bonded surface that won’t flake under stress.
You get a finished space that handles daily abuse.
- Tire marks wiped away after a busy weekend.
- Tool drops leave no lasting dents.
- Heavy carts glide without scratching.
- Wet boots track off, floor stays intact.
Chemical And Stain Resistance
When you spill oil, solvents, or paint, epoxy walls shrug it off instead of soaking it in—its cross-linked surface blocks chemicals and keeps stains from setting. You’ll appreciate epoxy’s chemical resistance for heavy-use garages; it prevents etching and simplifies cleanup after accidental drips. That stain prevention extends the wall’s appearance and reduces repainting frequency. Choose a high-solids epoxy and follow mixing/curing directions so the protective film forms fully. Below is a quick comparison to help you decide.
| Feature | Benefit |
|---|---|
| Chemical resistance | Resists solvents |
| Stain prevention | Keeps walls cleaner |
| Durability | Long-lasting protection |
| Maintenance | Low effort |
Seamless Easy-To-Clean Finish
Beyond resisting spills and stains, epoxy creates a smooth, continuous surface that makes cleanup fast and effortless.
You’ll appreciate how seamless application eliminates tiny crevices where dirt hides, so sweeping or mopping takes minutes.
Epoxy’s durable film stands up to scrapes, oil, and frequent washing, giving you easy maintenance without frequent repainting.
When you choose epoxy for heavy-use garages, you get a finish that looks professional and stays functional.
- A glossy wall shedding oil droplets like beads.
- A smooth panel you wipe with one swipe.
- A scuff-resistant corner after years of use.
- A spotless wall after a weekend project.
Acrylic-Latex With Alkyd: An Ideal Hybrid Option
Think of acrylic-latex with alkyd as a best-of-both-worlds paint that combines the easy cleanup and flexibility of acrylic-latex with the durability and adhesion of alkyd; you’ll get a finish that resists chipping, handles temperature swings, and stands up to garage wear. You’ll enjoy hybrid benefits like easier application and improved paint longevity without sacrificing toughness. It’s great for concrete, drywall, and trim where moisture or impact are concerns. Expect moderate drying time and strong adhesion. Clean tools with water, use proper ventilation, and pick a product labeled “alkyd-modified” for true hybrid performance.
| Feature | Benefit | Use |
|---|---|---|
| Adhesion | Strong | Trim |
| Flexibility | Resists cracking | Drywall |
| Durability | Impact-resistant | Concrete |
Comparing Finishes: Flat, Eggshell, Satin, and Semi-Gloss
Choosing the right finish for your garage walls changes how the space looks, cleans, and holds up over time.
You’ll weigh sheen, maintenance, and paint durability in a clear finish comparison to match function and style.
Flat hides flaws but isn’t as washable. Eggshell offers subtle sheen and easier cleaning. Satin balances sheen and wipeability for moderate-traffic areas. Semi-gloss stands up to moisture and scrubbing, brightening dim spaces.
- Flat: absorbs light, masks imperfections.
- Eggshell: soft glow, moderate cleanability.
- Satin: durable-looking, easy to maintain.
- Semi-gloss: reflective, resists stains and moisture.
Paint Durability: Abrasion, Scuff Resistance, and Washability
Your garage walls take a beating, so you’ll want paint that stands up to high-traffic wear and resists abrasion and scuffs.
Choose finishes and formulations that are easy to clean and shrug off stains without fading. That way you can scrub marks away without stripping the color or sheen.
High-Traffic Surface Toughness
In a busy garage, paint has to take a beating—abrasion from tools and carts, scuffs from tires and shoes, and frequent washings to remove grease and dirt—so you’ll want coatings rated for high durability and easy cleaning.
Choose paints designed for high traffic durability and resistance to surface abrasion; semi-gloss or satin alkyd or epoxy-modified acrylics perform well.
Look for abrasion and scuff ratings on technical data sheets, and consider a tougher topcoat in work zones.
Visualize impact points:
- Tool bench bump marks on lower walls
- Cart wheels scraping baseboards
- Bike tires brushing doorways
- Ladder rubs on corners
Cleanability And Stain Resistance
Because garage walls get splattered with oil, grease, mud, and paint drips, you’ll want finishes that wipe clean without staining or breaking down.
Choose semi-gloss or satin latex or epoxy paints—they resist abrasion, scuffs, and frequent washing.
Use microfiber cloths, mild detergent, and soft-bristle brushes for cleaning techniques that remove grime without dulling the finish.
Tackle stains quickly with a degreaser or trisodium phosphate solution, testing a hidden spot first.
Apply a washable primer and consider a clear acrylic or epoxy topcoat for extra stain prevention.
Regular spot cleaning keeps walls durable and looking fresh.
Mildew- and Mold-Resistant Paints for Damp Garages
If your garage stays damp, choose a paint formulated to resist mildew and mold so you won’t be repainting every few years.
You’ll want mildew resistant formulations and moisture proof coatings that bond to masonry or drywall, with antimicrobial additives to block spores.
Pick semi-gloss or satin for easier wiping and faster drying to limit dampness.
Prep surfaces: clean, kill existing growth, and seal cracks.
- Dark corners with visible spores.
- Buckets and boxes near the floor.
- Condensation on windows and pipes.
- A concrete wall with damp staining.
Stain-Blocking Paints for Oil, Grease, and Nicotine Stains
When old oil, grease, or nicotine stains keep bleeding through new coats, use a true stain-blocking primer designed for those contaminants so your finish paint actually hides the problem.
You’ll want a primer labeled for oil, grease, and nicotine that seals tannins and hydrocarbons, preventing bleed-through. Choose stain resistant formulas with strong adhesion and rapid drying to let you topcoat sooner.
For extreme cases, consider oil based options; they lock stains more effectively than many water-based primers.
Apply per manufacturer instructions, spot-prime heavy stains, sand glossy areas, and finish with a durable topcoat suited to garage traffic.
Color Choices: Light, Visibility, and Heat Absorption
Choose lighter paint tones to boost light reflectance so you’ll need fewer fixtures and can spot spills and tools more easily.
Better visibility improves safety when you’re working or moving vehicles in and out.
Also remember darker colors absorb heat, which can raise garage temperatures and affect stored items.
Light Reflectance Benefits
Because lighter paints bounce more light around, they make garages feel brighter and reduce the need for extra fixtures. You’ll want reflective colors and light enhancing finishes to maximize natural and artificial illumination, cut electric use, and keep surfaces cooler.
Choose semi-gloss or satin for durability and bounce without glare. Think about heat absorption too: paler tones reflect solar gain so your garage stays more comfortable.
- White walls amplifying daylight through windows
- Pale gray minimizing contrast for task areas
- Soft beige warming the space without trapping heat
- Off-white ceiling to boost upward reflection
Visibility And Safety
Although lighter colors boost visibility by reflecting more light, you’ll want to balance brightness with heat absorption and glare control to keep your garage safe and comfortable.
Choose paints that minimize harsh reflections while improving task visibility near workbenches and storage. Apply contrasting trim or stripes to outline steps, doors, and hazards so you can see edges clearly.
Use high-contrast zones for safety signage and mark walkways with durable, scuff-resistant paint. Consider matte or eggshell finishes to reduce glare.
Small visibility enhancements, like reflective tape or painted floor borders, further guide movement and prevent trips or collisions.
Heat Absorption Impact
When you pick garage wall colors, remember that darker paints absorb more heat while lighter tones reflect it. So, color choice affects both comfort and energy use; light colors keep the space cooler and reduce AC load, whereas dark colors can make the garage noticeably warmer, especially on sunlit walls.
You’ll balance aesthetics with heat retention strategies and consider insulation impact to control temperature. Choose finishes that reflect light and pair with proper insulation for best results.
- Sunlit east wall glowing bronze heat
- Pale off-white bouncing cool light
- Mid-tone gray warming slowly
- Deep navy trapping afternoon warmth
Low-VOC and Low-Odor Paint Options for Garages
If you’re painting a garage where people spend time or where fumes could linger, choose low-VOC and low-odor paints to keep air quality safe and avoid strong smells.
You’ll find many eco-friendly options labeled water-based acrylic or latex; they emit fewer volatile organic compounds and dry quickly. Look for certifications (Greenguard, Green Seal) and check product data sheets for VOC limits to guarantee paint safety.
Use low-odor primers and proper ventilation during application. For stubborn stains or mildew-prone areas, select mildew-resistant formulations.
These choices protect occupants, reduce lingering odors, and simplify cleanup with minimal compromise on durability.
Paint Options for Insulated or Heated Garage Conditions
For insulated or heated garages, pick paints formulated to handle temperature swings and trapped moisture so your finish won’t crack or peel.
You’ll want coatings that resist condensation, mold, and thermal movement common in insulated garages and heated environments.
Use breathable acrylic latex or moisture-tolerant primers, and choose semi-gloss or satin for cleanability.
Choose breathable acrylic latex or moisture-tolerant primers, and opt for semi-gloss or satin finishes for easy cleaning.
Prep well: clean, repair, and prime to guarantee adhesion.
- Smooth, washable semi-gloss acrylic for durability and light reflection.
- Breathable acrylic latex to prevent trapped moisture.
- Moisture-blocking primer for damp spots and condensation.
- Mold-resistant coatings where humidity concentrates.
Budget-Friendly Garage Paints That Still Perform
You don’t need to overspend to get garage paint that holds up — several affordable options deliver durability, stain resistance, and easy cleaning without breaking the bank.
Look for latex-based acrylics labeled for garages or high-traffic areas; they resist peeling, handle moisture, and scrub clean. Semi-gloss finishes boost washability.
Consider masonry acrylics for concrete block walls. Check product specs and local reviews for a performance comparison between brands, focusing on hide, adhesion, and mildew resistance.
Prioritize primers for raw surfaces; a good primer plus a mid-range topcoat often outperforms pricier alternatives.
These budget options give solid long-term value.
Premium Paints Worth the Extra Cost
When you want the best long-term protection and a cleaner look, premium garage paints deliver—offering tougher binders, better pigments, and superior mildew and stain resistance that mid-range options can’t always match.
You’ll pay more for premium quality and long lasting durability, but you get enhanced coverage, surface compatibility across concrete or drywall, and a choice of finish selection and color variety.
Consider eco friendly options if ventilation’s limited. Compare brands for warranties and performance.
- Smooth satin resisting scuffs
- High-build enamel sealing porous concrete
- Moisture-blocking primer plus topcoat
- Matte hides imperfections, cleans easily
How to Calculate Paint Quantity for Garage Walls
Start by measuring the length and height of each wall and subtracting areas for doors and windows so you know the true surface to cover.
Multiply wall dimensions to get square footage per wall, then add them for total wall area.
Check the paint coverage on the can — it tells you how many square feet a gallon covers.
Divide total area by that number to find gallons needed for one coat.
Factor in two coats if desired, and add 10–15% for waste, texture, and touch-ups.
Round up to buy whole gallons; you’ll avoid mid-project runs to the store.
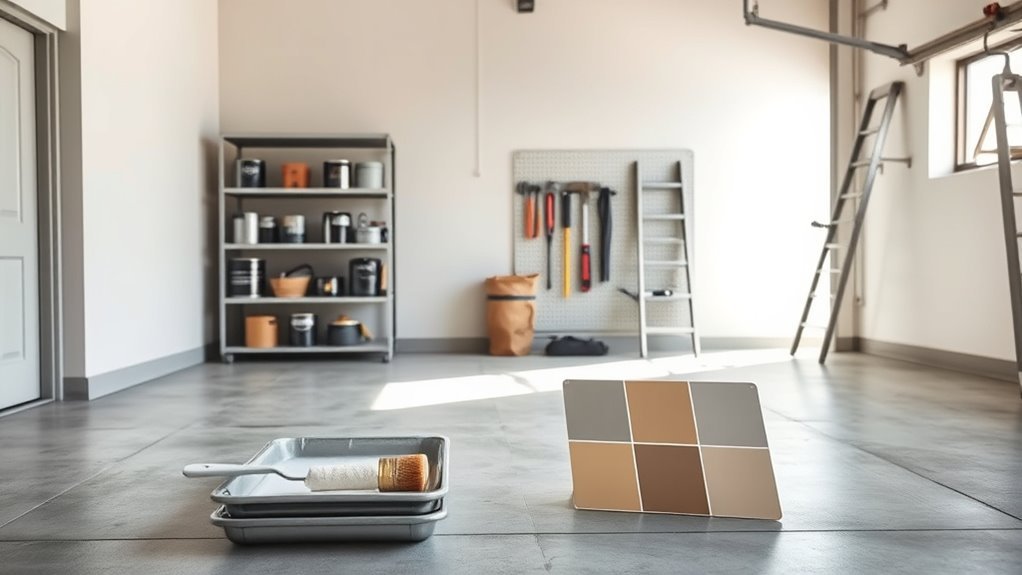
Tools and Supplies to Paint Garage Walls Efficiently
Before you start painting your garage walls, gather the essential painting tools—rollers, brushes, extension poles, trays, and a good-quality roller cover—to save time and get even coverage.
Don’t forget surface preparation supplies like sandpaper, patching compound, a putty knife, degreaser, and painter’s tape to guarantee the paint adheres and looks professional.
With the right gear on hand, you’ll work faster and avoid common mistakes.
Essential Painting Tools
Although the job might seem simple, having the right tools will make painting your garage walls faster, neater, and more durable.
You’ll want a compact kit of essential tools so you can focus on painting techniques and efficient coverage. Choose items that reduce drips, speed application, and deliver smooth edges. Visualize each tool’s role as you work.
- Roller with extension — covers large areas quickly and evenly.
- Angled brush — cuts precise lines along trim and corners.
- Paint tray and liners — control excess paint and limit mess.
- Drop cloths and painter’s tape — protect floors and create crisp edges.
Surface Preparation Supplies
Good preparation makes painting faster and longer-lasting, so gather the right supplies: a stiff broom, pressure washer or hose with nozzle, trisodium phosphate or degreaser for surface cleaning, scrub brushes, rags, painter’s tape, drop cloths, putty knife, joint compound, sanding block (coarse and fine), and a shop vacuum.
Choose brushes and rollers suited to wall texture—nap length matters. Have a respirator, gloves, goggles, and a ladder. For concrete or masonry, include a masonry primer and etcher.
Organize supplies on a cart or table so you can work efficiently and address defects before painting begins.
Step-by-Step: Painting Garage Walls
Get your tools ready and clear a workspace so you can paint efficiently and safely; this step-by-step guide walks you through prepping, priming, and applying paint to give your garage walls a professional finish.
Start by cleaning and sanding to reveal any uneven garage wall textures. Then patch holes and dust off.
Prime with a stain-blocking primer suited to drywall or masonry.
Roll on two thin coats of your chosen finish, following current paint color trends for light-reflecting shades if you want brightness.
Finish trim with a brush and ventilate while curing.
- Clean and sand
- Patch and prime
- Roll thin coats
- Trim and cure
Common Painting Mistakes and How to Avoid Them
Now that you’ve prepped, primed, and applied your coats, it’s worth looking at common painting mistakes so you don’t undo your work. Watch color selection—testing swatches prevents regret. Check surface compatibility: oil over latex or painting damp walls causes peeling. Avoid rushing; thin, even coats beat thick globs. Use proper tools and clean rollers to sidestep lint and streaks. Mask trim to keep lines crisp. Sand between coats when specified.
| Mistake | Fix |
|---|---|
| Wrong paint type | Match paint to surface |
| Poor prep | Clean and prime |
| Thick coats | Apply thin layers |
| Bad tools | Use quality brushes/rollers |
Maintenance Tips to Keep Garage Walls Looking Good
Keep a simple cleaning schedule so dirt and stains don’t build up and dull your paint.
Check for leaks or condensation regularly to prevent moisture damage before it ruins the surface.
Keep a small stash of touch-up paint and address chips or scuffs as soon as you spot them.
Regular Cleaning Schedule
Although you won’t need to scrub the walls every week, setting a simple, regular cleaning schedule will prevent grime and stains from building up and make touch-ups easier.
Decide on a cleaning frequency—monthly for light use, quarterly for busier garages—and note it on your calendar. Gentle soap, a soft brush, and warm water handle most dirt; avoid harsh abrasives that harm paint.
Keep a small touch-up kit handy for scuffs. Track wall maintenance tasks so you spot recurring stains or marks early.
- Sweep and dust corners
- Wipe lower panels
- Tackle grease spots
- Inspect for chips
Preventing Moisture Damage
Because moisture can quickly undermine paint and drywall, you’ll want to tackle humidity and leaks before they cause stains, bubbling, or mold. Inspect seals, fix roof or pipe leaks, and install moisture barriers on exposed studs. Use ventilation solutions like exhaust fans or a dehumidifier to keep relative humidity low. Check for condensation after cold snaps and improve insulation where needed. Monitor painted surfaces monthly and address damp spots immediately to prevent mold growth. Below is a quick reference.
| Action | Benefit |
|---|---|
| Seal leaks | Prevents water intrusion |
| Install barrier | Protects drywall and paint |
| Add ventilation | Reduces humidity and mold risk |
Touch-Up Paint Routine
After you’ve handled leaks and humidity, set a simple touch-up routine to keep your garage walls looking sharp: establish a maintenance schedule and keep supplies on hand.
Inspect quarterly for scuffs, chips, or mold. Use matched paint and gentle cleaners, and practice basic touch-up techniques so repairs blend.
- Clean the area, dry fully, sand lightly to key the surface.
- Apply primer to bare spots, feather edges for smooth changes.
- Use small brushes or rollers, multiple thin coats for color accuracy.
- Store labeled leftover paint and document dates in your maintenance schedule.
Touch-Up and Repair Strategies for Scuffs and Stains
When you notice scuffs or stains on your garage walls, act quickly to prevent them from setting and to avoid larger repairs later; start by identifying the mark—rubber scuff, oil stain, paint chip, or rust—so you can choose the right cleaner and touch-up paint.
For scuff repair, try a rubber eraser or melamine sponge, then clean with mild detergent.
For stain removal, use degreaser for oil, oxalic acid for rust, and isopropyl alcohol for marker.
Sand paint chips, prime bare spots, and apply matching touch-up paint.
Finish by sealing high-traffic areas to reduce future damage.
When to Repaint vs. Refinish With Epoxy or Paneling
If your garage walls show widespread peeling, moisture damage, or you want a durable, easy-to-clean surface for heavy use, consider refinishing with epoxy or installing wall paneling instead of simply repainting.
You should repaint for cosmetic wear or every few years based on repainting frequency, but choose epoxy or paneling when damage recurs, humidity persists, or you need tougher protection.
Epoxy advantages include seamless, stain-resistant surfaces; paneling offers impact resistance and easy mounting.
Picture these scenarios:
- Flaking paint over drywall seams.
- Persistent mold on lower walls.
- Oil-stained lower panels.
- A workshop needing pegboard-ready walls.
Eco-Friendly Paint Brands and Certifications to Consider
Because the paint you pick affects indoor air quality and the environment, look for brands that prioritize low-VOC formulas, responsibly sourced ingredients, and transparent testing. You’ll want eco friendly certifications like Green Seal, GREENGUARD, and EPA Safer Choice listed; they signal better indoor air and reduced toxins. Sustainable paint options from reputable makers often use recycled packaging and water-based resins. Consider third-party test results and brand transparency when choosing for a garage, where fumes and durability both matter.
| Certification | What it Means |
|---|---|
| Green Seal | Low environmental impact |
| GREENGUARD | Low chemical emissions |
How to Shop: Read Labels and Compare Tech Specs
You’ve picked a shortlist of eco-friendly brands and certifications; now read labels and compare technical specs to make the final choice.
Focus on label comprehension: check VOC content, recommended substrate, and drying times so the paint fits your garage conditions.
Use the tech specification sheet for coverage rate, sheen, and durability tests.
Compare abrasion resistance and mildew ratings to visualize long-term performance.
Ask retailers for SDS if anything’s unclear.
Trust numbers and standardized tests over marketing claims.
Balance coverage per gallon against prep needs, and you’ll pick a paint that performs, protects, and stays green.
Project Costs: Paint, Labor, and ROI
When planning your garage paint project, tally paint, supplies, and labor so you know the true cost and expected return; paint quality and prep time directly affect both upfront expense and long-term value.
Start with a clear cost breakdown: primer, paint per gallon, rollers, tape, patching compound, and disposal. Estimate labor hours if hiring pros or value your own time.
Start with a clear cost breakdown—primer, paint per gallon, rollers, tape, patching compound, disposal—and estimate labor hours.
Higher-quality, durable coatings cost more but reduce maintenance and add curb appeal.
Compare projected expenses to resale impact to gauge return investment—expect modest home-value gains but significant savings from avoided repairs and less frequent repainting.
Recommended Paint Products for Common Garage Scenarios
For most garage situations you’ll want products that balance durability, stain resistance, and ease of cleanup—choose based on floor vs. walls, traffic level, and moisture exposure.
You’ll pick semi-gloss latex for walls where garage wall aesthetics matter and you want easy wipe-downs. Use epoxy or polyaspartic for floors and high-traffic zones.
Rust-inhibiting enamel suits metal doors and trim. For humid garages, pick mold-resistant primers and paints.
Focus on proper paint application techniques: clean, prime, and apply thin even coats.
Visualize options:
- Clean white semi-gloss walls
- Gray epoxy floor
- Rust-proof trim enamel
- Mold-resistant primer and coat
Frequently Asked Questions
Can I Paint Garage Walls Myself or Should I Hire a Pro?
You can paint your garage walls yourself if you’re comfortable with prep and time, but hiring a pro saves time and guarantees finish. Weigh DIY vs. Professional and Cost Considerations to decide based on skill, schedule, budget, and quality.
How Long Must Paint Cure Before Parking a Car Inside?
Wait at least 24–72 hours, depending on cure time and temperature effects: warmer speeds curing, cooler slows it. You’ll avoid sticking, scratches, or fumes by waiting longer, test with a gentle touch before parking your car inside.
Are Spray-Applied Coatings Better Than Brushes/Rollers for Garages?
Yes — you’ll often prefer spray-applied coatings for faster application and more even coverage, but brushes/rollers work for edges; choose based on application techniques, desired finish, and coating durability to resist abrasion and moisture.
Can Painted Garage Walls Be Safely Used for Mounting Heavy Cabinets?
Yes—you can mount heavy cabinets on painted garage walls, but juxtaposing painted smoothness with brute load-bearing demands, you’ll need proper mounting techniques and consider paint durability; anchor into studs or use heavy-duty anchors to guarantee safety.
How Do I Remove Lead-Based Paint From an Older Garage Wall?
You should treat lead paint as hazardous: hire a certified contractor for safe removal techniques, or follow EPA-approved methods—containment, HEPA vacuuming, wet sanding—and avoid dry scraping or sanding to prevent toxic dust exposure.
Conclusion
You probably think garage paint’s just cosmetic, but research shows the right coating actually prevents moisture damage, stains, and odors—so your choice matters. Pick acrylic latex for finished drywall, epoxy or urethane for floors and heavy-use walls, and moisture-resistant masonry paint for concrete block. Prep thoroughly and match finish to use: satin for cleanability, flat for hiding flaws. Spend a bit more now and you’ll save on repairs and repainting later.