What Paint to Use on Steel Door? Best Paint Guide
For an exterior steel door you’ll want a quality metal primer to stop rust, then a durable topcoat—either acrylic latex for UV resistance, easy cleanup, and quicker drying, or oil-based enamel for the toughest, smoother finish and scuff resistance. Clean, degrease, and lightly abrade before priming, and apply two thin coats for best results. Choose latex for low odor and frequent repainting; pick oil for high-impact exposure, and keep reading for prep, quantities, and timing tips.
Quick Answer: Best Paint and Primer for Exterior Steel Doors
If you want a durable, weather-resistant finish for an exterior steel door, choose a high-quality exterior primer plus an acrylic latex or oil-based enamel topcoat formulated for metal.
You’ll prep by cleaning, degreasing, and lightly abrading the surface, then apply rust-inhibiting primer for adhesion and corrosion resistance.
For topcoats, acrylic latex offers easier cleanup and UV resistance; oil-based enamel gives a tougher, glossier film.
Prioritize paint durability over novelty, but consider color trends when selecting tones that resist fading.
Follow manufacturer dry times, use proper brushes or sprayers, and apply two thin coats for best results.
Why Paint Choice Matters for Steel Doors
Because your steel door is both a front-line weather barrier and a major visual element, the paint you pick affects protection, longevity, and curb appeal. You’ll want a finish that guards against rust, withstands UV, and complements steel door aesthetics while maximizing paint longevity.
Your steel door’s paint protects against rust and UV damage while shaping durability and curb appeal.
Choosing the right formulation and proper prep reduces peeling and maintenance.
- Corrosion resistance preserves metal integrity
- UV stability keeps color true longer
- Finish type influences cleaning and wear
- Primer compatibility prevents adhesion failure
- Color and sheen define curb appeal
Make choices that balance durability, maintenance, and appearance for lasting results.
How to Choose Between Oil-Based and Latex for a Steel Door
Now that you know how paint choice affects protection and appearance, you’ll need to pick between oil-based and latex formulations based on performance and practical concerns.
Consider drying time, cleanup, and flexibility: latex dries faster, cleans with water, resists cracking from door movement, and follows modern color trends easily; oil-based levels well and offers strong paint durability but needs mineral spirits and longer cure.
Think about environment and ventilation, how often you’ll repaint, and the substrate prep required.
Test samples in your chosen light, prioritize adhesion and finish, and pick the type that balances maintenance, longevity, and aesthetic goals.
When to Choose Oil-Based Paint for a Steel Door
When durability and a glass‑smooth finish matter most, choose oil‑based paint for your steel door.
When durability and a glass‑smooth finish matter most, opt for oil‑based paint on your steel door.
You’ll pick it when you need superior adhesion, resistance to scuffs, and a hard, long-lasting surface despite longer cure times.
Consider oil based benefits like leveling, stain-blocking, and a rich sheen for high-traffic or exposed entries.
Balance that against oil based drawbacks: stronger odor, longer drying, and tougher cleanup.
Use oil-based when longevity and a flawless finish outweigh convenience.
- High-impact areas
- Weather-exposed doors
- Stain-covered surfaces
- Metal with minor imperfections
- When maximum sheen is desired
When to Choose Water-Based (Latex) Paint for a Steel Door
If your steel door is rust-free and located indoors, choose a water-based (latex) paint for easier application and faster drying.
You’ll get low odor and simple cleanup with soap and water, which is ideal for interior spaces.
Avoid latex on outdoor or rusty doors since it won’t block corrosion like oil-based primers can.
When Rust Isn’t Present
Although steel doors with no rust or you want to repaint often don’t need heavy-duty primers, water-based (latex) paints are usually the smart choice for their ease of use, quick drying, and low odor.
You’ll save time on prep during routine steel door maintenance, and latex lets you experiment with paint color selection without long waits.
Apply on clean, degreased surfaces; sand lightly for adhesion. Use exterior-grade latex for outside doors and satin or semi-gloss for durability.
Advantages include:
- Fast drying for quicker return to service
- Low VOCs and odor
- Easy cleanup with soap and water
- Flexible finish resists cracking
- Good color retention
For Indoor Doors Only
Because indoor environments demand less extreme durability, you’d pick water-based (latex) paint for a steel interior door when you want quick drying, low odor, and easy cleanup without sacrificing a smooth, long-lasting finish.
You’ll appreciate latex for its easy sanding between coats, minimal VOCs, and compatibility with most primers. Choose satin or semi-gloss for durability in high-traffic areas; flat works in low-traffic rooms.
Match finishes to your interior door designs and use color psychology to set mood—soft blues calm, warm yellows energize.
Prep properly: clean, degrease, and prime; apply thin, even coats for best adhesion and appearance.
Acrylic Enamel vs. Alkyd for Steel Doors
Choosing between acrylic enamel and alkyd for a steel door comes down to what you value most: quick drying, easy cleanup, and UV resistance (acrylic enamel) versus deeper leveling and a hard, durable finish (alkyd).
You’ll pick acrylic enamel for acrylic advantages like color retention and faster recoat times; choose alkyd when alkyd durability and a smoother, self-leveling surface matter.
Prep, primer, and application technique affect longevity more than brand.
- Faster drying saves time
- Easier cleanup with soap and water
- Better UV resistance outdoors
- Alkyd gives a tougher, glossy surface
- Sanding and recoating differ between types
Best Rust-Preventive Paints for Steel Doors
When you want a steel door to resist corrosion long-term, pick paints formulated with rust inhibitors and good adhesion—these combine a corrosion-resistant primer with a durable topcoat so moisture and salt can’t reach bare metal.
Choose epoxy or oil-modified primers, zinc-rich primers for severe exposure, and polyurethane or acrylic enamel topcoats for UV and abrasion resistance.
You’ll follow rust prevention techniques like thorough surface prep, removing mill scale, and applying wet-film-thickness per instructions.
For effective steel door maintenance, inspect annually, touch up chips promptly, and use compatible products to avoid delamination and guarantee lasting protection.
High-Temperature Paints for Steel Doors
If your steel door faces high heat—near a furnace, boiler, or outdoor grill—you’ll want a heat-resistant coating that won’t blister or discolor.
Choose paints rated for the specific temperature range and follow manufacturer prep and cure instructions for best adhesion.
Apply thin, even coats and allow proper drying between layers to prevent runs and guarantee long-term protection.
Heat-Resistant Coatings
A few specialized paints are made to handle extreme heat, and they’re the ones you want for steel doors exposed to ovens, furnaces, or grill areas.
You’ll choose coatings that prioritize heat resistance and temperature stability so the finish won’t blister or fail. These formulations often contain silicone, ceramic, or inorganic pigments designed for sustained high temps.
Consider durability, color retention, and surface preparation before applying.
- Silicone-based coatings resist thermal cycling
- Ceramic-modified paints improve longevity
- Inorganic pigments prevent color fade
- High-temperature primers enhance adhesion
- Clear topcoats add extra protection
High-Temp Application Tips
Because high-temp paints behave differently than regular coatings, you’ll need to adjust your prep and application techniques to get a durable finish on a steel door.
Clean and de-grease thoroughly, remove rust, and use a high-temp primer rated for high temperature resistance.
Sand between coats for adhesion and apply thin, even layers—thicker coats can sag when cured.
Follow manufacturer cure schedules; some require baking or extended air cure.
Use proper ventilation and heat-resistant PPE.
Test a small area to confirm adhesion and color after heating.
Maintain tools with solvent recommended by the paint maker to preserve consistency and performance.
Low‑VOC and Eco-Friendly Options for Steel Doors
When you’re choosing paint for a steel door and want to reduce fumes and environmental impact, low‑VOC and eco‑friendly formulations give you durable protection without sacrificing performance.
You’ll get low VOC benefits like reduced odors and faster re-entry times, plus eco friendly materials that cut solvent use. Choose waterborne acrylics or zero‑VOC primers rated for metal, and guarantee proper adhesion with a clean, deglossed surface.
Expect similar longevity to standard paints when applied correctly.
When applied properly, low‑VOC options offer durability on par with conventional paints.
- Use waterborne acrylics for easy cleanup
- Pick zero‑VOC primer for adhesion
- Verify rust inhibitors in the formula
- Apply thin, even coats
- Follow manufacturer cure times
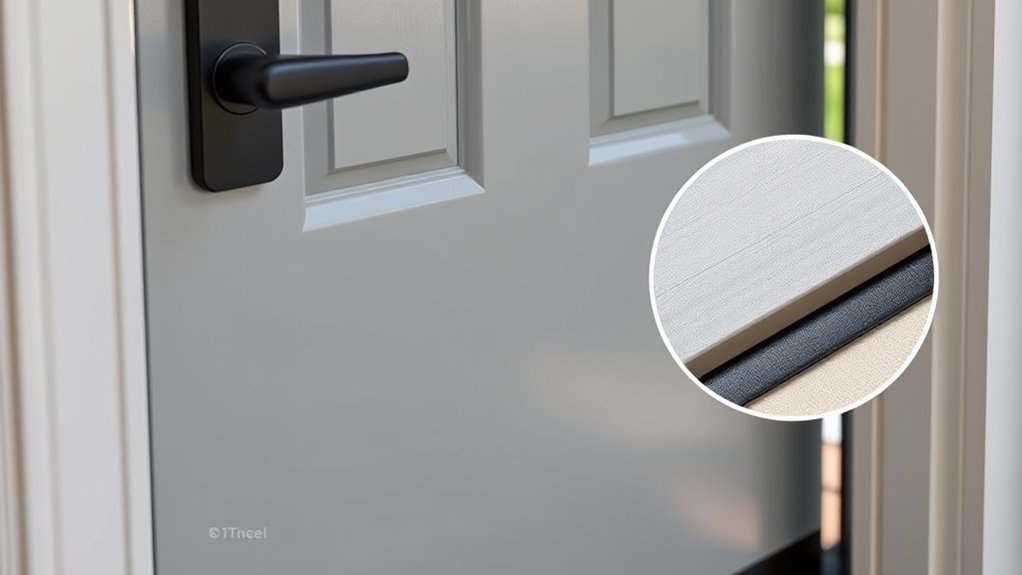
Best Finishes for Front Steel Doors (Gloss → Flat)
For a front steel door you’ll want to pick a finish based on how much wear and weather it faces.
High gloss gives the best durability and is easiest to clean, while semi-gloss balances shine with strong weather resistance.
If you prefer a subdued look, satin offers a soft sheen and flat hides surface imperfections for a more understated appearance.
High Gloss Durability
High-gloss finishes give your front steel door a mirror-like look and exceptional durability, resisting scratches, stains, and moisture better than lower sheens. You’ll find high gloss is long lasting, easy to clean, and ideal where appearance matters.
It highlights imperfections, so prep is essential: sand, prime, and remove rust before painting. Choose enamel or oil-based formulas for maximum hardness, or modern acrylic urethane for UV stability. Apply thin, even coats and allow full cure between layers to avoid runs.
- Easy maintenance
- Superior scratch resistance
- Strong stain repellence
- Enhanced color depth
- Longer service life
Semi-Gloss Weather Resistance
Although it doesn’t shine as intensely as gloss, semi-gloss strikes an excellent balance between appearance and protection for front steel doors, offering good weather resistance while still hiding minor surface issues better than full gloss.
You’ll appreciate semi-gloss durability: its tougher finish resists scuffs, moisture, and UV fading more than satin or flat, making maintenance easier.
For exterior steel doors exposed to rain, sun, and temperature swings, choose a high-quality exterior enamel labeled for metal to maximize weather resistance.
Prep and primer remain critical; proper adhesion prevents peeling so the semi-gloss durability lasts through seasons.
Satin And Flat Appearance
If you like a softer, more understated look than semi-gloss, satin and flat finishes give your front steel door a muted, contemporary appearance that hides imperfections even better.
You’ll choose satin finish for gentle sheen and wipeability, or flat finish for minimal reflection and a smooth, modern feel. Both reduce glare and soften architectural details; flat hides blemishes best, satin balances durability with subtler shine.
Prepare the surface, prime for metal, and use exterior-grade formulas to prevent peeling.
- Satin cleans easily without high gloss
- Flat masks dents and scratches
- Satin resists weathering better than flat
- Flat minimizes reflections
- Both need proper priming
How Primer Choice Differs for Bare vs. Painted Steel
When you’re working with bare steel, the primer has to do more than stick — it needs to seal mill scale and prevent rust.
On bare steel, the primer must do more than adhere — it has to seal mill scale and stop rust.
On previously painted steel, the primer’s main job is to promote adhesion and bridge compatibility between old and new coatings.
You’ll choose primer types based on condition: zinc-rich or epoxy primers for bare, corrosion-prone metal; modified acrylic or alkyd primers for sound painted surfaces.
Prep differs too: remove rust and grease on bare steel; clean and scuff for painted.
Focus on surface adhesion, curing time, and compatibility with your topcoat to guarantee a durable finish.
Best Bonding Primers for Smooth Steel Surfaces
Choosing the right bonding primer for smooth steel matters because it’s the foundation that guarantees your topcoat sticks and resists peeling. Look for primers formulated for low-porosity metal that contain strong adhesion promoters like silanes, chlorinated rubber, or specialty acrylic binders.
You’ll pair proper surface preparation and compatible bonding techniques to maximize adhesion. Clean, degrease, and scuff lightly; apply thin, even primer coats per manufacturer directions.
Recommended features: fast tack-free time, chemical resistance, and paintable within recommended window. Consider test patches before full application.
- Cleanliness is essential
- Light abrasion helps
- Use compatible topcoats
- Follow flash times
- Test first
When to Use Rust-Converting Primers
If the door has visible rust that you can’t fully remove, reach for a rust-converting primer to stop corrosion and stabilize the surface.
Use it on stubborn, hard-to-remove rust spots where sanding or wire-brushing won’t get everything.
After the primer cures, you can apply your topcoat for long-lasting protection.
When Surface Is Rusted
Unless the rust is just surface discoloration that scrapes off easily, you’ll want to use a rust-converting primer before painting to stop corrosion and create a stable base.
You should assess the damage, clean loose scale, and choose a primer suited to the metal and environment. Good rust treatment methods and surface preparation techniques make the primer effective.
Apply according to manufacturer directions, allow full cure, then topcoat with compatible paint.
Here are key reminders:
- Remove loose rust and dirt
- Degrease the area thoroughly
- Mask surrounding surfaces
- Apply primer evenly, thin coats
- Check cure time before topcoating
For Hard-To-Remove Rust
When rust has pitted or bonded tightly to the steel and mechanical removal would damage the door or take too long, reach for a rust-converting primer to stabilize the corrosion and provide a paintable surface.
You’ll apply a converter that chemically transforms iron oxides into a stable, inert layer, letting you avoid aggressive sanding. Choose products labeled for steel doors and follow cure times; converters vary in compatibility with topcoats.
Rust treatment options also include encapsulation versus removal, so weigh time and damage risk.
Use converters alongside regular rust prevention techniques—keep drains clear, touch up chips, and control moisture to limit recurrence.
Before Topcoat Application
Before you apply a topcoat, make certain the rust-converting primer has fully done its job and is compatible with your chosen paint: clean off loose scale, let the converter cure to the manufacturer’s recommended time, and confirm the topcoat type (oil- or water-based) the converter accepts.
Do a pre paint inspection to locate surface imperfections, remaining mill scale, or oily spots. Lightly sand converted areas for adhesion and remove dust.
Test a small patch with your topcoat. If the converter flakes or discolors, strip and start over. Use appropriate temps and humidity for curing to guarantee long-term protection.
- Inspect for loose rust
- Sand for adhesion
- Clean contaminants
- Patch-test topcoat
- Follow cure times
Zinc-Rich vs. Epoxy Primers for Corrosion Control
Choosing the right primer can make or break your corrosion control strategy for a steel door, so let’s compare zinc-rich and epoxy primers head-to-head.
You’ll find zinc primer benefits include sacrificial protection and excellent galvanic corrosion resistance, ideal for bare or abrasive-blasted steel.
Epoxy primer advantages are superior adhesion, chemical resistance, and a dense barrier that blocks moisture and salts, making it great over prepared substrates or under high-performance topcoats.
Use zinc-rich where active rust prevention is priority; choose epoxy when you need a tough, impermeable base that bonds well to fillers and topcoats.
Consider environment and maintenance frequency.
How to Test Paint Adhesion on a Steel Door
Start by selecting a small, inconspicuous area on the steel door and prepare it as you’d the rest of the surface—clean, dry, and free of loose paint or grease—so your adhesion test reflects real-world conditions.
Use simple paint adhesion methods: apply primer and topcoat, let cure, then score a crosshatch with a sharp blade. Press a standard tape over the cuts and remove quickly; inspect for flaking.
Repeat in a few spots to confirm consistency. Good testing surface preparation guarantees reliable results.
- choose hidden spots
- use proper curing times
- score clean cuts
- use quality tape
- document each test
Preparing a Steel Door for Painting (Step-by-Step)
1 clear, methodical prep makes painting a steel door go smoothly and guarantees the finish lasts—so gather your tools, work in a well-ventilated area, and plan to clean, repair, sand, prime, and protect hardware in that order.
Start by removing handles and masks; cover hinges. Clean the door surface with degreaser, rinse, and dry to remove dirt and oils that undermine paint adhesion.
Fill dents or scratches with metal filler, sand smooth, and wipe away dust. Lightly scuff glossy areas to promote adhesion, then apply metal primer evenly.
Reattach protected hardware after paint cures to finish professionally.
Removing Rust and Old Paint Safely From Steel Doors
Before you paint, tackle rust and loose old paint so the new finish will adhere and last. You’ll remove scale and flaking layers safely: contain debris, use wire brushes or chemical rust converters, and apply primer designed for metal.
Before painting, remove rust and flaking paint—contain debris, use rust converters or brushes, then prime metal promptly.
Choose rust treatment methods that neutralize corrosion without harming the door. Wear PPE, work outdoors or ventilated, and protect surroundings. This keeps your door sound and prepped for coating as part of regular steel door maintenance.
- Contain dust and chips
- Use appropriate PPE
- Select a compatible rust converter
- Clean thoroughly after treatment
- Apply metal primer promptly
Sanding and Scuffing Techniques for Metal Surfaces
Before you paint, use abrasive sanding—like 120–220 grit paper or a scuff pad—to remove remaining mill scale and create a tooth for primer.
For tight spots and glossy finishes, scuff the surface with a solvent-soaked cloth (denatured alcohol or mineral spirits) to remove oils and lift light contaminants.
Work methodically, wipe away residue, and let the metal fully dry before priming.
Abrasive Sanding Methods
Although sanding might seem simple, choosing the right abrasive and technique for metal surfaces is crucial to getting paint to stick and last.
You’ll use sanding techniques that focus on surface preparation and paint adhesion: start with coarser grits to remove rust or old finish, then move to finer grits for smoothness.
Pick abrasive materials designed for metal and use proper sanding equipment—orbital sanders for flats, hand blocks for edges.
Clean thoroughly between steps. For finishing touches, lightly scuff before priming to guarantee the primer bonds well.
- Start coarse, finish fine
- Use metal-specific abrasives
- Match equipment to area
- Clean between passes
- Light final scuff for adhesion
Scuffing With Solvents
When you need to remove contaminants and lightly abrade a steel door without heavy sanding, scuffing with solvents is a fast, effective option that also helps the primer bond. You’ll choose solvent types like isopropyl, acetone, or mineral spirits based on paint and finish; test first. Use clean cloths and circular motions, then let the surface dry. These cleaning methods remove oils, wax, and dust while creating a slight tooth for primer. Wear gloves and ventilate. Apply primer within the solvent’s recommended dwell time to avoid recontamination and guarantee long-lasting adhesion.
| Solvent | Use | Safety |
|---|---|---|
| Isopropyl | Light soils | Ventilate |
| Acetone | Tough residues | Flammable |
| Mineral spirits | Grease | Gloves |
Cleaning and Degreasing a Steel Door Before Priming
Since grease, dirt, and old finishes prevent primer from bonding properly, you’ll need to clean and degrease the door thoroughly before you prime.
You’ll follow simple steel door maintenance and surface preparation steps: remove loose paint, wash with a mild detergent, rinse, dry, then use a degreaser for oily spots.
Inspect for rust and treat it before priming. Work in shaded, ventilated areas and wear gloves.
- Remove loose debris and flaking paint
- Clean with warm soapy water and a sponge
- Rinse thoroughly and dry completely
- Apply a commercial degreaser to oily areas
- Neutralize and treat any rust spots
Best Tools for Painting a Steel Door: Brushes, Rollers, Sprayers
Picking the right tools makes painting a steel door faster and gives a more durable, professional finish, so you’ll want to choose between brushes, rollers, and sprayers based on the door’s profile and the paint you’re using.
Select brush types (angled sash for edges, nylon/poly for latex) and use roller techniques (short nap for smooth metal) to reduce texture.
If you opt for a sprayer, set sprayer settings for even coats but don’t overapply.
Practice tape usage to protect glass and hardware.
Follow surface preparation, wear protective gear, respect drying times, control paint application, choose finish selection carefully, and plan clean up methods.
How to Spray a Steel Door Like a Pro
Before you spray, clean and prep the steel thoroughly so paint adheres and runs are avoided.
Pick a spray paint formulated for metal and a nozzle that gives a fine, even mist.
Hold the gun steady and apply several smooth, overlapping passes for thin, uniform coats.
Prep And Clean
Prep work makes the difference between a paint job that lasts and one that flakes off in a season, so take your time to do it right.
You’ll remove dirt, grease, and old loose paint with appropriate cleaning solutions, then dry thoroughly. Sand to eliminate surface imperfections and to key the metal. Mask hardware and trim. Wipe again to pick up dust.
- Use degreaser or trisodium phosphate.
- Sand with 120–220 grit.
- Remove rust with wire brush.
- Clean edges and seams.
- Protect handles and glass.
Prime bare metal before painting for best adhesion.
Choose Right Spray Paint
With the door cleaned, sanded, and primed, it’s time to choose a spray paint that gives durable, even coverage and resists chipping and rust.
You’ll pick between enamel, acrylic, and oil-based spray paint types—each offers different durability and finish. Check labels for corrosion inhibitors and exterior grade formulations.
Match paint to surface compatibility: confirm the spray bonds to steel and the primer you used. Test a small hidden area for adhesion and finish.
Buy a can that lists UV and weather resistance for exterior doors.
Also choose the correct nozzle fan and overlapping technique for professional results.
Smooth, Even Coats
Start by holding the can or gun about 8–12 inches from the door and spray in steady, overlapping strokes so each pass covers about 50% of the previous one; this keeps the finish uniform and prevents drips.
You’ll control speed and trigger pressure to get a smooth application and an even finish. Keep movements parallel to panels, pause between coats to flash off, and inspect under good light.
If you see runs, sand lightly once dry and recoat. Maintain a consistent distance and pace for each coat to avoid texture differences.
- steady trigger control
- 50% overlap
- consistent distance
- flash-off time
- light sanding between coats
Brush and Roller Tips to Avoid Streaks and Drips
A few simple habits will cut streaks and drips when you paint a steel door: load your brush or roller evenly, work in consistent, overlapping strokes, and keep a wet edge to blend each pass.
Start with solid surface preparation to remove rust and old paint; that helps brush techniques and roller techniques perform predictably.
Thin paint only to manufacturer specs to maintain paint consistency and respect drying times.
Use smaller brushes for edge painting and foam rollers for flat panels to control texture.
Test color matching on a hidden area and follow product recommendations for tools and thinning to avoid runs.
How Many Coats of Primer and Paint a Steel Door Needs?
Most steel doors need two coats of primer and two coats of topcoat for durable, even coverage, though the exact number can vary by product and door condition.
You’ll assess surface rust, old finishes, and exposure before deciding. Two thin coats beat one heavy coat, improving paint durability and simplifying door maintenance later.
Use quality primer for adhesion and a matching topcoat for protection.
- Prep thoroughly: clean, sand, remove rust
- Apply a corrosion-inhibiting primer
- Use thin, even primer coats
- Finish with two thin topcoat layers
- Inspect and touch up edges promptly
Drying Times and Recoat Windows for Common Paints
You’ll want to know typical drying times for latex, oil-based, and enamel paints so you can plan the job.
Check each paint’s recoat window—some allow touch-up in an hour while others need 8–24 hours—to avoid traps like wrinkling or poor adhesion.
Remember temperature, humidity, and film thickness will speed up or slow down drying, so adjust your schedule accordingly.
Drying Times Overview
Understanding drying times helps you plan when to handle, recoat, or expose your steel door to weather. You’ll see oil-based, latex, and enamel paints vary widely.
Drying conditions and environmental factors — temperature, humidity, airflow, and surface prep — change tack and cure times. Expect tack-free moments, handle-safe windows, and full cure periods that can span hours to days.
Watch manufacturer specs, then verify on a small area before full exposure.
- Oil-based: slower initial dry, longer cure
- Water-based: faster tack-free time
- Enamels: durable, moderate cure
- High humidity: slows drying
- Warm, ventilated: speeds curing
Recoat Window Guidelines
Now that you know how drying conditions affect tack and cure, focus on recoat windows so you can schedule sanding, additional coats, or final handling without ruining the finish.
For latex, wait 2–4 hours for light recoat and 24 hours for full cure; for oil-based, expect 8–24 hours between coats and up to 7 days to harden. Alkyds sit between those ranges. Fast-dry enamel often allows 1–3 hours.
Follow recoat timing on labels and adjust for humidity and temperature.
Use proper recoat techniques: scuff sand with fine grit, remove dust, and apply thin, even coats to avoid adhesion failures.
Factors Affecting Drying
Because temperature, humidity, airflow, and film thickness all change how paint dries, you should consider them before you start painting a steel door.
You’ll see varying drying times and recoat windows across enamel, acrylic, and oil-based paints. Pay attention to humidity effects and temperature variations: low temps slow curing, high humidity traps moisture, and thick coats take much longer.
- Check manufacturer recoat times
- Aim for stable, moderate temps
- Use fans for airflow when safe
- Apply thin, even coats
- Avoid painting before rain or dew
Plan schedules around conditions to get durable, smooth results.
How Temperature and Humidity Affect Steel Door Painting
When you paint a steel door, temperature and humidity directly affect how the paint flows, cures, and bonds to the metal, so you’ll want to control both for a lasting finish.
When painting a steel door, control temperature and humidity to ensure proper flow, curing, and adhesion.
You’ll notice temperature effects immediately: too cold slows curing, makes paint thicken and sag; too hot speeds drying, causing brush marks or poor adhesion.
Humidity impacts moisture absorption and evaporation—high humidity lengthens dry time, risks blushing and poor film formation; very low humidity can cause pinholes and rapid skinning.
Aim for manufacturer-recommended ranges, typically 50–85°F and under 70% RH, and adjust ventilation and timing accordingly.
Masking and Protecting Hardware and Weatherstripping
Before you paint, remove knobs, hinges, and kick plates when possible or firmly cover them with painter’s tape and plastic to prevent drips.
Take care around weatherstripping—mask the edges so paint won’t gunk the seal or interfere with compression.
Small prep steps like these save you from sticky, nonfunctional hardware and bad-looking trim.
Remove Or Cover Hardware
If you can, take off handles, deadbolts, kick plates, and any removable trim so you’re not fighting around metal while painting; if removal isn’t possible, carefully mask and cover hardware and weatherstripping with painter’s tape and low-tack plastic or paper to prevent paint buildup and sticking.
Prioritize hardware removal when you can, and otherwise focus on hardware protection to avoid sticky, painted locks or ruined finishes. Clean surfaces first, label parts, and keep screws in a safe container. Move slowly around weatherstripping edges to avoid gaps.
- Label each removed part
- Use low-tack tape
- Cover with thin plastic
- Keep fasteners together
- Test tape adhesion
Protect Weatherstripping Edges
1 simple strip of painter’s tape along the door’s weatherstripping can save you from sticky, deformed seals and leaky edges, so press tape firmly against the rubber and overlapping the door surface to create a clean barrier.
Work around corners with short pieces to maintain edge protection and avoid gaps. Remove nearby hardware or mask hinges and locks to prevent paint buildup.
Use low-tack tape so you won’t peel rubber when you remove it. After painting, peel tape while paint is tacky for crisp lines.
Check seals afterward and reseal with silicone if weatherproof sealing was compromised.
Painting Recessed Panels and Edges Cleanly
When you’re tackling recessed panels and narrow edges, take your time and work in controlled passes so paint doesn’t puddle or bridge the lines; use a sash brush or a small angled brush to follow the contours and keep strokes light and even.
Use recessed panel techniques to thin coats, maintain edge painting tips, and avoid overloading bristles. Work from center outward in panels, feathering into edges.
Let each coat cure before a light sanding. Protect hardware and masking lines sharply.
- Use thin, even coats
- Choose a small angled brush
- Sand between coats lightly
- Mask adjacent surfaces
- Inspect under good light
How to Paint a Steel Door Frame and Threshold
Start by prepping the frame and threshold so paint will adhere and the finish lasts: clean away dirt, grease, and rust with a degreaser and a wire brush, sand smooth any rough spots, and apply a rust-inhibiting primer to bare metal; tape off adjacent surfaces and protect the floor so you can work quickly and avoid drips.
For door frame preparation, remove hardware or mask it, wipe dust, and make certain primer cures. Use a small angled brush for corners and a foam roller for flats.
For threshold painting techniques, apply thin coats, let each dry fully, and feather edges to avoid ridges. Reinstall hardware after full cure.
Touch-Up Strategies for Dings and Chips on Steel Doors
Start by evaluating the damage to determine if the ding or chip needs sanding, filler, or just a quick paint touch.
Make sure you match the paint type and finish so the repaired spot won’t stand out. When you apply paint, feather and blend the edges to smooth the shift and hide brush marks.
Assess Damage Area
A quick visual inspection tells you whether a ding is superficial or needs more work. Use damage assessment and surface inspection to decide if you’ll sand, fill, or just clean. Check edges, rust, and paint adhesion before starting.
- Note size: pinpoint, small chip, or scrape
- Probe depth: paint-only or metal-exposed
- Look for rust or bubbling under paint
- Assess surrounding adhesion and cracking
- Measure accessibility for tools and touch-up
Based on this assessment, pick appropriate prep: clean, sand, apply primer or filler as needed.
Don’t skip documenting condition for future reference.
Match Paint Finish
Now that you’ve assessed the damage and decided on cleaning, sanding, or filling, your next step is matching the paint finish so repairs blend with the rest of the door.
Choose a paint with finish compatibility to the original—gloss, semi-gloss, satin, or matte—so light reflects similarly. Test a small inconspicuous spot to confirm sheen and color match under typical lighting.
For tiny chips, use touch-up pens or a fine brush; for larger dings, use a small roller or spray can matched to sheen.
Keep aesthetic considerations in mind: consistency matters more than exact pigment in most cases.
Feather And Blend Edges
When you feather and blend the edges after filling or sanding, work outward from the repair so the new paint tapers into the old finish and avoids a noticeable ridge.
Use fine-grit sanding to soften boundaries, then apply thin layers rather than one heavy coat.
Practice feathering techniques and blending methods on scrap metal before tackling the door. Keep dry times between coats and inspect under good light.
- Sand progressively finer to remove hard edges
- Use a soft brush or small foam roller for thin coats
- Match sheen for seamless blending
- Lightly scuff surrounding paint before touch-up
- Blend while paint is still tacky
Handling Expanding Seams and Welded Spots on Steel Doors
If seams are bulging or welded spots show gaps, address them before painting so your finish lasts and looks right.
You’ll first clean the area, removing rust and loose filler. For expanding seams, grind back to sound metal, apply a flexible epoxy seam sealer, and press it into gaps to prevent movement.
For welded spots, grind smooth, fill low areas with a metal-appropriate body filler, sand level, then prime with a rust-inhibiting primer. Feather edges to blend with surrounding metal.
Let each layer cure fully and check for movement before topcoating to guarantee long-term adhesion and a smooth appearance.
Best Paints for Coastal or High‑Humidity Climates
After you’ve repaired seams and welded spots properly, choose coatings that resist the extra moisture, salt, and mildew common near the coast.
You’ll want paints formulated for humidity resistance and salt-spray protection. Pick marine-grade primers, acrylic-latex enamel topcoats with corrosion inhibitors, or two-part epoxy systems for high exposure.
Select coastal colors that hide fading and reflect sunlight to reduce heat stress. Maintain regular cleaning and touch-ups to prevent rust under film breaks.
Pick UV-stable coastal hues that mask fading and reflect heat; clean and touch up regularly to stop rust.
- Use marine-grade primer
- Prefer acrylic-latex enamel with inhibitors
- Consider two-part epoxy for extreme exposure
- Choose UV-stable coastal colors
- Schedule routine inspections and touch-ups
Best Paints for Garage Steel Doors and Large Panels
When you’re tackling garage steel doors and large panels, start with proper surface prep—cleaning, rust removal, and a compatible primer make paint last.
Choose durable exterior paints formulated for metal, like oil-based enamels or high-quality acrylics with UV and rust inhibitors.
Use the right tools—rollers for broad coverage and a brush or sprayer for edges—and follow recommended drying times and coat counts for even, long-lasting results.
Surface Preparation Essentials
Prepping a garage steel door or large panel correctly takes a few focused steps that make the paint stick and last: remove loose rust and old paint, clean oil and grime, sand for a key, and apply a suitable primer for steel.
You’ll focus on surface cleaning, adhesion testing, and primer selection before painting. Consider paint compatibility and weather considerations so finish durability isn’t compromised.
Rust prevention and maintenance tips extend life. Match color matching to avoid recoat surprises. Apply proper application techniques for even coverage.
- Degrease and rinse
- Remove rust to bare metal
- Sand to bright steel
- Use metal primer
- Test adhesion prior to topcoat
Best Exterior Paints
Now that the surface is properly prepared and primed, pick an exterior paint formulated for metal and weather exposure to guarantee lasting protection and appearance. You’ll want oil-based enamel or acrylic latex with rust inhibitors for exterior durability on garage steel doors and large panels. Choose satin or semi-gloss for cleanability and modern color trends. Match primer and topcoat compatibility and pick a formula rated for temperature swings and UV resistance.
| Paint Type | Best Use |
|---|---|
| Acrylic Latex | UV, flexibility |
| Oil-Based Enamel | Hard finish |
| Rust-Inhibiting | Corrosion control |
| Satin/Semi-Gloss | Easy cleaning |
| High-Temp | Heated areas |
Application Techniques And Tools
Start by choosing the right tools—quality brushes, a corrosion-resistant roller, and a sprayer if you’ve got large panels—to guarantee smooth, even coverage on garage steel doors.
For application methods, prep by degreasing, sanding, and priming; then decide between brushwork for edges, roller for flat areas, or spray for speed.
Focus your tool selection on corrosion resistance and nap length. Work in thin coats, maintain wet edges, and sand light between coats for adhesion.
Keep safety gear on when spraying.
- Prep thoroughly
- Match method to panel size
- Thin, even coats
- Use rust-resistant tools
- Sand between coats
Color Selection Tips for Steel Doors and Heat Absorption
Wondering how color affects your steel door’s temperature and longevity? You’ll use color psychology to set mood and curb energy costs: lighter hues reflect sunlight, reducing heat gain and improving thermal efficiency, while darker tones absorb warmth and can raise interior temperatures.
Choose light, UV-resistant pigments for south- or west-facing doors to limit expansion and fading. If you want a dark aesthetic, pick heat-tolerant, high-quality coatings and consider added insulation behind the door to offset absorption.
Balance curb appeal with climate: in hot regions favor pale colors; in cold climates, darker shades can help retain modest warmth.
How Finish Sheen Affects Durability and Maintenance
Choose a higher-gloss finish if you want extra protection against scratches and weather, because gloss forms a tougher, more water-resistant surface.
You’ll also find glossy sheens wipe clean more easily, so routine maintenance takes less time.
If you prefer a matte look, be ready for gentler protection and a bit more careful cleaning.
Gloss And Protection
A single coat of high-gloss or semi-gloss paint will show dirt, scratches, and imperfections differently than a satin or matte finish, and that matters for both durability and upkeep.
You’ll pick a gloss finish when you want a tough, moisture-resistant surface that acts as a protective coating against wear. Higher sheen repels stains and stands up to scuffs, while lower sheen hides flaws but may require more frequent recoating.
Balance looks and longevity based on traffic and exposure. Consider these trade-offs:
- Durability vs. appearance
- Ease of repainting
- Scratch visibility
- Moisture resistance
- Longevity of finish
Sheen And Cleaning
Sheen plays a big role in how easy your steel door will be to clean and how well it stands up over time; higher sheens tend to shed dirt and resist scuffs, while lower sheens hide imperfections but can trap grime and wear faster.
You’ll choose sheen options based on location and use: gloss or semi-gloss for entry doors that need durability, satin for balanced appearance, matte for low-reflection areas.
For maintenance, pick gentle cleaning methods—mild soap, soft cloth, and nonabrasive sponge—and avoid harsh solvents or rough pads.
Regular light cleaning prevents buildup and extends the finish’s life.
Long-Term Maintenance to Prevent Rust and Paint Failure
Because steel doors face moisture, abrasion, and temperature swings, you’ll need a consistent maintenance routine to keep rust and paint failure at bay.
You should focus on rust prevention and paint longevity by inspecting finishes, addressing chips, and minimizing weather exposure. Use proper surface treatment—clean, sand, and prime bare spots—to restore corrosion resistance quickly.
Follow these maintenance tips regularly to extend coatings and prevent costly repairs.
- Inspect door monthly for chips or bubbling
- Clean dirt and salt with mild detergent
- Lightly sand and feather edges of damage
- Apply rust-inhibiting primer to exposed steel
- Recoat with compatible paint as needed
Signs You Need to Repaint a Steel Door
Look for clear visual cues that tell you it’s time to repaint your steel door: peeling or flaking paint, rust spots, and widespread fading are the most obvious signs, while bubbling, chalky residue, or sticky finishes indicate underlying corrosion or failed coating adhesion.
You should perform a door surface evaluation regularly, checking edges, seams, and hardware. Use simple rust detection methods like scraping suspect areas, applying a rust converter test, or using a magnet to find hidden corrosion under paint.
If you see any of these signs, don’t delay—timely repainting prevents deeper rust and preserves door function and appearance.
Cost Comparison: DIY vs. Professional Steel-Door Painting
Deciding whether to paint your steel door yourself or hire a pro comes down to time, skill, and budget: DIY saves money on labor but adds tasks like prep, priming, and cleanup, while professionals charge more upfront yet deliver faster, cleaner results and warranty-backed workmanship.
Decide by weighing time, skill, and budget: DIY saves labor but adds prep; pros cost more yet offer speed and warranties.
You should compare DIY Budgeting against Professional Quotes, factoring Material Costs, Time Investment, Skill Level, and Project Scope to decide.
If you have limited experience or a large scope, pros may be worth it; if you’re handy, DIY can cut costs.
- DIY Budgeting reduces labor expense
- Professional Quotes include guarantees
- Time Investment varies widely
- Skill Level affects finish quality
- Material Costs depend on scope
Safety Gear and Ventilation When Painting Steel Doors
Before you start painting a steel door, suit up with the right protective clothing—long sleeves, gloves, and eye protection—to prevent skin contact and splatter.
Pick a respirator or mask rated for paint fumes and particulates, and change cartridges as recommended.
Work in a well-ventilated area or set up fans and open doors/windows to maintain steady airflow and clear fumes.
Protective Clothing Essentials
When you’re painting a steel door, wear proper protective clothing to shield your skin, eyes, and lungs from paint, solvents, and metal dust; a respirator with appropriate cartridges, chemical-resistant gloves, eye protection, and coveralls are the core essentials.
You should also protect knees and feet, arrange supplies, and keep the area tidy. Use ventilation fans to move fumes and keep cleaning rags handy for spills.
Choose slip resistant shoes and knee pads for comfort during low work, and store paint buckets on drop cloths to prevent contamination.
- safety goggles
- work gloves
- respirator masks
- coveralls
- slip resistant shoes
Respiratory Protection Choices
Protecting your skin and eyes is only part of the job—you also need the right respiratory protection to prevent inhaling paint fumes, solvent vapors, and metal particles. Choose NIOSH-rated respiratory masks—P95 or N100—for solvent-based paints and sanding dust. Use cartridge respirators for heavy fumes. Fit and seal checks matter; replace filters per manufacturer guidance. Pair masks with local extraction or approved ventilation systems for best results. Keep spare cartridges and a respirator hygiene kit handy.
| Gear | Use | Notes |
|---|---|---|
| P95/N100 | Dust/sanding | Filter particulates |
| Cartridge | Solvent fumes | Replace regularly |
| Disposable | Light tasks | Short duration |
| Storage | Clean/secure | Extend life |
Ventilation And Airflow
Because paint fumes and sanding dust can build up quickly in enclosed spaces, you’ll want to establish effective ventilation before you start work.
You should prioritize air circulation to reduce inhalation risk and speed drying. Open windows and doors, use fans to push fumes outside, and position a box or exhaust fan near the work area.
Follow ventilation tips like creating cross-breezes and avoiding stagnant corners. Keep doors propped and minimize time spent inside until odors fade.
Monitor conditions and pause if you smell strong solvent. Use this simple setup to keep your workspace safer and more comfortable.
- Open windows and doors
- Place exhaust fan facing out
- Create cross-breezes
- Use a box fan for airflow
- Avoid confined spaces
Eco-Friendly Disposal and Cleanup of Metal Paint Supplies
If you want to minimize environmental harm and stay safe, dispose of leftover metal paint and clean supplies thoughtfully.
You should seek eco friendly disposal options: check local hazardous-waste programs, drop-off events, or retailers that accept unused coatings.
Save small amounts by letting oil-based paint harden with kitty litter, then discard per local rules.
For reusable cans, label and store until a recycling program will take them; inquire about metal paint recycling for empty metal containers.
Clean brushes and rollers with appropriate solvents outdoors or in a well-ventilated area, capture wash water, and never pour solvents down drains.
Solving Common Problems: Bubbling, Peeling, Flaking
When you see bubbling, peeling, or flaking on a steel door, don’t ignore it—these issues signal underlying adhesion, moisture, or surface-prep problems that will only worsen over time.
You’ll want to diagnose bubbling issues versus adhesion problems caused by poor surface preparation or contamination. Consider weather exposure and environmental factors that accelerate failure.
For peeling prevention and flaking solutions, strip loose paint, clean, sand to bright metal, and apply a suitable primer. Mind coating thickness and drying conditions to guarantee paint longevity.
Regular inspections and simple maintenance tips keep small defects from becoming costly corrosion.
- Inspect early and often
- Clean before priming
- Sand to sound metal
- Use compatible primer
- Control thickness and cure
Fixing Orange Peel, Runs, and Texture Problems on Metal Paint
After you’ve tackled bubbling, peeling, and flaking, you’ll often find surface texture issues like orange peel, runs, or uneven stippling that also need attention. You’ll sand high spots with fine grit, feather edges, and clean dust before priming. Use slow, even passes with proper distance and overlap to avoid repeats. Spray settings, viscosity, and temperature control reduce orange peel; light coats prevent runs. Focus on texture repair techniques and paint application tips to restore a smooth finish quickly.
| Problem | Fix |
|---|---|
| Orange peel | Sand, thin, spray |
| Runs | Level, sand, recoat |
| Stipple | Light coats |
| Blotchy | Prime, adjust spray |
How to Repaint Over Oil With Latex (And Vice Versa)
Wondering whether you can repaint oil-based paint with latex (or switch the other way)? You can, but paint compatibility and proper surface preparation matter.
If going from oil to latex, clean, sand, and apply a bonding primer. From latex to oil, verify the latex is fully cured, sand lightly, and use an oil-based primer.
Skip shortcuts or you’ll get peeling or poor adhesion. Follow these essentials:
- Remove dirt, grease, and chalking
- Sand to dull glossy finishes
- Use a primer suited to the direction of change
- Allow full curing between coats
- Test a small patch first
Recommended Brand-Specific Products for Steel Doors
Now that you know how to handle paint-type changes, you’ll want product recommendations tailored to steel doors—paints and primers that bond, resist corrosion, and stand up to heavy use.
Choose rust-inhibiting primers like Rust-Oleum Clean Metal Primer or Zinsser Bulls Eye 1-2-3 for bare metal, then follow with oil-based or hybrid enamel topcoats such as Benjamin Moore Advance or Sherwin-Williams ProClassic.
For bare steel doors, use rust-inhibiting primer (Rust-Oleum or Zinsser) then oil or hybrid enamel finish.
For exterior doors consider Rust-Oleum Protective Enamel. These brand recommendations focus on adhesion and durability; consult product comparisons for gloss, drying time, and weather resistance.
Test on a small area to confirm compatibility before full application.
How to Estimate Paint and Primer Quantities for a Steel Door
Estimate paint and primer needs by measuring the door’s surface area and accounting for coat count and product coverage—measure height and width, subtract glass or inset panels, then multiply to get square footage.
Divide that by the manufacturer’s coverage rate (usually listed as sq ft per gallon) and increase the result by about 10–15% for waste, texture, and touch-ups.
Then factor coats: typically one primer coat plus one or two topcoats.
Check paint coverage on cans and compare primer types for adhesion to bare or prepped steel.
Keep a small spare can for repairs.
- Measure precisely
- Note number of coats
- Read coverage rates
- Choose primer types
- Budget 10–15% extra
Best Months and Seasonal Timing to Paint an Exterior Steel Door
If you want the longest-lasting finish, plan to paint your exterior steel door during late spring through early fall when temperatures consistently sit between about 50°F and 85°F and humidity is low to moderate—these conditions let primer and topcoats cure properly and reduce dust, dew, and rapid temperature swings that can cause runs or adhesion problems.
Choose days with stable weather conditions and check forecasts for rain, high winds, or extreme heat.
Consider the best temperature and humidity considerations for your chosen seasonal paint to guarantee ideal drying.
Proper timing improves paint longevity and reduces rework.
Preparing a Steel Door for a Custom Finish or Faux Look
When you want a custom or faux finish on a steel door, start by stripping any loose paint, sanding glossy surfaces to dull the sheen, and cleaning away grease and dust so new layers will adhere evenly.
You’ll remove hardware or mask it, repair dents and rust with appropriate fillers, and apply a compatible primer.
Plan layers and test faux techniques on a scrap panel. Work in thin, controlled coats and allow proper drying between effects.
- Remove loose paint
- Sand to a dull profile
- Clean and degrease
- Fill and smooth imperfections
- Prime before decorative layers
Quick Pre-Paint Checklist for Steel Doors
You’ve prepped the door for a custom finish; now run through a short checklist to make certain nothing’s missed before paint goes on. Check for dust, rust, and grease—good paint surface preparation avoids peeling. Confirm primer compatibility with the topcoat and test a small patch. Verify weather and drying times, and consider door color psychology for curb appeal and mood. Verify hardware is removed or masked, and hinges are lubricated.
| Item | Action |
|---|---|
| Surface | Clean, sand, prime |
| Environment | Dry, 50–85°F, low humidity |
| Finish | Color choice, compatibility |
Frequently Asked Questions
Can I Use Automotive Touch-Up Paint on a Steel Door?
Yes — you can use automotive paint on a steel door, but you’ll need proper prep, primer, and compatible clearcoat; automotive paint bonds well, but guarantee rust removal, sanding, and ventilation so the finish lasts and resists weathering.
How Do I Paint Steel Security Screens and Grilles?
You prep the surface by cleaning, sanding, and priming with a rust-inhibiting primer; then use a spray painting technique for even coverage, holding cans 8–12 inches away and applying light, overlapping coats until finished and dry.
Will Powder Coating Be Better Than Paint for My Steel Door?
Yes — powder coating usually wins for durability comparison and longevity, though it costs more upfront; you’ll get tougher finish, better corrosion resistance, and lower maintenance, but consider cost analysis, size, and ability to recoat later.
How Do Paint Warranties Cover Exterior Steel Door Finishes?
Warranties for exterior steel door finishes vary: you’ll get a specified warranty duration tied to finish durability, covering peeling, fading, or chipping for a set period, but they’ll often exclude wear from abuse, improper prep, or weathering.
Can I Paint Over Factory-Applied Textured Steel Finishes?
Yes — you can, though you’ll need to bribe the texture first: sand, clean, and prime for texture adhesion. If you skip surface preparation, the finish will sulk, peel, and haunt your warranty like a dramatic soap opera.
Conclusion
Choosing the right paint makes a big difference: properly prepped steel doors can last decades. Did you know rust causes over $2.5 billion in annual damage to U.S. infrastructure—so picking the right primer and paint isn’t just cosmetic, it’s protection. Follow prep, primer, and finish guidelines, and you’ll cut maintenance, boost curb appeal, and avoid costly rust repairs. Invest in quality now and you’ll save time, money, and headaches later.