What Removes Pencil Marks From Painted Walls?
You can remove pencil marks from painted walls using a soft rubber or kneaded eraser, a damp microfiber cloth with mild dish soap, a baking soda paste, or a lightly used Magic Eraser on harder finishes. Work gently, test a hidden spot first, and avoid scrubbing or harsh solvents that strip paint. Rinse and dry the area, touch up if the sheen changes, and keep supplies handy so you’ll know the best method for different paints as you learn more.
How to Remove Pencil Marks From Painted Walls : Fast, Safe Methods
Grab a soft eraser or a damp microfiber cloth and tackle pencil marks right away—fresh marks come off much easier. You’ll start gently, erasing or blotting without scrubbing to protect paint.
Test a hidden spot before using a mild cleaner or diluted dish soap, rinsing and drying promptly. For stubborn lines, try a magic eraser lightly, watching for sheen loss. Keep strokes with the grain or texture to avoid scuffs.
Learn pencil prevention tips: designate drawing zones or apply washable paint. Regular inspections and gentle wall care will keep surfaces looking clean and prevent future damage.
Quick Answer: Easiest Ways to Clean Pencil Marks Now
For a quick fix, grab a Magic Eraser and gently rub the pencil marks—it’s often the fastest option.
If you prefer a homemade solution, make a paste of baking soda and water and lightly work it over the mark.
For everyday smudges, a drop of mild dish soap in warm water and a soft cloth will usually do the job.
Use A Magic Eraser
Reach for a Magic Eraser when you want a fast, low-effort fix for pencil marks on painted walls. You’ll dampen the sponge, wring it out, and gently rub the mark—no heavy scrubbing needed.
You’ll see the magic eraser benefits immediately: it lifts graphite without harsh chemicals, works on semi-gloss and satin finishes, and saves time compared with many cleaning alternatives.
Test a hidden spot first to confirm paint won’t dull. For stubborn lines, use light, repeated passes. Rinse the area with a damp cloth afterward and let it dry.
Replace the eraser when it starts to disintegrate.
Try Baking Soda Paste
If the Magic Eraser isn’t handy or you prefer a gentler, DIY option, make a baking soda paste to tackle pencil marks.
Mix baking soda with just enough water to form a spreadable cleaning paste. Test a small, hidden area first to verify paint won’t dull.
Apply the paste with a soft cloth or sponge, using light circular motions—don’t scrub hard. Wipe residue away with a damp cloth, then dry the spot.
Repeat once if needed, but avoid abrasive pressure. This method’s mild abrasion lifts graphite without harsh chemicals, preserving most painted finishes when you work gently.
Apply Mild Dish Soap
1 quick and easy trick is to mix a few drops of mild dish soap with warm water and gently wipe pencil marks using a soft cloth or sponge.
You’ll dampen the cloth, wring it well, and test a hidden spot to verify paint won’t lift. Work in small circles, applying light pressure until graphite fades.
Rinse the cloth often and avoid soaking the wall. For stubborn marks, let the soapy water sit a few seconds before rubbing.
Finish by patting the area dry with a clean towel. This mild soap method is simple, safe, and effective for gentle wall care.
Which Paint Finish Matters: Flat, Eggshell, Satin, Semi-Gloss
If your wall has a flat finish, you’ll find pencil marks harder to remove because the paint soaks up residue and scuffs easily.
Eggshell and satin give a bit more forgiveness, but semi-gloss is the easiest to clean since its smooth, nonporous surface resists pencil lead.
Think about finish when you pick a cleaning method—what works on semi-gloss can damage flatter paints.
Flat Finish Challenges
While flat paint gives a smooth, non-reflective look that hides wall imperfections, it’s also the hardest finish to clean—pencil marks can smudge instead of lift and aggressive scrubbing may remove pigment.
You’ll find a flat finish offers low paint durability compared with glossier options, so you should test a discreet spot before cleaning.
Use gentle methods: a soft eraser, light dabbing with a barely damp microfiber, or mild soap applied sparingly.
Avoid abrasive pads and strong cleaners that strip pigment.
If marks persist, consider touch-up with the original paint or repainting with a more durable finish.
Semi-Gloss Ease of Cleaning
Semi-gloss paint makes cleaning pencil marks much easier because its smooth, slightly shiny surface resists staining and lets you wipe without smudging.
You’ll appreciate the semi-gloss advantages when you remove scuffs: gentle soap and water, a magic eraser, or a melamine pad usually do the job without repainting.
Because the finish repels oils and graphite, you can act quickly and avoid aggressive scrubbing that damages flat or eggshell surfaces.
Pay attention to cleaning frequency—spot-clean as soon as marks appear to prevent buildup.
For high-traffic areas, choose semi-gloss to reduce maintenance and preserve appearance longer.
How to Test a Small Spot Without Damaging Paint
Before you tackle the whole mark, pick an inconspicuous spot—behind a furniture edge or inside a closet door—and test your chosen method so you don’t harm the finish.
When spot testing, work from least to most aggressive: dry wipe, damp cloth, then mild cleaner. Use small, controlled motions and wait several minutes to inspect for sheen change, discoloration, or softening.
Note results and keep a record for paint protection. If the finish looks altered, stop and choose a gentler option.
Repeat tests on similar surfaces if needed, and only proceed with the full treatment once you’re confident it won’t damage paint.
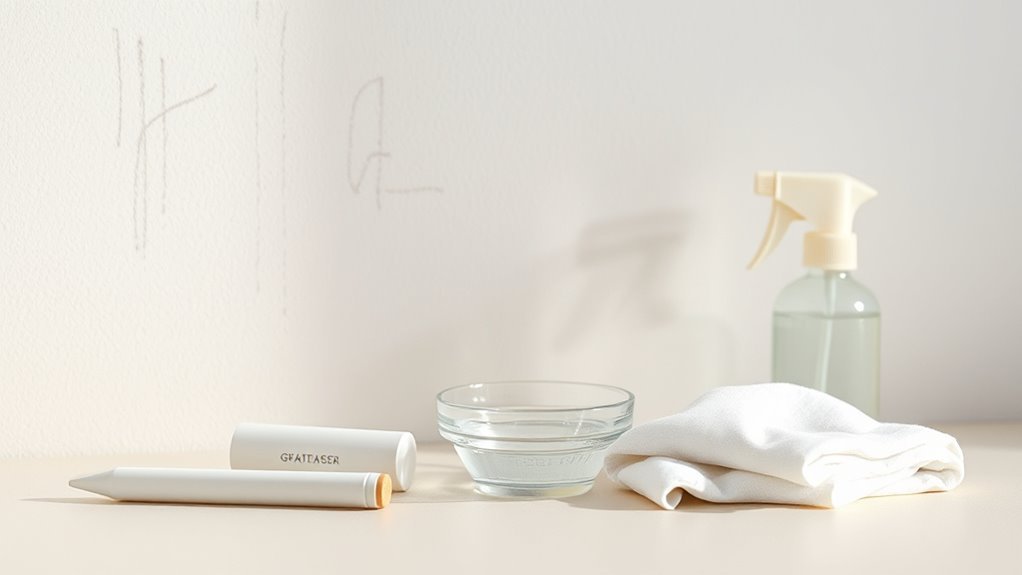
Tools You’ll Need: Erasers, Cloths, Cleaners, and Swabs
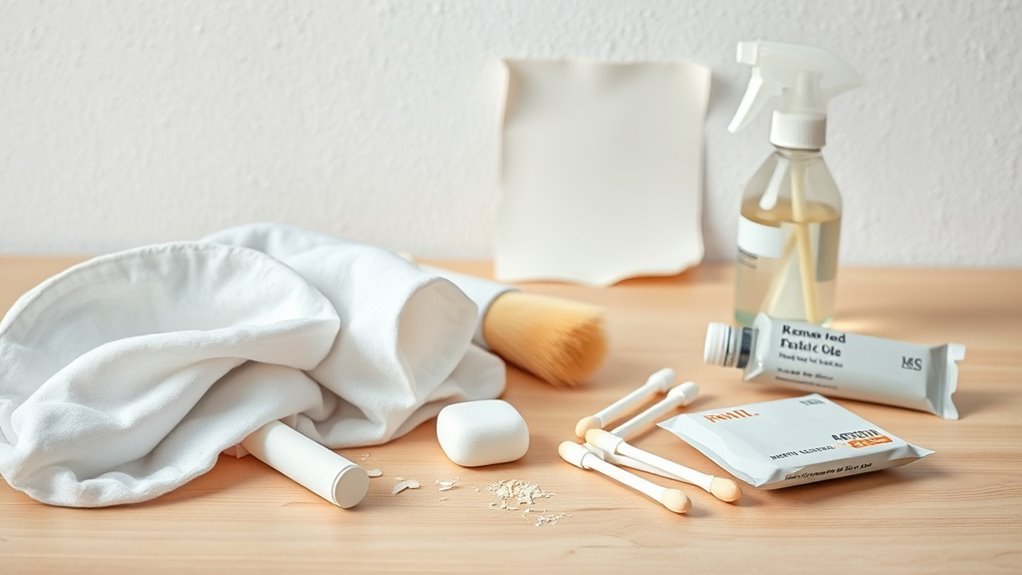
You’ll only need a few basic tools to remove pencil marks: a soft rubber eraser (or art gum eraser), microfiber or cotton cloths, mild cleaners like dish soap or a gentle all-purpose spray, and cotton swabs for tight spots.
You’ll gather items that suit different surfaces and eraser types, and practice gentle cleaning techniques. Visualize what you’ll use:
- Soft rubber or art gum eraser for surface graphite
- Microfiber cloth for blotting and buffing
- Mild dish soap solution or gentle cleaner in a spray bottle
- Cotton swabs for corners and trim
Keep tools clean, test first, and work lightly to protect paint.
Use a Standard White Eraser on Painted Walls
When the pencil marks are light and the paint is fully cured, you can try a standard white eraser first.
Use gentle, short strokes and don’t press hard to avoid scuffing the finish.
Test a small hidden spot if you’re unsure so you know how the paint will react.
When To Use It
Use a standard white eraser on painted walls for small, dry pencil marks—like doodles, signatures, or smudges—when the paint is fully cured and the surface is flat or eggshell; it’s gentle enough to lift graphite without damaging most finishes.
You’ll reach for it as one of your basic pencil removal techniques and wall care tips. Consider these moments:
- A child’s tiny scribble near trim.
- A faint sketch on a hallway wall.
- A smudge beside a light switch.
- A signature on a painted nursery.
Use it for spot cleaning; save heavier issues for other methods.
How To Erase Carefully
If the pencil marks are small and the paint’s cured, take a clean white eraser and work gently in short, light strokes—don’t press hard or scrub, which can dull or remove the finish. You’ll test a hidden spot first, erase toward the edge of the mark, and brush away crumbs. Repeat sparingly to avoid glaze removal. For ongoing pencil prevention tips and wall maintenance, keep pencils away from kid areas and teach gentle habits.
| Tool | Motion | Result |
|---|---|---|
| White eraser | Light strokes | Lifts graphite |
| Brush | Soft sweep | Removes debris |
| Test spot | Tiny area | Confirms safety |
Use a Kneaded Eraser for Delicate Finishes
Grab a kneaded eraser and gently dab at the pencil marks—don’t rub hard—and you’ll lift graphite without harming delicate paint. You’ll notice Kneaded eraser benefits immediately: pliable material molds to contours, picks up dust, and minimizes pressure on delicate finishes.
Gently dab with a kneaded eraser—mold it to contours to lift graphite without stressing delicate paint.
Work slowly, stretching the eraser to renew the clean surface as it picks up graphite.
- Soft, moldable pad conforms to trim and textured areas.
- No abrasive grit means less paint wear.
- Pinpoint dabbing avoids surrounding marks.
- Stretch to reveal a fresh, clean face.
Stop if paint lifts; switch methods if needed.
Damp Microfiber Cloth: Gentle Wiping Technique for Pencil Marks
Dampen a clean microfiber cloth with water and wring it out until it’s just slightly moist so you don’t soak the paint.
Use gentle circular strokes to lift the pencil marks, checking your pressure to avoid rubbing the finish.
Wipe the area dry with a fresh part of the cloth and inspect for any residue or remaining marks.
Prep The Cloth
Start by selecting a clean, lint-free microfiber cloth and lightly wetting it until it’s just damp—no dripping. You’ll prepare the cloth with care, choosing between cloth types suited for painted surfaces and avoiding abrasive weaves.
Squeeze out excess water, then fold the cloth into quarters so you have a fresh face as you work. Keep cleaning techniques simple and safe to protect paint.
- Smooth, tight weave microfiber
- Soft cotton blend (if microfiber unavailable)
- Lightly damp, not wet
- Folded for multiple clean surfaces
Store the cloth separately to prevent contamination before use.
Gentle Circular Strokes
With your folded, just-damp microfiber ready, use gentle circular strokes to lift pencil marks without harming the paint—apply only light pressure and let the cloth do the work.
You’ll move in small circular motions, keeping the contact area minimal and consistent. Pause if you feel resistance; aggressive rubbing risks dulling the finish.
Use gentle techniques: rotate the cloth to a clean section as graphite transfers, and avoid soaking the wall.
For stubborn lines, repeat brief passes rather than prolonged scrubbing.
Finish by smoothing the area with a dry edge of the cloth to prevent streaks and assess if further treatment’s needed.
Dry And Inspect
1. You’ve just wiped the pencil mark with a damp microfiber cloth; now dry and inspect. Gently blot until the surface is only slightly damp, then let it air briefly.
Dry cleaning with a soft, dry cloth prevents water spots and helps you see remaining graphite.
- soft blotting
- light pressure
- edge inspection
- touch test
You’ll notice faint residue—repeat gentle wiping if needed. Regularly drying prevents streaks and supports mark prevention by revealing stubborn lines early.
Finish with a final dry pass, and your paint stays intact while pencil marks vanish.
Baking Soda Paste: Mix and Apply Safely
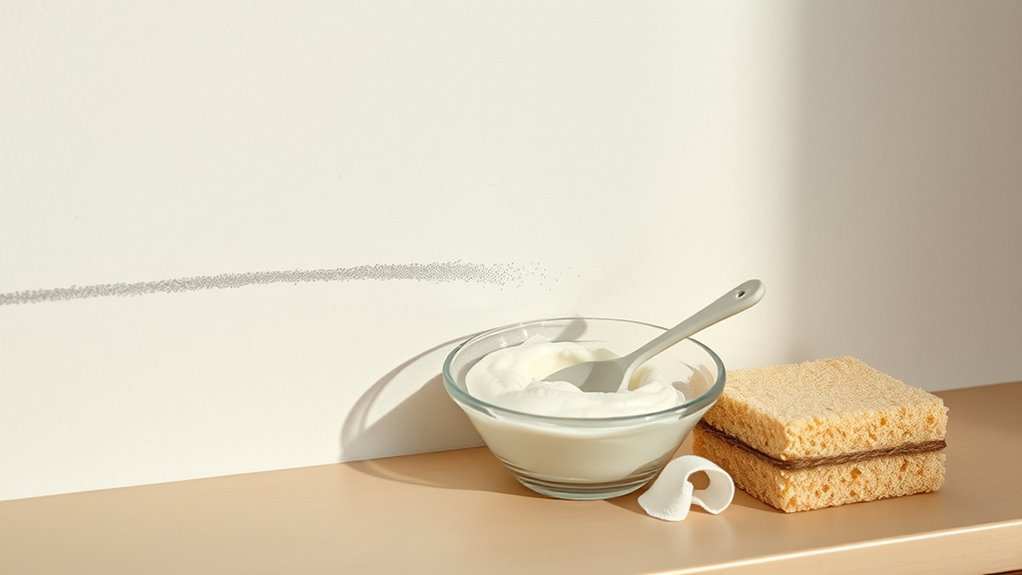
Make a thick paste by mixing baking soda and water until it holds its shape. Then apply it gently to pencil marks with a soft cloth or sponge. You’ll test a hidden spot first to verify no paint dulling.
Use light pressure and small circular motions, rewetting the cloth as needed to lift graphite without overworking the surface. After treatment, wipe away residue with a damp microfiber and pat dry.
If marks persist, repeat once more rather than scrubbing. Store leftover baking soda dry. Proper paste application removes pencil traces while minimizing damage to painted walls and trim.
Mild Dish Soap Solution: Step-by-Step Cleaning Method
If the baking soda paste didn’t fully remove the marks, try a mild dish soap solution next: mix a few drops of gentle liquid dish soap into a cup of warm water.
Dampen a soft cloth or sponge, and blot the pencil lines gently to lift graphite without harming the paint. Work in small sections, rinse the cloth often, and dry each spot to prevent water rings.
Follow these cleaning tips for best results:
- Lightly dampen cloth
- Blot, don’t scrub
- Rinse and reapply solution
- Pat dry promptly
Test an inconspicuous area first to confirm paint safety.
When to Use a Magic Eraser : and When to Avoid It
You can reach for a Magic Eraser when the pencil marks are stubborn and the paint is durable, like semi-gloss or satin.
Avoid it on flat, matte, or delicate finishes because the abrasive foam can remove paint or dull the surface.
Test a small, hidden spot first so you know whether it’ll clean the mark without damaging the finish.
When To Use
1 clear rule will help you decide: reach for a Magic Eraser when the pencil marks are superficial and the paint finish is semi-gloss or satin, but avoid it on flat, matte, or delicate painted surfaces where the abrasive action can dull or remove the finish.
You’ll test a hidden spot first, dab gently, and watch for fading. Use it sparingly as part of pencil prevention tips and wall maintenance strategies.
Picture these scenarios:
- Light scribbles on trim.
- Smudges near door frames.
- Pencil outlines on kids’ art areas.
- Marks in high-traffic hallways.
When To Avoid
Although a Magic Eraser can work wonders on many pencil smudges, don’t reach for one on flat, matte, or specialty finishes where its abrasive action can strip paint or leave a dull patch.
You should avoid scrubbing aged, thin, or heavily stained paint because you’ll expose primer or create visible sheen differences.
If walls are recently painted or you plan to sell, consider pencil mark prevention strategies instead of risky cleaning.
When damage seems likely, test a hidden spot first.
Factor in repaint considerations—sometimes touch-up or full repainting is wiser than aggressive removal that creates more work.
Surface Finish Matters
If a Magic Eraser seems tempting after weighing repaint risks, first check the wall’s finish—some surfaces tolerate its abrasive foam, others won’t. You’ll assess paint types and finish durability before scrubbing.
Use the eraser on semi-gloss or satin; avoid matte or flat where pigment sits near the surface.
Picture scenarios:
- Semi-gloss: smooth, high finish durability, safe for light pressure.
- Satin: moderate sheen, good for cautious use.
- Eggshell: lower durability—test hidden spot first.
- Matte/flat: fragile pigment—skip the eraser, opt for gentle cleaner or touch-up paint.
Test first; proceed slowly.
Paint‑Safe Commercial Cleaners and Stain Removers to Try
When pencil marks won’t come off with a damp cloth, try a paint-safe commercial cleaner designed for delicate finishes.
If a damp cloth fails, use a paint-safe cleaner made for delicate finishes—test first on an inconspicuous spot.
Look for products labeled safe for latex and enamel paints and test a hidden spot first. Choose stain removers with gentle surfactants rather than harsh solvents; many brands offer eco friendly options and kid safe solutions for nurseries and playrooms.
Apply with a soft cloth, blotting rather than scrubbing, and rinse with water afterward.
For stubborn marks use a melamine sponge marketed as safe for painted walls, following manufacturer guidance and working lightly to avoid finish dulling.
Using Rubbing Alcohol or Acetone Cautiously on Marks
If commercial cleaners don’t lift pencil marks, you can try rubbing alcohol or acetone but use them sparingly and carefully.
You test first on an unseen patch, dab with a cotton swab, and watch for paint softening. Work quickly and rinse the spot with water.
- imagine a small cotton swab tip
- picture gentle circular motions
- see a dampened white cloth removing residue
- visualize the patch blending with surrounding paint
Use rubbing alcohol for most finishes; reserve acetone caution for stubborn marks and hard, glossy paints.
Stop at any sign of finish dulling.
Dry Cleaning Sponge Method for Light Pencil Smudges
Because dry cleaning sponges lift graphite without wetting the paint, you can safely remove light pencil smudges with minimal risk of damage.
Since dry cleaning sponges lift graphite without wetting paint, gently erase light pencil smudges with minimal damage risk.
Use a fresh, high-quality dry cleaning sponge and test a small hidden area first. Work gently in short, light strokes, replacing the sponge surface as it darkens to maintain sponge effectiveness.
Don’t scrub hard—let the sponge abrade the graphite away. For best results, combine with basic dry cleaning tips: keep strokes one direction, use small sections, and avoid emulsifying paint.
Finish by wiping loose residue with a soft, dry cloth to reveal a clean surface.
Remove Deep or Hardened Pencil Lines Without Repainting
Tackle deep or hardened pencil lines by loosening and removing embedded graphite while protecting the paint finish — you’ll use a combination of gentle abrasion, targeted cleaning solutions, and careful residue removal to avoid repainting.
You want pencil preservation and wall protection, so proceed slowly. Test a hidden spot first. Use soft tools and mild cleaners, then repeat only as needed.
- Gently scuff with a fine eraser or white pencil eraser.
- Lightly buff with a microfiber cloth in circles.
- Apply diluted dish soap or isopropyl alcohol sparingly.
- Rinse and pat dry, inspecting for remaining marks.
Stop if paint dulls; consult professionals.
Cleaning Pencil Marks on Painted Trim and Baseboards
1 common spot for pencil smudges is painted trim and baseboards, and you can remove them without damaging paint by working slowly and using gentle, targeted methods. Use a soft eraser, mild detergent, or a damp microfiber and test discreetly. Focus on cleaning techniques that protect finish and guarantee paint preservation. Move in small strokes, rinse frequently, and dry promptly to avoid water damage.
| Tool | Use |
|---|---|
| Soft eraser | Lightly lift graphite |
| Microfiber | Gentle wiping |
| Mild soap | Break down grime |
| Cotton swab | Targeted spot cleaning |
Common Mistakes That Strip Paint or Leave Sheen Rings
When you scrub too hard, use harsh solvents, or leave water sitting on the surface, you can strip paint or create shiny rings that never match the surrounding finish.
You want to avoid common errors that ruin sheen removal attempts and undermine paint preservation. Visualize mistakes so you won’t repeat them:
- Vigorous scouring that abrades the finish.
- Solvent soaking that dissolves binders.
- Rubbing dirty cloths that spread grit and scratches.
- Letting cleaner puddle and dry, altering gloss.
Work gently with mild cleaners, blot instead of scrub, and test a hidden spot to protect finish and color.
How to Touch Up Paint If Cleaning Changes the Sheen
If cleaning dulls or shines a spot so it no longer matches the wall, you can usually fix it with a careful touch-up rather than repainting the whole surface. Identify the paint color and test sheen consistency on a scrap. Clean, sand lightly, then apply thin layers, feathering edges. Match application method (brush/roller). Let dry and compare; repeat if needed. If visible, blend a slightly larger area.
| Step | Tool | Note |
|---|---|---|
| Test | Sample | Confirm paint color |
| Prep | Sand/clean | Verify adhesion |
| Apply | Brush/roller | Match sheen consistency |
| Check | Dry | Repeat if needed |
Preventing Pencil Marks: Habits and Maintenance Tips
You’ve already learned how to touch up areas where cleaning altered the sheen; now let’s focus on avoiding pencil marks in the first place.
Adopt preventive habits and simple maintenance tips to keep walls pristine. Do regular inspections for scuffs and address them quickly.
Consider protective coatings in high-traffic zones and kid friendly strategies for art areas. Practice consistent wall care and teach children boundaries.
- Place washable chalkboards or paper panels
- Use corner guards and chair rails
- Keep pencils in trays away from walls
- Wipe marks immediately with a soft eraser or damp cloth
When to Call a Pro or Choose to Repaint Instead
Because small smudges and faint lines usually respond to quick cleaning, call a professional only when damage is extensive, the paint finish is uneven after cleaning, or you want a flawless, color-matched result across a large area.
Small smudges and faint lines usually clean right up—call a pro only for extensive or uneven paint issues.
You should seek a Professional Assessment if marks penetrate primer, involve multiple colors, or the wall has texture that simple cleaning can’t restore.
A pro will advise Repainting Options: spot touch-ups, full-wall repaint, or color correction with matched paint and finish.
Choose repainting when repairs are obvious, mismatched sheen persists, or time and longevity outweigh DIY fixes.
Frequently Asked Questions
Can Pencil Marks Transfer Through Glossy Finishes Over Time?
Yes — glossy finishes can allow pencil marks to transfer over time; you’ll notice long term effects as graphite embeds in the smooth surface, especially under friction or humidity, so you’ll need gentle cleaning or refinishing.
Are There Child-Safe Products for Removing Pencil From Nursery Walls?
Yes — you can use child-safe natural cleaners and DIY solutions like diluted white vinegar, baking soda paste, or mild castile soap; you’ll test a hidden spot first, gently rub with a soft cloth, and rinse well afterward.
Will Erasing Marks Affect Wallpapered or Textured Painted Surfaces?
An apple doesn’t fall far: yes, erasing can harm wallpapered or textured painted surfaces. You’ll see wall texture impact—gentler removal techniques (soft erasers, damp microfiber) reduce damage; always test a hidden spot first.
Can Pencil Graphite Stain Porous Primer or Bare Drywall?
Yes — pencil graphite can stain porous primer or bare drywall; you’ll see pencil residue sink in as primer absorption occurs, so you’ll need gentle cleaning or light sanding before repainting to fully remove visible marks.
How to Remove Pencil Marks Near Electrical Outlets Safely?
Turn power off, remove outlet cover, and gently use pencil mark removers like a rubber eraser, melamine sponge, or mild cleaner on a cloth; you’ll practice safe cleaning and avoid moisture near wiring before reassembling.
Conclusion
You’ve got this—most pencil marks wipe away with a gentle eraser or damp cloth, and coincidentally the same careful touch that saved your wall probably saved last week’s homework too. Test a small spot first, avoid harsh scrubbing that dulls finish, and keep basic supplies handy so you’ll be ready next time a crayon—or life—gets messy. If cleaning changes sheen, touch up with matching paint or call a pro for bigger fixes.