What Size HVLP Tip to Spray Latex Paint? Guide
You’ll generally want a 1.8–2.5 mm HVLP tip for most latex house paints, stepping down to 1.4–1.8 mm for thinner latex or trim work. Latex is thicker than oils, so larger orifices improve flow and reduce clogging; thin only slightly and test on scrap. Match tip to manufacturer GPM and nozzle codes, maintain proper distance and pressure, and clean tips promptly. Keep going and you’ll get tip charts, thinning tips, and troubleshooting next.
Quick Answer: Best HVLP Tip Sizes for Latex Paint
If you’re spraying latex with an HVLP gun, pick a tip that balances flow and atomization. You’ll typically choose 1.8–2.5 mm for house paints and 1.4–1.8 mm for thinner latex and trim.
Use tip selection strategies: match viscosity, adjust air pressure, and test on scrap.
Don’t forget HVLP maintenance tips like cleaning passages after each use and inspecting seals to keep spray patterns consistent.
Start coarse if you’re unsure, then move finer to reduce orange peel.
You’ll get better coverage faster when you pair the right tip with proper thinning and good gun upkeep.
Who This Guide Is For and How to Use It
Who are you spraying for—your own home renovation, a pro contracting job, or just experimenting with a weekend project?
This guide helps you match User preferences and Project types to Tips selection without guessing. You’ll get clear Application techniques and Surface considerations so you avoid Common mistakes like over-application or wrong tip choice.
Check Equipment compatibility and recommended Thinning methods before you start.
Follow concise Maintenance tips to keep gear reliable and Safety precautions to protect yourself.
Use the guide to pick options that fit your skill level, schedule, and finish goals, then test on scraps before committing.
How Tip Size Is Measured (Mm, GPM, Nozzle Codes)
Now that you know which projects, surfaces, and thinning methods suit different tips, you’ll want to understand how tip size is measured so you can pick the right one.
Manufacturers use tip measurement standards like millimeters (mm) for orifice diameter and gallons per minute (GPM) for flow capacity. You’ll see mm indicating the spray opening and GPM reflecting how much paint the tip passes at a set pressure.
Different nozzle codes combine numbers and letters to show pattern width, fan shape, and size—learn each brand’s legend.
Read specs, compare mm and GPM, and match nozzle codes to your latex viscosity.
Why Latex Needs Larger HVLP Tips Than Oil Paint
Latex is thicker than most oil paints, so you’ll need larger HVLP tips to handle the higher viscosity and maintain consistent flow.
Smaller nozzles clog more easily with latex, which interrupts spraying and forces frequent cleaning.
Bigger tips also help atomize the heavier material without overworking the gun, giving smoother coverage.
Paint Viscosity Differences
Because water-based latex has a higher viscosity and contains more solids and binders than most oil-based paints, you’ll need larger HVLP tips to keep the material flowing and atomizing properly.
You’ll notice paint composition affects how it sprays: latex carries more pigments, fillers, and binders that thicken the mix.
Check viscosity measurement with a simple cup or viscosity cup; manufacturers often list seconds or centipoise so you can compare products.
Higher readings mean you should open tip size and increase air pressure or thin slightly.
Adjusting for viscosity helps you maintain consistent atomization and an even finish without overworking the surface.
Nozzle Clogs More
If you don’t match the tip size to the thicker, particulate-heavy formula, you’ll see clogs more often with water-based latex than with oil-based paints.
You’ll notice larger particles, faster skinning, and suspended solids that gather at small orifices. Choose a larger HVLP tip to reduce restriction and stay ahead of common clogging causes like dried bits, inadequate strainers, and rapid evaporation.
Follow nozzle maintenance tips: clean immediately after use, soak problematic tips, and strain paint before pouring.
Keep solvent or water handy to flush during breaks, and inspect filters and seals regularly to prevent buildup and blockages.
Atomization And Flow
1 key reason you need larger HVLP tips for water-based paints is how they atomize and flow: latex contains more water, surfactants, and suspended solids, which resist being sheared into fine droplets.
So you’ll need a bigger orifice and higher volume to maintain smooth, even spray patterns without overworking the gun. You’ll adjust atomization techniques to compensate—raise fluid flow, open the needle, or slow travel speed—to overcome thicker flow dynamics.
Smaller tips force higher pressure, causing poor coverage, spatter, and tip clogs. Use larger tips to guarantee consistent droplet size, uniform laydown, and reduced rework.
How Paint Viscosity Affects Tip Choice
You’ll pick a tip based on how freely your latex flows—thicker paint needs a larger orifice to maintain an adequate flow rate.
If the tip’s too small you’ll have poor atomization or clogging unless you thin the paint enough to pass through smoothly.
Balance tip size and thinning to get consistent spray pattern and proper atomization without over-thinning the finish.
Paint Flow Rate
Paint viscosity directly controls paint flow rate through an HVLP tip, so choosing the right tip size depends on how easily your latex moves.
You’ll evaluate paint flow with viscosity testing and adjust tip adjustment and pressure settings to match atomization techniques. Proper nozzle selection and thinning techniques help you achieve consistent spray patterns while avoiding runs.
Prioritize surface preparation and equipment maintenance to prevent clogging and erratic flow.
When you test, change one variable at a time: tweak pressure, try a different tip, or alter viscosity. That method lets you dial in settings quickly and confidently for even coverage.
Tip Orifice Size
Because thicker latex resists flow, you’ll need a larger HVLP tip orifice to maintain proper atomization and avoid spitting or clogging.
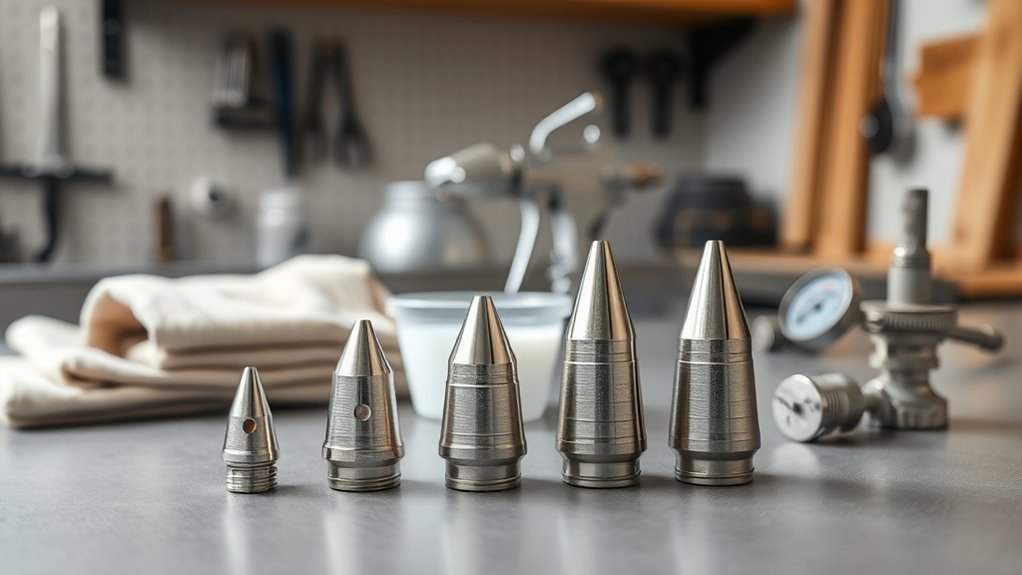
Choose an orifice sized for heavier-bodied latex—commonly 1.8–2.5 mm—for even laydown on walls and trim. Match tip compatibility to your gun model and spray pattern; check manufacturer charts rather than guessing.
Remember that correct tip size reduces strain on the pump and improves finish quality.
Keep tip maintenance regular: clean immediately after use, inspect for wear, and replace worn or distorted tips to preserve spray consistency and prevent uneven application or overspray.
Thinning And Atomization
When latex runs thicker than your gun can handle, thin it just enough to restore proper atomization without sacrificing hiding power; you’ll usually add water or a manufacturer-recommended reducer in small increments and test spray between adjustments.
You’ll watch viscosity and sheen, using a viscosity cup or flow cup to measure consistency.
Use thinning techniques that match the paint type and job — light thinning for walls, slightly more for detailed trim.
Consider atomization factors like tip size, air pressure, and spray distance; if you still see orange peel or runs, adjust tip or pressure before adding more reducer.
Matching HVLP Tip Size to Your System Output
Start by checking your sprayer’s actual output in fluid ounces per minute or gallons per hour so you can pick a tip that lets the gun lay down material without overworking the motor or forcing you to thin excessively.
Match HVLP compatibility to your sprayer model, then use tip selection based on measured output and the paint types you’ll spray.
Consider system pressure and viscosity impact: thicker latex needs larger orifice tips for proper atomization quality and spray efficiency.
Watch nozzle performance and adjust settings rather than forcing flow.
Regular equipment maintenance preserves output consistency, so your chosen tip keeps paint application even and reliable.
Reading Your Spray Gun’s Tip Chart
Now that you’ve matched tip size to your sprayer’s output and paint viscosity, learn to read the tip chart so you pick the right orifice, fan size, and spray pattern for the job.
The chart lists orifice diameter (thousandths), recommended fan widths, and pressure ranges. You’ll use tip selection to balance coverage and atomization—larger orifices for thicker latex, smaller for fine finishes.
Check tip compatibility with your gun model and air supply; charts often note compatible gun families. Match the chart’s pressure recommendations to avoid overspray or poor atomization.
Use the chart as your quick reference when changing projects.
Recommended HVLP Tips for Interior Walls
For most interior walls you’ll get the best balance of coverage and finish with an HVLP tip in the 1.8–2.5 mm (18–25 thousandths) range—these sizes handle common latex wall paints without clogging and still atomize well at recommended pressures.
Choose near 1.8 mm for smoother, low-VOC paints and tighter detail; opt for 2.2–2.5 mm when you need faster coverage or thicker formulations.
Keep the fan width moderate to avoid overspray and lap marks.
Regular spray gun maintenance—cleaning needles, tips, and filters—preserves consistent atomization and protects your interior wall finishes.
Test on scrap before starting.
Recommended HVLP Tips for Ceilings
Because ceilings are overhead and cover large, flat areas, you’ll want slightly larger HVLP tips than for walls—typically in the 2.0–2.8 mm (20–28 thousandths) range—to get good flow and minimize pass marks while keeping atomization smooth.
- Use 2.0–2.4 mm for smooth ceilings; it balances coverage and control when you focus on ceiling preparation.
- Choose 2.4–2.8 mm for textured or older surfaces that need heavier laydown.
- Hold the gun perpendicular, maintain consistent distance, and adjust pressure as your spray technique demands.
- Practice on scrap material to dial fan width and overlap, reducing drips and ensuring uniform finish.
Recommended HVLP Tips for Exterior Siding
For exterior siding you’ll want tip sizes matched to paint viscosity—thicker acrylics need larger tips than thinned latex.
Choose a nozzle that gives a wide, even fan to cover boards or clapboard without overbuilding the film.
Also factor in material and weather: porous wood soaks more and cold temps thicken paint, so bump the tip size or thin slightly as needed.
Tip Size By Viscosity
When you’re choosing an HVLP tip for exterior siding, match the tip size to the paint’s viscosity so you get even coverage without clogging or overspray; thinner 1.4–1.6 mm tips work well for house enamels and acrylics thinned slightly, while heavier 1.8–2.2 mm tips handle thicker latex and textured exterior formulations.
You’ll adjust tip size based on viscosity effects and desired flow rates to maintain a wet edge and avoid runs.
Consider these practical choices:
- 1.4 mm — low-viscosity acrylics, high atomization.
- 1.6 mm — standard exterior enamels.
- 1.8 mm — medium latex.
- 2.2 mm — heavy or textured paints.
Nozzle Pattern Width
How wide should your HVLP nozzle pattern be for siding? Aim for a 6–8 inch fan for most exterior siding to balance coverage and detail. Match nozzle design to spray efficiency and pattern consistency; wider fans speed work but can reduce control. Use application techniques like overlapping passes and consistent distance to improve finish. Check material compatibility with your tip, and perform tip maintenance before each job. Prioritize surface preparation to avoid defects. Consider environmental factors that affect atomization. Rely on user experience, and keep simple troubleshooting tips handy—adjust fan, pressure, or tip size if you see runs or dry spray.
Material And Weather Effects
Because latex varies in viscosity and formulation, you’ll need to match tip size and pressure to the specific exterior paint you’re using to get consistent atomization and adhesion.
Consider material impact and surface preparation before choosing a tip; wood, vinyl, and fiber cement need different flow.
Account for weather conditions—humidity effects and temperature influence drying and sagging. Adjust pressure or tip larger in cold or high-humidity conditions to maintain atomization.
For efficient paint application on siding, follow these tips:
- Test on scrap to gauge material impact and adjust tip.
- Increase tip size slightly in high humidity.
- Reduce atomization in hot, dry weather.
- Prep surfaces thoroughly before spraying.
Recommended HVLP Tips for Exterior Trim
For exterior trim, pick HVLP tips that balance fine atomization with enough flow to cover mouldings and sash without clogging; choose 1.4–1.8 mm for most latex sheens.
You’ll use exterior trim techniques to keep edges crisp: lower pressure, tighter fan for detail, and overlap passes.
Thicker paints may need 1.8 mm and slightly higher pressure or light thinning per manufacturer.
Consider paint finish options—flat trims hide flaws, semi-gloss sheds dirt and highlights profile.
Test on scrap trim, adjust pattern and distance, and clean frequently to prevent build-up.
This approach gives consistent coverage without runs or excessive overspray.
Recommended HVLP Tips for Doors and Cabinets
Choose HVLP tips that give a smooth, consistent atomization without sacrificing flow—typically 1.2–1.6 mm for cabinet and door lacquers and 1.4–1.8 mm for latex or heavier water-based finishes.
- Use 1.2–1.6 mm for fine door finishes and cabinet refinishing to control paint application and improve paint adhesion.
- Choose 1.4–1.8 mm when thicker latex requires more flow to maintain finish durability without orange peel.
- Prioritize surface preparation and nozzle selection in project planning; adjust spray technique to avoid runs and guarantee coverage.
- Follow regular equipment maintenance to sustain consistent atomization and peak finish durability.
Recommended HVLP Tips for Window Frames and Small Trim
For window frames and small trim you’ll want finer tips—typically 1.0–1.4 mm—for smooth control without over-spray.
Use a lower pressure and a narrower fan pattern so you can follow tight edges and corners precisely.
Move the gun steadily and keep it close to the surface, feathering starts and stops to avoid buildup in grooves.
Recommended Tip Sizes
When you’re spraying window frames and small trim with latex, pick a fine-tip HVLP nozzle—typically 1.0–1.4 mm—to get smooth, even coverage without obscuring detail.
For recommended tip sizes, focus on tip size selection that balances atomization and control. Use lighter thinning and lower pressure for crisp edges. Match nozzle to paint viscosity and working distance.
- 1.0 mm — best for very fine trim and delicate profiles.
- 1.2 mm — versatile for most window frames and casings.
- 1.3 mm — good for slightly thicker latex and faster coverage.
- 1.4 mm — use when you need a bit more flow without losing detail.
Technique For Tight Areas
Although tight corners and narrow profiles demand patience, you can spray them cleanly with a fine HVLP tip (1.0–1.2 mm), low pressure, and short, controlled passes. Hold the gun closer than for broad surfaces, feather the trigger to start and stop outside the piece, and keep your strokes overlapping by about 50% to avoid buildup in recesses.
For window frames and small trim, set spray patterns narrow, adjust nozzle angles to follow edge contours, and make small equipment adjustment increments.
Focus on surface preparation, consistent paint consistency, and steady airflow control for precision application in tight spaces to prevent runs.
Recommended HVLP Tips for Furniture and Antiques
Since you’re working on furniture and antiques, pick HVLP tips that give you control and a fine finish—typically 1.0–1.4 mm for latex paints and 0.8–1.2 mm for thinned latex or light-bodied acrylics.
For furniture refinishing and antique restoration, focus on even paint application and gentle spray techniques after proper project preparation and surface priming. Maintain tips to avoid clogs and inconsistent patterns.
Use lower pressure and multiple thin coats for smooth finishing touches.
Apply lower pressure and build multiple thin coats for an ultra-smooth, professional finish.
- 1.0 mm: detailed pieces, controlled laydown
- 1.2 mm: general furniture surfaces
- 1.4 mm: heavier latex on large panels
- 0.8 mm: fine trim and carvings
Tips for Latex Primer Vs. Finish Coats
1. When prepping, focus on surface preparation and product selection: choose a latex primer formulated for adhesion quality, then pick compatible finish coats.
Your application techniques differ—prime with slightly heavier mist for sealing, thin finish coats for smooth build.
Monitor drying times between layers and adjust spray pattern to avoid runs.
Consider environmental conditions like temperature and humidity; they affect cure and atomization.
Keep equipment maintenance tight—clean tips and filters after priming to prevent clogging before finishing.
Finally, follow safety precautions: ventilate, wear a respirator and gloves, and store solvents and paints safely.
When to Use 1.5–2.0 Mm Tips for Heavy‑Body Latex
When you’re spraying heavy‑body latex—high‑build primers, textured coatings, or masonry paints—a 1.5–2.0 mm tip gives the flow and pressure needed to atomize viscous material without overworking the surface.
For heavy‑body latex—primers, textured coatings, masonry paints—a 1.5–2.0 mm tip delivers the flow and atomization you need.
You’ll control latex viscosity with minimal thinning ratios so finish quality stays robust. Adjust pressure settings for atomization efficiency and confirm equipment compatibility before starting.
Practice spray technique on scrap after surface preparation to dial pattern and overlap.
- Monitor tip maintenance to prevent clog prevention issues.
- Use slow, steady passes to reduce rebound.
- Match tip size to coating weight.
- Clean thoroughly after each session to protect performance.
When to Use 1.0–1.3 Mm Tips for Thinned Latex
Use a 1.0–1.3 mm tip when you thin latex to improve flow for fine finishes or detailed work—trim, cabinetry, and light-bodied interior coatings respond best—because the smaller orifice and lower pressure produce a finer atomization and smoother laydown without over‑spraying.
You’ll thin only enough to reach the manufacturer’s recommended viscosity, test on a card, and adjust fan and pressure for even coverage.
This tip range excels when you need controlled edges and minimal texture.
Practice consistent gun speed and overlap, and perform regular HVLP tip maintenance to avoid clogging.
For latex paint application, patience and proper setup yield professional results.
Pick HVLP Tips by Project Scale: Small, Medium, Large
After thinning and testing tips in the 1.0–1.3 mm range for detailed work, you’ll pick different tip sizes as the project scale grows: small jobs like trim and cabinets need finer tips for control, medium projects such as doors and furniture benefit from mid‑range sizes for a balance of speed and finish, and large surfaces—walls, ceilings, decks—call for larger orifices to move more material quickly.
- For small project tips, choose 0.8–1.0 mm; focus on project preparation, surface preparation tips, and precise spray technique variations.
- For medium project tips, pick 1.2–1.4 mm for balance and expected finish expectations.
- For large project tips, use 1.6–2.0 mm to cover quickly.
- Always weigh tip selection criteria, material compatibility, and safety considerations.
How Surface Texture Changes Your Tip Choice
If you’re spraying a smooth surface, you can use a finer tip for an even, thin coat that minimizes orange peel.
For textured walls or stucco you’ll want a larger tip to push paint into crevices and avoid clogging.
Adjust tip size upward as texture increases to maintain coverage and reduce passes.
Smooth vs. Textured Surfaces
When you’re choosing an HVLP tip for latex paint, the surface texture should guide your pick: smooth surfaces need finer tips for thin, even coats, while textured surfaces demand larger tips to push paint into crevices without clogging or overworking the finish.
- For flat, smooth surface techniques, pick a 1.3–1.5 mm tip for controlled atomization and minimal orange peel.
- On lightly textured walls, use 1.7–1.9 mm tips to fill minor irregularities.
- For coarse textures, choose 2.0–2.5 mm to avoid frequent clogging and guarantee coverage.
- Match pressure and technique to address textured surface challenges without overspray.
Adjusting Tip For Texture
Now that you’ve matched tip sizes to general surface types, you’ll adjust more precisely based on subtle textural differences: finer tips give smoother atomization on polished surfaces, while rougher textures demand larger orifices to carry heavier droplets into crevices without clogging.
When adjusting tip for texture, consider adjusting viscosity and nozzle selection together so texture techniques achieve even spray consistency.
Prioritize surface preparation to avoid fisheye or buildup. Use pattern adjustment to direct droplets into valleys on coarse substrates.
Check material compatibility for coatings, scale the tip to project scale, and follow equipment maintenance to preserve finish quality.
How Temperature and Humidity Affect Atomization
Because air density and solvent behavior change with temperature and humidity, you’ll notice a real difference in how a HVLP gun atomizes latex paint. You’ll adapt atomization techniques to conditions to keep droplets consistent and avoid runs.
Humidity impact is critical: high moisture slows evaporation; heat speeds it.
- Cooler air increases density, requiring higher air pressure for the same spray pattern.
- Hot, dry conditions accelerate evaporation, producing finer mist and potential tip clogging.
- High humidity enlarges droplets and promotes orange peel; slow your stroke and overlap more.
- Monitor weather and test spray on scrap before committing to large surfaces.
When and How Much to Thin Latex (Ratios & Tests)
Temperature and humidity affect how paint leaves the gun, and they’ll also change how much you need to thin latex to get a smooth, consistent spray.
Start latex preparation with manufacturer specs, then choose conservative thinning ratios—often 5–10% water—adjusting as conditions demand.
Run viscosity tests with a cup or viscometer; note how atomization effects change droplet size.
Make incremental flow adjustments at the gun and retest spray consistency on cardboard.
If runs or orange peel appear, reduce flow or thin less.
Record ratios and results so you can reproduce successful settings for specific temperatures and humidity levels.
Best Thinners and Flow Agents for Latex
Choosing the right thinner or flow agent will make spraying latex far easier and improve finish quality, so pick products designed for water-based acrylics rather than solvent-based reducers.
You’ll want the best thinners and flow agents that preserve color, dry time, and adhesion. Use products labeled for latex or acrylics and follow manufacturer thinning recommendations.
Test small batches for sprayability and film build. Consider water-compatible flow agents to reduce tip clogging and orange peel without weakening the binder.
- Acrylic-compatible latex thinner
- Water-based flow agent concentrate
- Fast-dry latex reducer
- Low-VOC flow additive
How to Strain and Prep Latex for Spraying
Before you start spraying, strain your latex through a fine mesh or paint sock to catch lumps and debris that can clog an HVLP tip.
Test and adjust viscosity with a viscosity cup or manufacturer’s recommendations, thinning only as needed to match your chosen tip size.
Keep records of dilution ratios so you can reproduce consistent flow and finish next time.
Straining Paint Properly
When you’re prepping latex for spraying, straining removes lumps, skin, and debris that can clog your HVLP tip and ruin the finish, so take the time to do it right.
Use paint filtration methods and effective straining techniques to protect your gun. Choose a clean container, pour slowly, and avoid agitation that creates bubbles. Replace filters between colors and jobs.
- Use a cone or bag filter rated for latex
- Pour through a fine mesh into a clean cup
- Tap container to settle solids, then re-strain
- Keep disposable filters handy and discard after use
Adjusting Viscosity Levels
After you’ve strained the latex and removed debris that can clog the gun, make sure the paint’s viscosity matches your HVLP system; too thick and it won’t atomize, too thin and you’ll get runs and poor coverage.
You’ll test spray on cardboard, note droplet pattern, and measure flow with a viscosity cup if available.
For thicker latex, add small amounts of water or manufacturer reducer, mixing thoroughly and rechecking spray consistency.
Keep adjustments minimal—work in 5% increments. Aim for smooth atomization without sagging.
Document your final ratio for future jobs so you replicate ideal viscosity adjustment.
Spray Techniques for Consistent Latex Coverage
Once you’ve chosen the right HVLP tip size for your latex, focus on consistent technique to get even coverage and avoid runs.
You’ll combine surface preparation, nozzle selection, and subtle tip adjustments to improve finish quality. Control spray distance and use an overlap technique for uniform paint application. Monitor air pressure without getting into specific settings.
- Hold gun perpendicular, maintain consistent spray distance and steady motion for consistent coverage.
- Test nozzle selection and tip adjustments on scrap to avoid heavy buildup.
- Prep surfaces—clean, sand, and tack—to enhance adhesion and smooth finish.
- Use controlled passes, keeping rhythm and overlap technique steady.
Spray Settings to Pair With Specific Tip Sizes (Pressure, Fan)
Although tip size dictates how much paint leaves the gun, you’ll pair that choice with matching spray settings—primarily air pressure and fan width—to get an even laydown without overspray or orange peel. You’ll make pressure adjustments based on nozzle types and material compatibility, tune fan patterns for application speed and paint layering, and consider airflow dynamics and environmental conditions. Good spray techniques plus surface preparation and tip maintenance preserve finish quality. Use the table below to match broad settings quickly.
| Tip Size | Suggested Setting |
|---|---|
| Fine | Low pressure, narrow fan |
| Medium | Moderate pressure, medium fan |
| Large | Higher pressure, wide fan |
| Specialty | Adjust per material |
How to Test Spray Patterns and Adjust Tips
Before you start spraying a project, test your gun on a scrap panel and adjust the tip until the pattern is uniform and the edges are clean.
You’ll check spray technique, pattern adjustment, viscosity testing, pressure settings, nozzle maintenance, spray distance, air flow, surface preparation, material compatibility, and environmental factors to get predictable results.
- Hold the gun at consistent spray distance and sweep evenly to reveal fan shape and edge clarity.
- Change tip sizes and note pattern width, checking viscosity testing effects and material compatibility.
- Adjust pressure settings and air flow for a stable curtain.
- Clean and inspect nozzle maintenance before final pass.
Fixing Orange Peel: Tip, Pressure, or Thinning?
If your test panel shows a textured, dimpled finish instead of a smooth film, you’ll need to diagnose whether the orange peel comes from the tip, pressure, or the paint’s consistency.
First, check the tip—too large or clogged tips disrupt atomization and create orange peel causes; swap to the recommended HVLP size for latex and retest.
Next, adjust pressure: too low leaves coarse droplets, too high can blow fast-drying edges; find the sweet spot for your gun.
Finally, thin the paint per manufacturer directions; over-thinning reduces coverage, under-thinning resists leveling.
Improve your spray technique—consistent distance and speed—to eliminate texture.
Fixing Runs and Sags: Tip Size and Overlap Fixes
When you see runs or sags in your latex finish, start by checking the tip size and your overlap technique, because both directly control how much material lands on the surface and how it levels; a tip that’s too large deposits excess paint and heavy overlap or slow gun movement compounds buildup, creating gravity-fed runs.
- Inspect tip adjustment and swap to a smaller orifice for run correction; reduce flow to avoid excess.
- Refine spray technique: keep steady speed, proper distance, and consistent overlap to prevent sags.
- Verify surface preparation and paint consistency; heavy paint or dirty substrate increases sag risk.
- Allow adequate drying time between coats to preserve finish quality and enable effective sag removal.
Fixing Clogging and Spitting: Nozzle Care and Swaps
Although clogging and spitting can seem like minor annoyances, they quickly ruin a spray job and waste paint, so you need to address nozzles and tips as soon as you notice uneven spray patterns or sputtering.
Inspect nozzle types regularly and follow a maintenance schedule: wipe screens, soak tips in appropriate solvent, and use recommended cleaning techniques to remove dried latex.
For persistent issues, perform tip replacement and compare spray consistency afterward.
Troubleshooting issues means checking fluid filters, air caps, and flow rate.
Regular inspections and nozzle maintenance prevent clogs, improve performance optimization, and keep your spray work reliable.
Reducing Overspray When Using Larger Tips
When you use larger tips, lower the spray pressure to cut back on overspray and keep more paint on the wall.
Stand at the ideal gun distance—too close or too far will increase misting—and move the gun steadily.
Also make sure your air cap is set for the fan pattern you need so airflow is focused, not scattered.
Adjust Spray Pressure
Start by dialing down your spray pressure as you move to a larger tip—less pressure helps cut overspray and keeps the fan pattern tighter so more paint lands where you want it.
You’ll make spray pressure adjustments gradually, watching how the coating atomizes. Find ideal settings that balance flow and control; too low clogs, too high fogs.
- Reduce pressure in small increments and test on cardboard.
- Watch for smooth, even atomization without spits.
- Note setting that minimizes bounce-back and saves material.
- Record pressure per tip size for repeatable results and consistent finish.
Optimize Gun Distance
After lowering pressure for a larger tip, adjust your gun distance to further cut overspray and sharpen the fan pattern. You’ll notice distance effects quickly: too close causes runs, too far wastes paint.
Match gun distance and gun angle to project type and surface preparation—smooth panels tolerate closer work, textured surfaces need distance variation.
Use consistent spray technique with steady passes, keeping ideal distance to preserve spray pattern and minimize bounceback.
Combine airflow adjustment with distance tweaks rather than relying on one change. Practice on scrap material to dial in the balance between coverage, edge definition, and overspray control.
Use Air Caps Correctly
Although a larger tip boosts flow, you’ll need to use the correct air cap to prevent excessive overspray and maintain a tight fan pattern.
You’ll focus on proper air cap selection and simple air cap adjustment to control atomization. Inspect and clean regularly for air cap maintenance so passages stay precise. Match cap size to tip and material, then tweak inlet and fan settings for even coverage.
- Choose the proper air cap for latex and tip diameter.
- Perform air cap adjustment to narrow the fan when needed.
- Schedule air cap maintenance to avoid clogging.
- Test spray patterns before starting.
Cleaning and Maintaining HVLP Tips
Keeping your HVLP tips clean and well-maintained guarantees consistent spray patterns and extends tip life.
For tip maintenance, follow nozzle care and simple cleaning techniques after each job: flush the spray gun with recommended cleaning solutions, use soft brushes for residues, and apply disassembly tips to remove the tip and air cap safely.
Establish maintenance routines that include inspecting seals and screens to aid clog prevention.
After cleaning, dry parts thoroughly and use proper storage to prevent corrosion and dust.
Regular attention to these steps preserves tip longevity, maintains peak spray gun performance, and reduces the need for premature replacements.
When to Replace a Worn Tip and How Wear Affects Spray
Watch for changes in your spray pattern—skipping, widening, or uneven edges usually mean the tip’s worn.
Tip wear makes the fan less consistent and can increase overspray or rough texture, so your finish suffers even if your technique doesn’t.
Replace the tip when pattern defects persist after cleaning or when the orifice looks rounded or eroded.
Detecting Spray Pattern Change
How can you tell a tip’s worn before it ruins a finish? Watch the spray pattern closely during practice passes. Uneven edges, tails, or increased overspray signal wear. Make a careful tip adjustment first; if problems persist, the tip likely needs replacing.
- Compare current pattern to a fresh reference for symmetry and density.
- Note drift or feathering at normal distance—wear thins the core.
- Test different pressures after a tip adjustment; unchanged flaws mean erosion.
- Inspect the orifice visually for rounding or jagged edges; subtle damage alters atomization.
Act quickly to avoid salvage headaches.
Impact Of Tip Wear
When you spot pattern irregularities that don’t respond to adjustments, it’s time to replace the tip—continued spraying with a worn nozzle widens the fan, thins the core, increases overspray, and throws off edge definition so finishes become harder to correct.
You should watch wear indicators like uneven spray, increased runs, or need for higher pressure to maintain coverage. Good tip maintenance reduces wasted paint and keeps edges crisp; clean after each job, inspect the orifice and needle, and swap tips showing pitting or elongation.
Treat tips as consumables: timely replacement preserves finish quality and saves time on sanding and rework.
When To Replace
A worn tip starts to show its effects long before it fails completely, so you should replace it as soon as you notice consistent changes in pattern, coverage, or required pressure.
Watch for drooling edges, overspray, or thinning center fan — these signal tip wear that affects finish and efficiency. Regular nozzle maintenance will extend life, but don’t delay swapping a damaged unit.
- Uneven fan pattern or streaks
- Increased pressure needed for same atomization
- Visible erosion or lip deformation
- Frequent clogs despite cleaning
Replace worn tips promptly to keep consistent results and avoid rework.
Air‑Cap Vs. Turbine HVLP: Tip Recommendations
If you’re choosing between air‑cap and turbine HVLP systems for latex paint, know they demand different tip choices to get the same finish.
You’ll assess air cap types and nozzle variations to match turbine efficiency and atomization quality. For turbine units, pick slightly larger tips to preserve spray consistency under lower air volume; for air‑cap compressors, you can use finer tips for precise paint application.
Prioritize tip compatibility with your system selection and verify manufacturer specs.
Test spray patterns on scrap, adjusting tip size to balance coverage and atomization without overworking the paint or producing excessive bounce back.
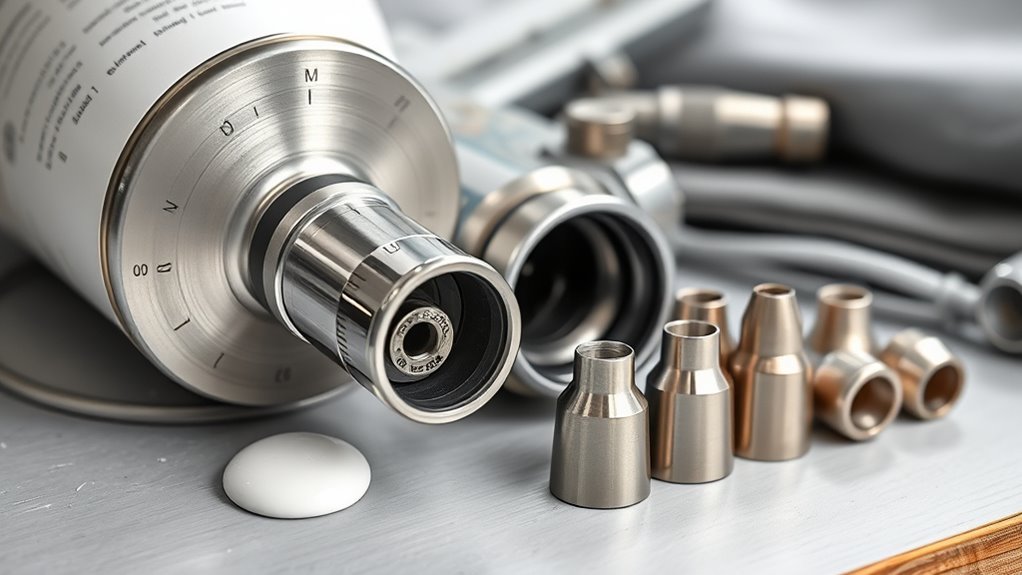
Tip Choices for HVLP Conversion Setups
When converting to an HVLP setup, you’ll want tip size recommendations based on the latex viscosity you’ll be spraying.
Match thinner paints to smaller tips and heavier, less thinned latex to larger orifice sizes to keep atomization clean.
We’ll cover specific tip numbers and how to adjust your mix so the gun performs reliably.
Tip Size Recommendations
You’ll want to match tip size to your latex viscosity and the job’s detail level: larger tips (1.8–2.5 mm) handle thicker, unthinned house paints and wide coverage, while smaller tips (1.0–1.4 mm) suit thinned latex, lighter primers, or any work requiring finer control.
- For exterior walls choose 1.8–2.5 mm for faster coverage and reliable tip size compatibility.
- For trim and cabinets pick 1.0–1.4 mm for controlled atomization and smoother edges.
- For multipurpose jobs consider 1.4–1.8 mm as a compromise for flow and detail.
- Prioritize ideal tip selection based on surface texture and spray technique.
Matching Viscosity To Tip
Because HVLP conversion kits change air delivery and pattern pressure, matching your latex’s viscosity to the tip size is critical for consistent atomization and finish quality.
You’ll assess paint thickness and make viscosity adjustments—measure with a viscosity cup or follow manufacturer thinning guidelines. Choose a tip rated for your adjusted viscosity; smaller tips need thinner material, larger tips handle heavier loads.
Test on scrap, tweak thinning and air settings, and note tip compatibility with the converter’s reduced pressure to avoid orange peel or runs.
Keep records of mixes, tip size, and PSI so you repeat successful setups reliably.
How Tip Size Affects Dry Time and Sealer Coats
If you choose a larger HVLP tip, your latex coats will lay down heavier and take longer to dry, and that affects when you can apply sealer layers.
Your tip selection and tip compatibility influence dry time; heavier application needs longer flash and cure.
Consider surface preparation and environmental factors—temperature and humidity change cure rates.
Proper application techniques and thin passes improve paint adhesion and speed sealing.
Balance finish quality with project efficiency by matching tip size to viscosity.
- Large tip: thicker coats, slower dry time.
- Small tip: thin coats, faster sealer coats.
- Adjust technique for adhesion.
- Monitor environment for consistent results.
Cost Vs Performance: Tips for DIY Vs Pros
You’ll weigh cost per project against long-term equipment durability when choosing tip sizes and sprayers.
For DIY jobs, cheaper tips may save money now but won’t hold up to heavy use, while pros benefit from higher-quality tips that deliver consistent performance.
Also factor in skill level—finer tips need more control, so a slightly larger, forgiving tip can cut rework and overall cost for less experienced painters.
Cost Per Project
Budget considerations matter when choosing HVLP tip sizes for latex paint, since the right tip can cut labor time and material waste.
You should do project budgeting and cost analysis up front to weigh material expenses against labor costs and project scope. Account for unexpected expenses and use price comparisons for tips, hoses, and masking supplies.
- Estimate project scope, resource allocation, and time to finish.
- Compare tip sizes by finish quality and material usage.
- Include labor costs in financial planning, even for DIY time value.
- Set budget constraints, prioritize essentials, and track actual vs estimated costs.
Equipment Durability Tradeoffs
While pros often opt for commercial-grade HVLP systems that tolerate heavy use, DIYers can get excellent results with midrange equipment if they match tip size and maintenance to the job.
You’ll balance equipment longevity against upfront price: higher material quality and build boosts performance reliability and extends replacement intervals, but raises purchase and maintenance costs.
Factor usage frequency—occasional projects don’t justify top-tier gear, frequent use does.
Keep maintenance costs down by cleaning tips and filters, storing properly, and inspecting seals.
Decide by comparing total cost of ownership versus expected reliability so you won’t outgrow your sprayer prematurely.
Skill Level Impact
Because skill level changes how much you’ll get from a given tip size, match your expectations to your experience: DIYers often do best with slightly larger, more forgiving tips that reduce clogging and overspray sensitivity, while pros can exploit smaller tips for finer control and thinner atomization.
- Assess skill levels: beginners benefit from beginner tips that tolerate thicker paint types and lower tool familiarity.
- Tackle common challenges with simple practice strategies to shorten the learning curve.
- Use advanced techniques only after you master experience impact and project complexity handling.
- Balance cost vs performance by matching tip choice to your experience and paint types.
Tool Checklist for Spraying Latex With the Right Tip
Start with a short checklist of essentials you’ll need to spray latex successfully: a compatible HVLP gun and the correct tip, a quality filter or strainer, proper hoses and fittings, protective gear, and a thinning solution or additive if your paint requires it.
Next, confirm tool compatibility—match tip size to paint viscosity and gun specifications. Include nozzle wrenches, spare tips (1.4–2.0mm range), and a pressure regulator.
Pack clean rags, a cup cleaner, and a small mixing stick. Practice spray technique on scrap with the chosen tip, adjust pattern and flow, then inspect for even coverage before you begin the main job.
Quick Troubleshooting Flowchart for Tip Issues
If your spray pattern’s uneven or you’re getting runs, follow a simple flowchart to isolate tip-related causes quickly:
- Check tip size and orifice for clogs; clean per tip maintenance steps and retest spray.
- Inspect spray pattern—split or tailing? Adjust fan/air and confirm troubleshooting techniques like reversing tip to clear debris.
- Verify paint viscosity and strain bucket; thin only if manufacturer allows, then re-evaluate pattern.
- Test on scrap—consistent defect persists? Swap to a known-good tip to confirm whether tip itself is faulty before replacing other components.
Common Problems and Which Tip Change Fixes Them
Once you’ve ruled out clogs, viscosity, and pattern issues, you’ll want to match specific spray defects to the tip change that fixes them.
If you see heavy orange peel, switch to a larger or finer fan tip depending on coverage—check tip compatibility first.
For excessive overspray, pick a smaller or more focused tip and refine your spray technique.
Runs and sags usually mean too large a tip or poor paint preparation; drop one size and thin per guidelines.
For spitting, inspect nozzle maintenance and replace damaged needles.
Use troubleshooting tips to balance equipment selection and application methods; avoid common misconceptions about “one-size” tips.
Document Tip Settings for Repeat Jobs
When you repeat jobs, keep a simple tip size chart on hand so you can match the nozzle to the paint and finish quickly.
Note the pressure and flow settings that worked best for each combination so you don’t guess next time.
Add brief job setup notes—substrate, thinning, and environmental conditions—to guarantee consistent results.
Tip Size Chart
A tip size chart lets you record the exact nozzle and air settings you used for each latex job so you can reproduce the finish reliably.
Use a simple table: job type, tip size, fan width, and notes on tip maintenance and spray techniques. Keep entries clear so you or a teammate can match results later.
- Surface — tip size, fan width, material viscosity, dry time
- Color coats — exact tip, overlap percentage, stroke speed, ambient temp
- Primer — tip, fluid flow note, nozzle wear checks, filter used
- Touch-up — reduced tip or setting, cleanup steps, maintenance reminders
Pressure And Flow
Because pressure and flow determine how much material leaves the nozzle and how it atomizes, you should record both readings for every latex job so you can reproduce finish and coverage reliably.
Note gun pressure settings at the regulator and actual PSI at the gun, plus fluid needle position. Track flow dynamics by noting cup or pump output, hose length, and any reducer used.
Keep entries simple: tip size, pressure settings, pump speed, and observed atomization (too heavy, orange peel, or smooth).
When you repeat a job, match these pressure and flow records to get consistent spray patterns and film build.
Job Setup Notes
Keep your setup notes concise so you can recreate the same finish next time.
When documenting Job preparation and Project planning, record Material selection, tip size, pressure, and thinning.
Note Equipment setup and Tools inventory so you repeat settings quickly.
Include Workspace organization, Surface cleaning steps, and Environmental conditions like temperature and humidity.
List Safety measures and PPE used.
Track Time management: prep, spray, dry times.
- Tip size, PSI, and fluid flow
- Masking, drop cloths, and ventilation setup
- Cleaner, solvent, and surface prep steps
- Timetable: start, passes, and cure checks
Top Brand Tip Charts to Consult (What to Look For)
When you’re choosing an HVLP tip for latex, consult tip charts from major manufacturers like Graco, Wagner, Fuji, and Earlex to compare recommended orifice sizes and spray patterns.
These charts tell you which tips handle higher-viscosity latex, which require thinning, and which deliver finer atomization for finish coats. Look for clear listings of tip brands and size compatibility, recommended PSI, and suggested thinning percentages.
Note spray fan width and material flow rates to match your project. Favor charts that include substrate recommendations and nozzle part numbers so you can reorder exact replacements and avoid trial-and-error adjustments on the job.
Safety and Ventilation When Spraying Thinned Latex
If you thin latex for HVLP spraying, take ventilation and respiratory protection seriously to avoid inhaling fine droplets and solvent vapors—set up cross-ventilation, run a filtered respirator rated for organic vapors/particulates (or P100 cartridges with an appropriate organic vapor prefilter), and position exhaust fans to pull contaminated air away from your breathing zone.
- Use a spray booth or well-ventilated area to control air circulation and vapor control.
- Wear full protective gear: respirator, goggles, gloves, and disposable coveralls for respiratory safety and paint hazards.
- Adjust spray patterns to minimize overspray and airborne droplets.
- Perform routine equipment maintenance to prevent leaks and ineffective filtration.
When to Call a Pro for Tricky HVLP Latex Projects
After you’ve set up ventilation and protective gear for spraying thinned latex, you’ll still face projects that are worth bringing in a pro—especially when the job involves complex substrates, large-scale surfaces, fine cabinetry, or strict finish tolerances that demand consistent atomization and overlap.
You should call for professional advice when HVLP challenges exceed your experience: uneven absorption, intricate profiles, or extensive masking needs.
Pros handle complex projects with proper tip selection, pressure settings, and technique to avoid runs, orange peel, or rework.
Also consult a pro if safety concerns escalate—confined spaces, combustible coatings, or medical sensitivities require expert management.
Further Reading and Resources on HVLP Tips and Latex
Because choosing the right HVLP tip and thinning approach can make or break a latex project, you’ll want a few reliable resources at your fingertips.
Choosing the right HVLP tip and thinning method is crucial—keep reliable resources handy.
Use guides that cover latex paint properties, nozzle sizing, and HVLP maintenance tips so you can spray efficiently and avoid clogs.
- Manufacturer manuals — tip charts, recommended thinning, and pump care.
- Trade forums — real-world troubleshooting and setup photos.
- How-to videos — spray technique, cleanup, and maintenance demos.
- Technical datasheets — viscosity, solids, and drying info for different latex formulas.
Bookmark these and update your references as products evolve.
Frequently Asked Questions
Can HVLP Tips Be Used for Oil‑Based Enamels Safely?
Yes — you can use HVLP tips for oil-based enamels safely if you match tip size and pressure; you’ll get good HVLP efficiency, strong Enamel compatibility, and reduced overspray when you thin and clean properly afterward.
Do Tip Materials (Stainless Vs Brass) Matter for Latex?
Like a trusty toolbelt, yes — you’ll find tip materials matter for latex: stainless resists corrosion better while brass’s cheaper, but both work if you do tip maintenance regularly; choose based on material durability, budget, and cleaning discipline.
How Do Tip Angles Affect Edge Control and Overlap?
Smaller tip angles give you tighter spray patterns and better edge control, reducing overlap; wider angles produce broader patterns that need more overlap for uniform coverage, so you’ll adjust speed and distance to manage edges.
Are Specialty Tips Available for High‑Solids Industrial Latex?
About 72% of manufacturers report improved transfer with specialty tips. You’ll find specialty applications tips for high‑solids industrial coatings; they’ll handle thicker material, reduce clogging, and deliver consistent atomization when you adjust pressure and nozzle size.
Can Electrostatic Guns Use Standard HVLP Tips?
No — you can’t just swap tips; electrostatic technology needs specialized HVLP compatibility adaptions and grounded, insulated components, so you’ll use dedicated electrostatic tips or converters designed for safe charge control and consistent transfer efficiency.
Conclusion
Think of your HVLP gun as a garden hose and latex as a thick summer stream: match the nozzle wide enough to let the flow run smooth, or you’ll choke the spray and ruin the bed. You’ve learned which tip sizes work, how viscosity and thinning change the flow, and when to call a pro. With the right tip, thin and patience, your finish will bloom—steady, even, and ready to weather.