What Size Nozzle for Latex Paint
For most interior latex you’ll want a medium tip—about 0.015″–0.019″ (1.5–1.9 mm) for walls and ceilings for smooth, even coverage. Use smaller tips like 0.009″–0.013″ (0.9–1.3 mm) for trim and cabinets where control matters. Heavy or unthinned latex needs 0.021″ (≈2.1 mm) or larger, or thin slightly for smaller tips. Match tip size to viscosity and pressure, test on scrap, and keep reading for setup, troubleshooting, and pro tips.
Which Nozzle Size Gives the Best Finish for Latex Paint?
When you’re after the smoothest finish with latex paint, choose a nozzle that balances flow and atomization—typically a 0.015″–0.019″ tip for medium-viscosity interior paints. You’ll get fine droplets that level well, minimizing brush marks and saving time compared with Brush alternatives.
Match nozzle size to your paint’s thinning and your sprayer’s pressure, and test on scrap to confirm edge definition and coverage. Consider how color mixing affects viscosity; heavier pigment loads may need a slightly larger tip.
Clean and maintain tips to avoid spitting. With these adjustments, you’ll achieve consistent, professional-looking results without overworking the surface.
Quick Nozzle Cheat Sheet for Latex Paint
Now that you know which tip sizes produce the smoothest finish, here’s a quick nozzle cheat sheet to help you pick the right tip fast. Use this when prepping for a job: check paint viscosity, strain for debris, and confirm your sprayer’s PSI. Remember, color mixing can change thickness, so test before spraying. Keep unused cans sealed and follow paint storage best practices to avoid skinning.
- Walls & ceilings: 0.015–0.019″ for latex.
- Trim & cabinets: 0.009–0.013″ for detail work.
- Heavy-bodied or unthinned latex: 0.021″+.
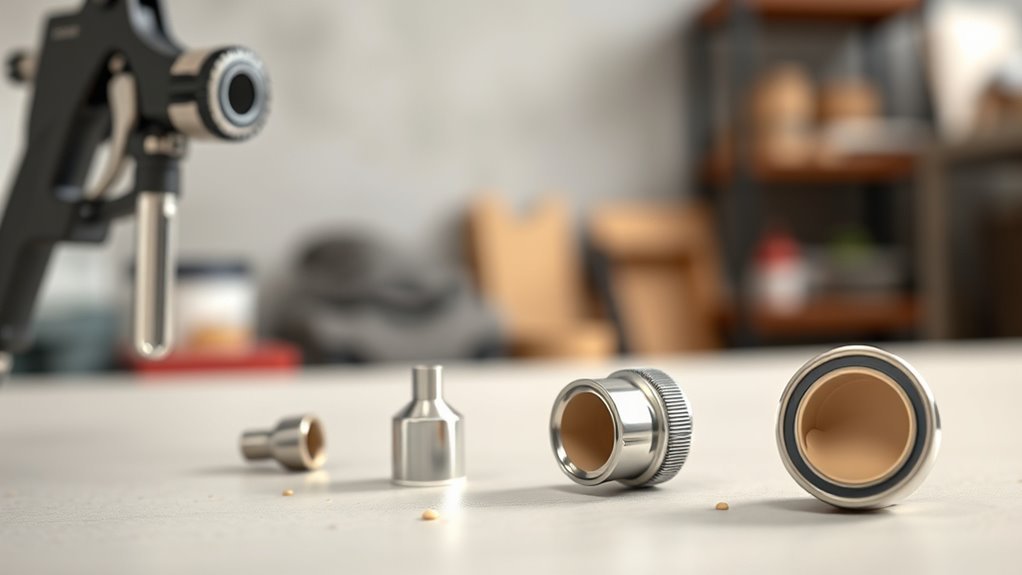
How Nozzle Size, Orifice & Fan Width Are Measured
Although nozzle specs can look technical, you’ll only need three basic measurements to pick the right tip: the orifice diameter, the fan width, and the spray pattern angle.
You read orifice in thousandths of an inch or millimeters; larger orifices handle thicker latex.
Fan width is measured at a set distance, usually 12–18 inches, showing the spray’s coverage.
Spray angle gives the cone spread in degrees and helps predict overlap and edge control.
Manufacturers note nozzle material—stainless, carbide, or polymer—since wear alters the orifice and fan over time.
Use these specs to match job and sprayer.
How Paint Viscosity and Thinning Affect Nozzle Choice
Because thicker latex won’t pass cleanly through a small orifice, you’ll need a larger nozzle or a thinner mix to keep the sprayer working efficiently. You’ll test viscosity with a cup or use manufacturer recommendations, then thin incrementally—avoid overthinning, which harms paint drying and can alter color matching.
Use a larger nozzle or thin incrementally—test viscosity and avoid overthinning to preserve drying and color.
Adjust spray pattern, not just nozzle, for uniformity.
- Start with manufacturer viscosity targets.
- Thin in small steps, retest spray and finish.
- Note drying times and color match after each change.
You’ll record settings so you repeat successful mixes and preserve finish quality.
Best Nozzle Sizes for HVLP & Handheld Sprayers (Latex)
For HVLP sprayers you’ll generally use a 1.8–2.5 mm tip for most latex paints.
While smaller handheld units work best with 2.0–2.5 mm tips depending on paint thickness.
You’ll want the lower end of that range for thinned or low-VOC latex and the higher end for heavier paints or primers.
In the next section we’ll compare specific sprayer models and nozzle recommendations so you can match tip size to your tool.
Best Nozzle Sizes
When you’re choosing a nozzle for latex paint, pick one that matches both your sprayer type and the job. You’ll balance flow, atomization, and finish while considering color mixing and surface preparation to get consistent results.
Typical recommendations:
- 1.4–1.8 mm — good for thicker latex on siding or cabinets.
- 1.0–1.3 mm — ideal for light latex primers and thinner topcoats.
- 0.8–1.0 mm — best for fine detail, light stains, and touch-ups.
Test on scrap, adjust pressure, and strain paint. You’ll avoid runs and uneven coverage when nozzle size suits paint viscosity and the surface.
Sprayer Type Guidance
If you’re using an HVLP or a handheld sprayer, matching nozzle size to both the sprayer’s flow capacity and the latex’s viscosity is critical for a smooth, even finish. You’ll generally choose 1.3–1.8 mm for thinner latex and 1.8–2.5 mm for heavier or unthinned formulas; consult your sprayer’s GPM rating.
Test spray a small panel after any color mixing to confirm atomization and coverage.
Account for environmental considerations like temperature and humidity—higher humidity may need larger tips or slower passes.
Clean and maintain tips to avoid clogging and color shifts, ensuring consistent application and finish.
Best Nozzle Sizes for Airless and Piston‑Pump Sprayers (Latex)
When using airless sprayers you’ll want to pick tip sizes that handle thicker latex—commonly .015 to .021 for walls.
Heavy coverage may require tip sizes in the range of .017 to .023.
Piston‑pump units often use interchangeable nozzles or tip kits, so check the manufacturer’s recommended orifice sizes before you buy.
Match tip size to paint viscosity and thinning (if any) to keep pressure and atomization ideal.
Airless Sprayer Tip Sizes
Because airless and piston‑pump sprayers put out higher pressure than handheld sprayers, choosing the right tip size matters for coverage, finish, and pump wear. You’ll pick sizes based on material thickness and desired spray pattern; color blending hinges on consistent atomization. Use smaller tips for thin stains and larger for heavy latex.
- 0.009–0.013: fine finish, trim, light coats.
- 0.015–0.019: versatile for latex on cabinets, doors.
- 0.021–0.027: heavy latex, exterior walls, faster coverage.
Match tip size to PSI and thinning recommendations to protect the pump and get uniform results.
Piston‑Pump Nozzle Options
Although piston‑pump sprayers share principles with airless units, they need slightly different nozzle choices to get the best results with latex—you’ll pick tips that balance flow rate, spray fan, and the sprayer’s maximum PSI to avoid cavitation and clogging.
Choose nozzles with moderate orifice sizes to maintain consistent atomization at lower continuous pressures; that helps preserve paint texture and prevents over‑spraying. Narrow fan patterns suit trim and precise color matching, while wider tips cover walls efficiently.
Test a few adjacent sizes on scrap to confirm finish and transfer efficiency, and clean filters frequently to keep performance stable.
Matching Tip To Viscosity
If you want a smooth, even coat with latex, match the tip size to the paint’s viscosity so the sprayer can atomize without overworking—thicker, higher-VOC or unthinned latex needs larger orifices and lower pressure.
Thinner or well‑thinned latex sprays cleanly through smaller tips. You’ll select tip size based on viscosity, surface preparation, and desired finish.
Consider these quick guidelines:
- Heavy latex (unthinned, textured): 0.017–0.021″ tip, lower pressure.
- Standard wall latex (moderate viscosity): 0.015–0.017″ tip, medium pressure.
- Thin or tinted paint color blends: 0.011–0.015″ tip, higher atomization.
Nozzle Choices by Project: Walls, Trim, Cabinets, Siding
Choosing the right nozzle depends on the surface you’re covering and the finish you want, so match tip size and spray pattern to each task.
Choose the right nozzle for each surface—match tip size and spray pattern to achieve the finish you want
For walls, use a larger tip (0.015–0.019″) and wide fan for even coverage. Keep paint storage sealed and mixed well after any color mixing to prevent settling.
For trim, choose a smaller tip (0.009–0.013″) and narrow fan for control and crisp edges.
Cabinets demand fine atomization (0.011–0.015″) for smooth finishes and thin coats.
For siding, pick 0.015–0.021″ with a robust pattern to handle texture and distance.
Match Nozzle Size to Pressure and Spray Technique
When you match nozzle size to spray pressure and your technique, you get cleaner atomization, fewer runs, and a more even finish. You’ll pick a smaller or larger tip based on pressure, material flow, and desired spray pattern, and you’ll adjust speed and overlap to control coverage.
Higher pressure needs larger orifice to avoid thin mist; lower pressure pairs with smaller tips for detail.
Consider nozzle durability for abrasive additives and frequent use. Harder materials wear tips faster, altering pattern. Check and replace worn tips to maintain consistency.
- Match tip to pressure
- Adjust technique
- Monitor wear
Common Clogging and Overspray Problems: And Fixes
Because paint bits and thickened latex quickly gum up tips, you’ll often see reduced spray, sputtering, or uneven fan patterns unless you tackle buildup proactively.
Clean filters and strain paint to control paint texture; thin slightly per manufacturer guidelines to prevent clogging.
If you get drips or heavy misting, lower pressure and widen the fan to reduce overspray.
Backflush the gun and soak tips in warm water with mild detergent between coats.
For poor color blending, purge old color thoroughly and spray overlap consistently.
Inspect seals and replace worn needles to stop intermittent sputter and uneven coverage.
Quick Checklist: Test, Switch, and When to Hire a Pro
Now that you’ve handled clogging, overspray, and nozzle care, run a brief test pattern before you commit to a full coat: spray on a scrap board or cardboard to check coverage, edge definition, and atomization. Then swap nozzles if the pattern’s too heavy or too fine. Check paint texture and color consistency in the test pass.
Follow this quick checklist:
- Inspect spray fan for even atomization and edge definition.
- Evaluate paint texture and color consistency after drying.
- Try a finer or larger nozzle if you see spitting, clogging, or heavy buildup.
Hire a pro when issues persist or for large, detailed jobs.
Frequently Asked Questions
What Nozzle Maintenance Schedule Should I Follow for Best Performance?
You should clean the nozzle after every use, flush during long jobs, inspect weekly for paint viscosity buildup, replace worn tips monthly, and follow a quick unclog routine whenever you spot nozzle clogging to maintain peak performance.
Can Nozzle Wear Change Spray Pattern Over Time?
Yes — nozzle wear will change your spray pattern over time; as edges erode and orifices widen, you’ll get uneven, heavier center deposits and misting, so inspect, replace, and recalibrate regularly to maintain consistent coverage.
Are Nozzle Materials (Stainless Vs Brass) Important?
Yes — you’ll prefer stainless for material durability; it resists corrosion and holds spray pattern longer. You’ll still do regular nozzle cleaning to prevent buildup, and brass can wear faster, altering pattern and flow.
Can I Use the Same Nozzle for Oil‑Based and Latex Paints?
Yes — but hold on: you’ll want to check compatibility first. You’ll match paint viscosity to nozzle selection, clean thoroughly between oil‑based and latex, and avoid cross‑contamination to keep spray quality consistent and reliable.
How Does Temperature Affect Nozzle Performance?
Temperature impact: you’ll see thinner spray pattern and higher atomization in warm conditions, while cold thickens paint, clogs nozzle, and widens uneven spray pattern; you’ll adjust pressure, tip size, and fluid thinning accordingly.
Conclusion
You’ve seen how nozzle size, fan width, and paint thinning all shape your latex finish, so test rather than trust theory: the idea that one “perfect” nozzle fits every job is false. You’ll get the best results by matching nozzle, pressure, and technique to paint viscosity and surface. Try a small test patch, tweak viscosity and speed, and adjust nozzle size until the spray lays down smoothly. If problems persist, call a pro.