What Tape to Use on Painted Walls? Complete Guide
Use low- to medium-tack painter’s tape so you get crisp lines without lifting or residue; choose delicate or low-tack for flat or fresh paint, medium-tack for satin or eggshell, and firmer tape for gloss or fully cured surfaces. Test a small area first, press edges firmly, seal with a putty knife to prevent bleed, and remove slowly at a 45° angle within the recommended time. Keep going and you’ll find detailed tips for tape choice, prep, and removal.
Which Tape Gives the Cleanest Paint Lines?
Consider surface texture, paint age, and drying time when testing tape types. Painter’s tape with a delicate adhesive often prevents bleed while removing cleanly; thin masking tapes suit straight edges on smooth surfaces, while multi-day tapes hold for longer projects.
Press tape down firmly along the edge, run a putty knife to seal, and remove it at a 45° angle once paint’s tack-free.
Test a scrap first—different paints and finishes react differently, so validate for clean lines before you commit.
Quick Picks: Best Tapes for Painted Walls
When you need a reliable go-to, low-tack painter’s tape gives clean edges without ripping fresh paint.
For ultra-sensitive surfaces, choose delicate surface paper tape to protect finishes and pull away cleanly.
Both are great quick picks depending on how fragile your paint job is.
Low-Tack Painter’s Tape
You’ll appreciate low tack benefits like gentle adhesion that peels cleanly and reduces surface damage. Use it on fresh paint, latex finishes, or trim that needs protection.
Follow simple application techniques: press edges firmly, smooth out bubbles, and remove tape slowly at a 45-degree angle while paint is dry to the touch.
Choose a reputable brand, test a small area first, and avoid long-term exposure—low-tack tape isn’t meant for months of outdoor use.
Delicate Surface Paper Tape
Because painted walls can scuff easily, delicate surface paper tape gives you a lightweight, paper-backed option that sticks gently without pulling finish or leaving residue.
You’ll appreciate delicate surface considerations: choose low-tack formulations, test a small area, and remove within recommended windows to protect newer or satin finishes.
Use proper tape adhesion techniques—press lightly along edges, avoid stretching, and remove slowly at a 45° angle.
This tape works well for crisp lines on cured paint and temporary masking. Ideal for DIY and pros, it balances hold and removability when you need a cautious approach.
- Low-tack formulas
- Test first
- Press edges gently
- Remove slowly
- Short-term use
How to Choose Tape by Paint Finish (Flat, Eggshell, Satin, Gloss)
If you’re working with flat, eggshell, satin, or gloss finishes, pick tape based on how much adhesion you can safely use without damaging the paint.
Different paint types create varied finish effects and surface resilience, so match tape tack to that resilience.
For flat or matte walls, use low-tack, delicate tapes to avoid lift.
Eggshell tolerates slightly stronger adhesive; choose medium-low tack for clean lines.
Satin handles moderate-tack tape well, giving crisp edges without harm.
For gloss, you can use standard painter’s tape with firmer adhesion, but test a small area first to confirm no finish damage.
Best Tapes for Fresh vs Fully Cured Paint
If your paint is still fresh, you’ll want low-tack, painter-grade tape that won’t lift wet film or leave adhesive behind.
For fully cured paint, you can use stronger tapes—like medium-adhesion masking or multi-surface tape—without risking damage.
Below we’ll compare safe options for fresh paint and tougher choices for cured surfaces so you can pick the right tape.
Fresh Paint Safe Options
When your paint’s still curing, choose tapes designed to peel cleanly without lifting or leaving adhesive behind; these “fresh paint safe” tapes have lower tack and gentler adhesives so you can mask and remove them sooner.
You’ll want tape compatibility with latex or oil-based finishes, avoid aggressive crepe tapes, and test a small area. Prefer low-tack painter’s tape for delicate trims and edging.
- 3M ScotchBlue delicate surface painter’s tape
- FrogTape Delicate Surface for minimal adhesion
- Low-tack washi tape for light masking
- Paper-based masking tape labeled “low adhesion”
- Test strips to confirm tape compatibility
Fully Cured Tape Choices
Because cured paint forms a tougher bond, you can use stronger tapes that hold cleanly without worrying about lifting finish or leaving residue; choose medium- to high-tack painter’s tapes or specialty adhesive tapes matched to your surface (latex or oil) and test a small hidden area to confirm removal time and residue.
For fully cured paint, prioritize tape durability and predictable release: contractor-grade painter’s tape, some gaffers, and automotive masking tapes work well.
Press edges firmly, avoid extreme sun or heat during dwell, and remove at a low angle after recommended time. Always test first to guarantee clean removal.
How Long Can You Safely Leave Tape on Painted Walls?
Although different tapes and paint types change the outcome, you can usually leave painter’s tape on for up to 14 days without damage, while delicate finishes may need removal after 24–48 hours.
You should monitor tape adhesion and consider paint durability before deciding how long to keep tape applied. Temperature, humidity, and sunlight affect performance, so check edges periodically and remove if tackiness increases.
- Remove tape slowly at a 45° angle.
- Score edges on newer paint jobs.
- Avoid heat exposure near taped areas.
- Test a small hidden section first.
- Clean residue promptly with mild solvent.
Low‑Adhesion Tapes for Delicate or Recently Painted Walls
When working with delicate or freshly painted walls, you’ll want low‑adhesion painter’s tapes like frogtape or blue painters’ tape designed for sensitive surfaces.
Prep the area by letting paint fully cure when possible, wiping away dust, and testing a small strip to confirm it won’t pull finish.
Remove the tape within the manufacturer’s recommended window and pull slowly at a 45° angle to minimize lift.
Painter’s Tape Options
If your walls are freshly painted or have delicate finishes, choose a low-adhesion painter’s tape to avoid peeling or damaging the surface; these tapes stick enough to block paint bleed but release cleanly without lifting underlying paint.
You’ll evaluate painter’s tape types and run a brief tape comparison so you pick the right option. Consider adhesion level, backing material, UV resistance, and removability window.
Match tape to paint cure time and surface texture.
- Delicate-surface low-adhesion tape
- Light-duty crepe paper tape
- Washi/masking film tape
- Paper tape with reduced tack
- Ultra-low residue tape
Surface Preparation Tips
After you’ve picked a low-adhesion tape that matches your paint and surface, get the area ready so the tape can do its job without pulling fresh paint.
Check wall condition: clean dust, grease, and sanding residue with a mild cleaner and let it fully dry.
Lightly wipe high-gloss surfaces to reduce slickness and test a small patch for tape compatibility.
Fill holes and smooth rough spots; cured paint holds tape better than tacky surfaces.
Work in stable temperature and humidity to avoid adhesive changes.
Use gentle pressure when applying to avoid embedding adhesive into delicate finishes.
Removal Timing Guidelines
Plan your removal before the tape goes on, because timing makes the difference between clean lines and pulled paint. You’ll want low-adhesion tapes for delicate or freshly painted walls; they balance adhesive strength and tape longevity to protect finish.
Remove tape while paint is tacky but not wet, or wait until fully cured per paint instructions. Pull at a 45-degree angle slowly, keeping tension low. If paint lifts, stop and score the edge.
- Check manufacturer cure times
- Test a hidden patch first
- Peel slowly, steady pace
- Keep a 45° pull angle
- Replace tape if adhesive weakens
High‑Adhesion Tapes for Textured or Exterior Painted Surfaces
When you’re dealing with textured interior walls or exterior painted surfaces, you’ll need tapes with stronger adhesion and flexible backing to bridge uneven profiles and resist weathering.
Choose high-adhesion options designed for rough substrates; they offer high adhesion benefits like reduced lifting and better paint edge seals.
Look for conformable cloth or rubber-based tapes that maintain textured surface compatibility without tearing.
Test a small area for residue and paint lift before long runs.
Apply with firm pressure, and remove slowly at a low angle after projects cure.
For outdoor use, pick UV- and moisture-resistant formulations to avoid breakdown.
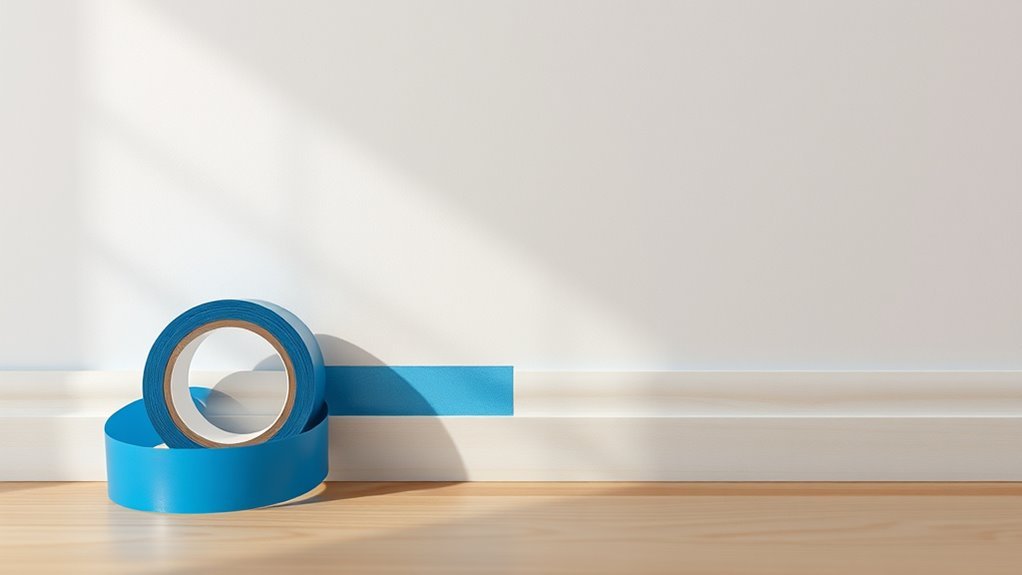
Painter’s vs Masking vs Duct Tape for Painted Walls
When you’re choosing tape for painted walls, painter’s tape gives the cleanest edges and is formulated to remove without peeling paint.
Masking tape is cheaper but can leave residue or lift finish on delicate surfaces, while duct tape is strongest and risks damaging paint when removed.
We’ll compare their benefits and trade-offs so you can pick the right one for your project.
Painter’s Tape Benefits
Choosing the right tape makes a big difference in protecting painted walls and getting clean lines, and painter’s tape is designed specifically for that job. You’ll rely on its controlled tape adhesion and gentle removal to preserve finishes while you paint. It reduces touch-ups, prevents bleed, and saves time.
- Clean removal without peeling paint
- Flexible edges for crisp lines on trim
- UV-resistant options for longer projects
- Low-residue adhesive for delicate surfaces
- Various widths for detail or broad coverage
Use painter’s tape when you want reliable wall protection and precise results.
Duct & Masking Differences
Although all three tapes look similar at a glance, you’ll want to pick based on adhesion strength, residue risk, and planned use: painter’s tape gives controlled adhesion and easy removal, masking tape sits in the middle for general-purpose protection, and duct tape bonds strongest but can damage paint and leave stubborn residue. You’ll use painter’s tape for clean lines, choose masking tape types for short-term covering, and reserve duct tape uses for heavy-duty sealing where paint damage isn’t a concern. Compare quickly:
| Tape | Best use |
|---|---|
| Painter’s | Clean edges |
| Masking | General protection |
| Duct | Heavy sealing |
| Peel risk | Low / Medium / High |
Which Tapes Won’t Leave Residue or Peel Paint?
If you want tape that won’t leave sticky residue or pull paint off your walls, pick low-tack painter’s tapes specifically designed for delicate surfaces.
You’ll minimize tape adhesion issues and reduce visible residue effects by choosing tapes with short-term adhesive formulas. Test a small patch for 24 hours on hidden areas to confirm removal safety.
Remove slowly at a 45° angle to avoid lifting paint.
- 3M ScotchBlue Delicate Surface
- FrogTape Delicate Surface
- Paper-based low-tack painter’s tape
- Washi masking tape (paint-safe grade)
- Tape labeled “removable” for 14 days
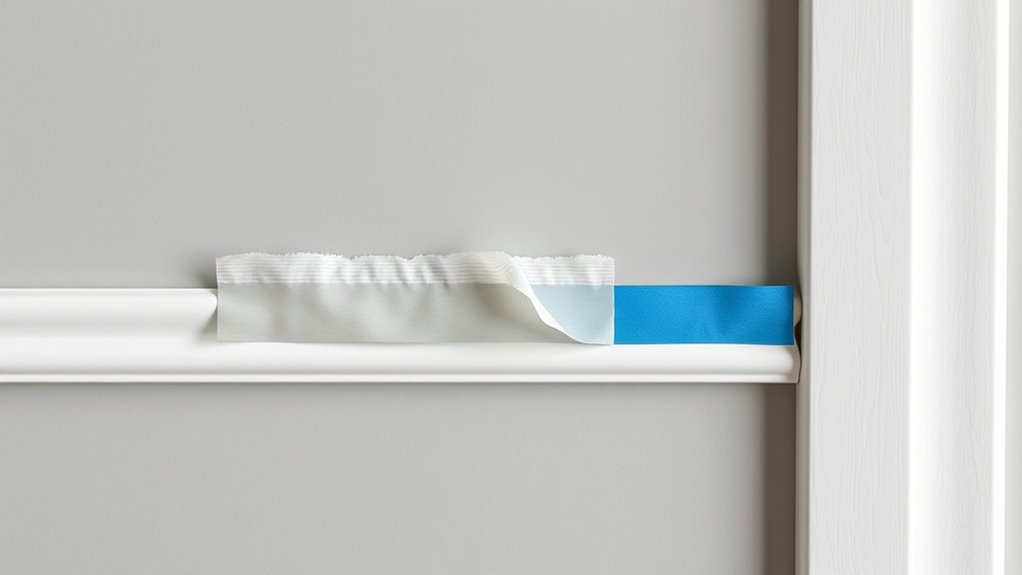
Which Tape to Use for Trim, Ceilings, and Baseboards?
You’ve picked a low-tack tape for painted walls; for trim, ceilings, and baseboards you’ll want tape that balances clean removal with a firmer edge for crisp lines.
Choose painter’s tape labeled for delicate surfaces on recently painted trim to avoid pull-off, and consider a medium-adhesion option where paint is fully cured.
For ceilings, ceiling tape recommendations include flexible, high-grip tapes that conform to textured surfaces without sagging.
For baseboards, use thin, stiff-edge tapes to follow contours and prevent bleed.
Compare trim tape options by adhesion level and release time, and always test a small hidden area first.
Best Tape Widths for Stripes and Patterns
When planning stripes or geometric patterns, pick tape widths that match the scale of the wall and the look you want: You’ll choose tape based on stripe width and desired pattern precision.
When planning stripes or geometric patterns, choose tape widths that match the wall’s scale and your desired precision.
Narrow tapes (1/8″–1/4″) suit fine lines and tight details; medium tapes (1/2″–3/4″) work for standard stripes; wide tapes (1″–2″) speed larger bands.
Consider layout, sightlines, and paint bleed tolerance. Test a small section to confirm crisp edges and adhesion without damage.
- 1/8″–1/4″: delicate accents
- 1/2″: versatile mid-range
- 3/4″: bold regular stripes
- 1″–2″: wide bands
- Mix widths for contrast
Preparing Painted Walls So Tape Sticks Without Damage
Before applying tape, make sure the painted surface is clean, dry, and smooth so the adhesive can grip without lifting or pulling off paint.
Check paint cure time—new paint needs full curing per manufacturer instructions.
Remove dust, grease, and chalking with mild detergent, rinse, and let dry.
Lightly sand glossy spots to reduce sheen and improve adhesion, then wipe residue away.
Test a small hidden area with your chosen tape types to confirm compatibility and peel strength.
For delicate or aged paint, use low-tack or painter’s tape and avoid prolonged application to prevent damage during removal.
How to Apply Tape for Perfectly Sharp Edges
Now that the surface is prepped and paint has had time to cure, apply the tape carefully to create a crisp line. You’ll choose among tape types based on surface and paint age, then follow precise edge techniques to avoid lifting.
Press the tape down firmly with a plastic card or your thumb, keeping a steady angle. Overlap short lengths for curves, remove dust before sticking, and work from top to bottom.
When removing, pull slowly at a 45° angle while the new coat is tacky to the touch for best release.
- Choose correct tape types
- Smooth edges firmly
- Overlap on curves
- Clean before applying
- Remove at 45°
Seal Tape Edges to Stop Paint Bleeding (No Sanding)
If you want crisp lines without sanding, seal the tape edges so paint can’t creep underneath.
After your tape application, press firmly along the edge with a plastic scraper or credit card to guarantee full contact and improve paint adhesion.
For added protection, run a thin bead of clear acrylic caulk or diluted base coat along the tape edge, smoothing it into the seam; let it dry fully. This creates a barrier that prevents bleeding and removes the need to sand later.
Work in short sections, reseal freshly exposed edges as you paint, and avoid lifting tape before the seal cures.
Safe Tape Removal Techniques to Avoid Paint Lift
After sealing tape edges to stop bleed-through, you’ll want to remove the tape without pulling fresh paint away. Work slowly and keep paint adhesion in mind: remove tape at a 45-degree angle back over itself, and pull low-and-slow to reduce lift.
Different tape types demand different timing—don’t assume all are equal.
- Remove within manufacturer’s dwell time.
- Score edge with utility knife for fragile finishes.
- Heat stubborn tape gently to soften adhesive.
- Pull in direction of longest uninterrupted edge.
- Replace overly aggressive tape types next time.
These steps protect your finish and respect varying tape types and paint adhesion.
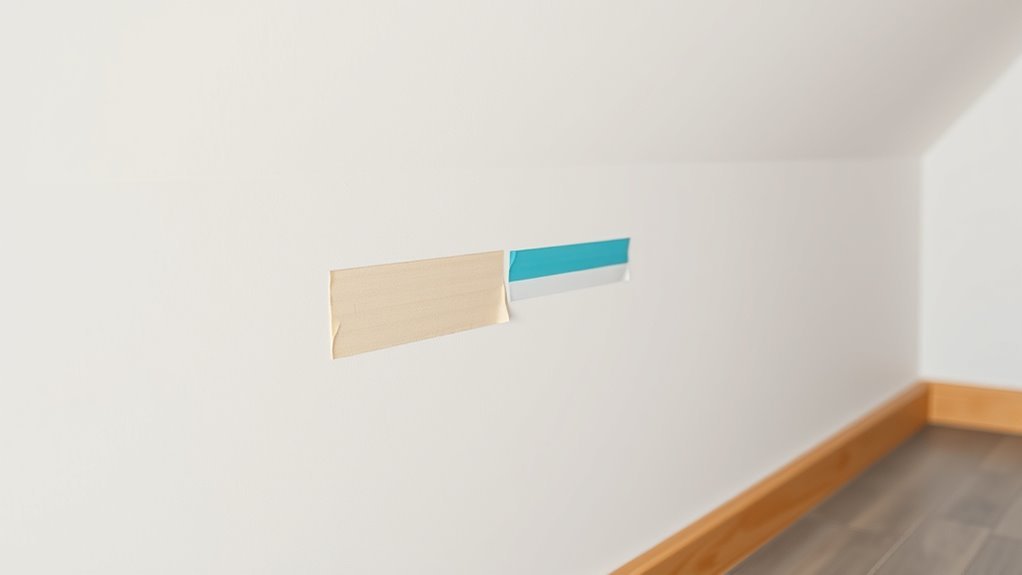
Testing Tape on Painted Walls: A Simple 3‑Step Method
Before you tape a whole wall, test a small area to see how the paint reacts; this three-step check takes minutes and prevents costly damage.
Step 1: Clean a discreet patch, apply a short tape strip, press firmly, and note adhesion — this gauges tape durability.
Step 2: Leave for the designated dwell time, then remove slowly at a 45° angle; inspect for lift or residue to judge paint compatibility.
Step 3: Repeat with alternative tapes or shorter times if needed, document results, and choose the tape that balances secure hold with safe removal for your specific painted surface.
Tools, Accessories, and Common Taping Mistakes (Quick Fixes)
When you’re ready to tape, gather the right tools and know the quick fixes so you don’t end up peeling paint or chasing gaps. You’ll need basic accessories and good tape storage to keep edges crisp.
Use a razor for clean cuts, a mini roller to press edges, and a scraper for removal mistakes. For tape application, press firmly along seams and remove slowly at a 45° angle.
- Painter’s tape rolls (labeled by surface)
- Utility knife or razor
- Mini roller or burnishing tool
- Plastic scraper or putty knife
- Clean cloth and mild solvent
Frequently Asked Questions
Can I Reuse Painter’s Tape From a Previous Project?
You can, but you’ll likely get reduced tape adhesion and shorter tape longevity after reuse; if the adhesive feels gummy, dusty, or won’t stick firmly, replace it to avoid paint bleeding and cleanup headaches during your next project.
Will Tape Harm Wallpaper Underneath Paint?
No — most tapes won’t ruin wallpaper if you test first; imagine peeling a sticky strip slowly to check. You’ll consider wallpaper types and paint adhesion, so pick low-tack tape and remove it gently within 24 hours.
Can I Tape Over Caulk or Wet Sealant?
You shouldn’t tape over wet sealant; you’ll compromise adhesion and finish. Wait for caulk drying times to complete, since tape adhesion factors—surface cleanliness, cure level, and tape type—determine whether tape will stick without lifting.
Which Tapes Work for Sprayed or Aerosol Paint Jobs?
Use low-tack painter’s tapes like blue or green for sprayed or aerosol paint jobs; they won’t lift paint if removed promptly. You’ll get clean edges by combining masking techniques and controlling paint adhesion with proper surface prep.
Does Tape Affect Fire-Rated or Acoustic Wall Coatings?
Yes — tape can damage fire-rated or acoustic coatings, so you should test first. You’ll preserve fire safety and coating durability by using low-tack, manufacturer-approved tapes, removing them slowly, and avoiding prolonged adhesion on treated surfaces.
Conclusion
Choose tape based on paint type, cure time, and how long you’ll leave it up. For crisp lines, use painter’s tape on cured satin or gloss; for fresh or delicate flats, test first. Seal edges to prevent bleed, remove slowly at a 45° angle, and don’t rush fresh paint. Imagine Sarah, who taped her nursery, waited 48 hours, then peeled slowly—she got perfect stripes and zero chipped paint, and cried happy tears seeing her finished room.