What Temperature Is Too Cold to Paint Exterior?
You shouldn’t paint exterior surfaces when air and surface temps drop near the paint’s minimums: about 50°F (10°C) for latex/water‑based and roughly 35–40°F (2–4°C) for oil/alkyds. Cold slows drying, risks poor adhesion, tacky or frosty finishes, and condensation can ruin wet paint if the substrate is near the dew point. Check surface temp, humidity, and forecasts; warm the area or wait for a stable window of warmer conditions to get proper curing — more guidance follows.
Quick Answer: When It’s Too Cold to Paint Exterior?
How cold is too cold to paint exterior surfaces? You shouldn’t paint when temperatures drop below 50°F (10°C) for latex paints; oil-based formulas tolerate a bit cooler, around 35–40°F (2–4°C).
In cold weather, paint won’t dry or cure properly, increasing painting challenges like poor adhesion, brush marks, and blistering. You’ll also face longer tack times and higher risk of frost on substrates.
If you must work near lower limits, use paints rated for low temps, warm the surface, and avoid moisture.
When in doubt, wait for stable daytime highs above the recommended manufacturer minimum.
Why Ambient Air Temperature Alone Isn’t the Whole Story
Knowing the minimum air temperature is a good start, but you shouldn’t treat that number as the only rule. You’ll need to watch ambient factors beyond a single reading: humidity, wind, surface temperature and sun exposure all change paint curing and paint performance.
Cold weather can delay film formation; temperature fluctuations overnight may undo daytime gains. Use temperature monitoring and consider seasonal changes when scheduling work.
Focus on these critical exterior conditions:
- Surface temperature relative to dew point
- Wind speed and drying rate
- Humidity/cloud cover
- Upcoming low-temperature forecasts
Plan around real conditions, not just the thermometer.
Minimum Temps for Latex (Water‑Based) Exterior Paint
While latex paints generally tolerate cooler conditions than oil-based formulas, you shouldn’t assume any cold day is safe for painting; most manufacturers set a minimum ambient and surface temperature around 50°F (10°C).
You should check both air and substrate temps with a thermometer before you start.
In cold weather, latex paint dries slower, risks poor film formation, and can freeze before curing, causing adhesion loss and blistering.
If temps drop near the limit, postpone painting until a warmer window or use temporary heating and wind breaks to maintain conditions.
Always follow the paint label’s specified minimums to guarantee a durable finish.
Minimum Temps for Oil‑Based and Alkyd Exterior Paint
When you’re working with oil‑based exterior paints, you’ll find they can tolerate cooler temperatures than latex and often remain workable down near 40°F (4–5°C).
Alkyds, a type of oil‑modified paint, usually have similar cold limits but can thicken and slow drying as temperatures drop toward freezing.
We’ll cover how those minimums affect application and drying so you can choose the right product for cold conditions.
Oil-Based Paint Minimums
If you’re planning exterior work, note that oil‑based and alkyd paints need warmer conditions than many latex formulas: manufacturers typically recommend applying them at or above 40°F (4–5°C), and some products require 50°F (10°C) or higher to cure properly.
You’ll want oil based advantages like durability and smoother finish, but only under ideal conditions. Follow temperature and humidity guidelines to avoid poor adhesion, extended tack time, or solvent trapping.
Consider these points before you paint:
- Verify substrate is above minimum temp.
- Check overnight lows.
- Control humidity where possible.
- Allow extended cure time in cool weather.
Alkyd Paint Cold Limits
Those oil‑based guidelines lead directly into alkyds, since alkyd paints are a common oil‑based choice for exteriors and have their own minimum temperature rules.
You should expect manufacturer minimums around 40°F (4–10°C), though some formulations allow painting down to 35°F with precautions.
Know alkyd properties: slower curing, solvent evaporation, and sensitivity to moisture.
Temperature effects slow film formation, increase tackiness, and can trap solvent, causing wrinkling or adhesion loss.
If temperatures will drop overnight, delay work.
Use warmed paint, heat the substrate, and follow label recommendations to guarantee proper drying and long-term performance.
Surface Temperature vs. Air Temperature When Painting Exterior
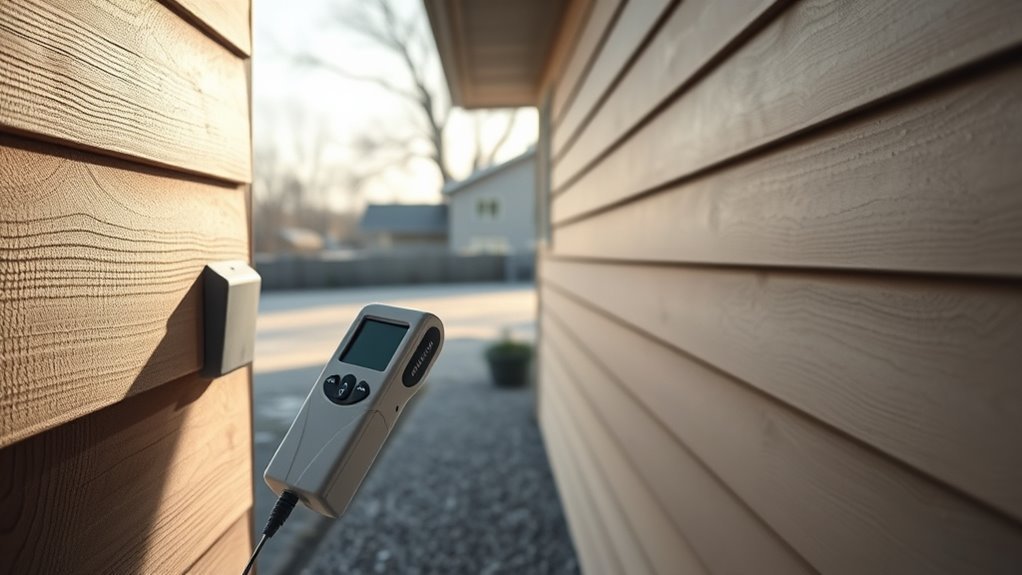
Don’t rely only on the air temperature—what matters is the surface temperature of the siding or trim you’re painting.
If the substrate is near or below the dew point you’ll get condensation, which prevents proper adhesion and curing.
Always check the actual surface temp and compare it to the paint’s recommended range, not just the ambient thermometer.
Surface Temperature Importance
Paint bonds to the surface, not the air, so you need to know the substrate temperature before you start.
You’ll prioritize surface prep to guarantee material compatibility and ideal paint adhesion.
Monitor temperature effects on drying time and paint performance, and consider weather conditions and environmental impact when planning.
Use temperature readings, not just forecasts, for accurate job scheduling and seasonal considerations.
- Measure substrate, not air.
- Adjust prep for cold surfaces.
- Expect longer drying times.
- Reschedule if adhesion risks rise.
Accurate surface temps keep coatings effective and protect your investment.
Dew Point And Condensation
Knowing the surface temperature is only part of the picture because moisture in the air can condense on a cooler substrate and ruin adhesion. You’ll need to compare the exterior surface temperature to the dew point before you start.
You should check dew point importance: if the surface is within a few degrees of the dew point, condensation effects will occur as paint cools during application or overnight. Wet film can’t form proper bonds, causing blistering, poor adhesion, or extended drying.
Avoid painting when surfaces approach dew point; wait for warmer, drier conditions or apply during the warmest part of the day to minimize risk.
Substrate Vs Air Temps
While air temperature sets the general conditions, what really matters for adhesion and curing is the substrate’s surface temperature—you’ll want to monitor both because they don’t always match.
You should check substrate types (wood, metal, masonry) since temperature variations across materials affect paint adhesion and cure rates.
Consider weather conditions and seasonal considerations: wind or shade can chill surfaces faster than the air.
Prioritize surface preparation and control substrate moisture before coating to guarantee paint longevity.
Use a surface thermometer and follow these steps:
- Measure multiple spots
- Compare to air temp
- Adjust timing
- Delay if needed
How Do Humidity and Dew Point Affect Drying?
How does humidity and the dew point change how paint dries? You’ll notice humidity effects slow evaporation, so high moisture levels extend drying times and raise the risk of runs and sagging.
Dew point influence matters because if surface temperature falls to the dew point, condensation forms and ruins wet paint. You should monitor temperature fluctuations day-to-night; sudden drops can condense moisture or stall curing.
Lower humidity speeds drying but may affect film formation; very high humidity prevents proper paint adhesion. Plan painting when humidity is moderate, surfaces stay above dew point, and temps remain stable through curing.
Why You Should Read Paint Labels and Technical Data Sheets
Always check the label instructions before you start—manufacturers list surface prep, application methods, and drying expectations.
Review the technical data sheet for detailed performance specs and compatibility notes you won’t find on the can.
Pay special attention to the listed temperature limits so you don’t paint below the product’s safe range.
Check Label Instructions
Want your paint job to last and perform as expected? Check label instructions before you buy or apply paint. Labels give you clear guidance on temperature limits, substrate prep, and drying times, and they reflect label accuracy for different paint types.
Read them so you don’t guess and risk failures.
- Confirm minimum and maximum temperature ranges.
- Note recommended humidity and surface temps.
- Follow dry and recoat time guidance.
- Verify any special surface or primer instructions.
Treat the label as your primary source for safe, effective application; it saves time and prevents costly mistakes.
Review Technical Data
Because labels only summarize key points, you should review the full technical data sheet for any paint you’re using; it gives the detailed performance specs, application limits, and testing conditions that labels can’t fit.
The TDS tells you measured paint drying times at specific temperatures and humidity, substrate recommendations, and required film thickness so you can predict results in cold weather.
It notes additives or primers that improve adhesion, freeze-thaw stability, and compatibility with sealers.
Reading it helps you plan work windows, choose formulations with extended open time, and avoid warranty issues.
Don’t rely solely on marketing claims—trust the data.
Note Temperature Limits
After you’ve checked the technical data sheet, study the label and TDS for explicit temperature limits—these tell you the minimum and maximum ambient and substrate temperatures where the product will perform as tested.
You should follow those temperature ranges closely to avoid adhesion failures, poor curing, or appearance issues.
In cold weather, paint may thicken or not cure, so never assume room-temperature guidelines apply outdoors. Note dew point and substrate temperature too.
Check these items before you start:
- Manufacturer minimum temperature
- Maximum application temperature
- Required substrate temperature relative to dew point
- Recoat and cure times at specified temperatures
Signs You Painted in Too‑Cold Conditions: Immediate and Delayed Problems
If you painted when temperatures were too low, you’ll usually notice telltale issues right away and some that show up weeks later; immediate signs include slow drying, tacky surfaces, and visible brush or roller marks.
Delayed problems can be cracking, peeling, or poor adhesion as the paint finishes curing. You’ll also see uneven sheen, blotchy color, and dirt sticking to tacky areas.
Over time, cold can weaken paint adhesion and cause premature failure as weather impacts fluctuate. Check edges and trim for lifting, test adhesion with a tape pull, and document defects before warranty or repair decisions.
Prep Steps to Improve Results When Temps Are Marginal
When temperatures are marginal, plan and prep deliberately to give the paint the best chance to cure properly: warm the work area, raise substrate temperature, and choose fast-drying or cold-weather formulations so you’re not fighting the clock.
You’ll focus on paint preparation and temperature considerations to avoid adhesion and curing failures. Do these steps before you open cans:
- Heat the work zone and keep temps stable.
- Pre-warm the surface with a heater or infrared lamp.
- Use paint formulated for low temps or add approved accelerators.
- Control humidity and avoid overnight freezes.
Follow these measures and inspect adhesion after drying.
Best Practices When Temps Are Cool but Safe to Paint
Because cool-but-safe conditions still slow drying and leveling, plan your work to minimize problems: paint during the warmest part of the day, keep coats thin, maintain steady airflow without drafts, and monitor humidity so the film cures evenly.
You’ll prep surfaces thoroughly, removing dirt, loose paint, and moisture. Use primers and products rated for lower temps to preserve paint adhesion.
Work in manageable sections so you can finish edges before temps drop. Avoid heavy buildup; thin, even layers cure better.
Check manufacturer guidelines for recoat windows and tack-free times. Stay flexible with schedules to match favorable conditions.
Tools and Techniques to Raise Local Temperature and Speed Curing
You can use portable heat lamps and heaters to warm the work area and keep paint curing steadily.
Preheating the surface with warm air or heat guns helps adhesion and prevents trapping moisture.
When appropriate for the coating, low-VOC accelerators or additives can speed chemical curing without compromising finish quality.
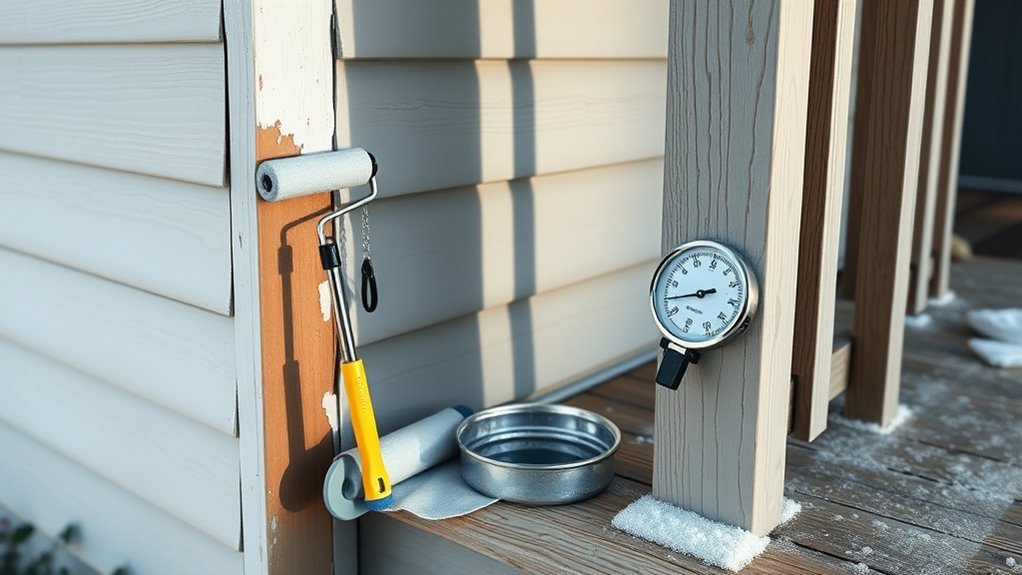
Portable Heat Lamps
If cold weather’s slowing your paint job, portable heat lamps can raise surface temperature and speed curing without reheating the whole space. You’ll choose among heat lamp types (infrared, quartz, halogen) to suit spot size and intensity.
Position lamps to warm painted areas evenly, keep them off wet paint to avoid blistering, and follow safety precautions for ventilation and fire risk. Use steady, moderate heat rather than blasting warmth.
Consider these setup tips:
- Maintain 3–6 ft distance depending on lamp.
- Angle to avoid glare into eyes.
- Shield surrounding materials.
- Monitor temperature and paint reaction continuously.
Surface Preheating Methods
1 practical way to speed paint curing is to preheat the surface directly using targeted tools and techniques that raise the local temperature without overheating the surrounding area.
You’ll use surface heating pads, portable infrared panels, or hot air guns on low to warm wood or metal before and during application.
Combine temporary insulation techniques—tarps, shrink wrap, or foam blankets—to trap heat and stabilize conditions.
Monitor with a reliable temperature monitoring device to keep readings within the paint’s recommended range, ensuring ideal paint adhesion.
Work in small sections, avoid overheating, and recheck temperatures frequently to maintain consistent curing and finish.
Additives And Accelerants
When time’s tight and ambient heat is low, additives and chemical accelerants let you speed curing without relying solely on external heating; they’ll thin or chemically alter paint to promote faster solvent release and crosslinking so coatings set more quickly.
You should weigh additive benefits against product compatibility and environmental factors. Choose accelerator types and follow application techniques to control temperature effects and drying times while preserving paint performance.
Consider:
- Low-VOC accelerants for cold conditions
- Fast-evaporation thinners to reduce curing time
- Catalysts for crosslinking-dependent systems
- Test patches to verify compatibility and final finish
Use sparingly and monitor results.
When to Delay Painting After a Cold Snap
Because paint needs stable temperatures to cure properly, you should hold off after a cold snap until nights and days consistently stay above the paint’s minimum recommended temperature.
Check forecasts for a solid 72 hours of stable warmth before starting. Use cold snap preparation by keeping materials warm indoors and testing a small patch once conditions look right.
Avoid evening work if temperatures drop near the minimum. For painting strategies, pick fast-drying formulas and plan coats on milder days.
If moisture, frost, or rapid temperature swings persist, delay longer—proper cure beats rushing and reduces peeling, blistering, or adhesion failures.
Temperature Tips by Surface: Wood, Metal, Stucco, Masonry
While each surface has its own thermal quirks, you can plan paint jobs more reliably by matching temperature guidelines to the material.
Wood needs moderate warmth to avoid trapped moisture. Metal requires higher temps to prevent condensation and guarantee adhesion. Porous surfaces like stucco and masonry demand both warmer air and substrate to cure properly.
You should:
- Keep wood preparation and painting above 50°F to avoid swelling and trapped moisture.
- Aim for 55–70°F for metal priming so primers cure and resist blushing.
- Warm stucco texture to at least 50–60°F and avoid freeze/thaw cycles.
- Confirm masonry sealing and coatings cure with sustained warmth and low humidity.
Quick Checklist: Can You Paint Today or Should You Wait?
You’ve matched temperatures to each surface—now decide whether conditions today actually let you paint. Check current and forecasted temps, humidity, and wind; temperature effects like slowed curing happen below recommended ranges.
Feel surfaces—cold or damp wood, metal, or masonry may need warming or drying. Inspect paint container for thickness and frost; don’t stir if frozen.
Choose painting techniques that fit conditions: thin coats, longer flash times, or heat guns for spot drying. If temps dip overnight or rain’s expected, wait.
When all checks pass, proceed; otherwise reschedule to protect adhesion, finish, and longevity.
Frequently Asked Questions
Can Low Temperatures Affect Paint Color and Sheen Long-Term?
Yes — low temperatures can harm color consistency and sheen durability long-term. You’ll see uneven pigments, fading, or loss of gloss if paint cures improperly; addressing temperature and proper curing prevents these lasting issues.
Will Cold Weather Increase Paint Fumes or VOC Off-Gassing?
Yes — colder temperatures slow fume dispersion, so you’ll notice reduced VOC off-gassing initially; however, temperature impact can delay full curing, potentially prolonging overall emissions as paints take longer to release solvents and stabilize.
Can I Paint Trim or Small Details in Colder Conditions Than Large Surfaces?
Absolutely — you can paint trim painting and small details in colder conditions than large surfaces; you’ll be braver than a polar bear, but you’ll need slow-drying formulas, warm tools, thin coats, and careful surface prep to avoid issues.
Do Additives or Paint Conditioners Change Cold‑Weather Application Limits?
Yes — additives and conditioners can help; you’ll get additive benefits like improved flow, adhesion, and freeze resistance, but they won’t eliminate temperature impact entirely, so you’ll still need to respect manufacturer low‑temperature limits.
How Does Freezing Rain After Painting Differ From Dew Damage?
Freezing rain effects damage fresh paint by freezing and glazing the film, causing cracking and adhesion loss, while dew formation wets surfaces slowly, delaying curing and causing blush or poor adhesion without the instant freeze stress freezing rain brings.
Conclusion
You can paint in cool weather, but don’t be reckless — paint has limits. Check both air and surface temps, follow the paint maker’s minimums (usually 35–50°F for latex, a bit warmer for oil/alkyd), and use heaters, warm primers, or sun‑side scheduling to help curing. If temps fall overnight or humidity’s high, wait. Paint too cold and your finish could fail faster than a houseplant in a blizzard — patience pays off.