What to Do Before Painting Walls
Before painting walls, you’ll decide the room’s purpose and color, gather quality brushes, rollers, drop cloths, and a stain-blocking primer, then clear or protect furniture and floors. Inspect and clean surfaces, remove loose paint, fix holes and cracks with filler, sand smooth, and wipe away dust. Mask trim, caulk gaps, and make certain ventilation and safe ladder use. Allow repairs to dry fully before priming and painting, and keep going to learn practical timing, tools, and troubleshooting tips.
Set Your Painting Goals and Desired Results
Before you pick a color or buy supplies, decide what you want the finished room to do and how it should feel; this will guide every choice you make.
You’ll list functions—sleep, work, entertain—and prioritize mood: calming, energizing, or neutral.
Use color psychology to match hues to purpose, balancing light levels and furnishings.
Consider paint durability for high-traffic areas and moisture-prone spots so finish and sheen support usability.
Set a budget, timeline, and maintenance expectations.
With clear goals, you’ll choose colors, finishes, and techniques that deliver a room that performs and feels the way you envisioned.
Decide Which Rooms to Repaint and Why
Now that you’ve defined how each room should function and feel, decide which spaces actually need repainting and why. Walk each room and note damage, stains, or colors that clash with your plans. Prioritize high-traffic and mood-sensitive areas—bedrooms and kitchens affect comfort and appetite.
Use color psychology to pick hues that support each room’s purpose: calming tones for bedrooms, energetic shades for offices. Consider timing and budget; repainting a whole house isn’t always necessary.
Also factor in eco-friendly paints to reduce VOCs, especially in nurseries and living areas where air quality matters most.
Choose DIY or Hire a Painting Pro?
Think about the project’s scope and your skill level before you start — big rooms, tricky textures, or detailed trim might be better left to a pro.
Compare the cost of hiring someone with the time and effort you’ll spend doing it yourself. That balance will help you decide whether to tackle the job or call in a painter.
Scope And Skill
When deciding whether to tackle painting yourself or hire a pro, weigh the project’s size, your comfort with prep and technique, and the look you want to achieve.
Assess room complexity—high ceilings, trim, textured surfaces—and match that to your skills. If you’ve practiced painting techniques like cutting in, rolling evenly, and blending, you’ll likely manage straightforward rooms.
Consider color psychology: bold hues demand precision; subtle gradients reveal flaws more easily. Be honest about patience, steady hands, and time for sanding and priming.
If the scope surpasses your experience, hire a pro to ensure durable, flawless results.
Cost Versus Time
Because budget and schedule often drive the decision, weigh the upfront cost savings of DIY against the value of your time and the risk of mistakes that can raise total expenses.
You should do a clear cost comparison: materials, tools, wasted paint, and potential repairs versus a pro’s labor and guarantee.
Consider Time management: how many weekends will you sacrifice, and will rushed work cause redoing?
If you’re handy, small rooms and trims often justify DIY. For large jobs, high ceilings, or limited time, hiring a painting pro usually saves stress and can be more cost-effective overall.
Estimate Total Time: Prep, Coats, Drying
Although you might rush to grab a brush, accurately estimating total time up front keeps the job from dragging out—plan for prep, multiple coats, and drying so you can schedule breaks and avoid surprises.
Start by timing wall preparation: cleaning, patching, sanding, and priming can take hours per room.
Begin by timing wall prep—cleaning, patching, sanding, and priming—which can take hours per room.
Account for paint texture—flat or textured finishes often need extra touch-ups.
Plan two coats minimum; allow manufacturer drying times between coats, and longer curing before rehanging fixtures.
Factor in ventilation, temperature, and color psychology choices that might prompt extra samples.
Add contingency time for repairs or unexpected delays.
Set a Realistic Budget for Materials and Labor
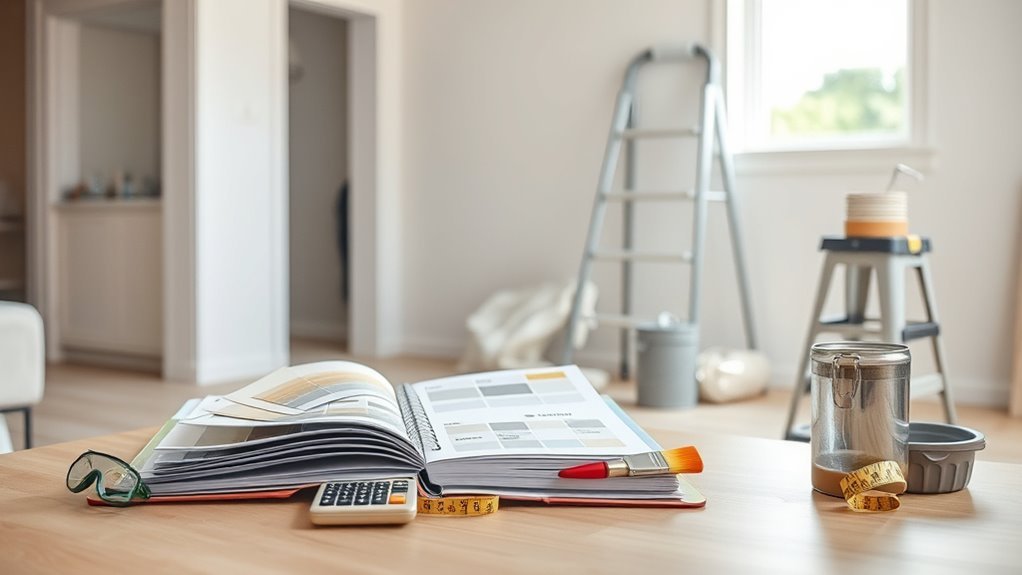
If you want the job to finish on time and without sticker shock, set a realistic budget that covers both materials and labor before you buy anything. You’ll save stress by doing quick Budget planning: get paint quotes, estimate primer and tape, and call contractors for labor rates.
Consider unexpected repairs and factor in quality versus cost when Material sourcing. Track estimates in one place and compare alternatives.
- Get three paint and labor quotes
- List required supplies by room
- Include contingency (10–15%)
- Compare DIY vs. pro costs
- Prioritize critical repairs first
Create a Room‑By‑Room Painting Checklist
When you tackle painting room by room, break each space into clear tasks so nothing gets missed. List prep steps: remove hardware, cover furniture, clean surfaces, repair holes, sand edges.
Note desired color psychology for each room—calming tones for bedrooms, energizing hues for kitchens—so you buy appropriate samples.
Record paint texture choices (matte, eggshell, satin) and where to use them. Include primer needed and ventilation plan.
Assign days for priming, painting, and drying. Check lighting at different times.
Tick off touchups and hardware reinstallation. Keep the checklist visible while you work.
Measure Walls to Calculate Paint and Primer
Before you buy paint, measure every wall and subtract openings like windows and doors so you know exactly how much paint and primer you’ll need. Measure height and width, multiply for square footage, and divide by coverage per gallon on the can.
Factor wall texture—rough surfaces need more paint—and note existing paint sheen only to guarantee compatibility with primer, not to choose finish.
Record doors, closets, and trim separately.
Use this simple checklist:
- Measure each wall (height × width)
- Subtract windows and doors
- Add 10% for waste and touch-ups
- Adjust for textured surfaces
- Check primer coverage and coats needed
Choose the Right Paint Finish Per Room
Because each room gets different wear and light, pick a finish that balances durability and appearance for the space.
You’ll choose flat or matte for low-traffic areas to hide imperfections, eggshell for moderate traffic to offer subtle sheen, satin for family rooms and kitchens where washability matters, and semi-gloss or gloss for trim, doors, bathrooms, and high-moisture zones.
Consider paint texture—smoother finishes show flaws more—so prep accordingly.
Let color psychology guide mood: calming finishes for bedrooms, energetic sheens for active spaces.
Match finish to function, and test samples to confirm durability and the look you intend.
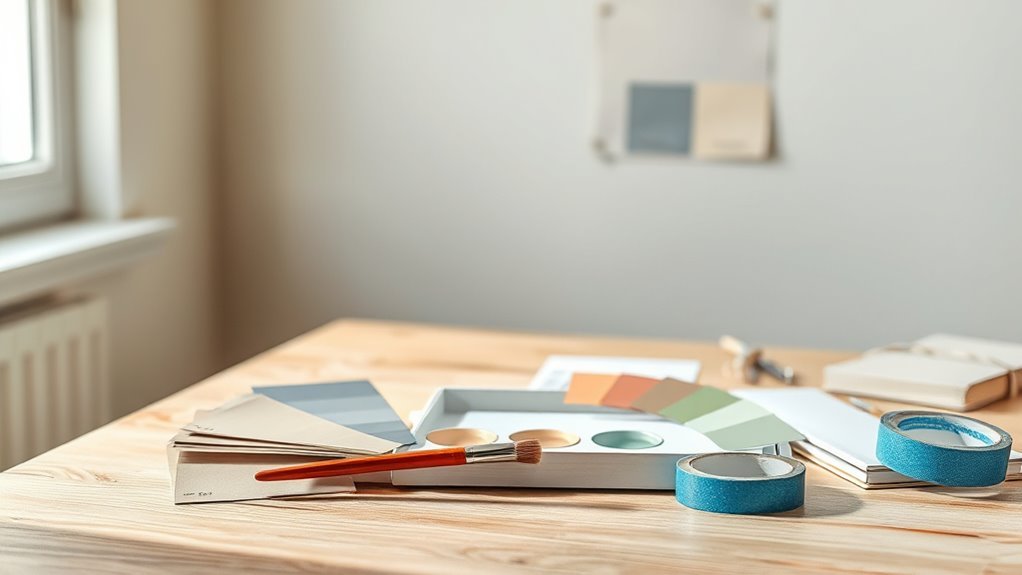
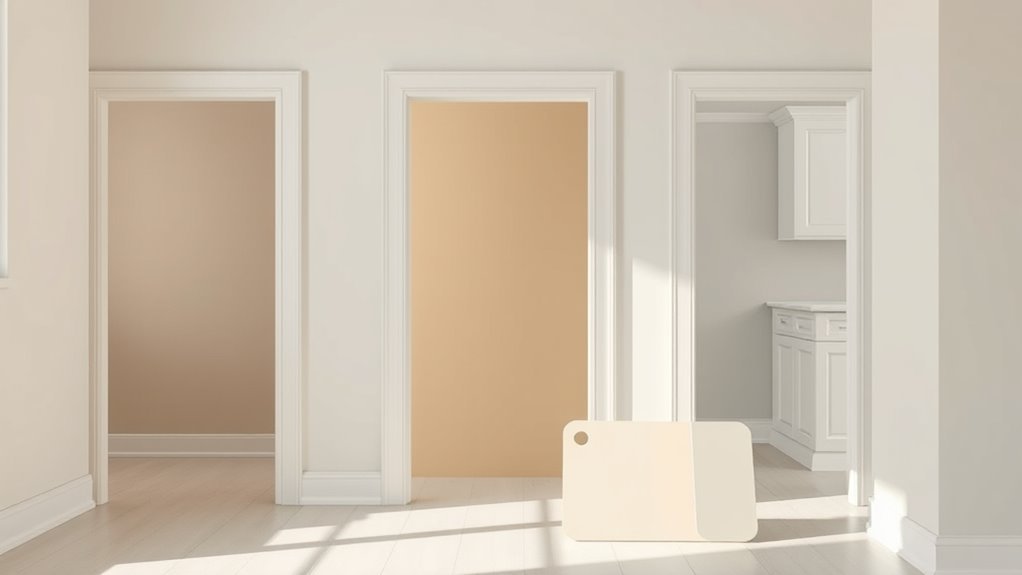
Pick Paint Color With Lighting in Mind
Since light changes a color more than any other factor, check your chosen swatches at different times of day and under the room’s actual lighting to see how hues shift. You’ll want simple lighting considerations and basic color psychology to guide mood and function. Consider direction, intensity, and fixture warmth before committing.
Balance natural and artificial light to avoid surprises.
- North light cools colors; pick warmer tones to compensate.
- South light boosts saturation; softer shades work well.
- Warm bulbs enhance reds and yellows.
- Cool bulbs mute warm hues.
- Aim for consistency between adjacent rooms to maintain flow.
Test Paint Samples on Your Walls
Once you’ve narrowed your choices, put actual paint on the wall to see how each shade behaves in your space—small swatches in the store can’t show texture, sheen, or how light shifts color throughout the day.
Apply 4×4-inch samples or larger, at least two coats, and label each patch. Observe samples morning, afternoon, and evening to note shifts and undertones.
Assess paint texture up close and how it plays with wall imperfections.
Test color pairing by placing samples near trim, flooring, and furnishings.
Remove samples after testing, and compare notes to choose the color that reads best in real conditions.
Select the Right Primer for Each Surface
Before you start painting, pick a primer that matches each surface so your topcoat adheres properly and looks even. You’ll choose based on substrate, stain-blocking needs, and Color coordination with your paint. Consider common primer types and match them to tasks so coverage’s efficient and finishes are consistent.
- Drywall: use an acrylic or PVA primer for even porosity.
- Bare wood: use an oil-based or shellac primer to seal tannins.
- Previously painted glossy surfaces: use a bonding primer.
- Stained or smoke-damaged areas: use a stain-blocking primer.
- Metal or rust-prone spots: use a rust-inhibiting primer.
Decide on Single Coat vs. Multiple Coats
Choosing the right primer helps determine how many paint coats you’ll need, so next decide whether one coat will do or you’ll apply multiple. You’ll weigh paint texture, surface porosity, and color psychology: bold colors or poor coverage often need extra coats, while light neutrals and high-hide paints may not. Test a small patch, note sheen and uniformity, then plan time and budget for drying between coats. Use this quick guide:
| Situation | Likely Coats | Tip |
|---|---|---|
| Light neutral, smooth | 1 | Test patch first |
| Bold color, porous | 2–3 | Prime if needed |
| Matte finish, uneven | 2 | Sand between coats |
Gather Essential Painting Tools and Supplies
When you’re ready to paint, gather the right tools so the job goes smoothly and finishes well: quality brushes and rollers matched to your paint and finish, a tray and liners, drop cloths, painter’s tape, a sturdy ladder, sandpaper and spackling tools for prep, plus rags and a bucket for cleanup.
You’ll also want items that help you evaluate Color psychology and paint texture as you work. Keep essentials handy so you can adjust choices on the fly.
- Tape measure and pencil
- Utility knife and putty knife
- Extension pole
- Gloves and safety glasses
- Small sample pots for testing
Choose Quality Brushes, Rollers, and Trays
Now that you’ve gathered supplies, pick brushes, rollers, and trays that match your paint type and wall texture so application goes smoothly.
Choose brushes, rollers, and trays matched to your paint and wall texture for smoother, more consistent application.
Choose natural-bristle brushes for oil-based paints and synthetic for water-based. Match roller naps to surface roughness to capture paint texture evenly.
Use quality trays or disposable liners to avoid contamination and speed cleanup. Select widths that suit trim versus broad walls to improve control and reduce strokes.
Test a small area to confirm even coverage and color harmony when layers dry.
Clean and store tools properly to extend life and maintain consistent results on future projects.
Pick the Right Ladder or Work Platform
Make sure the ladder or platform lets you reach the highest spots without standing on the top rung.
Check that it’s rated for your weight, sits level, and has slip-resistant feet or a stable platform.
If you’ll be working long stretches, choose a work platform for steadier footing and safer access.
Ladder Height And Reach
Because you’ll be working at different heights, pick a ladder or platform that gets you within comfortable reach of the ceiling and the top of the wall without standing on the top rung. You want proper ladder height to maintain ladder safety and avoid overreaching.
Measure the highest point you’ll paint, then choose a ladder that lets you hold tools and extend your arm naturally. Consider reach extension accessories if needed.
Quick checklist:
- Measure wall and ceiling heights first
- Choose a ladder with appropriate working height
- Factor in your reach extension with brushes/rollers
- Avoid standing on top rungs
- Keep tools within easy reach
Platform Stability And Safety
When you’re picking a ladder or work platform, prioritize stability and load capacity so you won’t risk a wobble or collapse while painting. Choose a model rated for your weight plus tools, inspect feet, locks, and spreaders, and set it on firm, level ground.
Use a platform with guardrails for extended work and secure tall ladders against slipping. Never overreach; move the ladder instead.
Follow manufacturer guidelines and local safety precautions, wear nonslip shoes, and keep tools tethered. If you’re unsure, rent a scaffold or hire a pro—platform stability and safe setup protect you and your project.
Prepare Protective Gear and Safety Items
Before you pick up a brush, gather protective gear and safety items so you stay safe and keep the job area clean. Put on gloves, goggles, and a mask before you start, and set up barriers to protect floors. Check ventilation and have a first-aid kit handy. Keep a trash bag nearby for used masking tape and rags.
Before you paint, gear up—gloves, goggles, mask, drop cloths, good ventilation, and a trash bag.
- Nitrile or latex gloves
- Safety goggles or glasses
- Respirator or dust mask
- Drop cloths and shoe covers
- First-aid kit and trash bag
Wearing proper protective gear and having safety items organized reduces accidents and speeds cleanup.
Clear the Room and Plan Furniture Storage
Start by removing as much furniture as you can and note what’s staying so you can plan storage and protection. Clear walking paths and label items you’ll move later; prioritize bulky pieces for temporary relocation.
Consider off-site or in-home storage solutions — garage shelves, a spare room, or rented unit — and measure doorways to guarantee fit.
For items that remain, plan furniture rearrangement to create working space and protect surfaces with drop cloths. Stack lightweight pieces safely and keep hardware, cushions, and fragile items in clearly marked boxes.
Confirm your plan before paint day to streamline setup and teardown.
Remove or Protect Fixtures and Hardware
If you want clean edges and fewer touch-ups, remove light switch plates, outlet covers, curtain rods, and any wall-mounted hardware you can; you’ll also protect fixtures and speed painting. Prioritize fixture removal for items that obstruct rollers or brushes, and use hardware protection like painter’s tape and plastic bags for sconces or thermostat units you can’t remove. Keep screws labeled in a small container.
- Turn power off before touching outlets
- Unscrew plates gently to avoid nicking paint
- Cover immovable fixtures with plastic
- Label hardware locations for reassembly
- Use soft cloths to pad delicate pieces
Take Down Wall Hangings and Switch Plates
After removing or protecting larger fixtures, take down all wall hangings and switch plates so you can paint uninterrupted and get crisp edges.
Unhook pictures, mirrors, shelves, and any wall decor, labeling hardware and grouping screws so reassembly’s quick. Use a screwdriver for switch plates, turning power off at the breaker if you’re unsure, and tuck screws into a labeled bag.
Patch small nail holes and sand lightly before painting. Store delicate items safely to avoid chips.
Taking these steps prevents missed spots, messy edges, and extra touch-ups later, and it speeds cleanup when you finish painting.
Clean Walls: Dust, Grease, and Stains
Because paint won’t adhere well to dust, grease, or stains, you should clean walls thoroughly before you roll. Start by dusting high to low, then tackle greasy areas near kitchens or light switches. Match cleaning intensity to wall texture so you don’t damage delicate surfaces. Use gentle degreaser, rinse, and let walls dry to preserve paint sheen. Check stains—spot-treat rather than over-wetting drywall.
- Feather dust from ceilings and crown molding
- Wipe switches and door frames
- Degrease cooking splatters carefully
- Spot-clean crayon or scuff marks
- Rinse and dry before priming or painting
Remove Mildew and Mold Safely
When you spot mildew or mold, tackle it promptly to prevent spread and protect your health. Wear gloves and a mask, keep the area well-ventilated, and isolate the space by closing doors or hanging plastic sheeting.
Use a mildew removal solution—commercial cleaner or diluted bleach (1 cup bleach to 1 gallon water)—and scrub with a stiff brush. Rinse, dry thoroughly, and discard contaminated rags.
For porous materials, replace rather than treat.
Address moisture sources: fix leaks, improve ventilation, and use dehumidifiers. These steps support effective mildew removal and long-term mold prevention so your painted walls stay clean and safe.
Repair Nail Holes and Small Dents
Walk the walls to locate every nail hole and small dent before you start painting.
Pick a filler that matches the damage and the wall material—spackling for tiny holes, lightweight compound for larger dings.
After the filler dries, smooth and sand the surface so your paint goes on evenly.
Locate All Imperfections
Start by scanning each wall from a few feet away, then move closer to spot nail holes, dings, and small dents that paint will only highlight. You’ll want to note how wall texture affects repair visibility and how flaws can alter color psychology once paint’s applied. Walk the room methodically and mark areas with a pencil or small sticker.
- Stand back and view from different angles
- Use a flashlight grazing the surface to reveal low spots
- Run your hand lightly to feel subtle dents
- Mark concentrations of imperfections for batch repairs
- Photograph walls for reference before priming
Choose Suitable Filler
Having identified and marked the holes and dents, pick a filler that matches the size and finish of each imperfection. For tiny nail holes use lightweight spackling; for larger dents choose a ready-mixed or two-part filler rated for wallboard or plaster.
Consider drying time and paintability so your repair takes paint similarly to surrounding surfaces. During filler selection, note whether you’re repainting with glossy trim or matte wall paint—this ties into Choosing colors because sheen differences show repairs.
Apply filler confidently, remove excess, and let it cure fully. Proper Filler selection prevents shrinkage and reduces repeat touch-ups.
Smooth And Sand Surface
Before you paint, make the repaired areas blend flush with the surrounding wall by sanding them smooth once the filler is fully cured. You’ll refine surface texture and match the wall’s finish using proper sanding techniques. Work gently, check edges, and avoid gouging. Finish with a quick wipe to remove dust so primer and paint adhere evenly.
- Use fine-grit sandpaper for small dents.
- Sand feathered edges to blend repair.
- Try a sanding block for consistent pressure.
- Check texture under angled light.
- Vacuum and tack cloth before priming.
These steps ensure repairs are invisible and ready for paint.
Fix Large Cracks and Damaged Drywall
If you spot large cracks or gouges in your drywall, repair them now so the finished paint looks smooth and professional. Start by evaluating damage: small cracks get crack filling; extensive holes or water damage may need drywall replacement.
Remove loose material, widen cracks slightly for better adhesion, then apply a backing tape or mesh. Use a quality joint compound in thin layers, letting each dry before adding more. Feather edges to blend with surrounding wall.
Once repaired, check for firmness and evenness. Prime patched areas to seal and guarantee consistent paint absorption before you proceed.
Sand Walls for Smooth Paint Adhesion
Pick the right sandpaper grit for the job—coarser for rough patches, finer for a smooth finish.
Sand evenly and consistently to avoid gouges or visible shifts.
Wipe or vacuum all dust thoroughly before priming so paint will stick properly.
Choose Grit Carefully
Start by matching sandpaper grit to the job: use a coarser grit (80–120) to remove old texture or major imperfections. Then switch to a finer grit (150–220) to smooth the surface for paint adhesion. You’ll focus on Grit selection and Sandpaper texture so paint sticks and looks even. Choose grits based on what you’re correcting and test on a small area first.
- Use 80–120 for heavy sanding
- Move to 150–180 for general smoothing
- Finish with 200–220 for a fine surface
Replace worn paper promptly. Match backing (hand vs. block) to the wall.
Keep edges crisp and avoid over-sanding.
Sand With Consistency
When you sand, keep steady pressure and even strokes so the surface stays uniformly smooth and paint grips properly.
You’ll work wall sections methodically, matching sanding techniques to the existing finish and avoiding overworking edges. Check texture consistency visually and by touch, blending rough spots into surrounding areas for an even base.
Use a sanding block or pole sander to maintain flatness; change grit if you spot deep imperfections. Stay mindful of corners and trim, smoothing progressions without creating dips.
Sand with consistent motion, pause to reassess, and proceed until the wall reads uniform and ready for primer.
Clean Dust Thoroughly
After sanding, don’t leave the fine dust on the wall—remove it completely so primer and paint adhere properly. You’ll want quick, effective Dust removal and Surface cleaning to avoid bumps or adhesion problems.
Use gentle methods first, then finish with a tack cloth or damp microfiber. Follow this simple checklist:
- Vacuum with brush attachment to lift loose dust.
- Wipe with a slightly damp microfiber cloth for lingering particles.
- Use a tack cloth for stubborn fine dust.
- Allow walls to dry fully before priming.
- Inspect under good light and repeat cleaning if needed.
Clean walls mean smoother paint and longer-lasting results.
Address Textured Surfaces Before Painting
If your walls have texture, you’ll want to evaluate and prep them before painting so the finish lays on smoothly and looks consistent. Check the type and severity of textured surfaces—stipple, knockdown, or popcorn—and decide whether to paint as-is or smooth areas.
Assess wall texture—stipple, knockdown, or popcorn—then prep or smooth so paint lays on evenly and looks consistent
Remove loose debris with a brush or vacuum, then wash grease and dirt with mild detergent.
For partial smoothing, use surface sanding with a pole sander and medium-grit paper, feathering edges to avoid visible lines.
Mask trim and cover floors.
When in doubt about extensive texture, consult a pro rather than risking poor results.
Repair Plaster and Lath Properly
Start by evaluating how much plaster and lath are damaged so you know whether patches or full replacements are needed.
Match repair materials and techniques to the original construction to keep surfaces stable and consistent.
If you’re unsure, consult a pro before you start cutting into walls.
Assess Damage Extent
While you’re planning the paint job, take time to assess plaster and lath damage thoroughly so repairs don’t show through the new finish. You’ll want to assess damage areas, evaluate surface stability, and prioritize fixes before priming.
Check for loose plaster, hollows, cracks, moisture stains, and detached lath. Use a systematic approach to avoid missed spots.
- Tap walls to find hollow sounds
- Probe cracks to gauge depth
- Measure moisture and dry time
- Remove loose material back to sound edges
- Note structural concerns for pros
Document findings, plan repairs, and only proceed when the substrate’s solid.
Match Original Materials
Because old plaster and lath behave differently than modern drywall, you’ll get the best, least-visible repairs by matching the original materials and techniques.
You should remove loose plaster, expose the lath, and use plaster mix compatible with the original—three-coat or two-coat where appropriate—so repairs move and cure similarly.
Blend edges feathering into sound plaster, then texture to match surrounding areas.
Prime and paint with compatible products to avoid sheen or absorption differences.
Matching textures and matching finishes reduces visible patches and future cracking.
If unsure, consult a plaster specialist to preserve appearance and structural behavior.
Treat Water Stains and Fix Leaks First
If you spot water stains or suspect a leak, deal with the source before you paint; drying and repairing the area prevents stains from bleeding through fresh paint and stops new damage. You’ll want to identify Water damage origin, make necessary Leak repair, and confirm the space is dry. Follow these clear steps to avoid wasted work:
- Locate the leak and shut off water if needed.
- Fix plumbing or roof issues, or call a pro.
- Dry the wall completely with fans or dehumidifiers.
- Clean stains with a mildew cleaner or TSP substitute.
- Prime repaired areas with a stain-blocking primer before painting.
Strip Old Peeling Paint When Necessary
First, check the wall to assess how much paint is loose, failing, or bubbled.
If the old finish is extensive or may contain lead, choose a safe removal method and gear up with proper protection.
After stripping, sand and clean the surface so it’s smooth and ready for primer.
Assess Paint Condition
When paint is bubbling, flaking, or pulling away from the wall, you’ll need to remove those failing layers before you repaint to guarantee the new coat adheres and looks smooth.
Check the surface visually and by touch to note loose spots, uneven paint texture, and underlying damage. Consider how paint texture affects final appearance and how color coordination might hide or reveal flaws.
Make a prioritized plan:
- Scrape loose paint and sand rough edges
- Patch cracks and fill holes
- Clean dirt, grease, and mildew
- Feather junctions for smooth texture
- Inspect for moisture sources before priming
Choose Safe Removal
Because old, peeling paint can hide hazards and compromise new finishes, you should choose removal methods that protect your health and the structure. Start by identifying lead or asbestos risks; if present, hire certified abatement rather than DIY.
For safer DIY, use wet-sanding, chemical strippers rated for your surface, or gentle scraping to minimize dust.
Set up ventilation strategies: open windows, use fans to exhaust air, and seal off work areas with plastic sheeting.
Collect debris carefully, label it, and follow local regulations for safe disposal.
Wear PPE—respirator, gloves, goggles—and clean thoroughly when finished.
Prep Surface Smoothly
If old paint is flaking or bubbled, strip it back to a stable surface so your new finish adheres and looks even. You’ll assess surface texture, remove loose paint with a scraper or sander, and stop at sound substrate.
Clean dust, repair imperfections with filler, then sand smooth so primer application bonds uniformly. Follow with a compatible primer to seal and even out porosity before painting.
- Wear protection and ventilate the room
- Test for lead if the home’s old
- Use appropriate scraper grit or tool
- Remove dust between steps
- Allow filler and primer to fully dry
Prime Patched and Repaired Areas Properly
Although the rest of the wall already looks smooth, you should always prime patched and repaired areas before painting to guarantee consistent adhesion and uniform sheen.
Use priming techniques that suit the patch materials you used—lightweight spackle, joint compound, or foam fillers each need specific primers.
Sand the patch flush, remove dust, then apply a stain-blocking or universal primer thinly and evenly; feather edges to blend with surrounding paint.
For large repairs, spot-prime twice, letting dry between coats.
Proper priming prevents flashiness and peeling, ensures color uniformity, and gives topcoat paint the best surface to bond with.
Mask Trim, Baseboards, and Ceilings Accurately
When you’re ready to paint, mask trim, baseboards, and ceilings carefully so paint lines stay sharp and cleanup’s fast. You’ll protect surfaces and get crisp edges by prepping methodically. Use quality painter’s tape and plastic or paper drop cloths, pressing tape firmly along molding and ceiling joins.
For accurate ceilings, overlap tape slightly and remove it while paint’s tacky, not fully dry. Follow these quick steps:
- Clean and dry all trim before taping.
- Choose tape width that fits the trim profile.
- Use a putty knife to seal tape edges.
- Cover floors and hardware.
- Remove tape at a 45° angle.
Where and How to Caulk Gaps
After taping and protecting trim, take care of the gaps that will show through paint by caulking seams between trim, baseboards, and the wall or ceiling. You’ll run a bead of paintable caulk, smooth it with a wet finger or tool, and wipe excess immediately.
Focus on joints where movement or settling created visible lines; don’t overfill narrow hairline cracks. Let the caulk cure fully before sanding lightly to match surrounding paint texture.
Use low-VOC, flexible caulk for durability. Inspect corners and junctions again, repairing missed spots so your finish looks seamless once you start painting.
Protect Floors With Drop Cloths and Tape
Before you lay down any paint, protect your floors by covering them with durable drop cloths and securing edges with painter’s tape so dust, drips, and tracked paint don’t create extra work. You’ll want reliable floor protection and careful tape application to keep cleanup minimal.
Lay cloths flat, overlap seams, and tape edges to baseboards. Check for curled corners and re-tape as you move. Keep a small trash bin nearby for used tape and debris.
- Choose canvas or heavy-duty plastic
- Smooth wrinkles before taping
- Use low-tack painter’s tape
- Tape around door thresholds
- Replace soaked cloths promptly
Plan Painting Order for Speed and Drying
Start with the ceiling so any drips won’t ruin freshly painted walls.
Work top to bottom—trim, walls, then baseboards—to keep a clean workflow and avoid recoat mistakes.
Give each coat the recommended drying time before moving on to the next surface.
Start With Ceilings
Since paint drips and mist will fall, you’ll boost efficiency and keep walls cleaner by tackling the ceiling first; start with assessment and proper tools. Check ceiling texture to choose nap length, and attach a paint roller to an extension for even coverage. Work steadily in sections, keeping ventilation on.
- Inspect for stains or repairs before painting
- Lay drop cloths and mask trim and fixtures
- Use a roller with the right nap for ceiling texture
- Cut in with an angled brush along edges
- Keep a wet edge to avoid lap marks
Finish ceilings, let them dry, then move to walls.
Work Top To Bottom
When you paint from the top down, you’ll prevent drips and overspray from ruining finished areas and make the job faster by letting higher sections dry while you work below.
Plan a clear sequence: ceiling, upper walls, lower walls, trim. Work methodically around each room so you aren’t re-taping or moving ladders twice.
Choose eco friendly paints for less odor while you tackle hard-to-reach spots first.
Think about color psychology when painting higher versus lower zones—lighter shades up can feel airy, deeper tones down add grounding.
Keep tools handy, maintain consistent brush and roller strokes, and finish each band before moving on.
Allow Proper Drying
Although painting looks fast, you’ll save time by planning sections so each coat can dry without interruption. You’ll sequence work to promote proper drying and efficient paint curing, avoiding rework and tacky finishes. Follow a simple order and watch conditions.
- Work high areas first, then walls, trim last
- Paint one wall at a time to keep edges wet
- Allow recommended dry times between coats
- Control temperature and humidity for faster curing
- Use low-VOC products to reduce odor and speed drying
Plan logically, monitor surfaces, and don’t rush recoat times to ensure durable, even results.
Prep Doors and Windows for Painting
If you want clean, professional-looking results, start by clearing and protecting all doors and windows before you paint. Remove or loosen door hardware and label screws, hinges, and strike plates so you can reinstall them precisely.
Clean window frames, sills, and tracks of dust and grime; sand any peeling paint and fill gaps with caulk. Use low-tack painter’s tape on glass edges and plastic sheeting to shield panes and nearby floors.
If doors are removable, take them off and lay them flat to avoid drips. Work systematically, room by room, to prevent missed spots and save time.
Prep Radiators, Vents, and HVAC Covers
Before you start painting, turn off HVAC power so you don’t trigger fans or spread dust.
Remove and clean vent and cover plates, wiping away dust and grease for a smooth finish.
Protect surrounding surfaces with drop cloths or painter’s tape to keep paint off floors and trim.
Turn Off HVAC Power
When you’re getting ready to paint, shut off the HVAC power so vents, registers, and radiators stay cool and dust-free while you work. You want HVAC safety and a clear electrical shutdown before touching anything. Turn power off at the breaker, label the switch, and confirm systems are idle.
- Locate the correct breaker and flip it off.
- Post a note so others don’t turn it back on.
- Wait for radiators and ducts to cool completely.
- Keep vents closed to limit dust circulation.
- Use a noncontact tester to verify power is off before proceeding.
Remove And Clean Covers
Start by removing and cleaning all radiator, vent, and HVAC covers so paint won’t trap grime or clog airflow later. You’ll perform cover removal carefully: turn off power, unscrew or unlatch covers, and note fastener locations.
Inspect for rust, dust buildup, and paint drips. Use a vacuum and brush to remove loose debris, then wash metal or plastic covers with mild detergent; rinse and dry thoroughly.
While covers are off, wipe surrounding grilles and ducts for surface cleaning, avoiding deeper duct work. Label each piece for easy reinstallation and store screws together so you can restore proper airflow after painting.
Protect Surrounding Surfaces
Now that covers are clean and labeled, shield the surrounding surfaces to prevent paint splatters and drips from settling on radiators, vents, and HVAC grilles. You’ll save time and avoid damage by using proper surface protection. Tape edges, use drop cloths, and cover vents to keep dust and paint out of your system.
- Lay a breathable cloth over radiators to avoid trapping moisture.
- Tape plastic sheeting around HVAC grilles for airtight edges.
- Remove small vent covers and wrap them in paper.
- Use painter’s tape on trim adjacent to vents.
- Keep a damp rag handy for immediate spot cleanup.
Check seals before painting.
Prep Wood Trim and Painted Metal Surfaces
Before you paint, give wood trim and painted metal a quick but thorough inspection so you’ll catch loose paint, dents, rust, and gaps that’ll ruin a smooth finish.
Before painting, inspect wood trim and painted metal for loose paint, dents, rust, and gaps that spoil the finish.
Check wood trim for peeling, holes, or swelling. Sand glossy areas and feather edges where paint lifts. Fill dents and gaps with wood filler or caulk, then sand smooth.
For metal surfaces, remove rust with a wire brush or sandpaper. Clean with a degreaser, and apply a rust-inhibiting primer.
Wipe down all surfaces, let them dry, and mask adjacent areas. Tack cloth before painting ensures dust-free adhesion and a professional look.
Prepare and Test a Paint Sprayer
Once you’ve prepped the room and protected adjacent surfaces, prep the sprayer so you don’t waste paint or time—flush the system, check hoses and seals for leaks, and assemble the nozzle and tip recommended for your paint type.
Then follow a quick test routine to confirm paint flow, spray pattern, and equipment calibration. Practice on cardboard to dial settings and test paint mixing viscosity, thinning only as the paint’s directions recommend.
Use this checklist before you start:
- Inspect filters and strain paint
- Confirm pressure settings
- Verify nozzle size and tip alignment
- Run a timed spray test
- Clean excess immediately
Check Humidity and Temperature for Painting
Because paint cures chemically, you should check the room’s humidity and temperature before you start—both affect drying time, adhesion, and finish.
Use a hygrometer and thermometer to confirm humidity levels stay between 40% and 60% and temperature sits within the paint manufacturer’s recommended range, usually 50–85°F (10–29°C).
If it’s too humid or cold, paint won’t cure properly; if it’s too dry or hot, it can flash-dry and blister.
Plan temperature control with heaters or air conditioners and dehumidifiers to stabilize conditions.
Monitor readings periodically during the job to ensure consistent results and proper curing.
Create Ventilation and Dust‑Control Plans
Good environmental control also means managing airflow and dust — even with ideal temperature and humidity, poor ventilation can trap fumes and let airborne dust settle into wet paint. You’ll do Ventilation planning and Dust control before you roll to protect finish and health.
Seal vents, use fans to create cross‑flow, and filter incoming air. Wear a mask when sanding and clean surfaces frequently to prevent contamination.
- Close HVAC intakes and seal doors
- Run exhaust fans or box fans near windows
- Use HEPA vacuums after sanding
- Dampen surfaces slightly to limit dust
- Cover furniture and floors tightly
Allow Drying Times Between Coats
While paint might look dry to the touch in an hour, you should wait the manufacturer’s recommended time between coats to guarantee proper adhesion, color development, and a smooth finish. You’ll plan around Drying times based on humidity, temperature, and product type. Allow full cure before recoat to avoid lifting or uneven sheen. Track intervals and don’t rush coat application; thin or thick passes change drying. Use a fan and ventilation to speed drying safely. Check edges and corners before the next coat.
| Condition | Wait Time |
|---|---|
| Low humidity | 2–4 hours |
| High humidity | 6–12 hours |
| Oil-based | 24 hours |
| Quick‑dry acrylic | 1–2 hours |
Mix and Thin Paint Correctly
If you want smooth, consistent coverage, start by thoroughly stirring the paint to reincorporate pigments and solvents that settle during storage. You’ll check manufacturer notes for recommended viscosity and use proper paint mixing tools to avoid lumps.
Test small batches and apply samples to see flow and coverage. Use thinning techniques sparingly—add only the suggested solvent and mix slowly.
Keep safety in mind with ventilation and gloves.
- Use a clean paddle or drill mixer for consistent Paint mixing.
- Measure thinner by volume, not guesswork.
- Stir from bottom up.
- Test on cardboard first.
- Don’t over-thin.
Store and Label Leftover Paint Safely
After you finish a project, seal leftover paint tightly and label each can so you can reuse it later without confusion. Wipe rims, press lids flat, and store cans upright in a cool, dry place away from sunlight and freezing temperatures to extend shelf life.
Use clear labeling techniques: note color name, formula number, date, and the room painted. Attach a swatch or tape sample for quick identification.
For small amounts, transfer to airtight, smaller containers to reduce waste. Keep paints out of reach of children and pets, and maintain an inventory list so you avoid buying duplicates.
Schedule Cleanup and Disposal of Supplies
Because cleanup affects how quickly you can move back into the room, set a specific time for washing brushes, disposing of wipes, and returning furniture so the job actually gets done. You’ll keep paint color samples safe and avoid stains by acting promptly.
Plan disposal methods for solvent and rags, and rinse brushes using appropriate brush techniques to extend life. Use labeled containers and follow local hazardous-waste rules.
A short checklist helps you follow through:
- Wear gloves when handling solvent-soaked rags
- Use airtight jars for leftover paint color
- Dry and store brushes after rinsing
- Bag and seal used wipes
- Return furniture on schedule
Inspect Prepped Surfaces Before Painting
Before you pick up a roller, walk the room and scan every wall and trim piece so you catch missed repairs or dust that’s still clinging to the surface. Check for uneven surface texture, leftover sanding grit, and primer streaks. Run your hand lightly to feel bumps or ridges and use a flashlight at an angle to spot imperfections.
Verify trim edges are clean and masked, and confirm caulk is dry. Consider how the existing surface texture will affect paint sheen and choose finish accordingly.
Only start painting once surfaces look and feel uniform to guarantee an even, professional result.
Troubleshoot Common Prep Problems and Fixes
Before you start painting, you’ll want to tackle common prep problems like cracks, dents, and uneven texture so your finish looks smooth.
If you spot mold or mildew, clean and treat the area thoroughly before sealing and painting.
And when paint won’t stick, you’ll need to identify adhesion issues—cleaning, sanding, or using a proper primer will usually fix them.
Fixing Surface Imperfections
Once you’ve cleaned and primed the area, take a close look for dents, cracks, peeling, and uneven texture so you can tackle them in the right order. You’ll assess surface texture and existing paint sheen to decide sanding, filling, or skim-coating.
Fix small dents with spackling, larger gouges with joint compound, and hairline cracks with flexible filler. Remove loose paint, sand glossy spots, and feather edges for a smooth progression.
- Sand glossy patches to match paint sheen
- Apply spackle, let dry, then sand
- Use patching tape for wide cracks
- Feather joint compound edges
- Wipe dust before priming
Tackling Mold And Mildew
After you’ve smoothed out dents and sealed cracks, inspect for mold or mildew—those stains can ruin new paint and keep returning if not handled properly.
If you find growth, protect yourself with gloves and a mask, then clean with a solution of detergent and water for surface grime. For stubborn areas, use a diluted bleach or commercial mold remediation product, following label directions.
Rinse and dry thoroughly; humidity fuels recurrence. Improve ventilation, fix leaks, and use a dehumidifier where needed.
Prime treated areas with a mildew-resistant primer before painting to guarantee long-lasting mildew prevention and a durable finish.
Solving Adhesion Problems
If paint peels, flakes, or simply won’t stick, you’ll need to diagnose the surface before you coat it again. Common culprits include old glossy finishes, chalky or dusty surfaces, grease, and moisture.
Test adhesion with tape or a razor. Sand glossy areas and remove chalk with a TSP substitute.
Enhance surface bonding with a clean, dry substrate and spot-prime bare areas. Use adhesion primers where stain, slickness, or patching compound threatens hold.
Quick checklist:
- Clean grease and dirt thoroughly
- Sand gloss to dull the sheen
- Remove loose paint fully
- Apply adhesion primer as directed
- Ensure area is dry before priming
Frequently Asked Questions
Can I Paint Over Wallpaper Without Removing It First?
You can sometimes paint over wallpaper, but it’s risky; you’ll need excellent surface preparation and consider wallpaper removal for best results. You’ll clean, repair seams, prime with an appropriate sealer, and use proper paint for adhesion.
Do I Need Permits for Painting Interior Walls?
No, you generally don’t need permits for painting interior walls, but check local rules if structural changes are planned. You’ll still choose painting techniques and color selection carefully, and you’ll want to protect floors and fixtures.
How Long Should New Drywall Cure Before Painting?
You should wait about 24–72 hours for new drywall to cure before painting; proper drywall preparation includes drying joint compound and primer application. Don’t rush—ensure surfaces are fully dry, sanded, and dust-free for best results.
Will Painting Increase My Home’s Resale Value?
Yes — painting can boost resale value if you choose neutral Color selection and high-quality paint durability; buyers notice fresh, durable finishes, so you’ll maximize appeal by picking timeless hues and durable coatings that resist wear and look newer longer.
Can I Paint Over Lead‑Based Paint Safely?
Yes — but cautiously: you’re balancing modern safety against old hazards. For lead safety, don’t sand; use encapsulating primers, wet-clean surfaces, HEPA vacuums, PPE, and follow local regulations during paint preparation to avoid exposure.
Conclusion
Before you roll on that first coat, pause and picture the finished room—you’ll save time, money, and headaches. Decide which rooms need repainting, whether you’ll DIY or hire help, and block out the time for prep, coats, and drying. Set a budget, label and store leftover paint, and schedule cleanup. Inspect and fix surfaces before painting; a little prep is like building a strong foundation, because a flawless finish starts long before the brush meets the wall.