What to Use to Clean Walls Without Removing Paint
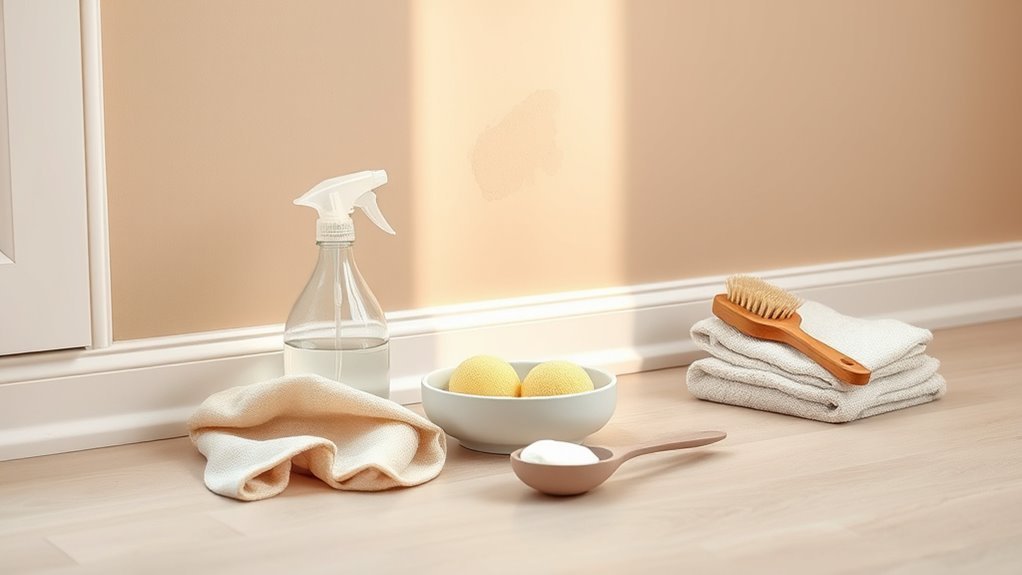
You can safely clean painted walls with a soft microfiber cloth or sponge, warm water, and a few drops of gentle dish soap; dust first, test a hidden spot, and blot stains rather than scrub to avoid lifting paint. Use a magic eraser very gently and try diluted isopropyl alcohol for marker or a baking soda paste for crayon, rinsing and drying each area. Follow paint‑finish guidelines and simple maintenance tips to keep walls fresh and avoid damage, with more practical steps ahead.
Quick, Safe Way to Clean Painted Walls
When you need to freshen painted walls quickly and safely, start with the gentlest method: dusting and a mild soap solution.
When freshening painted walls quickly and safely, begin with gentle dusting and a mild soap solution.
You’ll remove surface grime with a microfiber cloth or soft brush, then mix a few drops of gentle dish soap in warm water.
Test a hidden spot, blot rather than scrub, and work top to bottom to avoid streaks. Rinse with clean water and dry with a soft towel.
For stubborn spots, use a white eraser or diluted baking soda paste sparingly.
These steps help with wall maintenance and paint preservation while minimizing risk.
How Paint Finish Affects Cleaning (Flat, Eggshell, Satin, Semi‑Gloss)
When you’re cleaning, know that paint finish changes how gentle you need to be.
Flat finishes hide imperfections but won’t stand up to scrubbing, so you’ll want milder methods.
Semi‑gloss is much tougher and tolerates more vigorous cleaning without losing color or sheen.
Flat Finish Care
Although flat paint hides imperfections and gives walls a smooth, matte look, it also holds onto dirt and scuffs more than glossier finishes. So you’ll need gentler cleaning methods and less frequent scrubbing to avoid dulling or removing pigment.
For flat finish care, start with dry dusting or a soft microfiber to remove surface soil. Spot-clean with a damp sponge and mild detergent, testing an inconspicuous area first.
Use flat finish techniques like blotting instead of rubbing, minimal moisture, and quick drying to prevent staining. Regular wall maintenance—light dusting and prompt attention to marks—keeps paint intact without aggressive cleaning.
Semi‑Gloss Durability
Semi‑gloss stands up to scrubbing and moisture far better than flatter sheens, so you can tackle tougher stains and high‑traffic spots with more confidence.
You’ll appreciate the semi gloss sheen’s resistance when wiping fingerprints, scuffs, or spills; its gloss durability means you can use mild detergent and a soft sponge without worrying about dulling the finish.
Work top to bottom, test a hidden area first, and avoid abrasive pads. Treat grease with a degreaser diluted per instructions.
The result: cleaner walls that still look fresh and intentional.
- Relief: stains surrender quickly.
- Pride: rooms feel cared for.
- Calm: maintenance becomes simple.
Tools for Gentle Wall Cleaning
1 essential rule: pick tools that clean without stripping the paint. You’ll want soft sponges and microfiber cloths for most jobs; they lift dirt without abrasion.
Use a soft-bristled brush for textured surfaces and a lint-free mop or extendable duster for high areas.
Keep two buckets—one for clean water, one for rinsing—so you don’t redeposit grime. Test any tool on an inconspicuous spot first.
Replace or launder microfiber frequently to avoid trapped grit. Work gently, rinsing and drying in sections to prevent streaks and preserve the finish.
Mild Cleaners That Won’t Strip Paint
When you want to remove dirt without damaging the finish, choose mild cleaners designed to lift grime without dissolving paint. You’ll prefer mild detergents mixed with warm water or gentle cleaning solutions labeled safe for painted surfaces.
Test a small area first, blot rather than scrub, and work from bottom up to avoid streaks. Use soft cloths or sponges and rinse promptly to prevent residue. If grease’s stubborn, boost the solution slightly but stay conservative.
Test a small patch first, blot gently from bottom up with a soft cloth, rinse well—be conservative with stronger solutions.
- Relief when scuffs vanish without panic
- Confidence knowing surfaces stay intact
- Satisfaction from fresh walls, no damage
Using a Magic Eraser Safely
Before using a Magic Eraser, test it on a hidden spot to make sure the paint won’t come off.
Use gentle pressure and short strokes so you remove marks without abrading the finish.
Rinse the area with a damp cloth and dry it to prevent streaks or residue.
Test On Hidden Area
Since Magic Erasers can lighten or dull some paints, pick an inconspicuous spot—inside a closet, behind furniture, or near a baseboard—and gently rub a small area to check for damage or finish change before treating a visible section.
You should locate test areas among hidden spots so you can assess color shift, sheen change, or surface abrasion without worry. Wait a few minutes to see any lingering effects, then compare with surrounding paint.
If the sample looks unchanged, proceed cautiously. If not, stop and try a milder cleaner or consult paint guidance.
- Relief at safe discovery
- Frustration avoided
- Confidence restored
Use Gentle Pressure
Press lightly and let the Magic Eraser do the work—don’t scrub hard. You’ll avoid dulling paint by using gentle pressure and controlled strokes, keeping the pad almost flat against the surface.
Move slowly, checking the spot often so you can stop once the mark lifts. This cleaning technique preserves finish and supports wall maintenance without aggressive abrasion.
If you meet resistance, pause and reassess; try a softer touch or test elsewhere. Use short sessions to prevent heat or friction buildup.
Rinse And Dry
After you’ve lifted a mark with the Magic Eraser, rinse the area with a damp cloth to remove residue, then pat it dry with a clean towel to prevent water spots and streaks.
You’ll want gentle rinse techniques: wipe from top down, use minimal water, and change cloths when soiled.
For drying methods, press a soft towel lightly rather than rubbing, and let the paint rest before evaluating.
These steps protect finish and prevent streaks or softening. Be mindful of trim and baseboards—dry edges thoroughly.
Small, steady actions keep walls clean without harming paint.
- Relief: the stain is gone.
- Pride: you preserved the finish.
- Calm: the room looks renewed.
Removing Tough Stains: Crayon, Grease, Marker
When kids, pets, or kitchen mishaps leave crayon, grease, or marker on your walls, you don’t have to strip the paint to fix it; you can target each stain with the right technique and gentle cleaners to preserve the finish.
For crayon removal, gently rub with a damp magic eraser or a paste of baking soda and water, testing pressure.
For grease stains, blot excess, then apply dish soap diluted in warm water and rinse; repeat if needed.
For marker cleanup, try isopropyl alcohol on a soft cloth, dabbing rather than scrubbing.
Regular spot care aids stain prevention.
How to Test Cleaners on Painted Walls
Before you apply any cleaner broadly, test it in an inconspicuous spot to make sure it won’t dull, lift, or strip the paint. You’ll check paint compatibility and how the solution reacts with wall texture.
Dab a cotton swab, wait five minutes, blot with a soft cloth, then inspect under good light. If you see softening, gloss loss, or color change, stop and choose a gentler product. Note results so you don’t repeat mistakes. Trust your senses and patience.
- Relief when the spot stays perfect
- Frustration avoided by early testing
- Confidence in a safe cleaning choice
How to Wash Walls Without Streaks
Before you start, wipe dust and cobwebs off the walls so your cleaner won’t smear grit.
Use a mild, pH-neutral solution applied with a soft sponge to avoid lifting paint.
Finish by drying each section with a microfiber cloth to prevent streaks.
Prep Walls Properly
Although it’s tempting to start scrubbing right away, prepping the walls correctly is the step that prevents streaks and saves time.
You’ll begin with careful wall preparation: remove dust, cobwebs, and loose dirt with a dry microfiber cloth or vacuum brush. Do a surface inspection for cracks, flaking paint, or stains so you can address them before washing.
Tape off trim and cover floors to protect surfaces. Work from top to bottom to avoid drips.
- Relief: seeing a clean, cared-for room
- Confidence: knowing you won’t damage paint
- Pride: restoring your space thoughtfully
Use Mild Cleaning Solution
When you mix a gentle cleaner—like a few drops of dish soap or a mild all-purpose cleaner—with warm water, you get an effective solution that lifts dirt without stripping paint; use about 1 teaspoon per quart to start and adjust only if needed.
Test a hidden spot first, then work top to bottom in small sections. Use a soft sponge and rinse the sponge often to avoid redepositing grime.
For regular upkeep, set cleaning frequencies based on traffic: high-traffic areas monthly, low-traffic rooms quarterly.
Don’t overuse stronger detergents; stick with gentle solutions to protect finish and avoid streaks.
Dry With Microfiber
Grab a clean microfiber cloth and gently buff each washed section immediately after rinsing to prevent streaks and water spots. You’ll notice microfiber benefits right away: it lifts moisture and residue without abrasive scrubbing, so paint stays intact.
Work top to bottom, using light pressure and overlapping strokes. Change to a dry cloth when damp, and rotate through clean cloths to avoid redepositing grime. These drying techniques speed drying and leave a uniform finish. You’ll feel satisfied seeing streak-free walls that look refreshed without damage.
- Calm pride in a spotless room
- Relief that paint’s preserved
- Quiet joy in small care rituals
Remove Scuffs and Fingerprints Without Stripping Paint
If you want to get rid of scuffs and fingerprints without dulling or stripping the paint, start with the gentlest methods and work up only as needed.
Begin by wiping with a dry microfiber to lift dust, then a damp microfiber with plain water for light marks.
For scuff removal, use a pencil eraser or a melamine sponge dabbed lightly—test first in an inconspicuous spot.
For oily fingerprints, mix a few drops of mild dish soap with water and blot, don’t scrub. Rinse with a clean damp cloth and dry.
To reduce repeat marks, consider fingerprint prevention by placing furniture bumpers and using washable paints.
Cleaning Textured Walls and Wallpaper Safely
Before you start, test a hidden spot to make sure the texture or wallpaper won’t react.
Use soft brushes, microfiber cloths, or gentle sponges to avoid snagging or abrading the surface.
Stick to mild, pH-neutral cleaners or diluted soap solutions to protect the finish.
Test A Hidden Spot
Wondering whether that cleaner will damage the finish? You should always test a hidden spot before tackling textured walls or wallpaper.
Pick an inconspicuous area—behind furniture, inside a closet, or near a trim seam—and try your chosen solution. Note how the surface reacts to different paint types and finishes, and wait for full drying to catch discoloration or softening.
Keep a small notebook to record results and the cleaner concentration used. If any change appears, stop and try a milder method. Trusting tests saves time and prevents damage to walls you can’t easily restore.
- Relief when results are safe
- Confidence from careful testing
- Frustration avoided by small checks
Use Soft Cleaning Tools
When cleaning textured walls or wallpaper, reach for soft tools like microfiber cloths, natural sea sponges, and soft-bristled brushes to lift dirt without abrading the surface.
You’ll work gently, wiping in light, overlapping strokes to avoid snagging fibers or roughing paint. Use soft sponges dampened—not dripping—to blot stains; excessive water can warp wallpaper or seep into seams.
Microfiber cloths trap dust and reduce scrubbing, so rinse and wring them frequently to prevent grinding grit into the finish.
For crevices, move a soft-bristled brush slowly along the texture. Always dry the area with a clean cloth to prevent streaks.
Choose Gentle Solutions
Now that you’ve got the right soft tools, pick cleaning solutions that won’t harm paint or wallpaper fibers. You’ll want mild cleaners with gentle ingredients—diluted dish soap, vinegar mixes, or a pH-neutral cleaner—so textures stay intact and colors don’t fade.
Test a hidden spot first, blot rather than scrub, and work top to bottom. Consider eco friendly options to protect indoor air and surfaces while cleaning. Trust subtle action over force; it keeps surfaces beautiful longer and reduces anxiety about damage.
- Relief: gentle care feels safe.
- Pride: walls that last comfort you.
- Calm: eco choices soothe conscience.
Recipes for Specific Stains (Step‑By‑Step)
Before you tackle a specific stain, gather the basic supplies—mild dish soap, baking soda, white vinegar, microfiber cloths, a soft-bristled brush, and a spray bottle—so you can mix and apply each recipe quickly and safely; having everything at hand prevents over-scrubbing or uneven drying that can damage paint.
For scuffs, dampen a cloth with diluted dish soap, rub gently, rinse.
For crayon, make a paste of baking soda and water, rub lightly, wipe.
For grease, spray diluted vinegar, blot, then soap-clean.
For mildew, apply equal parts vinegar and water, wait ten minutes, scrub softly.
These stain removal techniques and specific stain recipes work fast.
Cleaners and Tools to Avoid (What Fades or Strips Paint)
Although it’s tempting to reach for strong cleaners and abrasive tools to attack stubborn marks, those choices often strip or fade paint faster than the stains themselves. You should avoid harsh solvents, bleach-based cleaners, and rough scouring pads that damage pigments and binders in many wall finishes.
Even “safe” cleaning agents can alter sheen or cause color loss if misused. Test any product in an inconspicuous spot, dilute per instructions, and use soft cloths or sponges.
If you want to protect painted surfaces, skip these damaging options:
- Harsh solvents that scare you with fumes
- Bleach solutions that leave uneven fading
- Metal scrubbing pads that gouge finishes
Maintain Painted Walls to Reduce Cleaning
If you want to cut down on scrubbing later, build simple habits that keep paint looking fresh: wipe splatters immediately, use doormats and chair pads to limit dirt and scuffs, and address high-traffic areas with periodic spot-cleaning before grime sets in.
You should dust walls weekly with a microfiber duster, treat fingerprints promptly with a gentle cleaner, and avoid harsh solvents that shorten paint longevity.
Rotate furniture and rugs to prevent uneven wear, control humidity to prevent mold, and teach household members simple care routines.
These wall maintenance steps save time and help preserve finish uniformity and color.
Troubleshooting: When Cleaning Reveals Paint Damage
When cleaning exposes flakes, stains, or uneven sheen, don’t panic — you can assess the damage quickly and decide whether a repair or a touch-up will save the finish.
Check adhesion by gently scraping a loose flake, compare color for paint fading, and blot stains to gauge depth.
If damage is superficial, clean, prime, and do precise wall touch ups; if widespread, consider repainting the whole wall for uniformity.
Trust small fixes to restore confidence.
- You deserve a wall that looks cared for.
- Small repairs relieve worry quickly.
- Restored paint lifts the whole room.
Frequently Asked Questions
Can I Use a Steam Cleaner on Painted Walls?
Yes — you can use a steam cleaner on painted walls, but you’ll need painted wall precautions: test a small area, use low settings, keep the nozzle moving. Steam cleaner benefits include sanitizing and removing grime without harsh chemicals.
Are Commercial Bathroom Cleaners Safe for Painted Finishes?
Yes — commercial bathroom cleaners can be safe for painted finishes if you test first, dilute as directed, wear gloves, guarantee ventilation, and avoid abrasive formulas; follow safety precautions to balance cleaner effectiveness with paint protection.
How Often Should Painted Walls Be Deep Cleaned Annually?
Think of your walls like a well-tended garden: you should deep clean painted walls about once or twice yearly. For wall cleaning frequency, follow paint maintenance tips—spot-clean monthly and deep-clean annually to preserve finish and vibrancy.
Will Scented Cleaning Products Damage Paint or Cause Discoloration?
Scented cleaners usually won’t damage paint if you test first and dilute properly, but harsh chemicals or dyes can shorten paint longevity; you should spot-test, rinse well, and avoid prolonged scrubbing to preserve finish.
Can Painters’ Caulk or Touch-Up Paint Fix Cleaning-Related Chips?
Yes — you can fix cleaning-related chips: you’ll use touch up techniques like feathering touch-up paint and careful caulk application to fill gaps, smooth edges, and blend seams so repairs look seamless and hold up over time.
Conclusion
You can clean painted walls without stripping paint—no harsh scrubbing or strong solvents required. Use soft cloths, a gentle sponge, and mild cleaners like diluted dish soap or baking-soda paste for scuffs. Test a small area first so you won’t risk visible damage. Imagine a labeled tray: “sponge, soap mix, microfibre, water” — follow that order and you’ll visibly restore walls without fading finish, keeping paint intact and looking refreshed.