What Type of Paint Is Best for Bathroom Walls
You should use a moisture-resistant, low- or zero-VOC acrylic-latex paint with a satin or semi-gloss finish for bathroom walls because it cleans easily, resists mildew, and dries faster than oil-based options. Prime any repaired or stained areas with a mildew-blocking primer first. In high-humidity or poorly ventilated spaces, choose a paint labeled mildew-resistant and run an exhaust fan when curing. Keep going to see testing, prep steps, and pro tips for long-lasting results.
Who This Guide Is For and How to Use It
Whether you’re repainting a tiny powder room or renovating a master bath, this guide helps you choose the right paint, finish, and prep techniques for moisture-prone spaces.
You’re a DIYer, renter, or pro seeking practical advice on paint types, sheen choices, and surface prep tailored to bathrooms. Use the quick-read sections for immediate decisions, deeper sections for planning, and product comparisons before you shop.
You’ll also find tips to coordinate bathroom decor and implement ventilation strategies that protect finishes. Follow the steps, skip what you don’t need, and refer back when evaluating durability, maintenance, or future touch-ups.
Quick Answer & 3-Step Decision Checklist
Quick answer: pick a semi-gloss or satin sheen and a moisture-resistant formula for bathroom walls.
Start by evaluating how much steam and splatter the room gets, then choose a durable, washable paint with mold inhibitors.
Finish by testing a small swatch to confirm look and performance before you commit.
Paint Sheen Choice
If you want bathroom walls that resist moisture, stand up to cleaning, and still look good, choosing the right paint sheen matters. Quick answer: use satin or semi-gloss for walls and trim—satin balances subtle shine with easy wiping; semi-gloss offers higher paint durability and scrubbability for high-traffic areas.
3-step checklist:
1) Assess surface: smooth walls benefit from satin to hide flaws; textured surfaces can handle higher sheen.
2) Prioritize cleanability vs. reflection: more sheen equals easier cleaning but more highlight.
3) Test a small area to confirm paint texture and visual comfort before committing.
Moisture-Resistant Formulas
Because bathrooms see lots of steam and splashes, pick a moisture-resistant paint formula to prevent peeling, mold, and staining.
Quick answer: choose a mildew-resistant acrylic or bathroom-specific latex and match it to your paint color and wall texture for best results.
Follow this 3-step decision checklist:
- Visualize glossy sheen beads on tile-adjacent walls after a shower.
- Imagine a satin finish hiding minor wall texture while shedding moisture.
- Picture a semi-gloss trim resisting steam near sinks and tubs.
Decide based on humidity level, existing wall texture, and desired paint color—test samples in the actual bathroom before committing.
Why Moisture Resistance Matters for Bathrooms
You’ll want moisture-resistant paint because it helps prevent mold growth in a humid bathroom environment. It also protects the paint finish from peeling and staining so your walls keep looking fresh.
That protection extends the life of the wall surface, saving you time and repair costs.
Preventing Mold Growth
When bathrooms trap steam and stay damp, mold can take hold within days, so choosing moisture-resistant paint helps you keep surfaces dry and clean. You’ll limit spores, protect finishes, and ease cleaning while considering color psychology to make the space feel fresher. Pick paints labeled mildew-resistant and low-VOC to reduce environmental impact.
- Smooth, glossy tiles shedding beads of water
- Matte paint resisting fuzzy dark spots along grout
- Sealed corners that won’t harbor damp
Apply proper ventilation, wipe wet surfaces, and use mold-inhibiting primers. That combo prevents outbreaks and keeps your bathroom healthy.
Protecting Paint Finish
Keeping mold at bay is a big part of preserving your bathroom’s paint, but moisture resistance goes further—protecting color, sheen, and the coating itself from peeling, blistering, and staining.
You’ll want a finish that resists water and allows easy cleaning so humidity doesn’t dull your chosen hues or alter color psychology effects. Satin or semi-gloss are smart options: they reflect light predictably and handle scrubbing without losing sheen.
Consider paint texture too; smoother surfaces repel moisture better and discourage mildew cling. Choose formulations labeled for bathrooms or high-humidity areas to maintain appearance and minimize frequent repainting.
Extending Wall Durability
Because bathrooms see constant steam, splashes, and sudden temperature swings, choosing moisture-resistant paint is one of the smartest steps you can take to extend wall durability. You’ll protect drywall and trim from peeling, mold, and staining while preserving color psychology choices that set mood.
Select a high-quality semi-gloss or satin and prep surfaces thoroughly; sealing joints and priming porous areas prevents moisture entry. Apply paint with steady brush techniques to avoid streaks and guarantee even coverage.
Visualize results:
- A glossy, wipeable wall that reflects soft light
- Crisp trim resisting mildew
- Smooth, uniform color that lasts
How to Check Wall Moisture Before Painting
Want to avoid paint failure and mold? Check wall moisture before you pick paint color or tackle wall texture. Start by feeling for dampness and discoloration; musty smells signal excess humidity.
Use a handheld moisture meter on multiple spots—record readings and compare to manufacturer limits (usually under 12–15% for drywall). If you don’t have a meter, tape a plastic sheet over a square foot for 24 hours; condensation means moisture is trapped.
Test near plumbing, corners, and behind fixtures. Only proceed when readings are consistently low and surfaces are dry to the touch to assure paint adhesion and longevity.
Fixing Mold Stains and Damaged Drywall First
Before you paint, tackle mold stains and any damaged drywall so the finish will stick and the room will stay healthy. You’ll remove stains, dry the area, and decide if drywall repair or replacement is needed.
Clean with a proper solution, wear protection, and let surfaces fully dry before moving on. Visualize the steps:
- Scrub dark mold patches until the surface lightens.
- Cut out softened drywall and replace the section.
- Sand seams smooth, then prime repaired spots.
Addressing mold prevention and completing drywall repair now guarantees paint bonds to a clean, stable surface.
Do You Need a Mildew-Resistant Primer?
Now that you’ve treated mold and repaired drywall, decide whether a mildew-resistant primer will help your bathroom paint last. You’ll want one if humidity’s high or ventilation’s poor; it aids mold prevention and improves adhesion. During Primer application, choose a product labeled mildew-resistant and follow drying times. Benefits: blocks stains, evens surface, adds protection. Quick checklist:
| Situation | Benefit | Action |
|---|---|---|
| High humidity | Reduces mildew | Use resistant primer |
| Stained drywall | Seals stains | Spot-prime first |
| Poor ventilation | Extra protection | Pair with exhaust fan |
A primer isn’t mandatory, but it’s smart insurance.
How Primer Type Affects Bathroom Paint Performance
Choose a primer based on the problems your bathroom faces: moisture-blocking primers seal out dampness and protect paint from peeling.
Stain-blocking primers stop tannin, mold stains, and water marks from bleeding through.
You’ll get longer-lasting finish and fewer touch-ups when the primer matches the issue.
I’ll explain when to use each type and how they affect topcoat performance.
Moisture-Blocking Primers
Because bathrooms stay humid and get splashed, primers that block moisture make a big difference in how long your paint lasts and how well it resists mildew. You’ll choose primers that seal porous surfaces, prevent peeling, and improve paint adhesion so paint durability rises.
Look for eco friendly options with low VOCs that still form a water-resistant barrier.
Picture results:
- A smooth, sealed wall after a quick coat
- No blistering where steam hits frequently
- Paint clinging firmly around shower edges
Apply per instructions, let cure fully, and then topcoat with a mildew-resistant bathroom paint for best performance.
Stain-Blocking Primers
Moisture-blocking primers handle dampness, but they won’t stop stains from water, smoke, or previous paint bleeding — that’s where stain-blocking primers come in. You’ll choose a primer formulated to seal tannins, rust, and mildew stains so they don’t bleed through your finish.
Prioritize stain resistance ratings and read labels for oil- or shellac-based options when tackling severe discoloration. Check primer compatibility with your chosen bathroom paint—latex paints need different adhesion than oil-based finishes.
Apply per instructions, sanding between coats if required. Proper primer selection guarantees a clean, durable topcoat that resists spotting and reduces rework.
Acrylic-Latex vs Oil-Based Bathroom Paint: Which to Pick?
When you’re picking paint for a bathroom, the main choice usually comes down to acrylic-latex or oil-based formulas, and each has distinct pros and cons that affect durability, drying time, and cleanup.
You’ll favor acrylic-latex for faster drying, easier cleanup, lower VOCs, and eco-friendly certifications.
Oil-based wins on hardness and stain resistance but needs solvent cleanup and longer cure times.
Consider color psychology for mood and light reflection when choosing finish.
Imagine finishes like:
- Satin acrylic bouncing soft light in a small shower
- Gloss oil highlighting trim details
- Eggshell acrylic smoothing out wall imperfections
Best Paint Formulations for Small vs Large Bathrooms
For small bathrooms, you’ll want formulations that reflect light and resist moisture to make the space feel larger and stay durable.
In larger bathrooms, you can prioritize rich sheens and more breathable finishes that handle higher humidity without trapping moisture.
Let’s compare specific paints and finishes that suit each room size so you can pick the best fit.
Small Bathroom Strategies
Wondering how paint choice can make a tiny bathroom feel larger and stay durable? You’ll want moisture-resistant eggshell or satin finishes that reflect light without showing grime, supporting your bathroom decor and lighting design.
Lighter, warm neutrals expand space; a single accent wall adds depth without clutter. Consider semi-gloss for trim to resist water.
- Pale warm beige that bounces light
- Narrow vertical stripes to lift the ceiling
- Soft blue-gray to calm and widen sightlines
Choose washable, mildew-resistant formulas and pair paint with bright, layered lighting to maximize perceived space and longevity.
Large Bathroom Choices
Although large bathrooms give you more freedom, you still want paint that balances durability, moisture resistance, and the look you’re after; choose satin or semi-gloss for walls that need frequent cleaning and eggshell for areas with less splash.
In a roomy bath you can use deeper hues—paint color psychology matters—yet prioritize trim and ceiling finishes that resist mildew.
Make sure bathroom ventilation is strong; even durable paints fail if humidity lingers.
Consider washable formulas in high-traffic zones and lower-sheen options where you want softness.
Test samples under your lighting to confirm how color reads at different times.
Low-VOC and Zero-VOC Bathroom Paints
If you’re worried about indoor air quality, choosing low-VOC or zero-VOC paint for your bathroom can make a big difference. You’ll reduce VOC emission and still get durable coverage suited for moisture-prone spaces.
Look for eco friendly options certified by reputable programs and check labels for actual VOC content rather than marketing terms. You can expect easier breathing after painting and fewer lingering odors.
- Soft, fresh color that doesn’t overpower the room
- Clean tub surround without chemical smell lingering
- Light steam carrying less paint odor
Apply like regular paint, ventilate, and enjoy safer air.
Mold- and Mildew-Resistant Paints: Do They Work?
When you’re trying to keep bathroom surfaces free of black spots and slippery patches, mold- and mildew-resistant paints can help—but they aren’t a guaranteed cure. You’ll reduce surface growth because these paints inhibit spores and often include biocides, improving paint durability in humid zones.
Still, they work best with proper ventilation, cleaning, and fixing leaks. If you’re sensitive to additives, look for eco friendly alternatives that use safer mildewcides or natural antimicrobial agents.
Choose resistance as one part of a strategy: maintenance, moisture control, and substrate prep determine long-term success more than paint alone.
Choosing the Right Paint Sheen for Bathrooms
Because bathroom conditions demand durability and moisture resistance, picking the right paint sheen matters as much as color. You’ll balance washability, gloss, and hiding power while considering eco-friendly finishes and paint manufacturer reputation. Choose a sheen that fits the room’s use and maintenance habits.
Because bathrooms need moisture-resistant durability, pick a sheen that balances washability, gloss, and hiding power.
- Soft satin that wipes clean without glaring reflections.
- Low-luster eggshell hiding imperfections yet resisting damp.
- Matte for low-splash zones, offering a smooth, modern look.
Ask about VOC levels, warranties, and real-world reviews from the paint manufacturer. Test samples on wet walls to confirm appearance and performance before committing.
What Semi-Gloss Offers for High-Moisture Spaces
After weighing sheen choices like satin and eggshell for different bathroom zones, you’ll find semi-gloss stands out for areas that see frequent moisture and cleaning.
You’ll notice semi-gloss benefits immediately: a smooth, reflective finish that repels water droplets and resists staining. That moisture resistance makes scrubbing grime and mold easier without dulling the surface.
Use it around tubs, showers, and sinks where steam and splashes concentrate. It’s tougher than flat or eggshell, so you can clean spots often.
Keep it off large wall expanses if you want to hide imperfections; semi-gloss highlights flaws.
When Satin Is a Better Choice Than Semi-Gloss
If your bathroom has only moderate humidity, satin can give you the moisture resistance you need without the high shine of semi-gloss.
You’ll get a softer, more forgiving sheen that hides minor imperfections and reads warmer under most lighting.
Choose satin when you want durability with a subtler look.
When Humidity Is Moderate
When your bathroom sees regular showers but not constant steam, satin finishes hit the sweet spot between moisture resistance and a softer look. They stand up to splashes and wipe clean without the shiny, plastic feel of semi-gloss.
You’ll appreciate satin when you use humidity control and simple ventilation strategies to keep levels moderate. It resists mildew better than flat paint and reads warmer than high gloss.
Imagine how it performs in daily life:
- Soft sheen catching morning light on painted trim
- Water beads sliding off painted walls after a quick wipe
- Subtle texture hiding minor imperfections
Choose satin for balanced durability and warmth.
For Subtle Sheen Needs
Because satin gives you a soft, low-luster finish that still wipes clean, it’s the go-to if you want moisture resistance without the overt shine of semi-gloss. You’ll prefer satin when color psychology calls for warmth or calm—its gentle sheen deepens hues without glare. Satin hides minor imperfections better, so paint texture looks natural. It resists mildew and cleans easily, but won’t spotlight flaws like semi-gloss. Use satin on walls for a balanced, cozy bathroom that’s practical. Compare options below to decide quickly.
| Feature | Satin |
|---|---|
| Sheen level | Low-luster |
| Durability | Good |
| Cleaning | Easy |
| Aesthetic | Soft warmth |
Flat and Matte Finishes: When to Avoid Them
Although flat and matte paints lend a soft, modern look, you should avoid them in bathrooms with poor ventilation or high-traffic areas where moisture and stains are common.
Flat and matte paints look modern but avoid them in damp, high-traffic bathrooms—choose tougher sheens for durability.
You’ll find Flat finishes and Matte textures absorb splashes and scuffs, making cleaning harder and promoting mildew. Choose tougher sheens if you can’t control humidity.
- damp towels pressed against a low-vent wall
- toothpaste splatter near the sink that won’t wipe away
- kids’ fingerprints and soap scum on lower walls
If maintenance or moisture is an issue, pick satin or semi-gloss for durability and easier cleaning.
How Sheen Affects Color Perception in Bathrooms
If you pick a glossy finish, colors will read brighter and more saturated, while flatter sheens mute hues and hide contrasts, so consider how light and reflections will change the shade you expect.
You’ll notice sheen influence immediately: high gloss bounces light, exaggerating highlights and making small bathrooms feel livelier, while eggshell or satin softens progressions and preserves subtler tones.
For accurate color perception, test swatches on multiple walls and view them at different times of day under your bathroom lighting. That way you’ll choose a sheen that complements fixtures, balances natural and artificial light, and delivers the mood you want.
Paints That Hide Imperfections vs Highlight Them
You’ll notice sheen matters a lot — flat and matte finishes hide bumps and flaws while glossy paints make them pop.
Color and texture also play a role: darker, textured paints mask imperfections better than light, smooth ones.
Still, proper surface prep is key, because no finish can fully hide a poorly prepped wall.
Sheen Matters Significantly
Since bathroom walls deal with moisture, scrubbing, and occasional dings, the paint sheen you pick will change how those imperfections look every day. You’ll notice glossier sheens reflect light and spotlight bumps, while flatter sheens mask texture and minor flaws.
Consider durability versus camouflage: semi-gloss cleans well but reveals, eggshell hides more yet still wipes, matte hides most but can be less washable.
Think about Color psychology when selecting finish to influence mood, and seek eco friendly options to limit odors.
Imagine surfaces as:
- A glossy mirror catching light
- A soft eggshell hiding small flaws
- A matte blanket smoothing sight
Color And Texture Effects
Although color and texture seem like small choices, they change how bathroom walls show wear and light. You’ll use color psychology to set mood—soft neutrals hide flaws, bold hues reveal character. Matte finishes and subtle Texture enhancement scatter light, masking imperfections; satin or gloss reflect more, highlighting ripples or brush marks. Decide whether you want walls to disappear or to stand out, then pick finish and tone accordingly. Quick reference table:
| Effect | Best Choice | Result |
|---|---|---|
| Hide flaws | Matte + light neutral | Soft, forgiving look |
| Highlight details | Gloss + saturated color | Sharp, lively appearance |
| Balance | Satin + mid-tone | Moderate sheen, subtle depth |
Surface Prep Importance
When you want walls to flatter rather than betray flaws, surface prep matters as much as paint choice. You’ll decide whether to mask or reveal imperfections by sanding, filling, and priming.
Consider how color psychology influences perception: darker tones can hide shadows, while light hues spotlight texture. Choose paint texture deliberately—matte hides minor bumps, eggshell or satin shows more detail but cleans easier.
- Smooth, primed plaster reflecting soft light
- Subtle stipple breaking up faint cracks
- Satin sheen catching practical highlights
Prep transforms substrate so your paint performs, whether you hide flaws or celebrate character.
Painting Tile and Trim: Product Picks
If you’re planning to paint tile and trim, pick products made specifically for high-moisture surfaces and frequent cleaning. Choose a mildew-resistant primer and an epoxy or acrylic polyurethane topcoat for durability.
For trim, water-based enamel offers quick dry times and low VOCs; oil-modified enamel provides a tougher finish but needs ventilation. Match sheen to function—semi-gloss hides moisture and wipes clean.
Consider color psychology when selecting contrasts: crisp white trims feel fresh, deep hues add drama.
If you’re restoring period homes, pick palettes and sheens that respect historical styles while using modern, moisture-tolerant formulations.
Preparing Bathroom Surfaces: Cleaning and Sanding
Before you paint, you’ll need to strip away soap scum and mildew, fix chips or cracks, and smooth rough patches so the surface will take primer and paint evenly.
Use appropriate cleaners and filler, then follow proper sanding steps—starting coarse and finishing fine—to create a consistent profile.
Doing this prep will help your paint last and look professional.
Surface Cleaning Essentials
Although it might seem tedious, you’ll get better paint adhesion and a smoother finish by thoroughly cleaning and lightly sanding bathroom walls first.
For effective surface cleaning during paint preparation, remove soap scum, mildew, and oils with a mildew cleaner or trisodium phosphate alternative; rinse and let dry.
Lightly sand glossy areas to dull the sheen—don’t over-sand. Wipe away dust with a tack cloth before priming.
- streak-free surfaces after degreasing
- faint sanding dust brushed away
- clean corners and grout lines free of residue
This prep saves time later and helps your paint last in humid bathroom conditions.
Repairing And Smoothing
Wondering how to fix dents, holes, and rough spots so your paint goes on smooth and lasts? You’ll patch holes with a lightweight spackle, press it flush, and let it dry. For larger gouges, use a setting compound, then feather edges for an even surface.
Remove loose paint and clean residues so fillers bond. After filling, check the surface for bumps and valleys and address them before priming.
Keep decorative techniques in mind—stenciling or texture adds interest, but only after surfaces are truly smooth. Proper prep guarantees consistent paint texture and a durable, professional-looking bathroom finish.
Proper Sanding Techniques
Once you’ve cleaned and patched the walls, sand carefully to create a smooth, consistent surface that helps primer and paint adhere evenly. Start with 120–150 grit for high spots, then finish with 220 for a uniform feel; that shift evens out wall textures and improves paint durability. Sand in circles or with the grain, keep pressure light, and vacuum dust frequently. Protect fixtures and wear a mask.
- Smooth out bumps until the surface feels even under your palm.
- Feather edges of patches so gradual change vanishes.
- Check corners and trim where texture differs and blend gently.
How Many Coats Do Bathroom Walls Need?
When you’re painting bathroom walls, plan for at least two coats so you get even coverage and good moisture protection; a primer counts as one coat if it’s tinted to match the topcoat.
You’ll usually apply two full coats of bathroom-grade paint—sometimes a third for deep colors or high-traffic areas. If you use a tinted primer, you’ll save time and improve adhesion.
Choose finishes resistant to mildew and wipeable surfaces. Factor in color psychology when picking shades; lighter hues need fewer coats.
If you prefer eco-friendly options, select low-VOC paints that still offer solid coverage and durability.
Drying and Curing Times: Scheduling Your Project
When planning your bathroom paint project, remember that drying time depends a lot on humidity—high moisture can double or triple how long paint feels dry.
You’ll also need to wait the full cure time before heavy use or reinstalling fixtures, since cured paint is what resists moisture and stains.
Check the manufacturer’s times and factor in ventilation or a dehumidifier to keep your schedule on track.
Drying Time vs. Humidity
Although paint can feel dry to the touch within an hour, higher humidity slows solvent evaporation and can extend both drying and full curing times considerably, so plan schedules and ventilation accordingly.
You’ll want to control moisture to protect paint durability and avoid accelerated color fading; use dehumidifiers, run exhaust fans, and paint on drier days.
Consider these images as you plan:
- A steamy shower fog clinging to tacky paint
- A dehumidifier quietly pulling moisture from the air
- A painted wall left to rest in a well-ventilated room
Monitor humidity; slower drying increases risk of runs and tackiness.
Cure Time Before Use
Humidity affects not just how quickly paint feels dry but also how long you should wait before using the room. Full curing can take days to weeks depending on the paint type and conditions. You’ll plan around cure time: latex may be touch-dry in hours but needs up to two weeks for full hardness. Oil-based varieties cure slower.
Reduce application delay by painting when humidity is low and ventilation is strong. After the final coat, avoid hanging towels, heavy traffic, or cleaning for the recommended period on the label. If you’re unsure, wait extra time to prevent marks, peeling, or mildew.
Ventilation’s Role in Paint Durability and Finish Choice
Because bathrooms trap moisture, proper ventilation directly affects how long your paint lasts and what finish you should pick. You’ll want reliable air circulation and effective ventilation systems to prevent peeling, mold, and discoloration.
Choose higher-sheen finishes where moisture lingers and matte where airflow removes damp fast. Install or upgrade exhaust fans, run them during and after showers, and consider a timer or humidity sensor.
- A steamy mirror clearing as fan hums
- Paint clinging smooth where air sweeps
- Dark spots failing to form with steady extraction
Good ventilation lets your paint perform and stay fresh longer.
Best Paint Brands for Bathrooms at Different Budgets
When you pick paint for a bathroom, focus on mildew-resistant formulas and durable sheens that fit your budget. Premium lines give longer-lasting protection and smoother finishes. Mid-range options balance performance and cost. Budget paints can work if you prioritize semi-gloss or satin and prep thoroughly.
Focus on mildew-resistant paints and durable sheens—premium for performance, mid-range for value, budget if you prep well.
For premium, consider Benjamin Moore Aura or Sherwin-Williams Emerald for superior resistance and color fidelity. They pair well with strong ventilation systems.
Mid-range picks like Behr Premium Plus or Valspar offer solid mildew resistance and value.
On a tight budget, choose reputable store brands but prioritize prep, primer, and Color psychology to match mood.
Cost vs Lifespan: Choosing Budget-Friendly Paint
You’ll want to weigh upfront price against how long the paint will actually last in a moist bathroom.
Think about durability factors like mildew resistance and how often you’ll need to repaint, then compare total cost over time.
That way you can pick a paint that saves money without sacrificing performance.
Budget Vs. Durability
Although a higher-priced bathroom paint often promises longer wear, stretching your budget can still be smart if you match cost to expected lifespan and usage. You’ll balance immediate savings against replacement frequency, considering color psychology to pick hues that tolerate fading and paint texture for scrubbability.
Choose where to spend: high-traffic wet zones get durable finishes; low-impact areas can use budget-friendly options. Visualize outcomes:
- A glossy, wipeable strip around the sink resisting soap scum.
- Soft matte walls in a guest bath needing occasional touch-ups.
- Trim with semi-gloss that hides dings and cleans easily.
Decide based on use, not sticker price.
Long-Term Cost Analysis
How long do you want your bathroom paint to last before you factor cost? You’ll weigh upfront price against lifespan: premium paints resist moisture, mold, and scuffs, so you repaint less often and save labor and product long-term.
Calculate cost per year by dividing purchase plus prep by expected years. Don’t forget indirect savings: easier cleaning and fewer repairs.
Choose finishes that suit humidity and maintain color psychology—calming hues may need less frequent updates than trendy tones.
Also consider texture contrast for high-touch areas; durable semi-gloss trims cost more but extend interval between full repaints, improving value.
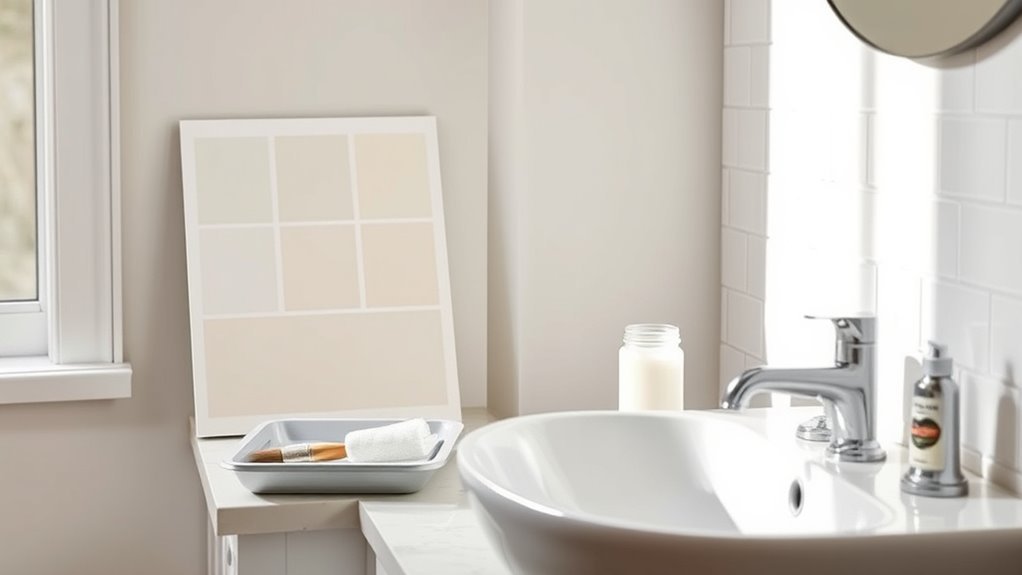
Test-Swatch Checklist: What to Try Before You Buy
Before you commit to a full can, test a few swatches on different walls and under the bathroom’s real lighting so you can see how color, sheens, and coverage actually perform in place.
Before buying a full can, test swatches on different walls to see true color and finish.
Use small panels to evaluate color psychology effects and paint texture up close; note how tones shift with morning and artificial light.
Track drying time, adhesion, and washability. Label each swatch with brand, sheen, and date.
Compare against fixtures and tile before deciding.
- A glossy swatch near the shower showing reflections
- A satin patch by the vanity showing fingerprints
- A matte square on the ceiling showing breath marks
Color Choices for Humid Spaces and Bathroom Lighting
When you’re choosing paint for a humid bathroom, pick colors that both withstand moisture and work with the room’s light. You’ll favor mildew-resistant finishes, but color choice matters: cool blues and greens feel fresh and calm, while warm neutrals add cozy contrast.
Use color psychology to influence mood—soft tones relax, brighter accents energize. Test swatches at different times to see lighting effects on hue and saturation; artificial bulbs shift warmth, natural light changes throughout the day.
Balance ceiling and trim shades to reflect light upward and keep the space feeling open despite humidity.
Maintenance Tips to Keep Bathroom Paint Looking New
Because bathrooms stay damp, you’ll need a short maintenance routine to keep paint looking fresh. Wipe splashes quickly, run fans after showers, and avoid abrasive cleaners that thin the finish. Remember how color psychology affects perceived cleanliness—lighter hues show grime sooner, so monitor them more often.
Check for peeling that indicates wrong paint thickness or ventilation problems. Do a monthly quick inspection and deep clean every quarter.
- Steam on mirrors fogging pale blue walls after hot showers
- Soap scum streaks on lower walls near the sink
- Tiny damp spots near grout lines signaling hidden humidity
Stick to gentle cleansers and prompt drying.
Quick Repairs: Touching Up Chips and Stains
After your routine inspections catch steam spots, soap scum, or tiny damp patches, you’ll want a simple plan for touching up chips and stains so small flaws don’t become big problems. You’ll clean, sand lightly, and use matching finish and sheen. Consider color psychology when choosing touch-up spots—lighter trims hide marks; accents can disguise repairs. Match paint texture and apply thin layers, feathering edges. Keep labeled small containers of mixed paint for consistency.
| Tool | Action | Tip |
|---|---|---|
| Cleaner | Remove residue | Use mild detergent |
| Sandpaper | Smooth edges | Fine grit only |
| Brush | Apply paint | Feather outward |
| Container | Store mix | Label date and batch |
When to Repaint vs Recoat the Finish
If you’re seeing widespread wear, peeling, or persistent stains that touch-ups can’t hide, it’s time to decide between a full repaint or simply recoating the finish. You’ll choose repaint when substrate damage, strong odors, or a color change driven by color psychology demands full coverage.
Recoating works if the film is sound and you want a fresh sheen or to highlight decorative techniques like stenciling. Consider moisture-prone areas and prep needs.
Visualize outcomes:
- Matte walls refreshed with a thin satin recoat
- Bold new hue replacing faded pastels
- Subtle texture preserved by targeted recoating
Match scope to condition and goal.
Eco-Friendly Paints and Certifications to Watch
When you’re choosing paint for a bathroom, prioritize low-emission, responsibly sourced options that protect indoor air quality and reduce environmental impact. Look for Eco certifications like Green Seal, GREENGUARD, and EU Ecolabel; they verify low VOCs, minimal off-gassing, and safer manufacturing.
Check product labels for responsibly sourced binders and Natural pigments, which lower chemical load and often come from renewable materials. Also confirm third-party testing for mold resistance and moisture tolerance suited for bathrooms.
You’ll balance performance with sustainability by picking certified low-emission paints, reading technical datasheets, and choosing reputable brands with transparent ingredient lists.
Specialty Options: Paints for Steam Rooms and Saunas
Because steam rooms and saunas expose surfaces to extreme heat, humidity, and rapid temperature changes, you’ll need specialty coatings designed for high-moisture, high-temperature environments. You’ll choose Steam room paints and sauna wall coatings formulated to resist mold, peeling, and thermal shock.
Look for epoxy, silicone-modified, or high-temperature acrylics and follow ventilation and substrate-prep guidelines.
Picture how each finish performs:
- Smooth epoxy sealing ceramic tile grout, shedding moisture like glass.
- Breathable silicone-modified paint allowing steam to escape without trapping water.
- High-temp acrylic on wooden sauna walls, maintaining color despite heat.
Apply per manufacturer specs and replace if failure appears.
Common Mistakes Homeowners Make Choosing Paint
Although you might think any paint labeled “bathroom” will do, homeowners often grab the wrong product, underprepare surfaces, or ignore ventilation needs—mistakes that lead to peeling, mold, and wasted money. You’ll want mildew-resistant, washable finishes and proper priming. Don’t pick low-VOC solely for label appeal—research eco friendly options that still resist humidity. Consider Color psychology for small spaces; darker hues trap moisture visually. Avoid skipping caulk or sanding; poor prep kills longevity. Consult product specs, test swatches, and ventilate during application to protect results and health.
| Mistake | Fix |
|---|---|
| Wrong finish | Choose semi-gloss |
| Skipping prep | Clean and prime |
| Ignoring vent | Install fan |
| Cheap paint | Buy quality |
| Bad color | Test swatch |
Professional Painter Tips for High-Humidity Bathrooms
If you’re tackling a high-humidity bathroom, plan your approach around moisture control and durable finishes so your paint lasts and stays mold-free. You’ll choose mildew-resistant, semi-gloss or satin finishes and prime with a moisture-blocking primer.
Consider color psychology to make the space feel fresh or cozy, and pick a paint texture that hides minor imperfections without trapping moisture. Ventilation and proper curing matter—run the fan and wait recommended dry times.
Visualize the final room with these cues:
- Bright, reflective surfaces that expand the space
- Soft, warm tones for comfort
- Smooth, wipeable texture for easy cleaning
Behavioral Q&A: Readers’ Next Questions Answered
Wondering what readers usually ask next? You’ll want to know which finishes hide flaws, how color psychology affects mood in small bathrooms, and whether satin or semi-gloss handles steam better. Ask about mildew-resistant formulas, proper primers, and maintenance routines you can stick to.
You’ll also question how wall textures change sheen and cleaning ease, and if textured walls trap moisture more. Expect queries on ventilation’s role, paint longevity, and touch-up tips that blend seamlessly.
If budget limits choices, you’ll seek cost-effective, durable options that don’t sacrifice appearance or performance.
Decision Flowchart: Pick the Right Bathroom Paint
You’ve got the questions—now let’s turn them into a clear decision path you can follow. Start with humidity exposure: high? Pick mold-resistant finishes. Next consider style and Color psychology—do you want calming blues or energizing yellows? Finally check health and VOCs; choose brands with eco-friendly ingredients.
- A small, steamy shower: satin or semi-gloss for washability.
- A large, well-ventilated bath: matte for softness and subtle texture.
- A guest powder room: eggshell for low sheen and easy cleaning.
Follow steps in order and you’ll pick durable, beautiful paint that fits mood and safety.
Frequently Asked Questions
Can Bathroom Ceiling Paint Differ From Wall Paint in Formulation?
Yes — you can choose different formulations; Bathroom paint formulations vary so Ceiling wall differences matter. You’ll pick mildew-resistant, semi-gloss or satin for walls and flatter, moisture-tolerant ceiling paint formulated to reduce drips and hide imperfections.
Can Paint Prevent Condensation on Cold Bathroom Walls?
No, paint can’t stop condensation on cold bathroom walls entirely, but using moisture resistance and paint durability-focused coatings can reduce surface dampness and resist mold; you’ll still need ventilation and insulation to control actual condensation.
Are Tinting Additives Safe for Mildew-Resistant Paints?
Yes — if you’re careful. Coincidentally, when colors match your mood, mildew inhibitors can still work, but you’ll check paint compatibility first; tinting additives may reduce resistance, so follow manufacturer guidance and test a small area.
How Do Decorators Handle Painted Wallpaper in Bathrooms?
You strip or prime painted wallpaper, then sand and apply moisture-resistant primer before decorating; you’ll use faux finishes or decorative murals sparingly, sealing with a durable clear coat to protect against humidity and guarantee long-lasting results.
Can You Paint Over Lead-Based Bathroom Paint Safely?
You can’t safely paint over lead-based bathroom paint without precautions; lead paint hazards require testing and containment. You should hire pros or use safe removal techniques like HEPA vacuums, wet scraping, and proper disposal to avoid contamination.
Conclusion
Think of your bathroom as a lighthouse: the right paint is the glass that keeps moisture and mold at bay so your sanctuary keeps shining. Choose high-moisture, mold-resistant paint after checking and fixing any damp or damaged walls. Avoid common shortcuts, follow pro tips for ventilation and prep, and you’ll steer clear of problems. With the right choices, your bathroom will stay bright, protected, and welcoming for years to come.