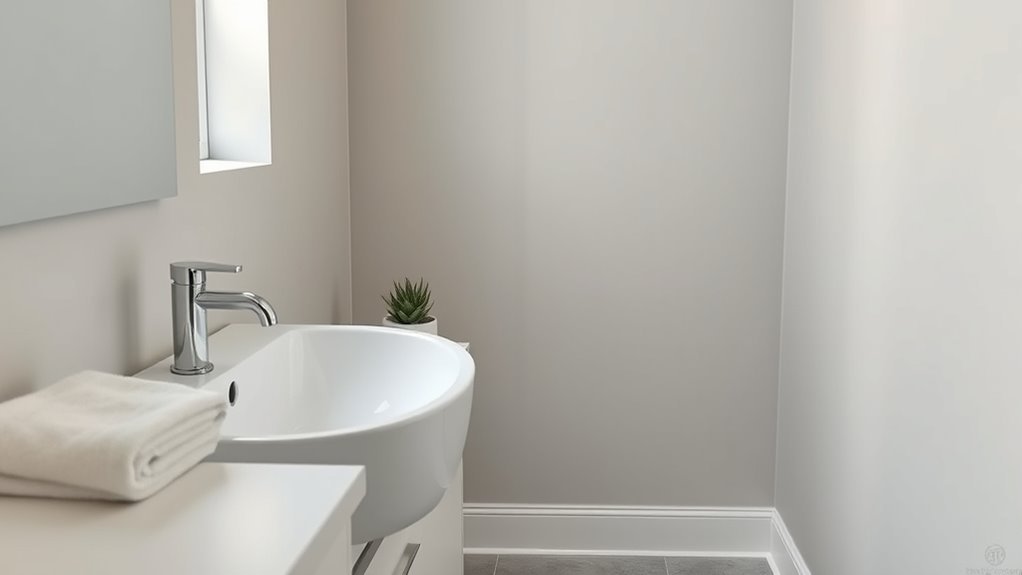
What Type of Paint to Use on Bathroom Walls
You should pick a high-quality acrylic-latex paint labeled mildew- or moisture-resistant, preferably low- or zero-VOC, since bathrooms trap humidity and mold risks. Choose a satin or semi-gloss sheen for easier cleaning and better moisture protection; use eggshell or matte only in well-ventilated, low-moisture spots. Prep surfaces: clean, dry, sand, and prime with a moisture-blocking primer, and add factory mildewcide or an approved additive if needed — continue for tips on testing, colors, and tricky surfaces.
Quick Answer: Best Paint for Bathroom Walls
When you’re choosing paint for bathroom walls, pick a finish and formula that resist moisture and mildew—satin or semi-gloss water-based acrylics are the best all-around choice because they dry hard, clean easily, and withstand humidity.
For a quick answer, choose a high-quality acrylic latex with mildew-resistant additives and low-VOC or zero-VOC labels so you get durability without toxic fumes.
Match sheen to traffic and cleaning needs; satin hides imperfections better than gloss.
Follow current color trends if you want a modern look, but balance bolder choices with neutral trim.
Consider eco-friendly options to reduce environmental impact.
Why Moisture Resistance Matters in Bathrooms
You’ll want moisture-resistant paint because it helps prevent mold and mildew from taking hold on bathroom surfaces.
It also keeps your paint from peeling or blistering when humidity spikes. That protects indoor air quality and keeps the room healthier for you and your family.
Preventing Mold And Mildew
Because bathrooms stay humid and warm, mold and mildew can take hold quickly unless you choose moisture-resistant paint and keep ventilation strong.
You should prioritize bathroom ventilation—use exhaust fans, open windows, and run fans during and after showers to cut humidity.
Select mold resistant coatings formulated for high-moisture spaces; they contain antimicrobials that inhibit growth on the finish.
Clean surfaces regularly with mildew-safe cleaners, fix leaks promptly, and dry wet areas after use.
For added protection, repaint with high-quality semi-gloss or satin mildew-resistant paint every few years where moisture is persistent to maintain a sanitary surface.
Protecting Paint From Peeling
If moisture gets behind your bathroom paint, it can lift the finish and cause peeling, so choosing moisture-resistant products and managing humidity is critical to keeping walls intact. You should pick paints labeled for high humidity and prep surfaces thoroughly to help adhesion.
Consider color psychology when selecting shades—lighter hues hide flaws and reflect light, reducing perceived dampness. Compare options in paint brand comparisons for mildew inhibitors and warranty details.
Simple steps protect your finish:
- Use satin or semi-gloss finishes for moisture resistance
- Prime with a stain-blocking primer
- Guarantee proper ventilation and quick repairs
- Clean gently to avoid abrading the film
Maintaining Indoor Air Quality
When moisture stays trapped in your bathroom, it fuels mold and mildew that harm indoor air quality and can trigger allergies or respiratory issues. You should choose moisture-resistant paint to limit spores and make cleaning easier. Combine ventilation, a dehumidifier, and regular wiping to keep surfaces dry. Consider indoor plants for minor humidity control and natural air filtering, and use air purifiers if allergies persist. Below is a quick care checklist:
| Action | Benefit |
|---|---|
| Moisture-resistant paint | Reduces mold growth |
| Vent fan use | Improves ventilation |
| Wipe tiles | Removes residue |
| Indoor plants | Natural filtering |
| Air purifiers | Captures allergens |
What to Look For: Key Paint Properties for Bathrooms
Though bathrooms face unique challenges—high humidity, frequent splashes, and cleaning—you can choose paint that stands up to them. Pick mildew-resistant, washable latex for durability and easy maintenance.
Consider low-VOC or eco-friendly formulations to protect indoor air and align with color psychology choices that promote calm or energy. Look for paints labeled as mold-resistant if moisture is persistent.
Prioritize adhesion and stain resistance so the finish lasts through scrubbing. Balance function with finish selection later.
Key properties to check:
- Moisture and mildew resistance
- Scrubbability and stain resistance
- Low VOC / eco-friendly formulations
- Good adhesion and durability
How Paint Sheen Affects Mildew and Cleaning
You’ll notice paint sheen changes how moisture and mildew behave on bathroom walls, with higher sheens shedding water better than flat finishes.
That smoother surface also makes scrubbing and wiping easier, so stains and soap scum come off with less effort.
We’ll compare common sheen levels so you can pick the right balance of mildew resistance and cleanability.
Sheen Impact On Mildew
If moisture’s a constant in your bathroom, the paint’s sheen will affect how easily mildew takes hold and how simple cleanup will be. You’ll favor higher-sheen finishes because they resist moisture penetration and discourage mildew growth; they also let you wipe surfaces more effectively.
Consider color psychology when choosing shades—lighter hues show less spotting and feel fresher.
If you want eco-friendly options, pick low-VOC semi-gloss or satin formulas with mildewcide additives.
Points to weigh:
- Sheen level and moisture resistance
- Surface porosity after painting
- Compatibility with mildewcide additives
- Long-term durability against damp conditions
Cleaning Ease By Sheen
Having chosen a higher-sheen finish to deter mildew, you’ll also notice it makes cleaning far easier—glossy or semi-gloss paints create a smoother, less porous surface that resists stains and lets you wipe away soap scum and mold spores with a damp cloth or mild cleaner.
You’ll prefer these sheens in high-moisture zones because they reduce scrubbing and extend paint life. Balance practicality with color psychology to keep bathrooms bright and calming while choosing durable finishes.
If you want eco-friendly options, look for low-VOC, mildew-resistant formulations in satin to semi-gloss sheens that simplify maintenance.
Matte vs Eggshell vs Satin: Which Sheen to Choose
When deciding between matte, eggshell, and satin for your bathroom walls, focus on how each sheen balances appearance and practicality.
You’ll pick matte for muted color palettes and to hide flaws; it gives a soft paint texture but isn’t great with moisture.
Eggshell offers subtle luster, easier cleaning, and works for moderate-traffic baths.
Satin boosts durability and wipes clean well while keeping a gentle sheen that flatters tile and fixtures.
- Matte: hides imperfections, low sheen
- Eggshell: versatile, moderate durability
- Satin: durable, wipeable
Choose based on humidity, traffic, and finish preference.
Why Semi-Gloss Is Best for Trim and Shower Surrounds
You’ll want semi-gloss on trim and shower surrounds because it stands up to moisture and wear far better than flatter sheens. Its smooth, washable surface makes cleanup quick after soap scum or splashes.
Plus, the subtle shine sharpens trim lines for a crisp, finished look.
Durable Moisture Resistance
Why choose semi-gloss for trim and shower surrounds? You want durable moisture resistance that stands up to steam, splashes, and frequent use while keeping edges crisp and colors true under varied bathroom lighting and considering color psychology.
Semi-gloss creates a protective, slightly reflective surface that resists water penetration and mold.
- Sheds water quickly, reducing swelling and rot risk
- Resists mildew growth when cleaned regularly
- Holds up to scrubbing without wearing thin
- Highlights trim lines, complementing overall color choices
Choose semi-gloss for longevity and reliable protection in wet zones.
Easy-To-Clean Finish
Because bathroom trim and shower surrounds get messy fast, choosing a semi-gloss finish makes cleanup simple and fast. You’ll wipe splashes, soap scum, and steam marks without scrubbing paint off. Semi-gloss stands up to moisture when paired with proper ventilation options and complements most color schemes for a polished look. It resists staining, reflects light to brighten tight spaces, and keeps trim durable where water lands. Below is a simple comparison to help you decide quickly.
| Feature | Benefit | Where to Use |
|---|---|---|
| Semi-gloss | Easy wipeability | Trim, surrounds |
| Moisture resistance | Longevity | Shower areas |
| Light reflectance | Brighter feel | Small bathrooms |
Crisp Trim Definition
Having a crisp trim means clean edges, subtle sheen, and a surface you can wipe without worrying about wear—qualities semi-gloss delivers. You’ll want semi-gloss on trim and shower surrounds because it resists moisture, highlights lines, and cleans easily.
The paint texture is smooth, so brush marks’re minimal and progressions stay sharp. Choose semi-gloss for longevity and low maintenance.
- Resists humidity and mildew
- Shows fewer brush strokes thanks to paint texture
- Wipes clean without dulling finish
- Accentuates architectural details
Use a quality semi-gloss for crisp trim that stays crisp over time.
High-Gloss Paint: Benefits and When to Avoid It
If you want a bathroom finish that’s ultra-durable and easy to clean, high-gloss paint delivers both—its shiny surface resists moisture, stains, and scrubbing far better than flatter sheens.
You’ll appreciate how simple maintenance becomes: wipe splashes, remove soap scum, and prevent mildew buildup.
Use high-gloss on trim, doors, or small walls where reflection enhances light.
Avoid it if you want to conceal imperfections—gloss highlights bumps and uneven drywall.
Consider eco-friendly options to reduce VOCs, and consult paints that mimic historical finishes if restoring period bathrooms.
Test a small area to ensure the look suits your space.
Bathroom Paint: Acrylic-Latex vs Oil-Based Pros & Cons
When choosing paint for a bathroom, you’ll mainly decide between acrylic-latex and oil-based formulas because each handles moisture, durability, and maintenance differently.
You’ll likely pick acrylic-latex for quick drying, easier cleanup, lower VOCs, and better color retention.
Oil-based paints give a smoother finish and greater hardness but need stronger solvents and longer cure times.
- Acrylic-latex: faster drying, easier cleanup
- Oil-based: durable, hard finish
Consider color psychology for mood and perceived space.
Look for eco friendly options to reduce VOC exposure.
Match finish and ventilation to your priorities.
Mildewcide and Anti-Mold Additives: Do They Help?
You can choose between paints that already contain mildewcide and separate anti-mold additives you stir in before painting. Each approach helps inhibit growth, but neither replaces proper ventilation, cleaning, or fixing leaks.
I’ll compare their effectiveness, cost, and limitations so you can pick what works best for your bathroom.
Mildewcide vs. Paint Additives
Although both mildewcides and anti-mold paint additives aim to prevent fungal growth, they work differently and aren’t interchangeable; understanding their roles helps you choose the right product for your bathroom. You’ll pick mildewcide for factory-mixed protection or additives you stir into paint for custom treatment.
Consider:
- Eco friendly options if you want lower VOCs and gentler biocides.
- Color matching techniques to maintain hue when tinting treated paints.
- Application: additives mix at painting time; mildewcides are often pre-formulated.
- Surface type: porous areas may need stronger, specialized products.
Read labels carefully and follow manufacturer instructions.
Effectiveness And Limitations
Having chosen between mildewcide and paint additives, it helps to know how well they actually work and where they fall short. You’ll find mildewcide in factory-formulated paints offers consistent protection, while additives let you boost ordinary paint’s resistance.
Both slow mold growth but don’t eliminate moisture problems; you still need ventilation and proper prep. Performance varies with formulation, so check labels and certifications rather than marketing.
Pick products that match your style and practical needs—consider color trends and eco friendly finishes when renovating. In high-humidity spots, plan maintenance and occasional repainting; these treatments extend life but aren’t permanent cures.
Low-VOC Bathroom Paints and Ventilation Tips
When you’re choosing paint for a bathroom, pick a low-VOC formula and pair it with proper ventilation to protect your health and keep finishes lasting longer. You’ll get eco friendly finishes that reduce odors and emissions, important if you use the room soon after painting.
Combine product choice with ventilation strategies to control moisture and speed drying.
- Run an exhaust fan during and after showers
- Open windows when weather allows
- Use a timer for intermittent fan operation
- Maintain fan ducts and replace filters
These steps limit mold risk, improve air quality, and preserve paint film.
Choosing the Right Primer for Damp Bathrooms
When you’re prepping a damp bathroom, start with a moisture-blocking primer to keep water vapor from ruining your topcoat.
Pick a mildew-resistant formula if you want long-lasting protection against mold in humid spots.
And don’t skip proper surface prep—clean, dry, and repair any damaged areas before priming.
Moisture-Blocking Primers
Because damp bathrooms can quickly undermine paint, you’ll want a primer that seals moisture and blocks stains before you topcoat. Choose a water-resistant or oil-based primer designed for high-humidity spaces, and consider how Color psychology and paint texture will affect perceived brightness and warmth once topcoats go on.
Apply primer to repaired, clean surfaces for best adhesion. Look for stain-blocking formulas if previous water marks exist.
- Check drying time and recoat window
- Confirm compatibility with your finish
- Prefer high-adhesion, low-VOC options
- Test a small patch first
Proper priming extends paint life and protects substrates.
Mildew-Resistant Formulas
After sealing and priming for moisture, you’ll want a formula that actively resists mildew growth in high-humidity bathrooms. Choose mildew-resistant primers labeled for bathrooms; they contain fungicides that inhibit spores and improve topcoat adhesion.
You’ll still pick paints compatible with eco-friendly finishes if you prefer low-VOC options—many mildew-resistant products now meet those standards.
Match primers to historical color schemes by testing small patches to ensure true hue and coverage without staining. Apply per manufacturer instructions, guarantee full cure before finishing.
Regular ventilation plus these targeted primers gives durable protection and keeps finishes looking fresh longer.
Surface Prep Essentials
If your bathroom holds moisture most of the day, start by choosing a primer made for damp environments so paint will adhere and resist mold. You’ll prep surfaces by cleaning, repairing, and selecting a primer with mildew inhibitors.
Pick products that pair with your color therapy plan and consider eco-friendly options to limit VOCs. Use a stain-blocking primer where needed and a bonding primer on glossy tiles. Apply per label for full protection.
- Clean with a nonabrasive mildew cleaner
- Repair cracks and sand glossy patches
- Choose mildew-resistant, low-VOC primer
- Match primer to your final paint type
Surface-Prep Checklist for Damp Bathroom Walls
When your bathroom walls feel damp, you can’t skip proper surface prep—doing so prevents mold, poor adhesion, and paint failure. Check lighting and ventilation systems first; good bathroom lighting helps you spot stains and peeling, while ventilation systems reduce moisture. Follow this concise checklist:
| Task | Why it matters |
|---|---|
| Inspect for soft spots | Detect rot early |
| Clean with mildew cleaner | Removes spores |
| Dry fully (fans/heaters) | Prevents re-wetting |
Sand glossy areas, repair damaged drywall or caulk gaps, and prime with a mold-resistant primer. Only paint when surfaces are completely dry and odors are cleared by ventilation.
Paints for Very Humid, Poorly Ventilated Bathrooms
Because high humidity and poor ventilation keep surfaces damp much of the time, you’ll need paints formulated to resist moisture, mildew, and peeling rather than standard interior eggshells or flats.
In damp, poorly ventilated spaces, use paints designed to resist moisture, mildew, and peeling.
Choose a high-quality semi-gloss or satin mildew-resistant latex; these shed moisture and clean easily. Consider alkyd-based enamels for extreme conditions, but note ventilation needs.
Look for products labeled “mildew-resistant” or with antimicrobial additives; some manufacturers offer eco-friendly finishes that balance performance and lower VOCs.
You can reference historical paint styles for color choices without compromising function.
Tips:
- Use a mildew-resistant primer
- Prefer semi-gloss/satin
- Guarantee proper prep
- Choose low-VOC options
Best Paint for Tiny Powder Rooms
Moving from moisture-heavy bathrooms to tiny powder rooms means changing priorities: here you’re aiming to make a small space feel larger, brighter, and more finished rather than to battle constant damp.
Choose a semi-gloss or satin finish for easy cleaning and subtle light reflection without overwhelming texture. Pick a light, cool Paint color schemes—soft whites, pale grays, or muted pastels—to visually expand the room.
Use one accent wall or bold trim to add personality without cluttering Bathroom decor. Good paint paired with strategic lighting and a mirror will maximize perceived space and keep the powder room feeling crisp and intentional.
Durable Paint Choices for Heavy-Use Family Bathrooms
Durable paint matters in a family bathroom where scuffs, humidity, and frequent cleanings are the norm, so choose formulas that stand up to wear without sacrificing appearance. You’ll want paints labeled washable or scrubbable and mildew-resistant finishes to protect surfaces while keeping Bathroom decor looking fresh.
Pair paint choices with proper Ventilation systems to reduce moisture and prolong lifespan.
Consider these durable options:
- High-quality acrylic latex eggshell for balance of durability and subtle sheen
- Satin enamel for easier cleaning and stain resistance
- Semi-gloss for trim and high-contact areas
- Mold-resistant bathroom-specific formulations for extra protection
Color + Sheen: Hide Imperfections in Older Bathrooms
After you pick a resilient formula, think about how color and sheen can mask dings, uneven plaster, and other age-related flaws. You’ll use color psychology to choose tones that divert attention—warm neutrals and medium grays soften contrast.
While very light or glossy finishes highlight bumps, opting for a low- to mid-sheen can be beneficial. It cleans well but won’t scream texture the way high gloss does.
Matte or eggshell finishes hide minor imperfections by scattering light. Consider a slight paint texture for troubled walls to visually blend patches.
Balance aesthetic with maintenance needs so the bathroom looks refreshed without emphasizing flaws.
How to Test Paint Samples Effectively in Your Bathroom
When you’re ready to pick a final shade, test samples on-site so you see how light, moisture, and existing fixtures affect the color. Paint several 12–18-inch swatches in different spots (near the vanity, by the shower, and on an interior wall) and observe them at morning, midday, and under bathroom lighting to note shifts and undertones.
You’ll evaluate performance and compatibility with bathroom decor and check for mildew resistance. Consider ventilation too—poor ventilation systems can darken finishes.
Use this checklist:
- Note color shifts under warm and cool bulbs
- Check finish after a steam session
- Assess against towels and tiles
- Evaluate cleanability and durability
Preparing and Painting Tile or Other Glossy Surfaces
If you want to refresh glossy tile or other shiny surfaces, proper prep is the key. You’ll clean thoroughly with a degreaser, sand lightly to dull the sheen, and wipe away dust.
Use a high-adhesion primer made for tile, then apply a mildew-resistant bathroom paint.
Consider color psychology when choosing hues—lighter tones enlarge small bathrooms, while muted blues calm.
Pick paints with eco-friendly formulations to reduce VOCs and odors.
Work in ventilated conditions, use quality rollers for even coverage, and allow full cure time before exposing surfaces to water for lasting results.
When to DIY and When to Hire a Pro
Though a weekend of painting can save you money, decide up front whether your bathroom project matches your skills, schedule, and tolerance for risk.
If you’re handy, small bathrooms and simple repainting with eco-friendly options are doable.
Hire a pro when plumbing, ventilation, or complex prep is involved, or for Historical restoration where paints and techniques must match.
Consider time, finish quality, and warranty needs.
- You have time, patience, and tools
- Project requires specialized prep or patching
- You want professional-level durability and finish
- Restoration or permit-required work is involved
Frequently Asked Questions
Can Bathroom Paint Be Used on Ceiling Ventilation Fans and Light Fixtures?
You can’t assume bathroom paint suits ceiling ventilation fans and light fixtures; check ventilation fan compatibility first, and use proper light fixture painting techniques, nonflammable, heat-resistant coatings, and avoid moving parts or electrical contacts when coating.
How Long Should Newly Painted Bathrooms Be Left Unused After Painting?
Think of patience like letting paint set like bread rising: you should leave a newly painted bathroom unused for at least 24–48 hours; full curing can take up to 2 weeks. Drying time varies, so follow ventilation tips.
Can Bathroom Paint Prevent Water Intrusion From Leaks or Plumbing Issues?
No, paint alone won’t stop leaks; you’ll still need repairs. You can use waterproof coatings and mold resistant paints to reduce moisture damage and mold growth, but they don’t replace fixing plumbing or sealing structural water intrusion.
Are There Paint Options Safe for People With Asthma or Severe Chemical Sensitivities?
Absolutely — you can practically breathe relief: you’ll want Low VOC paints and allergen free coatings, which minimize fumes, off-gassing, and irritants, so you’ll dramatically reduce asthma triggers while still getting durable, washable bathroom finishes.
Does Paint Color Affect Perceived Humidity or Mold Growth in Bathrooms?
No, paint color won’t change actual humidity, but you’ll notice moisture perception differences: darker, glossy finishes can highlight dampness, while light, matte colors can hide stains; mold visual cues still depend on lighting and texture.
Conclusion
You’ve got the know-how to pick paint that fights moisture and cleans up easily, so don’t let a damp bathroom drag down your day. Choose a mildew-resistant, semi-gloss or satin finish for wet zones, test samples in real light, and prep surfaces well—or hire a pro for tricky tile. Like a lighthouse in fog, the right paint guides you to a fresher, more comfortable bathroom that lasts. Act now; your walls will thank you.