What Type of Roller for Latex Paint
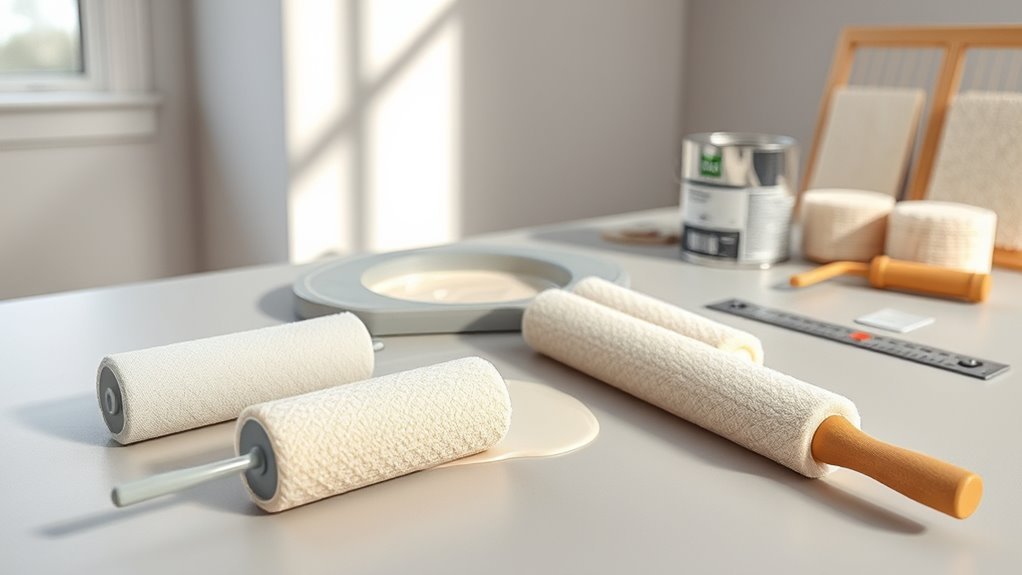
Pick a roller nap that matches your surface: use short naps (1/4″–3/8″) for smooth walls, trim and cabinets to lay down thin, glossy coats; medium naps (1/2″–3/4″) for typical drywall and lightly textured plaster to balance coverage and hide minor flaws; long naps (3/4″–1 1/4″) for textured walls, stucco or masonry to reach crevices and hold more paint. Choose synthetic or microfiber for latex, and keep one handy for switching if you need different coverage—more tips follow.
How to Choose the Right Roller: Step-by-Step Decision Framework
When you’re choosing a roller for latex paint, start by matching the roller’s nap to the surface texture: smooth surfaces need short naps (1/4″–3/8″), semi-smooth need medium naps (3/8″–1/2″), and rough surfaces need long naps (3/4″–1″ or more).
Next, check paint compatibility: confirm the roller material suits latex and the finish you want. Test absorbency and release on a small patch, then evaluate pile shedding.
Confirm the roller material works with latex and your desired finish; test absorbency, release, and shedding on a small patch.
Choose a size for coverage and maneuverability.
After use, follow proper roller storage—clean thoroughly, dry, and store flat or hanging to retain shape and performance.
Quick Answer: Which Roller to Use for Common Latex Jobs
Although the exact choice depends on surface texture and project scale, you can usually pick a roller by matching nap length and material to the job.
For smooth walls, choose a short-nap synthetic roller for even latex coverage.
For lightly textured surfaces, pick a medium nap to hold more paint.
Use a thicker, shed-resistant roller for exterior or rough surfaces.
When cutting in or painting trim, switch to a good-quality small foam or short-nap sleeve.
Keep rollers clean between coats to avoid color mixing and store damp sleeves properly to prevent mildew—follow recommended roller storage for longevity.
Nap Length: How It Affects Coverage and Texture
Because the roller nap determines how much paint it holds and how it lays down on the surface, choosing the right nap directly controls coverage and texture. You’ll pick thicker naps for rough surfaces to fill crevices and create a more textured finish, while smoother walls need shorter naps for even coverage.
Nap affects how layers blend, so consider color mixing when overlapping coats to avoid streaks. For consistent results, follow roller maintenance: clean thoroughly, store dry, and replace when fibers mat.
Match nap to surface profile and paint sheen, and you’ll get predictable coverage and the texture you want.
Short Nap (1/4″–3/8″): Best Uses and Tips for Latex
For smooth walls and trim, you’ll want a short nap (1/4″–3/8″) roller because it lays down thin, even coats with minimal texture.
You’ll get the best results when you apply light pressure and use multiple passes to keep coverage uniform.
Since latex dries quickly, work in manageable sections and keep a wet edge to avoid lap marks.
Smooth Surfaces Preferred
When you’re painting smooth walls, trim, or cabinets with latex, a short nap roller (1/4″–3/8″) gives the cleanest finish and lays down paint evenly without trapping texture. You’ll appreciate how it minimizes stipple so surfaces look factory-smooth.
Use quality rollers and steady, overlapping passes to avoid lap marks. For precise color matching, roll test patches and let them dry under the same light before committing.
If you’ve primed bare wood or patched drywall, use compatible paint primers to guarantee adhesion and true color payoff.
Clean the roller promptly to maintain nap integrity for future touch-ups.
Thin Paint Coverage
Short-nap rollers (1/4″–3/8″) are ideal when you want thin, even coats of latex that dry quickly and reveal true color without texture buildup. You’ll use them on smooth walls, doors, and trim where crisp, flat results matter.
Load the roller lightly and apply overlapping passes to avoid ridges. Thin coverage minimizes orange peel and shows accurate color mixing choices.
Clean immediately after use and follow proper roller storage to keep nap intact for touch-ups. For best results, avoid heavy pressure and reloading too often—let the roller do the work so your finish stays consistent and smooth.
Quick Drying Tips
Want your latex paint to dry fast without sacrificing an even, smooth finish? Choose a short nap roller (1/4″–3/8″) for minimal texture and quicker drying. Work in thin, even coats—avoid overloading the roller—to speed curing and reduce tackiness.
Use proper paint thinning sparingly; follow manufacturer limits so you don’t weaken film formation. Keep room temperature moderate, humidity low, and make sure good ventilation or use a fan to accelerate evaporation.
When doing color mixing, mix thoroughly and test a small patch to confirm coverage and drying behavior. Light sanding between coats helps adhesion and smoothness for a professional result.
Medium Nap (1/2″–3/4″): When to Pick It for Latex
If you’re working on lightly textured walls, semi-rough drywall, or surfaces with minor imperfections, a medium nap (1/2″–3/4″) is usually the right choice.
It holds more latex than a short nap, so you’ll get better coverage with fewer passes.
You’ll also get a bit more texture in the finish, which helps hide flaws without looking overly stippled.
Best Surfaces For Use
When you’re tackling walls and ceilings with light-to-moderate texture, a medium nap (1/2″–3/4″) roller is your go-to choice for latex paint. It balances coverage and detail so you won’t oversaturate or miss crevices.
Use it on painted drywall, lightly orange-peeled surfaces, and skim-coated plaster. Keep color matching in mind when switching rollers and maintain roller storage to preserve nap integrity between coats.
- Drywall: smooth to light texture — even finish.
- Skim-coated plaster: holds paint without blotching.
- Light stucco/veneer: fills shallow valleys while keeping detail.
Paint Coverage And Texture
Why pick a medium nap roller for latex? You’ll get balanced coverage and subtle texture on semi-smooth walls. It holds enough latex to speed work, hides minor flaws, and helps with color matching by applying paint evenly. Check paint compatibility with your chosen roller material to avoid shedding or uneven finish. Use it when you want a soft orange-peel look without heavy stipple.
| Surface | Coverage | Texture |
|---|---|---|
| Drywall | Good | Fine |
| Light stucco | Fair | Soft |
| Plaster | Very good | Subtle |
| Satin finish | Excellent | Smooth |
| Eggshell | Excellent | Low sheen |
Long Nap (1″–1½”): Rollers for Textured and Rough Surfaces
Because textured walls and rough masonry trap paint in crevices, you’ll want a long-nap roller (1″–1½”) to reach deep into valleys and produce even coverage. You’ll find these rollers excel on textured finishes, reducing patchiness and the need for repeated passes.
For textured walls and masonry, use a 1″–1½” long‑nap roller to reach crevices and ensure even coverage.
Choose a durable nap that holds enough latex without dripping, and adjust pressure to avoid splatter. Keep roller maintenance in mind: clean thoroughly after use and store properly to preserve pile.
Benefits to remember:
- Penetrates deep textures for uniform color
- Speeds work on rough surfaces
- Cuts repainting and touch-ups needed
Microfiber vs Synthetic vs Natural Rollers for Latex
Although each pile material has strengths, choosing between microfiber, synthetic (polyester/nylon), and natural (woad/animal hair) rollers comes down to the finish you want, the surface you’re painting, and how easy you want cleanup to be.
You’ll pick microfiber for smooth walls and superior pickup/release with water-based latex; it resists lint and helps avoid unintended color mixing.
Synthetic covers handle acrylics and rougher textures, clean easily, and cost less.
Natural rollers give a traditional finish with oil-leaning paints but shed more and require careful roller storage and cleaning.
Match material to paint and surface for best results.
Woven vs Knit Covers for Latex: Durability and Paint Release
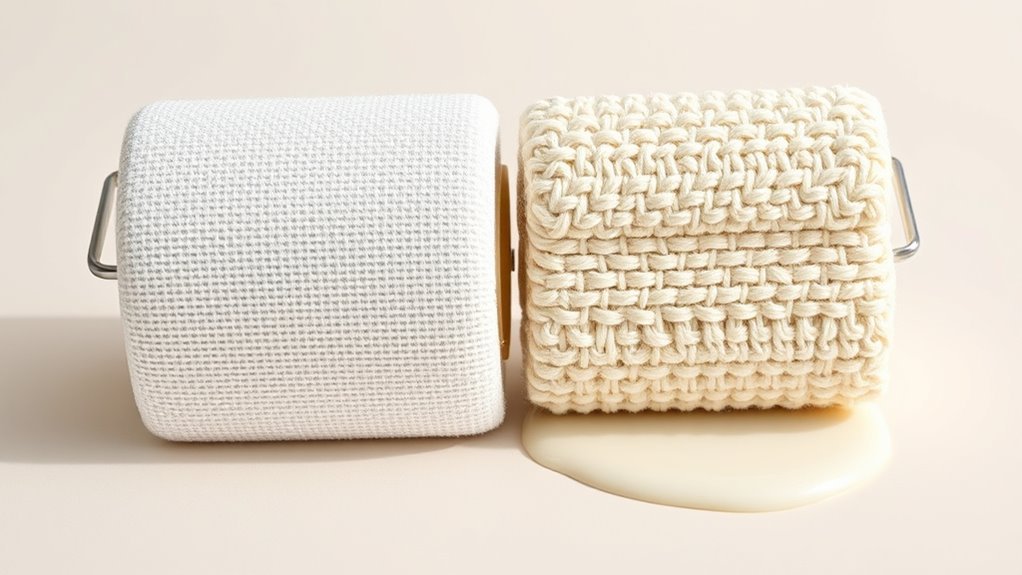
After you pick the pile material that matches your paint and surface, the cover’s construction—woven or knit—shapes how long it lasts and how cleanly it releases latex. You’ll notice woven covers resist abrasion and shed less on rough surfaces, while knit covers hold more paint and release it evenly on smooth walls.
Consider these factors:
- Durability: woven = longer life, knit = higher pickup.
- Release: knit gives smoother laydown; woven minimizes lint.
- Care: rinse promptly, store flat for good roller storage and to preserve pile.
Also think about color matching when switching covers between jobs.
Roller Cores and Frames: Pick for Fit, Shedding, and Sag
When you pick a roller core and frame, focus on fit, shedding, and sag to get smooth results and fewer touch-ups. Choose a snug core so covers spin true; loose cores cause streaks and uneven paint color.
Opt for a sturdy frame with a firm cage to prevent sag under a loaded cover, especially with thicker latex. Check for minimal shedding—metal cores and quality synthetic covers reduce fuzz transfer.
Consider easy-clean frames and remove covers after each job for proper roller maintenance. A well-matched core and frame saves time, improves finish consistency, and cuts down on touch-ups.
Roller Diameter & Handle Length: Match Tool to Task
Choose your roller diameter based on surface size and texture—wider rollers cover big, flat walls while narrower ones handle trim and tight spots.
Pick a handle length that keeps you comfortable and stable, from short for precision to long or extendable for ceilings and high walls.
Match the roller and handle to the task so you get even coverage, less fatigue, and fewer touch-ups.
Roller Diameter Choices
Wondering which roller diameter will make your job faster and neater? You’ll pick diameter based on surface texture and access.
Larger diameters cover faster on smooth walls; smaller diameters give control in tight spots. Consider how color matching and paint mixing affect coverage—thicker naps and larger rollers hide inconsistencies.
Choose like this:
- 9–18 inches: big areas, fastest coverage on smooth surfaces.
- 6–9 inches: medium spaces, balanced speed and control.
- 4–6 inches: tight areas and trims where precision matters.
Match roller diameter to wall size and texture for efficient, even coats without overworking the paint.
Handle Length Options
How far do you need to reach? You’ll pick a roller handle based on reach, control, and surface height. Short handles give precision on trim and cabinets; longer handle length helps cut ceilings and high walls without ladders. Consider weight, grip, and extension compatibility so your roller handle stays balanced and reduces fatigue.
| Task | Recommended handle length |
|---|---|
| Trim & cabinets | Short (6–10 in) |
| Standard walls | Medium (12–18 in) |
| High walls | Long (24–36 in) |
| Ceilings | Extendable pole |
| Tight spaces | Compact design |
Matching Tool Purpose
Which roller size and handle length will give you the best control and coverage for the job at hand? You’ll choose based on surface, reach, and desired finish.
Short handles give control on trims; long handles let you reach high walls. Wider diameters cover floors or large walls faster; narrow rolls suit cabinets and tight spots. Consider roller texture for sheen and paint build, and think about color matching when blending new paint with existing walls.
- Small diameter + short handle: precision, minimal splatter.
- Medium + standard handle: versatile, balanced control.
- Large + extension: fast coverage, less maneuverability.
Best Rollers for Interior Drywall and Smooth Ceilings
When you’re painting interior drywall or smooth ceilings, choose a roller that lays down an even, burr-free coat without trapping air or leaving lint behind. Use a 3/8″ to 1/2″ synthetic microfiber or woven nap to get smooth, consistent coverage; these minimize stipple and help maintain your desired paint sheen.
For cutting in and trims, switch to a high-quality mini-roller to match texture and assist color matching near edges. Pick a roller labeled lint-free and compatible with latex to reduce touch-ups.
Clean and store covers properly to preserve nap integrity for the next project.
Rollers for Semi-Rough Surfaces: Plaster and Light Texture
Because semi-rough plaster and light textures have more peaks and valleys than smooth drywall, you’ll want a roller that can reach into crevices without leaving excessive stipple. Choose a medium-nap synthetic roller (3/8″–1/2″) to balance coverage and texture control. It helps with consistent color matching and preserves your desired paint sheen.
For semi-rough plaster or light texture, use a 3/8″–1/2″ medium-nap synthetic roller to reach crevices and preserve sheen.
Consider these points when selecting:
- Nap length: medium for light textures.
- Material: woven or knit synthetic for latex adhesion.
- Density: firmer core to avoid sagging and reduce stipple.
Test on a scrap area to confirm finish and adjust nap or technique if needed.
Rollers for Rough Surfaces: Stucco, Masonry, Exterior Latex
For rough surfaces like stucco, masonry, and exterior siding you’ll need a different roller than the medium-nap used for light textures: pick a long-nap (3/4″–1 1/4″) synthetic or blended roller that can reach deep into crevices and hold more latex without shedding. You’ll choose rollers that follow texture patterns, resist clogging, and pair with sturdy roller handles for reach and control. Use thicker nap to reduce spotting and bounce. Clean thoroughly after exterior jobs to maintain pile. Table below summarizes options.
| Surface | Nap | Recommendation |
|---|---|---|
| Stucco | 1″ | Synthetic long-nap |
| Masonry | 1–1.25″ | Blended durable |
| Exterior siding | 3/4″ | High-capacity nap |
Best Roller for Glossy and Semi-Gloss Latex Trim
If you want crisp, mirror-like results on glossy or semi-gloss latex trim, choose a small, dense roller cover—typically 3/8″ or 1/4″ nap—made from woven microfiber or a high-density foam that minimizes texture and back-rolling. You’ll work carefully, keeping edges sharp and avoiding excess paint.
Mind color mixing so touch-ups match sheen and hue. Practice good roller maintenance: clean thoroughly and store flat to avoid deforming the nap.
- Use short, overlapping passes for even laydown.
- Remove lint before painting to prevent imperfections.
- Replace covers when buildup affects finish.
Choosing Rollers for Latex Primers vs Finish Coats
When you’re prepping and finishing a wall, choose your roller with the coat’s purpose in mind: primers need thicker naps or higher-capacity fibers to grab and hold more pigmented base.
Finish coats benefit from shorter, denser naps that lay down a smooth, uniform film and preserve sheen. You’ll pick a high-capacity synthetic or natural blend for primer to penetrate texture and seal substrate.
Use a low-nap microfiber or woven roller for final coats to minimize stipple and ease color matching. Clean thoroughly between coats and follow proper roller storage to keep nap shape and avoid contamination.
How Pile Interacts With Sheen and Hiding Power
Pay attention to pile when you’re matching rollers to paint sheens, because longer naps can slightly reduce gloss by scattering light.
You’ll also find that thicker piles tend to lay down more paint, which helps hiding on rough surfaces but can reveal texture on smooth, high-sheen finishes.
Choose a shorter nap for glossy coats and a longer one for matte or textured surfaces to balance sheen and coverage.
Pile vs Paint Sheen
Curious how the nap on your roller affects final sheen and coverage? You’ll notice pile changes how light reflects and how much sheen shows. Short nap smooths for higher sheen; long nap softens appearance. Consider these effects:
- Short nap — reflects light, emphasizes gloss; clean application avoids trapping paint fumes.
- Medium nap — balances sheen and texture; good for uneven surfaces.
- Long nap — diffuses light, lowers apparent sheen; hides small flaws.
Also remember roller storage: wrap and hang to prevent nap damage and contamination that alters finish. Choose pile to match desired sheen and maintenance needs.
Pile Affecting Hiding
How does roller pile impact hiding power and the way paint covers a surface? You’ll find pile length changes how evenly latex lays down and how sheen reads.
Short pile gives tight, smooth coverage that minimizes texture, improving hiding on high color contrast walls and helping paint adhesion by compressing pigment into the substrate.
Medium pile balances coverage and pickup for moderately textured surfaces.
Long pile holds more paint and fills crevices but can leave a stippled effect that reduces apparent hiding on dramatic color contrast and may alter sheen perception.
Choose pile to match surface texture and desired hiding performance.
How to Minimize Lint and Shedding With Latex Rollers
When you’re rolling latex paint, even a few stray fibers can ruin a smooth finish, so take steps to prevent lint and shedding before you begin. Choose a roller texture suited to your paint color sheen and surface; tighter naps shed less on smooth walls.
Prep new covers by rinsing and drying or brushing them with masking tape to remove loose fibers. Store rollers in a sealed bag to keep dust away.
- Inspect covers under light for stray lint.
- Remove fuzz with tape or a lint brush.
- Replace worn covers promptly to avoid contamination.
How to Load a Roller Properly With Latex Paint
When you load a roller for latex paint, start by choosing the right nap and size for your surface so the roller holds and releases paint correctly.
Roll it evenly in the tray to saturate the cover without creating thick spots.
Finally, roll off excess paint on the tray’s slope so you avoid drips and streaks on the wall.
Choose The Right Roller
Want smooth, even coverage? You’ll pick a roller that suits surface texture and paint type, balancing current decorating trends with practical roller customization to match finish goals. Consider nap length, material, and core fit so your roller performs reliably.
- Choose nap by surface — short for smooth, medium for slight texture, long for rough.
- Prefer woven or knit covers for durability; foam for ultra-smooth finishes.
- Match core size and frame for easy loading and less splatter.
You’ll prepare the roller frame and cover, ensuring compatibility so loading goes without hassle.
Load Roller Evenly
How do you get an even, drip-free coat with latex paint? Load your roller by dipping it into the tray well, rolling across the ridged area to spread paint evenly, and repeating until the nap’s uniformly saturated.
Work from a moderate paint amount; overloading causes drips and uneven texture, underloading forces extra passes. Keep a consistent pressure as you roll to avoid lines.
Between sessions, wrap the roller in plastic for short-term roller storage, or clean it thoroughly if pausing longer.
Match paint batches for color matching and finish consistency before you begin to guarantee seamless results.
Remove Excess Paint
Why bother removing excess paint from the roller? You’ll avoid drips, streaks, and uneven coverage, which helps with color matching and a professional finish. After loading, roll off surplus on the tray’s slope or a clean board until it looks damp, not dripping. Don’t squeeze—pressing forces paint into the core.
- Remove excess to control flow and avoid splatter.
- Maintain nap integrity for consistent texture.
- Prepare for roller storage without hardened buildup.
Do this every load; it saves touch-ups and keeps rollers usable for accurate color matching later.
Rolling Technique: Stroke Patterns and Pressure for Even Finish
When you roll latex paint, keep a steady, overlapping stroke pattern and consistent pressure so the finish stays even and free of lap marks. Start with a W or M motion, then fill in with parallel vertical passes, slightly overlapping each previous pass.
Use light pressure near edges and firmer pressure in the field, maintaining the same handedness to avoid streaks. Reload the roller evenly; don’t glob paint. Wipe excess on the tray to control flow.
After painting, follow proper roller storage to preserve nap and prevent contamination. Remember good color mixing before you begin to avoid touch-up mismatches.
When to Switch Rollers Mid-Job and How to Do It Cleanly
Even with steady strokes and consistent pressure, you’ll hit points where switching rollers keeps the finish uniform and speeds the job. Know when nap wears, lint builds, or edges dry—swap before streaks appear. Prep the new roller on a clean tray, load evenly, and feather joins to blend.
Mind roller maintenance so tools perform and avoid cross-contamination that ruins paint color matching.
- Swap when nap compacts or lint transfers.
- Change after cutting in a different tone or sheen.
- Replace if roller picks dried bits or sags.
Work methodically, overlap edges, and keep progress seamless.
Cleaning and Storing Latex Paint Rollers to Extend Life
How do you keep rollers ready for the next job without shrinking their lifespan? Rinse latex from the nap with warm water until runoff runs clear, then spin or shake excess water outdoors. Use mild soap for stubborn paint, working the fibers gently. Never let dried paint harden on the roller—tackle it immediately.
For short-term breaks, wrap the roller in plastic wrap to prevent skinning. For long-term roller storage, dry completely and keep in a breathable container to avoid mildew. Label storage with paint color used so you’ll match rolls to jobs and avoid cross-contamination.
Budget vs Premium Rollers for Latex: Cost, Performance, When to Splurge
Although you can save money with cheaper rollers, the extra cost of premium ones often pays off in finish quality and durability. You’ll notice fewer lint specks, smoother coverage, and less rework when you choose better nap and denser fibers.
Premium rollers hold paint longer, improving color matching and reducing streaks during paint mixing or touch-ups.
- Cost: budget rollers lower upfront cost but wear faster.
- Performance: premium gives consistent laydown, fewer passes.
- When to splurge: high-visibility rooms, textured walls, or full-room repainting.
Pick based on project scale, surface texture, and tolerance for imperfection.
Troubleshooting Common Roller Problems With Latex Paint
If your roller starts leaving fuzz in the paint, you’ll want to check for shedding and whether the nap is right for your finish.
Uneven coverage usually means you’re not loading the roller evenly or the nap isn’t suited to the surface.
We’ll cover how to spot the cause quickly and fix both problems so your next coat looks smooth.
Roller Shedding Issues
When fibers start appearing on your freshly painted walls, it’s usually a sign your roller’s shedding and needs attention. Catching the problem early prevents a patchy finish and saves time on cleanup.
You should check roller durability and wash new rollers to loosen loose fibers before use. Poorly made naps undermine paint adhesion and leave lint.
- Replace cheap rollers to restore smooth application.
- Pre-wash and tumble-dry high-quality naps to reduce shedding.
- Use a lint roller or light sanding between coats for stubborn fibers.
Act quickly to maintain finish quality and avoid rework.
Uneven Paint Coverage
Shedding fibers can leave thin, patchy spots, but uneven coverage has other common causes you can fix quickly: improper loading, rolling too fast, using the wrong nap, or working over a partially dried coat. Check load amount, slow your stroke, and pick a nap suited to texture. Inspect for color matching issues after primer and clean rollers; poor roller storage can deform nap and trap debris. If patches persist, back-roll while paint is wet. Replace shed or flattened rollers.
| Cause | Fix | Tip |
|---|---|---|
| Improper load | Re-dip evenly | Use tray spread |
| Wrong nap | Match surface | Swap for texture |
| Dry overlaps | Back-roll wet | Work in sections |
Frequently Asked Questions
Can I Use the Same Roller for Oil-Based and Latex Paints?
You shouldn’t; oil-based and latex paints need different rollers. You’ll choose roller material and nap length based on paint type and surface; using the same roller risks contamination, poor finish, and cleaning difficulties.
How Does Temperature/Humidity Affect Latex Roller Performance?
Extreme conditions can make your roller act like a drama queen: Temperature effects speed drying or slow pile release, while humidity impact causes tackiness or sagging; you’ll adjust technique, nap choice, and drying time to compensate.
Are Disposable Rollers Better for Small Touch-Ups?
Yes — you’ll find disposable rollers handy for small touch-ups because they limit cleanup. They sacrifice roller durability but offer consistent paint absorption for short jobs, so you’ll trade lifespan for convenience and speed.
Can Rollers Be Used for Staining or Clear Coats Over Latex?
Yes — you can use rollers for staining or clear coats over latex; you’ll save time as a Brush alternative, but you’ll need strict roller cleaning techniques afterward, or you’ll contaminate finishes and shorten roller life.
Do Roller Covers Release Particles That Affect Health or VOCS?
Yes, roller covers can shed fibers and dust, so you should wear protection; you’ll reduce health concerns and VOC emissions by using low-VOC paints, clean covers outdoors, and choose lint-free, synthetic covers to minimize particle release.
Conclusion
You’ve got the tools and the know-how now, so pick the roller that matches your surface and finish and don’t be afraid to switch if you’re not getting the results you want. Want smooth, semi-gloss walls? Use a short nap; working over textured surfaces? Go medium or long. Keep rollers clean, store them right, and upgrade when performance matters. Ready to make your paint job look professional and last longer?