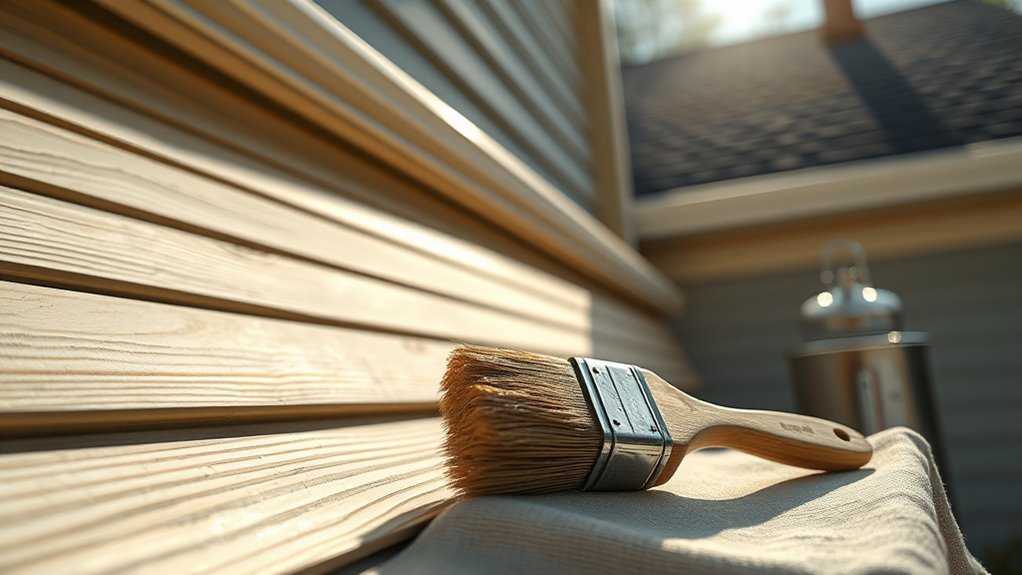
When Is It Too Hot to Paint Exterior?
You shouldn’t paint exterior surfaces when air or surface temps climb above the paint’s labeled limits (often 85–95°F), or when humidity is high, because heat and moisture hurt adhesion, speed drying too fast, and cause blistering or poor sanding. Watch direct sun, hot siding, and wind that accelerate evaporation; aim for cooler mornings or late afternoons, use shade or misting, and do a small patch test first — keep going and you’ll find step-by-step checks and tools to guide you.
Quick Answer: Safe Temperature & Humidity Windows

How hot is too hot to paint? You should aim for moderate temperature effects: typically 50–85°F for most exterior surfaces, though material types and paint specs vary.
Monitor humidity levels—high humidity slows drying speed and harms paint adhesion.
Consider weather conditions and heat impact on surface preparation: very hot, sun-baked siding can prevent proper sanding and cleaning.
Choose painting techniques that minimize rapid skinning or blistering, like shading areas or working mornings.
If temps exceed manufacturer recommendations or humidity is above recommended ranges, postpone.
Prioritize manufacturer guidance and test a small section to confirm adhesion and drying speed before proceeding.
Quick Checklist: Is It Too Hot to Paint Exterior Today?
Before you start, check a few quick environmental and surface conditions so you don’t waste time or ruin the finish.
Verify temperature effects: daytime highs and lows stay within the paint performance range. Note humidity levels and weather influence—avoid painting before storms or during extreme humidity.
Assess exterior factors: direct sun, hot siding, and wind can harm drying. Plan project timing to paint morning or late afternoon for cooler conditions.
Confirm surface preparation is complete and dry. Consider environmental effects like UV and heat management—shade or mist surfaces if needed.
If all checks pass, proceed confidently.
How to Use This Guide to Decide Now
Use the temperature thresholds to check if today’s heat falls within your paint’s safe range.
Consider how your paint type affects drying and adhesion so you can pick the right product or adjust technique.
Then plan timing and techniques—like early-morning starts, shading, or slower-curing additives—to get good results now.
Temperature Thresholds
When temperatures drop below a paint’s recommended range or soar above it, you’ll see drying problems, adhesion failures, or uneven finish—so knowing exact thresholds lets you decide whether to delay, modify your plan, or proceed with precautions.
Check product labels for minimum and maximum temps; match them to local weather patterns and environmental factors. Plan project scheduling around cooler mornings or evenings when needed.
Focus on surface preparation and select application techniques that suit conditions. Use heat mitigation like shade, misting, or fans when marginal.
- Monitor temperature extremes hourly
- Track paint performance indicators
- Adjust application techniques
- Prioritize paint longevity and durability
Paint Type Effects
Now that you know how temperature limits affect timing and technique, consider how different paint types respond to heat so you can choose or adapt products on the spot.
You’ll weigh paint formulation—latex vs. oil—against temperature impact and humidity effects to predict drying times and paint adherence.
Prioritize surface preparation to maximize paint longevity under heat and account for environmental factors like sun exposure.
Your color selection matters; darker hues absorb more heat, altering cure.
Match equipment choice—sprayer, roller, brush—to formulation and conditions for even film build.
Use this guide to decide which product suits the day.
Timing And Techniques
Because heat changes how paint behaves from the moment you load your brush, you should pick products and pace your work with the day’s temperature and sun exposure in mind.
Use painting strategies that emphasize temperature management and surface preparation, and consult weather forecasting to choose cooler windows.
Plan equipment selection and drying techniques to suit rapid evaporation. For clear scheduling tips and project planning, prioritize mornings, shade, and frequent breaks to preserve paint durability.
Practice heat mitigation to avoid blistering.
Remember these essentials:
- Start early in shaded areas
- Keep tools and paint cool
- Prep surfaces thoroughly
- Monitor humidity and sun exposure
What People Mean by “Too Hot to Paint Exterior?
If your paint starts drying too quickly, it’s usually what people mean by “too hot” for exterior work: high temperatures speed evaporation, which can cause brush marks, poor adhesion, and visible lap lines.
You’ll notice heat stress on coatings and reduced paint performance when temperature impact and humidity effects combine. Proper surface preparation and timing help, but extreme weather conditions amplify adhesion issues and shorten drying times.
Adjust application techniques—work in shaded areas, use slower solvents, and follow contractor guidelines—to maintain uniform coverage. Recognize signs early so you can pause or modify the job for reliable, long-lasting results.
Why Paint Dries Differently in High Heat
High heat speeds the chemical and physical processes that turn wet paint into a solid film, which is why you’ll see very different behavior on hot days compared with mild ones.
You’ll notice heat impact on drying rates and temperature effects that alter paint performance quickly. Consider surface conditions and application challenges before you start.
Pay attention to humidity interaction but don’t immerse yourself in its mechanics here—save that for the next section. Keep weather considerations in mind when planning.
- Faster skin formation
- Thinner flash drying
- Elevated tackiness risk
- Uneven adhesion
How Heat and Humidity Work Together to Change Drying
When heat and humidity combine, they create competing effects on paint drying that you’ll need to manage: heat speeds solvent evaporation and film coalescence, while humidity slows moisture loss and can prolong tackiness or cause blushing.
So you must balance timing, ventilation, and product choice to get an even, durable finish. You’ll watch humidity effects alter drying speed despite temperature influence.
Moisture levels change paint chemistry and create drying challenges under variable environmental factors.
Moisture shifts alter paint chemistry, complicating drying and demanding tweaks for consistent results across changing conditions.
Adjust surface preparation and application techniques for prevailing painting conditions: thin coats, extended flash times, and improved airflow help you control cure, adhesion, and final appearance.
Ideal Relative Humidity Ranges for Exterior Painting
Because moisture in the air directly affects how paint bonds and dries, you should aim to paint exteriors when relative humidity is generally between 40% and 70%.
You’ll manage humidity effects and moisture levels to protect paint performance and control drying times. Check weather conditions and environmental factors before starting. Good surface preparation and sensible painting techniques reduce problems caused by high or low humidity.
Use these application strategies to improve outcomes:
- Avoid painting during rapid humidity swings
- Pause if surfaces feel damp
- Prioritize mornings with stable humidity
- Adjust coating thickness for slow drying
Also consider temperature impact when planning work.
Safe Temperature Ranges for Latex Exterior Paint
You’ll want to paint latex exteriors within the manufacturer’s ideal temperature window—usually between about 50°F and 85°F—to guarantee proper film formation.
Pay attention to humidity and the dew point, since high humidity or a dew point near the surface can stall drying or cause blushing.
Also remember extreme heat speeds up skin formation but can prevent proper curing, leading to cracking or poor adhesion.
Ideal Temperature Window
If temperatures stay too low or swing wildly from day to night, latex exterior paint won’t cure properly and can fail prematurely. You should aim for ideal temperature ranges to guarantee optimal painting conditions and durable results.
Work when daytime temps sit comfortably above the manufacturer’s minimum and below extreme heat that causes fast drying. Also plan around overnight lows that might drop below safe limits.
Follow these quick checks before you paint:
- Daytime 50–85°F (10–29°C) is generally safe
- Avoid painting in direct, intense midday sun
- Start early or late to dodge peak heat
- Confirm product-specific limits on the label
Humidity And Dew Point
Temperature’s only half the story; humidity and dew point control whether latex paint will actually dry and bond.
You need to watch humidity effects closely—high moisture impact slows film formation and raises vapor pressure, preventing proper cure.
Understand dew point significance: if surface temperatures approach it, condensation ruins adhesion.
Consider climate considerations and local weather patterns when scheduling work; air quality and temperature fluctuations also influence drying rates.
Plan around seasonal changes and other environmental factors to avoid nights or mornings that bring moisture.
If you account for these variables, you’ll pick windows that let latex paints dry effectively and last longer.
Heat Effects On Curing
When exterior heat climbs, it doesn’t just speed drying—it changes how latex paint cures and bonds to the substrate, so you need to choose application windows carefully.
High heat increases heat retention, shortens curing times, and can harm paint performance if you ignore temperature impacts. You’ll face adhesion risks, disrupted drying stages, and poor finish quality without proper surface preparation and attention to moisture balance.
Use smart application techniques and plan for cooler periods.
- Avoid painting midafternoon on sun-baked walls
- Test a small area for blistering or poor cure
- Keep surfaces shaded and cool when possible
- Adjust thinner coats and timing for proper cure
Safe Temperature Ranges for Oil-Based and Alkyd Paint
Because oil-based and alkyd paints rely on solvent evaporation and oxidative curing, they need a narrower temperature window than many water-based formulas.
Oil and alkyd paints cure by solvent evaporation and oxidation, so they require a tighter temperature range than water-based paints.
You should plan to apply them when temperatures sit between about 40°F and 90°F (4°C–32°C), avoiding extremes that slow drying or prevent proper film formation.
Follow oil-based guidelines: avoid painting in cold nights or scorching afternoons, and keep humidity moderate to prevent extended tackiness.
For alkyd recommendations, start when a stable forecast gives several dry hours above the minimum and below the upper limit.
Test a small area and allow full cure before exposure to heavy use or moisture.
Surface Temperature vs. Air Temperature: Why It Matters
Air temperature gives you a general idea of painting conditions, but the temperature of the surface you’re coating often determines whether the paint will adhere, level, and cure properly.
You need to check surface temperature, not just air temperature, because temperature impact changes drying speed and adhesion.
Consider weather influence and humidity factors alongside paint science when planning. Use temperature measurement tools and observe heat effects on substrates.
- Surface may be hotter or cooler than ambient
- Drying speed shifts with small temperature changes
- Humidity factors alter cure and finish
- Temperature impact affects adhesion and longevity
How Direct Sun Raises Surface Temperatures
When you paint in direct sun, the surface can get much hotter than the air because sunlight adds energy directly to the material.
That buildup depends on how long the surface stays exposed and whether its color or finish reflects or absorbs those rays.
Lighter, reflective surfaces stay cooler while dark, matte ones trap heat and can alter drying and adhesion.
Sunlight Versus Air Temperature
If you leave a wall or deck in direct sun, its surface can heat far beyond the reported air temperature, and that difference matters for paint performance.
You’ll notice sunlight intensity raises surface temps quickly, so you should check both surface and air temperature before painting. Paint cures and adheres differently when the substrate is considerably hotter than the surrounding air.
To decide whether conditions are suitable, consider these factors:
- surface exposure to direct sun
- material color and heat absorption
- timing of application during the day
- manufacturer temperature limits for application
Measure both sunlight intensity and air temperature to make the call.
Surface Heat Buildup
Because sunlight strikes and transfers energy directly to a surface, that surface can run many degrees hotter than the ambient air, and you’ll feel the difference on touch and through faster paint drying.
When surfaces heat, you’ll need careful surface preparation to remove oils and loose material that worsen heat-related failures. Manage heat reflection and select surface coatings suited to high temperatures to protect paint adhesion.
Thermal expansion stresses bonds; monitor moisture levels and altered drying times.
Watch weather patterns for peak sun, plan job scheduling for cooler periods, and prioritize equipment care to avoid overheating sprayers and brushes during hot exterior work.
Reflectivity And Color Effects
Sunlight hitting a surface doesn’t just warm the air—it pumps energy straight into the material, and the color and reflectivity determine how much it soaks up.
You’ll notice reflectivity effects instantly: light colors reflect more, dark colors absorb more, changing heat absorption and raising surface temperatures. That affects thermal expansion and paint longevity, and prompts choices about surface treatments to mitigate damage.
Consider these trade-offs:
- Light colors reduce heat absorption but influence color perception and aesthetic considerations.
- Dark colors increase thermal expansion risk.
- Surface treatments can improve paint longevity.
- Think about environmental impact when choosing finishes.
Siding That Heats Up Most in Sun
When you’re deciding whether it’s too hot to paint, consider which siding material soaks up heat the most: dark-colored fiber cement and certain metal panels can become oven-hot in direct afternoon sun. You’ll evaluate siding materials by heat absorption, color impact, thermal variation, UV exposure, surface treatments, insulation factors, and heat retention. Know that metal and dark fiber cement show rapid temperature spikes, vinyl warps under sustained heat, and textured surfaces trap heat differently. Use cooler colors, reflective coatings, or added insulation to reduce peak temperatures before painting.
| Material | Heat Behavior |
|---|---|
| Metal panels | Rapid spikes |
| Dark fiber cement | High retention |
| Vinyl | Warps |
How Heat Affects Paint Adhesion on Wood
If the wood’s surface is hot to the touch, paint won’t bond properly because the heat speeds drying on the surface while the underlying wood stays moist, causing blistering, poor adhesion, and premature peeling.
You’ll notice reduced paint adhesion when high temperatures lower open time and trap moisture in the wood. Focus on surface preparation and correct application techniques to preserve paint performance.
Temperature impact matters more than you think. Consider these steps:
- Check moisture content before you paint
- Avoid direct sun and peak heat
- Use slow-drying primers or additives
- Apply thinner coats at cooler times of day
How Heat Affects Metal and Aluminum Surfaces
Because metals heat and cool much faster than wood, high temperatures can seriously change how paint behaves on metal and aluminum surfaces.
You’ll notice metal expansion and aluminum conductivity increase heat absorption, causing surface reflections and temperature gradients that raise thermal stress. That stress can weaken paint adhesion and shorten coating durability if you don’t time work or prep properly.
Consider environment impact like sun exposure and humidity when choosing formulas with strong weather resistance.
For maintenance considerations, plan inspections after heat waves, use primers designed for metals, and allow cooling periods before recoating so coatings cure and perform as expected.
Hot-Weather Behavior on Vinyl and PVC Siding
Metals hold and transfer heat differently than plastics, so you’ll see different paint challenges on vinyl and PVC siding.
You need to manage vinyl expansion and low thermal conductivity that causes heat retention and temperature fluctuation, affecting paint adhesion. UV damage accelerates surface degradation and color fading, while moisture absorption worsens edge lift.
Focus on siding maintenance and timing coats when surfaces cool.
- Allow siding to cool before painting
- Use flexible primers for movement
- Choose UV-resistant, breathable paints
- Inspect for surface degradation and moisture
Act promptly on repairs to preserve finish and adhesion.
Painting Masonry, Stucco, and Concrete in Heat
1 simple rule will help you start: hot masonry, stucco, and concrete hold heat and dry out fast, so you’ll need to time and prep differently than you would for siding or metal. You’ll choose masonry paint and plan stucco techniques to control texture application and finish types. Focus concrete prepping for surface adhesion, consider color choices for thermal expansion, and prioritize weather resistance and paint durability. Work mornings or shaded afternoons, mist porous surfaces, and use primers suited for high heat. Table quick guide:
| Task | When | Tip |
|---|---|---|
| Prep | Morning | Clean, etch |
| Prime | Shade | High-temp primer |
| Paint | Cool | Thin coats only |
Why Thinning and Flash Drying Happen in High Temps
When temperatures climb and the sun beats down on a painted surface, solvents evaporate far faster than the paint can level, so your coating thins and skins over before you’ve had a chance to spread it evenly.
You’ll notice thinning paint consistency, poor flow, and a tendency for brush marks as binders can’t redistribute. High temps speed solvent loss, causing flash drying that traps pigments and reduces adhesion.
To manage this, control conditions and technique:
- Work in shaded or cooler hours
- Use slow-evaporation additives sparingly
- Apply thinner coats for better leveling
- Keep materials cool and covered between uses
Signs Paint Is Drying Too Fast to Watch For
If you follow those precautions but still work in warm conditions, watch for a few clear signs that paint is drying too fast to correct.
You’ll notice uneven paint consistency, brush marks and lap lines forming before you can blend. Reduced drying time may leave tacky spots that attract dust despite good surface preparation.
Heat effects can thin the coat, so your application techniques need adjusting or you’ll see patchy coverage. Poor paint quality worsens fast-dry issues; inspect adhesion as coatings fail to lock to the substrate.
Use temperature monitoring and watch weather conditions to prevent common drying failures.
Risks in Extreme Heat: Cracking, Blistering, Peeling
Because extreme heat accelerates the curing process unevenly, you’ll see structural failures like cracking, blistering, and peeling develop quickly on painted surfaces.
You must account for heat impact and environmental effects when evaluating paint durability and surface integrity. Thermal expansion stresses materials, creating adhesion challenges even with proper paint formulation and careful application techniques.
For project planning, weigh weather considerations and timing to avoid costly repairs.
Consider these preventive steps:
- Pause exterior work during peak heat
- Choose formulations rated for high temperatures
- Test adhesion on small areas first
- Adjust techniques to slower drying (shade, misting)
Avoid rushing; protect substrate integrity.
Why Heat Causes Blotchy Sheen and Noticeable Lap Marks
Ever notice shiny and dull patches appearing as paint dries too fast in hot weather? You get blotchy sheen and visible lap marks because heat effects accelerate drying times unevenly.
If surface temperature varies—sunlit versus shaded areas—each stroke skins over at a different rate, hurting paint adhesion where layers don’t fuse. High surface temperature plus low humidity impact solvent evaporation, creating mismatched gloss and streaks.
You can minimize problems by adjusting application techniques: work smaller sections, maintain a wet edge, use slower-flash solvents or additives, and paint during cooler parts of the day so coatings level and bond consistently.
When Fast-Drying Helps: Touch-Ups and Trim
When you’re working on touch-ups or trim in hot weather, fast-drying paint can be a big help because it cures quickly and lets you recoat or finish sooner.
You’ll have less risk of drips and runs since the paint sets up faster on vertical surfaces. For small, controlled areas it’s often the ideal choice to keep the job neat and move on.
Quick Cure Advantages
A few quick-drying paints make touch-ups and trim work much easier because you can recoat and handle parts of the job without waiting hours for tack-free film; that means you’ll finish faster, avoid dirt nibs or run repairs, and get usable surfaces back into service the same day.
You’ll benefit from quick curing formulations when time’s tight. Use effective techniques: work in small sections, keep tools clean, and feather edges. Fast cures reduce downtime and let you assess coverage sooner.
Consider humidity and temperature to guarantee proper film formation.
- Small-section approach
- Clean tools regularly
- Feather edges carefully
- Monitor conditions
Reduced Drip Risk
If you’re doing touch-ups or trim, fast-drying paint cuts the time paint stays wet and heavy enough to sag, so you’ll get cleaner lines and fewer runs to fix later. You’ll work faster, reduce drip prevention worries, and keep sharp edges during tight paint application on trim and small defects. Fast curing helps when you must repaint adjacent sections quickly without rewetting edges. Use steady, light passes and check angles for pooling. Match sheen and technique to original finish so touch-ups blend and don’t attract attention.
| Benefit | Action |
|---|---|
| Less sagging | Light passes |
| Fewer runs | Fast strokes |
| Cleaner edges | Angle check |
| Quick recoat | Blend technique |
Ideal Small Areas
For small touch-ups and trim work, fast-drying paint lets you move quickly and keep crisp lines without waiting around for full cure.
You’ll focus on small area preparation: clean, sand, and prime chips or nicks so new paint bonds. Choose an ideal paint selection—fast-dry formulas with good coverage and UV resistance—for trims and accents.
Work in short sections, keep tools ready, and avoid broad strokes that invite lap marks.
- Clean surface first
- Lightly sand edges
- Use quality brushes
- Match sheen and color
That approach keeps touch-ups tidy and reduces heat-related drying issues.
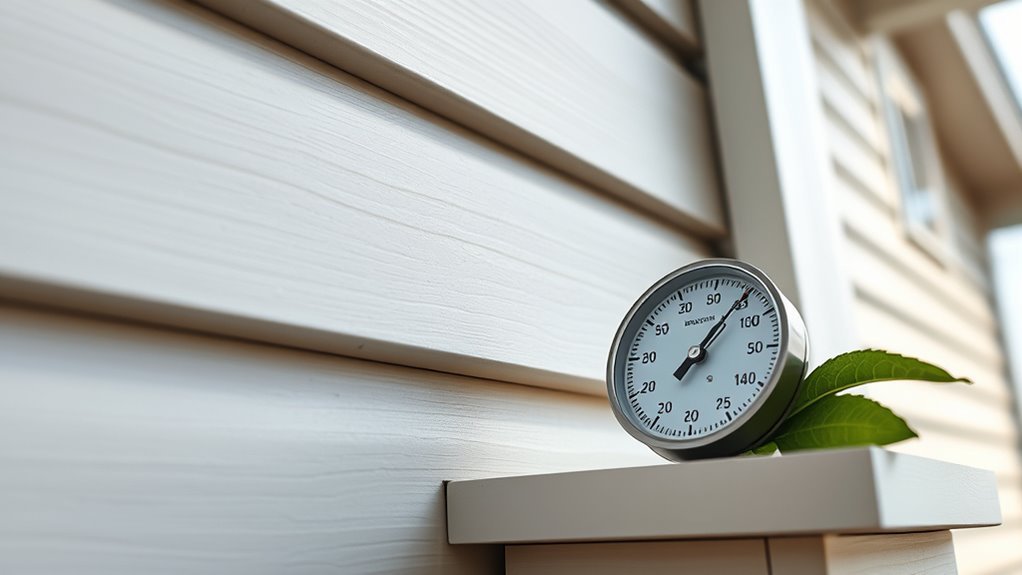
How to Check Surface Temperature Safely Before Painting
Wondering whether the surface is cool enough to paint? You should prioritize surface temperature safety before starting.
Use simple, noninvasive temperature measurement techniques to avoid damage: touch test (briefly) only for risk-free areas, paper or tape adhesion checks, and timing—measure in shade or early morning after the surface has cooled.
Don’t rely on ambient air temp alone; surfaces heat differently. If you suspect hot spots, wait until consistent cool readings across areas.
Record conditions—time, sun exposure, recent weather—so you’ll know when it’s safe to paint without harming finish or adhesion.
Using an Infrared Thermometer: Tips and Target Readings
You’ll want to use an infrared thermometer to confirm the proper surface temperature before you paint, since air temps can be misleading.
Aim the device at the surface from the recommended distance, hold it steady, and sweep a few spots to catch hot or cool patches.
Look for readings within the paint manufacturer’s target range—if they fall outside, wait or cool the surface.
Proper Surface Temperature
When you’re checking surface temps with an infrared thermometer, aim for readings that match the paint manufacturer’s recommended range rather than guessing by touch; most exterior paints perform best when the surface is between 50°F and 90°F (10°C–32°C), with direct-sun surfaces sometimes running 10–20°F hotter than ambient air.
You should include surface preparation and surface testing in your routine, and use temperature monitoring to predict drying times and paint adhesion. Consider weather conditions and environmental factors to preserve paint durability and exploit heat resistance. Follow correct application techniques to avoid failures.
- Check multiple spots
- Avoid peak sun
- Record readings
- Wait if out of range
Infrared Measurement Technique
If you’re using an infrared thermometer to check surface temperatures before painting, point it at multiple spots from the same distance and angle each time to get consistent readings. Hold it steady, wait for the display to stabilize, and note emissivity settings if your device allows adjustments.
You’ll use infrared technology for surface analysis and heat mapping to spot hot zones or cooler patches that affect coating adherence. Confirm temperature calibration and equipment reliability before work to improve measurement accuracy.
Combine thermal imaging and simple moisture detection scans, apply proper painting techniques, and record readings for clear data interpretation and decision-making.
Reading Manufacturer Temperature & Humidity Limits
Wondering what those tiny printed numbers mean? You’ll read temperature guidelines and humidity effects on the can to protect paint performance and curing processes.
Follow limits for application techniques and surface preparation so adhesion factors and drying times stay within spec. Watch weather conditions and use monitoring tools to confirm compliance.
- Check minimum and maximum temperature range
- Note acceptable relative humidity and dew point
- Match drying times to forecasted conditions
- Adjust application techniques for heat and moisture
Respecting labels keeps coatings reliable, prevents failures, and guarantees manufacturer warranty coverage.
How to Adjust Timing for Local Microclimates
You should track daily temperature swings so you paint during stable, safe windows.
Check surface temperatures too, since sun-warmed siding can exceed air temps and ruin adhesion.
When needed, shift your work hours to mornings or evenings to avoid peak heat.
Track Local Temperature Swings
How do you account for the small but important temperature swings that happen across your property and neighborhood? You’ll use temperature tracking and humidity monitoring to spot temperature variations and humidity trends that affect paint conditions.
Watch local forecasts and weather patterns daily, noting climate changes and seasonal fluctuations. Anticipate heat impacts during midday and cooler pockets at night so you can schedule application windows.
- Place sensors in sun and shade
- Log readings before and after painting
- Compare microclimate data to local forecasts
- Adjust start times for daily temperature variations
This keeps paint curing consistent and reduces defects.
Account For Surface Heat
Because surfaces can heat far above ambient air temperature, you’ll need to check and adjust for their specific heat loads before you paint. Measure surface temperature with infrared tools and use temperature monitoring to spot hot spots.
Consider heat retention of materials—dark siding stores heat, reflective surfaces stay cooler—and how heat effects alter drying speed and paint adhesion.
Plan surface preparation when temperatures are stable; high temperature fluctuations can cause blistering and poor paint performance. Time work for cooler parts of the day, allow longer cure windows, and choose products rated for higher substrate temperatures to guarantee lasting results.
Shift Work Hours
When should you schedule painting to dodge daily heat peaks and local microclimates? You’ll use shift scheduling to reduce heat exposure and protect paint quality while keeping work productivity high.
Coordinate with temperature monitoring to start cool shifts, limit midday tasks, and follow safety regulations to prevent employee fatigue. Good project management balances crew communication and work life balance so crews stay rested and efficient.
Implement clear protocols:
- Morning and evening shifts when surfaces are cooler
- Break schedules aligned with heat forecasts
- Rotate crews to minimize continuous sun exposure
- Real-time temp checks to adjust plans promptly
Best Time-of-Day Schedule for Hot-Weather Exterior Painting
Wondering what time of day gives you the best chance of a smooth, durable finish in hot weather?
Plan morning sessions for critical coats when temperatures and humidity impacts are lower, aiding surface prep and controlling drying times.
Plan morning sessions for critical coats when cooler temperatures and lower humidity aid prep and control drying times.
Use evening strategies for touch-ups as temperatures drop, but monitor temperature checks to avoid dew.
Choose paint types rated for heat and fast curing; consult weather patterns to schedule around heat spikes.
Prioritize crew comfort with breaks and hydration so work remains precise.
Focus on timing, not tricks: coordinated shifts, clear timelines, and responsive adjustments will protect finish quality.
Using Shade, Tarps, and Covers to Lower Surface Heat
Scheduling helps, but you’ll still face sun-baked surfaces that soak up heat faster than air temperatures rise.
So use shade, tarps, and covers to control what the sun does to the substrate. You’ll want practical shade strategies and tarp techniques that lower radiant load and enable proper adhesion.
Think temporary awnings, breathable tarps, and reflective covers to promote surface cooling before and during painting. Monitor substrate temperature with an infrared thermometer.
Consider:
- Positioning portable canopies for peak sun hours
- Using reflective tarps over dark siding
- Securing breathable covers to prevent trapped moisture
- Shading nearby ground to reduce reflected heat
Choosing Paint Formulated for High Heat
When temperatures soar, you’ll want paint made for high heat—like silicone, ceramic, or specially rated alkyds—to withstand the stress.
Check labels for UV and heat resistance so the finish won’t chalk, fade, or blister under sun and sustained heat.
Also prep the surface thoroughly—clean, remove rust or loose coating, and follow primer recommendations for best adhesion.
High-Heat Paint Types
If your project will face sustained high temperatures, pick a paint that’s engineered for heat resistance rather than a standard exterior or interior formula.
You’ll need products that address high heat challenges and maintain paint performance when surfaces get hot. Know common types and where they work best:
- Silicone-based high-temp coatings for metal exhausts and ovens
- Ceramic-modified paints for radiant-heat barriers and industrial surfaces
- Alkyd heat-resistant enamels for grills and machinery
- Specialized intumescent or ablative coatings for fire-protection and extreme thermal loads
Choose based on maximum service temperature, adhesion, and compatibility with the substrate to guarantee durable results.
UV And Heat Resistance
Although high temperatures alone can break down conventional paints, UV exposure compounds that damage by accelerating fading, chalking, and binder degradation.
So pick coatings formulated to resist both heat and sunlight. You should choose products labeled for UV protection and heat resistance to maintain color and gloss on sun‑exposed walls and trim.
High‑quality exterior formulations include UV stabilizers and flexible binders that tolerate thermal cycling without cracking.
Apply during milder parts of the day to let films form properly.
Check technical data sheets for maximum service temperatures and UV ratings, and favor paints with proven warranties for harsh, sunny climates.
Surface Preparation Needs
Sun and heat-resistant coatings perform best when they’re applied to properly prepared surfaces, so you’ll want to spend time getting substrates ready before you paint.
Focus on surface cleanliness and surface integrity to maximize paint adhesion. Consider environmental factors and weather impact—high heat shortens drying times and can trap substrate moisture.
Use appropriate prep techniques to remove dirt, mildew, and loose material, and adjust application methods for hot conditions to protect finish quality.
Remember these checklist items:
- Clean and degloss for adhesion
- Check substrate moisture before painting
- Time coats to account for fast drying times
- Shield work from extreme weather impact
Additives and Extenders to Slow Drying in Heat
When temperatures push paint to set too fast, you can use retarders, extenders, or specialized additives to slow drying and keep working time manageable. You’ll see additive benefits like extended open time, smoother leveling, and improved paint performance under hot sun.
Choose extender options compatible with your coating—waterborne vs. solvent-based—and follow manufacturer dosing. For heat management, work mornings or shaded areas, monitor drying times, and adjust application techniques to avoid lap marks.
Consider weather considerations like humidity and wind, and don’t skip proper surface preparation before adding anything. Test small areas first so you’re confident in results before proceeding broadly.
How to Prep Surfaces Differently When It’s Hot
Slowing paint with additives helps, but you also have to change how you prep surfaces in hot conditions.
You’ll focus on surface preparation to control surface moisture and offset humidity impact and temperature fluctuations. Clean, cool surfaces promote paint adhesion and consistent drying times despite weather conditions and paint formulation differences.
- Work early or late to avoid peak heat and preserve surface moisture.
- Mist and wipe to remove dust without overwetting; monitor humidity impact.
- Choose primers with heat resistance matched to application techniques and paint formulation.
- Sand and repair quickly to minimize exposure to rapid drying times and temperature fluctuations.
Roller, Brush, and Sprayer Tips for Hot Weather
Because heat speeds film formation and can change how paint flows, you’ll need to adjust your rolling, brushing, and spraying techniques to keep coverage even and avoid lap marks or dry edges. You’ll use roller techniques with shorter, wetter passes; modify brush application to maintain a wet edge; and make sprayer adjustments to lower atomization. Practice surface cooling, active heat management, and temperature monitoring. Watch drying times to prevent adhesion issues and tweak paint consistency as needed. Keep equipment care tight to avoid clogs.
| Tool | Adjustment | Benefit |
|---|---|---|
| Roller | Short, wet passes | Even coverage |
| Brush | Slow, full strokes | Wet edge |
| Sprayer | Lower pressure | Finer spray |
How Many Coats and Wait Times in Hot Conditions
If temperatures climb, you’ll usually need the same number of coats but allow longer flash times between them to guarantee proper adhesion and avoid trapping solvents under a skin of fast-drying paint.
If temperatures rise, keep coat count the same but lengthen flash times to ensure adhesion and avoid trapped solvents.
In hot weather, monitor drying rates and curing times closely, adjust coat thickness to prevent cracking, and choose paint formulations designed for heat.
Surface preparation matters more when environmental impacts accelerate curing. Use measured application techniques to protect finish quality and paint longevity.
Consider these quick rules:
- Thin coats reduce blistering
- Extended flash time aids adhesion
- Avoid midday sun to limit weather effects
- Follow manufacturer curing times precisely
How to Test a Small Area Before Committing to the Whole Job
Before you commit to painting the whole surface, test a small, inconspicuous area to confirm adhesion, color match, and drying behavior under current heat conditions.
You’ll use simple test methods and patch trials to evaluate performance: clean the spot, apply chosen material choices, note drying conditions, and record results.
Conduct surface evaluation and temperature checks at painting time and again during curing; log humidity levels too.
This quick job preparation step informs project planning, helps predict paint adhesion issues, and reveals whether alternative material choices or timing adjustments are needed before scaling up to the full exterior.
What to Do if a Heatwave Hits Mid-Project
When a heatwave rolls in mid-project, pause and reassess your plan rather than pushing ahead—high temperatures can ruin wet paint, cause blistering, and interfere with adhesion.
You should protect surface prep, monitor temperature fluctuations, and prioritize worker safety to prevent heat stress. Consider cooling strategies and shade options, and accept short-term project delays rather than risking rework.
Use these steps to act calmly:
- Shift work to cooler hours and make scheduling adjustments.
- Increase moisture management and slow drying with misting where safe.
- Shelter freshly painted areas from direct sun.
- Provide hydration, breaks, and shade for crews.
Document decisions to justify delays.
How to Fix Common Hot-Weather Paint Failures
If your paint is drying too fast and leaving lap marks or poor adhesion, slow it by working in smaller sections, misting the surface lightly, or using a retarder additive.
Check surface temperature with an infrared thermometer and avoid painting when the substrate is hotter than the paint’s recommended range, or cool the area with shade or a fan.
These steps will help you fix common hot-weather failures and get a smooth, durable finish.
Paint Drying Too Fast
Although fast drying might sound like a win on a hot day, it can cause paint to skin over, bubble, or fail to level—leaving you with visible brush marks, poor adhesion, and a brittle finish.
You’ll fix this by adjusting paint application and drying techniques: slow curing improves paint adhesion and finish. Monitor temperature and humidity effects, and plan job scheduling to avoid peak heat.
Focus on surface preparation and choose a coating selection rated for heat. Use simple heat management like shading and misting.
Tips:
- Work in morning/late afternoon
- Thin coats, more passes
- Watch temperature monitoring
- Account for weather impact
Surface Temperature Issues
Hot surface temperatures can wreck an otherwise well-executed paint job, so after managing fast drying you’ll want to focus on the actual temperature of the substrate.
You should start with thorough surface preparation and surface cleaning to guarantee paint adhesion; greasy or hot surfaces repel coatings.
Use temperature monitoring to avoid painting midday heat—aim for stable weather conditions and cooler mornings.
Control moisture and allow proper drying times between coats to prevent blistering from thermal expansion.
Adjust application techniques and paint layering: thinner coats, slower cure formulas, and shorter exposure reduce failures in hot weather.
When to Postpone Painting Until Cooler Weather
When temperatures stay above a paint’s recommended range or humidity climbs high, you should postpone the job until conditions cool—doing otherwise can ruin adhesion, extend drying times, and create visible flaws like blistering or sagging.
You’ll want to monitor painting conditions and weather forecasts, especially during summer challenges. Prioritize surface preparation and avoid rushed work that worsens adhesion issues or reduces paint performance.
Plan projects around lower humidity levels and milder temperature effects to guarantee proper drying times. Consider delaying if any of these apply:
- Sustained high heat
- Very high humidity
- Direct midday sun on surfaces
- Poor ventilation
Predicting Short-Term Weather Windows (24–72 Hrs)
When you’re planning paint work in the next 24–72 hours, check that projected temperatures stay within the paint’s recommended range so it can cure properly.
Watch humidity and dew point forecasts closely, since high moisture or overnight dew can ruin fresh coatings.
Also factor in short-term wind predictions—gusty conditions can cause overspray, dust contamination, and faster drying than expected.
Temperature Range Limits
If you’re planning a paint job over the next few days, focus on short-term temperature forecasts for the 24–72 hour window, because small swings can make or break adhesion and drying times.
You need clear temperature range limits to guide painting strategies and heat management. Know manufacturer min/max temps and adjust surface preparation and application techniques accordingly.
Consider color selection and how dark shades raise film temperature, affecting curing times and paint longevity. Use scheduling tips to avoid heat spikes.
Quick checklist:
- Verify daytime and nighttime temps
- Avoid surfaces >manufacturer limit
- Plan cooler application times
- Adjust technique for marginal temps
Humidity And Dew
Because humidity and overnight dew can ruin a fresh finish, you should check both relative humidity and dew point forecasts for the 24–72 hour window before you paint.
You’ll assess humidity effects and dew impact on moisture levels that alter paint performance. Favor windows with stable weather conditions and modest temperature fluctuations so drying times stay predictable.
Good surface prep and monitoring air quality reduce contamination risks. Choose painting techniques that tolerate higher moisture only when necessary, and delay when forecasts show high overnight dew or rising humidity.
Plan short sessions around low-humidity periods to protect finish integrity and adhesion.
Short-Term Wind Effects
Although wind can change quickly, you should check short-term forecasts and on-site conditions before starting a session, since gusts and steady breezes both affect spray patterns, drying rates, and dust contamination.
You’ll predict 24–72 hour windows by watching wind patterns, timing work for calmer periods, and adjusting surface preparation routines. Monitor hourly forecasts and on-site anemometer readings, and plan backups.
Consider these quick actions before painting:
- Delay spraying if gusts exceed manufacturer limits
- Shield work with temporary barriers
- Increase tack cloth frequency for dust control
- Adjust thinner and drying times for steady breezes
Stay flexible and prioritize quality.
Cost and Time Trade-Offs: Paint Now vs. Wait
When temperatures climb into the high 80s or above, you’ll have to weigh immediate costs against potential delays: painting now can save on labor rescheduling and seasonal price spikes, but it risks faster drying, adhesion problems, and costly touch-ups later.
You should run a clear cost analysis to compare current expense management versus wait benefits. Consider budget considerations, timing strategies, and project planning: will resource allocation shifts and contractor availability offset weather-related rework?
Assess financial implications of warranty claims, extra materials, and lost productivity. Decide based on quantified risks, timelines, and your tolerance for potential remedial costs.
Safety and Comfort Tips for Crews Working in Heat
If crews must work in high heat, prioritize hydration, shade, and scheduled breaks so everyone stays alert and avoids heat illness. You’ll prevent heat exhaustion by using hydration strategies, cooling techniques, and strict safety protocols.
Adjust crew scheduling to cooler hours, rotate tasks, and enforce work breaks. Use protective gear that’s breathable and sun-protective, plus shade solutions like canopies.
- Provide water, electrolyte options, and hydration reminders.
- Implement cooling techniques: misting fans and cold packs.
- Schedule frequent work breaks and rotate heavy tasks.
- Monitor health: check for heat exhaustion signs and record observations.
Keep sun exposure limited and track health monitoring consistently.
What Contractors and Warranties Say About Hot-Weather Painting
Check the paint can or tech sheet before you start so you know the manufacturer’s temperature limits and any required application windows.
You’ll also want to follow your contractor’s best practices for timing and surface prep to stay within those guidelines.
Finally, be aware that warranties often require you to meet those temp and timing conditions to keep coverage valid.
Manufacturer Temperature Limits
Manufacturers set temperature limits because paint chemistry and film formation change dramatically in heat. You’ll want to follow those specs to keep warranties valid and avoid costly failures.
You should read manufacturer guidelines and temperature recommendations before painting; paint specifications list application limits tied to product performance and curing conditions.
Consider environmental factors like humidity and direct sun, plus surface preparation and prevailing weather conditions to protect paint longevity. Contractors often refuse work outside those limits to avoid warranty voids.
Remember these priorities:
- Check product performance notes
- Respect application limits
- Monitor curing conditions
- Follow surface preparation guidance
Application Window Guidelines
After you’ve reviewed product specs and site conditions, you’ll want to know the practical application window contractors follow and what warranties actually require when temperatures climb. You’ll limit work to morning or late afternoon to manage temperature variations and humidity effects. Contractors stress surface preparation, proper application techniques, and monitoring drying times to protect paint quality and paint longevity across exterior surfaces. Expect adjustments for environmental factors and weather impacts. Use high-quality products and shade where possible.
| Time Window | Reason |
|---|---|
| Morning | Cooler temps |
| Afternoon | Stable humidity |
| Evening | Slower drying |
| Midday | Avoid rapid curing |
Warranty Coverage Conditions
Anyone can void a paint warranty by applying products in conditions the warranty doesn’t cover, and you’ll want to know those limits before you start work.
Read contractor instructions and product data sheets so you understand warranty implications and coverage limits tied to temperature, humidity, and surface conditions. If you ignore them, defects from improper curing may be excluded.
Ask for written confirmation of acceptable temperature ranges and required preparation. Keep records and photos in case you claim later.
Key factors often include:
- ambient temperature thresholds
- dew point and humidity limits
- surface temperature requirements
- allowable application times
How to Document Conditions to Protect Your Warranty Claim
If you want your warranty claim to hold up, document site conditions the moment you notice them. You should note date, time, weather, surface temperature, paint batch numbers, installer name, and any site deviations from agreed specs.
Good documentation practices mean logging observations promptly, keeping originals, and noting who was present. For warranty protection, create a concise written timeline and retain receipts, contracts, and any communications.
Use a consistent format so records are easy to follow. Don’t rely on memory; contemporaneous notes strengthen your position. Share copies with your contractor and keep backups in case a dispute arises.
How to Record Photos and Readings for Contractor Disputes
When you’re disputing a contractor, photograph the ambient conditions around the work area—sky, surface, and any heat sources.
Record temperature and humidity readings with a reliable gauge and note the device model.
Make sure photos and readings are timestamped and geotagged so your evidence is verifiable.
Photograph Ambient Conditions
Because disputes over paint jobs often hinge on conditions at the time of application, you should document ambient factors with clear photos and precise readings.
Use ambient photography techniques and brief captions showing time, location, and context for weather condition assessment. Capture shadows, sun angle, surface gloss, surrounding heat sources, and any visible moisture. Store images with timestamps and backup copies.
Include a short written note alongside photos describing observed conditions.
- Shoot wide, medium, and close-up views
- Photograph reference objects for scale
- Record sky visibility and wind effects
- Backup to cloud and local drives
Document Temperature Readings
How should you record temperature readings so they’re credible in a contractor dispute? You’ll use consistent temperature documentation: note device model, calibration, and location. Capture multiple temperature measurements during application to show temperature monitoring and temperature fluctuations. Photograph the gauge near the painted surface and log ambient readings to demonstrate temperature impacts and adherence to temperature guidelines. Record temperature variations over time for temperature analysis. Use a simple table for clarity:
| Time | Surface °F/°C | Ambient °F/°C |
|---|---|---|
| 10:00 | 95°F / 35°C | ninety |
| 14:00 | 105°F / 41°C | 100°F / 38°C |
Timestamp And Geotag Evidence
If you want your temperature photos and readings to hold up in a contractor dispute, timestamping and geotagging each image is essential: you’ll prove when and where measurements were taken.
Use apps or camera settings that embed metadata, enable timestamp tracking, and confirm geotag verification. Record device model, thermometer serial, and weather source in a brief log. Keep originals and backups.
- Capture wide shots showing work area and thermometer
- Save raw files with embedded time and GPS
- Note any calibration or adjustments immediately
- Sync photos with written logs and reliable weather data sources
Long-Term Climate Trends and Future Repaint Timing
As global temperatures rise and precipitation patterns shift, you’ll need to factor long-term climate trends into when you plan future repaints. Sustained increases in heat, humidity, or more intense storm seasons can shorten paint life and change ideal application windows.
You should monitor climate impacts and temperature evolution in your region, using future forecasting and seasonal trends to schedule work.
Consider environmental considerations and weather patterns that affect paint longevity, adopt climate adaptability in material choices, and plan repainting strategies that address long term effects.
That proactive approach helps protect finishes and reduces premature recoats.
Quick Decision Checklist: Step-by-Step for This Afternoon
Need a quick yes-or-no? Use this checklist to decide if you should paint this afternoon.
Check surface preparation first: is the substrate clean and dry for good paint adhesion?
Check surface preparation first: ensure the substrate is clean and fully dry for proper paint adhesion.
Confirm temperature monitoring shows safe ranges; avoid extreme heat effects that speed paint drying too fast.
Note humidity levels and current weather patterns; high humidity or sudden storms will ruin finish.
Match application techniques to surface materials to guarantee even coverage.
Consider project scheduling: can you finish before evening temperature drops or heat spikes?
- Surface preparation complete
- Temperature monitoring in safe range
- Humidity levels acceptable
- Application techniques matched to materials
Tools and Apps to Monitor Painting Conditions
You can use weather monitoring apps to track temperature, wind, and UV forecasts before you start painting.
Pair those apps with portable thermal and humidity sensors to get real-time readings at the job site.
Together they help you decide whether conditions are safe for paint application.
Weather Monitoring Apps
Anyone prepping for a painting job should use a reliable weather app to track temperature, humidity, wind, and precipitation in real time—conditions that determine whether paint will dry properly or fail.
You’ll want tools that show weather impact clearly and offer monitoring features like temperature alerts and humidity tracking. Check user reviews and app comparisons to pick one that fits your workflow.
Use apps for planning, not replacing judgment. Quick painting tips include avoiding high wind and rapid temperature swings.
Recommended features to look for:
- Accurate forecasts
- Real-time alerts
- Historical trends
- Easy sharing of conditions
Thermal and Humidity Sensors
Weather apps give a broad picture, but thermal and humidity sensors put local conditions in your hands so you can act on them. You’ll use thermal monitoring to spot hot surfaces and humidity tracking to avoid blistering or slow curing. Portable sensors clip to trim, log temps, and alert when conditions cross safe thresholds. Choose devices with data logging, Bluetooth, and weatherproofing so you can check readings from your phone before you roll.
| Sensor | Key Feature | Use Case |
|---|---|---|
| Infrared thermometer | Surface temp | Spot-check siding |
| Hygrometer | % RH | Monitor humidity |
| Data logger | Bluetooth | Record conditions over time |
Sample Short Test Protocol for a Patch Trial
Before you start the full job, run a short patch trial to confirm how the paint behaves in the current heat and humidity. You’ll pick a discreet area, apply the planned coat thickness, and note drying and adhesion.
Use patch testing to spot blistering, orange peel, or sagging early. Record temperatures, surface temp, and relative humidity for trial evaluation. Check film after recommended recoat and again at 24–48 hours. Compare results to manufacturer limits and your job specs.
- choose representative surface
- follow intended application method
- document conditions and timing
- inspect adhesion and appearance
Further Reading and Manufacturer Resources
If you want to dive deeper, consult a mix of manufacturer technical data sheets, industry handbooks, and peer-reviewed articles to get reliable guidance on painting in heat and humidity.
You’ll find manufacturer guidelines that clarify temperature limits, surface prep, and curing times. Use curated painting resources and product recommendations to choose heat-tolerant coatings.
Review safety precautions for solvents, ventilation, and sun exposure. Study application techniques like reduced film thickness and slower rollers for hot conditions.
Prioritize solvent safety, proper ventilation, sun protection, and adjust application—thinner coats and slower rollers in heat.
Check maintenance tips for inspection and recoating. Don’t forget environmental impacts of volatile compounds and quality assurance protocols to document results and guarantee long-term performance.
Frequently Asked Questions
Can Extreme Heat Affect VOC Emissions and Paint Odor Outdoors?
Yes — extreme heat increases VOC emissions and paint odor outdoors, so you’ll need to follow VOC regulations and adjust paint application timing, thinner choice, and ventilation strategies to reduce fumes and guarantee proper curing.
Can Paint Color Choice Influence Heat-Related Drying Problems?
Yes — lighter colors can cut surface temperatures by up to 30%, so your color selection matters: choosing high heat-reflection hues helps prevent too-rapid drying, blistering, and adhesion problems, while dark shades increase those risks.
Do Primers Need Adjusting for High-Temperature Exterior Painting?
Yes — you should adjust primers for high-temperature exterior painting: choose a primer formulation rated for heat, follow temperature guidelines on the label, thin or use slower-cure additives if needed, and test adhesion before full application.
Can Insects or Debris Increase During Fast Drying in Heat?
Birds of a feather flock together — yes, during fast drying in heat you’ll see more insect attraction and debris settling, because tacky paint draws bugs and airborne dust lands quickly on surfaces before the film fully cures.
How Does Nighttime Dew After Hot Days Impact Paint Curing?
Nighttime dew after hot days slows curing because dew formation reintroduces moisture, so your paint can soften, risk adhesion failure, and extend moisture retention on the surface; you’ll want drier nights or protective coverings.
Conclusion
You’ve got the checklist and tools—now what? If temperatures exceed the paint label’s limits or humidity’s high, wait for cooler, drier conditions or choose a high-heat formula. Do a quick patch test this afternoon to confirm drying and adhesion. Remember: timing and prep beat rushing in hot weather. Trust what the can and your trial tell you, and you’ll avoid blistering, poor adhesion, and wasted effort. Ready to paint smart?