When Painting a Wall Do You Cut In First?
Yes — you should usually cut in first along trim, ceilings, and tight corners to get crisp edges and prevent drips. Use a steady hand, hold the brush like a pencil, and work in short sections so you can feather into the wall. Then roll and immediately blend into those wet edges for a seamless finish. For oil, high‑gloss, or quick‑dry paints, cutting in first is especially helpful. Keep tools clean and you’ll see pro results if you want more tips.
Cut In First or Roll First? Quick Decision Guide
If you’re wondering whether to cut in or roll first, choose based on edge control and drying time: you’ll cut in first when you need precise lines around trim, ceilings, or tight corners, using steady cutting techniques to limit overlap.
Decide by edge control and drying time: cut in for precision around trim, then roll into wet edges for seamless blends
Cut a few feet of perimeter, then roll immediately into wet edges so paint application blends seamlessly.
If drying’s very fast or surfaces are textured, rolling first can work, but expect more touch-ups.
Plan sequence room by room, keep a wet edge, and match paint load on brush and roller. That saves time and reduces visible seams.
Why Cutting In Produces Crisper Edges
When you cut in, your steady hand technique keeps the brush where it belongs so lines stay sharp.
You’ll control the amount of paint at the edge, preventing drips and blurring. Guiding strokes away from the trim rather than toward it helps produce crisp, professional-looking edges.
Steady Hand Technique
Steady your wrist and focus on the edge: cutting in cleanly is all about controlled, deliberate strokes that let you lay paint precisely where the roller won’t reach.
You’ll benefit from steady hand exercises—simple wrist rolls, fingertip squeezes, and slow mirror tracing—to build muscle memory before you load your brush.
Hold the brush like a pencil, use your forearm for movement, and keep a consistent angle to minimize drips.
Practice basic cutting techniques on scrap cardboard to refine pressure and pace.
Stay patient, pause to wipe excess paint, and work in short sections so your lines stay crisp and confident.
Edge Paint Control
Because cutting in lets you control paint thickness and direction at the boundary, you get a crisper edge than with a roller alone.
When you cut in, focus on edge alignment so the paint meets trim or adjoining walls neatly; keep a consistent strip of paint rather than blobs. Adjust brush pressure to meter paint flow—light for thin, precise lines; firmer when you need more coverage.
Work in short, confident strokes and reload the brush before it drags. That control prevents roller bleed and feathering, letting you blend later with a roller without losing the sharpness you established.
Brush Stroke Direction
Match your brush strokes to the edge you’re cutting in so the bristles lay paint down in a single, controlled direction; that consistency keeps the paint from feathering and creates the crisp line you want.
You’ll use deliberate brush stroke techniques to follow the seam between wall and trim, moving from the wall toward the trim or vice versa depending on access.
Make small, confident passes rather than scrubbing. Subtle brush angle adjustments help the bristles kiss the edge without bulging paint onto trim.
Practice maintaining steady pressure and direction; the result is a sharp, professional-looking edge with minimal touch-up.
When Pros Roll First and Cut In Wet
When pros roll the field first and cut in wet, they lay down continuous, even coats so the brushed edges blend seamlessly into the rolled surface.
You’ll adopt pros rolling habits and follow surface preparation before painting. Use cutting techniques that emphasize wet blending and edge precision while maintaining workflow efficiency. Focus on paint application and application methods that prevent lap marks.
- Start with consistent roller passes for uniform sheen.
- Cut in immediately while paint stays wet.
- Keep a loaded brush and feather edges gently.
- Use professional tips: maintain pace, clean edges, and efficiency strategies.
Paint Types That Favor Cutting In First
If you’re working with oil-based paints, high-gloss finishes, or quick-drip formulas, you’ll usually want to cut in first to control edges and prevent lap marks.
These types tend to level slowly or show brush and roller marks more easily, so cutting in gives you cleaner lines.
Start by cutting a crisp perimeter before rolling to get the best final appearance.
Oil-Based Paints
- Prep edges
- Brush selection
- Maintain wet edge
- Clean tools
High-Gloss Finishes
Oil-based paints demand careful edge prep and tool care, and high-gloss finishes take that precision a step further because they show every brushstroke and overlap.
When you’re cutting in, use a steady, loaded brush and short, controlled strokes to create a crisp line; high gloss durability means mistakes stand out, so tidy edges matter.
Work in manageable sections so you can feather into the rolled area while the sheen stays consistent.
Clean and condition brushes between sessions to avoid drag.
Inspect under good light for tiny imperfections and touch them before the finish fully sets to preserve sheen maintenance.
Quick-Drip Formulas
Many waterborne and fast-drying alkyd blends fall into the quick-drip category, and they reward a cutting-in-first approach because they level rapidly and resist singling out dragged lines.
You’ll want to cut in before rolling so edges stay crisp and the roller blends seamlessly during paint application.
Consider these practical points:
- Use a high-quality angled brush for control.
- Work in small sections to match drying rates.
- Keep a wet edge to avoid lap marks.
- Adjust thinning slightly for quick drying paints to reduce drips.
Cutting in first saves touch-ups and yields a smoother, more professional finish.
Paint Finishes and Their Edge‑Blending Needs
Because different finishes reflect light and show brush or roller marks differently, you’ll need to adjust your edge‑blending technique for each one.
Consider sheen variation and light reflection: gloss hides less than matte, so you’ll blend tighter on shinier surfaces.
Check finish compatibility and paint durability to guarantee topcoats won’t flake.
Prioritize surface preparation and color matching at edges to avoid visible seams.
Use application techniques that suit texture contrast—brush for detail, roller for flat areas—and account for environmental factors and drying times to avoid lap marks.
Match tools to finish and work in small sections for seamless shifts.
Room Size and Layout That Affect Your Order
In a small room you’ll want to plan your cutting‑in order to avoid bumping wet edges and to make the most of limited maneuvering space.
In an open layout you’ll need a strategy that prevents lap marks across sightlines and coordinates multiple wall planes.
Think about furniture placement and traffic flow so you can choose the sequence that keeps edges crisp and work efficient.
Small Room Strategies
When you’re working in a small room, plan your cutting-in order to minimize trips and awkward reaches; start with the wall sections farthest from your entry and work toward the door so you won’t trap yourself or smudge fresh edges.
Consider how small space choices—color psychology and cohesive palettes—change perception. Account for wall textures and light effects when choosing brushes and drying time.
Place mirrors and wall art after paint to test impact on furniture arrangement and decorative accents. Prioritize edges around vertical stripes and focal points.
Use this quick checklist:
- Tape edges by far wall
- Cut near ceiling
- Work down walls
- Exit through door
Open Layout Considerations
Moving from small-room sequencing, open layouts demand a different cutting-in strategy because you’ll be juggling sightlines, traffic flow, and larger uninterrupted wall runs.
In an open layout you’ll prioritize cut lines that support color coordination across zones, consider furniture placement before you tape, and use paint contrasts to define areas without blocking flow.
Pay attention to light effects and wall textures that alter space perception; test swatches in different spots.
Cut where visual balance and design cohesion matter most—around focal walls, between differing textures, and near high-traffic passages—so changes read intentional and tidy.
Skill Level: When Beginners Should Cut In First
Because precision takes practice, beginners should usually cut in before rolling large areas. You’ll avoid beginner mistakes and handle common challenges by working methodically.
Follow these steps to build confidence and minimize touch-ups:
- Start with a small section to practice steady edges.
- Keep a wet edge so seams stay smooth.
- Use short, controlled strokes near trim and corners.
- Pause to assess coverage and correct any drips.
Cutting in first helps you control paint placement and prevents accidental smudges on trim.
With repetition, your speed and accuracy will improve, reducing frustration and wasted paint.
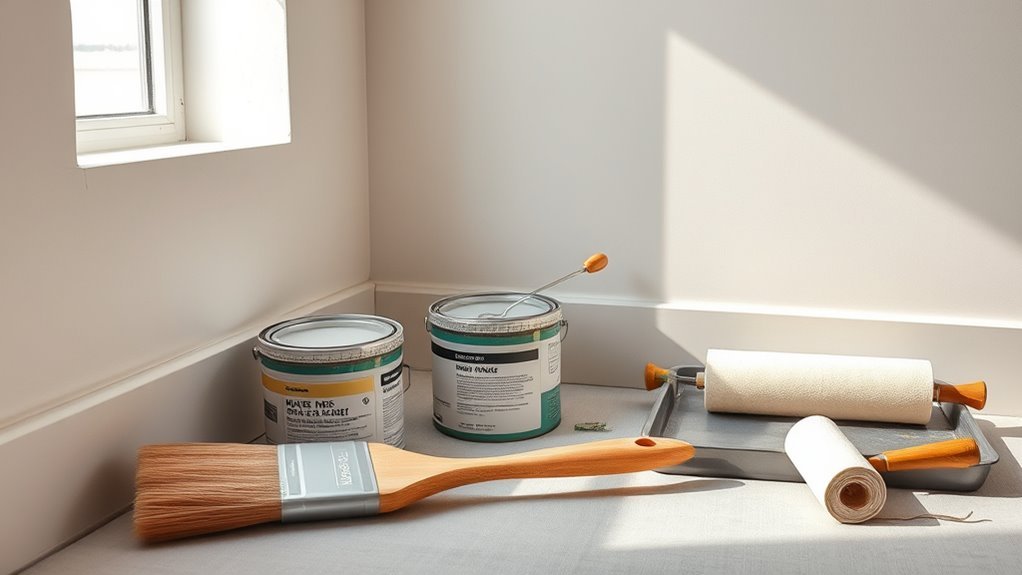
Tools You Need to Cut In Like a Pro
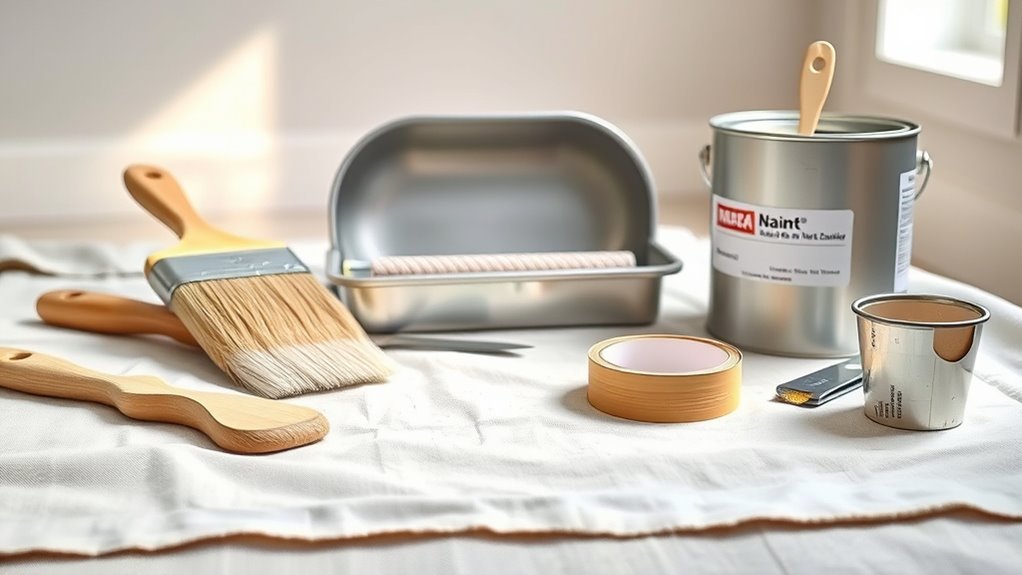
Now that you’ve practiced cutting in, set yourself up with the right tools to speed the job and improve your edges. Gather cutting tools suited to your wall textures and focus on surface preparation to remove dust.
Choose brush types appropriate for trim and corners; avoid diving into “best brushes” specifics here. Use painter’s tape sparingly and pair it with edge guides for straighter lines.
Combine rolling techniques for large areas with careful cut‑ins along seams. Have paint trays ready, follow cleanup methods promptly, and wear safety gear.
A tidy, minimal kit saves time and yields crisper results.
Best Brushes for Clean Cut‑In Lines
Choose a brush that matches the cut‑in task: a narrow, angled sash brush for tight corners and trim, a 2½–3‑inch high‑quality nylon or polyester blend for broad straight lines, and a small artist’s brush for detail spots you can’t reach with a larger tool.
Choose the right brush: angled sash for trim, 2½–3″ nylon/poly for edges, and a tiny artist’s brush for detail.
You’ll select brush types and brush sizes to balance line precision and coverage.
- Pick edge tools matched to edge materials (wood, drywall, metal).
- Favor reputable paint brands and brand recommendations for compatibility.
- Practice technique practice: steady hand, angled bristles, controlled loads.
- Do brush maintenance and follow cutting tips to keep crisp lines.
Choosing the Right Roller Nap for Smooth Blending
After you’ve cut clean edges with the right brushes, pick a roller nap that helps blend those lines into the rest of the wall without leaving texture mismatches.
Choose nap length based on wall finish: 1/4″–3/8″ for smooth plaster, 3/8″–1/2″ for lightly textured, and 3/4″ or more for heavy texture.
Match roller types to paint sheen and surface to avoid lap marks. Load evenly, roll out excess, and feather into the cut‑in while paint is wet.
Use consistent pressure and overlap strokes with proper blending techniques so the shift between brush and roller disappears.
Painter’s Tape vs. Freehand Cutting In: When to Use Tape
Decide whether to tape or cut in freehand based on the job’s demands and your comfort level: use painter’s tape for tight deadlines, crisp multi-color edges, or surfaces you can’t steady easily.
Opt for freehand when you want speed, avoid tape residue, or can produce a steady, consistent line. You’ll weigh tape advantages versus mastering freehand techniques.
- Use tape application for sharp edge definition and when cutting precision matters.
- Choose freehand for quicker work and fewer setup steps.
- Mind tape longevity and proper tape removal to protect finishes.
- Consider tape alternatives for textured or curved surfaces.
How to Properly Load a Brush for Cutting In
1 steady load on your brush sets the stage for a clean cut-in line, so dip only the lower third of the bristles into paint, tap the brush against the can’s inner ridge to remove excess, and then gently stroke it across the can’s lip to blend and prevent drips.
You’ll judge brush loading by feel: the ferrule should feel damp but not heavy. Check paint consistency—thin paint soaks in and sags, thick paint resists smooth release—adjust with manufacturer’s thinner if needed.
Refill frequently rather than overloading. Keep strokes deliberate, reload the same way, and wipe the tip to avoid blobs.
Step‑By‑Step Method to Cut In a Corner
Pick the right angled sash or trim brush so you can reach tight corners without fighting the wall.
Position the brush at a slight angle and use steady, controlled strokes to lay paint precisely where the two surfaces meet.
Finish with light, outward feathering strokes to blend the edge into the wall for a seamless look.
Choose The Right Brush
When you’re cutting in a corner, choosing the right brush makes the job faster and neater; go for a high-quality angled sash brush in a size that matches the corner width so you have control without overloading paint.
Pick brush types based on paint compatibility and surface. Consider bristle materials: synthetic brushes for latex, natural fibers for oil.
Match brush sizes to corner width. Learn basic brush techniques and maintain brush care to extend life.
- Angled brushes: precision in tight corners.
- Synthetic brushes: durable with water-based paints.
- Natural fibers: smooth finish with oil-based paints.
- Brush brands: test for performance.
Positioning And Angle
Before you start cutting in, position yourself so your forearm can move in a steady, controlled arc and your wrist stays relaxed; this lets you keep the brush at a consistent angle and follow the corner line smoothly.
Use a clear positioning strategy: stand where your shoulder, elbow, and hand align for natural motion. Adjust stance for small angle adjustments and refine brush placement so bristles meet the wall at the desired angle.
Rely on visual alignment between bristle tip and corner, maintain confident hand positioning, and keep consistent edge proximity.
Prioritize angle precision in every stroke to master the cutting technique.
Smooth Feathering Technique
Although it looks simple, smooth feathering takes deliberate strokes and steady wrist control to create a clean, blended edge in a corner. You’ll use the feathering technique for smooth blending and edge softening, focusing on brush control and edge alignment to guide paint shifts.
Work in thin paint layering and match wall finish for texture matching. Follow these steps:
- Load the brush lightly and remove excess for controlled strokes.
- Anchor the brush tip at the corner, pull outward with gentle pressure.
- Soften the edge by flicking the wrist to taper paint.
- Inspect shifts and redo any hard lines until seamless.
How to Cut In Around Windows and Trim
Start by masking the glass and adjacent trim, then load a sharp angled brush with a modest amount of paint so you can work steadily and avoid drips. You’ll focus on window framing and surface preparation: clean, sand, and prime edges for paint adhesion. Use precise tool selection and trim techniques to follow corner strategies and pattern alignment. Seal edges against bleed with a thin bead of paint, watch light reflection to catch missed spots, and match color at joints for a seamless look. Remove tape while paint is tacky to preserve crisp lines.
| Tool | Tip | Purpose |
|---|---|---|
| Angled brush | Modest paint | Edge sealing |
| Painter’s tape | Mask glass | Pattern alignment |
| Sandpaper | Light scuff | Paint adhesion |
| Cloth | Wipe dust | Surface preparation |
Cutting In at Baseboards and Door Frames
When you cut in at baseboards and door frames, work with a sharp angled brush and just enough paint so you can steady your hand and avoid drips; this lets you lay a clean bead along the gap where wall meets trim and keeps paint from running onto the floor or into the jamb.
Use baseboard techniques and door frame strategies to stay neat and efficient.
- Tape edges where needed to protect flooring.
- Load brush modestly to prevent blobs.
- Pull steady strokes away from trim toward wall.
- Inspect and touch tiny gaps before rolling.
Keep motion smooth and change brush when frayed.
How to Cut In Ceilings and Crown Molding
Cut a steady bead of paint where the wall meets the ceiling and crown molding by using a sharp angled brush, keeping the load light so you don’t get drips, and working in smooth, controlled strokes that move away from the trim onto the wall.
Position yourself so you can see the junction clearly, brace the hand holding the brush, and use your wrist for small steady motions.
For ceiling cutting, tilt the brush slightly toward the ceiling for a clean line, then feather out onto the wall.
With crown molding, follow its profile, painting one small section at a time to avoid overlaps.
Cutting In Around Light Fixtures and Outlets
After you’ve established clean lines at the ceiling and crown molding, move on to fixtures and outlets where careful brushing matters most.
Prepare wall prep and note fixture placement and outlet placement before cutting in. Consider fixture types and sizes, room lighting, and paint colors to guide edges.
Use proper cutting tools and cutting techniques, and follow outlet safety and electrical concerns by turning power off and removing covers.
- Label locations and map fixture sizes.
- Use angled brushes for tight gaps.
- Paint around fixtures after removal when possible.
- Replace covers carefully to protect fresh paint.
How to Avoid Lap Marks When Cutting In First
When you cut in first, work in small sections so each area stays manageable.
Keep a wet edge by moving quickly between adjacent strokes, and use a proper brush technique—light pressure and long, even pulls—to blend the new paint into the rolled area.
Doing these three things will help prevent lap marks and give you a smooth finish.
Work In Small Sections
If you work in small, manageable sections and keep a wet edge between the cut-in and rolled areas, you’ll prevent lap marks and get a seamless finish.
Use a small section strategy to stay organized and keep your pace steady for efficient painting. Focus on one vertical area at a time, cut in, then roll before moving on.
- Outline a 3–4 foot zone to tackle.
- Cut in along trim and corners within that zone.
- Roll and blend outward while paint is wet.
- Move methodically to the next zone, repeating.
This keeps edges consistent and reduces rework.
Maintain Wet Edges
Keeping a wet edge is what prevents visible lap marks, so work while the cut-in and rolled paint overlap and stay damp. You’ll plan each small panel so brush and roller meet before drying; that’s the core of wet edge techniques.
Move steadily along the wall, keeping a thin, even paint film to avoid ridges. When joining sections, feather the roller into the cut-in to allow smooth edge blending.
If paint starts to skin over, stop and blend immediately or restart that span. Maintain consistent speed, monitor drying conditions, and use matching paint load to preserve seamless shifts.
Use Proper Brush Technique
Start by loading your brush correctly and holding it like a pencil so you get control without splaying bristles; dip only about a third of the bristle length, tap off excess, and use steady, confident strokes that follow a consistent direction.
You’ll refine brush grip, brush angle, and hand stability to control paint flow and stroke pressure. Practice technique practice to match paint consistency to surface texture for smooth results.
Tips:
- Use light stroke pressure near edges for edge precision and minimal edge overlap.
- Maintain consistent paint flow; reload before dragging dry.
- Match brush angle to corner profiles.
- Train steady hand stability.
Blending Brush Strokes With the Roller Finish
A few careful passes will help you blend brush edges into the roller’s texture so the wall looks seamless. Use brush blending and roller technique together: soften cut-in edges, match nap direction, and keep stroke synchronization for paint harmony. Work wet-on-wet, employ blending methods like light feathering, and focus on edge softening and edge refinement to avoid hard lines. Maintain texture matching and application consistency by rolling out from the brushed area immediately. Practice finish shift with small overlapping strokes.
| Brush edge | Roller finish |
|---|---|
| Feathered | Lightly rolled |
| Blended | Even texture |
When Paint Dries: Timing Your Cut‑In
After you’ve blended brush strokes into the roller finish while the paint’s still wet, you need to know when to cut in around trim and ceilings as the surface begins to set.
Watch edge drying and test a small area: if paint resists tack but still blends, it’s prime cut in timing.
Consider environmental factors and drying conditions—temperature, humidity, and ventilation affect paint drying and paint absorption.
Adjust for paint consistency and use gentle drying techniques if needed.
- Check tackiness carefully.
- Monitor absorption at edges.
- Factor room conditions.
- Move fast but deliberate.
How to Feather the Wet Edge When Rolling First
When you roll the main field, keep a wet edge by overlapping each pass about 2–3 inches and lifting the roller at the end of each stroke so paint tapers off instead of building a ridge.
Work in consistent sections, maintain uniform pressure, and watch for laps. Use a light, quick return stroke to blend each overlap, employing a feathering technique that softens shifts.
If paint starts to dry, stop and reload the roller rather than forcing a blend.
Keep the edge straight by rolling toward the taped line but don’t press hard.
Finish with gentle cross-rolls to even sheen and eliminate ridges.
How and When to Back‑Roll After Cutting In
Having feathered the wet edge with your roller, move in to back-roll the cut-in areas while the paint is still wet so you blend the brush strokes into the main field.
Use a short-nap roller and gentle pressure to employ the back rolling technique correctly, matching texture and promoting even paint absorption. Work systematically and don’t overwork edges.
- Start within five minutes of cutting in.
- Roll from the cut line toward the center.
- Overlap with the main field by a few inches.
- Finish with light passes to remove ridges.
This guarantees seamless shifts and uniform coverage.
Working Alone vs. With a Partner: Workflow Tips
If you’re working solo, set a clear sequence: cut edges first, then back‑roll or fill in panels so you don’t have wet edges to manage.
With a partner, one person cuts in while the other follows with the roller, syncing pace to avoid laps and lap marks.
Decide roles before you start and communicate as you move down the wall.
Solo Painter Workflow
Whether you’re tackling a single accent wall or repainting an entire room, your approach changes a lot depending on whether you’re working solo or with a partner; knowing which tasks to handle alone and which to share will keep the job faster and neater.
Use solo painter strategies and efficient workflow techniques to sequence tasks so you don’t retrace steps. Plan breaks between coats, set up tools nearby, and work top-to-bottom.
Follow this checklist:
- Cut in edges first around trim and ceiling.
- Roll large areas immediately after edging.
- Touch up drips and thin spots once semi-dry.
- Clean and store tools before final inspection.
Partnered Painting Sequence
Start by assigning clear roles so you and your partner move in sync: one person cuts in along ceilings, corners, and trim while the other follows with the roller on large sections, then swap tasks between coats to reduce fatigue and maintain fresh edges.
You’ll plan movement direction, decide who tackles tricky corners, and set timing for breaks. With partner collaboration, communicate about paint thickness, overlap, and drying time so seams stay invisible.
Practice synchronized painting: move steadily, match pressure, and keep a wet edge. After each coat, review edges together and touch up before the paint sets to guarantee a seamless finish.
Speed Techniques for Cutting In Large Rooms
When you’re cutting in a large room, speed comes from planning your path and using tools that extend your reach and control.
You’ll use speed painting habits and efficient techniques to maintain steady paint application while respecting quick drying windows.
Consider room layout and time management to optimize workflow efficiency.
- Map a logical route to avoid backtracking.
- Use an angled brush plus an extension pole for reach.
- Keep a wet edge and moderate paint load to control drying.
- Work in consistent sections so you can roll immediately after cutting in.
How to Cut In on Textured vs. Smooth Walls
When you cut in on textured walls, you’ll need a thicker nap brush and a steady, bouncing motion to work paint into crevices.
For smooth walls, use a slimmer angled brush and long, confident strokes for a crisp edge.
Both approaches rely on consistent pressure and quick feathering to blend with the roller.
Textured Wall Technique
Although textured walls demand a bit more patience, you can cut in cleanly by adjusting your tools and technique—use a stiffer brush, load it with less paint, and work in short, controlled strokes to get into the nooks without spreading drips onto the texture.
You’ll appreciate textured wall benefits like hiding imperfections, but face textured wall challenges when bristles skip or snag.
Follow this concise routine:
- Use a stiff, angled sash brush for better control.
- Thin coats prevent pooling in crevices.
- Work small sections, blending into adjacent areas.
- Dab excess paint on a rag to avoid blobs.
Smooth Wall Technique
Start by switching to a softer, angled sash brush and a slightly fuller load of paint—smooth walls let you glide the brush without snagging, so you can use longer, confident strokes to create a crisp edge.
With proper wall preparation you’ll control paint application: tape edges, sand minor imperfections, and wipe dust.
Adopt a steady brush pressure to avoid ridges; use light pressure for edge precision and firmer strokes for fill.
Use paint layering and subtle blending methods to feather into roller-applied areas, maintaining texture control.
Pause between thin coats to improve finish quality and prevent lap marks.
Managing Paint Sheen Differences at Edges
If your trim or adjacent wall has a different sheen than the area you’re cutting in, you’ll notice the contrast at the edge more than anywhere else, so adjust your technique to minimize it.
You want paint sheen, edge management, and sheen compatibility to create subtle edge shifts and finish cohesion.
Try these steps:
- Wipe and prime edges for uniform absorption.
- Use the same sheen where possible; match sheen compatibility.
- Apply thin, even coats and employ feathering blending techniques.
- Inspect under natural light, touch up with minimal overlap to maintain clean edge shifts and cohesive finish.
Fixing Mistakes From Cutting In Too Thick
When you notice a thick bead of paint from cutting in, act quickly to avoid drips and noticeable ridges.
Gently smooth the bead with a damp, clean brush or a mini roller, feathering into the wet paint to blend edges. For faster mistake corrections, wipe excess with a lint-free cloth and reflow the paint before it skins.
If it dries slightly, lightly sand with fine-grit paper and recoat just that area.
Adjust your cutting techniques next time: load less paint, use steady pressure, and keep a light hand. Small fixes prevent larger touch-ups later.
Troubleshooting Ragged Cut‑In Lines
If your cut‑in edges look ragged, first check your brush load so you’re not working with too much or too little paint.
Use steady hand techniques—brace your arm, move slowly, and keep a consistent angle—to smooth the line as you go.
For dry edges, feather them out or lightly recoat the area while the paint’s still tacky to blend and fix uneven spots.
Check Brush Load
Check your brush load before you cut in: too little paint causes dry, ragged edges and too much creates drips and loss of control.
You’ll fix most ragged cut‑ins by tuning brush load and watching paint consistency; good brush maintenance keeps performance steady.
- Dip the brush a third in, tap off excess on the can rim to avoid drips.
- Test a scrap to confirm even lay and edge wetness.
- Replenish frequently—thin films dry fast and cause pulled fibers.
- Clean and reshape after breaks so bristles track true.
Adjust load, not speed, to cure ragged lines.
Steady Hand Techniques
Although a steady wrist matters most, you’ll get cleaner cut-in lines by combining controlled arm movement with a relaxed grip and consistent pace.
You’ll develop a steady grip and hand stability by anchoring your pinky or heel of the hand on the wall, using brush control to guide strokes.
Use visual guidance—follow the tape edge or trim line with your eyes, not just the brush—to improve line precision.
Practice drills build muscle memory: short continuous strokes, slow long pulls, and angled passes.
Focus techniques like breathing and brief pauses keep steadiness under fatigue.
Repeat until confident.
Fixing Dry Edges
When your cut‑in line dries with a ragged edge, you can usually salvage it quickly by re‑moistening and feathering the paint before repainting. Start by softening the crusted tip with a damp brush or sponge, then blend outward to eliminate a hard ridge.
Use these dry edge remedies and quick edge touch ups:
- Lightly mist the dried area, wait a few seconds, then feather with a soft brush.
- Run a sharp, dampening tool along the line to level paint buildup.
- Recut with a loaded angled brush, keeping strokes smooth.
- Finish with a thin glaze if color mismatch remains.
How Temperature and Humidity Affect Cut‑In Timing
If the air’s cold or humid, paint dries slower and you’ll need more time before cutting in; conversely, warm, dry conditions speed drying and shorten your wait.
You should account for humidity effects and temperature influence when estimating paint drying times. These environmental factors guide your timing adjustments and project planning: choose ideal conditions, schedule work around weather considerations, and allow additional cure time in damp or cool rooms.
For reliable results, focus on surface preparation and thoughtful material selection—use paints rated for low temperatures or higher humidity.
Monitor conditions and test a small area before committing to full cut‑in work.
Safety Tips When Cutting In on Ladders
Because ladders put you off the ground and limit your mobility, you should prioritize stability and safe positioning before you pick up a brush for cutting in.
You’ll reduce falls and improve paint safety by following concise ladder rules. Keep tools close and avoid overreaching.
- Inspect ladder feet, locks, and spreaders for ladder stability before use.
- Set ladder on firm, level ground and maintain three points of contact.
- Use a tool belt or bucket hook so you don’t lean or stretch while cutting in.
- Don’t stand on top two rungs; move ladder as needed to stay safe.
Prepping Walls So Cutting In Is Easier
After you’ve secured your ladder and organized your tools, prepare the wall so cutting in goes smoothly: clean the surface, repair dents or nail holes, and sand any rough spots that’ll show through paint.
For effective wall preparation, focus on surface cleaning and assess wall texture—smooth or textured alters brush selection and stroke technique.
Test paint consistency and color contrast near trim and ceilings to judge coverage.
Plan edge alignment and a corner strategy so lines stay crisp.
Use consistent lighting effects while you work to spot missed areas.
These steps make cutting in faster, neater, and reduce touch-ups later.
How Priming Changes Whether You Cut In First
Decide whether to prime before or after cutting in based on the surface you’re painting.
If the wall is bare or has stains, you’ll want primer down first so your cut-in edges seal properly.
For already-painted, uniform surfaces you can cut in with topcoat and spot-prime as needed.
Primer First Or After
Wondering whether to prime before you cut in or after? You’ll usually prime first to secure primer benefits: improved primer adhesion, consistent primer coverage, and better primer finish before paint.
Primer choice and primer types matter for primer application and primer drying time. If you prime first you’ll cut in on a uniform base; if you skip it you’ll deal with primer versus paint inconsistencies.
- Prime first: guarantees adhesion and evens porosity.
- Prime after: only for spot-primed repairs.
- Fast-drying primer: speeds workflow but watch tackiness.
- Heavy primer: needs full cure before cutting in.
Surface Type Determines Timing
Because different surfaces absorb and hold primer differently, you’ll change when you cut in based on the substrate: smooth, sealed surfaces like previously painted drywall let you prime first and cut in immediately, while porous or repaired areas—new drywall, bare wood, or patched spots—often need extra priming and drying time before you cut in to avoid lap marks and uneven sheen.
Assess wall types and paint absorption to set timing strategies. Prioritize surface preparation for paint adhesion and edge precision. Match cutting tools and technique to texture impact. Monitor drying conditions to guarantee edge consistency and avoid rework.
Where to Start: Ceiling Edge or Wall Corner First?
Should you start cutting in at the ceiling edge or the wall corner first? You’ll choose based on ceiling preparation and corner techniques. Generally, begin where alignment matters most to you.
- Start at the ceiling edge when ceiling preparation is complete and you want a crisp top line.
- Start at the wall corner if corners show irregularities needing steady control.
- For textured ceilings, cut the corner first to avoid splash on rough surfaces.
- If working alone, tackle the more visible edge first so touchups are easier.
Trust your sightline and skill; pick the spot that minimizes corrections.
Cutting‑In Strategies for Two‑Tone Walls
When you’re working on a two-tone wall, plan your cutting‑in sequence so the sharper, more visible color gets the cleanest edge; you’ll begin with careful wall prep and tape placement.
You should prioritize edge definition where color contrast is strongest, then apply paint layering to build consistent coverage.
Consider finish selection to guarantee wear resistance and sheen match.
Work from primary to secondary tones to maintain visual balance and design cohesion, integrating accents last for accent integration without smudging borders.
This approach preserves style continuity and shapes room atmosphere while minimizing touchups and preserving crisp, professional lines.
How to Cut In for Accent Walls and Trim
Start by establishing a clear sequence: tackle the accent wall before cutting in trim so you can protect crisp color edges and avoid accidental overlap.
You’ll use accent wall techniques and color contrast strategies, plus visual flow considerations to guide placement. Follow a focused plan:
- Paint the accent wall, minding wall texture effects and highlight and shadow to maintain depth.
- Let dry fully; assess lighting impact analysis to confirm tones.
- Tape trim edges if needed, combining trim painting tips with paint finish selection.
- Cut in trim carefully, applying color balance methods that support design theme integration.
Pro Habits for Consistently Sharp Cut‑In Lines
Although tight edges take practice, you’ll build reliable habits that make sharp cut‑ins feel routine. You’ll start with wall preparation and surface inspection so paint adheres and edges stay crisp.
Choose brush types and professional tools that suit your paint consistency and color matching needs. Adopt cut in techniques that steady your hand: load the brush correctly, use controlled strokes, and remove excess paint.
Focus on paint application rhythm and keep a wet edge to avoid lap marks. Regular technique practice reinforces muscle memory, so you’ll achieve repeatable edge precision every time you paint.
When to Use an Edger Tool Instead of a Brush
Wondering whether an edger tool will speed your job or just add clutter? You’ll choose an edger when corners, trim proximity, and time matter.
Consider these points to weigh edger tool benefits against brush comparison:
Weigh edger benefits against brushes: speed and uniformity vs. control for complex shapes.
- Speed: edgers cover long straight runs faster than a brush.
- Consistency: they give uniform lines with less wobble.
- Accessibility: edgers reach tight gaps without constant tape.
- Control: brushes still win for complex shapes and feathering.
You’ll often use an edger for straight edges and a brush for detail. Match tool to task to save time and keep lines sharp.
How to Choose Between Single‑Step and Two‑Step Cutting
Decide whether you need speed or control: single‑step cutting is faster but can sacrifice neatness, while two‑step gives you the precision to protect trim and corners.
Consider your room conditions—lighting, wall texture, and how visible mistakes will be—to pick the method that fits the job.
If you’re working in tight spaces or on high-contrast trim, you’ll probably want the extra accuracy of two‑step cutting.
Single‑Step Pros And Cons
Single-step cutting saves time by letting you cut and blend the edge in one pass, which is great when you’re short on time or working on smaller rooms; however, it demands steadier hands and often a higher-quality brush or angled trim roller to avoid obvious overlap marks.
So weigh speed against the skill and tools you have.
- Faster workflow — ideal when time is limited.
- Fewer tools — simplifies your cutting techniques and gear.
- Risk of visible seams — poor paint application shows quickly.
- Requires practice — steady stroke and consistent pressure matter.
Choose single-step when you can control edges and finish.
Two‑Step Precision Benefits
If you want cleaner, more controlled edges and can spare the time, two-step cutting gives you that precision: first lay down a narrow back-bead or barrier coat along trim, then follow with a full-fill pass that blends seamlessly into the wall. You’ll prefer the two step technique when you want crisp lines without tape, and the precision application reduces touch-ups. It’s slower than single-step but cuts bleed and lap marks. Use steady strokes, a loaded angled brush for the back-bead, then a wider brush or roller for the fill. Choose based on time, skill, and desired finish.
| Benefit | When to use |
|---|---|
| Crisp edges | Detail work |
| Fewer touch-ups | Visible trim areas |
Room Conditions To Consider
Because room conditions affect paint behavior, you’ll pick single‑step or two‑step cutting based on factors like humidity, temperature, lighting, wall texture, and how visible the trim is.
You’ll assess room temperature and humidity levels first, since paint drying time shifts with climate. Check lighting conditions to spot seams or missed edges.
Consider wall texture and surface preparation: rough surfaces may need two‑step cutting for control. Match technique to conditions and skill.
- If humidity high → two‑step to prevent dragging.
- If room temperature moderate → single‑step often works.
- If poor lighting → two‑step for precision.
- If smooth walls → single‑step.
Cost vs. Time Tradeoffs of Cutting In First
When you cut in before rolling, you’ll usually pay more in labor or time upfront but save on paint waste and touch-ups later. Contractors often charge higher hourly rates for the precision work, while DIYers invest extra minutes per wall to avoid ladder reshuffling and over-coverage.
You’ll weigh cost efficiency against time management: cutting in improves finish quality and reduces waste, but slows progress. Consider labor considerations, project prioritization, and workflow optimization to decide where precision matters.
Under tight budget constraints, balance planning strategies and resource allocation—hire pros for visible rooms, cut corners where speed trumps perfection.
How to Plan Paint Sequence for Multi‑Room Jobs
Planning the sequence for a multi‑room paint job lets you work efficiently and avoid redoing areas; start by mapping rooms by priority—high‑traffic and visible spaces first—and group adjacent rooms so you can work outward without crossing wet paint.
Plan room order by priority and adjacency—start with high‑visibility spaces and work outward to avoid wet paint.
You’ll factor paint color selection, room lighting considerations, wall texture evaluation, and room function impact.
Use this checklist to plan:
- Assess surfaces and note surface preparation tips and wall texture evaluation.
- Decide paint finish options and aesthetic design choices per room.
- Schedule project timeline planning to avoid overlaps and drying conflicts.
- Balance budget considerations with personal preference factors.
Cutting In Exterior Walls: Key Differences
Although exterior cutting in follows the same basic principle as interior work, you’ll adapt your tools, technique, and timing to handle weather, larger surfaces, and different trim materials.
You’ll choose exterior tools like angled sash brushes and weatherproof tape, focus on surface preparation to remove dirt and mildew, and consider weather considerations that affect drying and paint adhesion.
Account for environmental impact and paint compatibility with substrates, plan seasonal timing to avoid extremes, and pick color choices that handle UV and fade.
Texture effects on siding demand technique adjustments, so include these items in project planning before you start.
Cutting In Around Built‑Ins and Shelving
When you’re cutting in around built‑ins and shelving, start by protecting surfaces with painter’s tape and drop cloths to avoid drips and scuffs.
Use an angled brush and steady, small strokes to paint clean edges around fixed fixtures without removing them.
In tight or narrow spaces, work from the outside in and consider a mini brush or foam brush to reach cramped spots.
Protecting Shelves And Edges
If you want clean lines and no accidental drips, start by protecting shelves and built‑ins before you cut in—tape edges, drape surfaces with drop cloths, and remove or mask hardware so paint can’t sneak into crevices.
Use these prep techniques to guarantee shelf protection and surface safeguarding:
- Lay shelf coverings and secure with painter’s tape for edge sealing.
- Use low‑tack tape for edge masking, pressing into corners to stop paint splatter.
- Cover open shelving with plastic or paper, weighting edges to prevent lifting.
- Keep a damp cloth and cleanup tips handy for immediate touchups.
Cutting Around Fixed Fixtures
Now that your shelves and hardware are protected, focus on cutting in around the fixed fixtures with steady, deliberate strokes.
You’ll face fixture challenges like odd corners and trim; do thorough fixture preparation by cleaning and taping edges.
Use cutting techniques that favor a steady hand and angled brush for edge precision and consistent paint application.
Watch lighting considerations closely so shadows don’t hide missed spots.
Keep fixture alignment and surrounding surfaces in mind to avoid drips and uneven coverage.
Work methodically, reloading the brush sparingly, and feather paint toward the wall to blend with broader rolls.
Working With Narrow Spaces
Because narrow gaps demand steady control, approach built‑ins and shelving with a small angled brush and deliberate strokes so you don’t overload tight corners. You’ll use narrow brush techniques and edge precision tips to avoid drips. Consider wall texture considerations and choose tools accordingly.
- Prep: remove dust, tape edges — tool selection tips matter.
- Cut: steady wrist, short strokes for corner challenges.
- Vertical: work top‑to‑bottom — vertical space solutions prevent runs.
- Reach: use a stable ladder — ladder safety and positioning are essential.
These tight space strategies keep lines crisp and protect shelving finishes.
Eco‑Friendly Paints and Cutting‑In Considerations
When you choose low‑VOC or zero‑VOC paints, you reduce fumes and improve indoor air quality while still needing to adjust your cutting‑in technique slightly; these formulas can dry differently and may require a steadier hand, thinner coats, or longer open time to avoid lap marks.
You’ll appreciate eco friendly benefits like reduced VOC emissions and lower paint toxicity, plus sustainable materials and green certifications that signal responsible production.
Pick biodegradable options when available, follow safe application steps, and test brush and edge performance on scrap.
Adjust pressure and speed to match drying behavior and minimize environmental impact and touchups.
Common Cutting‑In Myths Debunked
You might’ve heard rules about the order you should cut in, but some are more rigid than necessary and can slow you down.
Don’t assume a brush is always better than a roller—each has strengths depending on edges and surface texture.
I’ll also clear up misconceptions about edge‑blending techniques so you can get a seamless finish without needless fuss.
Cutting-In Order Myths
Although many painters swear by a strict sequence for cutting in, the truth is there’s no single “correct” order that works for every job. You should base cutting in techniques on surface preparation, paint consistency, and color matching rather than rigid rituals.
Avoid common mistakes like rushing edges or ignoring edge control. Choose tools by task, considering brush selection alongside roller application to finish efficiently.
- Start where light shows flaws.
- Tackle high-traffic zones first.
- Do opposite corners to avoid wet overlap.
- Finish trims after walls if humidity or drying varies.
Brush Versus Roller
One key decision you’ll make when cutting in is whether to reach for a brush or a mini-roller, because each tool suits different edge conditions and paint types.
You’ll weigh brush techniques for detailed edge precision and spot corrections against roller advantages for faster paint application on flat areas.
Consider surface preparation: smooth trim favors a good sash brush, textured walls suit a mini-roller.
Your tool selection affects finish comparison and how seams look as paint drying progresses.
Pick the tool that matches the edge and surface to minimize touchups. That choice saves time and yields a consistent result without extra work.
Edge‑Blending Techniques
Start by matching the paint thickness along the edge so the new coat blends into the old—this prevents obvious ridges or shiny versus matte patches where you cut in.
You’ll use edge blending to smooth paint shifts, adjust color matching, and respect wall texture. Focus on edge precision and brush control; different technique variations suit trims or large walls.
Try these blending methods:
- Feathering with light strokes for gradual shifts.
- Back‑rolling to marry edges to roller lay.
- Wet‑edge overlap to avoid lap marks.
- Dry‑brush touchups for texture corrections.
Choose application techniques that match paint application and surface conditions.
How to Practice Cut‑In Technique Quickly
If you want to build steady hands fast, practice short, focused drills that mimic real edges: set up strips on cardboard or wall, then repeat cut in practice using timed runs.
Focus on quick techniques—steady wrist, measured strokes, and consistent paint loading.
Focus quick techniques—steady wrist, measured strokes, consistent paint loading for cleaner, faster cut-ins.
Work on brush control and corner strategy separately: ride the corner, pause, then pivot.
Practice edge blending and smooth changes by feathering strokes and matching paint consistency.
Prioritize wall preparation and correct tape or bare-edge drills.
Use proper tool selection and vary brush sizes.
Short, frequent practice drills sharpen muscle memory so your cut-in speed and accuracy improve reliably.
How to Judge a Successful Cut‑In by Sight
You’ll know a cut‑in is working when the edge looks even and clean against trim or adjacent walls.
Check that the paint thickness is consistent along the line and that there aren’t drips or feathered gaps.
Finally, make sure the cut‑in blends seamlessly with your rolled area so the seam disappears once the wall’s finished.
Even, Clean Edge
A clean, even cut‑in looks sharp the moment you step back: the paint edge is straight, the line is continuous with no ragged breaks, and the shift between the wall and trim or ceiling reads as a single, intentional boundary.
You judge success by sight and subtle cues. Focus on:
- Even edge continuity along the junction.
- Clean lines that show precision painting control.
- Color contrast clarity where hues meet without bleed.
- Overall visual balance reflecting design principles and artistic flair.
Use steady wrist movement, appropriate brush load, and repeat small passes with wall techniques that prioritize control.
Consistent Paint Thickness
Check the paint film along your cut‑in for uniform sheen and edge buildup—consistent thickness reads as even color and gloss from any viewing angle. You’ll judge success by consistent application, minimal edge visibility, and controlled paint layering. Consider texture uniformity and wall conditions; different brush types affect finish matching. Note drying times and color saturation as the film evens out. Use steady strokes and blending techniques to avoid ridges. Scan from multiple angles and light directions to spot thin or heavy areas. Make corrections promptly while paint is wet to maintain uniformity and avoid reworking after full cure.
| Area | Issue | Fix |
|---|---|---|
| Edge | Ridge | Feather stroke |
| Surface | Thin | Add coat |
| Corner | Buildup | Blend out |
| Texture | Varied | Use correct brush |
| Drying | Patchy | Adjust timing |
Seamless Blend With Roller
When you roll toward a freshly cut‑in edge, watch for a seamless shift where the roller’s nap feathering merges the brushed film without visible ridges or lapping lines; a successful cut‑in reads as continuous color and texture from arm’s length and from different angles.
You’ll judge blend by small cues tied to roller techniques and blending techniques, plus wall preparation and paint consistency.
- Match roller nap for texture matching and roller coverage.
- Feather edges to control paint absorption and edge blending.
- Maintain wet edge for seamless application and roller advantages.
- Inspect from multiple angles to confirm uniform film and finish.
When to Call a Pro for Precise Cut‑Ins
If your cut‑ins need to be perfectly straight, time‑sensitive, or involve tricky surfaces like textured plaster or glossy trim, call a pro—it’s worth it to avoid costly touch‑ups or repainting.
You’ll benefit when precision techniques and professional tips matter most: complex color shifts, high‑visibility rooms, or limited access areas.
Pros apply cutting strategies and edge control reliably, use timing methods that fit drying and workflow efficiency, and handle paint preparation to prevent failures.
Take expert recommendations for scope, schedule, and finish expectations; hire when mistakes are costly or you want guaranteed results rather than risking do‑over work.
Tools and Hacks Pros Use for Perfect Lines
Pros use a handful of specialty tools and simple hacks that let you cut crisp, repeatable lines without redoing work later.
You’ll want to adopt proven cutting techniques and rely on professional tools to save time and frustration.
Try these essentials:
- Painter’s angled brush for tight corners and controlled strokes.
- Quality masking tape applied and burnished for razor edges.
- Edging tool or shield to guide straight passes along trim.
- Mini roller for back‑rolling to blend cut lines into field paint.
Use steady pressure, short strokes, and keep tools clean; you’ll get pro results fast.
Cutting‑In Order and Cleanup: Best Practices
Because you’ll want a predictable workflow and minimal touch-ups, start cutting in before you roll the main field and follow a consistent sequence: ceilings first, then trim and baseboards, and finally around windows and doors. You’ll use precise cutting techniques for clean edges, prioritize wall preparation to improve paint adhesion, and stagger work by drying times. Maintain edges with steady strokes, practice brush care to preserve bristles, and refine paint application for uniform coverage. Use efficient cleanup methods to avoid stains and speed recovery.
| Calm focus | Proud finish |
|---|---|
| Careful edge maintenance | Thoughtful brush care |
| Smart cleanup methods | Confident paint application |
Checklist: Should You Cut In First?
You’ve planned your cutting‑in order and cleanup; now decide whether to cut in before you roll. Use this quick checklist to guide your choice, focusing on cutting techniques and appropriate brush types so you get clean lines without wasting time.
- Room size: cut in first for small spaces; roll more in large rooms.
- Paint type: high‑viscosity paints favor cutting in to control edges.
- Skill level: practice cutting techniques if you’re less steady; use angled brush types for accuracy.
- Drying time: cut in first when edges must dry before rolling adjacent areas.
Frequently Asked Questions
Can Cut‑In Technique Affect VOC Exposure in Small Rooms?
Yes — your cut‑in technique can change paint fumes in small rooms: poor air circulation during cutting raises exposure duration, so use ventilation methods like window fans, open doors, and breaks to reduce VOC exposure.
Does Cutting in First Change Paint Coverage per Gallon?
Cutting in first doesn’t change paint coverage per gallon; it influences paint application and coverage efficiency by affecting overlap, touch‑ups, and waste. You’ll likely use similar gallons, but technique can alter actual efficiency and appearance.
How Does Wall Substrate (Plaster vs. Drywall) Alter Cut‑In Grip?
Plaster usually gives you firmer cut in techniques because its harder, absorbent surface boosts paint adhesion, while drywall’s smoother, softer face can need more careful cutting, priming, and thinner coats to guarantee consistent grip.
Will Cut‑In Timing Impact Paint Warranty or Manufacturer Recommendations?
Yes — you should follow paint warranty and manufacturer guidelines, because improper timing or technique (including cut‑in sequence) can void coverage; check labels, document steps, and contact the manufacturer if you’re unsure to protect your warranty.
Can Cutting in Affect Future Wallpaper Adhesion?
Yes — cutting in can affect future wallpaper adhesion if paint drying or surface cleaning are incomplete; you should perform adhesion testing, follow thorough wallpaper preparation, guarantee paint fully cures, and clean the surface before applying new paper.
Conclusion
You’ll usually cut in first to get sharp, confident edges—careful, steady strokes against trim make the room look finished. But sometimes you’ll roll broad, wet swaths first, then cut while paint’s still tacky to blend lines seamlessly. The confident, patient trim work contrasts with the fast, sweeping roll; together they turn messy starts into polished results. Choose based on paint, finish, and skill—then commit and enjoy the clean transformation.