When to Paint House Exterior? Best Time Guide
You should plan exterior painting for a stretch of dry, mild weather—daytime temps between about 50–85°F, low humidity, and several consecutive dry days so coats can cure properly. Start in late spring to early fall in temperate areas, avoid midday heat in hot climates, and pick the driest months for humid coasts. Prep and repairs need extra dry time after rain or power washing. Keep going and you’ll find timing tips by surface and climate.
How to Use This Guide: DIY vs. Hire
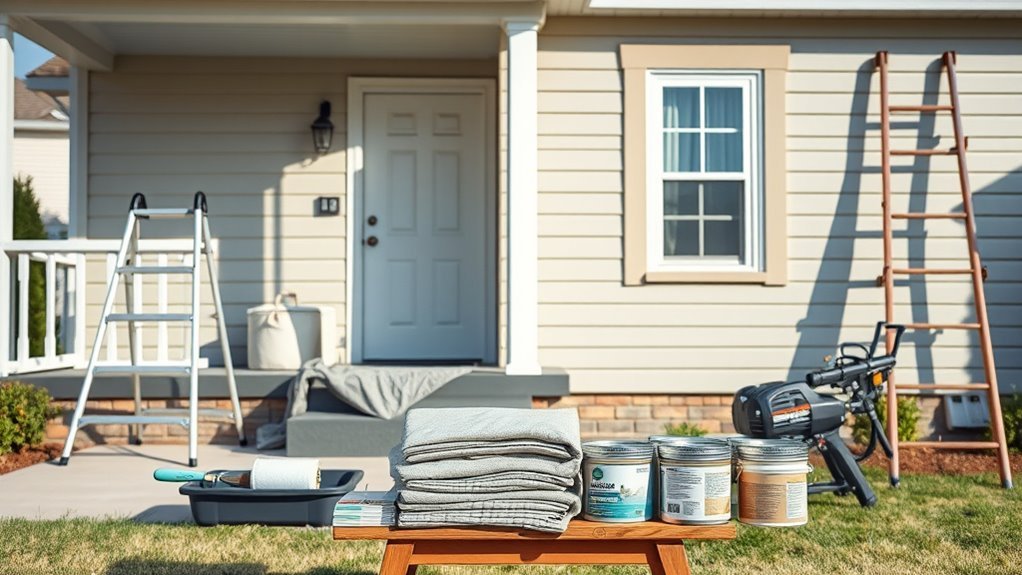
Before you decide whether to tackle the exterior paint job yourself or hire pros, weigh your time, skill level, and the house’s complexity.
DIY can save money but demands hours, proper tools, and safety measures, while contractors bring experience, speed, and warranties that often justify the cost.
You’ll compare DIY techniques versus hiring professionals, balance cost considerations and equipment needs, and assess project scope.
Plan surface preparation, paint selection, and safety precautions.
Use strict time management and weather monitoring to pick workable days.
This guide helps you decide when to commit personally or contract the job for reliable results.
Quick Decision Flowchart: Best Painting Window Today
Wondering when you should paint today? Use this quick flow: check local weather for clear, dry hours and temperatures; if conditions are good, inspect surfaces for peeling, mildew, or bare wood.
Wondering whether to paint today? Check clear, dry weather and inspect surfaces for peeling, mildew, or bare wood.
If you see damage, paint now; if surfaces are sound, consider your painting frequency—are you on a routine schedule or delaying? If routine and within cycle, proceed; if delaying, prioritize high-exposure areas.
If weather’s poor, postpone until a stable window. Factor in climate considerations like humidity and overnight lows when planning start and cure times.
This keeps work efficient and paint long-lasting without guessing.
Best Months to Paint by Climate
If you live in a temperate region, aim to paint between late spring and early fall when temperatures stay consistently within the paint manufacturer’s recommended range and humidity is lower; in hotter, drier climates you’ll often get the best results in late fall through early spring when heat and sun aren’t accelerating drying, while in coastal or humid areas pick the driest months with mild daytime highs to avoid slow cure times and mildew risk.
Consider these seasonal tips for spring readiness and fall considerations:
- Temperate: late spring–early fall for steady temps.
- Hot/dry: late fall–early spring to avoid heat.
- Humid/coastal: pick driest months with mild days.
What Determines a Good Painting Day
When’s the best day to paint? You want steady weather conditions: low wind, moderate humidity, and no rain forecast so paint can dry evenly and boost paint longevity. Pick a day with stable light so you spot missed areas.
| Factor | Good Sign | Why it matters |
|---|---|---|
| Wind | Calm | Prevents debris and uneven drying |
| Humidity | Moderate | Guarantees proper film formation |
| Precipitation | None | Avoids washout and adhesion issues |
Check forecasts the week before, plan morning starts, and avoid extremes. Proper timing preserves finish and extends paint longevity.
Ideal Temperature Range for Exterior Paint
You’ll get the best results painting when temperatures stay within the manufacturer’s recommended window—usually between about 50°F and 85°F.
Stay away from very hot days, because extreme heat can cause paint to dry too fast and fail to level properly.
If it’s colder or hotter than the ideal range, wait for milder conditions to guarantee adhesion and finish.
Best Temperature Window
Because temperature affects how paint flows, dries, and cures, you should plan exterior painting for days when daytime temperatures stay within about 50°F to 85°F (10°C to 29°C).
You’ll want to avoid wide temperature fluctuations that stress paint adhesion and slow ideal drying. Pick consecutive days with steady conditions and low humidity for consistent results.
- Start in mid-morning after dew evaporates and finish well before temperatures drop at night.
- Check forecasts for overnight lows; stable nights prevent curing issues.
- Pause if sudden swings, rain, or heavy dew are predicted to protect finish and longevity.
Avoid Extreme Heat
If you’ve picked a day within the 50–85°F range, also watch for heat spikes that can harm paint performance. You should avoid direct midday sun and surfaces hotter than the ambient air, since excessive heat causes rapid drying, blistering, and reduced adhesion.
Monitor forecasts and paint only when temperatures stay steady for several hours. Use lighter colors or temporary shade to lower surface temperature and limit heat stress on fresh coatings. Proper timing preserves paint durability and prevents premature failure.
If an unexpected heat wave arrives, postpone work; waiting a few days protects your finish and saves time.
Humidity’s Impact on Adhesion and Drying
When humidity climbs, paint takes longer to dry and may not stick as well, so you should plan accordingly; high moisture in the air slows solvent evaporation and can prevent proper film formation, leading to tacky surfaces, blushing, or poor adhesion.
You’ll notice humidity effects quickly, and ignoring them causes adhesion issues and uneven finishes. To minimize problems, follow these steps:
- Paint when relative humidity is below 60% and temps are stable.
- Use products labeled for high-humidity conditions and longer cure times.
- Allow extra dry time between coats and check tack before recoating.
Monitor forecasts and reschedule if moisture’s high.
How Wind and Sun Affect Exterior Paint
You’ll want to watch wind speed because high gusts can blow dust onto wet paint and cause uneven drying.
Also consider sun exposure timing—painting direct sun in midday heat can make paint skin over too fast and lead to lap marks.
Plan jobs for calmer, cooler parts of the day to get smooth, even results.
Wind Speed Effects
Although wind might seem only to cool a working surface, it has several direct effects on exterior paint application and drying. You should monitor wind speed because it changes drying time and can harm paint adhesion.
High gusts cause surface damage by blowing debris and creating uneven films, while constant breezes speed curing too fast. Check weather forecasts to avoid scheduling conflicts and plan calmer windows.
- Low wind: better adhesion, controlled drying time.
- Moderate wind: watch for debris, shorter open time.
- High wind: risk of surface damage, poor finish, reschedule.
Sun Exposure Timing
Because sun and wind together dictate how paint sets, you should time exterior painting to avoid strong sunlight on wind-exposed surfaces.
You’ll want mornings or late afternoons when sunlight’s gentler and winds are calmer, reducing rapid drying that causes brush marks, lap lines, or poor adhesion.
Monitor sun exposure on different walls—south- and west-facing areas heat fastest—so paint those when shaded.
Slower, even curing improves paint longevity and minimizes rework.
If wind picks up, pause; if direct sun’s intense, use temporary shade.
Planning around local sun paths and typical breezes gives a professional, durable finish.
Choosing Paint Type for Your Season (Latex vs. Oil)
When temperatures and humidity shift with the seasons, choosing between latex and oil paint comes down to how each performs under your local conditions and timeline.
You’ll favor latex for flexibility, quicker curing in mild, humid seasonal trends, and easier cleanup. Oil gives harder finish and long-term paint durability in drier, stable weather, but it needs warmer, less humid days and longer drying.
Consider:
- Latex: fast cure, resists cracking, best in cooler, moist spells.
- Oil: superior hardness, great for high-wear areas in dry seasons.
- Schedule: match paint type to forecasted humidity and temps.
When Fast-Drying Exterior Paints Make Sense
If your schedule or local weather window is tight, fast-drying exterior paints can be a practical choice after weighing latex vs. oil. You’ll appreciate fast drying benefits when you need quick recoats, less downtime, and reduced exposure to changing weather. Use them in ideal conditions—moderate temps and low humidity—to guarantee adhesion and finish. They’re perfect for short work windows, small projects, or touch-ups where speed matters over extended open time. Consider surface prep and ventilation; fast cure can lock in imperfections if you rush. Compare product specs before buying.
| Advantage | When to Use |
|---|---|
| Speed | Tight schedule |
| Less rain risk | Short forecast window |
| Quick recoats | Multi-coat jobs |
| Touch-ups | Small areas |
Reading Manufacturer Temp and Humidity Specs
Check the paint can or tech sheet for the manufacturer’s recommended temperature range so you know when the product will cure properly.
Also note the maximum allowed humidity and any surface temperature limits—painting outside those specs can ruin adhesion and drying.
If conditions don’t match, wait or choose a product rated for the temps and humidity you’re facing.
Manufacturer Temperature Range
Although paint can look fine on a mild day, manufacturers specify precise temperature and humidity ranges you should follow to verify proper adhesion and curing.
You’ll check the label for temperature guidelines and paint compatibility with substrate and primer. Don’t guess—follow the lower and upper temperature limits and note dew point instructions.
If you paint outside recommended ranges you risk poor film formation, bubbling, or failure to cure.
- Confirm minimum and maximum temperatures listed.
- Match paint compatibility to your surface and local climate.
- Plan work during sustained periods within those limits to guarantee success.
Maximum Allowed Humidity
When you read a paint label, pay close attention to the maximum allowed humidity so you don’t trap moisture under the film or slow drying to the point the paint won’t properly cure.
Check manufacturer specs for a percentage limit—often 85% or lower—and don’t paint when dew, fog, or prolonged dampness push humidity above that.
Use humidity control like dehumidifiers in enclosed areas or wait for a dry forecast.
Aim to start and finish coats within the manufacturer’s stated window to achieve ideal conditions; otherwise adhesion, color development, and longevity can suffer, costing time and money.
Surface Temperature Limits
Surface temperature matters as much as air temperature, so you should always read the manufacturer’s temperature and humidity specs before painting; they usually list a minimum and maximum surface temperature (often between 50°F and 90°F or the metric equivalent) and may give different ranges for primers, topcoats, and specialty finishes.
You’ll check surface preparation and temperature monitoring before you start. Follow these quick steps:
- Verify the product’s surface temp range and acceptable humidity.
- Measure substrate temperature with an infrared thermometer at several spots.
- Delay work if surface is too hot, cold, or damp; record readings and conditions.
This prevents adhesion failures and uneven curing.
Morning vs. Afternoon: Pick the Right Time
If you’re deciding whether to paint in the morning or afternoon, think about temperature, sunlight, and humidity—these factors directly affect drying time and finish quality. You’ll prefer morning light for cooler temps and steady drying; afternoon shade helps avoid harsh sun and blistering. Choose morning when dew’s evaporated and humidity drops; pick afternoon if temperatures peak too high early. Watch wind and surface heat. Balance comfort and paint specs.
| Time of Day | Pros | Cons |
|---|---|---|
| Morning | morning light, cooler | Possible dew |
| Midday | Fast drying | Harsh sun |
| Afternoon | afternoon shade, stable | Elevated temps |
Best Days to Paint After Rain or Dew
Because moisture lingers longer than you might think, wait until siding and trim are fully dry before painting after rain or heavy dew. You’ll reduce peeling and adhesion problems by choosing days with the best drying conditions: warm, low-humidity, and breezy.
Consider the rain impact on underlying wood or caulk before starting.
- Check forecast for 48–72 hours of dry weather.
- Confirm surfaces are visually dry and cool-to-the-touch.
- Prefer midday warmth with steady airflow for faster curing.
If you follow those steps, you’ll avoid trapped moisture and get a more durable, attractive finish.
Test Surface Temperature Before Painting
Want to make certain paint adheres properly? You should test surface temperature before painting to guarantee coatings cure and stick.
Use an infrared thermometer or thermometer strip for accurate temperature measurement across siding, trim, and deck boards. During surface preparation, check several spots in sun and shade—materials can vary widely.
Record readings and compare them to the paint manufacturer’s recommended range; avoid starting if temperatures fall outside that window. Test at application height and during expected drying time, since temperatures change.
Doing this simple check prevents adhesion failures and uneven drying, saving time and repainting later.
When to Delay for Freezing Risk
Don’t paint if nighttime temperatures are likely to drop below freezing, because low overnight temps can prevent proper film formation.
Make sure surfaces are dry — you shouldn’t paint on dew, rain-soaked siding, or any wet areas.
After a frost event, wait until the surface has fully thawed and dried before you start.
Watch Nighttime Temperatures
Nighttime temperatures matter as much as daytime highs when you’re planning exterior painting. If the mercury dips near freezing after sunset, paint can fail to cure properly, leading to blistering, cracking, or poor adhesion.
You should monitor forecasts for temperature fluctuations and nighttime humidity, since cold, moist nights extend drying time and increase failure risk. Delay jobs when lows approach freezing or swing wildly.
- Check 24–48 hour lows and dew point.
- Avoid starting if nights drop near 32°F or if humidity stays high.
- Prefer stretches of steady, above-minimum temperatures to guarantee proper cure.
Avoid Wet Surfaces
If surfaces are wet or have residual frost, wait — water trapped in wood, masonry, or trim can freeze overnight and ruin a fresh coat by causing poor adhesion, bubbling, or flaking.
You should only paint when surfaces are dry to the touch and daytime temperatures stay above the paint manufacturer’s minimum.
Use wet weather precautions: avoid painting after rain, morning dew, or melting frost.
Follow surface preparation tips like wiping, sanding, and allowing several dry days for porous materials.
Check forecasts for overnight lows and humidity; if freezing is possible, postpone to protect finish longevity and avoid costly repairs.
Delay After Frost Events
When frost has recently formed, you should wait several days before painting so any trapped moisture can fully evaporate and daytime temperatures stay safely above the paint maker’s minimums.
You’ll reduce frost impact and guarantee solid surface preparation by timing work when nights stay above freezing and days are warm.
Check forecasts and inspect surfaces for lingering crystals or dampness.
Follow this quick checklist:
- Wait 48–72 hours after frost melts before painting exterior wood or metal.
- Verify surfaces are dry to the touch and free of frost impact evidence.
- Choose days with consistent daytime temps above the paint’s minimum.
How Temperature Swings Affect Curing
Because paint cures through chemical reactions that depend on temperature, rapid swings between hot days and cool nights can slow or unevenly set the finish.
You’ll notice tacky spots, patchy sheen, or premature cracking if temperature fluctuations interrupt the curing process. Work when daily highs and lows stay within the paint manufacturer’s recommended range for several consecutive days.
Tacky spots, uneven sheen, or premature cracks signal interrupted curing—paint only when temperatures stay within the recommended range.
Apply thin coats to reduce trapped heat and moisture, and avoid painting late afternoon if nights cool sharply.
If swings are unavoidable, choose fast-curing formulations or additives designed for variable conditions, and monitor drying before applying subsequent coats.
Plan Painting Around Seasonal Maintenance
Fluctuating temperatures can wreck a paint job, so plan your exterior painting to align with seasonal maintenance tasks like gutter cleaning, roof inspections, and siding repairs.
You’ll use seasonal trends to pick windows of dry, mild weather and guarantee maintenance alignment so repairs are done before painting. Coordinate crews and materials, and schedule inspections early to avoid delays.
Consider this checklist:
- Spring: clear gutters, fix minor roof issues, wash siding.
- Summer: tackle larger repairs, paint during consistent warm spells.
- Fall: finish touch-ups, protect against early cold snaps.
Timing saves effort and extends paint life.
Preparing Surfaces in Wet Seasons
Although wet seasons make surface prep trickier, you can still get a durable paint job by focusing on thorough drying, mold removal, and proper patching before any primer goes on.
You’ll prioritize surface preparation: perform surface cleaning with a pressure washer, treat mildew, and scrape loose paint.
Do a moisture assessment with a meter; don’t paint until readings stay within manufacturer limits.
Track weather monitoring to pick multi-day dry windows and respect drying times between coats.
Use primers designed for damp conditions to improve paint adhesion.
Only begin final paint application when surfaces are clean, dry, and structurally sound.
Preparing Surfaces in Hot, Dry Seasons
When temperatures soar and humidity drops, you’ll need to adjust your prep techniques to prevent paint failures: you’ll focus on surface preparation techniques that combat rapid moisture loss and heat.
Work mornings or late afternoons to avoid peak sun. Use a mild detergent rinse, inspect for cracks, and replace brittle caulk.
Lightly mist wood before priming to reduce suction—don’t soak. Choose primers and paints formulated for fast-dry climates to guarantee ideal drying conditions without surface film issues.
Monitor substrate temperature; if it’s too hot, wait. Keep tools shaded and store coatings in a cool place until use.
Timing Scraping, Sanding, and Priming by Season
Because seasonal conditions change how paint bonds and dries, you should time scraping, sanding, and priming to match temperature, humidity, and sun exposure so each step produces a clean, stable surface ready for coating.
In spring and fall, work on mild days: scrape loose paint, sand edges, and apply primer when temperatures stay within manufacturer specs and humidity is moderate for reliable adhesion.
In hot, dry summer, avoid sanding in direct sun; prime late afternoon to reduce flash drying.
In cold winter, postpone priming until daytime temps rise.
Prioritize seasonal prep to guarantee surface readiness and long-lasting results.
Repaint vs. Touch-Up: How to Decide
After prepping surfaces at the right times of year, you’ll need to decide whether a full repaint or a targeted touch-up makes sense. You’ll check overall wear, peeling, and color fading to judge repaint frequency versus spot repairs.
Use touch up techniques for isolated chips, nail pops, or small stains; match sheen and feather edges for blend.
Consider these quick criteria:
- Extent of peeling or chalking: widespread means repaint.
- Color uniformity: mismatched patches favor repaint.
- Surface integrity: soft or rotten areas require full repaint and repair.
Choose based on long-term protection and visual cohesion.
When to Repaint Exterior Trim, Siding, and Doors
A few clear signs tell you it’s time to repaint trim, siding, or doors: peeling or flaking paint, visible wood grain or bare spots, persistent chalking, or areas that absorb water instead of shedding it.
You should schedule repainting when surfaces are dry and temperatures suit paint selection; weather considerations matter for adhesion and cure.
Prioritize trim maintenance to seal joints and prevent rot, follow siding preparation like cleaning and priming, and focus on door finishing for smooth operation and seal longevity.
Choose coatings that offer exterior protection and match substrate needs so your work lasts.
City vs. Rural: Local Microclimate Effects
If you live in a city, the urban heat island effect can speed paint drying and stress finishes, while rural homes face cooler nights that slow curing.
You’ll also notice different wind and moisture patterns—stronger gusts and salt spray near coasts, or persistent damp in sheltered valleys—that affect how often you need to repaint.
Factor these local conditions into your timing and product choices for longer-lasting results.
Urban Heat Island
While city neighborhoods often feel several degrees warmer than nearby rural areas, that temperature gap matters when you’re planning an exterior paint job. You’ll face urban heat that speeds drying, raising blister and adhesion risks if surfaces get too hot.
Adjust painting strategies: pick heat-tolerant formulas, schedule cooler mornings, and test small areas.
- Choose acrylics rated for higher substrate temps.
- Work early to avoid peak pavement-reflected heat.
- Keep primers and cleaners from evaporating too fast.
You’ll also watch surface temperature, not just air temp, and pause if coatings flash-dry before leveling.
Wind And Moisture Patterns
Because urban canyons and open rural fields channel air differently, you’ll see clear contrasts in wind speed and moisture that affect exterior painting. You should check local moisture levels before painting; city sites often dry faster but trap pollutants, while rural sites may hold humidity longer. Note prevailing wind direction to avoid overspray and guarantee even drying. Plan paint days when winds are light and humidity is within manufacturer recommendations.
| Setting | Impact |
|---|---|
| City narrow streets | Faster drying, pollutant risk |
| City open plazas | Variable gusts |
| Rural sheltered | Higher humidity |
| Rural exposed fields | Strong consistent winds |
Using Local Weather Averages to Pick Weeks
When planning exterior painting, check local weather averages so you can pick weeks with consistent temperatures, low humidity, and minimal rain probability; this gives paint the time it needs to cure properly and reduces the risk of runs, blistering, or extended touch-ups.
Plan exterior painting during stable, low-humidity, dry weeks so paint can cure fully and avoid defects.
Use historical data to identify stable windows based on local climate patterns and seasonal temperature averages. Choose weeks where nights and days stay within the paint manufacturer’s temperature and humidity range.
Consider:
- Average weekly humidity and rainfall totals
- Typical daytime/nighttime temperature swings
- Length of consecutive dry days
That approach minimizes surprises and helps schedule crews efficiently.
Reading Short-Term Forecasts to Pick Days
After you’ve identified the best weeks from historical averages, use short-term forecasts to pick the exact days for painting; they’ll tell you whether a chosen week will actually deliver the stable, dry conditions you expect.
Check 3–5 day outlooks each morning, watching predicted humidity, precipitation probability, and temperature ranges. Use reliable weather apps for hourly updates and radar to spot passing fronts.
Favor consecutive dry days with moderate temperatures and low overnight dew. If forecasts change, be ready to shift start times or postpone.
Relying on short term forecasts keeps paint curing on schedule and avoids wasted work.
Seasonal Checklist: Week-by-Week Paint Prep
Start by breaking your prep into weekly tasks—cleaning, scraping, sanding, and priming—so you know exactly what to finish before paint day.
Check forecasts each week and shift tasks to keep sensitive steps, like priming and topcoating, on weather-safe windows.
That way you’ll stay on schedule and avoid redoing work after unexpected rain or temperature swings.
Weekly Prep Tasks
Anyone can keep a painting project on track by breaking prep into weekly tasks; this keeps work manageable and prevents last-minute rushes.
You’ll follow a concise weekly painting routine tied to your project timeline, balancing surface preparation and equipment maintenance without overdoing any step.
- Week 1: Inspect surfaces, plan paint storage, order supplies, and list paint tools.
- Week 2: Clean and repair surfaces, caulk gaps, and test small paint patches.
- Week 3: Final prep, mask areas, confirm weather considerations, and stage cleanup process and tools.
Stick to the list, adjust timing, and maintain tools.
Weather-Safe Scheduling
Because weather dictates when paint will adhere and cure properly, you should schedule each week of prep around realistic local forecasts and seasonal norms.
Check long-range weather patterns to pick dry, mild windows; plan scraping, washing, and priming on consecutive good days so coats cure fully.
Build scheduling flexibility for unexpected rain, heat spikes, or cold nights—reserve buffer days and reorder tasks (trim and repairs can wait for prime weather).
Monitor humidity and wind forecasts daily, use breathable tarps for short delays, and confirm final coat timings at least 48 hours ahead to avoid rework and guarantee durable finishes.
Protecting Fresh Paint From Sudden Weather
If bad weather moves in while your paint is still curing, act fast to shield the surface and preserve your work.
Check the weather forecast immediately, then prioritize actions that maintain paint durability and appearance.
Check the forecast right away, then focus on steps that preserve paint durability and finish.
Follow these steps quickly:
- Erect tarps or plastic sheeting, securing edges to prevent wind intrusion.
- Use temporary awnings or umbrellas over exposed areas to block rain without touching wet walls.
- Move ladders and tools into dry storage; blot splatters with a soft cloth, avoiding scrubbing that damages film.
Act promptly and cautiously to protect your finish until conditions allow normal curing to resume.
Safely Speeding Cure Times With Ventilation
When you want paint to set faster without risking adhesion or appearance, increase airflow around the surface while keeping temperature and humidity in check.
You can angle fans to move fresh air across panels, open nearby windows or doors, and remove obstructions that trap moisture. Use gentle, consistent airflow—too strong winds can scatter particles or cause uneven drying.
Combine ventilation techniques with proper timing: paint during mild, dry periods and after dew has lifted.
Avoid risky shortcuts; only use approved drying accelerators recommended by your paint manufacturer.
Monitor curing visually and by touch before exposing the surface to stress.
When Heaters or Tents Are Worth It
Wondering whether heaters or tents will actually save your paint job? You’ll weigh heaters’ effectiveness against cost and risk. Use them when brief cold snaps threaten drying, or when dew forms overnight.
Consider tent usage for small areas or wind protection, not entire houses unless pros handle ventilation.
Use tents for small sections or wind protection—avoid covering whole houses unless pros ensure proper ventilation and safety.
- When to use heaters: temperatures below manufacturer recommendations, short-term fixes, monitored setups.
- When to use tents: wind, light rain, or to contain overspray on small sections.
- When to avoid both: large projects without trained crews, high fire risk, or poor ventilation.
Avoiding Trapped Moisture Under New Paint
Before you paint, make sure the surface is fully dry by feeling for dampness and using a moisture meter where needed.
You’ll also want to monitor and lower humidity around the work area—use dehumidifiers or wait for a drier day to prevent trapped moisture.
Taking these steps helps the new paint adhere properly and avoid peeling or blistering.
Check Surface Dryness
If rain or high humidity’s been recent, don’t assume the exterior’s dry enough for paint — moisture trapped beneath a fresh coat will cause peeling and blistering.
You should treat surface preparation seriously: inspect siding, scrape loose paint, and remove mildew. Use moisture testing to confirm dryness before priming.
Follow a simple checklist:
- Use a moisture meter on several spots; wait until readings meet paint manufacturer specs.
- Tap and listen for hollow sounds indicating trapped damp or rot needing repair.
- Feel surfaces; avoid painting if surfaces cool or damp to touch.
Proceed only when every test and inspection passes.
Control Humidity Levels
Because paint cures by releasing moisture, you’ll want to control ambient humidity during and after application to prevent trapped moisture and adhesion problems. You should monitor weather forecasts, avoid painting when dew point is high, and use dehumidifiers or fans if needed. Good humidity control helps coatings bond and dries primers faster. Follow manufacturer RH limits and allow extra drying time in shaded or cool spots. Balance ventilation and protection from rain so you’re not creating condensation.
| Action | Benefit |
|---|---|
| Use dehumidifier | Speeds drying |
| Ventilate | Prevents buildup |
| Delay if wet | Avoids blisters |
Practice consistent moisture management.
Scheduling Multi-Day Exterior Projects by Season
When you’re planning a multi-day exterior paint job, season dictates how long each coat needs to dry and how many days you’ll realistically have to work.
You should base timing strategies on seasonal weather and local weather patterns to set realistic project duration and avoid scheduling conflicts.
Consider ideal conditions for drying and the planning logistics needed for buffer days.
Seasonal considerations change how many consecutive workdays are feasible, so build flexibility into your schedule.
- Prioritize stable weather windows.
- Allocate buffer days for rain or humidity.
- Sequence tasks to maximize productive days.
Contractor Availability and Seasonal Pricing
You’ll want to plan around peak season scheduling because painters book up fast in warm months.
If you’re flexible, off-season discounts can save you money and get you faster start dates.
Always check typical booking lead times so you’re not stuck waiting or paying rush fees.
Peak Season Scheduling
As temperatures rise and dry weather becomes reliable, painters get booked fast, so plan ahead to lock in your spot and avoid higher rates.
Peak season—usually late spring through early fall—means contractors juggle more jobs, subcontractors, and weather windows, which drives up demand and sometimes prices.
You’ll want to watch peak season trends and aim for ideal scheduling to minimize delays and unexpected surcharges.
Consider these steps:
- Book 6–8 weeks ahead to secure preferred dates.
- Request written timelines and contingency plans for weather.
- Confirm crew availability and material lead times before signing.
Off-Season Discounts
Because demand drops in late fall and winter, contractors often lower rates or offer specials to fill their schedules, so you can save by booking outside peak season.
You’ll see off season savings in hourly rates, bundled tasks, or waived fees. Ask contractors about seasonal promotions and whether discounts apply to materials, prep work, or warranties.
Get quotes from several pros, confirm weather-related guarantees, and request written terms for any reduced-price work.
Remember lower prices reflect demand, not necessarily lower quality; check references and reviews.
Plan flexibly so you can take advantage of these temporary pricing windows.
Booking Lead Times
When demand peaks in spring and summer, plan well ahead—contractors often book weeks to months in advance, so start requesting quotes early to lock in your preferred window.
You’ll face lead time considerations and potential scheduling conflicts, so be proactive. Consider off-season rates if you can be flexible.
- Get multiple quotes early to compare availability and pricing.
- Ask each contractor about cancellation policies and buffer time for delays.
- Reserve a spot with a deposit to avoid last-minute scheduling conflicts and price increases.
Being decisive reduces stress and helps you secure the best timing and value.
DIY Now or Hire a Pro: Quick Criteria
If you’ve got steady hands, basic tools, and only minor prepping and repairs, you can confidently tackle your exterior paint job yourself; otherwise hiring a pro will likely save time and prevent costly mistakes. You’ll weigh DIY considerations against professional advantages: assess skill assessment honestly, estimate budget implications, and note time constraints. Match project scope to safety measures and equipment needs. Use this simple comparison to decide quickly.
| You DIY | Hire Pro |
|---|---|
| Lower cost, more time | Faster, guaranteed finish |
| Limited tools, more risk | Full equipment, insured work |
Does Season Affect Your Paint Warranty?
Check your paint warranty for specific weather and temperature ranges they require during application, because contractors and manufacturers often set strict limits.
If paint fails due to you ignoring those seasonal requirements—like applying in freezing or overly humid conditions—coverage could be reduced or denied.
Also follow the required maintenance steps the warranty lists to keep claims valid if seasonal wear shows up later.
Warranty Weather Requirements
Because paint manufacturers tie warranties to proper application conditions, the season you choose can matter more than you think. You should read warranty terms closely so you know temperature and humidity limits; ignoring them risks voiding coverage.
Pay attention to short-term weather fluctuations during and after application.
- Check temperature windows — paints often require specific daytime and nighttime ranges.
- Monitor humidity — high moisture can prevent curing and breach warranty conditions.
- Avoid freeze/thaw periods — repeated swings can stress film formation and lead to claims denial.
Following these rules helps you maintain warranty protection and finish longevity.
Coverage For Seasonal Failures
When you file a warranty claim for peeling, blistering, or other seasonal failures, the manufacturer will look at when and how the paint was applied to determine coverage.
You should expect them to assess job records, ambient conditions, and product specs.
Seasonal challenges like freeze-thaw cycles, high humidity, or extreme heat can void coverage if application violated temperature or moisture limits.
Document temperatures, surface prep, and drying times to support a claim.
Weather impacts during application and curing are critical; if painters ignored recommended windows, the manufacturer may deny responsibility.
Know your contract and provide clear evidence if you pursue a claim.
Maintenance To Preserve Warranty
After documenting application conditions for a warranty claim, you’ll want a clear maintenance plan to keep that warranty valid through seasonal shifts.
You should follow warranty considerations closely and handle small issues before they worsen. Track inspections after harsh weather and keep records.
- Inspect quarterly for cracking, peeling, or mildew; log findings and photos.
- Clean gently with recommended solutions; avoid pressure washing that voids coverage.
- Touch up using approved products and methods listed in the warranty.
These maintenance tips preserve protective coatings and demonstrate care if you must file a seasonal-failure claim.
Choosing Pro-Grade Paint for Extreme Seasons
If you live where summers scorch or winters freeze, choosing pro-grade exterior paint will keep your siding looking good and performing longer.
You want formulations rated for paint durability against UV, thermal cycling, and moisture. Check technical data sheets for adhesion, elongation, and freeze-thaw resistance to confirm season suitability.
For hot climates pick heat-reflective, flexible acrylics; for cold regions choose low-temperature cure alkyd-acrylic hybrids or specialized elastomeric coats.
Also consider mildew inhibitors and solid pigments for lasting color.
Hire pros who follow manufacturer prep and application windows to maintain warranty and maximize lifespan in extreme seasonal conditions.
Low-VOC Paints: Best Seasons to Use Them
Because low-VOC paints release fewer fumes and dry differently than traditional formulas, you’ll want to pick times when temperatures and humidity favor proper curing—typically mild, dry days in spring or fall.
Because low-VOC paints emit fewer fumes, choose mild, dry days—spring or fall—for proper curing.
Choose days with steady 50–75°F and low humidity to maximize low VOC benefits and avoid extended tacky periods. Consider eco-friendly options for occupied homes or near children. Plan around weather forecasts and brief rain windows.
- Spring: gentle warmth, quick curing.
- Early fall: stable temps, less pollen.
- Mild summer days: only if humidity stays low.
How Pests and Allergens Affect Prep & Timing
Before you paint, have a pest inspection to catch nests, wood rot, or insect damage that could wreck new coatings.
While prepping, use wet sanding, tack cloths, and HEPA filtration to cut airborne allergens and keep work areas clean.
Scheduling painting when pests are less active and pollen counts are low will save time and reduce rework.
Pest Inspection Before Painting
When you’re planning exterior paint work, don’t skip a thorough pest and allergen inspection—hidden nests, insect damage, or mold can force extra repairs, change timing, and affect paint adhesion and indoor air quality.
You should use an inspection checklist to spot wood rot, entry points, and active infestations before priming. Addressing issues first saves rework and protects finishes.
Include pest prevention strategies in your scope, sealing gaps and trimming vegetation. If you find structural damage, postpone painting until repairs finish. Hire a pro if infestations are extensive; otherwise treat, seal, and proceed on a dry, stable day.
- Inspect
- Repair
- Seal
Allergen Reduction During Prep
How will you keep allergens from turning your prep work into a health hazard? You’ll identify allergen sources—mold, dust, pollen, and insect droppings—then remove them before sanding or priming. Wet-clean surfaces, use HEPA vacuums, and work on low-pollen days. Wear an N95, gloves, and eye protection to maintain paint safety. Seal off vents and use negative pressure fans to stop spread. Schedule work when humidity’s moderate to limit mold release. Quick checklist:
| Task | Tool | Timing |
|---|---|---|
| Remove mold | Cleaner & brush | Before sanding |
| Vacuum dust | HEPA vacuum | Daily |
| Control pollen | Wet wipe | Morning |
| Protect crew | PPE | Always |
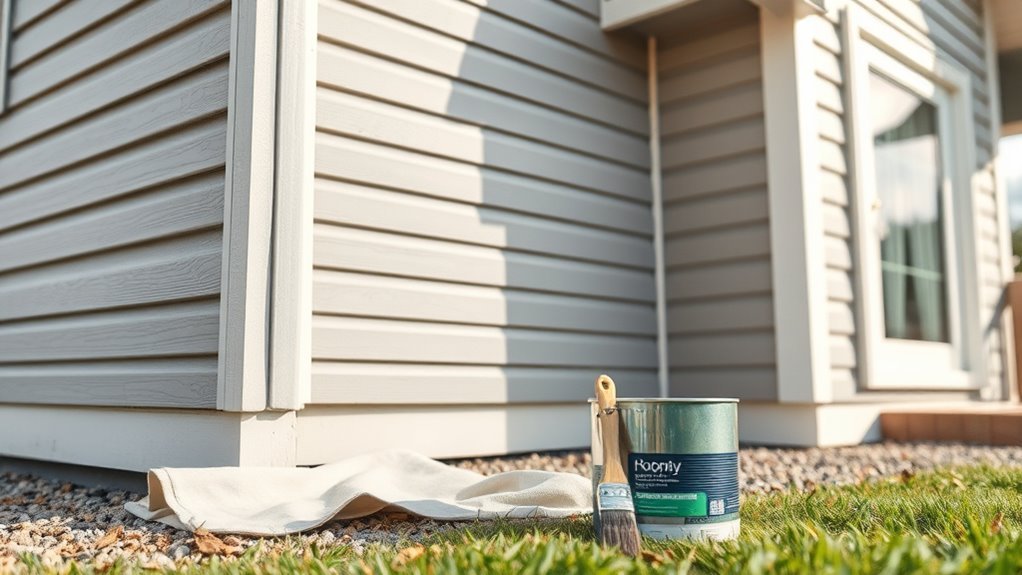
Special Timing for Wood, Stucco, Brick, and Metal
Because each material reacts differently to weather and age, you’ll want to time exterior painting to the specific needs of wood, stucco, brick, and metal rather than using a one-size-fits-all schedule.
Because materials age and weather differently, schedule exterior painting to each surface’s specific needs, not one-size-fits-all.
Focus on condition: wood needs inspections for rot and wood protection; stucco needs crack checks for stucco care; brick benefits from evaluating mortar before brick sealing; metal needs rust removal prior to metal coating.
Plan around temperature and humidity tolerances for each material. Consider:
- Wood: paint after repairs, in dry, mild weather.
- Stucco: paint when fully cured and dry.
- Metal/Brick: avoid high moisture.
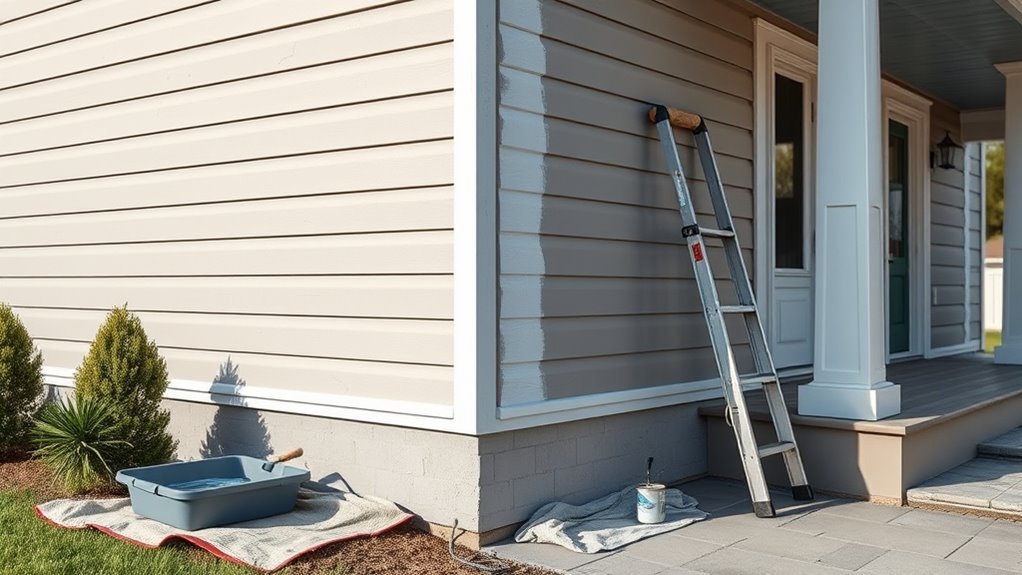
When to Paint After Repairs or Power Wash
After you’ve addressed material-specific issues like rot, cracks, mortar, or rust, plan the timing for painting around any repairs and the day you power-wash the surface.
You want repair readiness: patched areas must fully cure, caulk should dry, and new wood needs time to settle.
After power washing, let siding dry completely—often 24–72 hours depending on humidity and temperature—before priming or painting.
Avoid painting immediately after repairs or cleaning; trapped moisture or uncured fillers cause adhesion failures.
Check moisture with a meter if unsure.
Schedule work on a string of dry days to guarantee consistent drying and lasting results.
Quick Checklist: Pick Your Best Painting Window
1 simple checklist helps you pick the best window to paint your house exterior: choose a stretch of 3–7 dry days, temperatures between 50–85°F (10–29°C), low wind, and humidity under about 70%.
Make sure all repairs, caulking, and power-washed surfaces have fully dried before you prime or paint.
Use weather patterns and seasonal trends to schedule work, apply preparation techniques, and confirm surface conditions.
Track temperature monitoring and humidity control during your project.
Consider paint selection for paint durability and future exterior maintenance.
Quick steps:
- Check forecast and seasonal trends.
- Verify dryness and surface prep.
- Confirm product specs and plan.
Common Timing Mistakes That Shorten Paint Life
If you rush into painting without respecting weather windows, drying times, and product guidelines, you’ll cut years off your finish.
You’ll shorten paint lifespan by ignoring weather conditions and seasonal factors that alter drying time and humidity levels.
Skipping prep causes preparation mistakes: trapped surface moisture and poor cleaning reduce paint adhesion.
Painting during temperature extremes or right before storms undermines paint quality and causes cracking, blistering, or peeling.
Choose days with stable, moderate temperatures and low humidity, follow manufacturer drying time, and fix substrate issues first.
That discipline protects paint adhesion, extends paint lifespan, and preserves your investment.
Frequently Asked Questions
Can I Paint Exterior Surfaces During Pollen Season?
You can, but pollen effects can reduce paint adhesion, so you’ll need thorough cleaning, tack cloths, and dry, calm conditions; otherwise pollen will contaminate wet paint, causing blemishes and poor long-term bonding that you’ll regret.
How Soon After New Construction Can I Paint Exterior Siding?
I’d wait about 30–90 days after new construction before painting siding, since siding material choices affect paint drying time; I once watched fresh cedar “settle” like bread cooling, and patience guaranteed a flawless finish.
Will Nearby Landscaping Chemicals Affect Fresh Exterior Paint?
Yes — chemicals from nearby landscaping can cause chemical interactions that mar finishes and reduce paint longevity. You’ll want to avoid spraying near fresh paint, rinse overspray promptly, and choose compatible, resistant exterior coatings.
Is It Okay to Paint if Overnight Temperatures Dip Slightly Below Manufacturer’s Min?
Yes — you can risk it, but don’t gamble: follow temperature considerations, respect manufacturer’s guidelines, monitor dew, and plan drying windows carefully. You’ll avoid adhesion failures, prolong cure time, and reduce potential bubbling and peeling.
How Long Should Newly Painted Surfaces Be Left Un-Touched for Hardware Reinstallation?
Wait at least 24–72 hours for paint to dry, but allow full curing time of 7–30 days for ideal paint adhesion before reinstalling hardware; gentler handling sooner’s okay, but avoid stress to guarantee long-term finish integrity.
Conclusion
You’ve got the timing basics—pick dry, mild days and match your schedule to your climate, surface, and repairs. Whether you DIY or hire pros, plan around ideal temps and allow proper cure times after power washing or patching. Want your paint to last, or gamble on quick looks that peel sooner? Choose the right window, follow the checklist, and avoid common timing mistakes to protect curb appeal and cut future costs.