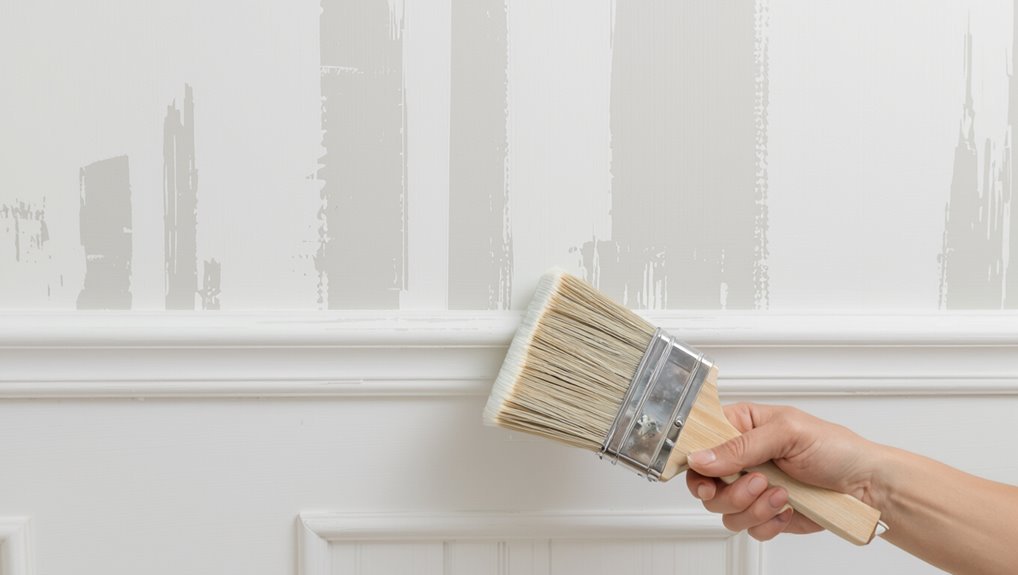
Why Do My Walls Look Streaky After Painting?
If your walls look streaky after painting, it usually means prep, technique, or drying conditions failed you: uneven cleaning or sanding, glossy spots, or porous drywall can absorb paint differently, and thinning paint or using the wrong roller nap creates roller marks, lap lines, and brush streaks. Humidity, temperature, and rushed overlaps worsen the effect. You can often fix small areas with sanding, primer, and careful recoat, and the next steps explain how to do that.
Quick Answer: Why Your Walls Look Streaky
Wondering why your freshly painted walls look streaky? You’re likely facing uneven application, poor surface prep, or incompatible paint layering.
If you rushed or thinned paint too much, coverage will vary and reveal roller paths. Lighting and shadowing can exaggerate inconsistencies, so your color selection affects perceived uniformity—darker or glossier hues show flaws more.
Match paint finish across touchups and full coats; mixing flat with eggshell, for example, creates visible differences.
Humidity, temperature, and drying time also change how paint levels.
Recoat with proper technique, consistent product, and correct environmental conditions to achieve a smooth result.
How to Identify Roller Marks, Lap Lines, and Brush Streaks
When you inspect freshly painted walls, look for consistent patterns that reveal roller marks, lap lines, or brush streaks so you can diagnose the problem quickly.
Roller marks show as parallel ridges or lines where the nap skipped or overlapped—check your roller technique, pressure, and direction.
Lap lines appear as darker, glossier bands where paint overlapped before drying; note timing and blending at edges.
Brush streaks are thin, directional lines from bristles, often near trim or corners—evaluate brush selection, stroke length, and angle.
Walk the room in different light angles to spot these defects and note where technique caused them.
Prep Steps to Avoid Streaks: Clean, De-Gloss, and Sand
Although skipping prep might save time, proper cleaning, de-glossing, and sanding are what keep paint from streaking and help it lay down evenly. You’ll avoid uneven sheen and poor adhesion by focusing on surface preparation before any paint application.
First, degrease and remove dust so the primer and paint bond. Next, de-gloss glossy surfaces with a liquid deglosser or sanding to remove shine. Finally, sand rough spots and feather edges, then wipe clean.
- Clean with TSP substitute or mild detergent
- Use a de-glosser or 120–220 grit sandpaper
- Wipe and vacuum between steps
How Old or Uneven Drywall Causes Patchy Paint
If your drywall is old or uneven, it’ll soak up paint inconsistently and leave patchy, streaky areas.
You’ll notice faded spots where the paper or joint compound is more porous and darker, glossier areas where seams or repairs resist absorption.
Addressing these surface differences before you paint will make the finish uniform.
Aged Drywall Effects
Because drywall ages and settles, older or uneven boards often soak up paint differently, leaving you with patchy, streaky walls. You’ll notice faded spots, satin inconsistencies, and thin areas where drywall aging reduced paint adhesion. Addressing the substrate helps prevent repeat problems.
- Inspect seams, repairs, and nail pops for weak paper or crumbling joint compound.
- Sand glossy or deteriorated surfaces, then apply a quality primer to unify porosity.
- Use compatible primers and allow proper cure times to restore adhesion and uniform finish.
If you prep thoughtfully, you’ll get consistent coverage and avoid streaky results on older walls.
Uneven Surface Absorption
When older or uneven drywall soaks up paint at different rates, you’ll get visible patches, streaks, and color variation that no amount of rolling will hide. You’ll notice how surface texture and varying paint absorption create darker and lighter areas. Prep fixes this: sand rough spots, skim coat low areas, and prime with a high-adhesion sealer to unify porosity. Test a small section to confirm uniform coverage before tackling the whole wall. Addressing substrate irregularities prevents repeating work and improves final appearance.
| Problem | Fix |
|---|---|
| High porosity | Primer/sealer |
| Rough texture | Sand smooth |
| Low spots | Skim coat |
| Patchy finish | Test & recoat |
Primer Mistakes That Show Through Finish
Although primer’s job is simple—create a uniform base—mistakes you make during priming will often telegraph through the finish coat and leave streaks, lap marks, or uneven sheen.
You need consistent primer application and the right primer types for the surface; thin, patchy coats or over-brushing show through. Let each coat dry fully and sand light between coats to remove nibs. Avoid reworking drying edges.
- Skipping surface prep (dust, grease)
- Applying too-thin or too-thick coats
- Using wrong primer types for glossy or porous surfaces
Correct technique prevents primer flaws from becoming permanent finish problems.
How Paint Quality and Formulation Affect Streaks
Primer problems often make streaks obvious, but the paint itself plays a big role too.
You’ll notice paint formulation affects how evenly pigment spreads; poor pigment consistency causes visible banding. Quality impact shows up in coverage and color saturation, so cheaper products may need more coats.
Drying time interacts with application technique—working too slowly or overworking edges leaves lap marks. Proper surface preparation guarantees paint adhesion and reduces uneven absorption that exaggerates streaks.
Choose a formula suited to your substrate and climate, follow manufacturer drying and rolling recommendations, and you’ll cut streaks and improve final appearance.
Why Over-Thinning Paint Creates Streaks (And Limits)
If you thin paint too much, it won’t level properly and you’ll see streaks, lap marks, and poor coverage because the binder that holds pigment and film together gets diluted.
Thin paint won’t level—expect streaks, lap marks and poor coverage as dilution weakens the binder.
You risk over thinning issues that reduce adhesion and hide imperfections. Lower paint viscosity alters flow, so brush or roller paths don’t blend and drying happens unevenly.
Keep thinning minimal and follow manufacturer limits. Consider these effects:
- Reduced tint strength and patchy color
- Faster sagging or runs on vertical surfaces
- Longer open time required for leveling, increasing dust pickup
Respect viscosity guidelines to avoid streaks and compromised durability.
Pick the Right Roller Nap and Brush to Avoid Streaks
Thinning mistakes can make brush and roller marks worse, so you’ll also want to pick the right tools for a smooth finish.
Choose roller nap based on surface texture: short naps for smooth walls, medium for light orange peel, long for rougher surfaces.
Your brush selection matters—synthetic for latex, natural for oil—to control paint absorption and release.
Match application technique to paint consistency; thicker paints need stiffer tools and slower, even strokes.
Do a brand comparison if unsure; higher-quality tools reduce streaks.
Clean and maintain tools, and use consistent pressure for uniform coverage and professional finishing touches.
Cutting-In Tips That Prevent Visible Lines
When cutting in, keep a consistent paint load on your brush so you don’t leave heavier lines at the edges.
Work in long, smooth strokes and immediately feather the paint outward to blend with the rolled area.
If you keep your brush loaded the same and feather each pass, the seams will disappear.
Use Consistent Paint Load
Load your brush or angled sash brush with the same amount of paint each time you cut in so you get an even bead along the edge. You’ll avoid lap marks by using steady paint load techniques and following simple paint consistency tips.
Work steadily, reload before the brush runs dry, and keep edges wet to blend with the roller.
- Dip to the same depth and tap off excess.
- Keep a small tray or bucket for quick, identical reloads.
- Pause briefly between sections to confirm even coverage.
Practice consistent rhythm and you’ll minimize visible lines and achieve a smooth, professional finish.
Feather Brush Strokes
A soft, deliberate feathering motion keeps your cut-in edges seamless, so drag the brush lightly from the painted line into the unpainted area to thin the paint at the edge and blend with the roller-applied coat.
Use proper brush selection—angled sash brushes for corners, high-quality synthetic filaments for latex—to control paint load and edge definition. Load the tip, not the ferrule, and wipe excess to avoid ridges.
Practice feathering techniques by making short, overlapping strokes that taper out. Work while paint is wet so you can blend with the roller.
Clean, steady motions prevent visible lines and streaks.
Maintain a Wet Edge for Smooth Coverage
If you keep a wet edge as you paint, you’ll blend new and still-wet strokes smoothly so lap marks don’t form. You should work in manageable sections, use wet edge techniques, and monitor painting consistency to avoid dry overlaps.
Move methodically across the wall, keeping adjacent areas damp. Use a full roller or well-loaded brush so coverage stays even. Maintain a steady pace; don’t stop mid-panel and return later.
- Start at one corner and work outward in panels
- Reload tools before edges dry
- Overlap each pass slightly into the wet area
This prevents streaks and yields a uniform finish.
How Inconsistent Pressure Creates Roller Marks
If you don’t apply even pressure with the roller, you’ll leave areas with more paint and others with less, causing visible roller marks.
Those uneven strokes create overlap lines that stand out once the paint dries.
You’ll also notice the paint thins near edges where you eased off pressure, making streaks more obvious.
Uneven Roller Pressure
When you press harder with the roller in some spots and lighter in others, the nap picks up and deposits paint unevenly, leaving visible ridges and roller marks. You’ll see streaks where pressure varied; consistent roller technique and correct paint consistency reduce that.
Focus on steady wrist motion and even passes.
- Load the roller evenly; avoid heavy edges.
- Maintain steady pressure; use long, overlapping strokes.
- Check paint viscosity; thin or thick mixes worsen marks.
If you spot ridges, lightly re-roll while wet to blend.
Practice and mindful pressure give a smooth, uniform finish.
Visible Overlap Lines
Because you’re not keeping pressure consistent across the wall, the roller leaves visible overlap lines where one pass laid down more paint than the last.
You’ll notice visible streak patterns following the roller’s path; heavier pressure deposits extra paint, lighter pressure drags it thin, and the changes show as lines.
To prevent this, maintain even wrist and arm motion, reload the roller evenly, and overlap each stroke by about 50% while blending before the paint skins over.
Good roller application means steady pressure, consistent coverage, and finishing each section uniformly so overlap lines disappear into a seamless finish.
Thinning Paint Near Edges
Those same pressure changes that make overlap lines also thin paint near edges, where you naturally lift or ease the roller. You’ll see faint streaks because reduced paint viscosity at the roller tip and uneven pressure change film thickness.
To fix it, focus on consistent pressure and purposeful edge blending so the roller deposits uniform paint.
- Keep steady, even pressure as you approach corners.
- Use a loaded brush or mini-roller for clean edge blending.
- Match paint viscosity by stirring and thinning per label instructions.
If you control pressure and viscosity, you’ll avoid roller marks and get smooth, consistent coverage.
Drying Conditions: Humidity, Temperature, and Airflow
If your paint dried too slowly or unevenly, changes in humidity, temperature, and airflow are usually the culprits.
You’ll notice humidity effects when high moisture prolongs drying times, causing sags, lap marks, or uneven sheen.
Temperature fluctuations matter: cold slows curing and can trap solvents, while heat can make paint skin over too fast, leaving irregular texture.
Don’t ignore airflow importance—stagnant air stalls evaporation, but strong direct drafts can cause uneven drying across the wall.
Control room climate: aim for manufacturer-recommended temps, moderate humidity, and gentle, consistent circulation to promote uniform drying and reduce streaking.
How Sheen Differences Make Streaks Obvious
If different areas of your wall end up with uneven gloss levels, they’ll catch light differently and look streaky.
You’ll notice shinier patches reflecting more light while flatter spots absorb it, making contrast obvious.
Check sheen consistency to fix the problem before repainting.
Uneven Gloss Levels
When paint dries, variations in sheen — from matte to satin to semi-gloss — make any inconsistency stand out, so uneven gloss levels are a common reason your walls look streaky.
You notice patches where gloss varies because finish reflects differently; uneven lighting and paint thickness exaggerate it. To fix it, match sheen and apply evenly.
Quick tips:
- Use the same sheen across the wall and test a sample area first.
- Sand and recoat glossy spots to level surface reflectivity.
- Roll with consistent pressure and maintain a wet edge to avoid overlap marks.
Consistent sheen control prevents streaky appearance.
Light Reflection Variance
Uneven gloss on a wall doesn’t just sit there — it changes how light bounces back, and that’s what makes streaks so obvious.
You notice bands where sheen shifts because light reflection differs across the surface; some areas throw back a crisp highlight while others diffuse softly. Those contrasts exaggerate minor color variations and brush marks, turning small application differences into visible streaks.
To reduce this, control sheen by using the same finish, maintain a wet edge, and apply consistent pressure and overlap.
Proper lighting checks during and after painting help you spot and correct reflection-related streaks before they set.
Substrate Absorption: Why Some Spots Dry Differently
Because different wall materials soak up paint at different rates, some areas will look darker or glossier as they dry.
You’ll notice substrate types cause absorption variations that change paint interactions across surface textures. Moisture levels and environmental factors alter drying times, so untreated spots stand out.
Primer applications even out porosity and reduce contrast, so skip them and you’ll see streaks.
- Check substrate types and surface textures before painting.
- Control moisture levels and environmental factors during drying.
- Use primer applications where absorption variations are obvious to normalize paint interactions and drying times.
Spot Fixes vs. Full Repaint: Which to Choose
Start by evaluating the damage to decide if a spot fix will blend or if the whole wall needs repainting.
Check that you can match the paint color and sheen, and feel the texture to guarantee touched-up areas won’t stand out.
If color, sheen, and texture all line up, a targeted repair can save time and paint; if not, plan a full repaint.
Assess The Damage
When you inspect streaky walls, decide whether you can hide the flaws with a few targeted touch-ups or if the problem runs deep enough to warrant repainting the whole surface.
Look closely in different light, feel for texture variations, and note where streaky paint shows through. If streaks are isolated, spot fixes can work; widespread issues mean a full repaint.
- Small streaks: clean, sand, and retouch with matching paint.
- Moderate: feather edges, blend with a mini-roller using consistent painting techniques.
- Severe: strip, prime, and repaint the entire wall to guarantee a uniform finish.
Match Paint & Texture
Think of matching paint and texture as a balancing act: you need the right color, sheen, and surface feel to make a spot repair vanish.
If you’re fixing a small area, test samples to check texture matching and paint compatibility with the existing finish. Use the same brand and formula when possible—differences in binder or sheen can reveal repairs even if color seems correct.
Blend edges by feathering and replicate surface patterns with appropriate tools.
Choose a full repaint when multiple spots need work, colors have faded, or finishes differ across walls. That avoids patchy results and saves time long-term.
Sanding and Feathering to Remove Roller Marks
Grab a fine- to medium-grit sanding block and lightly sand the roller marks until the ridges disappear and the edges blend into the surrounding paint.
Use gentle pressure and short strokes; you’re refining surface texture, not stripping paint. Focus on sanding techniques that prevent gouging and keep work neat. Feathering edges reduces visible shifts so new touch-ups vanish into the wall.
- Sand parallel to the wall, then cross-sand very lightly for uniformity.
- Wipe dust with a tack cloth before any touch-up.
- Inspect under angled light to catch subtle ridges.
Finish by sanding only what’s needed and re-coating sparingly.
How to Re-Prime and Match Texture and Sheen
After you’ve smoothed and cleaned the area, re-priming is the next step to guarantee new paint bonds evenly and hides any sanding or patchwork.
Choose a primer formulated for the surface (stain-blocking for repairs, high-adhesion for glossy spots) and apply it in thin, even coats.
Select a primer suited to the surface—stain-blocking for repairs, high-adhesion for glossy areas—and apply thin, even coats.
Once dry, assess texture matching: recreate the original wall finish with light stipple, knockdown, or smooth passes before painting.
For sheen variation, paint a small test patch and compare from different angles and lighting.
If contrast remains, lightly sand and recoat the primer or adjust your technique until the repair blends seamlessly.
Best Tools and Products for Streak-Free Recoats
A few well-chosen tools and the right products make the difference between a streaky finish and a pro-looking recoat: pick a high-quality microfibre roller cover (3/8″–1/2″ nap for most walls), a dense angled brush for cutting in, and a solvent-appropriate primer and paint formulated for good hide and flow; these combine to lay down even film, reduce lap marks, and hold back brush or roller lines so your touch-ups disappear into the wall.
Use streak free tools and high quality products to avoid rework. Essentials include:
- Microfibre roller (consistent nap, lint-free)
- Angled sash brush (cutting in)
- Quality primer and paint (good hide and flow)
A Practical Checklist for a Streak-Free Paint Job
When you’re ready to paint, follow a concise checklist that keeps every step focused on preventing streaks: inspect and prep surfaces, choose the right tools and paint, control your environment (temperature and humidity), use consistent application techniques (load the roller evenly, maintain a wet edge), and finish with light feathering to blend edges.
Next, clean and sand imperfections, prime bare spots, and allow proper drying. Test paint application on a scrap board, noting nap direction and texture techniques for uniform coverage.
Work in manageable sections, keep roller loads steady, overlap passes, and inspect under good light before declaring the job done.
Quick DIY Fixes for Common DIY Mistakes
If your paint looks uneven, you can even out thin spots by applying a light second coat while the first is tacky.
Smooth out visible brush or roller marks by reworking the area with a slightly damp brush or a fine roller, keeping a wet edge.
For drips and runs, sand them smooth once dry and feather in fresh paint for a seamless finish.
Fix Uneven Paint Application
Spotting roller marks, lap lines, or patchy coverage? You can fix uneven paint application without starting over.
Use proper paint layering techniques and adjust roller application methods to blend seams and even sheen. Work while paint’s wet, keep a wet edge, and feather out overlaps.
Try these quick steps:
- Roll in consistent strokes, reload often to avoid dry patches.
- Lightly back-roll across edges to blend layers and match texture.
- Thin stubborn spots with a bit of paint and smooth with a high-quality roller.
If problems persist, wait for full drying then reassess; small touch-ups often save time and money.
Smooth Brush And Roller Marks
Smooth out brush and roller marks quickly with a few targeted moves that restore an even finish without repainting the whole wall. You can blend marks by lightly reworking damp edges with a dry, high-quality brush using smooth application techniques and the ideal brush selection for your paint type. Work from a wet edge, feather strokes outward, and avoid overworking. If roller texture shows, use a slightly damp sponge to soften stipple, then dry-brush along grain. Monitor lighting changes to catch missed areas.
| Tool | Action | Tip |
|---|---|---|
| Brush | Feather | Use ideal brush selection |
| Roller | Light roll | Maintain wet edge |
| Sponge | Soften | Dampen slightly |
| Dry brush | Blend | Short strokes |
| Cloth | Buff | Gentle pressure |
Remove Drips And Runs
After you’ve blended brush and roller marks, you may still spot paint drips or runs that ruin the finish; the good news is you can fix most of them without repainting the whole wall.
Lightly sand any raised drip with fine-grit paper, feathering edges so the surface blends. If paint thickness caused the run, scrape off excess before sanding.
Wait appropriate drying time between sanding and touch-up. Use a thin coat with a loaded brush or small roller for touch-ups, then blend.
- Sand gently
- Remove excess paint
- Touch up thinly and blend
When to Call a Pro: Signs You Need a Contractor
Not sure if the problem’s fixable on your own? If streaks persist after your attempts, schedule a contractor consultation for a professional assessment.
Call a pro when stains reappear, large areas show uneven texture, or underlying issues like moisture, mold, or peeling paint exist. You should also hire someone if you lack proper tools, need color matching over extensive walls, or the surface requires repairs beyond simple sanding.
A contractor can diagnose substrate problems, recommend remediation, and guarantee warranty-backed results.
Don’t delay if structural or health risks are present—getting expert help saves time and prevents costly repeats.
Preventive Habits for Your Next Paint Project
If you want streak-free walls next time, build good habits into every stage of the job: prep thoroughly, use quality materials, and control your environment.
You’ll get consistent results when you plan ahead, pick proper color selection for coverage, and match paint finishes to surface needs.
Clean, sand, and prime before you roll. Work in uniform lighting and avoid painting in extreme humidity or heat. Use even strokes and maintain a wet edge.
Clean, sand, and prime first; paint in even strokes with a wet edge, stable lighting, and moderate humidity.
Quick checklist:
- Wipe, sand, and prime surfaces
- Choose color selection and finish for the room
- Paint in stable temperature and consistent lighting
Resources and Product Recommendations (Tools & Primers)
Now that you’ve got good habits down, let’s look at the tools and primers that make streak-free walls possible.
Choose paint tools that match primer types and surface treatments: water-based primers for drywall, oil-based for stains.
Prioritize wall preparation—cleaning, sanding, patching—before applying primer.
Use proper application techniques: even roller selections (nap length for texture) and brush options for trim.
Pick reputable paint brands and matched primers.
Consider drying aids and environmental factors like humidity and temperature to avoid streaking.
Follow manufacturer instructions and test a small area to confirm coverage, adhesion, and finish before committing to the whole room.
Frequently Asked Questions
Why Do Streaks Appear Only in Certain Lighting at Specific Times of Day?
Because sunlight and artificial lighting hit at specific lighting angles, you’ll see highlights and shadows emphasizing surface texture; those contrasts reveal minor sheen or application differences, so streaks only show when angles and intensity line up just right.
Can Wallpaper Residue Under Paint Cause Streaky Finishes?
Like ghosts beneath wallpaper, residue can bleed through and make finishes streaky. You’ll need better wall preparation and proper primer application to hide remnants; otherwise paint won’t bond evenly and streaks will keep showing.
Do Water-Based and Oil-Based Paints Streak Differently on the Same Wall?
Yes — you’ll see different streaking: paint composition affects flow and sheen, and your application technique alters appearance. Oil-based paints level smoother; water-based dry faster and can show lap marks unless you adjust thinning, brush, or rolling methods.
Will Applying a Clear Coat or Varnish Help Hide Streaks?
Like sweeping fog off glass, no — a clear coat effectiveness is limited; it can even highlight flaws. You’ll find varnish application can add sheen and protection, but won’t reliably hide streaks without proper base correction.
Can Pets or Dust During Painting Create Long-Term Streak Patterns?
Yes — pet hair and dust particles can create long-term streak patterns if they stick during painting; you’ll need proper painting techniques, thorough cleaning, and controlled drying times to prevent embedded debris ruining the finish.
Conclusion
You’ve stood back, squinted, and watched streaks zigzag like tired rivers down a freshly painted wall — frustrating, but fixable. Treat your surface like a canvas: clean and sand the bumps, prime uneven spots, and use the right roller and paint speed so strokes blend like a smooth wash. Small touch-ups can polish the picture; if the “rivers” keep running, call a pro to restore that clean, even finish you imagined.