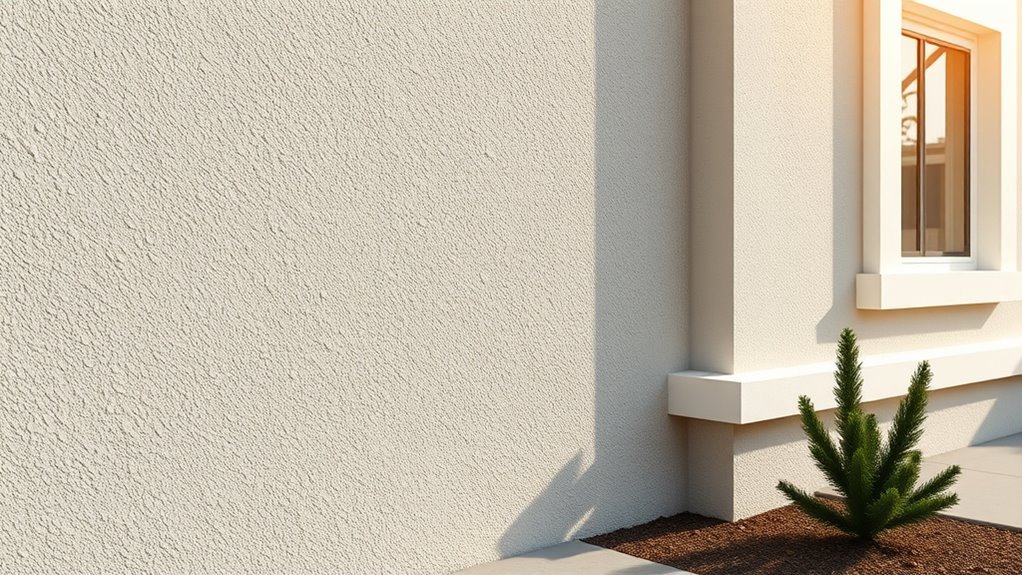
Can You Paint Over Stucco Exterior
Yes—you can paint exterior stucco if you prep it properly. Inspect for cracks, moisture, and loose or chalking paint, then clean, repair, and let it dry. Use a breathable primer and 100% acrylic or elastomeric exterior paint matched to the stucco’s texture and porosity, apply with sprayer or roller, and follow ideal weather and drying times. With good materials and prep you’ll get long-lasting results; keep going to learn tips, tests, and when to call a pro.
Can You Paint Stucco? (Quick Yes/No + Checklist)
Yes — you can paint stucco, and doing it right will extend the life and improve the look of your exterior. You should inspect for cracks, efflorescence, and moisture; repair and allow full drying.
Yes — you can paint stucco; inspect and repair for cracks or moisture, then fully dry before painting.
Clean surfaces with a mild detergent or pressure wash, then use a masonry primer. Choose breathable, elastomeric or acrylic paint suited for stucco.
Match texture by using similar application techniques and Texture matching products to preserve appearance. Plan color coordination with trim, roof, and landscape.
Test a small area first. Follow manufacturer drying times and apply two coats for durable, even coverage.
Paint vs. Replace Stucco: When to Choose Which
When deciding whether to paint or replace your stucco, weigh the extent of damage, moisture issues, and long-term goals. Painting works well for surface wear, color updates, and minor cracks.
Replacement is the right choice for structural failure, persistent water intrusion, or widespread delamination.
You should paint if damage is cosmetic, color fading is the main issue, and substrate is dry and sound.
Choose replacement when rot, mold, or hidden structural defects exist, or when texture matching across large areas is impossible.
Factor in cost, disruption, and how long you want results to last before deciding.
Will Your Stucco Take Paint? Signs It’s Ready: Or Not
Before you grab paint, check whether the stucco is dry, free of active moisture, and has no hidden damp spots that will repel coating.
Inspect for cracks, crumbling, or loose areas that need repair first.
Also confirm the existing coating—if it’s oil-based or sealed, you’ll need the right primer or removal before painting.
Surface Moisture Check
How do you know if your stucco’s ready for paint? First, check surface moisture with a moisture meter or the plastic sheet test: tape a 2×2 foot plastic square to the wall for 24 hours and look for condensation. Readings under 12% (or no moisture under plastic) generally mean you can proceed.
Don’t paint when humidity’s high or after recent rain; allow several dry days. Moisture affects adhesion, curing, and final color selection and can darken textured areas, so consider texture considerations when timing your job.
Recheck problem spots before priming to avoid failures.
Crack And Damage
Wondering whether your stucco can hold paint? Check cracks and damage first—you’ll need sound substrate for good adhesion and color coordination with repairs. Small hairline cracks can be sealed; larger gaps need patching before priming. Also weigh weather considerations: paint in dry, mild conditions to avoid trapping moisture.
| Issue | Severity | Action |
|---|---|---|
| Hairline cracks | Low | Seal, sand |
| Structural cracks | High | Repair, consult |
| Flaking stucco | Medium | Remove, reapply |
If you skip fixes, paint will fail. Do repairs, then test a small area to confirm bond and finish.
Existing Coating Type
Curious whether your stucco will accept paint? Check the existing coating type first: cementitious stucco, acrylic finish, or elastomeric coatings each behave differently. You’ll want to identify adhesion, gloss, and previous paint chemistry—alkyd over latex or vice versa can fail.
If the surface is uncoated, primer choice matters. Test a small patch to confirm bond and observe for blistering.
Consider how the current finish affects color coordination and whether texture enhancement will be preserved or lost.
When in doubt, consult product specs or a pro; choosing compatible primers and paints guarantees a lasting result.
How to Test Stucco Adhesion and Moisture Levels

Before you grab paint, test the stucco’s adhesion and moisture so you don’t hide problems that’ll cause peeling or failure later. Start by inspecting for cracks, blisters, and loose patches; press a putty knife to suspect areas and pry gently to check adhesion.
Use a moisture meter across multiple spots and record readings—values above manufacturer limits mean repair and drying are needed.
Do a small tape pull test: apply strong tape, pull sharply, and watch for surface removal.
Note areas where texture matching or color coordination will be affected by repairs, then plan patching and recheck before priming.
Cleaning Stucco: Pressure Washing and Stain Removal
Before you paint, you’ll need to clean the stucco using pressure-washing techniques that won’t damage the surface—use a wide fan nozzle, moderate pressure, and keep the wand at a safe distance.
Target stubborn stains with appropriate treatments—mild detergent, a bleach solution for mildew, or a masonry cleaner for efflorescence—and always spot-test first.
Rinse thoroughly and allow the stucco to dry completely before moving on to priming and painting.
Pressure Washing Best Practices
When you’re preparing to pressure wash stucco, start by evaluating the surface for loose material, cracks, and areas with heavy staining so you can choose the right pressure, nozzle, and cleaning solution. You’ll test a small area to check color contrast and texture matching before full cleaning. Use low pressure (800–1200 psi), a wide fan nozzle, and hold the wand 12–18 inches away. Work top to bottom, keep moving to avoid gouging, and rinse thoroughly. Protect plants and vents. If unsure, consult a pro to prevent damage and preserve your stucco’s finish.
| Step | Purpose |
|---|---|
| Test area | Verify color contrast |
| Pressure check | Prevent damage |
| Technique | Ensure texture matching |
| Protect | Shield surroundings |
Stain Treatment Techniques
If you spot discoloration or mildew on stucco, tackle stains with targeted cleaners and gentle agitation rather than cranking up pressure. You’ll test a small area first, use a soft-bristle brush, and choose cleaners matched to the stain—oxygen bleach for organic growth, trisodium phosphate for grime.
Rinse thoroughly and repeat only if needed. For persistent tannin or rust, apply stain-specific removers per instructions.
After cleaning and drying, consider how Color psychology affects your repaint choice; pick tones that mask imperfections.
Use Eco friendly paints and proper primers to guarantee stain-blocking and long-term adhesion.
Tools and Materials Needed to Paint Stucco
Though stucco holds paint well, you’ll need the right tools and materials to get a durable, even finish. Gather masonry primer, 100% acrylic exterior paint formulated for stucco texture, and a color matching sample to verify hue consistency.
Use a high-quality pump sprayer for large areas and 3/4–1-inch nap rollers for rough surfaces; keep angled brushes for trim and tight spots.
Have a pressure washer, biodegradable cleaner, masonry patch compound (for minor surface defects), painter’s tape, drop cloths, extension poles, safety gear, and buckets.
Test a small area to confirm adhesion and color before full application.
Repairing Stucco Cracks and Delamination Before Painting
Because paint won’t hide structural problems, you should fix cracks and delamination before you prime and paint, so your finish lasts and looks right.
Paint won’t hide structural issues—repair cracks and delamination before priming and painting for a lasting, professional finish
Inspect for hairline cracks, wider gaps, or areas where stucco has pulled away. Clean debris, undercut loose edges, and use a compatible patching compound to fill voids.
Recreate the original stucco texture while the compound is still workable so repairs blend. Sand minimally, then spot-seal with the appropriate product.
When repainting, consider color matching at repaired spots to avoid visible patches—test small areas and adjust tint for seamless integration before finishing.
Matching Primer to Stucco: What to Use and Why
When you’re ready to prime stucco, choose a product that matches the surface’s porosity and composition so the finish adheres, breathes, and lasts. You’ll pick a masonry or acrylic primer for high-porosity, cement-based stucco and a breathable, latex-based primer for thincoat finishes.
Use pigmented primers to aid color matching when switching extreme hues, reducing coats of topcoat.
For textured surfaces, apply primer with a roller or sprayer to ensure full coverage and texture blending so paint doesn’t puddle or highlight imperfections.
Always test a small area to confirm adhesion, breathability, and final appearance before completing the job.
Best Exterior Paint Types for Stucco
Which paint will give your stucco the best protection and finish? You’ll want 100% acrylic exterior paint for durability, flexibility, and breathability—key for stucco’s movement.
Elastomeric coatings work for heavy cracking but can hide texture; consider them only when repairs demand extra waterproofing.
Use high-quality masonry paints for long-lasting color and stain resistance.
Pick satin or low-sheen finishes to balance water resistance and highlight texture without exaggerated glare.
Plan color coordination with trims and landscaping to enhance curb appeal while managing texture contrast between walls and architectural details.
Always follow manufacturer instructions and test a small area first.
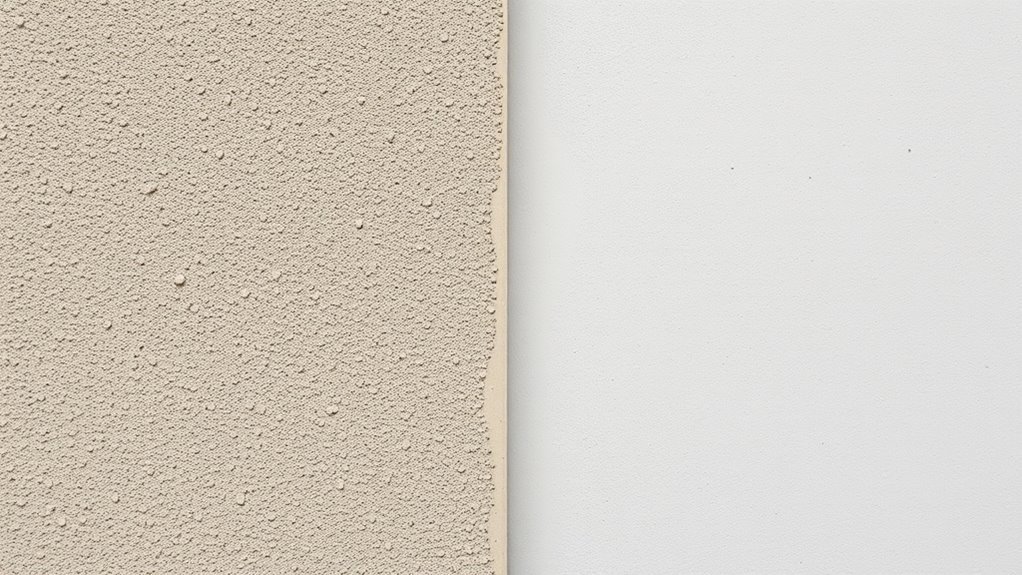
How Stucco Texture and Porosity Affect Paint Choice
You’ve picked the right type of paint, but now consider how your stucco’s texture and porosity will influence that choice.
Rough, highly textured stucco increases surface area, improving paint adhesion but demanding thicker coats or higher-viscosity formulations to fill crevices.
Rough, textured stucco boosts adhesion but requires thicker or higher‑viscosity paint to properly fill crevices.
Smooth stucco needs primers that promote paint adhesion without hiding fine detail.
Highly porous stucco soaks up more primer and paint, which affects coverage and long-term stucco durability; using a penetrating acrylic primer seals pores and evens absorption.
Inspect and test a small area: adjust primer, tint, and coat count to balance coverage, protection, and preserved texture for lasting results.
Choosing Colors That Work With Stucco Texture
Because stucco’s texture changes how light plays across a wall, pick colors that complement—not fight—those shadows and highlights. You’ll want a palette that uses contrast subtly: mid-tones to showcase texture, lighter hues to emphasize peaks, and deeper shades to anchor recesses.
Test swatches at different times of day to judge color coordination with sunlight and surrounding landscaping. Consider finishes that enhance texture without masking it—flat to hide imperfections, satin for slight sheen.
Use accent trims to frame relief areas. Prioritize cohesive combinations that respect the stucco’s character for effective texture enhancement and lasting curb appeal.
How to Paint Stucco: Step-by-Step Process
When you’re ready to paint stucco, plan and prep methodically: inspect for cracks and loose material, clean the surface thoroughly, patch and caulk where needed, prime with a masonry primer, and choose the right paint and application tools so your finish lasts.
Next, protect trim and landscaping, then sand or wire-brush rough spots for texture smoothing.
Apply primer evenly and let it cure. Test a small area for color matching under different light.
Paint in consistent sections, maintaining wet edges to avoid lap marks.
After drying, remove masking, touch up imperfections, and inspect for uniform coverage and adhesion.
Roller vs. Sprayer vs. Brush: Best Application Methods
Choosing between a roller, sprayer, or brush comes down to the stucco’s texture, the size of the job, and the finish you want. You’ll pick a sprayer for speed on large areas and even color schemes. A roller with thick nap is suitable for rough textures, and a brush is ideal for edges and detail.
Consider texture enhancement: rollers press paint into crevices, sprayers coat evenly but can miss deep pores, and brushes force paint into fine textures. Match tools to your goals, test a small patch, and adjust your technique.
- Sprayer: fast, even coverage
- Roller: great for rough stucco
- Brush: detail work
Always test a patch to confirm the desired finish.
How Many Coats for Painted Stucco?
Before you pick colors, make sure the stucco is clean, patched, and fully dry so the paint and primer can bond properly.
You’ll almost always want a dedicated primer coat to seal porous areas and improve adhesion, especially on older or patched stucco.
Follow that with a high-quality finish coat—sometimes two thin finish coats are better than one thick one for even coverage and durability.
Surface Preparation Needs
Although stucco can take paint well, you’ll need to plan coat count carefully to guarantee proper adhesion, coverage, and breathability. You’ll assess surface porosity, repairs, and existing finish to decide coats.
For color matching and texture blending, test small areas so final hue and surface feel align. Sand loose particles, remove mildew, and hose away dust before painting.
Consider two finish coats after a compatible base; some spots may need a touch-up coat for uniformity.
- Clean and rinse thoroughly
- Repair cracks and fill holes
- Test color matching and texture blending
- Allow proper drying time between coats
Primer Coat Importance
After you’ve cleaned and repaired the stucco, decide on primer strategy to guarantee paint bonds and breathes properly.
You’ll typically apply one coat of high-quality masonry primer; rough or highly porous areas may need a second coat to even out absorption.
Choose primers compatible with your topcoat and that allow moisture vapor escape to prevent peeling.
Match primer tint to your chosen color schemes when coverage is limited, and test on varied Texture patterns to confirm uniform sheen.
Let primer cure fully before painting, and inspect for missed spots so your finish coat adheres smoothly and lasts longer.
Finish Coat Recommendations
When you’re choosing finish coats for stucco, plan on two coats as the standard: one to build uniform color and another to lock in durability and coverage. You’ll often need a third coat for deep texture or dramatic color schemes, especially over repaired areas.
Pick high-quality acrylic masonry paint and match sheen to exposure; flat hides imperfections, satin resists dirt.
Consider texture options when estimating paint quantity—heavy texture soaks more.
Apply with brush and roller or airless sprayer for even coverage. Follow drying times between coats to prevent trapped moisture.
- Assess substrate and repairs first
- Test color schemes on small patches
- Use appropriate tools
- Check weather forecast before painting
Drying Times, Weather Windows, and Seasonal Tips
If you paint stucco in the right conditions, the surface will dry evenly and the finish will last longer. Aim for temperatures between 50–85°F (10–29°C) and low humidity so paint can cure properly.
Plan for at least 24–48 hours of dry weather after each coat. Cooler temps or damp air can double cure times.
Choose color palettes mindful of heat retention and fading. Lighter tones reflect sun, darker ones emphasize texture enhancement.
Spring and fall usually offer the best weather windows.
Avoid painting in direct midday sun or when rain’s forecast within 48 hours to prevent blistering and washout.
Top Mistakes That Shorten Painted Stucco Lifespan
Don’t skimp on prep—you’ll regret painting over dirt, loose stucco, or old failed coatings.
Using the wrong paint system or one not formulated for masonry will cause premature peeling and chalking.
And if you ignore moisture issues and poor drainage, paint won’t last no matter what you apply.
Skipping Proper Surface Preparation
Because stucco’s textured surface traps dirt, loose particles, and old paint, skipping proper preparation sets you up for peeling, uneven coverage, and wasted effort. You need to clean, repair cracks, and prime so new paint adheres and achieves desired color coordination and texture enhancement.
If you rush, moisture and trapped debris will cause failure.
- Pressure-wash to remove dirt and salts
- Scrape loose paint and chip away failing patches
- Patch cracks and allow full drying time
- Apply a compatible masonry primer for uniform absorption
Do the prep and your paint will last and look as desired.
Using Incompatible Paint Types
When you slap the wrong type of paint onto stucco, adhesion problems, cracking, and premature peeling follow fast — masonry surfaces need breathable, flexible coatings designed for cementitious substrates. You should pick elastomeric or masonry acrylics that allow vapor escape and move with hairline shifts.
Don’t use interior latex or non-breathable oil-based paints; they trap moisture and delaminate.
Consider texture considerations: thicker, textured paints can hide imperfections but must be compatible with substrate elasticity. Also plan color matching carefully—dark colors absorb heat, increasing thermal stress.
Test patches reveal adhesion, finish, and true color before committing to the whole surface.
Ignoring Moisture And Drainage
You might’ve picked the right paint, but moisture and poor drainage will undo your work faster than bad adhesion. If you ignore water entry, paint blisters, peels, and stucco degrades.
Install proper moisture barriers before painting and assess rooflines, gutters, and grading. Choose Drainage solutions that move water away from walls and fix leaking fixtures.
- Check gutters and downspouts for clogs and leaks
- Add or repair moisture barriers behind stucco where possible
- Regrade soil to slope away from the foundation
- Install or improve Drainage solutions like French drains or extension piping
Act now to protect your paint and stucco.
How Long Painted Stucco Typically Lasts
If you maintain it properly, painted stucco can last 10 to 25 years before needing a full repaint. Your climate, exposure, and prep determine longevity: dry, sheltered walls outlast wet, sun-baked ones.
With proper care, painted stucco can go 10–25 years before a full repaint—climate and prep decide longevity.
Use high-quality exterior acrylic paint and breathable primers so moisture can escape. Pay attention to color selection, since darker hues may fade faster and retain heat, affecting paint life.
Also guarantee texture matching when touching up to avoid obvious patches. Regular inspections, gentle cleaning, and timely minor repairs extend performance.
With routine care and proper materials, you’ll delay major refinishing and preserve curb appeal.
Troubleshooting: Peeling, Efflorescence, and Mildew
Although painted stucco can look great for years, peeling, efflorescence, and mildew signal different problems you’ll want to address promptly. You’ll diagnose causes: poor adhesion, salt deposits, or moisture and organic growth. Fixing them needs cleaning, drying, and targeted repair before repainting so paint sticks and finish looks uniform.
- Remove loose paint, treat mildew with fungicide, and rinse thoroughly.
- Neutralize efflorescence, identify water sources, and let masonry dry completely.
- Patch and sand damaged areas for seamless texture blending before primer.
- Use careful color matching and compatible primers to restore appearance and durability.
Maintenance Tips to Keep Painted Stucco Looking Good
To keep painted stucco looking its best, you should set up a regular cleaning routine—gentle washing every 6–12 months removes dirt and prevents mildew.
Inspect the surface seasonally and do timely touch-up painting on chips or worn areas to stop moisture intrusion.
Small, consistent upkeep will extend the life and appearance of your paint job.
Regular Cleaning Routine
When you keep a simple cleaning schedule, painted stucco will stay vibrant and last longer. You’ll protect finish and color psychology benefits while minimizing wear. Use soft brushes, mild detergent, and spot-clean stains promptly. Rinse thoroughly and avoid high-pressure washers that can damage texture. Choosing eco friendly paints originally makes maintenance easier and safer for plants.
- Inspect quarterly for dirt, mildew, or efflorescence.
- Gently scrub stains with a soft-bristle brush and diluted cleaner.
- Rinse from bottom up to prevent streaking.
- Trim plants and keep gutters clear to reduce staining and moisture.
Timely Touch-Up Painting
Because small chips and faded spots can spread quickly on stucco, you should tackle touch-ups as soon as you spot them—this prevents moisture intrusion and keeps the finish uniform.
Inspect annually and after storms, noting cracks, flaking, or blisters. Clean areas, remove loose material, and use compatible primers and patching compounds. Match texture and color; test a small section before committing.
For historic homes, balance historical preservation with modern protection, choosing breathable coatings that won’t trap moisture.
Prefer eco-friendly paints and low-VOC products to reduce environmental impact.
Keep a simple record of dates, materials, and weather for future maintenance.
Cost Estimate: DIY vs. Hiring a Pro
Although painting stucco yourself can save money upfront, you’ll need to weigh material costs, your time, and the risk of mistakes against a pro’s labor and warranty. You should factor in paint, primers, scaffolding or rental lifts, and tools, plus time for texture analysis and choosing color schemes that suit your home.
DIY might cut labor but increases your exposure to rework costs. Hiring a pro raises upfront expense but offers speed, correct application, and a warranty.
- DIY: lower labor cost, higher time investment
- Pro: higher cost, guaranteed finish
- Materials: quality affects longevity
- Hidden costs: repairs, disposal
When to Call a Pro: Structural Issues and Complex Repairs
If you spot deep cracks, crumbling stucco, or water stains that reach the framing, call a pro—these signs point to structural problems or moisture intrusion that DIY fixes won’t reliably solve. You should hire a contractor for underlying damage, flashing replacement, or re-lathing rather than cosmetic painting. A pro performs moisture diagnostics, texture analysis, and recommends compatible primers and color palette choices after repairs. Expect permits and structural reports for major work. Use the table below to weigh issues and responses.
| Issue | Recommended Action |
|---|---|
| Framing rot | Structural repair, re-lath |
| Widespread delamination | Remove, replace, test |
Frequently Asked Questions
Can Painted Stucco Affect Home Resale Value?
Yes — painted stucco can help or hurt resale value depending on texture compatibility and paint longevity; you’ll boost curb appeal with proper matching, long-lasting coatings, and maintenance, but poor texture or fading will turn buyers away.
Will Painting Stucco Change Historic or Hoa-Approved Finishes?
Yes — 72% of historic districts restrict exterior changes, so you’ll likely need approvals; painting can alter texture enhancement and color customization, so check HOA or preservation rules first to avoid violating historic or approved finishes.
Can You Paint Stucco Over Masonry Veneer or Brick Accents?
Yes — you can paint stucco over masonry veneer or brick accents, but you’ll need texture matching and moisture prevention measures; prep, prime masonry, match finish, and use breathable, water-resistant coatings so you’ll avoid trapping moisture and delamination.
Are There Eco-Friendly or Low-Voc Paints Suitable for Stucco?
Yes — you can choose eco friendly coatings and low VOC options for stucco; they’re durable, breathable, and mildew-resistant. You’ll want a masonry-specific acrylic or elastomeric formula and proper surface prep for best results.
Can Interior Stucco Be Painted Differently Than Exterior Stucco?
Yes — you can, and darn it, think like a Victorian decorator: you’ll treat interior stucco gentler, using different primers and paints for Color matching and Texture alteration so you won’t trap moisture and can tweak finish and sheen.
Conclusion
Yes — you can paint stucco, and with the right prep it’ll last and look great. Treat it like skin: clean, repair cracks, test moisture, prime, then paint with masonry or elastomeric products. Skip painting if there’s hidden water damage or major crumbling — replace instead. Regular washing and timely touch-ups keep the finish fresh. If structural issues or persistent moisture show up, call a pro so small problems don’t turn into costly storms.