Can You Spray Latex Paint With a Hvlp Gun
Yes — you can spray latex with an HVLP gun, but you’ll need to prep and thin the paint, pick the right tip (typically 1.8–2.5 mm), and fine‑tune pressure and pattern to avoid clogging, runs, and orange peel. Clean and strain the paint, prime and prep surfaces, mask thoroughly, and practice on scrap to dial settings. Use multiple thin coats and clean the gun often. Keep going to learn setup, technique, and troubleshooting tips.
Can You Spray Latex Paint With an HVLP Gun? (Short Verdict)
Although HVLP guns can spray latex paint, you’ll usually need to thin the paint and use a larger tip to get consistent atomization; you’ll also adjust pressure and technique.
Although HVLP can spray latex, thin it, fit a larger tip, and tweak pressure and technique for consistent atomization.
You can get good results if you prep surfaces, strain the paint, and test spray patterns. Expect slower coverage than airless systems, but finer control and less overspray help delicate jobs and tight spaces.
Include color matching swatches and test panels before committing to large areas. Choose eco-friendly options like low-VOC latex to minimize fumes.
With patience and setup, an HVLP will handle latex for many trim and furniture projects.
When HVLP Is a Good Choice vs Airless
If you need a super-smooth, controlled finish on furniture or trim, you’ll want an HVLP for its low overspray and finer atomization.
But if you’re covering walls or siding and speed matters, an airless system will coat large areas much faster.
Think about whether finish quality or surface speed is your priority and choose accordingly.
Fine Finish Needs
When you need a smooth, controlled finish on cabinets, furniture, or trim, HVLP shines because it delivers fine atomization and low overspray, letting you build thin, even coats without blasting the workspace.
You’ll prefer HVLP when color matching delicate tones or preserving paint branding appearance matters, since its gentle laydown reduces texture and mottling. Use thin, properly thinned latex or acrylic enamels and test spray to dial pressure and nozzle size.
HVLP lets you feather edges and avoid runs, producing factory-like results on detailed work. For small, visible pieces where finish quality beats speed, choose HVLP.
Large Surface Speed
Because HVLP gives you control and a fine finish, it’s tempting to use it on big jobs—but for large-area work you’ll usually pick an airless sprayer for speed. You’ll choose HVLP when color matching and delicate edges matter, or when combining spray with brush techniques on trim. Airless wins for walls, fences, and exterior siding where coverage speed and thick coats rule.
| Task | Best Choice | Why |
|---|---|---|
| Trim/detail | HVLP | Precise finish, easy color matching |
| Walls | Airless | Fast coverage |
| Touch-ups | Brush/HVLP | Blend with brush techniques where needed |
When to Choose Airless or Brush-and-Roll Instead
Although HVLP excels at fine finishes, you should pick airless or brush-and-roll for jobs that demand speed, heavy coverage, or textured surfaces. You’ll save time on large walls, fences, or rough stucco where atomization struggles.
For fast, heavy, or textured jobs, choose airless or brush-and-roll—save HVLP for fine trim and cabinetry.
Airless sprayers deliver thicker coats with fewer passes; brush-and-roll lets you work edges and impromptu touch-ups without thinning.
Consider logistics: color mixing near the worksite and proper paint storage between days affect workflow. If you need rapid recoat, uniform coverage, or have limited prep, choose airless or brush-and-roll.
Reserve HVLP for detailed trim, cabinetry, or delicate surfaces.
Which Latex Paints Spray Best With HVLP
If you need the smooth, controlled finish HVLP gives for trim and cabinets, pick latex formulations that are thin enough to atomize well—typically water-based acrylics labeled for spraying or “spray-ready” interior latex.
You’ll favor paints with consistent Color mixing labs and clear paint branding so you get repeatable results. Look for low-sheen sheens and products stating compatibility with sprayers.
Consider:
- Small-batch acrylic enamel for cabinets — durable, sands smooth
- Pre-thinned “spray-ready” interior latex — saves time, reduces clogging
- High-quality cabinet coatings from trusted brands — fewer additives, predictable coverage
Test before full application to confirm finish.
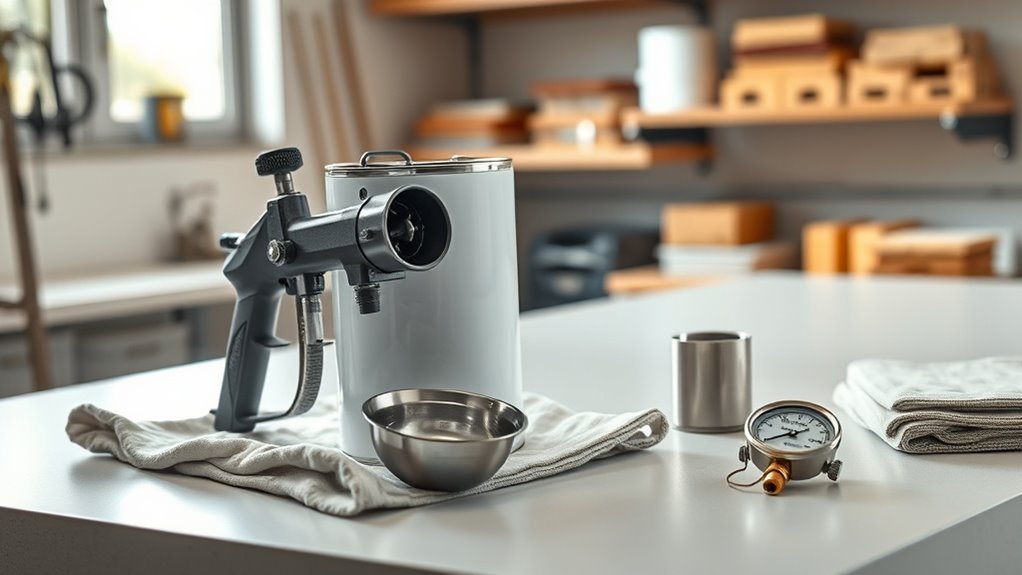
Understanding Paint Viscosity for HVLP Spraying
When you’re prepping to spray with an HVLP gun, viscosity is the key variable that determines whether the paint will atomize evenly or clog the nozzle. Too thick and you’ll get sputters and orange peel, too thin and you’ll suffer runs and poor coverage.
You’ll check viscosity with a cup or meter and adjust for consistent fan pattern and droplet size. Proper viscosity preserves color matching by preventing uneven sheen or pooling that shifts hue.
It also reduces overspray and waste, lowering environmental impact. Monitor temperature and humidity, and verify gun settings before starting each panel.
Thinning Latex: How Much and When
After you’ve measured viscosity and set your HVLP gun, decide whether the latex needs thinning by testing sprayability on a cardboard or scrap panel. Latex designed for sprayers often needs only 5–10% water added, while thicker formulations can require up to 15–20%. You’ll adjust gradually: add small amounts, stir, retest.
Consider color mixing effects and how thinning changes pigment coverage and texture application. Watch for sagging or orange peel; stop thinning when atomization is smooth without runs.
- Light coats help you control build and reduce sag.
- Keep records of ratios for repeat jobs.
- Test different nozzles for spray pattern.
Best Thinning Agents : What to Use and Avoid
When you’re thinning latex for an HVLP gun, pick solvents that preserve paint flexibility and atomize cleanly, like water-based reducers or compatible acrylic thinners.
Avoid strong solvents such as lacquer thinner or mineral spirits that can break down latex binders and clog your gun.
I’ll walk you through the safe options and the ones to steer clear of so your finish and equipment stay intact.
Best Thinning Solvents
If you want smooth, consistent coverage with an HVLP gun, choosing the right thinning solvent matters—use compatible agents that preserve latex binder, spray pattern, and drying time. You’ll typically choose water for acrylic latex; for thicker formulations, use manufacturer-recommended reducers to maintain color matching and respect paint branding instructions. Measure carefully and test spray on cardboard before the job.
- Water for most acrylic latex blends, thin slowly
- Commercial latex reducers for heavy-body or high-solids paints
- Small amounts of retarders to slow drying in hot conditions
Always follow label ratios and test to avoid finish issues.
Thinners To Avoid
Now that you’ve covered which solvents work, you also need to know which thinners to avoid so you don’t ruin the finish or harm your HVLP gun.
Don’t use gasoline, acetone, lacquer thinner, or any solvent labeled for industrial degreasing — they break down latex binders and seals.
Avoid heavy-duty paint strippers and solvents that alter pigments; they’ll mess up color blending and unpredictable gloss levels.
Steer clear of untested household solvents or mixing multiple thinners.
If a product isn’t specified for water-based or latex paints, don’t risk it.
Stick to recommended, manufacturer-approved thinning agents only.
Straining and Filtering Latex for HVLP
Before loading latex into your HVLP gun, strain and filter it to remove skin, lint, dried flakes, and pigment clumps that can clog the tip and ruin a finish. You’ll pour paint through a fine mesh or disposable filter into a clean container, checking consistency for smooth color mixing and even texture application. Don’t skip filtering between batches or after stirring; solids form quickly.
Strain latex before loading your HVLP gun—filter out skin, lint, and clumps for smooth, clog-free results.
- Use a 100–200 mesh nylon or stainless strainer.
- Line a funnel with a paint sock for quick jobs.
- Filter each color after tinting to avoid cross-contamination.
Clean strainers promptly to maintain reliable flow.
HVLP Nozzle Sizes That Work for Latex
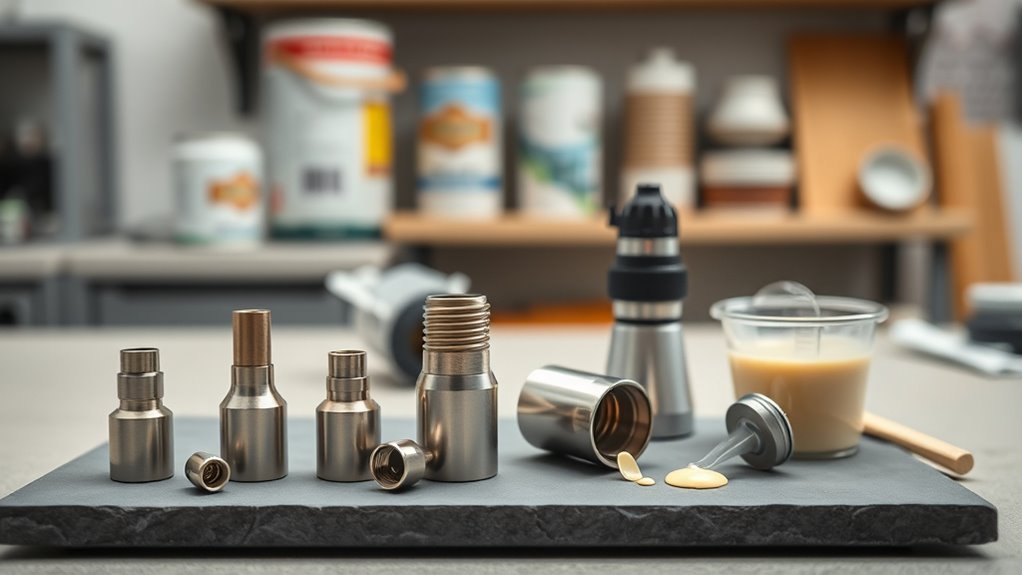
When choosing an HVLP nozzle for latex, match the tip size to the paint’s viscosity and the job’s scale. You’ll typically use 1.8–2.5 mm tips for standard interior latex.
1.4–1.8 mm tips work for thin, low-VOC or eco-friendly paints and fine trim.
Wider tips help heavy-bodied latex and faster coverage on walls, while smaller tips improve control for cabinets, color blending, and detail work.
Test on scrap, note atomization and sagging, and adjust thinning minimally.
Pick a nozzle that balances finish quality with transfer efficiency to avoid runs and maintain consistent spray patterns.
Setting HVLP Pressure and Air Flow
Although HVLP systems run at lower pressure than conventional sprayers, you’ll still need to dial in both PSI and air volume to get smooth atomization with latex. Start low, increase PSI slowly until droplets break into a fine mist; too high causes runs.
Match air volume to nozzle size and material viscosity. Remember proper thinning per manufacturer and consistent color mixing to avoid streaks. Keep paint storage sealed and at recommended temperature to preserve flow properties.
- Begin at recommended PSI for your gun and nozzle
- Gradually adjust while testing on cardboard
- Record settings for each paint and job
Adjusting Fan Pattern for Even Coats
Set the fan width to match the surface so you’re not wasting paint or missing spots. Keep a consistent overlap (about 50%) and maintain the same distance from the surface to achieve even coverage.
Also control the pattern direction—horizontal for large walls, vertical for trim—to minimize lap marks.
Adjusting Spray Width
If you want even coverage, adjust the fan pattern so the spray spreads uniformly across the surface without overspray at the edges. You’ll set width based on panel size, paint viscosity, and desired finish; check manufacturer guidance and consider color matching needs tied to paint branding.
Start narrow for detail, widen for flat panels, and tweak air pressure for consistency. Practice on scrap to confirm settings before committing.
- Narrow fan: precise control, less waste
- Medium fan: general-purpose balance
- Wide fan: fast coverage on large, flat areas
Make small incremental changes and record settings for repeatable results.
Overlap And Distance
After you’ve dialed in the fan width, focus on overlap and distance to guarantee even coats. You’ll keep the gun parallel to the surface, overlap passes about 50%, and maintain a consistent distance—typically 6–12 inches—so color blending stays uniform and texture effects remain controlled. Vary distance slightly for edges, but don’t change overlap ratio. Practice on scrap to confirm coverage without runs. Use steady, even speed; stop between passes to reassess. Below is a quick reference:
| Overlap | Distance |
|---|---|
| 30% (edges) | 6 in |
| 50% (main) | 8 in |
| 70% (touch-up) | 12 in |
Pattern Direction Control
When you adjust the HVLP gun’s fan pattern, think about how the spray’s shape and angle affect edge blending and overlap so each pass lays down an even coat. You’ll control direction to reduce visible seams, improve color matching, and preserve brush compatibility for touch-ups.
Shift from vertical to horizontal passes depending on panels, and tweak the fan width to avoid buildup at edges. Visualize spray paths:
- Narrow fan for tight, detailed areas
- Wide fan for large, flat surfaces
- Slightly angled passes where edges meet
Keep consistent speed and overlap so each layer cures uniformly and matches adjacent brushed finishes.
Spray Distance, Stroke Speed, and Overlap
Although it can be tempting to hold the HVLP gun close, maintaining the proper spray distance—usually 6 to 10 inches for latex—gives you a smooth, even coat. Keep that range consistent to avoid runs and uneven color matching.
Move the gun at a steady, moderate stroke speed—too fast causes thin coverage, too slow causes buildup. Overlap each pass about 50% to blend edges and ensure a uniform finish.
Hold the gun perpendicular to the surface, start and finish strokes slightly beyond your work area, and guarantee environmental impact in mind by minimizing overspray and waste through controlled technique.
Test Spray Patterns: Quick Checklist and Sample Settings
Before you start on the main piece, spray a few test panels to dial in pattern shape and atomization—this quick checklist helps you verify air pressure, fluid flow, and fan width so you won’t be surprised on the job.
You’ll confirm Color matching under real application conditions and guarantee paint branding instructions (nozzle size/reduction) are followed. Use the checklist below, adjust one variable at a time, and record results.
- Air pressure: fine vs coarse atomization, note psi and distance
- Fluid flow: needle/air cap setting, watch for runs or dry edges
- Fan width: overlap pattern, choose 3–4″ for trim, 6–8″ for panels
Preparing Interior Walls for HVLP Latex
Before you start spraying, you’ll want to clean and repair walls so paint adheres smoothly and flaws don’t show. Choose the right primer and sheen for your room and the latex formula you’re using to guarantee coverage and durability.
Finally, mask trim and set up good ventilation to protect surfaces and keep fumes moving out.
Surface Cleaning And Repair
When preparing interior walls for HVLP latex spraying, clean, dry surfaces and repaired defects are essential to getting a smooth, even finish. You’ll remove dust, grease, and loose paint with a mild detergent or TSP substitute, rinse, and let walls fully dry.
Patch holes and sand smooth; feather edges so the spray blends. Match patched areas for color matching and guarantee surfaces promote paint durability. Seal stains before spraying.
- Scrub high-traffic areas and rinse thoroughly
- Fill cracks, sand, and wipe dust away
- Inspect for remaining imperfections and rework as needed
Primer And Sheen Selection
Now that surfaces are clean and repaired, pick a primer and sheen that work with latex and your HVLP setup to get consistent coverage and spray performance.
Choose a water-based primer rated for latex; it levels well and reduces suction on patched areas. Match primer tinting to your topcoat for easier color matching and fewer coats.
For sheen, satin or eggshell hides imperfections while offering a balance between washability and sprayability.
Thin primer and paint per manufacturer specs so the HVLP sprayer atomizes properly.
Keep a brush for cut-ins and minor touch-ups; practice brush techniques to blend edges into sprayed areas seamlessly.
Masking And Ventilation Setup
Since HVLP spraying creates fine mist and overspray, set up thorough masking and ventilation so paint only lands where you want it and air stays breathable. Cover trim, floors, and fixtures with low-tack tape and plastic sheeting; seal doorways to contain overspray.
Position box fans to pull air out, and open windows for cross-ventilation; use a respirator rated for paint mist.
Check your paint branding label for thinning and flow recommendations, and confirm color mixing ratios before loading the gun. Plan a test spray on cardboard to tune atomization and fan speed.
- Tape edges tightly
- Create negative pressure
- Test spray first
Preparing Exterior Surfaces for HVLP Latex
Before you load your HVLP gun, get the exterior surface clean, dry, and stable so the latex will adhere properly. Start by rinsing dirt and mildew with a mild detergent, then spot-treat stains and sand peeling areas until edges are feathered.
Repair cracks and loose trim with appropriate filler, allow full cure, and sand smooth. Prime bare wood, metal, or patched sections for uniform absorption and better color matching.
Choose quality exterior latex formulated for the climate; consider low-VOC, eco-friendly options to reduce odor and environmental impact. Inspect for loose debris before you begin spraying.
Masking and Protecting Nearby Surfaces
Before you start spraying with an HVLP gun, cover adjacent areas like trim, windows, and plants with plastic or masking paper to prevent overspray.
Lay down heavy-duty drop cloths or rosin paper on the floor and tape seams to catch drips and protect walkways.
Keep ventilation moving—open windows, use fans, and position them to blow fumes and overspray away from the work area.
Covering Adjacent Areas
When you’re spraying latex with an HVLP gun, protect everything around your work area by masking off adjacent surfaces and creating a controlled spray zone. A few minutes of careful prep will save hours of cleanup and prevent costly overspray on trim, floors, or furniture.
Plan where overspray might drift and cover clamps, hardware, and vents. Keep color mixing and brush techniques in mind for touch-ups after unmasking.
Use low-tack tape and plastic sheeting, and secure edges. Visualize the finished edges and work outward from the target surface.
- Tape corners and seams tightly
- Drape vertical surfaces smoothly
- Isolate delicate fixtures
Floor And Drop Cloths
After you’ve masked walls and fixtures, focus on the floor—it’s the biggest target for drips and overspray, and protecting it saves time and money. Lay heavy-duty drop cloths or paper backed with plastic, overlapping seams and taping edges to prevent paint seeping under.
Use cardboard or rosin paper in high-traffic zones and secure with low-tack tape. Keep a designated area for paint storage nearby but off the protected surface to avoid spills on fresh coverings.
If you’re matching trim or testing colors for color matching, place small test panels on covered zones to catch overspray and maintain a clean workspace.
Ventilation And Airflow
Because HVLP spraying creates fine airborne mist, you’ll want to set up strong ventilation and control airflow so paint doesn’t drift onto masked surfaces or settle in the room. Position fans to pull air out of the space, open windows downwind, and use a box fan with a filter to capture overspray.
Seal off adjoining rooms with plastic and tape, and cover vents. Keep your masking tight to protect surfaces and materials, especially when matching color across panels or working with different paint branding that can vary finish and tint.
- Exhaust fan toward outside
- Overlapping tape seals
- Filtered air intake
Controlling Temp, Humidity, and Ventilation
Although paint manufacturers often list acceptable temperature and humidity ranges, you’ll get the best finish by keeping both steady. Aim for about 65–75°F and 40–60% relative humidity, and avoid rapid swings that can cause orange peel, runs, or extended drying times.
You should monitor conditions with a thermometer and hygrometer, adjust HVAC or use heaters and dehumidifiers, and schedule work during stable weather.
Good ventilation removes overspray and fumes but keep airflow gentle to prevent dust.
Maintain consistent paint storage temperatures to preserve viscosity and color matching.
Check conditions throughout the job and pause if they change considerably.
How Temperature & Humidity Affect Atomization and Drying
When you spray latex with an HVLP gun, temperature and humidity directly change how the paint atomizes and how fast it dries. You’ll feel Temperature influence in spray pattern consistency: warmer air lowers viscosity, creating finer atomization and faster drying. Colder air thickens paint, causing coarse droplets and longer cure times.
Humidity impact slows evaporation, promotes larger droplets, and can cause tacky films or longer recoat windows. Monitor conditions and adjust fluid/thinner and gun settings accordingly.
Visualize effects:
- Warm, low-humidity: quick drying, fine mist
- Cool, low-humidity: sluggish atomization
- High humidity: slow dry, risk of tackiness
Avoiding Orange Peel, Runs, and Sags
To prevent orange peel, runs, and sags you’ll need the right mix of proper thinning, consistent spray technique, and correct gun setup.
Thin the latex to the manufacturer’s recommendation, keep your gun moving at a steady distance and speed, and adjust fluid and air pressure for a fine, even atomization.
Small test passes and adjusting fan width or pressure between coats will help you spot and fix problems before they set.
Proper Paint Thinning
If your spray pattern looks bumpy or starts to sag, the solution usually lies in how you thin the latex for HVLP spraying. You’ll measure and adjust to avoid orange peel, runs, and sags. Consider viscosity, recommended reducer, and test passes on cardboard. Keep track of color mixing ratios and proper paint storage to maintain consistency between batches.
- Thin gradually: add small amounts, stir, test.
- Use viscosity cup or meter to match gun specs.
- Filter mixed paint to remove skin or debris.
Follow manufacturer thinning guidelines, note ambient temperature, and retest until spray lays flat and even.
Spray Technique Tips
Although you’ve thinned the latex correctly, spraying it evenly still takes deliberate technique—hold the gun perpendicular to the surface, keep a consistent 6–10 inch distance, and move your whole arm in smooth, overlapping strokes so each pass covers about 50% of the previous one.
Keep application speed steady; too slow lays on excess causing runs and sags, too fast produces thin, orange-peel textures.
Start and finish each pass off the edge to avoid blobs. Watch wet edges and adjust motion rather than pressure.
For best results, test on scrap to confirm color matching and finish before committing to the final coat.
Gun Setup And Pressure
When you set up your HVLP gun, dial pressure and fluid flow so the spray forms a full, even fan without spitting or heavy edges. You’ll avoid orange peel, runs, and sags by testing on cardboard, adjusting until droplets level smoothly. Maintain tip distance, overlap passes, and let coats tack before next pass.
- Start with lower pressure; increase slowly if atomization is poor.
- Watch for heavy edges; reduce fluid or speed up motion.
- Keep filters clean; clogged passages worsen color matching and waste paint.
This minimizes waste, improves finish, and reduces environmental impact.
Preventing Clogging and Tip Build-Up During a Run
While you’re spraying, keep the tip moving and the gun tilted slightly to prevent paint pooling at the nozzle, which is the main cause of clogging and buildup.
You should monitor spray pattern and stop briefly to clear runs before they dry. Use properly thinned latex per color mixing guidelines and stick to compatible paint branding to avoid chemical thickening.
Keep a small brush or probe handy to dislodge soft drips during pauses, and blow compressed air through the cup or nozzle at low pressure if a film forms.
Adjust fan and fluid settings to reduce overspray and maintain consistent flow throughout the run.
Cleaning an HVLP Gun After Latex Paint
Because latex dries into a stubborn film, you’ll need to clean your HVLP gun immediately after use to prevent clogged passages and damaged seals. Rinse the cup, needle, and nozzle with warm water mixed with an eco-friendly solvent designed for latex. Wipe seals and air caps, then blow compressed air to clear passages.
For quick color matching jobs, flush between colors to avoid contamination.
- Remove excess paint, then scrub soft parts with a brush.
- Soak removable parts briefly in recommended cleaner.
- Inspect seals and lubricate lightly before reassembly.
Store dry to stop mildew and keep performance consistent.
When to Deep-Clean and Disassemble During Big Jobs
If your project runs several hours or covers large surfaces, plan routine deep-cleans and partial disassembly at set intervals so build-up doesn’t compromise spray patterns or damage seals.
Stop every 60–90 minutes on long runs: empty cup, flush with appropriate cleaner, and remove nozzle cap and needle for inspection. If you notice spitting, uneven fan, or drying at the tip, disassemble further and soak parts briefly.
Keep spare seals and tip sizes for quick swaps to maintain color matching when switching hues. Between deep-cleans, use brush alternatives like soft swabs for detail without full teardown.
Primers and Undercoats: Spraying Latex Primers With HVLP
When you’re prepping a surface for latex topcoats, choose a high-quality latex primer formulated for spraying and thin it to the manufacturer’s recommended viscosity so your HVLP gun lays down an even, tack-free film. You’ll control flow, reduce orange peel, and achieve consistent adhesion.
Use mask and ventilate; pick primers with eco-friendly formulations when possible. Consider color matching primers to reduce topcoat coats. Spray at recommended pressure, keep tip size appropriate, and back-roll or lightly sand between coats if needed.
- Smooth bare wood or patched drywall
- Previously painted surfaces with stains
- Metal primed for adhesion and corrosion resistance
How Many Thin Coats to Apply With HVLP
Although you’ll see recommendations varying by material and gun setup, plan to build latex with HVLP in multiple thin coats rather than one heavy pass; aim for 2–4 light coats, letting each flash off until tack-free before the next. You’ll control drips and orange peel, improve color matching, and avoid needing extra primer selection adjustments. Test spray on scrap, watch overlap, and sand lightly between coats if needed.
| Coat | Dry Time | Tip |
|---|---|---|
| 1 | Flash | Thin |
| 2 | Tack-free | Even |
| 3 | Sandable | Light |
| 4 | Final | Touch-up |
Choosing Spray-Friendly Finishes: Matte, Eggshell, Semi-Gloss
Because finish sheen affects hiding, durability, and repairability, you’ll want to pick the sheen that matches the part’s use and the spray technique you’re comfortable with.
You’ll find matte hides imperfections, eggshell balances sheen and washability, and semi-gloss resists scuffs.
Consider Color matching carefully—gloss level changes perceived hue—and evaluate texture options before thinning for HVLP.
Match solvent and tip size to finish sheen for even laydown.
Examples:
- Matte: low reflection, forgiving for walls and primed surfaces
- Eggshell: subtle sheen, good for living areas
- Semi-gloss: durable trim and cabinets
Spraying Specialty Latex: Masonry, Elastomeric, Textured
If you’re tackling masonry, elastomeric coatings, or textured latex, you’ll need to adjust thinning, tip size, and technique so the heavier formulations atomize evenly and bond correctly. These products are thicker, hold more solids, and often require larger HVLP nozzles, slower spray speed, and higher overlap to get complete coverage without orange peel or clogging.
You’ll thin per manufacturer guidelines, test spray patterns on scrap, and choose tips sized for high solids. Use back-and-forth passes with light coats to avoid runs.
Account for color mixing impacts on viscosity, and respect paint branding recommendations to preserve elasticity, adhesion, and warranty.
Estimating Paint Consumption for HVLP Jobs
When you estimate paint for an HVLP job, start with the manufacturer’s coverage per gallon to set a baseline.
Then adjust that number for surface porosity—rough or unsealed masonry soaks up more paint than smooth drywall.
Finally, factor in your spray efficiency rate, since overspray and transfer losses mean you’ll need more paint than brush-and-roller estimates suggest.
Coverage Per Gallon
Estimating coverage per gallon for HVLP spraying helps you plan material costs and job time accurately. You’ll estimate coverage by considering coat thickness, spray overlap, and paint type.
For latex with HVLP, expect slightly higher consumption than brushing because you apply thinner coats more evenly. Factor in color blending and texture techniques, which can increase usage.
Typical ranges run 250–400 sq ft per gallon for one coat; multiple coats raise totals.
- Smooth, single-coat rooms: aim for higher end of range.
- Heavy texture or deep color shifts: plan extra paint.
- Trim and detailed work: budget separate allowance.
Surface Porosity Effects
Although porous surfaces soak up more paint, you can plan around that by evaluating substrate texture and moisture before you spray. You’ll estimate extra material when surface porosity is high, since paint absorption varies with grain, age, and dampness. Prime sealed surfaces if you want consistent coverage; leave rough, untreated areas for heavier coats. Measure a test patch so you know how much more latex you’ll need. Use the table below to compare common substrates and expected absorption.
| Substrate | Texture | Relative absorption |
|---|---|---|
| Bare wood | Rough | High |
| Dry drywall | Smooth | Medium |
| Previously painted | Smooth | Low |
Spray Efficiency Rates
Because HVLP systems send more paint to the target and less into the air, you’ll usually see higher spray efficiency than with conventional guns — meaning you can estimate lower overall paint consumption per coat.
You’ll calculate material needs by factoring transfer efficiency, surface area, and coat thickness. Expect savings versus brushing, but include overspray allowances for complex shapes. Consider color mixing impacts and whether thinning alters coverage.
- Tight patterns reduce waste on flat panels
- Detailed edges may need brush techniques touch-up
- Porous substrates demand extra coats
Track actual usage on a test panel to refine your estimates.
Speeding Up Large-Area Spraying Without Losing Quality
When you’re tackling large surfaces with an HVLP gun, you can speed up the job without sacrificing finish by optimizing setup and technique—use the right tip size, thin the paint only as the gun manufacturer recommends, and adjust air pressure and overlap to maintain consistent coverage.
Work in systematic passes, keep the gun moving at a steady pace, and use a wider fan pattern to reduce passes. Use extension poles or scaffolding to maintain distance and angle.
Match color in batches to avoid re-spraying, and minimize environmental impact by using low-VOC latex and capturing overspray with proper masking and filters.
Troubleshooting Adhesion, Flaking, and Film Failure
If your latex finish is peeling, flaking, or developing soft spots, start by checking substrate prep and environmental conditions—poor cleaning, incompatible primers, trapped moisture, or painting in extreme humidity/temperature often cause film failure.
Diagnose systematically: test adhesion with tape, probe soft spots, and smell for solvents that indicate contamination.
Fix by stripping, sanding to keyed profile, and using compatible primer or sealer. Consider moisture meters and wait for proper conditions.
For aesthetic fixes, address color matching and use eco friendly options when recoating.
Quick checklist:
- Clean, degrease, and sand substrate
- Verify primer compatibility
- Ensure dry, moderate temperature before spraying
Adapting HVLP Technique for Doors, Trim, and Cabinets
Want a smooth, professional finish on doors, trim, and cabinets? You’ll prep surfaces, thin latex to the gun manufacturer’s specs, and choose a fine tip for detailed work.
Hold the spray equipment perpendicular, keep a consistent 6–8 inch distance, and overlap passes by 50% to avoid stripes.
Use thin, even coats and let flash time between layers to prevent runs.
Sand lightly with fine grit between coats for adhesion and a glassy result.
Cure times affect paint durability, so allow recommended drying before handling.
Clean the HVLP thoroughly to maintain performance and longevity.
Cost Comparison: HVLP Setup vs Airless vs Brush-and-Roll
After you’ve nailed technique and prep for doors, trim, and cabinets, the next question is what your budget will buy: HVLP setups, airless sprayers, and brush-and-roll each carry different upfront costs, ongoing expenses, and time investments. You’ll weigh equipment price, material waste, and finish quality—HVLP favors control and color matching but needs thinner and patience; airless costs more upfront but speeds large jobs and reduces overspray waste; brush-and-roll is cheapest but longer, with variable paint durability. Consider total project cost, not just sticker price.
Weigh equipment, waste, and time—HVLP for control, airless for speed, brush-and-roll for budget.
Typical trade-offs:
- HVLP: moderate equipment, low overspray, fine finish
- Airless: higher cost, fast coverage
- Brush-and-roll: low cost, labor-intensive
Rent, Buy, or Hire? Evaluating Options for Your Job
When you’re planning a paint job, decide whether to rent, buy, or hire based on job size, frequency, and your comfort with gear.
Renting makes sense for a one-off since you’ll get pro equipment without the storage headache. If you paint often, buying an HVLP pays off; you’ll control color matching and maintain gear for consistent results.
Hire a pro when time, finish quality, or complex surfaces matter more than cost.
Also weigh environmental impact: renting reduces wasted tools, buying may mean better maintenance and longer life, while professionals often follow disposal and cleanup protocols you might not.
Safety, PPE, and Ventilation Best Practices
You’ll need the right PPE—respirator, eye protection, gloves, and coveralls—when spraying latex with an HVLP gun to protect your lungs and skin.
Make sure your workshop has cross-ventilation or a mechanical exhaust to remove overspray and solvent fumes.
Don’t skip checking filters and airflow rates before you start to keep the space safe.
Personal Protective Equipment
Wondering what gear you need before firing up an HVLP gun? You’ll want PPE that protects your lungs, skin, and eyes while preserving color matching and paint durability.
Wear a properly fitted respirator for latex particulates and mist.
Use gloves and coveralls to avoid contamination that can ruin finish consistency.
Eye protection prevents splatter injuries.
- NIOSH-rated respirator (P100 or N95 for light mist)
- Chemical-resistant gloves and disposable coveralls
- Safety goggles and a hat to protect hair and skin
Inspect and replace gear regularly, and keep a clean change area to prevent cross-contamination.
Proper Workshop Ventilation
Why does ventilation matter in your workshop? You’ll limit inhalation of overspray and fumes, protect color matching accuracy, and prevent solvent buildup near paint storage. Set up cross-ventilation with exhaust fans and intake vents, and use a filtered spray booth or portable extractor when spraying. Keep doors partly open, run fans before, during, and after work, and monitor airflow with a smoke pencil or an anemometer. Maintain filters and clean ducts regularly. Use respirators when ventilation’s limited.
| Task | Equipment | Frequency |
|---|---|---|
| Exhaust | Fan with HEPA | Every job |
| Booth filters | Cartridge | Weekly |
Storing and Reusing Thinned Latex Safely
If you plan to save thinned latex for another session, act quickly and seal it properly to prevent skinning, contamination, and bacterial growth.
If saving thinned latex, seal containers quickly to prevent skinning, contamination, and bacterial growth.
You’ll label containers with paint type, thinner ratio, and date; include notes on color mixing and any branding strategies used so you can replicate color matches later.
Store in airtight, solvent-safe containers, remove excess air, and keep them cool and dark.
Before reuse, inspect odor, texture, and strain through a fine mesh. Dispose if foul-smelling or congealed.
Quick action and clean habits preserve quality and prevent clogged HVLP tips.
Pro-Level Workflow Checklist Before You Spray
Before you pull the trigger, run through a quick surface prep checklist to confirm the substrate is clean, sanded, and primed where needed.
Check your thinning is within the paint maker’s recommended ratios and test viscosity so atomization will be smooth.
Set up your HVLP with the right air pressure, nozzle, and a clean cup, and make a short spray test to lock in your settings.
Surface Prep Checklist
When you’re prepping to spray latex with an HVLP gun, a disciplined surface checklist keeps your finish consistent and reduces rework. You’ll inspect, clean, and correct defects so spray application mirrors the care of color mixing and brush techniques used earlier.
Remove grease, sand glossy areas, and fill gouges. Mask edges and tack-rag dust before you spray.
- Degrease and clean with appropriate solvent; rinse and dry.
- Sand and feather edges; remove sanding dust with a tack cloth.
- Fill, prime, and check adhesion; mask and test a small spray pass.
Follow this order to avoid costly touch-ups.
Paint Thinning Guidelines
Now that your surface is clean, sanded, and masked, you need to get the paint viscosity right for your HVLP gun to lay down smooth, even coats.
Test small batches: thin latex with manufacturer-recommended water or acrylic reducer, aiming for a flow consistency like heavy cream. Shake and strain after any color mixing to remove lumps.
Use a viscosity cup or simple spray test on cardboard to dial in atomization without runs. Keep thinner additions minimal to preserve adhesion and drying time.
Be mindful of environmental impact—work with proper ventilation, collect waste, and avoid over-thinning that increases overspray.
Equipment Setup Steps
If you’re aiming for pro-level results, set up your HVLP system and workspace methodically so every pass is predictable and efficient. You’ll inspect the gun, strain cups, and hoses, confirm tip size, and test spray on cardboard. Adjust air pressure, fluid flow, and atomization for latex viscosity, and plan finish sequences tied to color matching and branding strategies.
- Clean, level workspace with proper ventilation
- Calibrated gun settings and spare tips ready
- Test panel with final thinned mix and adhesion check
Label mixed batches, document settings per color, and wear PPE before you spray.
Frequently Asked Questions
Can HVLP Guns Be Used for Oil-Based Paints or Alkyds?
Yes — you can spray oil-based paints and alkyds with an HVLP gun, but you’ll thin properly and check solvent compatibility to preserve paint adhesion, clean thoroughly, and adjust nozzle and pressure for consistent atomization and finish.
How Does Water-Based Acrylic Differ From Latex for HVLP Spraying?
Water-based acrylics atomize finer, so you’ll enjoy water based advantages like faster drying and easier cleanup; latex compatibility varies, so you’ll thin, adjust tip/pressure, and test to prevent clogging or poor spray pattern.
Will HVLP Spraying Affect VOC Emissions or Regulations?
Yes—you’ll still need to follow VOC regulations: about 10–20% of indoor air pollution comes from paints. You should monitor VOC limits, use low-VOC products, and practice Spray safety to minimize exposures and compliance risks.
Can I Spray Textured Popcorn Ceilings With an HVLP Gun?
Yes — you can spray textured popcorn ceilings with an HVLP gun if you’ll use proper texture application techniques, thin materials appropriately, test spray patterns, and follow popcorn ceiling removal precautions where needed to prep and protect surfaces.
How Do I Spray Near Delicate Electronics or Artwork Safely?
Want to avoid disaster? You’ll isolate electronic safety by powering down, unplugging, and covering devices with sealed plastic; you’ll guarantee artwork protection by masking, using drop cloths, gentle air pressure, and slow passes to minimize overspray and vibration.
Conclusion
Short verdict: yes, but only sometimes—you’ll want thin, low‑sheen latex, proper thinning, and patience. I once thinned a gallon for an old HVLP and sprayed a bathroom in two coats; the fan-like mist looked like a soft snowfall, covering walls smoother than my first brush job. Remember: HVLP shines on trim and cabinets, not big exterior walls—match your gun, paint, and prep, or go airless for speed.